DIY Dollar Tree Broomstick Pathway Lights
Learn how to make these brilliant broomstick pathway lights from Dollar Tree materials for a simple & gorgeous Grandin Road dupe!
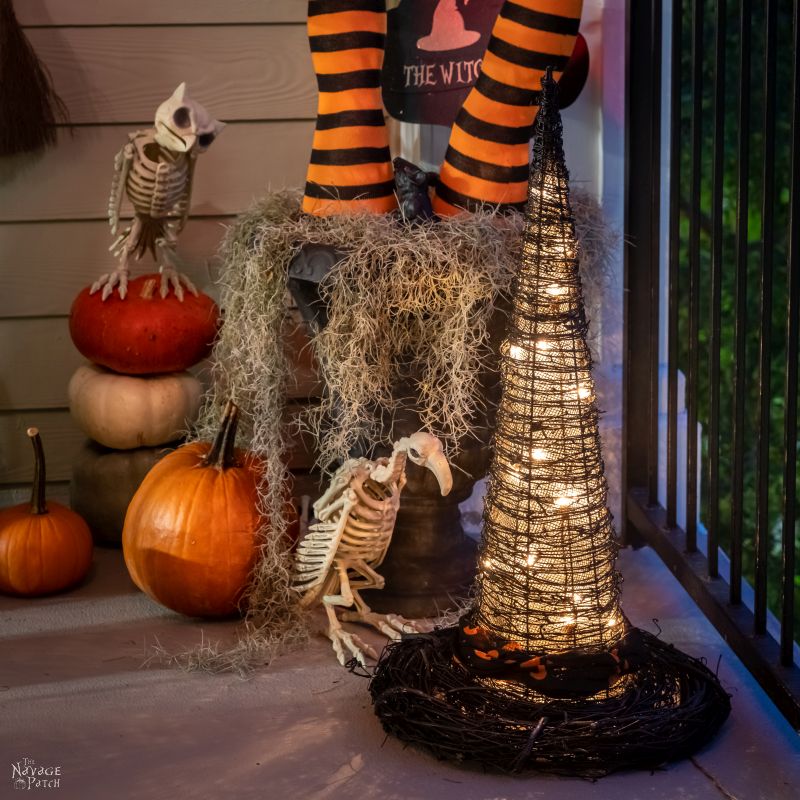
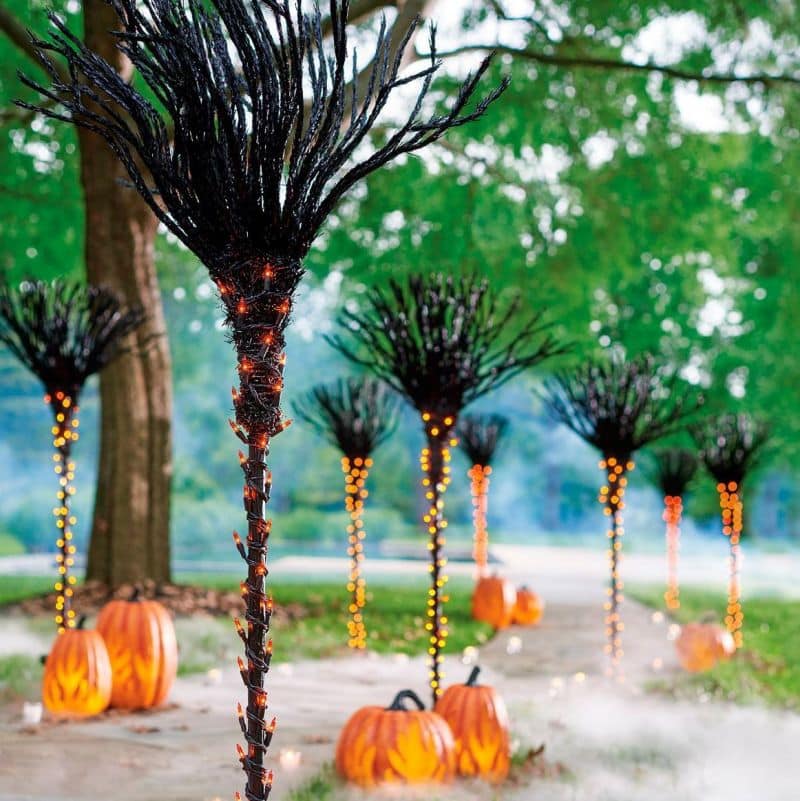
Last October we published our Grandin Road inspired lighted witch hat tutorial:
And it spawned the following comment thread:

Well, my babes had also seen those same broomstick pathway markers in the Grandin Road catalog, and she was already mulling over some ideas. But Mo’s comment was the push she needed to kick her thoughts into high gear. There’s nothing like a friendly reader-challenge to get us going!
But last Halloween we were living in a third-floor apartment in Jacksonville. Lights like these demanded a yard, or at least a walkway. Oh sure, there were sidewalks all over the apartment complex, but without the context of a front door and some other Halloween decorations, we just didn’t think it was the right year to make them.
And we’re glad we waited, because the Dollar Tree gods smiled upon us with their bountiful fall florals this summer!
Would it surprise, shock or offend you to learn that my babes dragged me to every Dollar Tree within driving distance on July 1 in a bid to find the first fall florals? While children were running past us in bathing suits and reeking of Coppertone – screaming at the top of their lungs because summer break had really just begun – my babes was hunting for autumn pumpkins and picks. To her credit, we did start finding the fall florals a few days later.
And her desperate play to be the first to find Halloween items at Dollar Tree has kept me and my poor truck running on fumes since mid-July! When it comes to Halloween, the woman is a cackling idea machine fueled by caffeine and Dollar Tree!
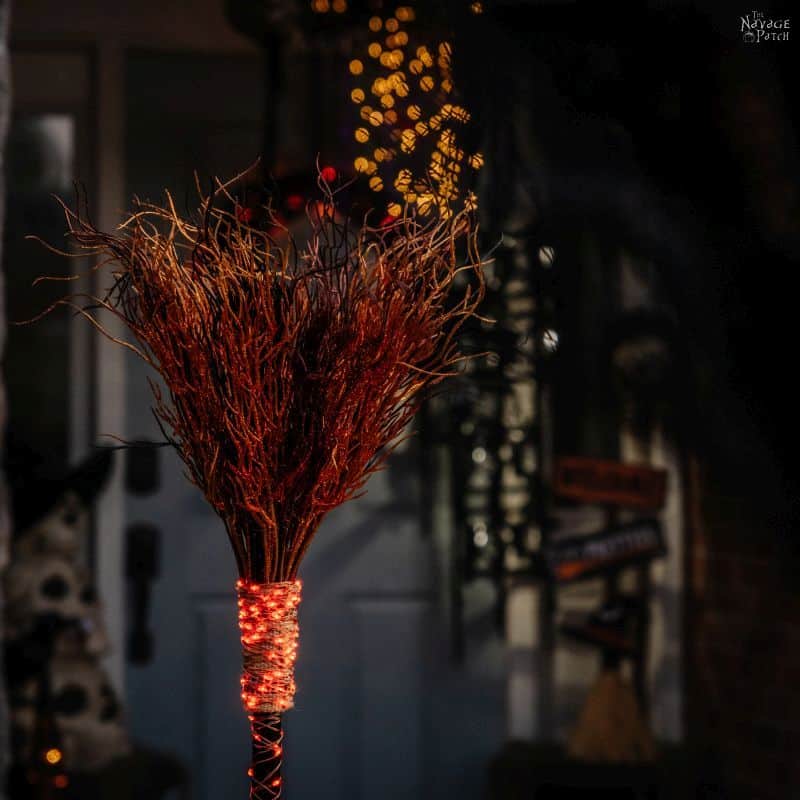
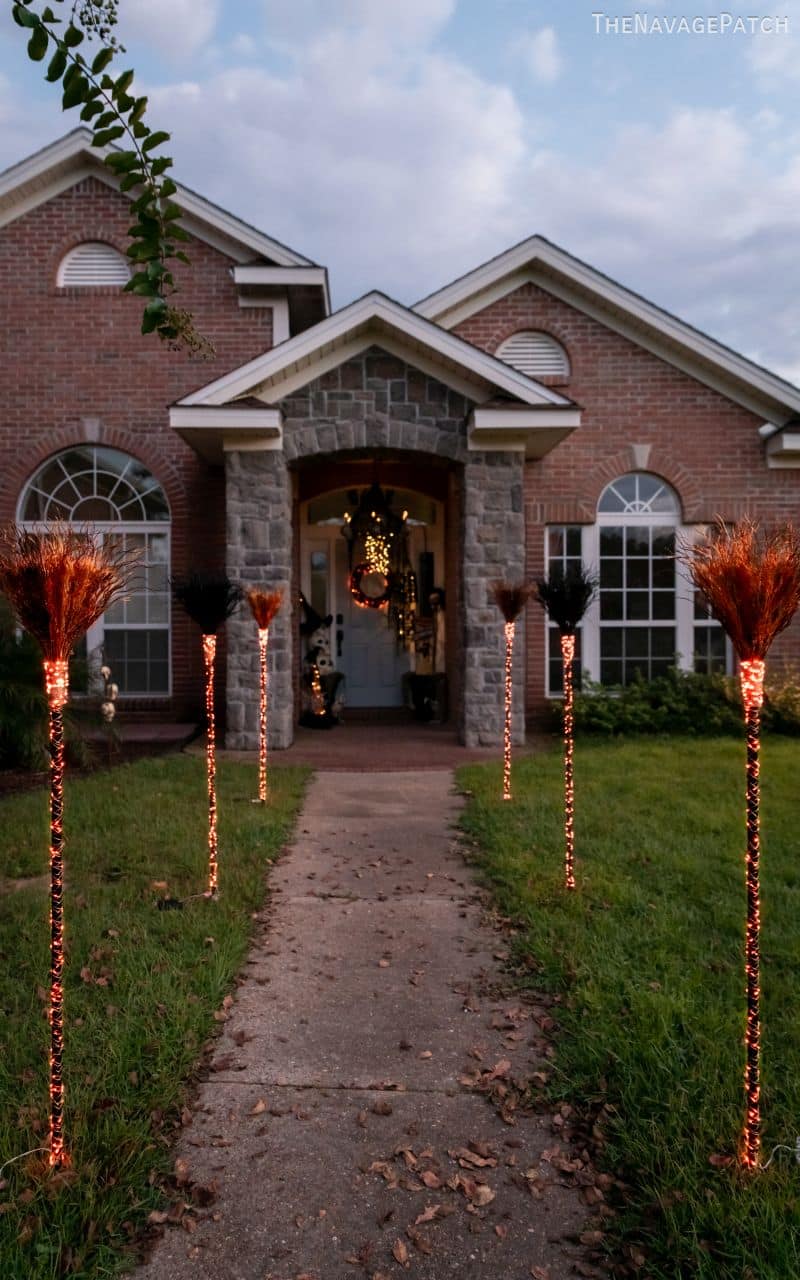
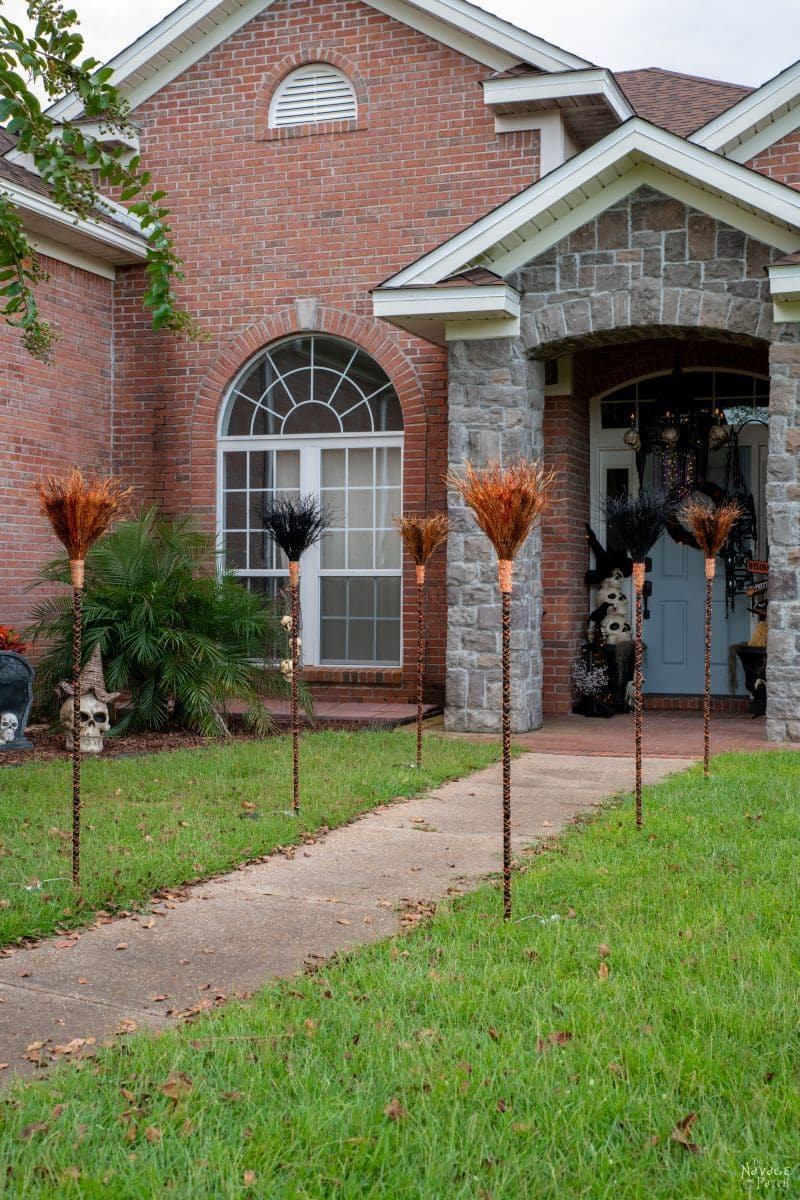
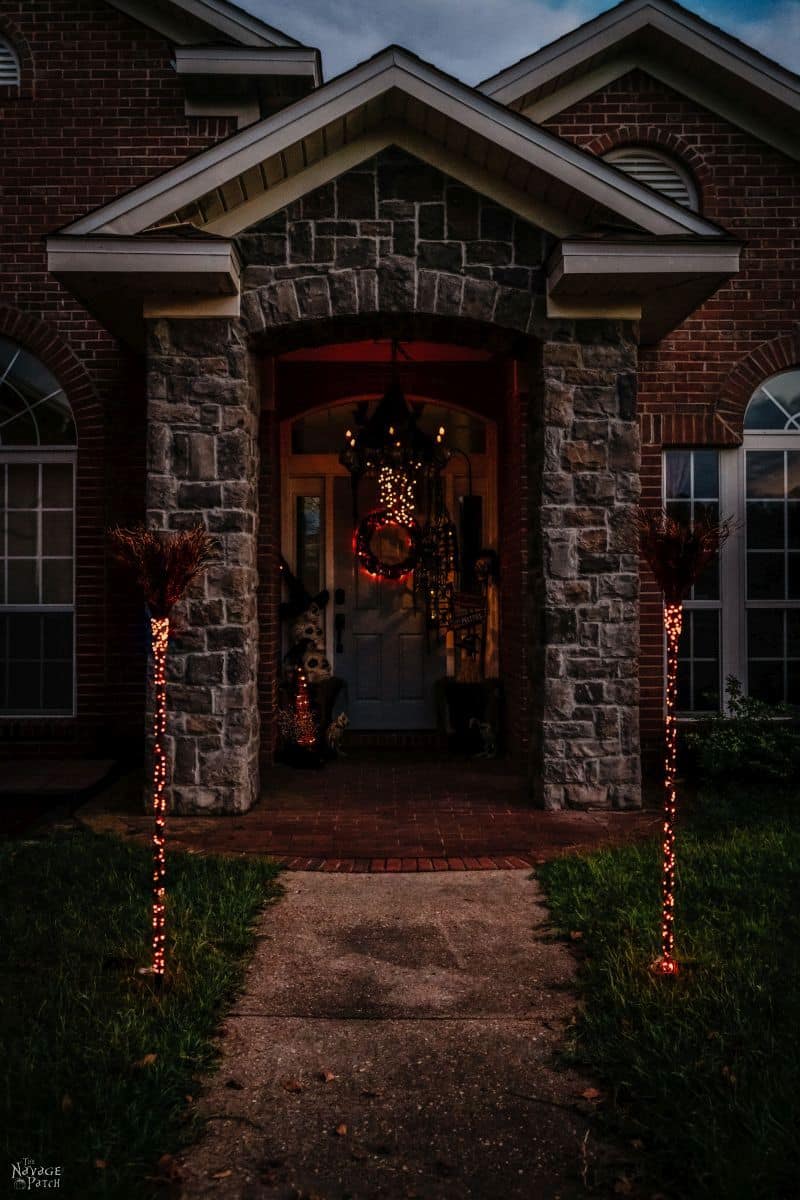
She may cackle and make me drive her to the ends of the earth in search of supplies, but I can never argue with her vision. These Dollar Tree broomstick pathway lights are incredible. And at night? Stunning.
I’m not going to sit here and tell you they’re the cheapest decorations you can make this Halloween. They’re not – even with Dollar Tree materials. But they are far cheaper than Grandin Road. Let’s a take a quick look at cost.
Grandin Road broomstick pathway markers – set of 3 for $150. There is no option to buy one, so your cost is $150.
Our broomstick pathway lights – about $28 per light if you make them with the lights we used or about $22 if you use battery-operated lights from Walmart. Dollar Tree sells orange lights, but they are labeled for indoor use only, so I can’t recommend them for this project. You can probably find outdoor-rated plug-in lights for cheaper at Amazon or Walmart. You can also bring the cost down by using fewer branches. I used 14 for each broom, but you could shave a few off to save a little money.
DIY BroomStick Pathway Lights SUPPLIES LIST
Affiliate links are provided below. Full disclosure here.
- Dollar Tree Black Broom Handle
- Vice-grip pliers
- 14 Black, Gold, or Bronze Glitter Halloween Branches
- Glue gun and hot glue sticks
- Burlap, twine or any scrap fabric
- Orange fairy lights (we used solar 200 LED orange lights which were $11 each, but you can buy any other outdoor kind from Amazon or Walmart for cheaper)
- Garden stakes (optional)
We love to see our DIY Halloween decor out in the wild! If you make this Halloween DIY decor for your home, take a picture or video and post it on Instagram, be sure to tag us @TheNavagePatch!
Dollar Tree Broomstick Pathway Lights VIDEO Tutorial
Watch our short and fun video below for an overview of our broomstick pathway lights before you read the detailed step-by-step tutorial.
More Easy DIY Halloween Decor Ideas
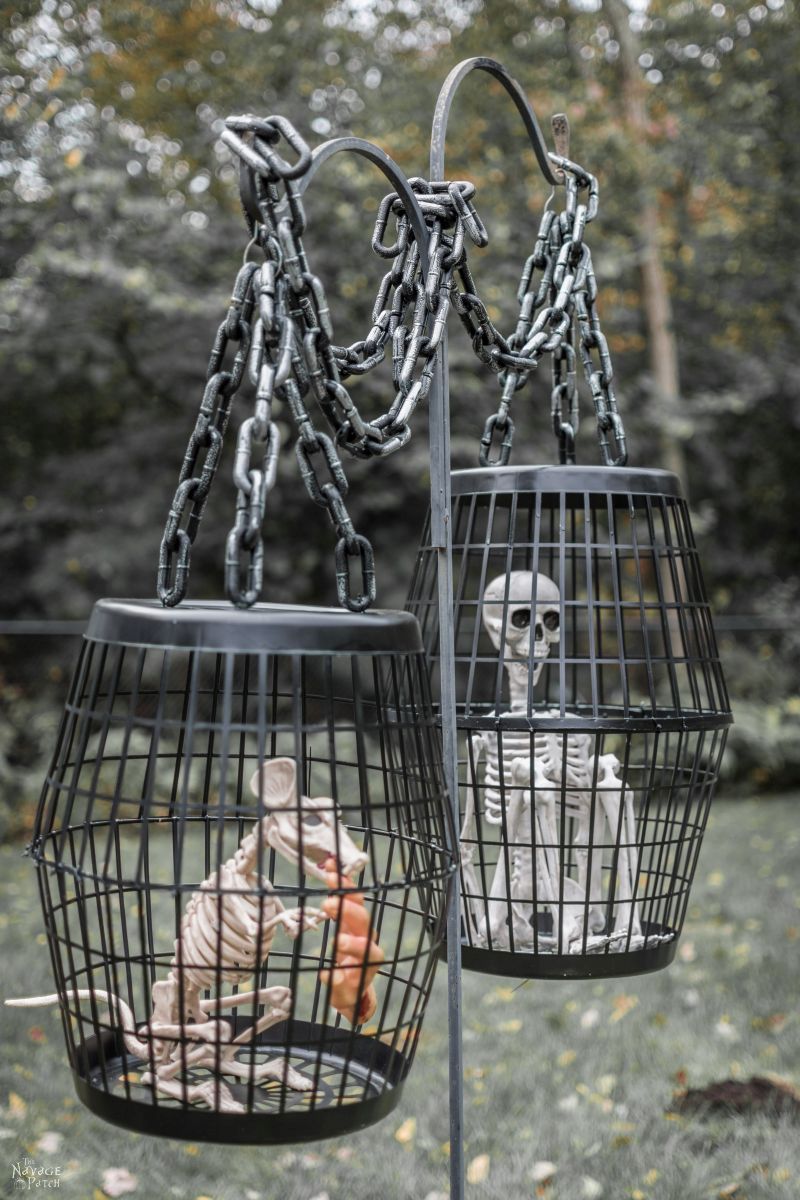

- Hanging Cage Halloween Prop
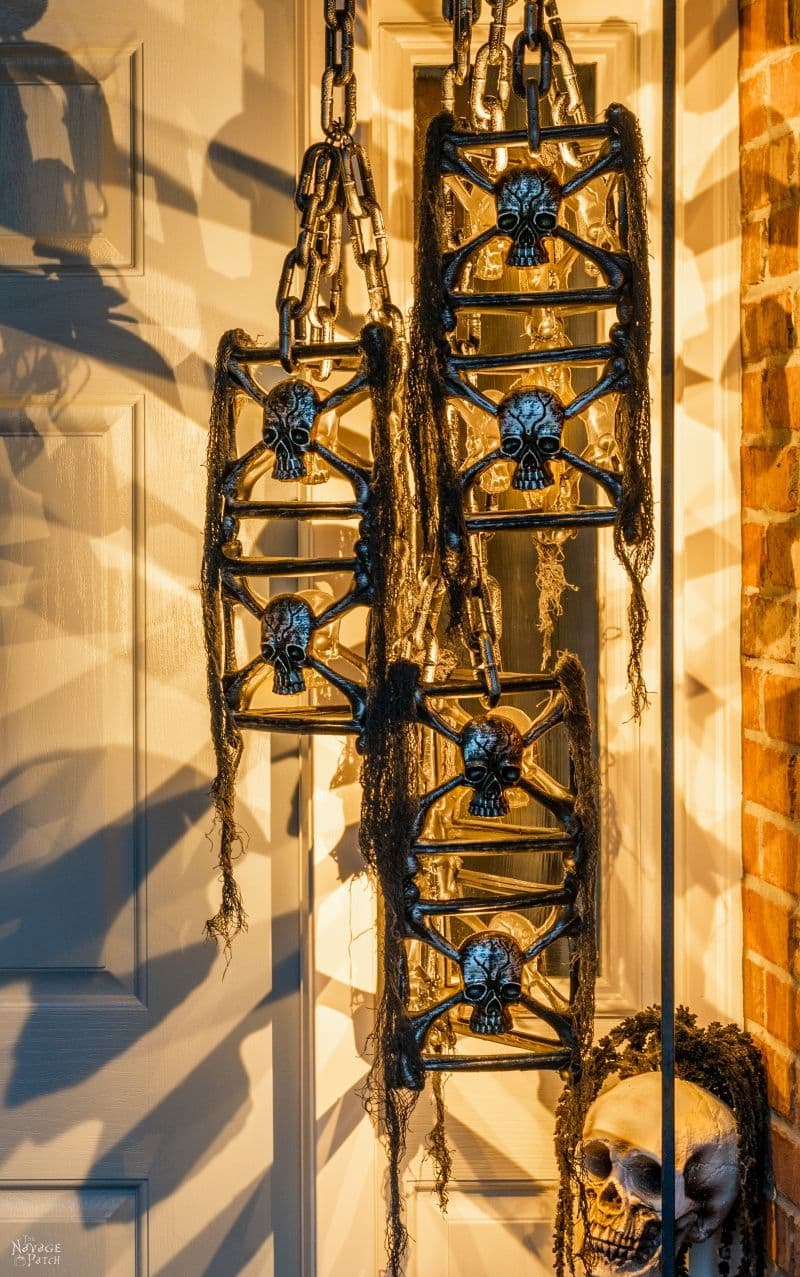
- DIY Dollar Tree Halloween Lights
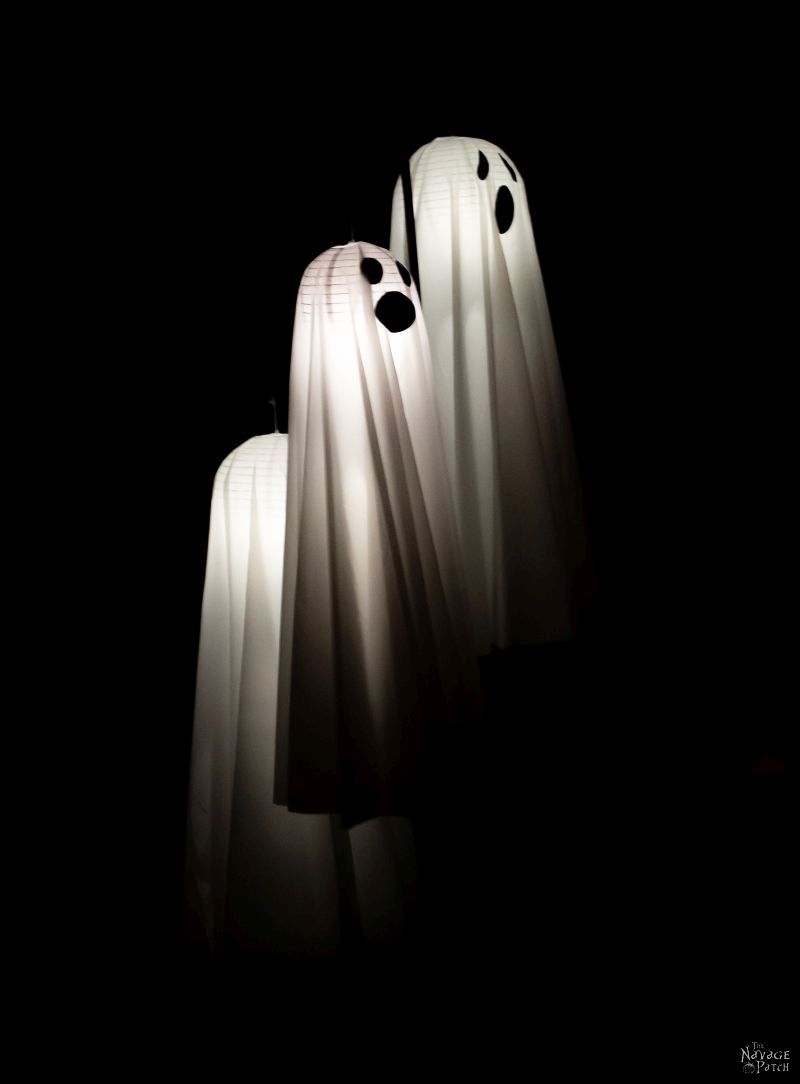
- Easy Lighted Hanging Ghosts (A Dollar Store DIY)
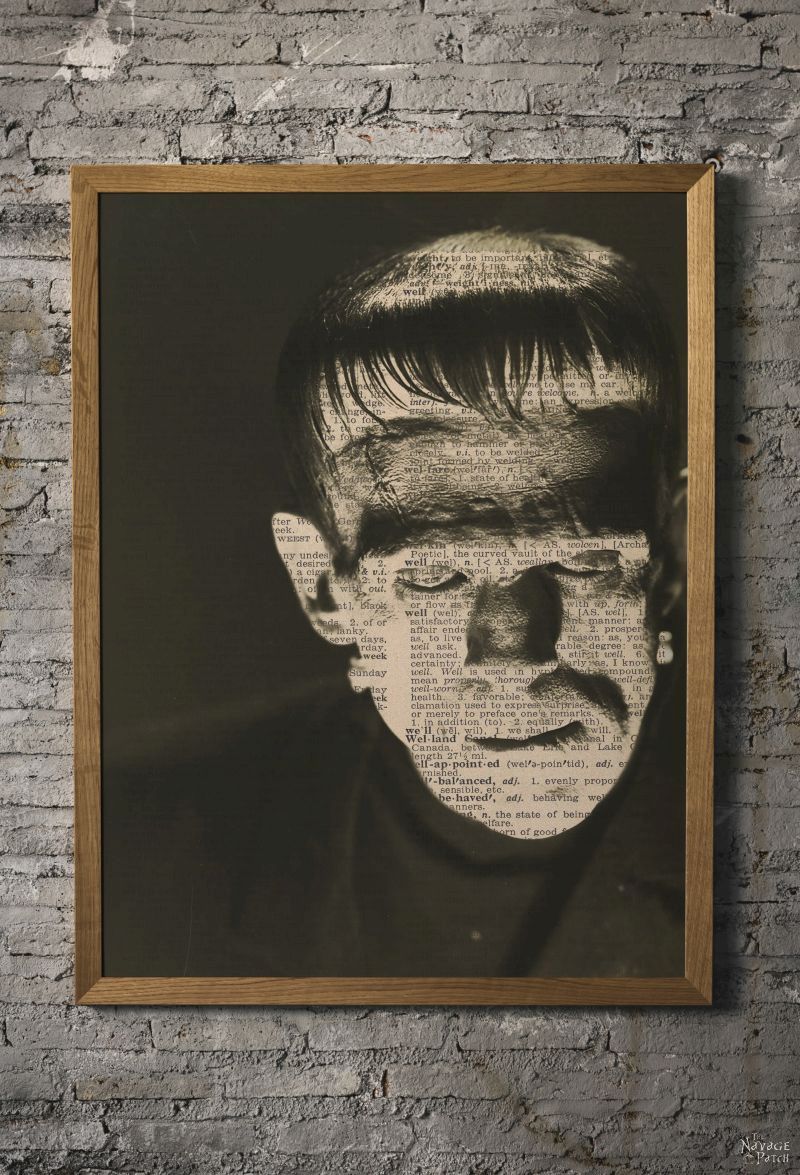
- Free Vintage Movie Monster Printables
- DIY Halloween Fire Wreath
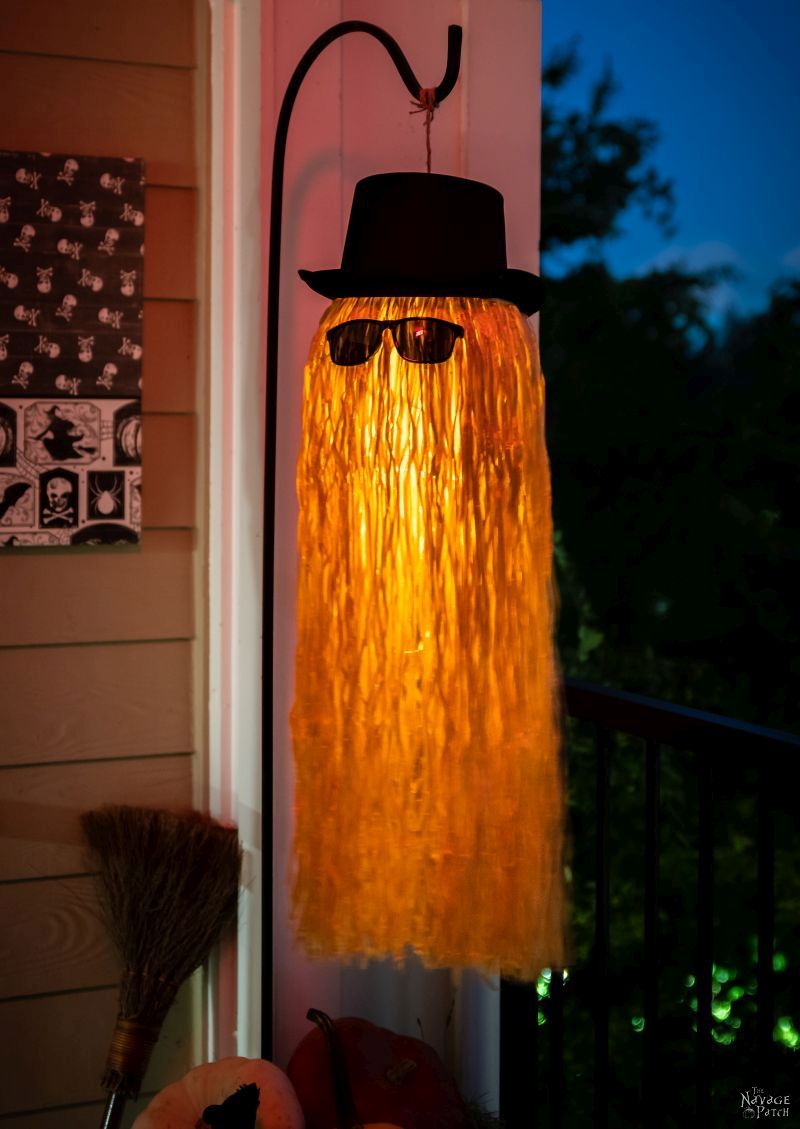
- DIY Cousin Itt Pathway Light
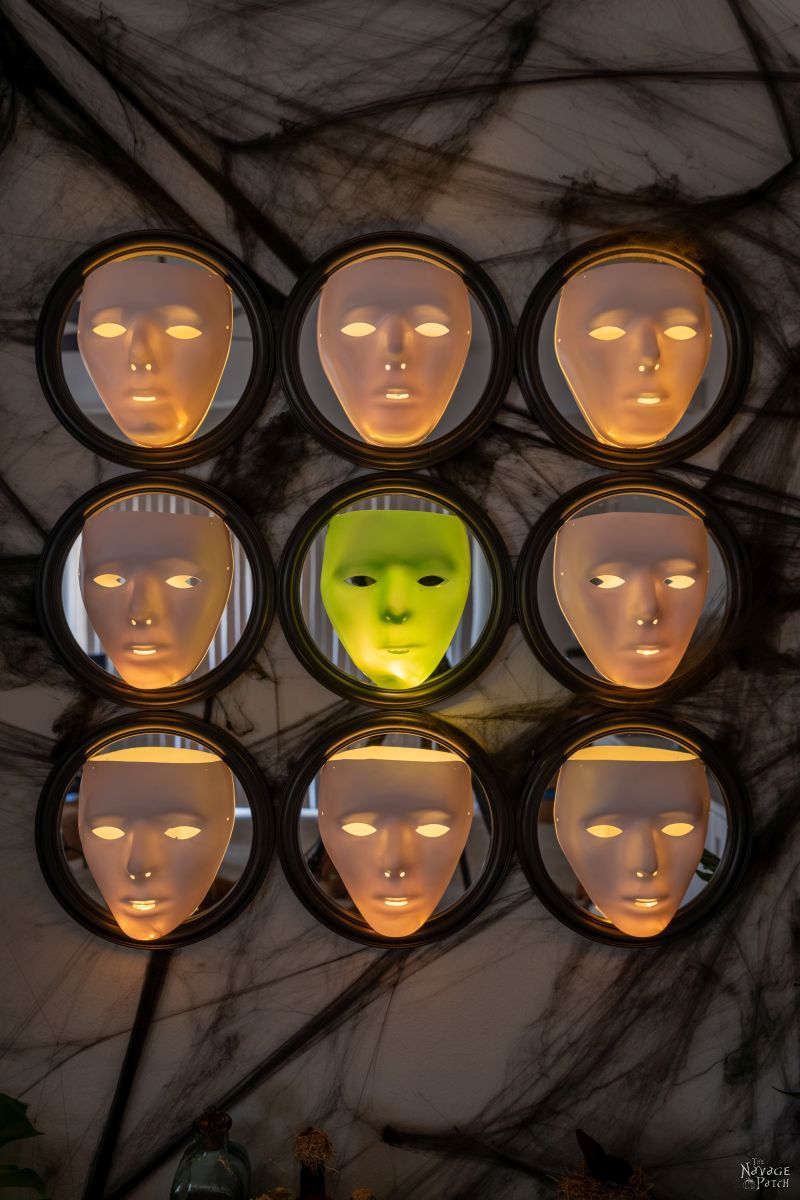
- Gallery Of The Faceless – Easy Halloween Wall Decor
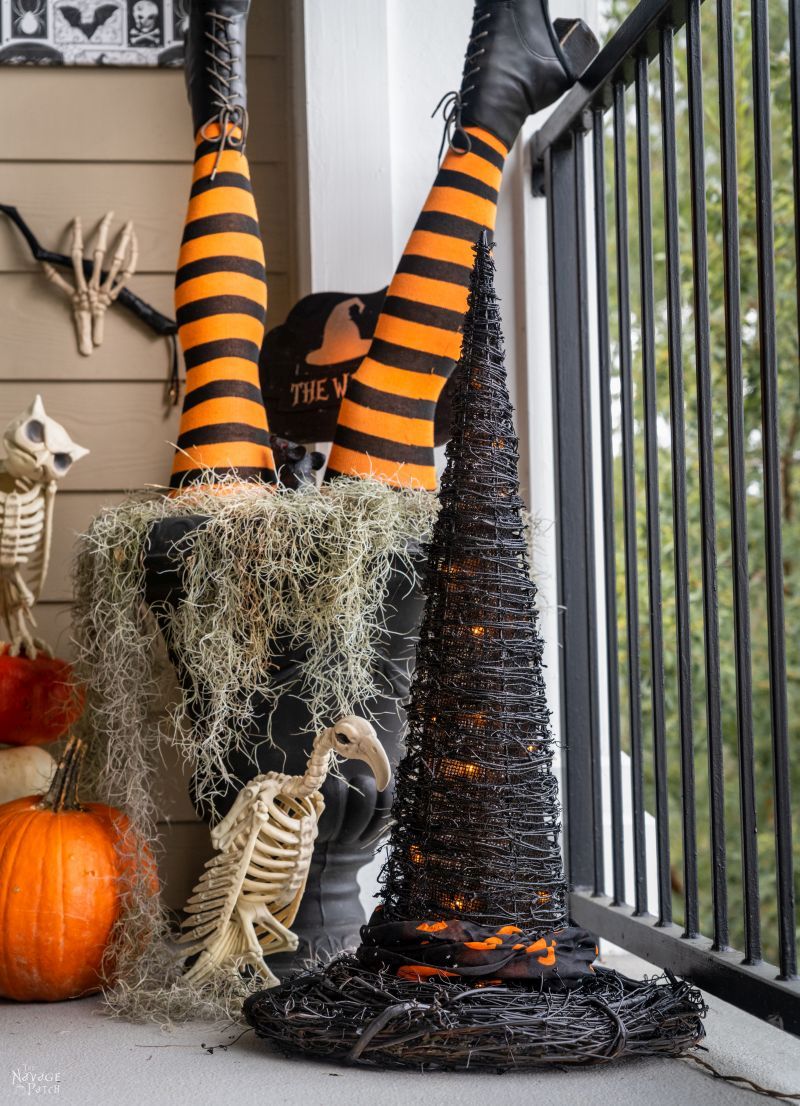
- DIY Lighted Witch Hat (Grandin Road Inspired)
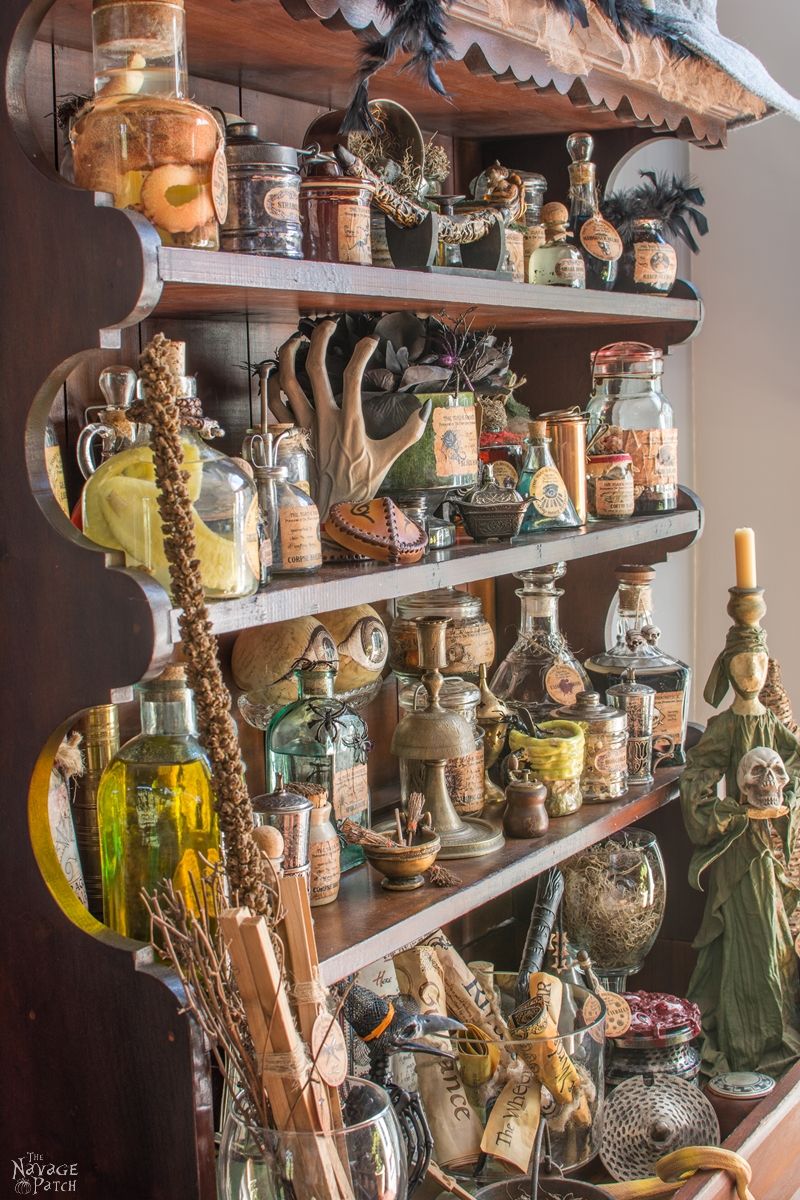
- Apothecary Jars And Free Printable Labels
- Free Vintage Witch Printables
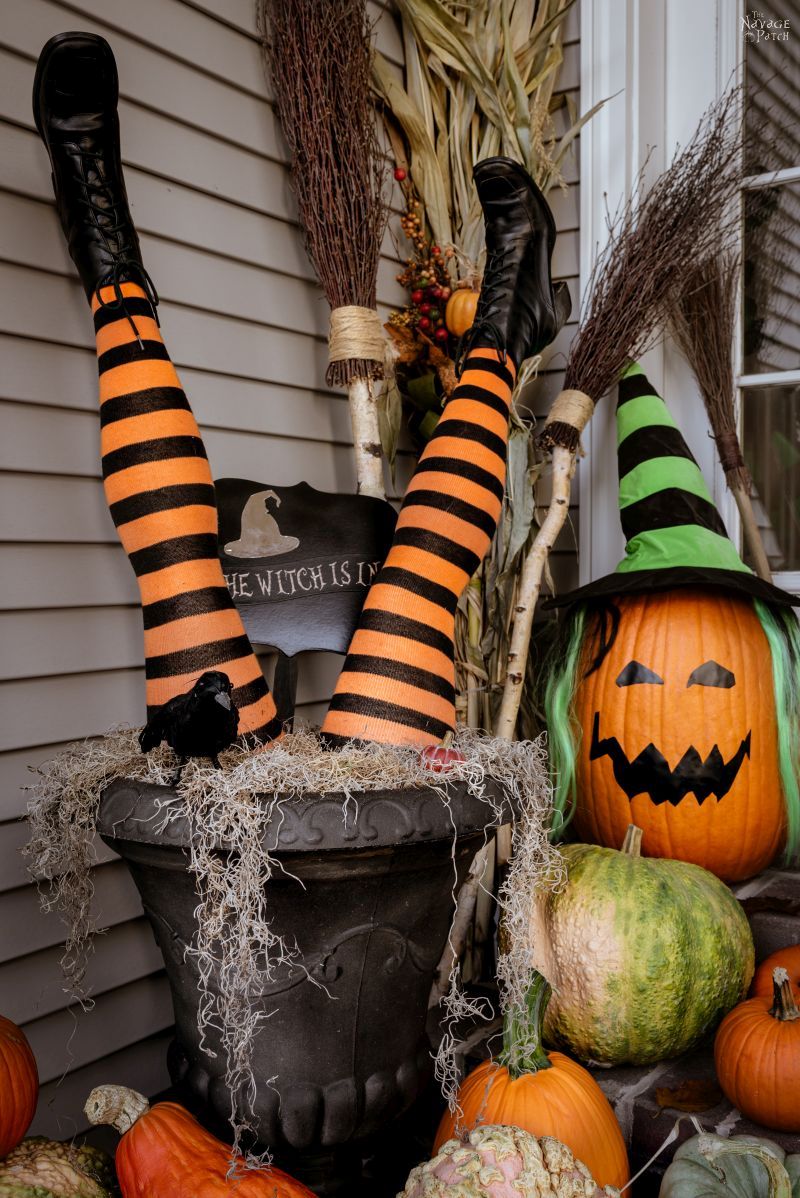
- DIY Witch Legs (Grandin Road Inspired)
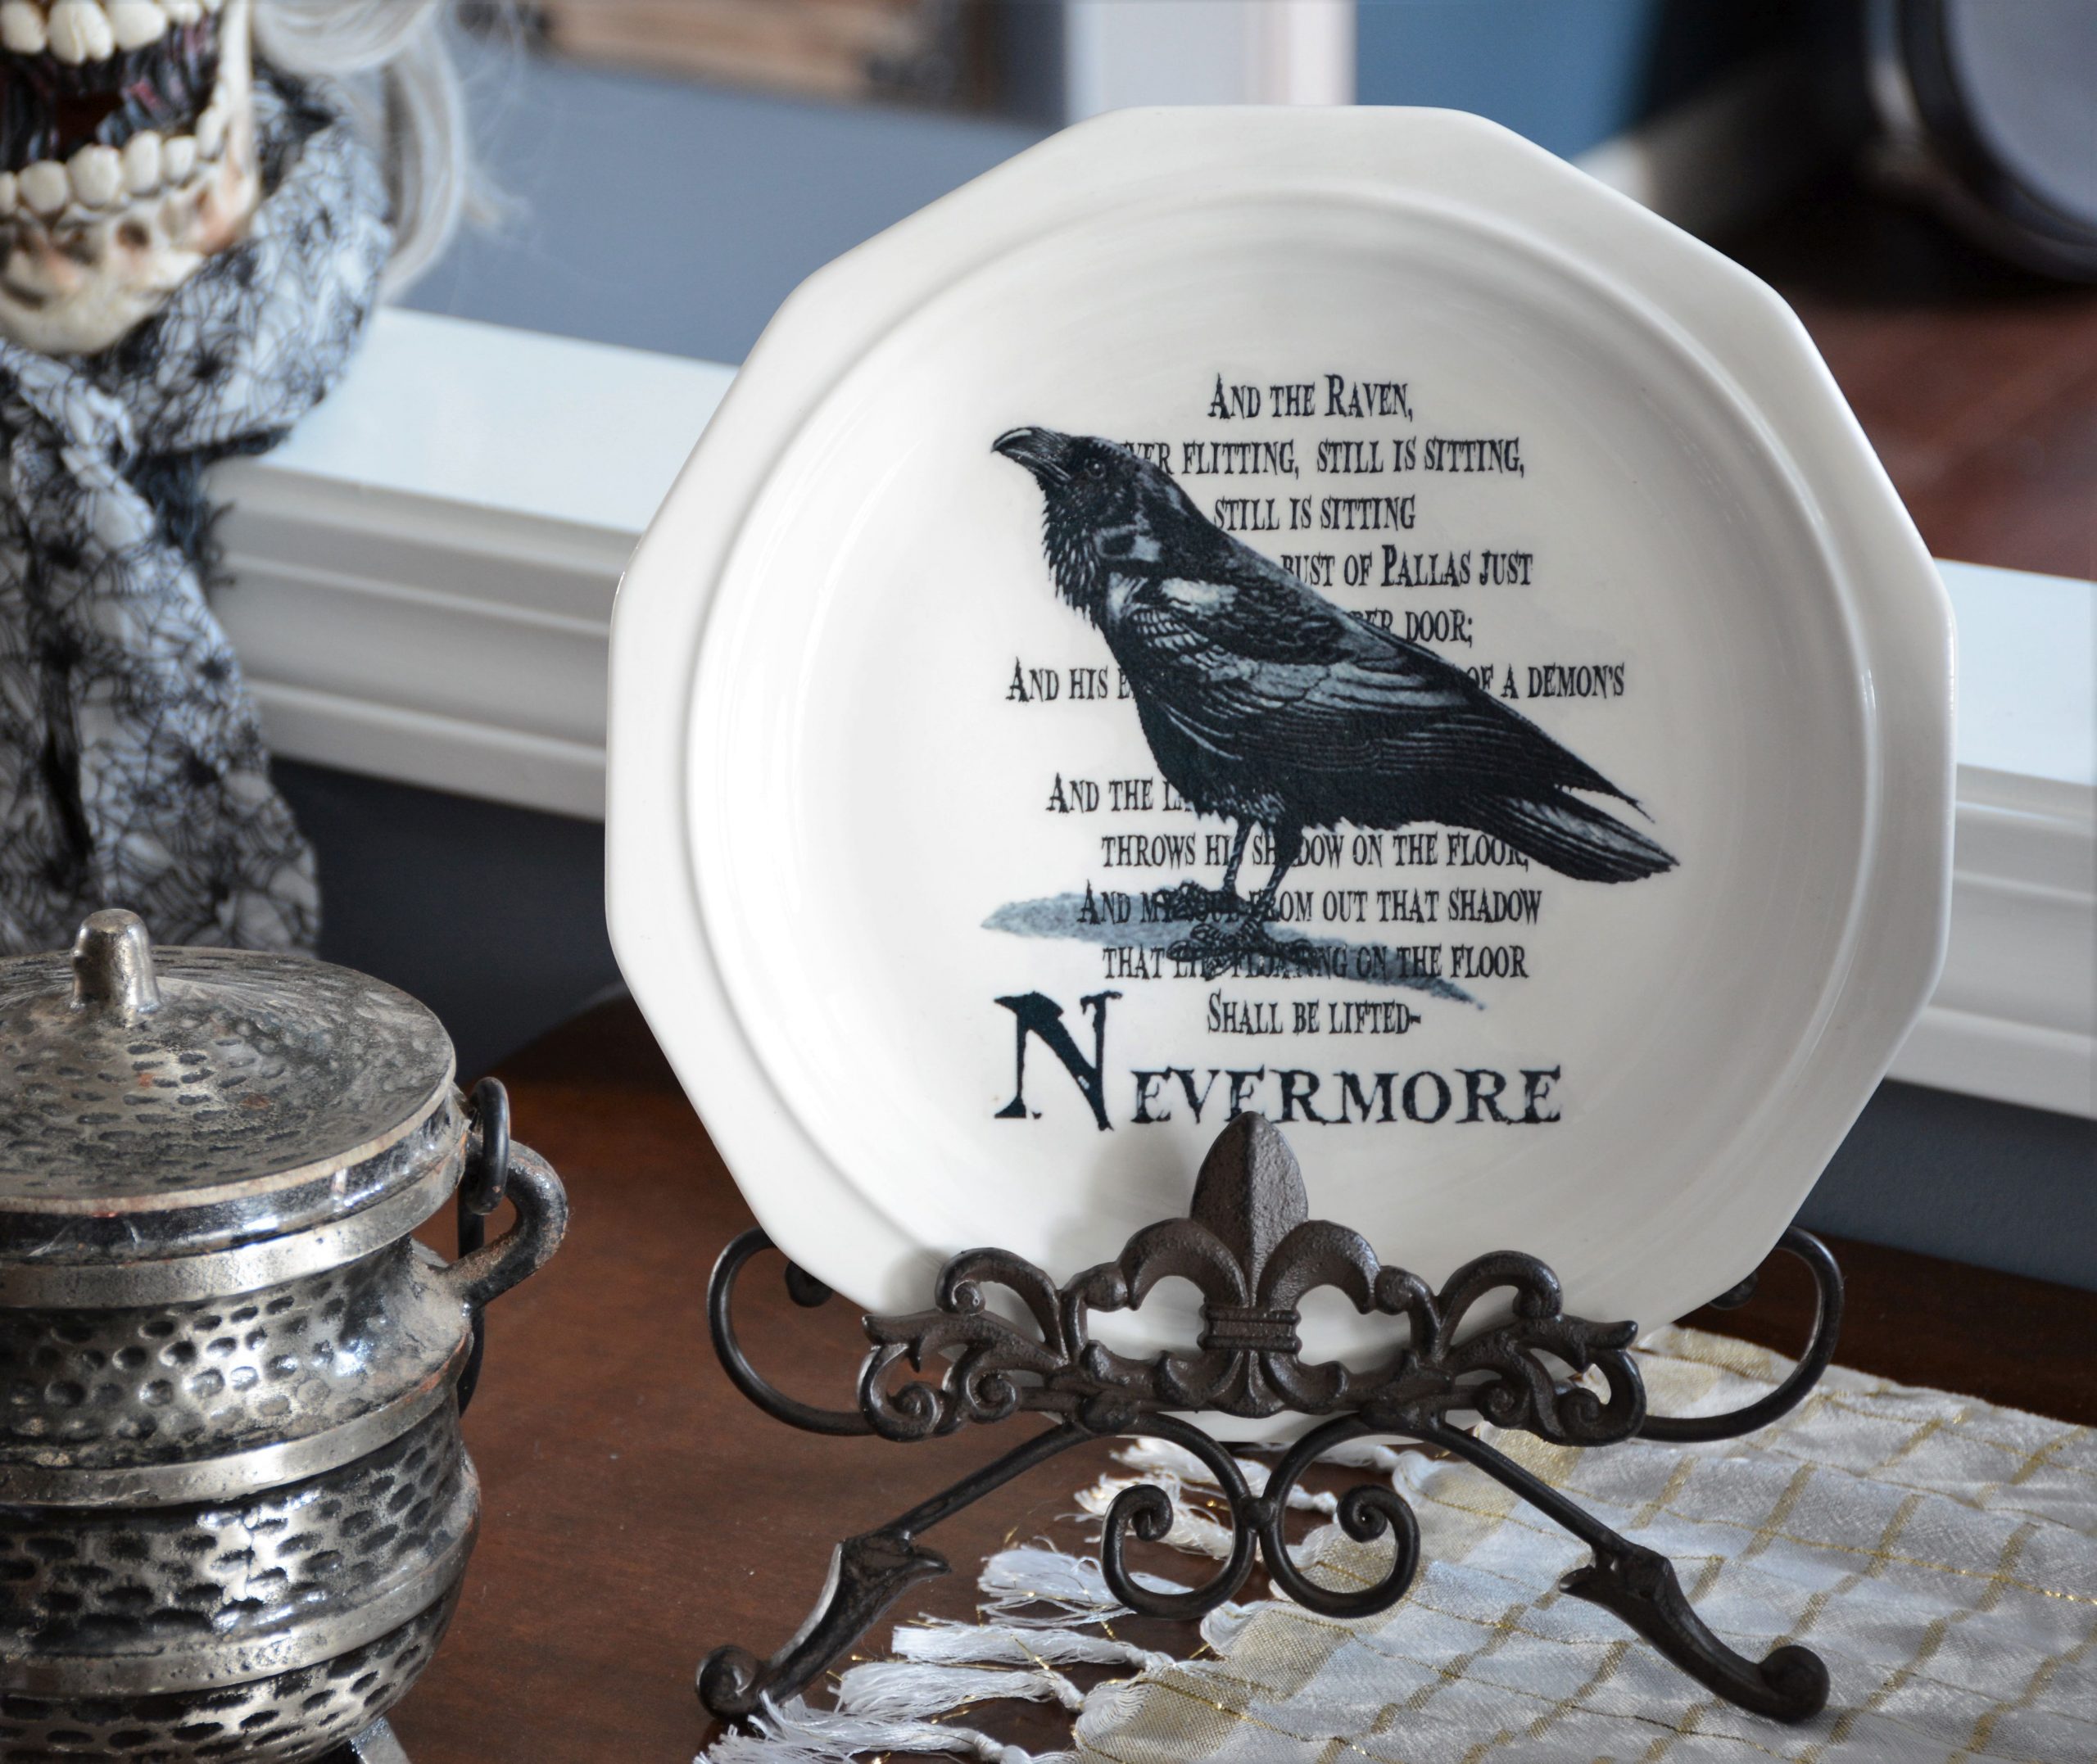
- Dishes Of Darkness: Pottery Barn Inspired Halloween Plates
Dollar Tree Broomstick Pathway Lights Tutorial
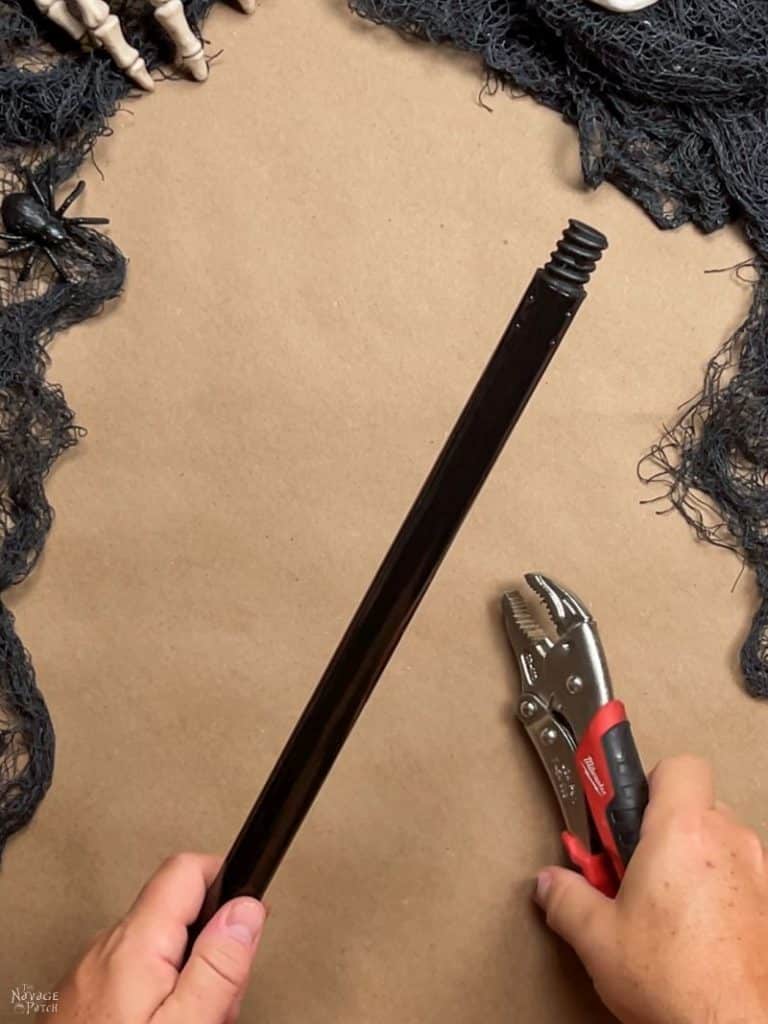
Step 1 – Prepare the broomstick
The Dollar Tree broom handles have a plastic hanging loop at one end – this will stay, as you’ll be covering it with the branches. There is a threaded piece of plastic on the other end for attaching mop heads, broom heads, etc. I used a pair of vice-grips to pull it out.

There’s a label on the handle that needs to go, but it won’t go without leaving some sticky residue.

You can leave the residue if it doesn’t bother you or clean it off like I did with Goo Gone. Dollar Tree sells the small bottle shown below.

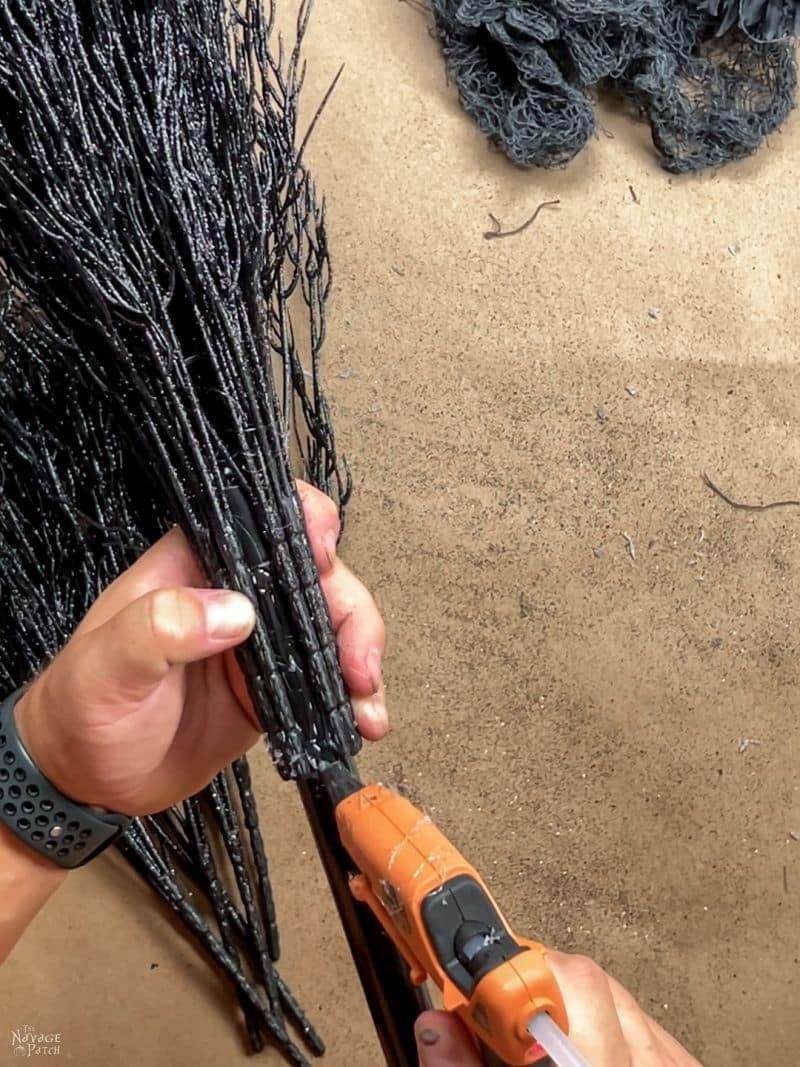
Step 2 – Glue the branches on the handle
I used black glue sticks on the low-temp setting – this allowed the branches to set much quicker.


I glued the branches, one after another, until I worked all the way around the handle. It took 14 branches to complete the circle. As I mentioned earlier, you can put a little space between the branches and use 10-12 instead of 14 to save some money.

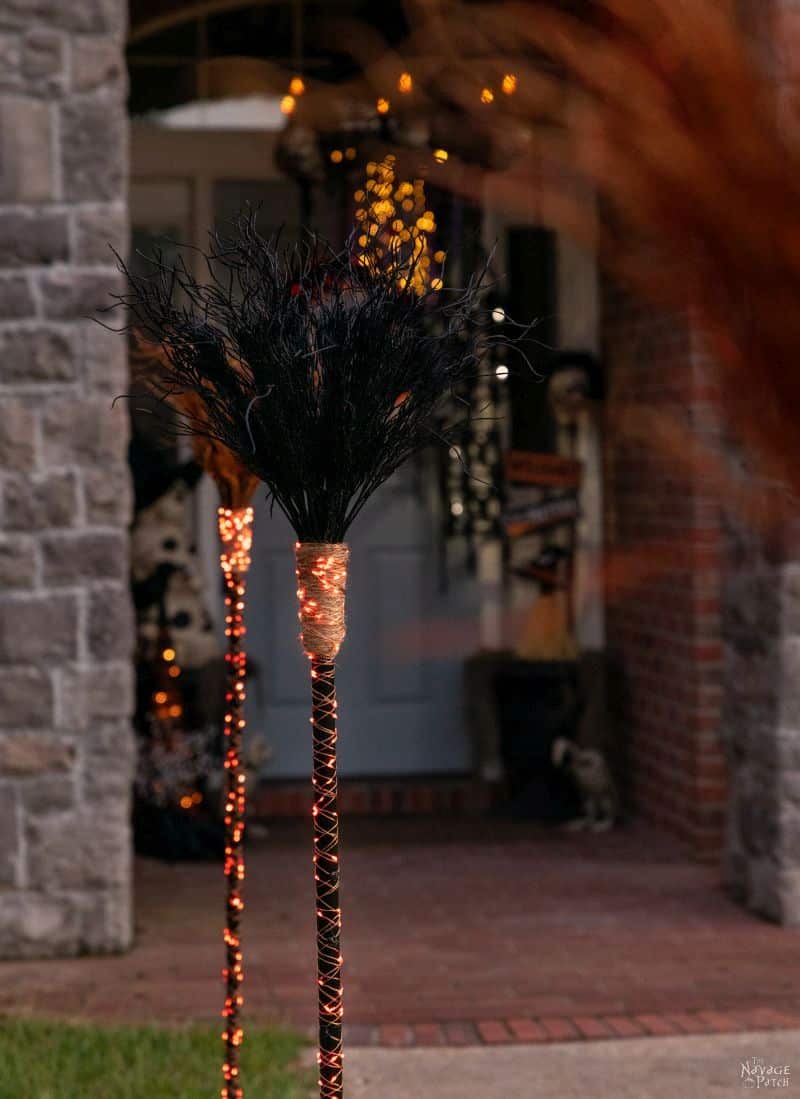
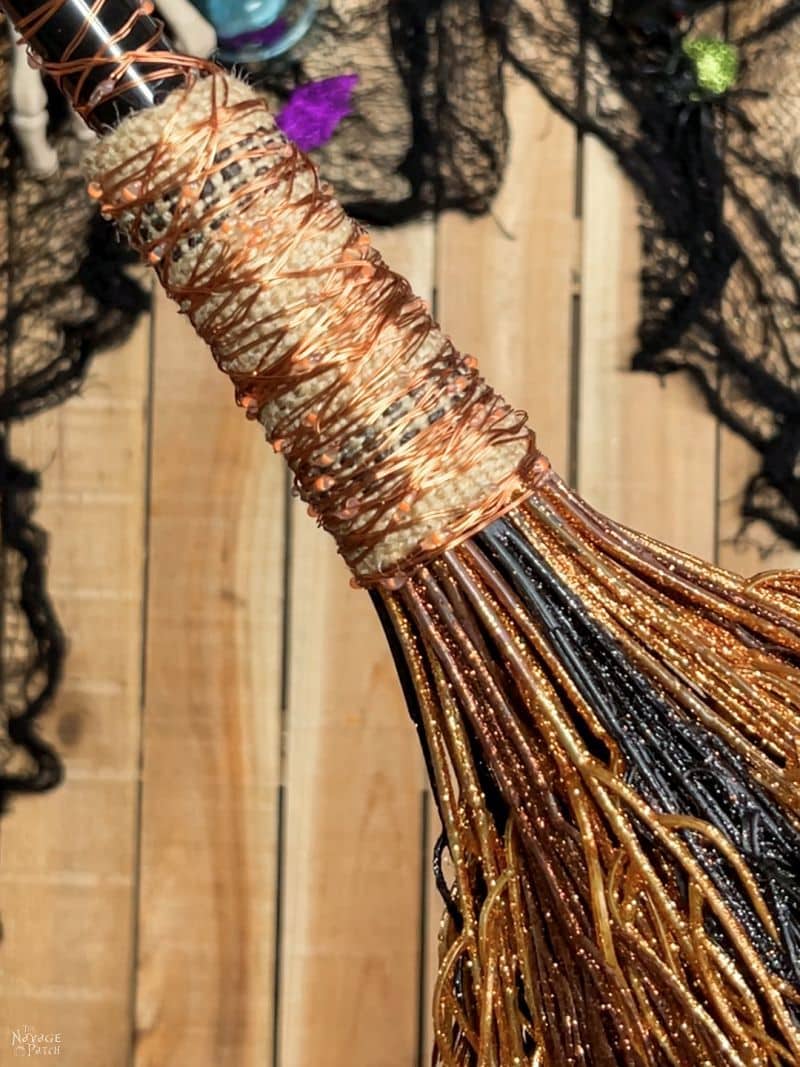
I made a total of 6 broomstick pathway lights – 2 black and 4 with various fiery colors.

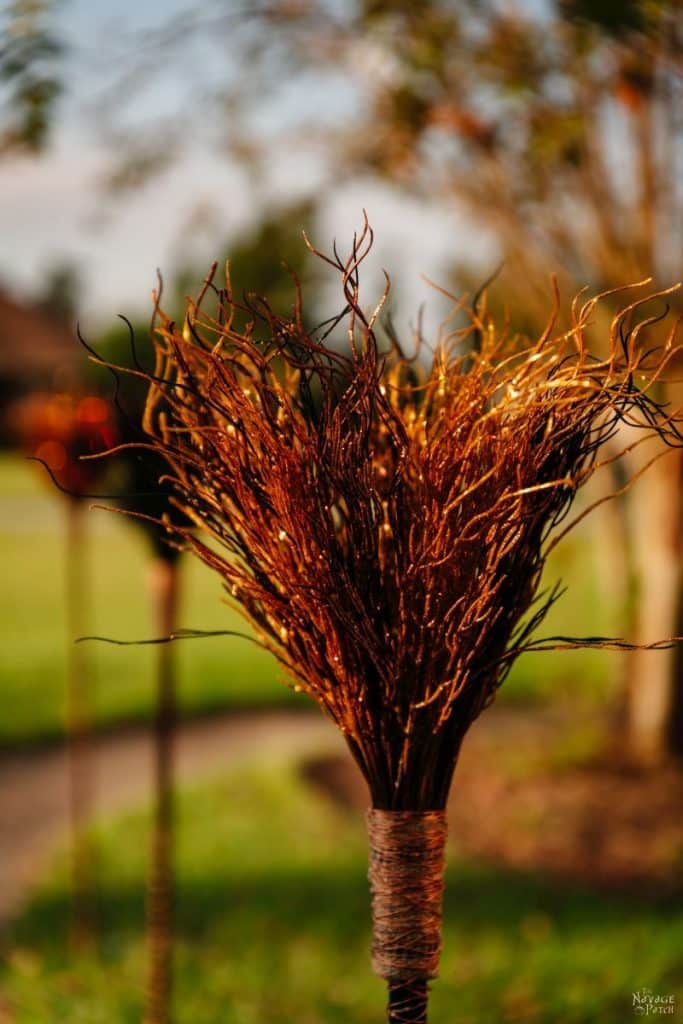
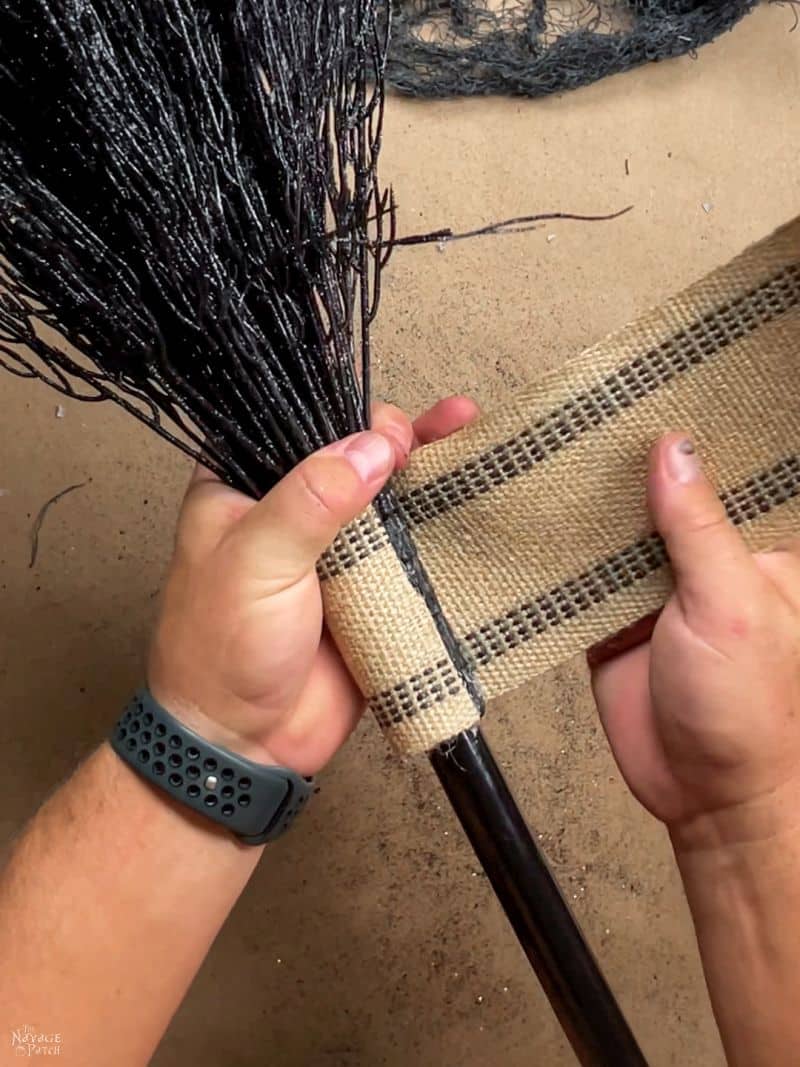
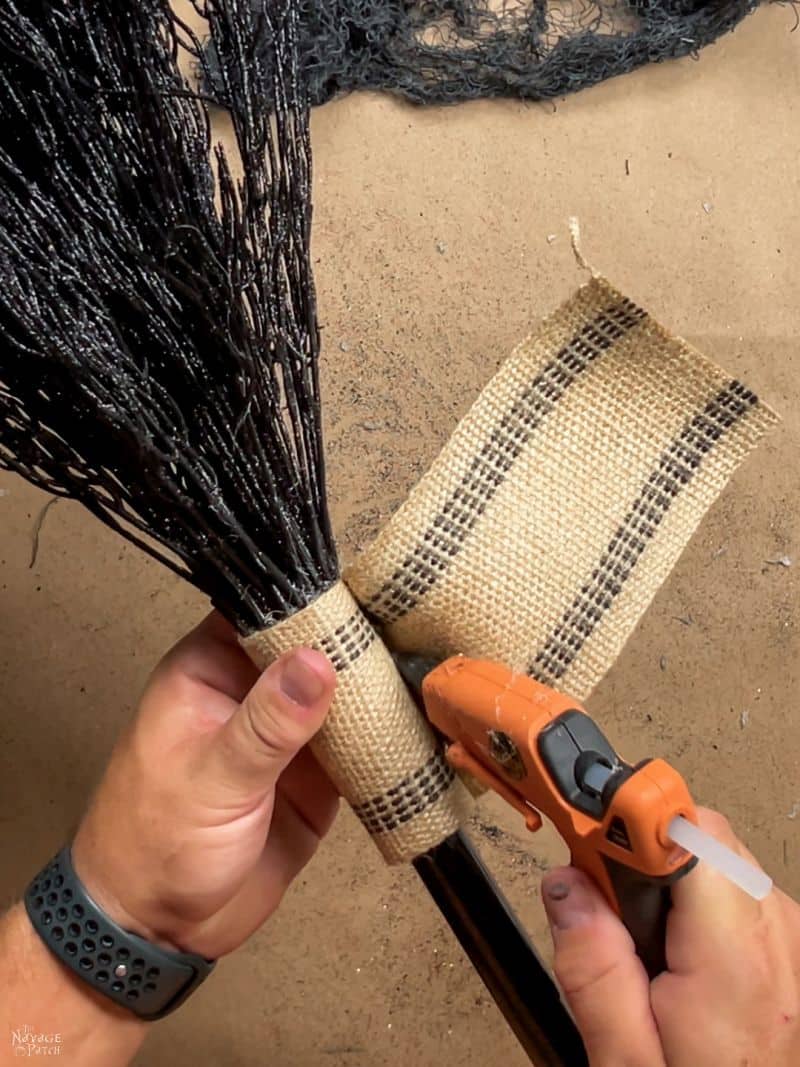
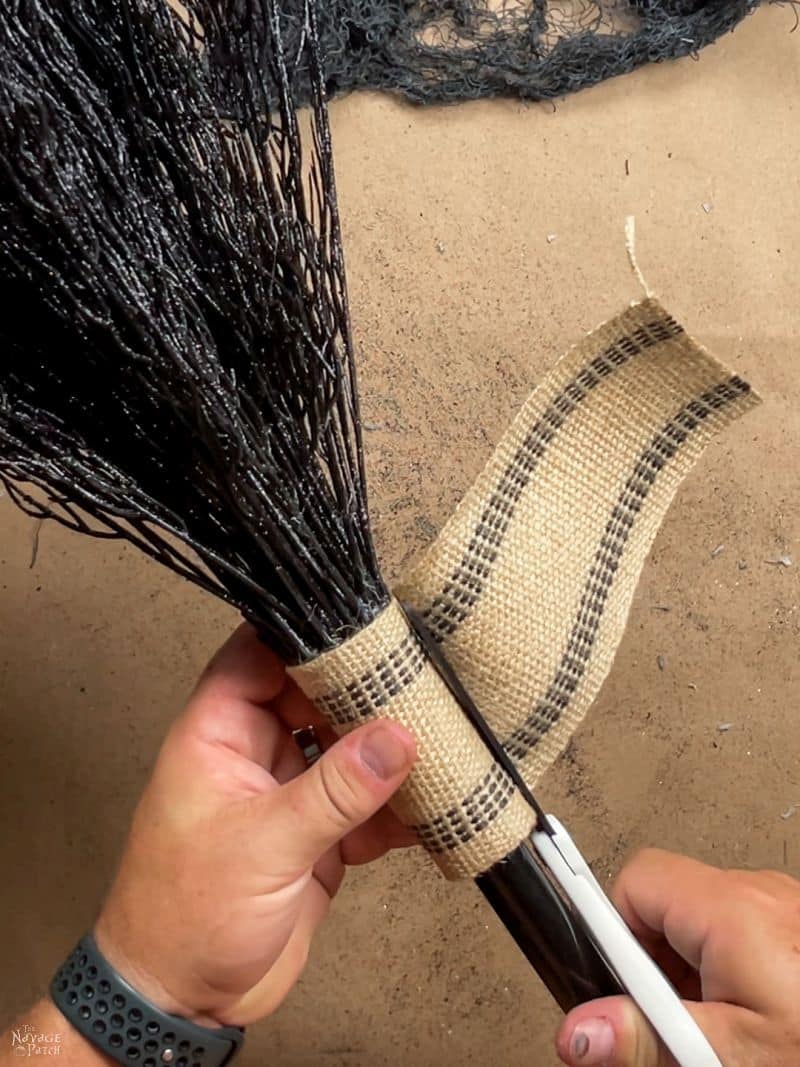
Step 3 – Wrap the ends
I wrapped the ends of the bristles in two ways – with twine and with burlap webbing, though you can use any scrap fabric. It will be covered in lights in the end.
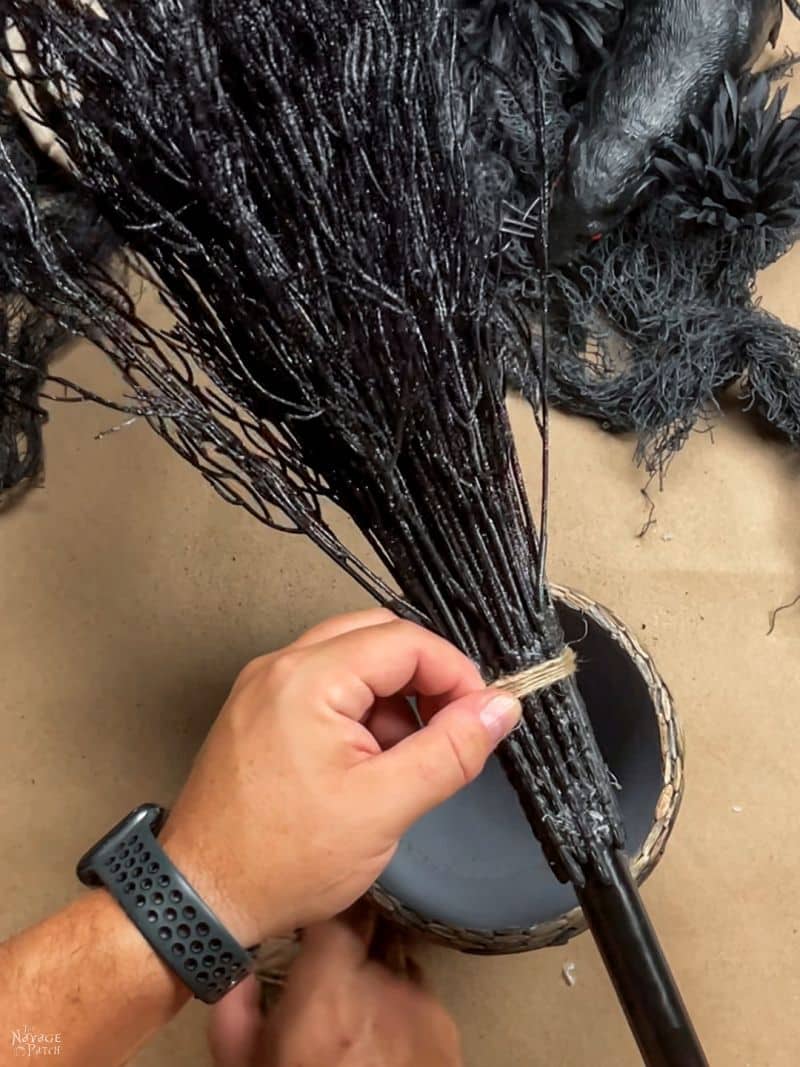
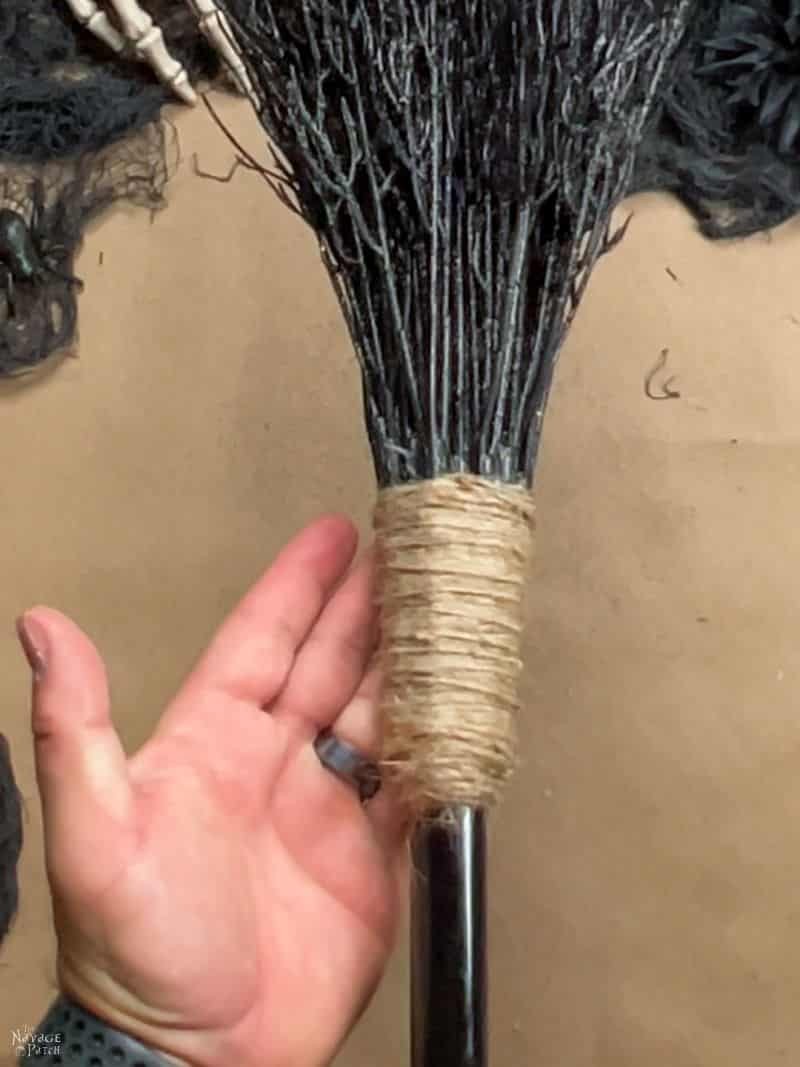
The twine looked nicer, but it took much longer!
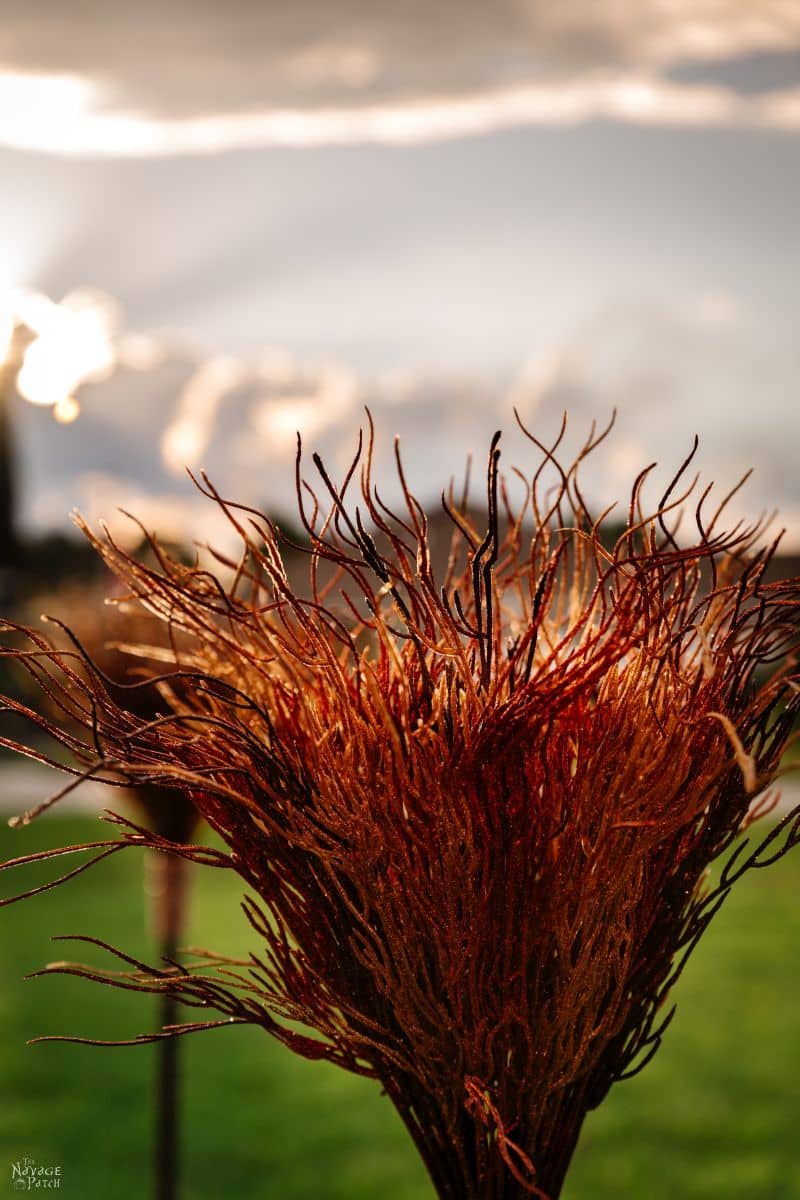
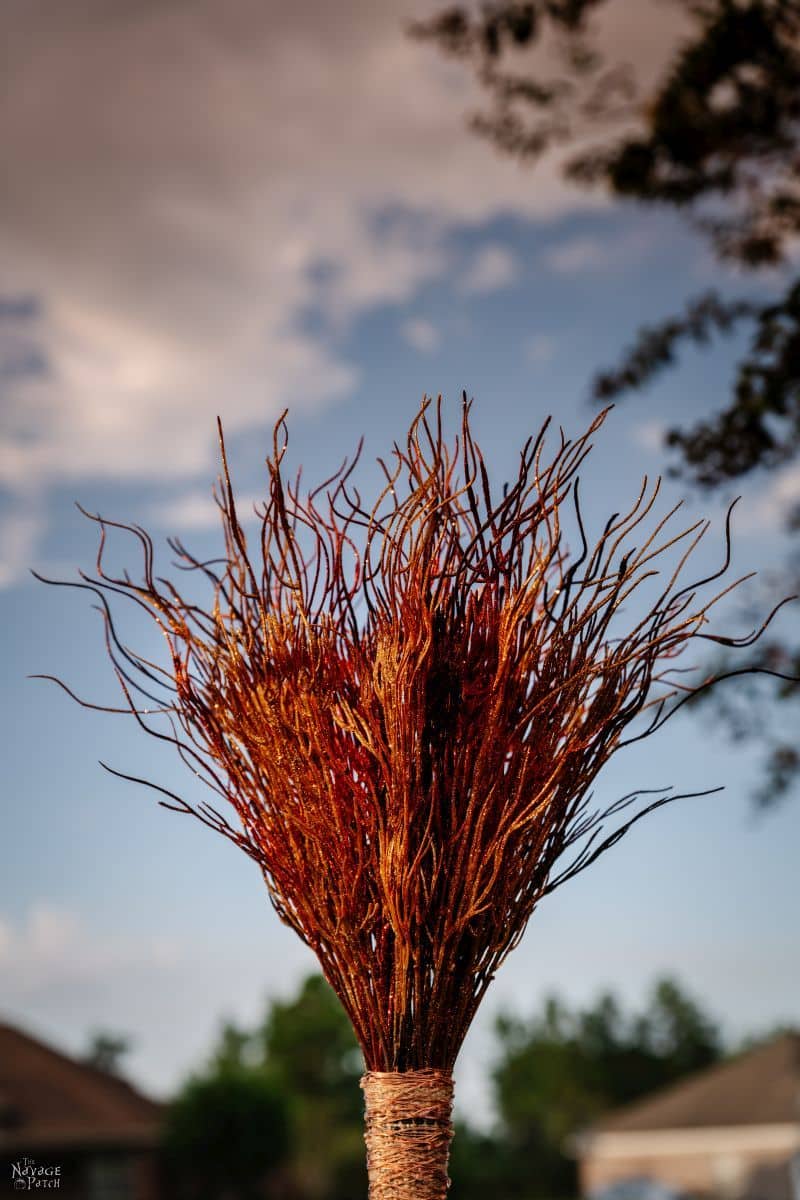
Step 4 – Fluff the broom
I gave the broom head a little more body by gently pulling the branches outward.

Step 5 – Wrap the lights
Our fairy light strings were really long, and at first we thought we’d gotten them too long, but because they’re fairy lights and not bulbs, I just kept wrapping and wrapping until I used up the whole strand.

I started by securing the end near the solar collector with a dab of hot glue, and then I started wrapping.

Every so often, I put another dab of glue to keep the light string from shifting.

Up and down, crisscrossing the previous run until I used up all the lights.

Step 6 – Install ground stakes
I used stakes from a tomato cage system I haven’t used in years and hammered them into the ground until about 4 feet was showing above the grass.

Then I slid our broomstick pathway lights onto each ground stake and let them charge up for nightfall!
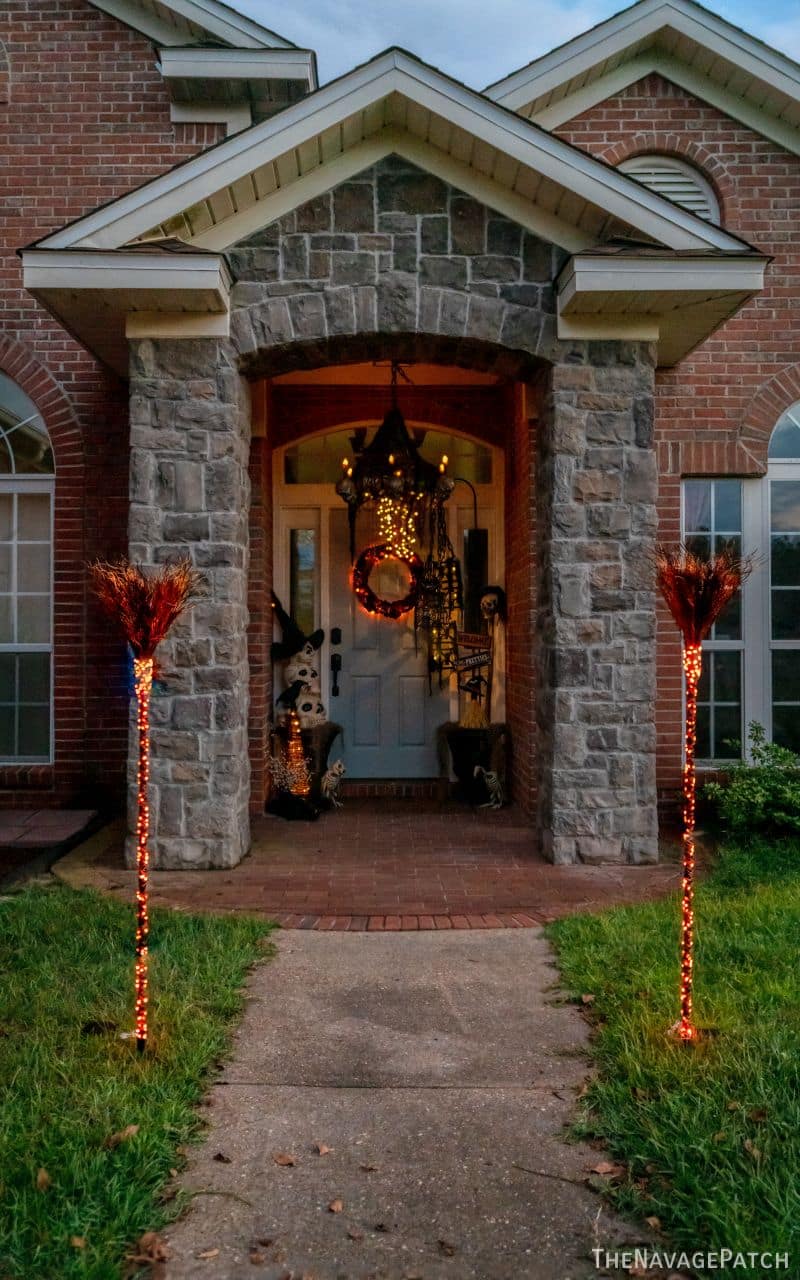


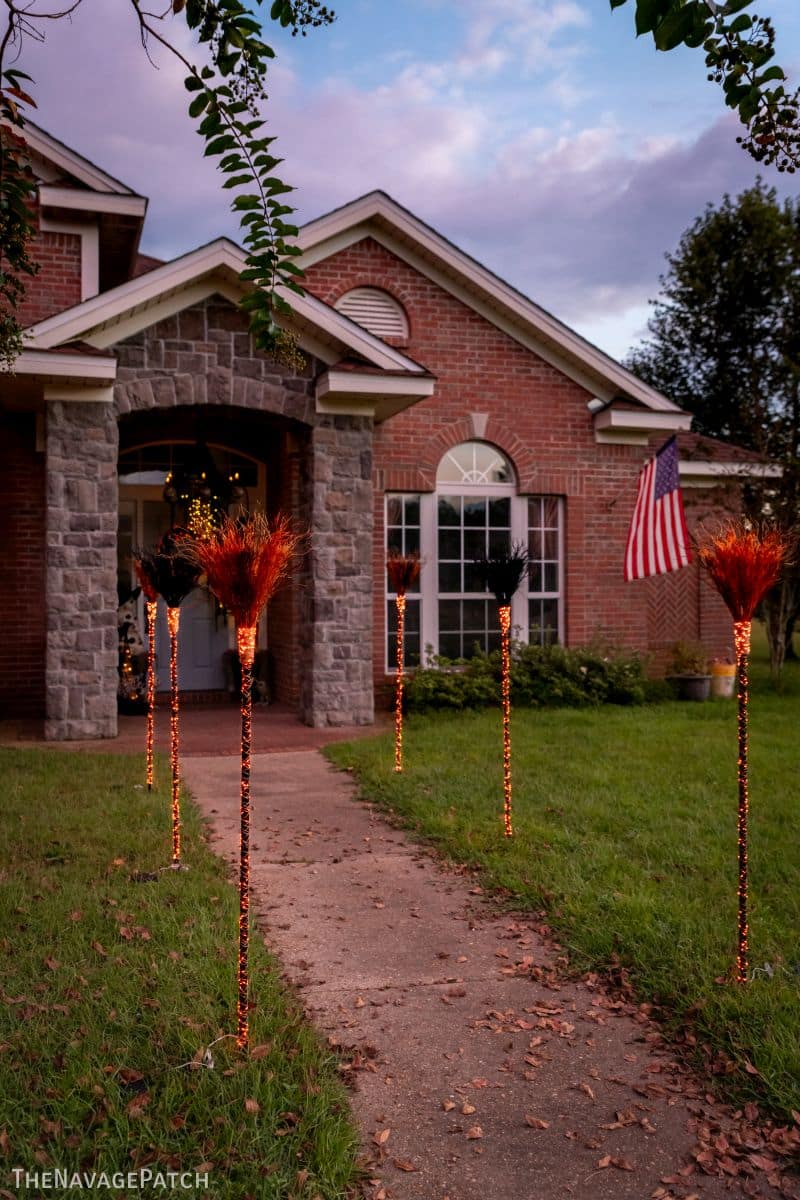
They look great in daylight too!


How do you like our broomstick pathway lights? Let us know in the comments!

Love the decorations! I always wondered what your neighbors think of all the decorations.
Thank you, Mary! Currently, they think we’re weird. We’ve had full-blown Halloween since the kids were still on summer break. That said, the neighborhood kids think it’s amazing! 🙂
Once again you meet the challenge! Great job!
Thank you, Patti!
Awesome job! Your crafts and projects are genius and I have learned so much from you and them. Thank you, thank you for rekindling my love of DYI projects and crafts. Love the website and blog.
Carol
Good Hope, GA
Thank you, Carol! I’m so happy to read that we’ve rekindled your love of DIY. Trust me, I know it can all get stale without inspiration – from the smallest crat to the biggest room renovation. If you don’t love what you’re doing, it’ll show in the end!
OMG, OMG, OMG, these are better than the originals 😍 I knew you guys would rock something cool and you guys surpassed my expectations!!!
I am so excited to recreate these! Thank you so much!! 🤗
WooHoo! Thank you, Mo! We are thrilled you like them! They turned out better even than we thought, especially considering Handan thought she bought lights that were too long. I told her just to wrap the whole thing and see how it looks. Well, it looked amazing! 🙂
Love them!! Thank you again for coming up with something better than the original. I came thisclose to breaking down and purchasing the Grandin Road version last year. But I quit huffing the silver paint and came to my senses. I figured if anyone could come up with a way to recreate them without breaking the bank it would be you guys!!
LOL – longer with more twinkle is always better than shorter and sparse.
Now, back to shopping for supplies…
Exactly! Everybody wants more twinkle! Send pics when you guys have yours set up!
Awesome! Planning a trip to PC, might have to swing by Freeport and scope you out to see the full display.
Swing by at dusk and you’ll see what we have so far all lit. Shouldn’t be hard to find our house… :D:D:D
Absolutely fabulous!! I want to be your neighbor!!
There are a few houses for sale in the ‘hood! 🙂
These are awesome! I’m living in an apt complex so no yard. However, I have two daughters living near that DO decorate their yards! I might make some of these for them!
Perfect! And hey, you could also prop one up in the apartment! 🙂
These are just awesome Greg!!!!
Thanks, Connie! 🙂
AWESOME! You and Handin never fail to amaze me with your ideas!
Love it!
Thank you so much, Pam! 🙂
Love them! I will definitely need to add these to my Halloween craft day with my daughter.🖤
Yes! So easy to make! 🙂
Love, love, love the lighted broomsticks! You guys keep coming up with the cutest and most decorative ideas. I really enjoy seeing each new creativity. Keep up the great work.
Thank you so much, Lisa! These were really fun to make! 🙂
So cool! I love holiday decor that looks great by day and night!
Yes! That’s the key, Kristi!
These are awesome! I absolutely love any decor with fairy lights. They truly make things magical. If I can get all the supplies I might make a couple to put at the entrance to my stairs. I think I’ll add lights to the “broom” part though.
Gail, my thoughts exactly! I love the project, but at night the broom part gets lost. I would intertwine it in the broom branches for the full effect at night!
That’s a great idea, Gail! Send pics or post to IG and tag us! 🙂
Amazing! Love all your ideas! Can’t wait to see what is next and your instructions are so clear anyone can do the projects you create. Thank you for sharing.
Thank you so much, Nancy! I strive to make the instructions as clear as possible, so I’m happy to hear that!
What a wonderful Fall idea! If you wanted a little more light you could put a small solar light stake in the middle of the “broom straw” too. Would be nice for country folk like us! I love your creativity!
That’s a great idea, Geni! That was actually in our original plan, but we omitted it to stay a little more true to the GR design. 🙂
You will have the best Halloween house in the neighborhood!
I certainly hope so, Terry, because I’ve been hearing stories about a Christmas house that is so complex, he starts the process on September 1st. We won’t be competing with him, but I’m hoping we’ll own Halloween! 😀
The two of you are nothing short of AMAZING!! Just a wonderful, wonderful Halloween Display. (I got nothin’, maybe your brother could come over and help me with my front porch display!) Nice Job!!
Thank you so much, Wendy! If I had a brother, I’d send him your way! 🙂
Damn, another trip to Dollar Tree, glad the hubby loves me.
They turned out great!!
Was thinking I would do a broom I just saw on YouTube, it’s done with a mop head & a remote controlled car. It’s really cool, but cost a bit more, and probably more time consuming. I think I like this (yours)one better, and save the other one for when the grandbabies come down to visit. We are in Port Orange, FL which is just below Daytona Beach.
Have a great week-end!
Danni
Thanks, Florida neighbor! Have fun making them! 🙂
Those look amazing! Do you put the solar charger on the top somewhere?? I am all things halloween all year long sokeep those ideas coming!!Love your blog!
Thanks, Vicki! We put the chargers on the ground. They have enough wire that we could keep them far away, but we just bunched up the wire and kept them right near the bases.
My daughter would absolutely go crazy for these. She just loves halloween. A serious LOVE for it.
I always try to make her something for Halloween and this year I’ve gone with making her pillows for her Birthday coming up on the 5th of September.
Maybe this could be a possible project for her for next year!!
Thank you for sharing!!!
She’ll love them, Paulette! Have fun! 🙂
Looks fabulous. How about one of those flickering flame solar lights for inside the branches. I might get one made this year since I already have the branches and my DT is already sold out. There is always next year. Thanks for the inspiration.
That’s a great idea, Jean! 🙂
I have been trying to contact you to let you know that the tinsel witch hat you were looking for is in stock in Palm Bay FL
Sincerely,
Linda
Yes! We finally found some, Linda! (stocked up just in case) 🙂
Okay, what the trick removing the ends from the broom handles? Did you use a vice as well as vice-grips to remove the ends or just brute strength, (which I obviously don’t have)? lol
Oh, did you get a stuck one? I pulled 6 of those from 6 handles. Four came out easily, but two required a lot more force. Shoot! Do you have someone to help you? For the finicky ones, I had Handan hold the other end while I pulled on the vice grips with two hands. Or, yes, if you have an actual vice, that would certainly help! Good luck! I hope it doesn’t give you too much trouble! 🙂
Easy way to remove those ends. Take a small drill bit and drill through the dimples and easy-peasy, removes easily! Thanks, can’t wait to begin assembling my brooms! Fun project!
Great tip! Thanks for sharing!
I really like them, great idea. I had one thought. What if some of the lights were up in the branches so they might show more at night- burning brooms?
That’s a great idea, Anne!