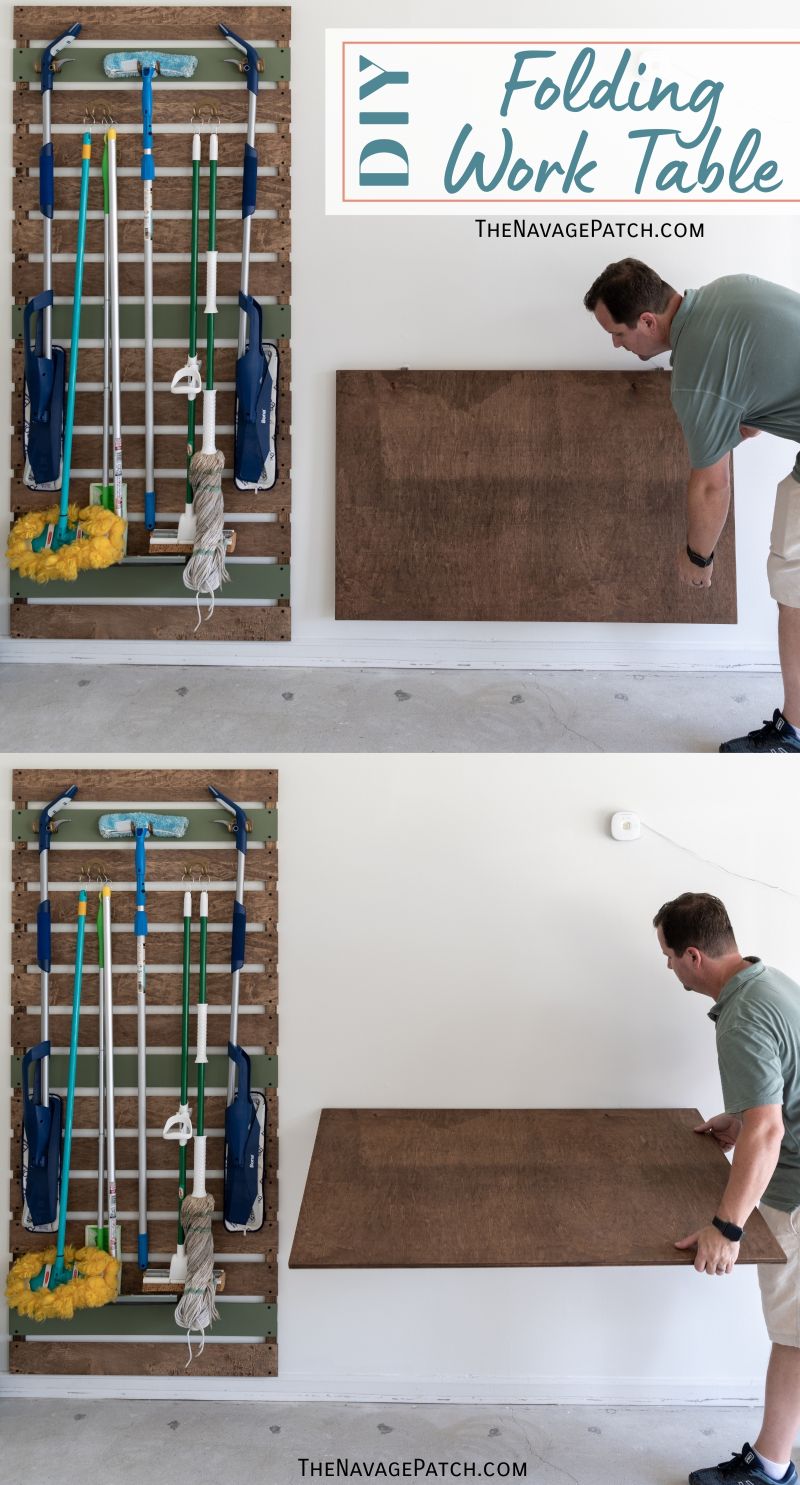
DIY Folding Work Table
We built two folding work tables for our garage to save space when not in use but give us work space and entertaining space when needed.
My eyes were bigger than our garage.
When Handan first proposed the garage makeover, I entertained the notion that somewhere among the mudroom and lockers and general fancy-pantedness of her highfalutin Garage Mahal there would be some space for a good old-fashioned workbench.
The kind with a pegboard above it, full of neatly organized tools.
And greasy car parts strewn about the bench.
And maybe an old pin-up girl calendar hanging askew on the wall next to the screwdrivers.
When we prepped the garage, she insisted we keep the old pegboard that Baris and I removed from the walls, so there was some validity to my hope.
Finally, I’d be that guy!
The one wearing oil-stained blue coveralls with a red handkerchief flopping out of the back pocket.
The one with a carburetor in one hand, a socket wrench in the other, and a puzzled expression on his face.
I’d be a car guy! Because, I didn’t want a garage, I wanted a garage.
And that was when I remembered that I know as much about cars as I do about sewing. Who was I kidding? I’d never be a car guy, unless you call a John Deere riding mower a car – now there was a machine I could fix! Nope, that ship sailed a long, long time ago, and I’d have to be content with my role as DIYer and fixer-of-things-that-are-broken. Never-you-mind the fact that I’m the one doing the breaking 9 times out of 10!
Still, I’d always wanted a proper garage workbench. There’s more to a garage than just cars. I could still have a workspace for those times I wanted to work upstairs near the light of day. But as my babes’ plan crystallized, I puzzled over my workbench (and pegboard).
Where would they go?
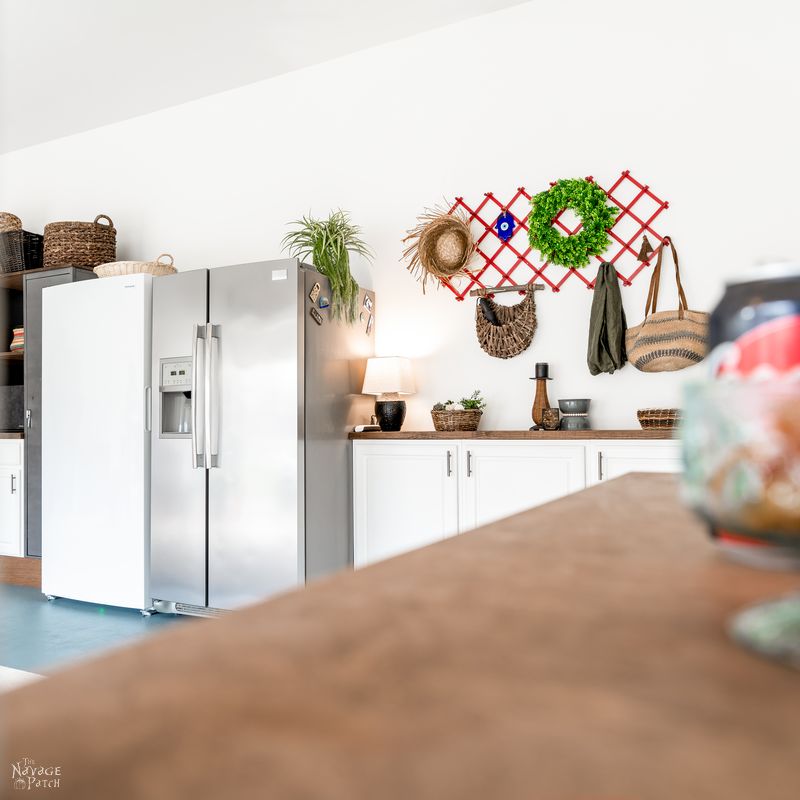
The back wall was spoken for. Between the locker storage unit, the freezer, the fridge and the mudroom cabinets, there was barely enough floor space left over for a faux plant, let alone an entire workbench.
That left the two side walls. A nice, long workbench along the far wall would have been a dream! But even with two smallish cars, there’d be no room left to actually open the car doors. It was looking like a bust for my workbench.
But my babes is nothing if not resourceful.
We couldn’t have a traditional permanent workbench, so she found a way to create a temporary workspace – one that would fold away when not in use.
DIY Folding Work Table
Okay, so I didn’t get my bench. Big whoop. What I got instead were two (yes, two!) simple DIY tables, shorter than a bench, maybe, but also much deeper. In fact, they’re more like tables than benches. And the best part is, they fold down when not in use, so they hardly take up any garage real estate at all.
I know, I know, this is not new technology I’m talking about here. I’m in no way claiming that Handan unlocked the secrets of the fold-away table and we’re here to bestow this knowledge upon humanity. Nope. Folding shelf brackets have been around for ages. They’re just new to us, meaning that while we’ve been aware of their existence for some time, this is the first opportunity we’ve had to put them into use.
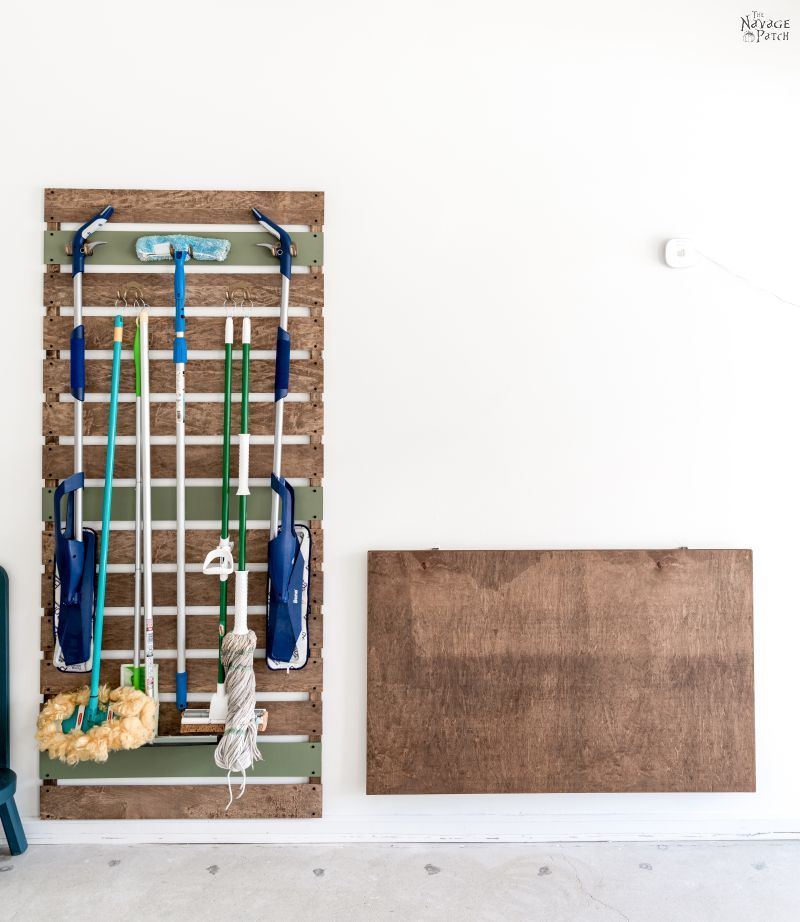
Now, technically the last project of this garage makeover was the DIY mop & broom storage rack I wrote about in my last post. But at the time of building these folding work tables, I thought they were the last, so I’m presenting them here as the last component.
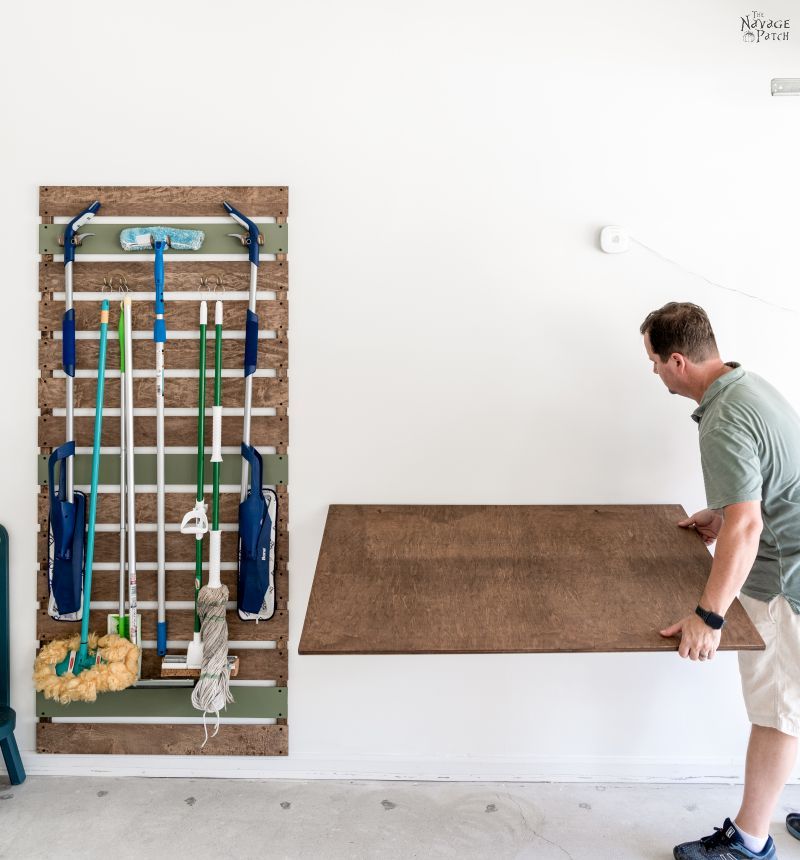
As with the other garage makeover projects, our aim was to spend as little as possible. For this project, we only had to buy two sets of 18″ folding brackets. I had one last full sheet of 3/4 inch plywood in the basement (bought at the beginning of the pandemic, before lumber prices skyrocketed), and I used that for the table tops.
As far as projects go, this is one of the most straightforward. We decided on a size for the tables, and then I cut the plywood down to size, sanded it, and stained it. A day later, I sealed it with dead flat varnish.
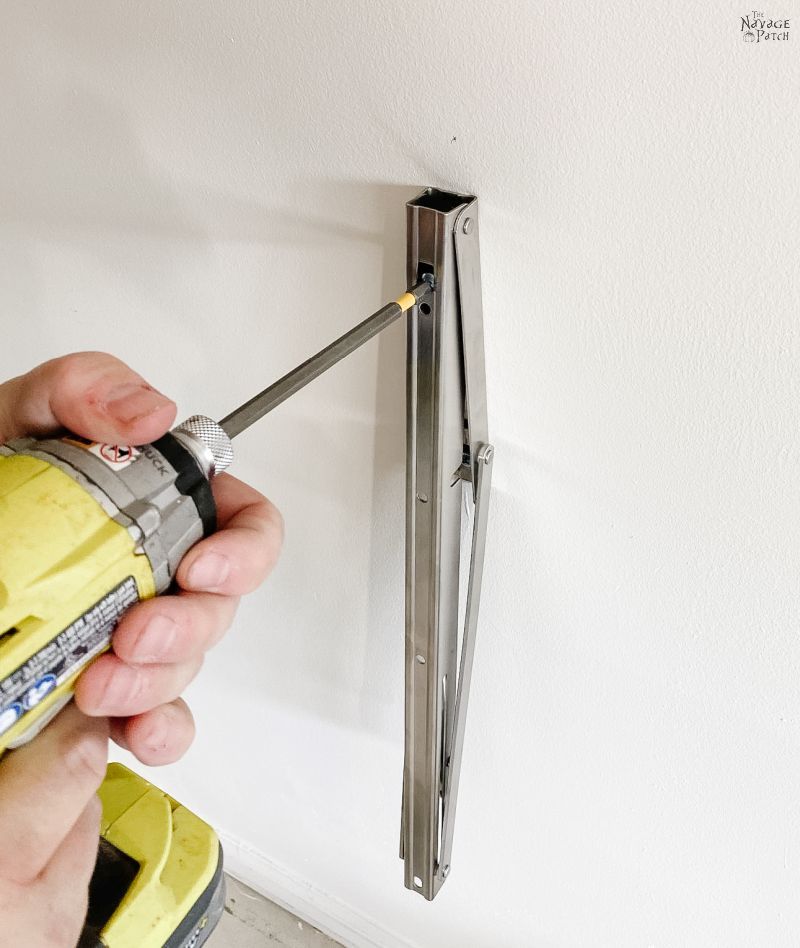
On installation day, Handan and I found studs in the garage wall on which to mount the folding brackets. Each bracket is secured with two longs screws. The bottom screw was easy enough to tighten, but it did require a 6-inch Phillips-head impact bit to reach through the angled support arms.
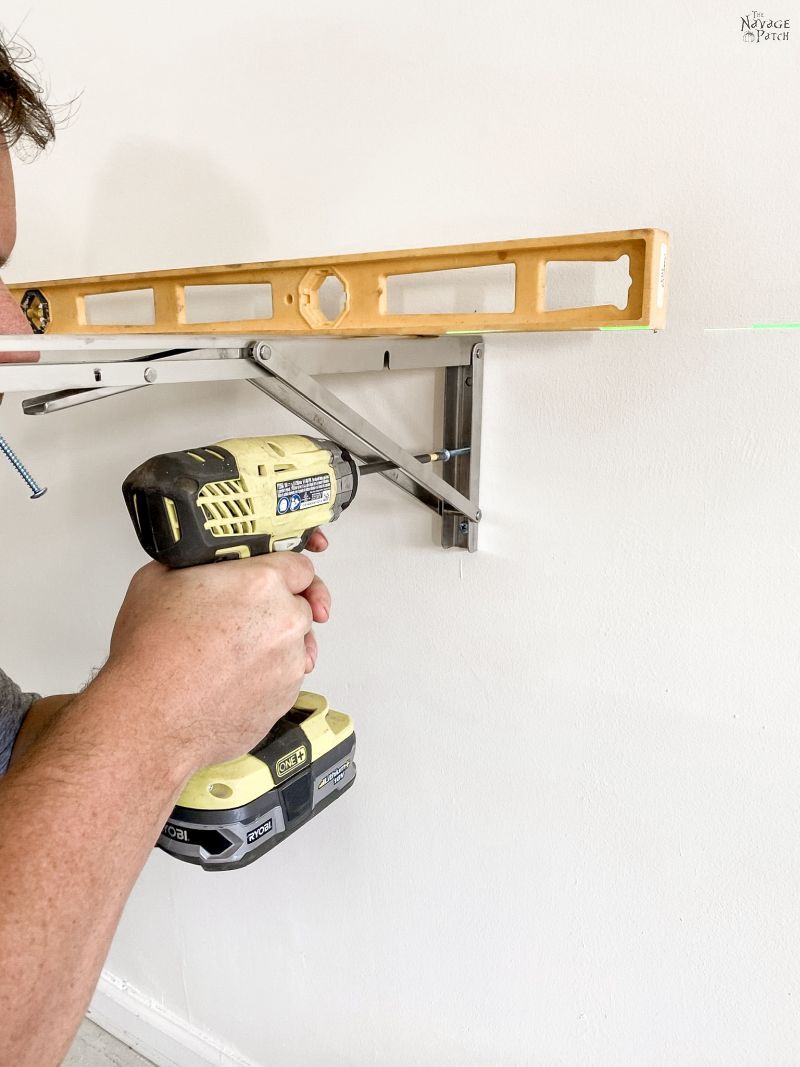
The top screw was easier, thanks to a small screwing window thoughtfully provided by the manufacturer.
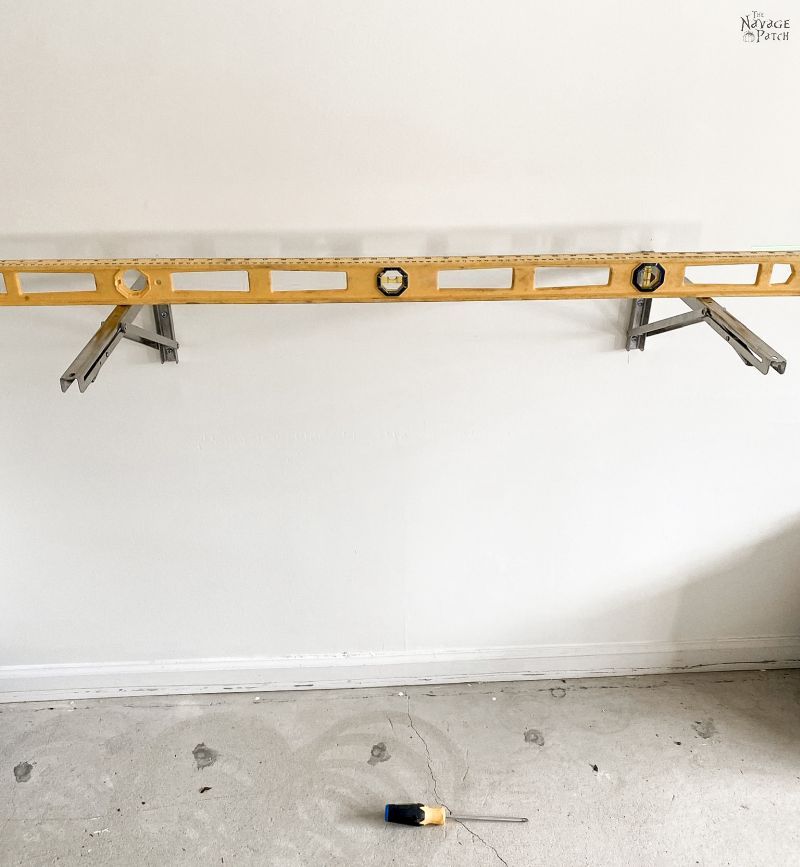
We used a combination of laser level and I-beam level to attach the brackets. Perfectly level!
Mounting the table to the brackets was as easy as placing it on, centering it and driving in 4 screws…from below.
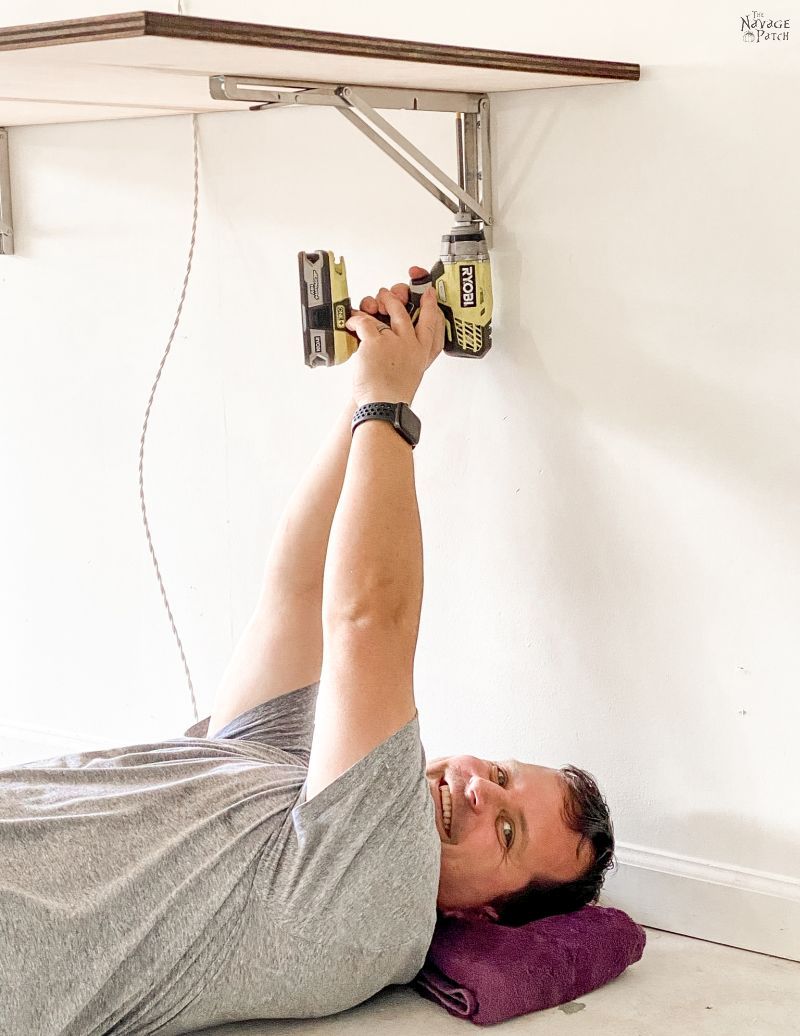
If you’re wondering why I’m so smiley in the picture above, it’s because I was under the disillusion that I was screwing in the last screw of the entire garage makeover. As far as I was concerned, this project was in the can. I’m sure the photographer knew better, but she didn’t tell me…at least not then. But I was able to enjoy my victory…for a while.
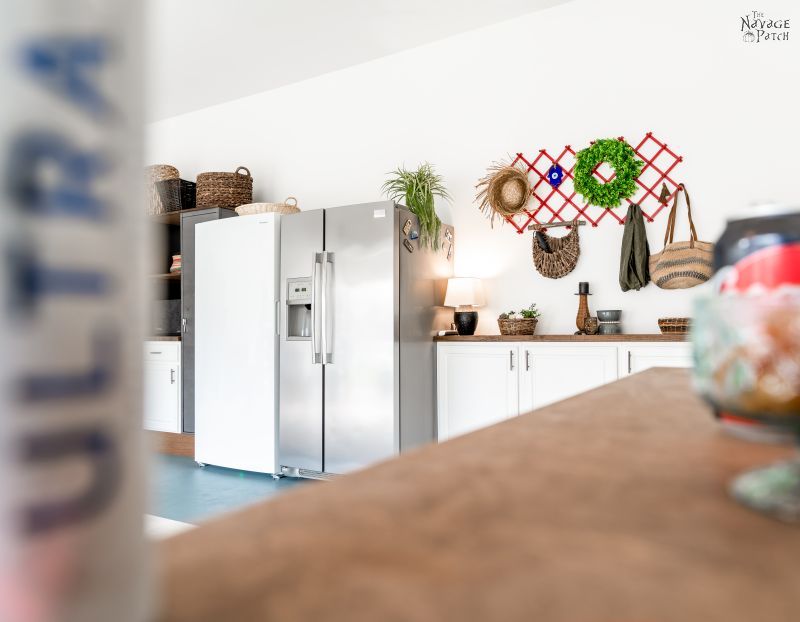
Here is one of the folding work tables in action. There was no more work to be done, so we set it up as its alter-ego: a hospitality table.

Folded down, it’s completely out of the way, taking up about 2 inches of space.
There is nothing fancy about this folding work table. It is meant for a garage, so nothing more than simple plywood and stain was needed. But there are so many possibilities with these folding brackets: laundry-folding table, stow-away breakfast table, kids study table, crafting table, you name it!
Our folding work tables are a breeze to open and close. In the future, I may install a small pegboard above one of them so I can have that garage workshop feeling.
But for now, these tables are great for small projects, and they’ll be perfect for rainy-night entertaining! Now that our garage is looking more respectable than the apartments I used to live in when I was single, there’s no reason not to pull out the cars, set up some lawn chairs and watch thunderstorms in style!
We love it when you share our posts on Facebook and Pinterest!


I love to see all the projects that you guys tackle. Everything is just amazing. Thank you for sharing!
Thank you so much, Candy! It’s non-stop these days! 😀
<3 Garage Mahal 😉
😁
Very resourceful! Now…….. we need to see a big picture, full shot of that garage in action!
Coming up soon, Audra! 🙂
Great job, I’m inspired to move forward on making one myself as an ironing board in the laundry room but any ideas on how if I wanted the table top to fold up instead of down.
Your story telling skills always make me smile 🙂
Hi Maria, since the board needs to be supported form the bottom, I’m not sure how you’d DIY one with the folding hinges that are available. Sometimes, it’s just easier and cheaper to buy instead of DIY, and this seems to be one of those times. Here is a fold-up ironing board that may suit your needs, and considering the price of all the components needed to DIY one, it may be the cheaper option. Good luck!
Green stripes to mimic the broom/mop holder would look good.
That’s a good idea, Debi! 🙂
Just wondering where second folding table was located, as you mention two. Love this idea
Directly across from one another on opposite walls. 🙂
I had two melamine solid core door slabs left over from a jobsite that was about to find it’s way into the dumpster. I installed one on each side of my double car garage so I had the flexibility of having a bench to work off on either side or both. I’m a carpenter and a car guy, so I needed the surface to beat things into submission on. After putting the strap hinges on, safety chains on both ends for support and finally a barrel bolt to lock them in the upright position (I had a concrete retaining wall below to contend with), I had the most useful and rugged work bench that served me well for many years until I sold my place in CT.. Your project brought a smile seeing your resourcefulness come out.
“Beat things into submission” LOL! That’s what it feels like much of the time! I can picture how you made yours, and yes, I imagine they were very sturdy. Thanks for sharing, Pat.
Fantastic idea! Will work well in my garage that just barely holds two cars. Also love your choice in beer.
Thanks, Robert!
As a person who lives in a small house with no basement and a small shed I really appreciate ways to economize space. In our 18×26 shed my husband has all of the equipment and tools needed for a small hobby farm (and my car goes in there too!) but I have no place to spray paint, hammer, drill etc. By making a folding workbench I won’t have to trip over the mowers and weed wacker to get to the saw horses then find a board. You just may have saved our marriage 🙂
Well, that’s a relief! I’m happy to have been of service, Jean, lol! 😀
This is THE MOST EXCITING post of yours yet (IMHO) because it is PRECISELY what I have been longing for in the laundry room…the garage…*someone stop me before I put one in a bedroom or two…!!*
Thank you again for sharing your magic with us all!
Awesome! So glad to hear it, Cherie! I hope you get one in every room! 🙂