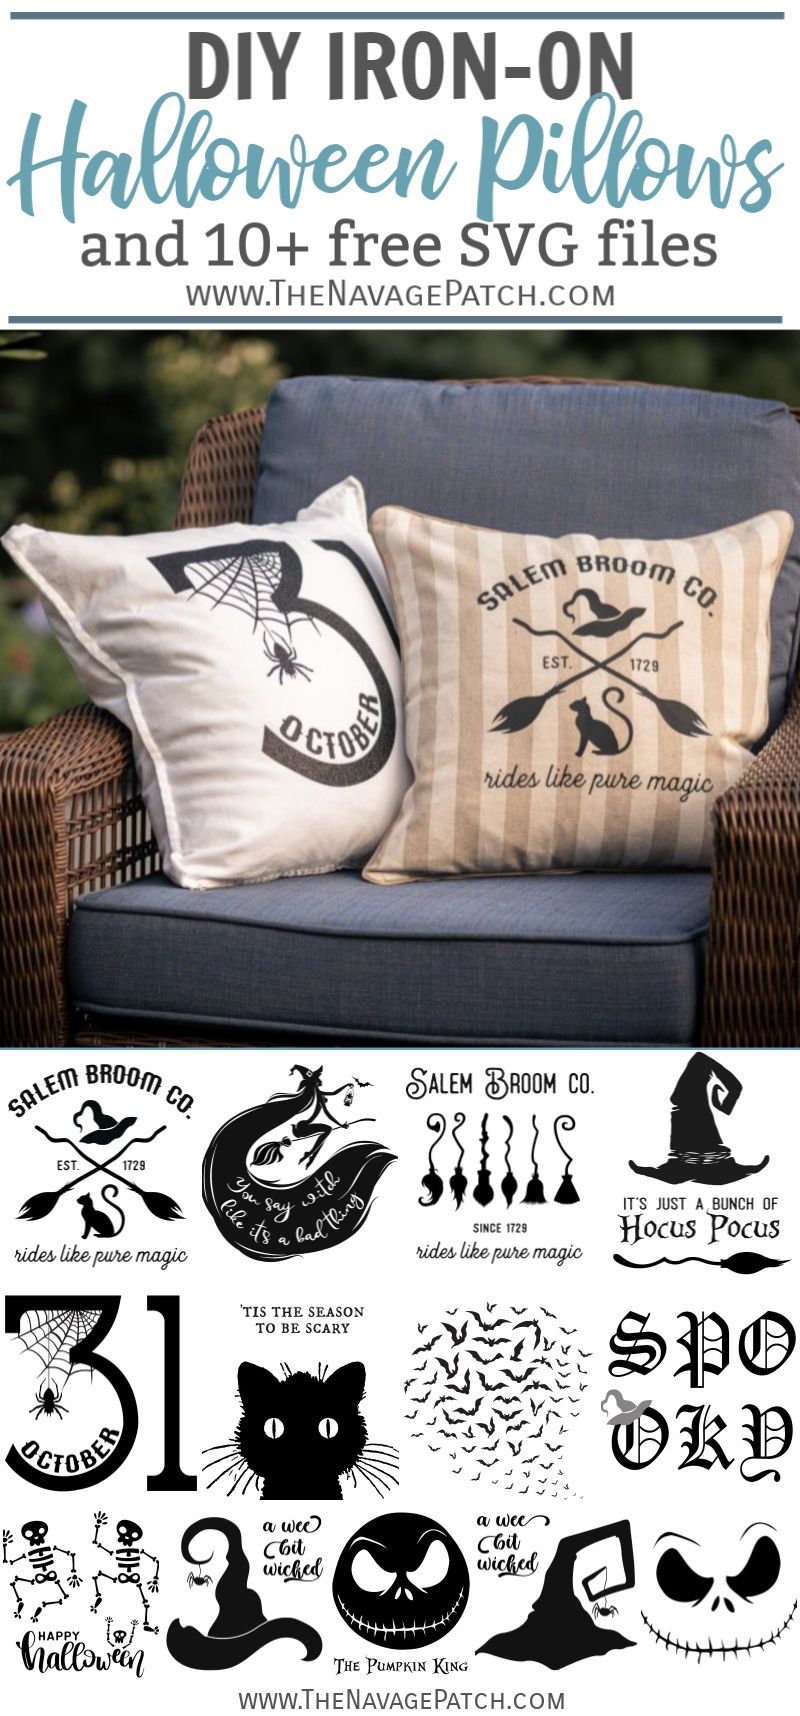
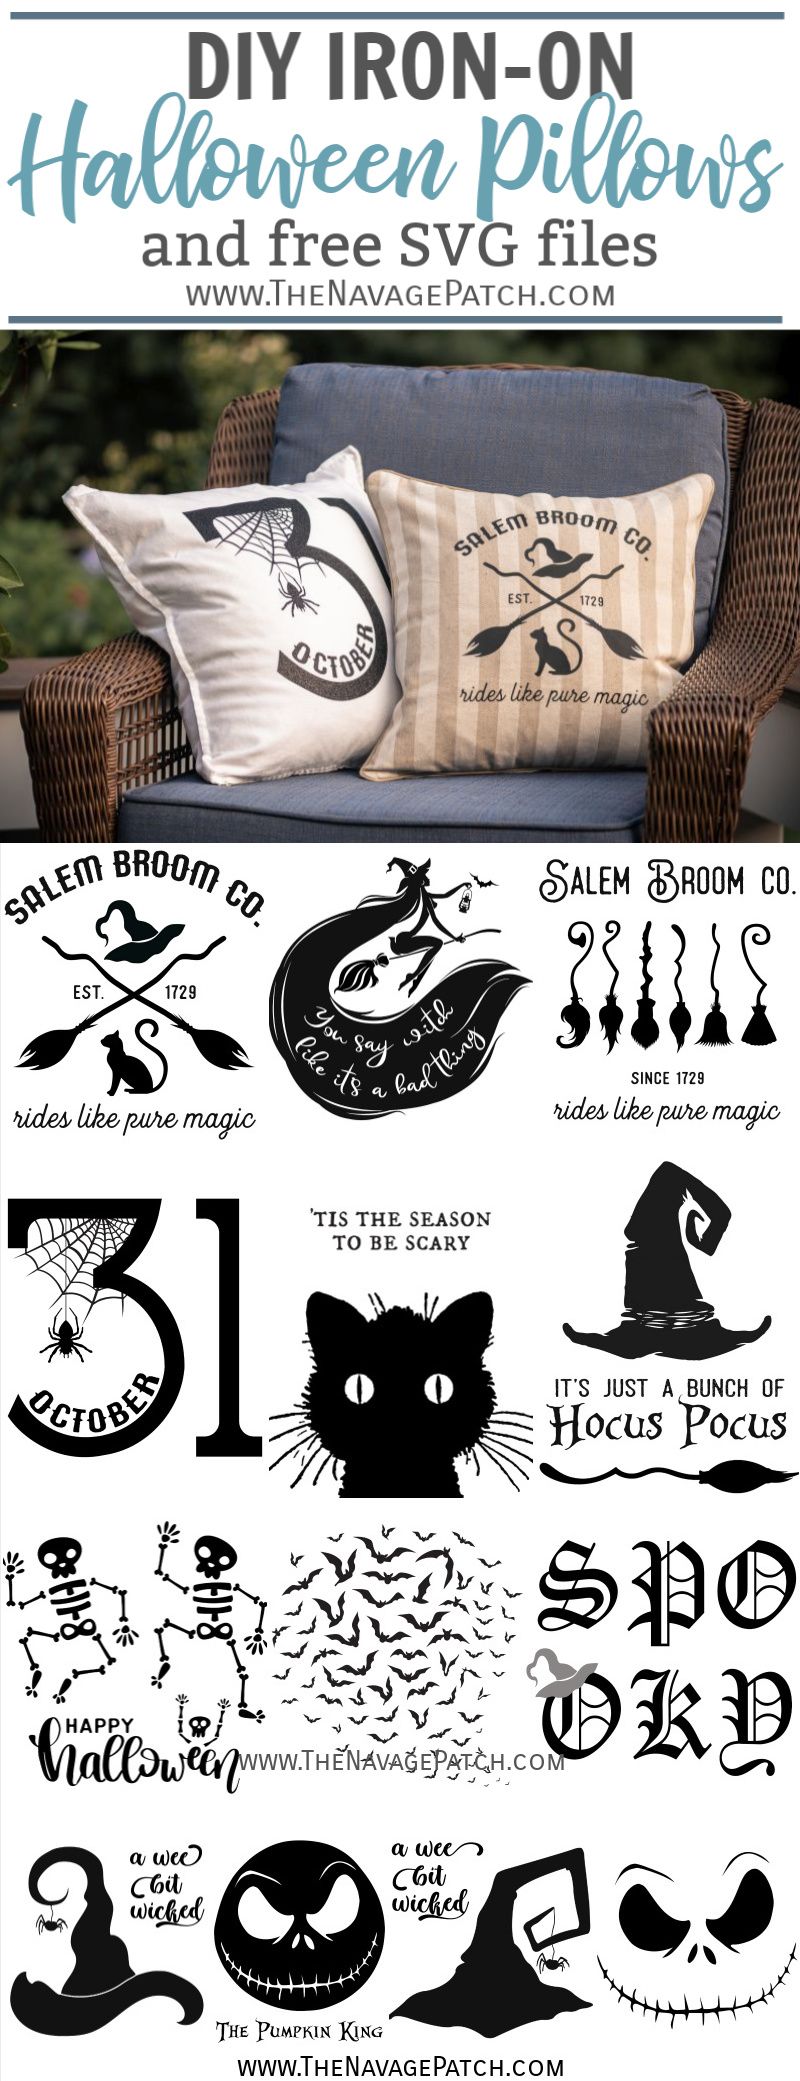
DIY Iron-On Halloween Pillows with Cricut (& 13 Free SVGs)
These DIY iron-on Halloween pillows are a fun way to decorate this October, and our 13 free SVG designs are sure to please your inner witch! (You know you have one)
I’m used to them by now, you know.
The pillows, I mean.
The endless ocean of throw pillows.
And now that I have the power to design1 and make them, I’ve become the primary pillow polluter in the house!
We’ve grown quite the collection! Christmas pillows, patriotic pillows, Halloween pillows and more!
But don’t think for a moment that I’m just making them so they can sit unused on a chair in some forgotten corner.
Don’t think that I’m spending my precious time cluttering our bed with pillows that need to be tossed, unused, on the floor each night.
No siree, Bobby-Jo!
I’m a-makin’ ’em, and I’m a-usin’ ’em, too!
You see, my beloved Handan (whom I hold in the highest regard and whom I love so much) decided that our power-recliner loveseat in the family room was getting to be a little too big and bulky and a little too much of an eyesore.
Well, I had to agree with her on the eyesore part – it didn’t look so great in photos, and since we’re bloggers, everything has to look good in photos, no matter the cost to human comfort!2,3
On the other hand, sitting on that loveseat was like sitting on a cloud. A big, gray, microfiber cloud.
But if my babes wanted a different sofa, my babes was gonna get a different sofa!
And so she did, (and therefore, so did I).
The good news is it looks great in pictures, and we all love it.
The bad news, is….I’m just kidding, there is no bad news! Everything is AWESOME! 😀
But occasionally…
Just occasionally…
Usually after sitting for too long in front of the Dummy Box…
I feel the need for some of that heavenly cushioning.
And that is where my DIY Halloween pillows come in!
If I get the itch to recline, I just have to toss some pillows on a makeshift ottoman, stuff some more pillows behind me and voilà! Instant recliner!
Footnotes:
1 Let’s be honest here. Handan is the one designing them. I’m just the dope with an EasyPress 2 in his hands!
2 By now, you should know that bloggers are entirely full of Grade-A American Bullcrap, and nothing about their lives is to be trusted. For every fancy little sofa you swoon over while surfing through Blogland, there’s some sorry sap of a husband cursing it behind the scenes and wishing for a La-Z-Boy.
3 Well, everything except for me. There ain’t enough lipstick at a Maybelline convention to pretty-up this pig!
*******
Okay, enough recliner talk and enough of my yapping!
You didn’t come here to be bored to tears by husbandly woes and lost recliners! You came for some kick-ass Halloween pillows, so let’s get to it!
This is a sponsored conversation written by me on behalf of Cricut. The opinions and text are all mine.
DIY Iron-On Halloween Pillows SUPPLIES LIST
Affiliate links are provided below. Full disclosure here.
- 18 x 18 or 20 x 20 throw pillow covers
- Cricut Maker, Explore Air 2 or other smart cutting machine
- Free Halloween pillow SVGs (we have 13 free Halloween SVG designs available in The VIP Patch)
- Cricut EasyPress 2, heat press or iron
- Large EasyPress mat
- Heat transfer vinyl (we used Cricut Everyday Iron-On in black and black glitter)
- Cricut long standard grip mat
- Brayer (optional)
- Weeding kit or tweezers
- 18 x 18 or 20 x 20 pillow inserts (we like the 20 x 20 insert with the 18 x 18 cover – it gives a fuller look)
We love to see our printables out in the wild! If you display our free printables in your home or use our free SVGs in your projects, and take a picture and post it on Instagram, be sure to tag us @TheNavagePatch!
How to Make Iron-On Halloween Pillows
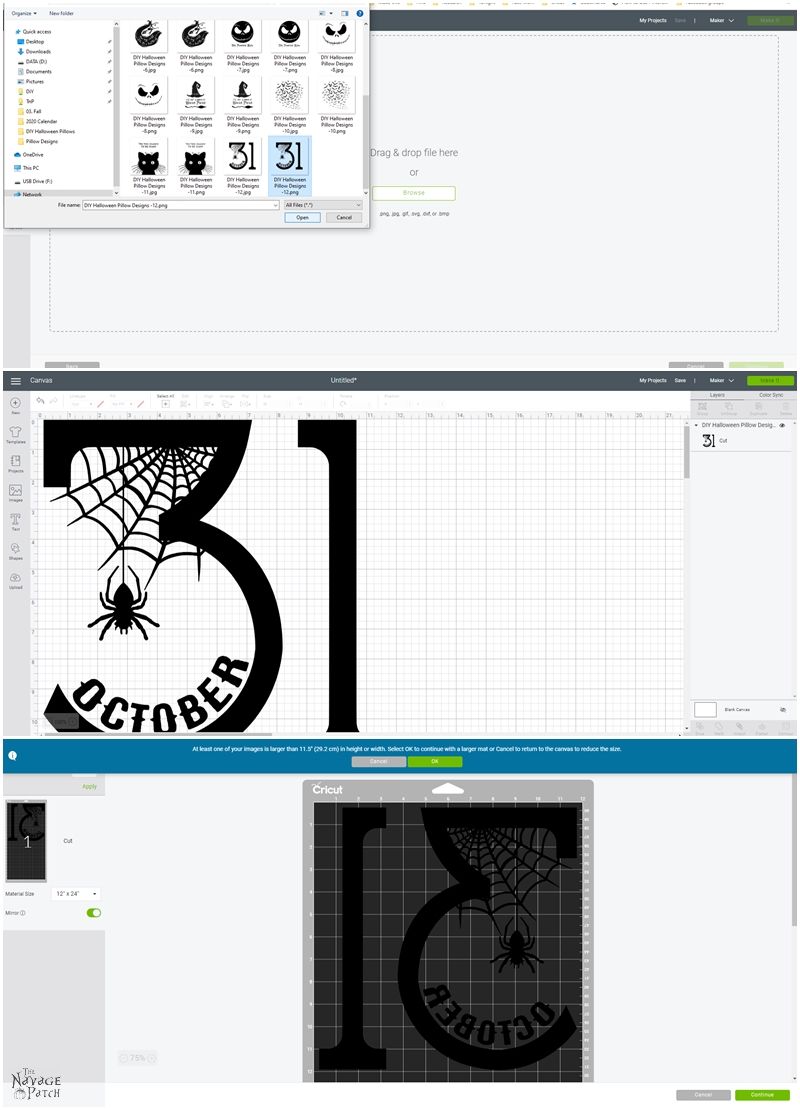
Step 1 – Load your design into Cricut Design Space
Load your design into Cricut Design Space. Don’t forget to reverse the images if they have writing on them! As usual, we forgot on our first try…ooops!
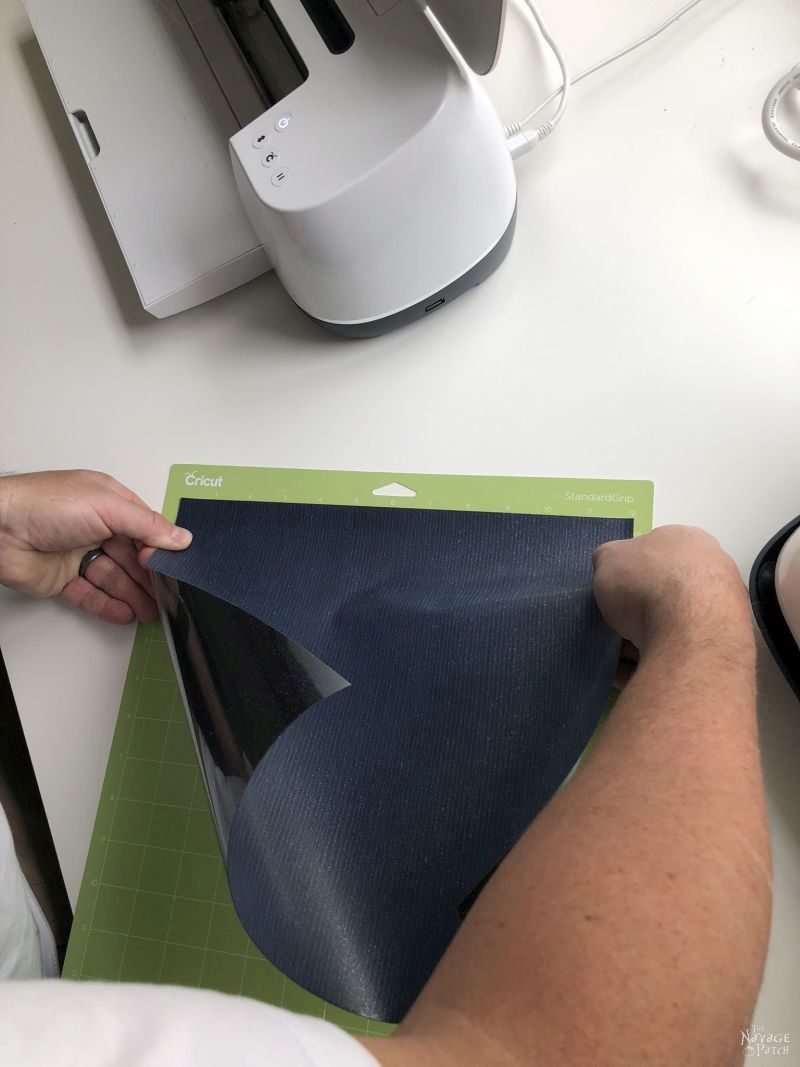
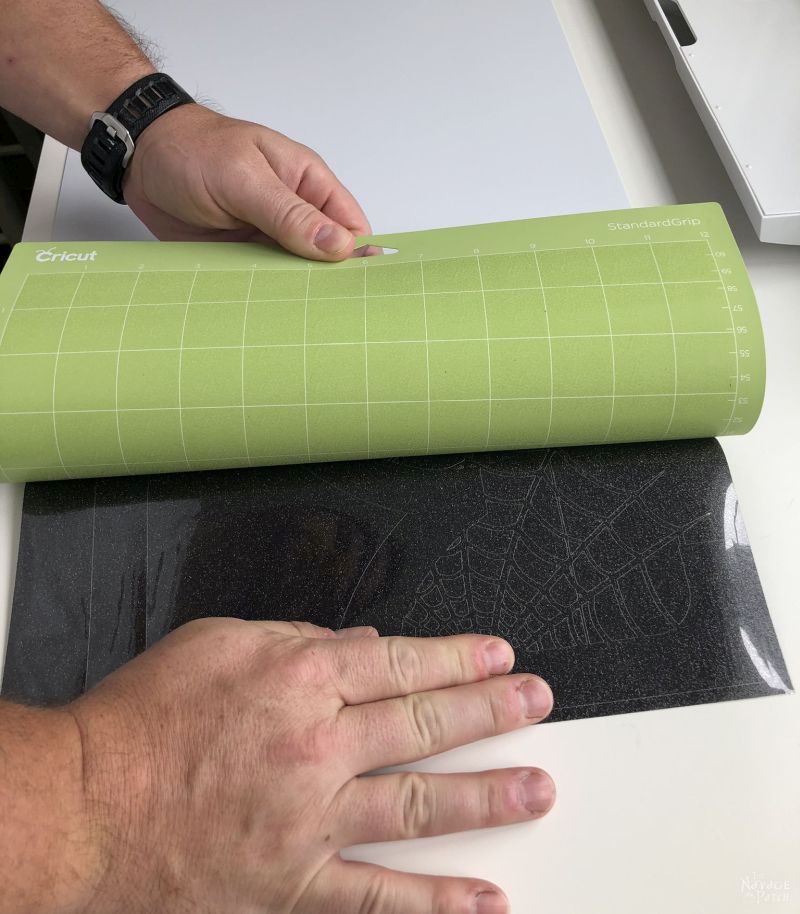
Step 2 – Prepare the vinyl for cutting
Not only did we not reverse the image on our first try, but we also stuck the vinyl on the mat backwards. Yep, the same mistake we made on our first try making our iron-on mugs!
Remember – shiny side down!
One of these days, we’ll remember it, too!
For the pillows we’ve made so far, we used Cricut black Everyday Iron-On and black Glitter Iron-On. The pillow shown here was made with Glitter.
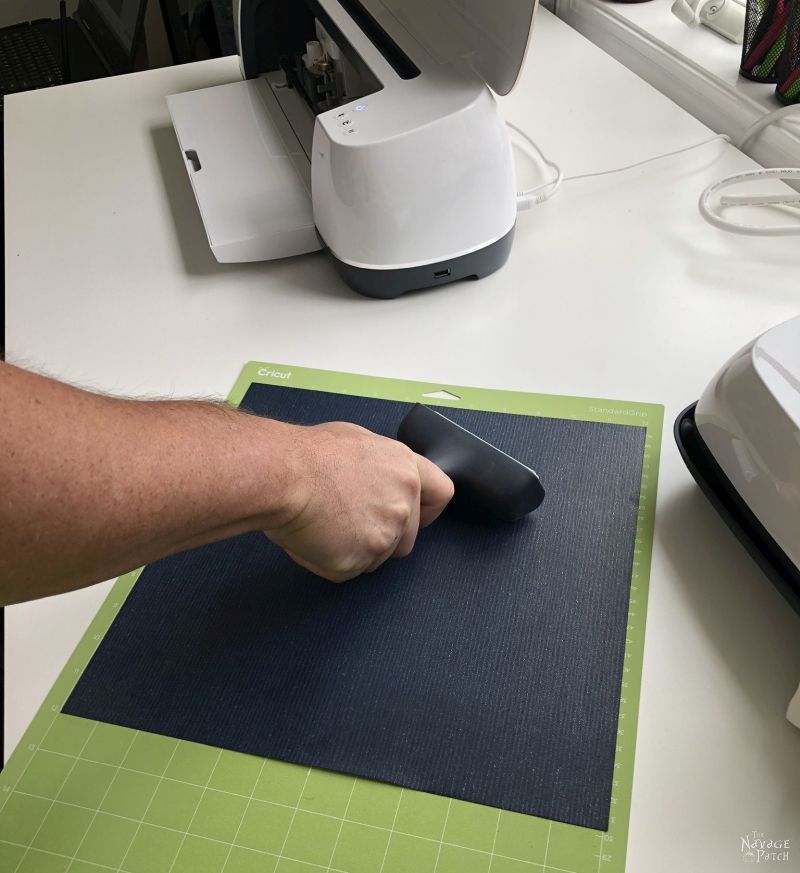
I’ve become a huge fan and disciple of the brayer. Not only does it keep my vinyl in place as my Maker does its thing, but every time I say the word “brayer,” this is playing in my mind.
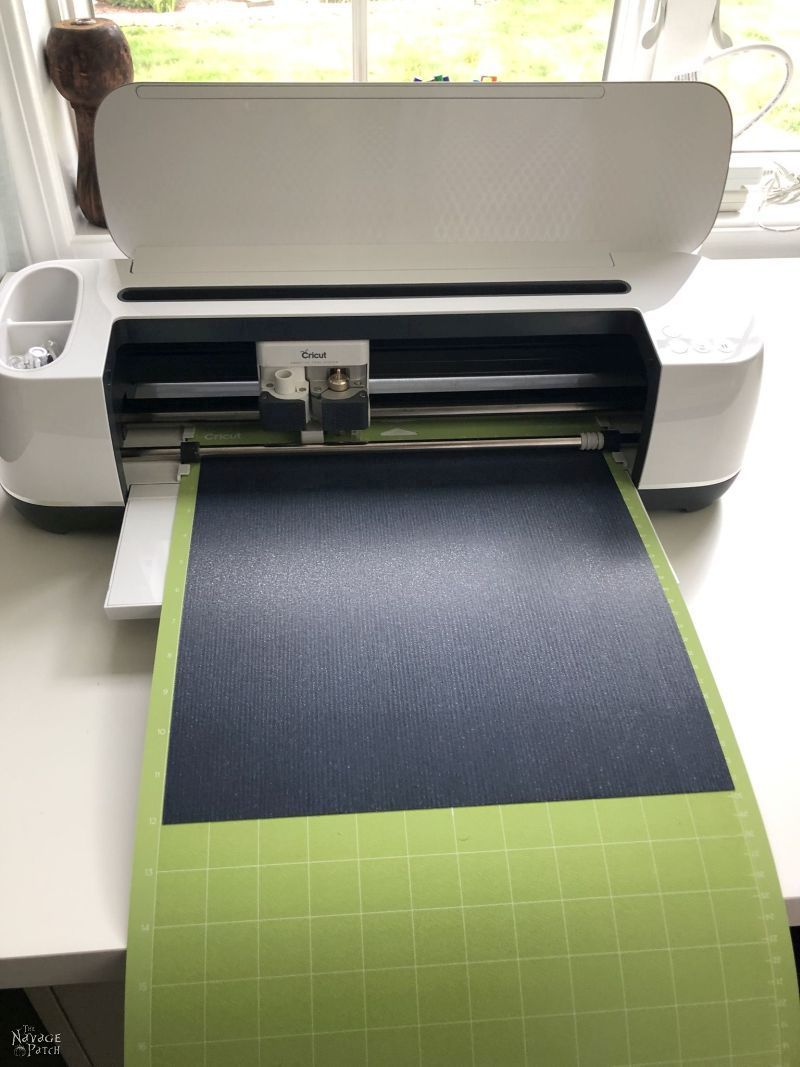
Step 3 – Cut the designs with a Cricut Maker, Explore Air 2 or other die-cutting machine
Let’s be honest – at this stage, the machine is doing all the hard work, and you’re just standing there as useless as a chocolate teapot, so you may as well go make yourself a cup of coffee or pour yourself a glass of wine. Your Cricut will tell you when you can become useful again.
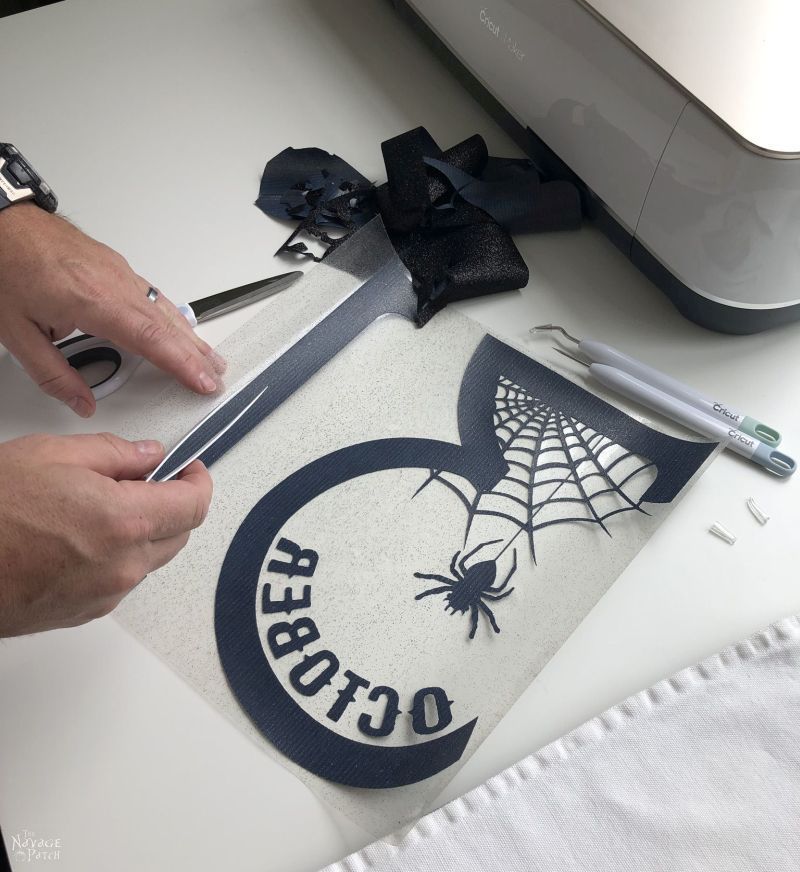
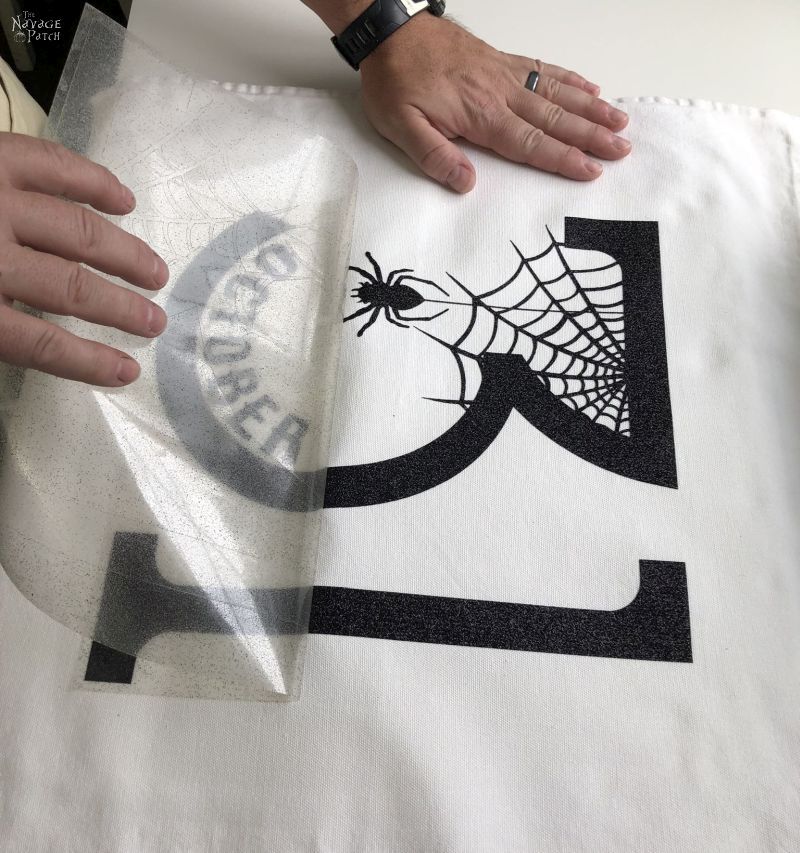
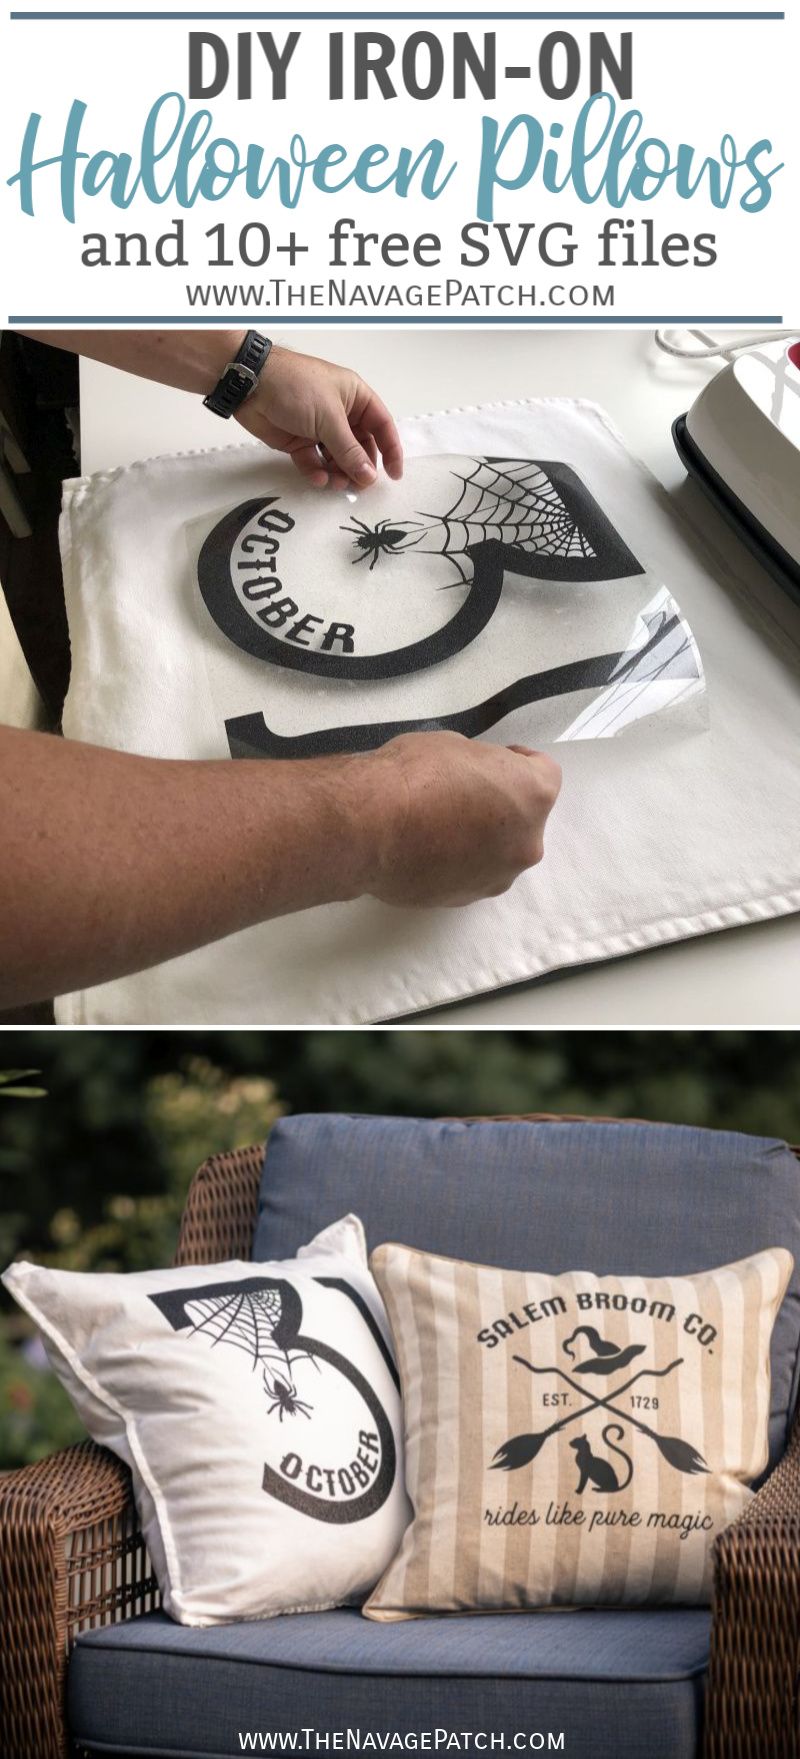
Step 4 – Peel and weed
Huzzah! Your hands are once again required! Put down the wine and grab some tweezers!

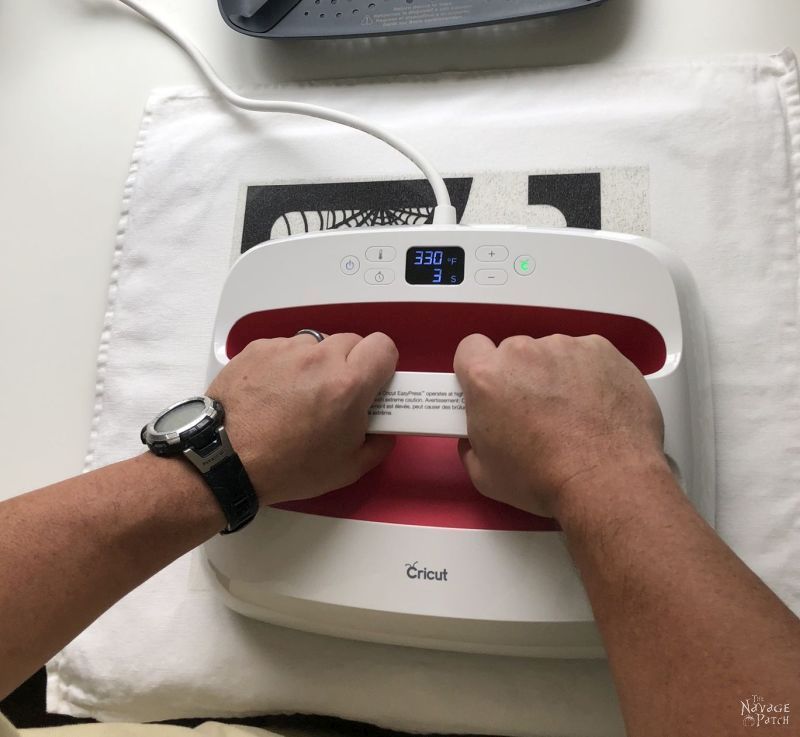
Step 5 – Set your heat press according to your material and iron the pillow cover
This not only gets rid of wrinkles and moisture for a better heat transfer, but it makes your pillow cover look like it didn’t just roll out of bed without a shower and onto your sofa.
Use Cricut’s heat guide to find the optimal temperature for the material you’re using. For the cotton pillow cover below, it was 330 degrees.

Step 5 – Position the Halloween pillow design on the cover
You can eyeball it like I did, or you can use a tape measure to make sure you have it centered.
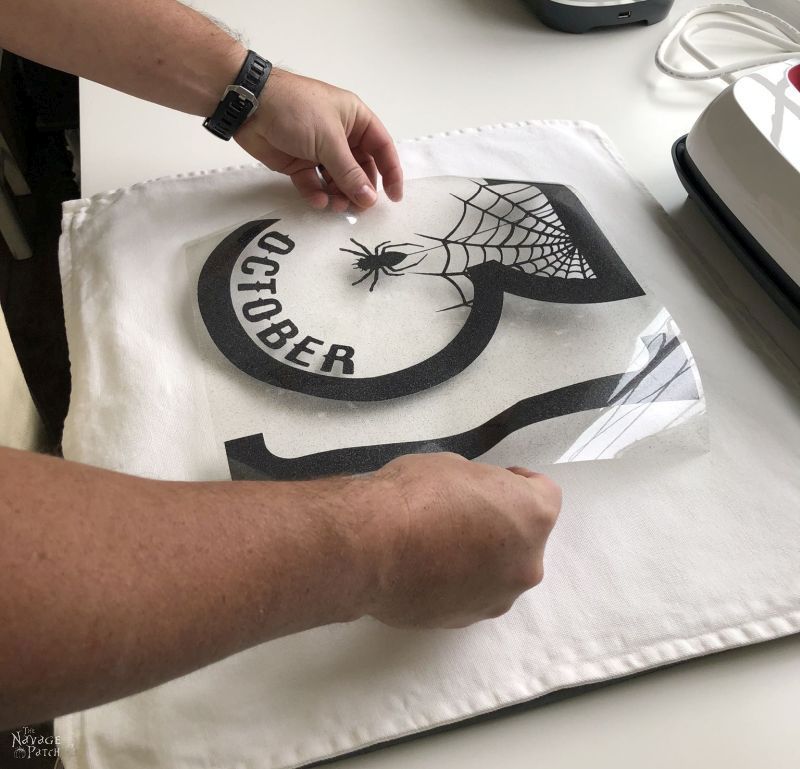
When it looked centered, I pressed it in place with my hands.

Step 6 – Apply heat
According to Cricut’s heat guide, I needed to press for 30 seconds at 330 degrees.
But since the design was bigger than our EasyPress 2, I pressed for about a minute, making sure I covered all areas equally.

Step 7 – Cool & peel
This glitter vinyl is warm peel, so I let my Halloween pillow cover cool for a few seconds, and then I peeled it.


It peeled perfectly with no issues.
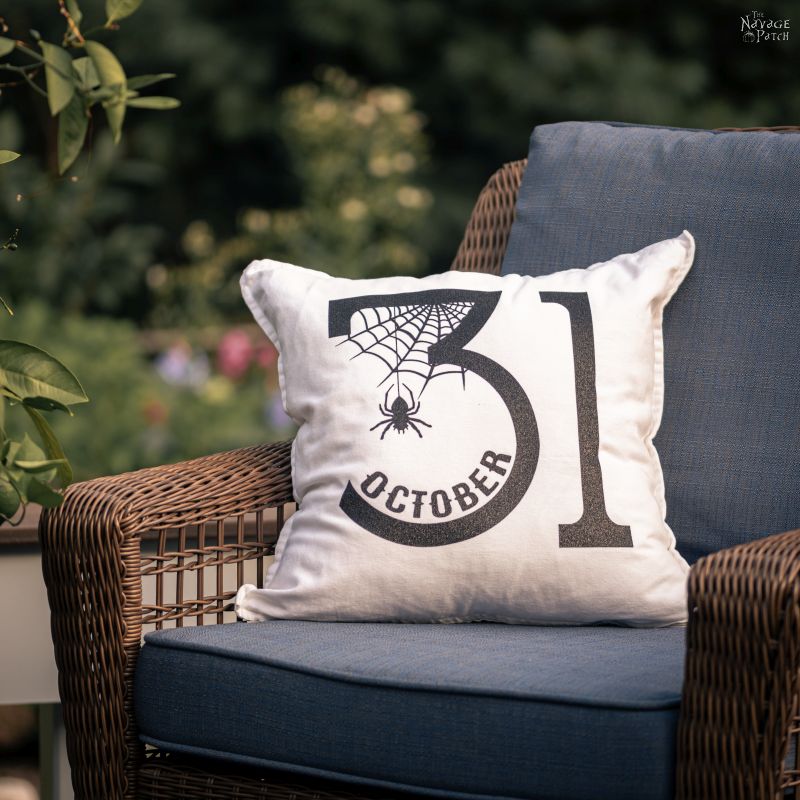
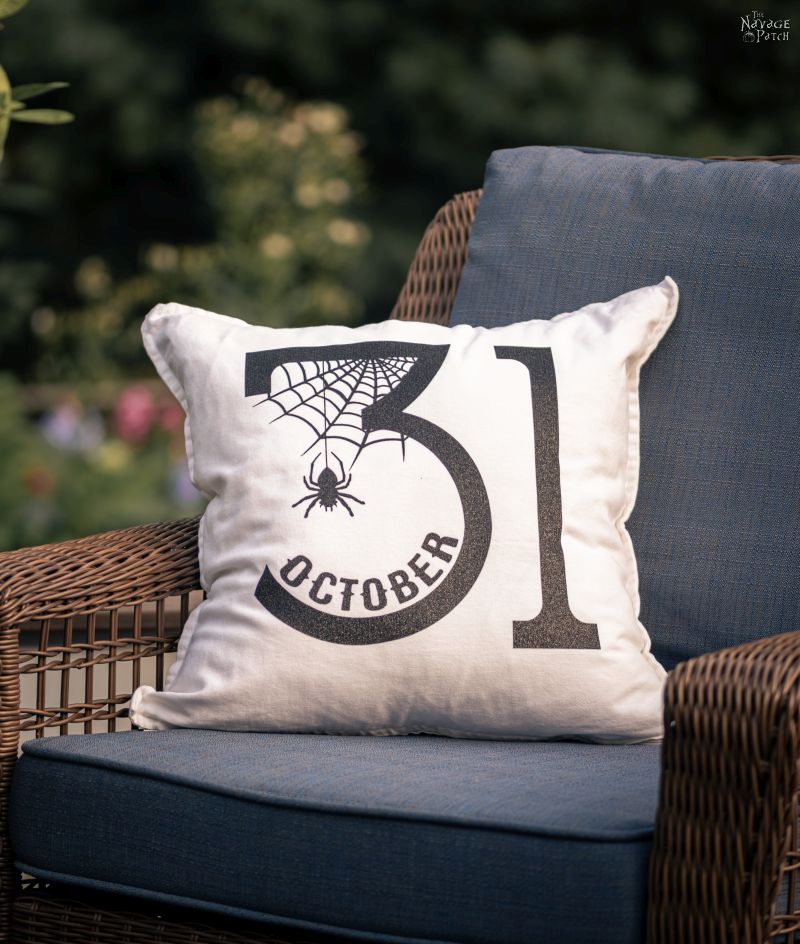
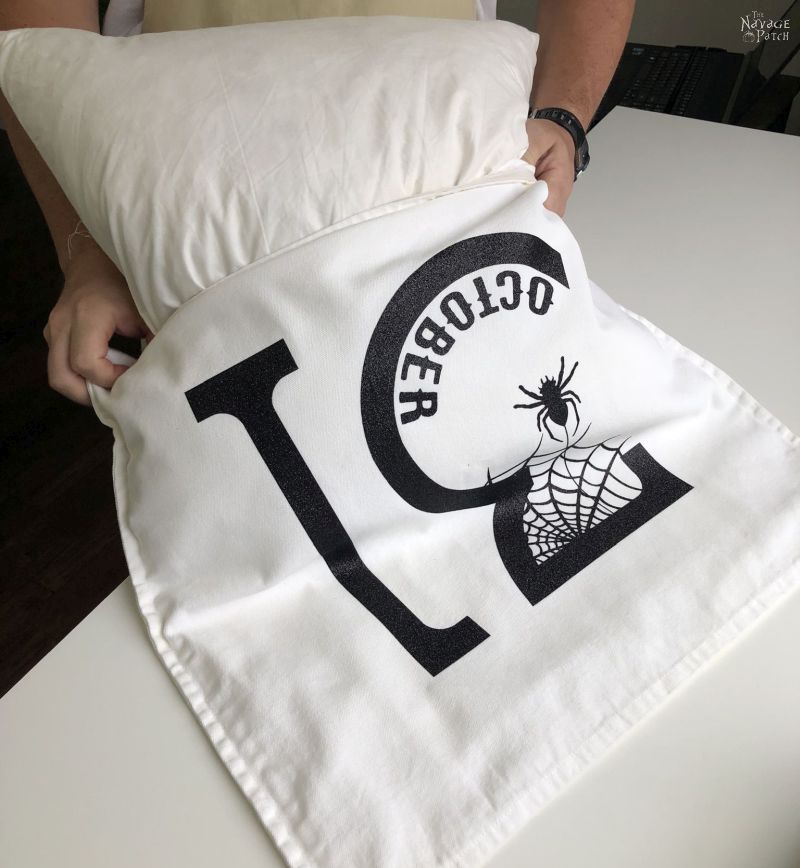
And that was it for our October 31 Halloween pillow design! The glitter iron-on looks fantastic on the cotton cover!
I stuffed a pillow in the cover and tossed it on the sofa!

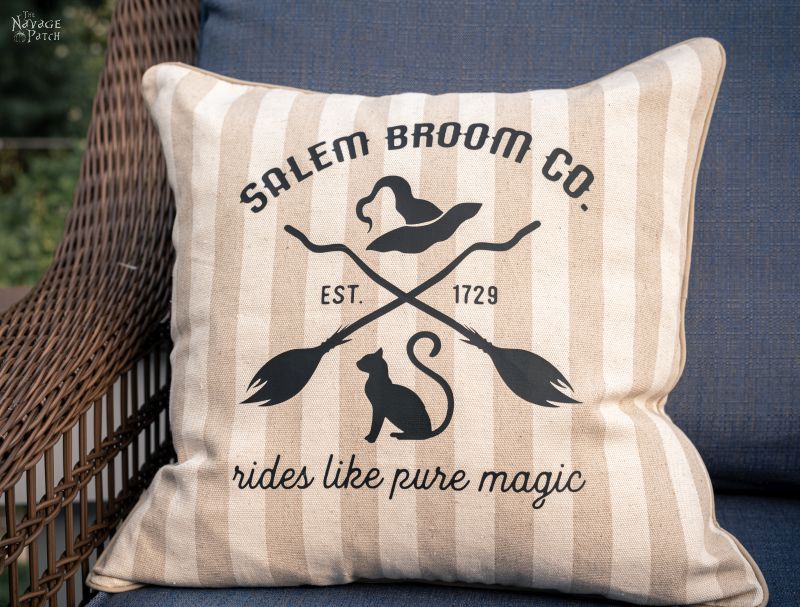
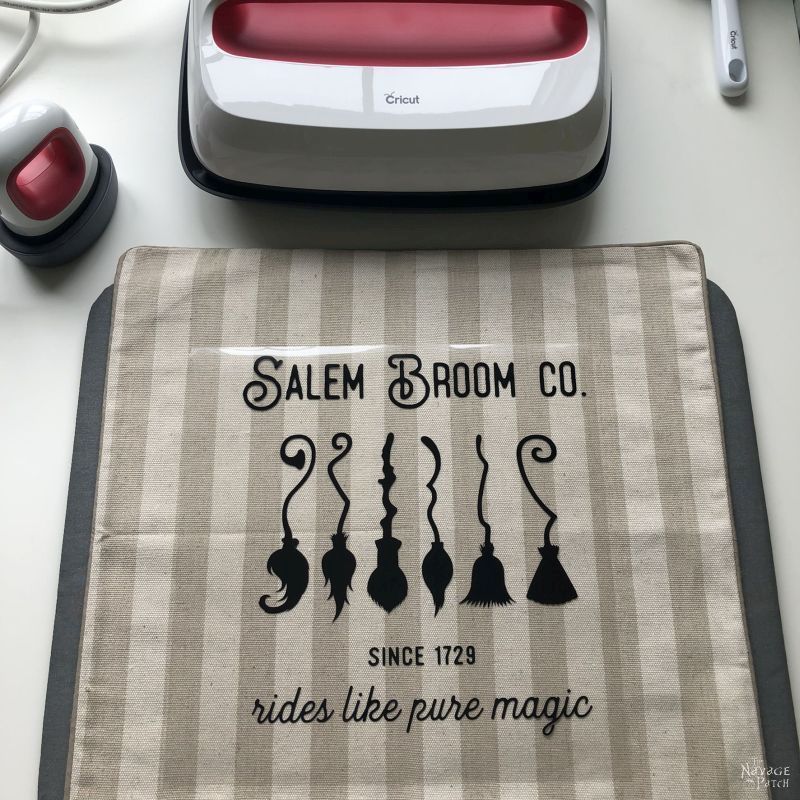
For our next two Halloween pillow designs, we used a much rougher, striped canvas cover. They required a higher temperature and a longer press.
We found that with these covers, we really had to wait until it was almost cool after pressing, otherwise, the design wanted to lift off the cover, especially with the thinner elements like the “since 1729” or any punctuation marks.
With the design below, we had a little trouble with “1729.”
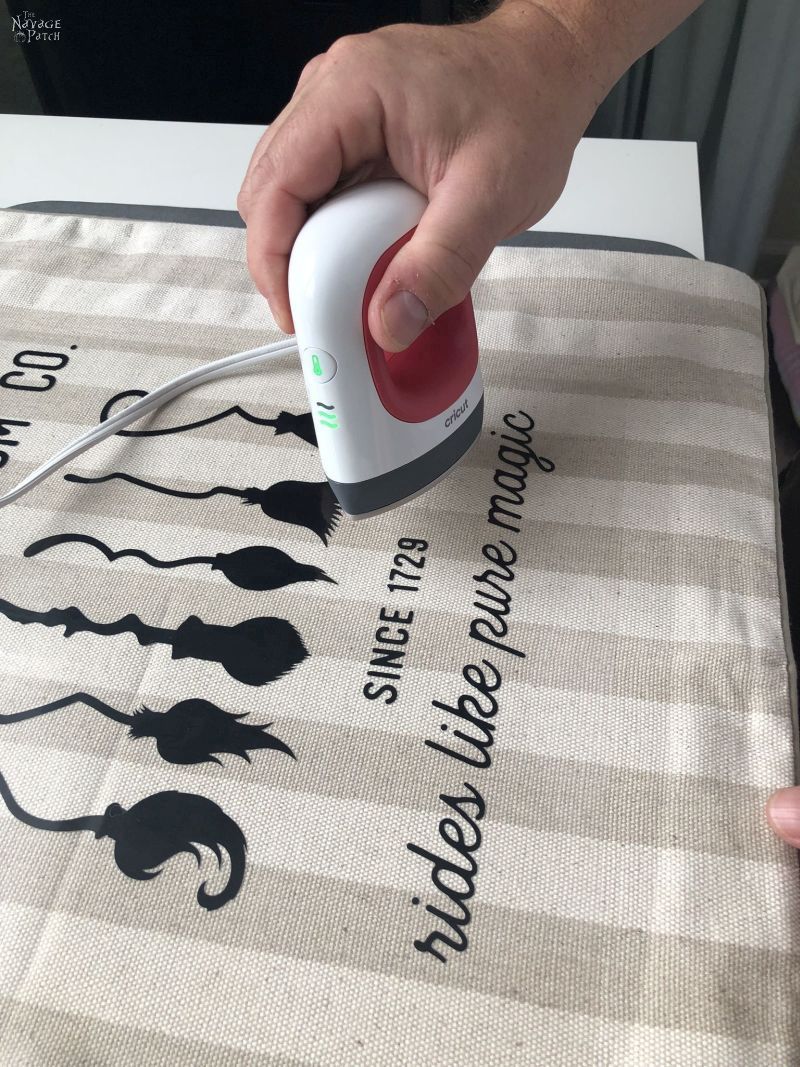
But that is where our Cricut EasyPress Mini came to the rescue!
I just positioned it exactly over the troubled area for about 15-20 seconds, and the date finally joined the rest of the design on the pillow cover.

When the whole thing had cooled, I carefully peeled.

As a final step to help the vinyl bond with this rougher material, I flipped the pillow cover over, and pressed for another minute from the back, moving the EasyPress 2 all around.

We’ve made 3 iron-on Halloween pillows so far, but we plan on making a whole bunch more (just as soon as we restock our pillow cover inventory first!)


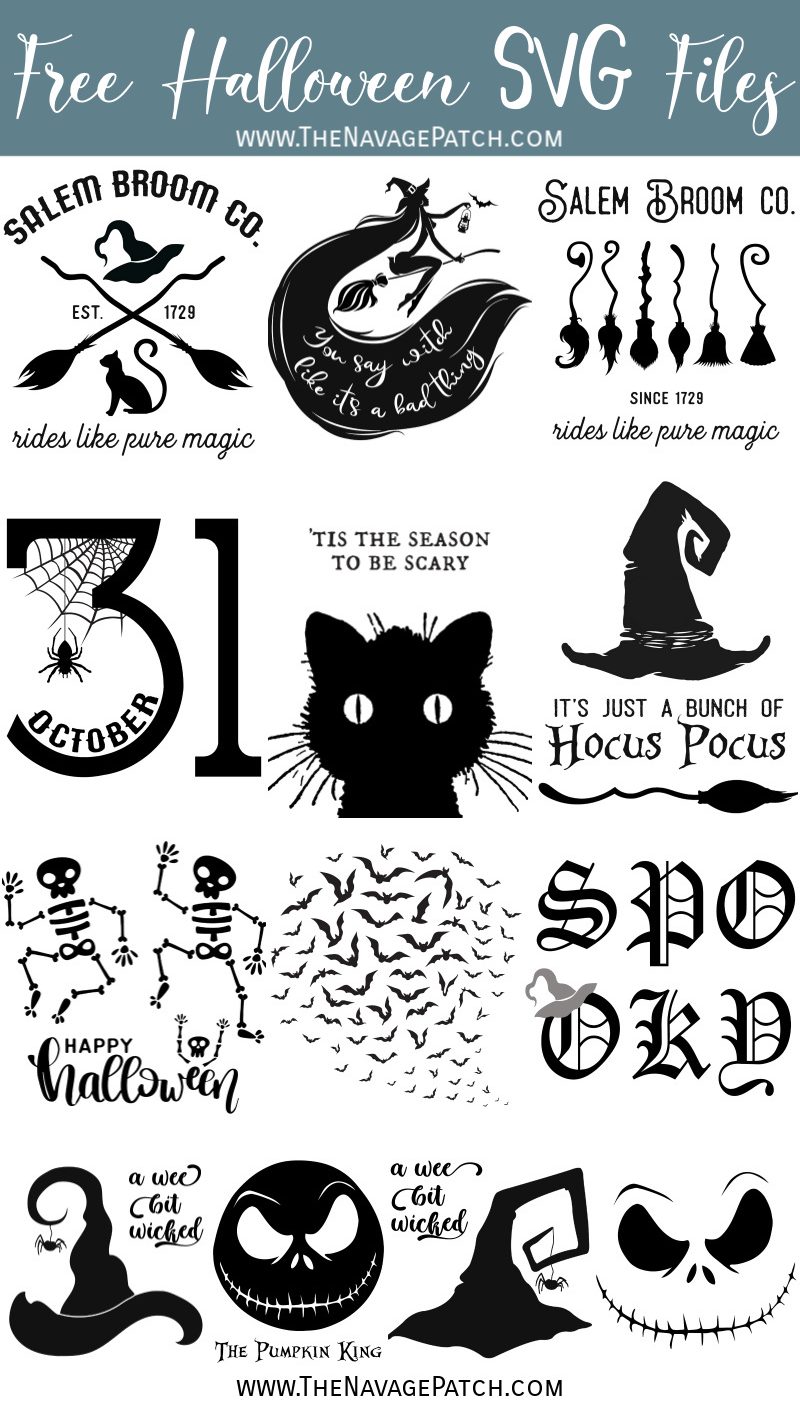
Free Downloadable Halloween SVGs
As usual, here is some information on these free iron-on Halloween pillow designs: we created today’s freebies as JPG, PNG and SVG files which are resizable and compatible with Cricut and all other cutting machines.
Now it’s time to click on the button below to download today’s freebies – they are all in the “Halloween” and “SVGs – Stencils” section of The VIP Patch.
take me to your
amazing freebies library
If you’re not a Navage Patch VIP, you won’t be able to access our Freebies Library. But that can be easily fixed! Subscribe for free on the form below and become a Navage Patch VIP. Once you subscribe, a password will be sent to you in our Welcome email, and that will give you access to The VIP Patch [Freebies Library].
Love free SVGs? Then check out our guide on Where to Find the BEST Free SVG Files!
Love the new designs! But now that ‘brayer’ sound will be popping up in my head too – lol!
I love the cat and broom ones! I have got to get a Cricut so I can have fun too. (But it will have to wait until I finish budgeting for next years decor/room updates and after I remodel my craft area and basement rec room so I have room to put one where I can actually use it. Can I borrow your craft room? My craft corner is kind of cramped by supplies leaving my workable desk space very tiny.
If you did not wash the covers before applying the designs, there could be some type of sizing or scotchguard that caused the issues with the last two…..just a thought. These are soooo cute!
Oh we never thought of washing the striped pillow covers. Yes you’re right – they may shrink a bit when washed. Thank you for the hint – we’ll scotch guard them! 🙂
I totally love these! And I really appreciate that you use switchable pillow covers! Honestly, who has room to store all those pillows! You only need the covers to switch out seasonally. And so, where do you guys get your pillow covers?
K
LOVE the colors and items you chose! All my rooms are neutral with big pops of color, and I do switch out seasonally. To me, the neutral background is soothing, but the colors add some energy. Love reading your blog!
So EMBARRASSED at the previous comment. Obviously it was meant for another blog – all except the part where I LOVE reading YOUR blog. I do look forward to seeing your posts in my email and read every one, not only for the great projects you do, but for your humor and style of writing. These designs are adorable – especially like the dancing skeletons!
That’s okay, Dyan! Thank you so much! 🙂
love your designs and your blog. wish you would contact someone like OHMYCS to offer your designs for machine embroidery. would love to embroidery some of them and be able to sell the finished product
Hi Susan, thank you so much! We haven’t dabbled in embroidery yet, but that company is on our radar if we ever do!
We don’t do the Halloween thing here but I still want a pillow case with the brooms. Because I do live the witch life ?
LOL, you guys must think we’re nuts over here for this holiday!
A little, definitely. They keep trying to push the Halloween thing here and it has sort of become a bit of a thing. I hear some kids even go Trick-or-Treating (when I tried as a lad, everyone told us to go away!) If I ever get to America, I really want to be there for Halloween, just to experience it personally.
I really love the “Salem Broom Co. “ design. Wish it was still in business!!
Maybe it still is!
I just discovered your wonderful blog (via Pinterest – where else?!) and immediately became a member of the VIP Patch! I can’t wait to check out more of your projects. Love, love, love these pillows and thank you so much for offering the amazing cut files to go along with it. I’m like a kid in a candy store – so many fun things to look at! And I’m sure you hear it all the time, but I think it’s amazing that you craft along with your wife! So refreshing! I love the way you write – you make me laugh, which is always a good thing (especially these days)!
Thank you, Deb, and welcome to The Navage Patch! I hope you’ll find a lot to make you laugh here – Handan I always trying to spread a few smiles! 😀
How do I download the SVG for these Halloween images? I downloaded and only came up as JPEGs. Thanks in advance!
Hi Stella,
Once you go to our download folder, you need to scroll down to get to the PNG and SVG files. The folder starts with the JPGs, then moves on to the PNG files, and at the very end we have the SVG files (as shown in screen shot below).
I hope this helps! 🙂
Where do I find the download button at? I don’t see where to even attempt to download these awesome images.
Hi Jennifer, please have a look at our printables FAQ page – it should answer all your questions: https://www.thenavagepatch.com/printables-faq/