
Pottery Barn Inspired DIY Planter & Plant Stand
Using old stoneware crocks and a cedar 2×4, learn how you can make this gorgeous Pottery Barn Inspired DIY planter and plant stand with this easy tutorial!
Okay look, this post may offend certain people because it involves recklessly spraying antiques with various colored paints. Some of you may live in a part of the country or the world where those antique stoneware crocks have some sort of value. But sister, lemme tell you – they’re a dime a dozen here in New England. You can’t walk through a tag sale without tripping over one or two. Visit any thrift store, and you’ll find them bubbling up from the floor boards. They’re plentiful, and they’re cheap – especially if they’re chipped, cracked or flawed.
But a quick look on Etsy and Ebay has me scratching my head. There are people paying small fortunes for these things! I don’t get it! Maybe I should open a side business…
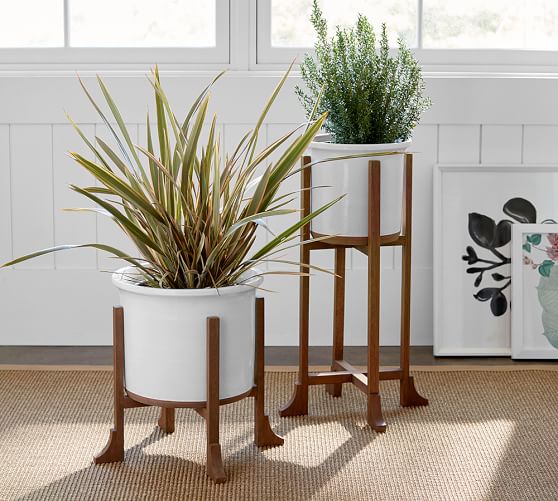
Anyway, back to the matter at hand. In this post, I’m going to show you how to turn those useless old crocks (no, I’m not talking about your husbands) into beautiful planters, and I’m going to show you how to build a plant stand for your snazzy new planter inspired by the $200 Pottery Barn Florent planter. Here’s the inspiration:
As usual, Handan was the brains behind this project. She can see things for what they can be, not just what they are now. I have no such talent. While her mind churns and chugs and froths and calculates, constantly analyzing and hypothesizing, my mind is more like an old-timey southern farmboy drifting down the Miss’ippi River on a log raft while chewing a blade of grass and smoking a corn cob pipe.
Handan showed me the picture above and then retrieved two crocks that had been inhabiting various shelves, ledges, basement nooks and garage corners during their few years in our house. I remembered one from a few years back. I made sauerkraut in it.
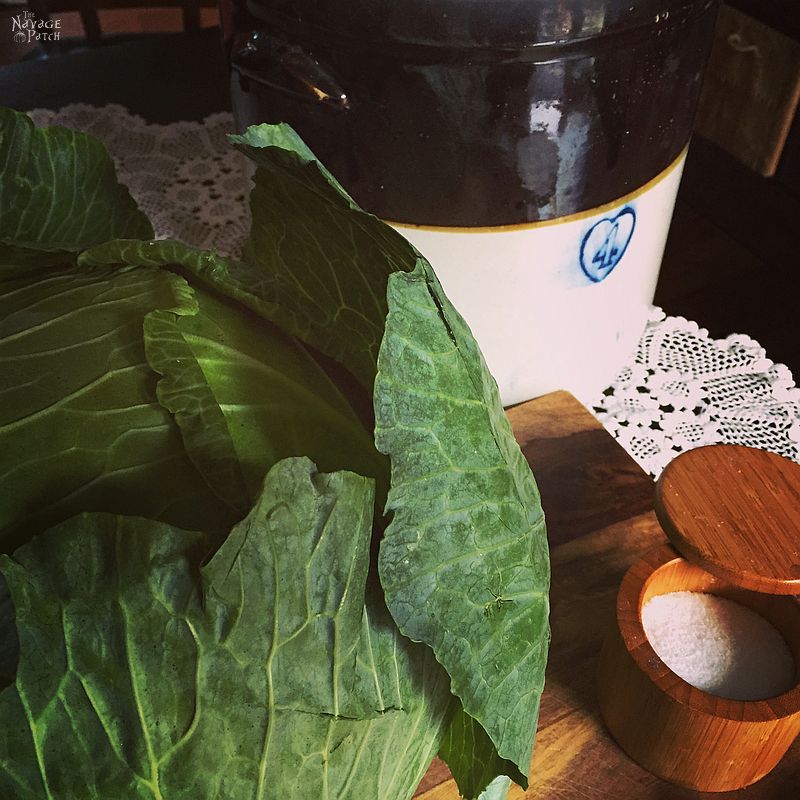
When it had fermented, I cooked it with a good German Riesling, onions, apples, cider vinegar and brown sugar, and I paired it with grilled kielbasa. It was delicious, and now I’m in the mood for some good Polish food!
But first, the Pottery Barn inspired DIY planter and plant stand!
I started with the biggest crock, the number 6 (not the number 4 pictured above).
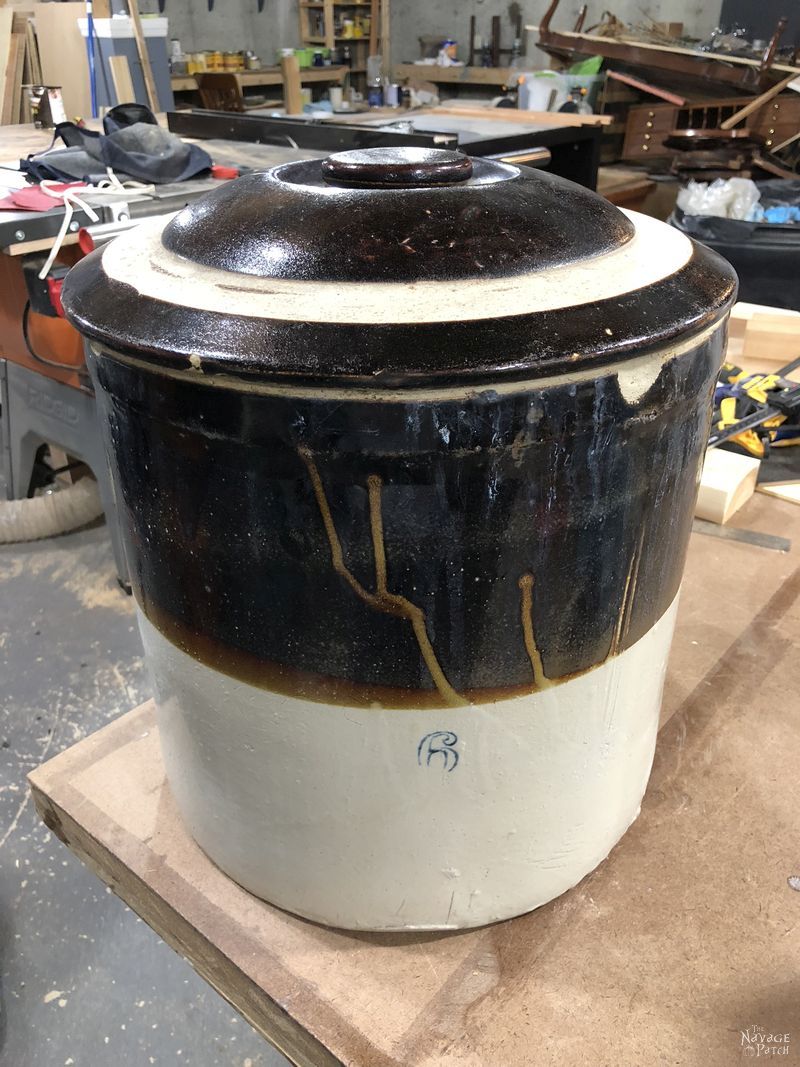
If you are wondering what I did with the top, I’ll have a post on that in the near future. But look at that sad number 6. Chipped, scratched and by the looks of it, glazed by a drunken buffoon who drank a little too much of the pickle juice on his lunch break.
My first order of business was to measure the diameter and the height of the crock, so I could work out the dimensions of the plant stand. I pulled my measure like so.
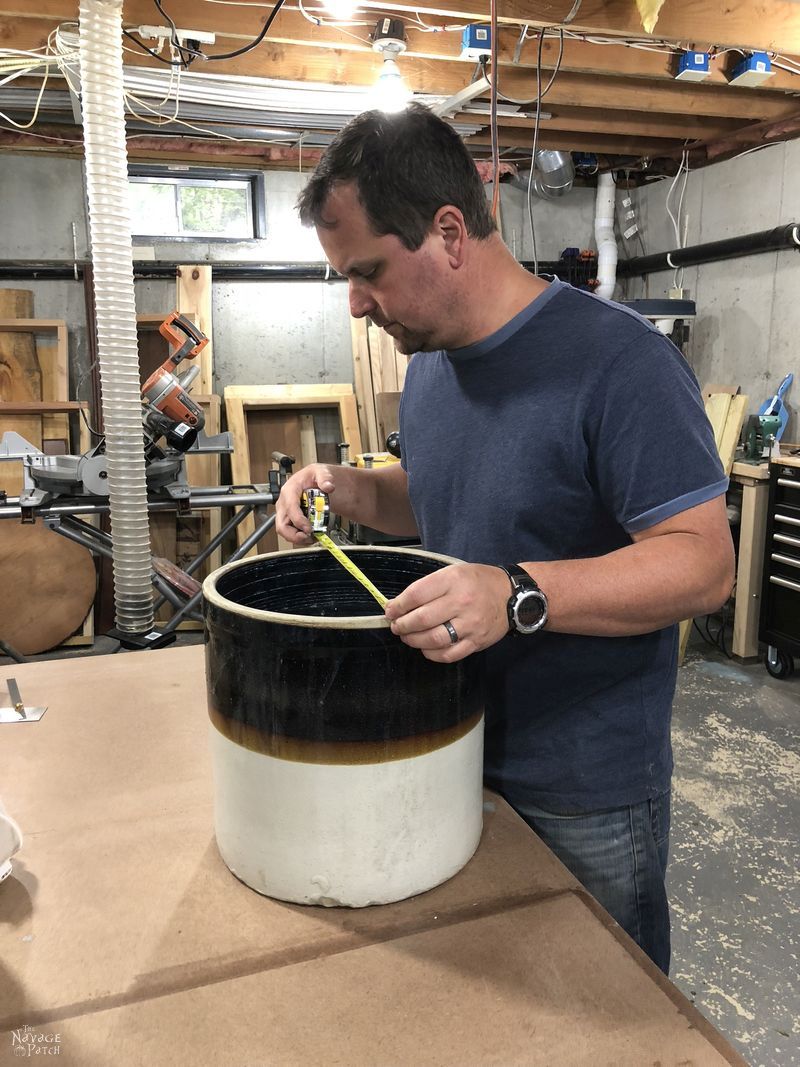
Mmmmhmmmm, mmmhmmmm. yes, very interesting. Thirteen inches. Fascinating.
But what’s this?!? The tape measure is out of control!
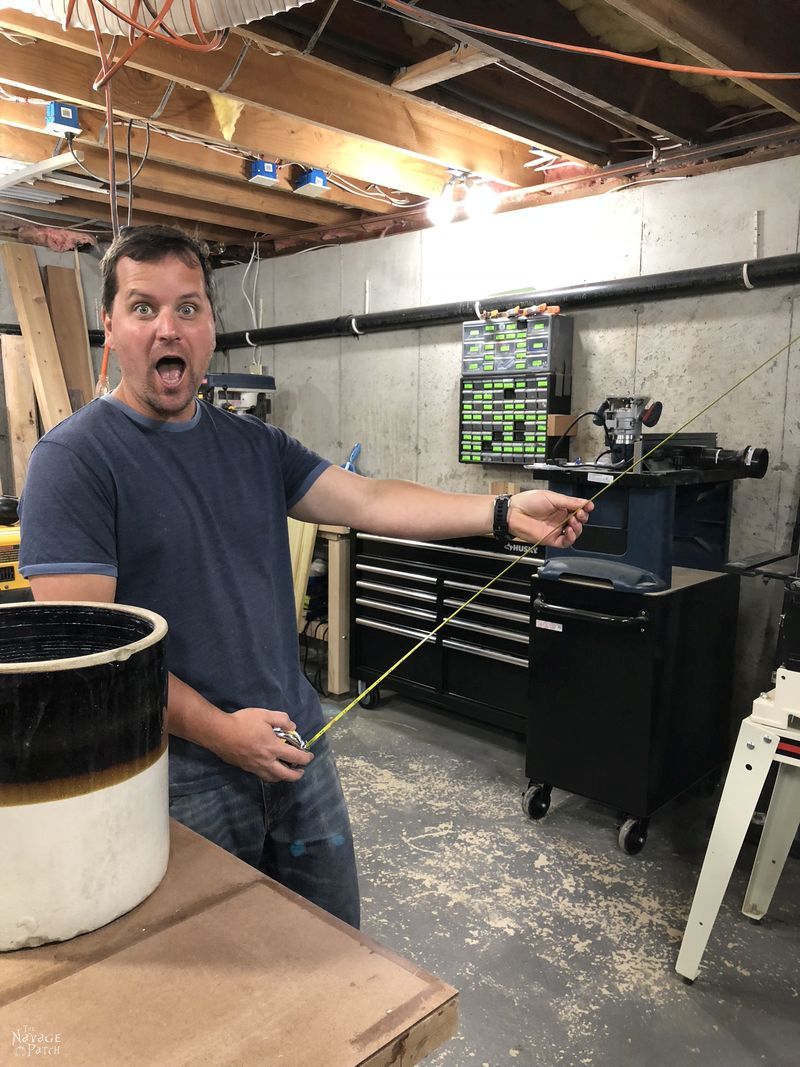
Okay, okay, enough joking around. This is serious business, and I’m a totally super-serious guy.

See? Serious. And I have my eye on you….So no more screwing around!
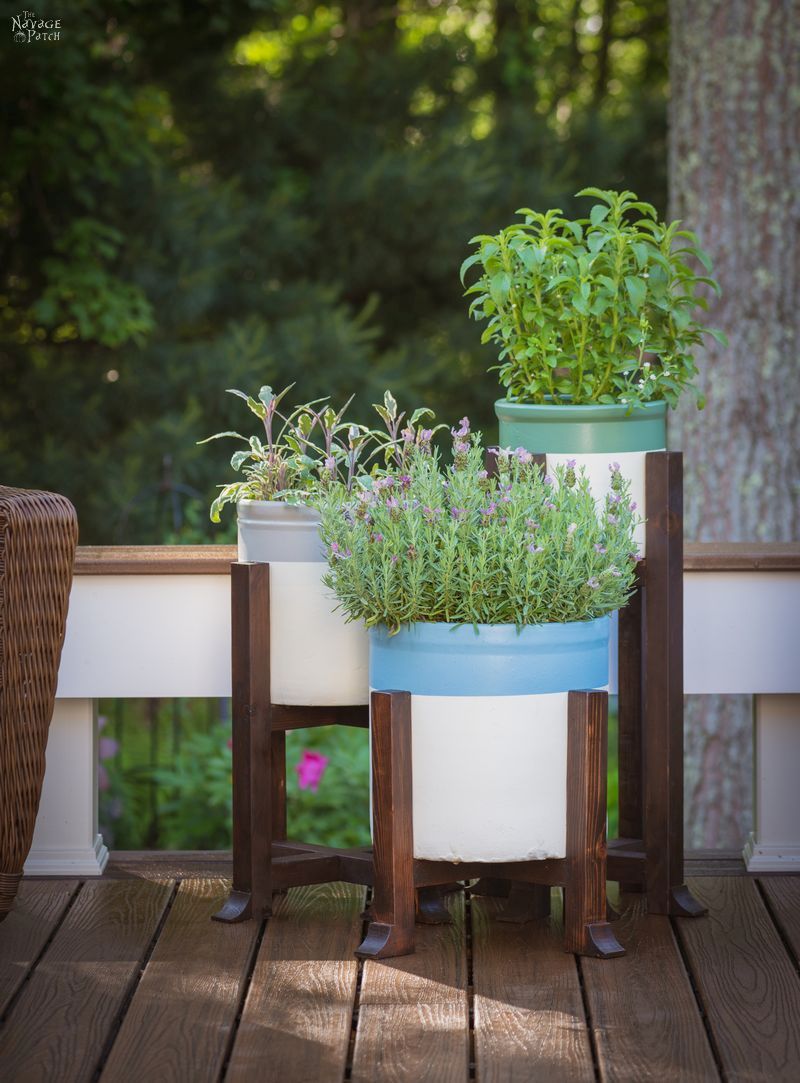
From the 13 inch diameter, I estimated that the plant stand should be 14 inches tall. As it turned out, the planter sold by Pottery Barn has a diameter of 13.75 inches, and the stand is 14.75 inches tall, so my guesswork was pretty good.
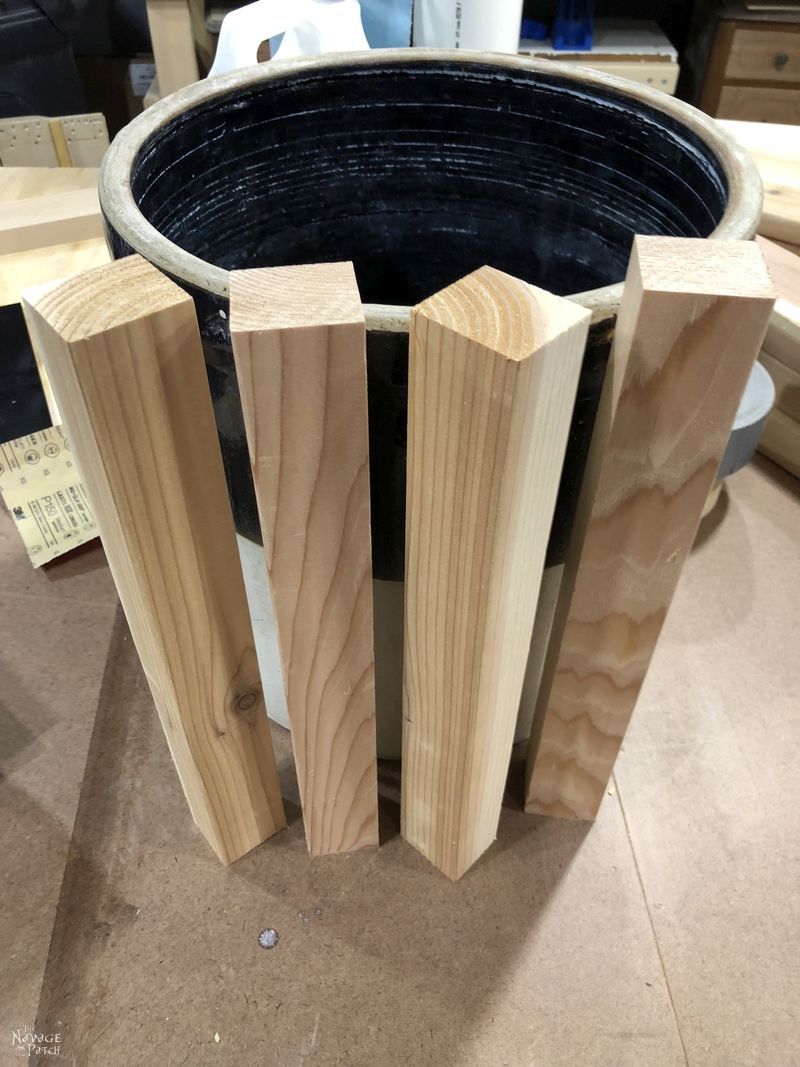
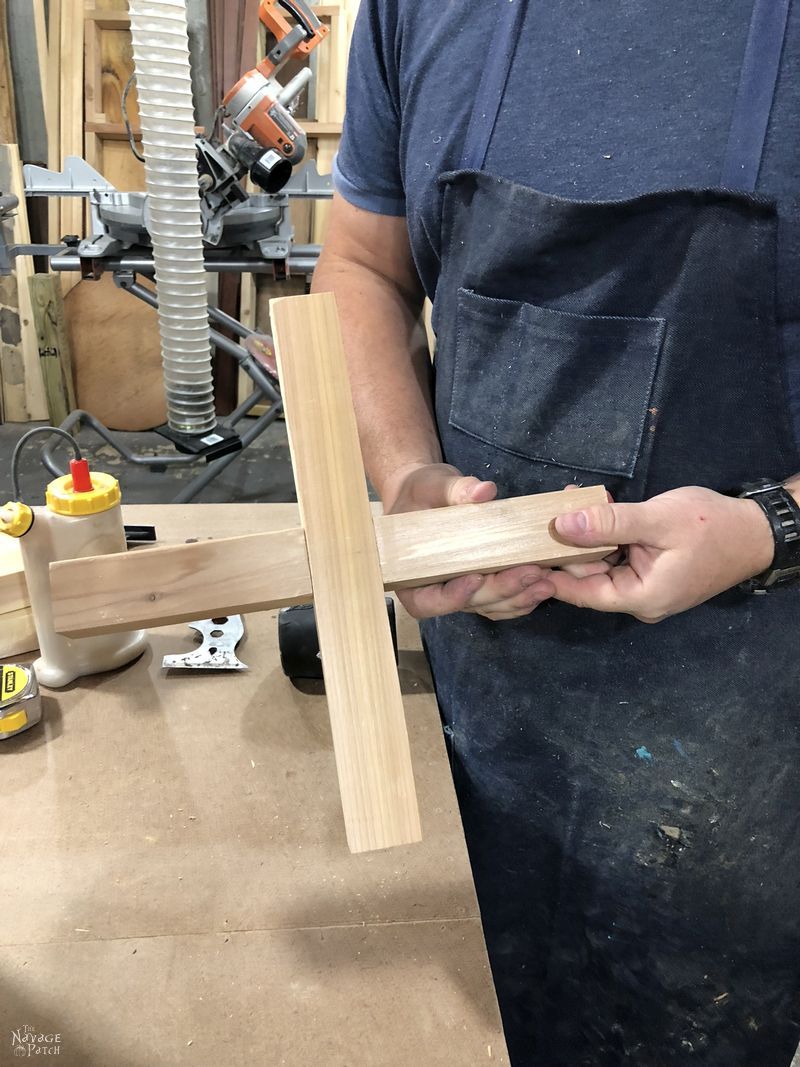
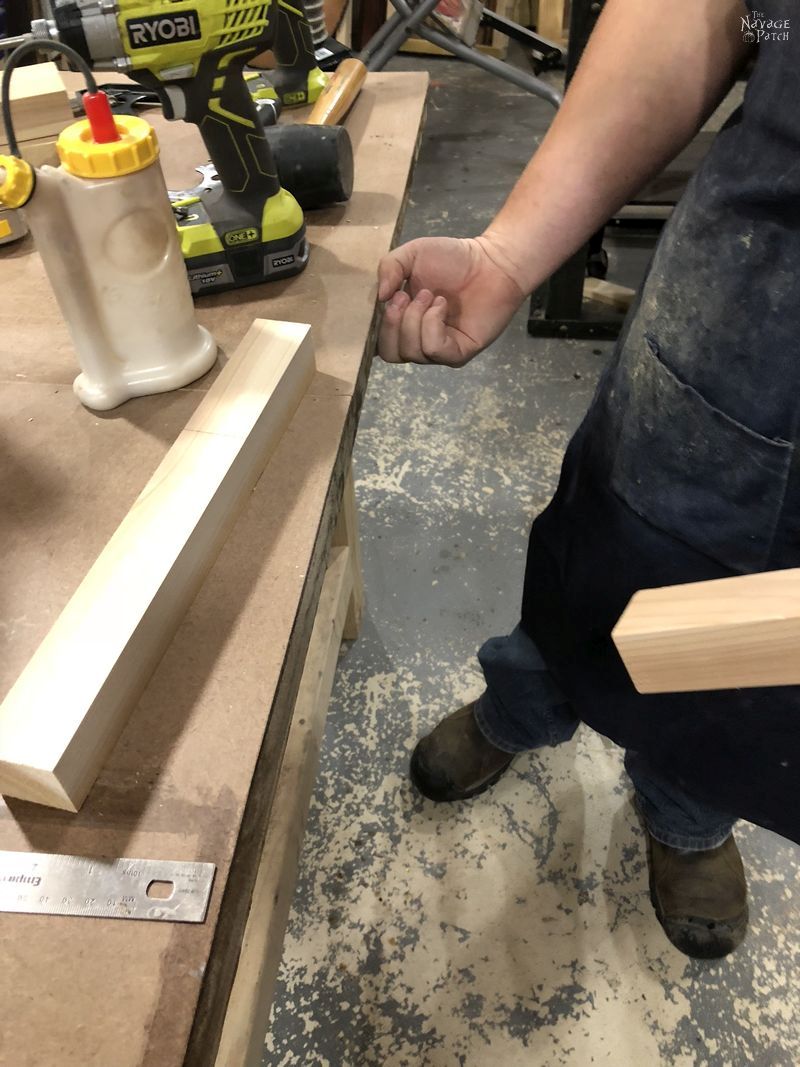
Though Pottery Barn’s planters are for indoor use, Handan wanted ours to live on the new deck, so I made them from cedar 2x4s that I ripped in half (that means I cut them the long way). The resulting pieces were 1 1/2 inches on one side and about 1 5/8 inches on the other. I’ve included a cut list at the end of the post. Here are the pieces for the 4 vertical posts.
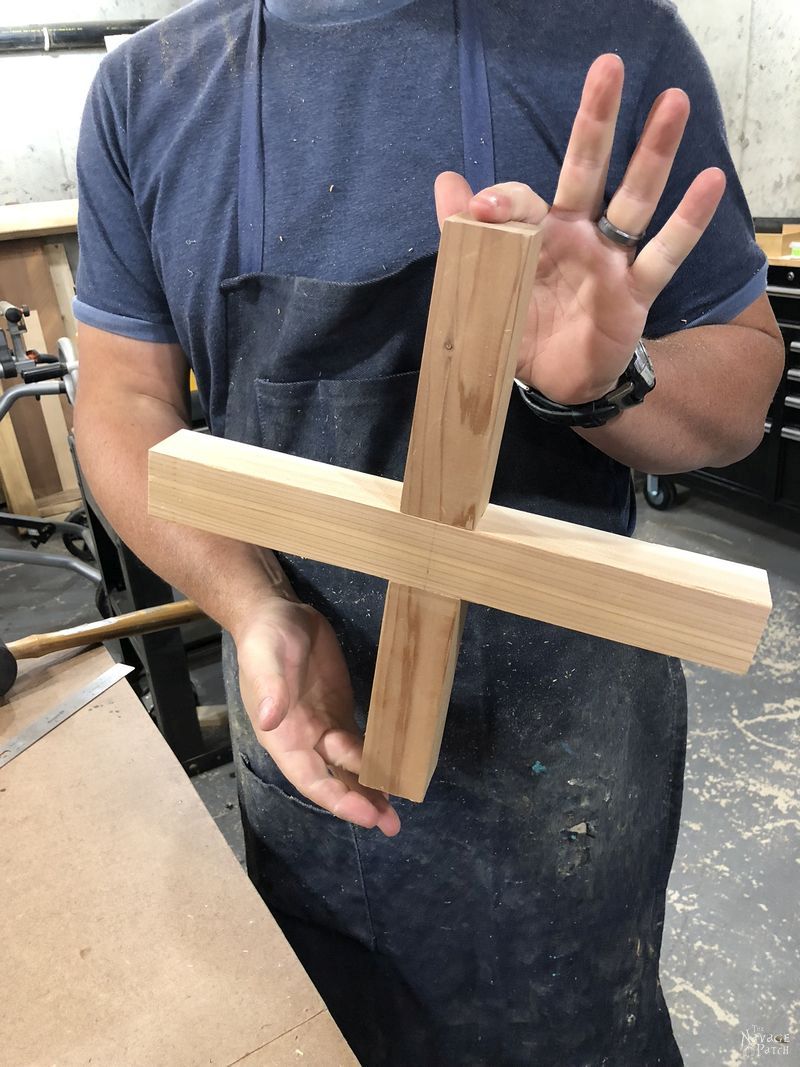
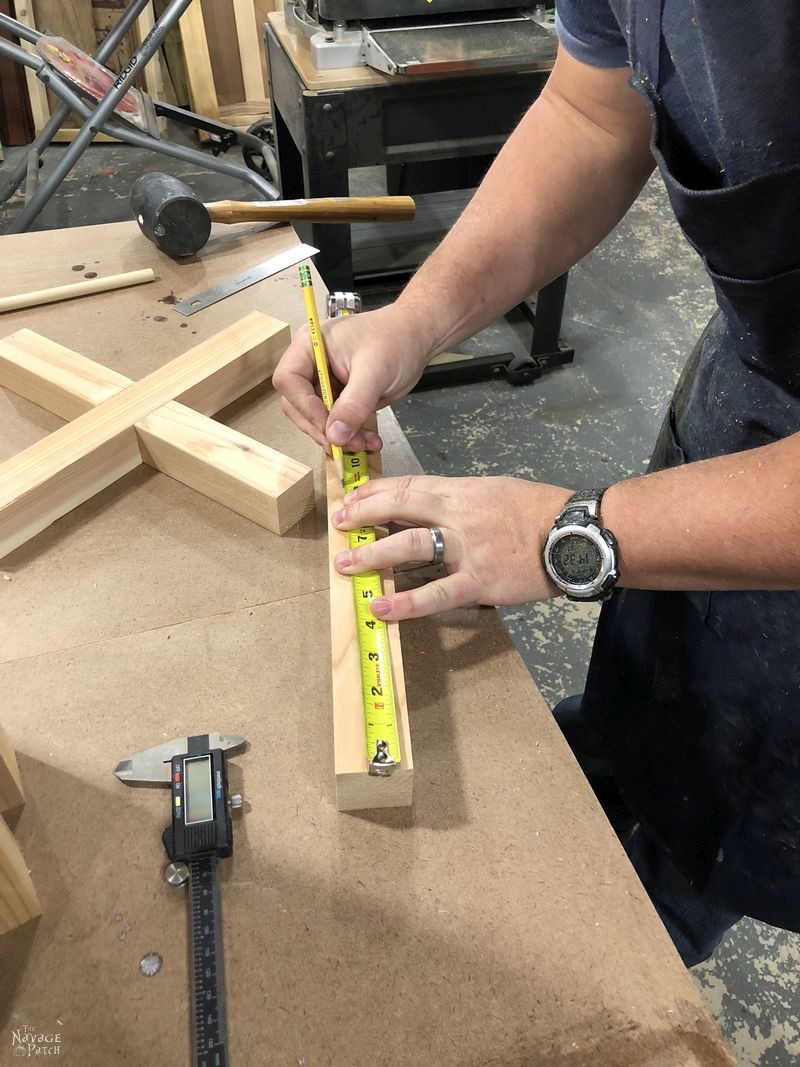
Next, I cut two pieces for the cross support. Since the diameter of the crock is 13 inches, I cut the pieces to 13 1/16 inches just to be safe.
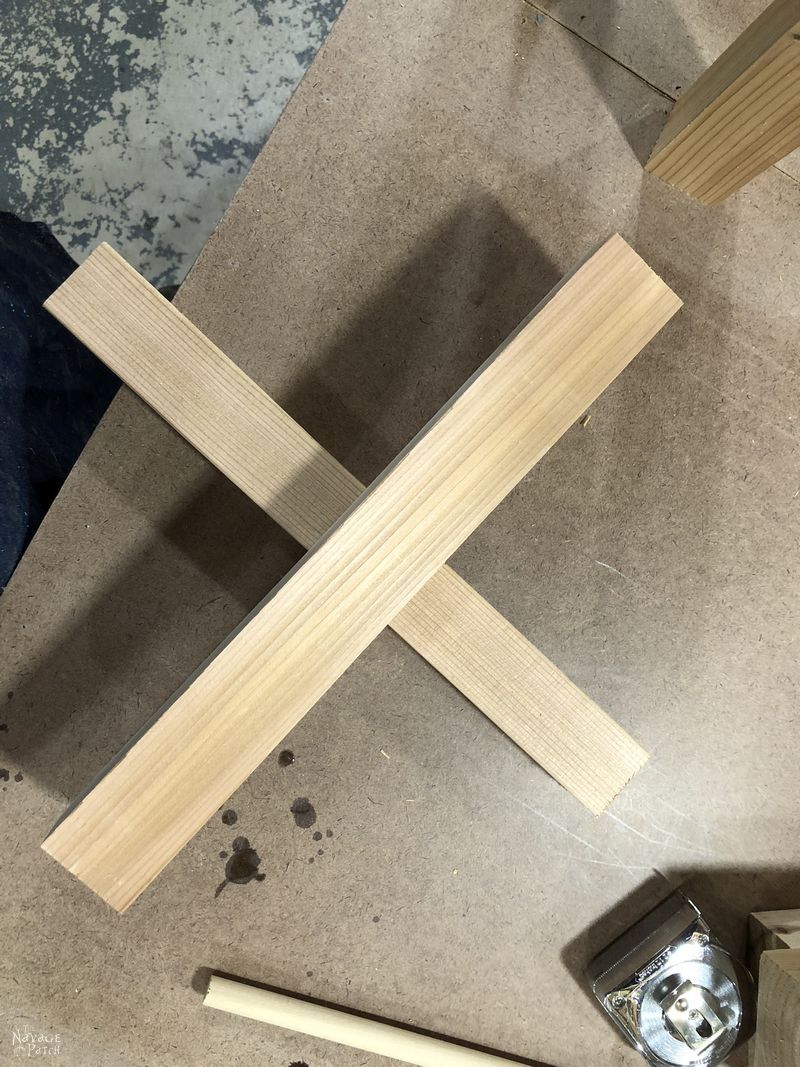
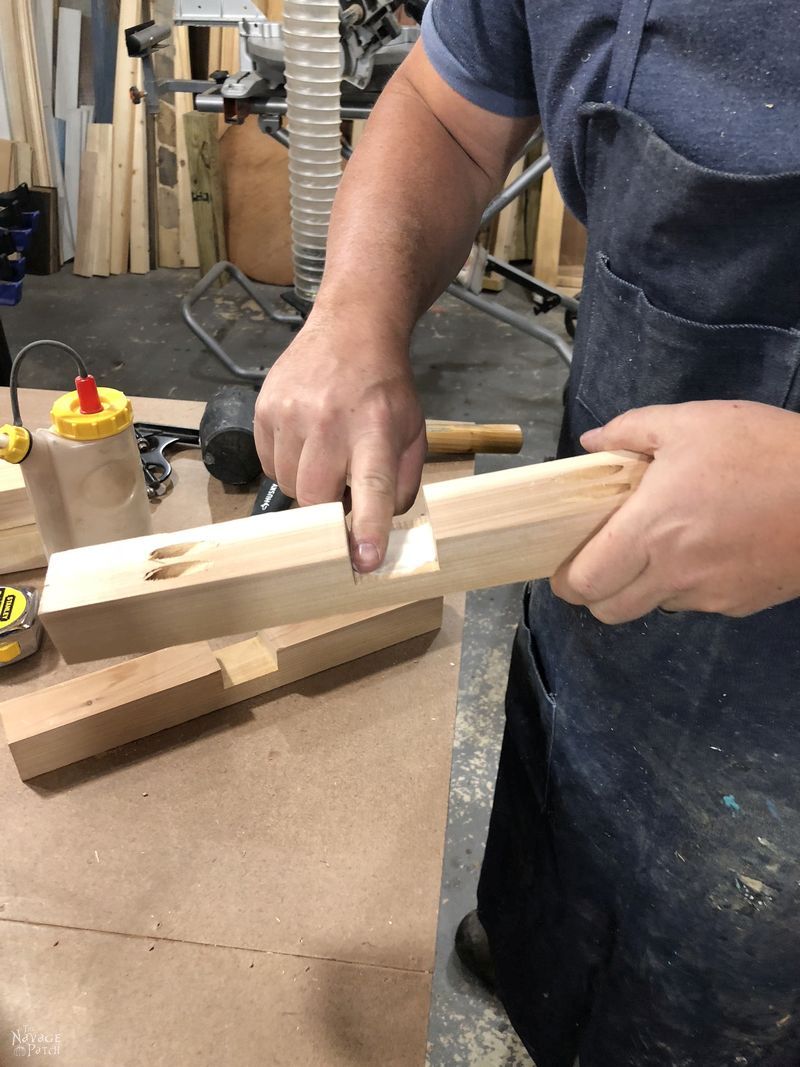
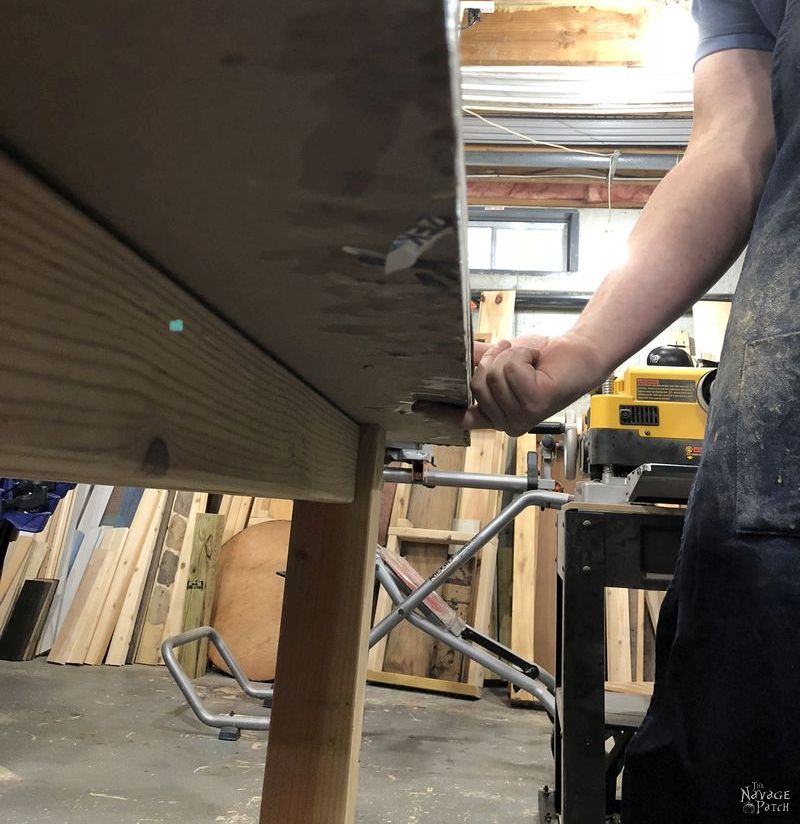
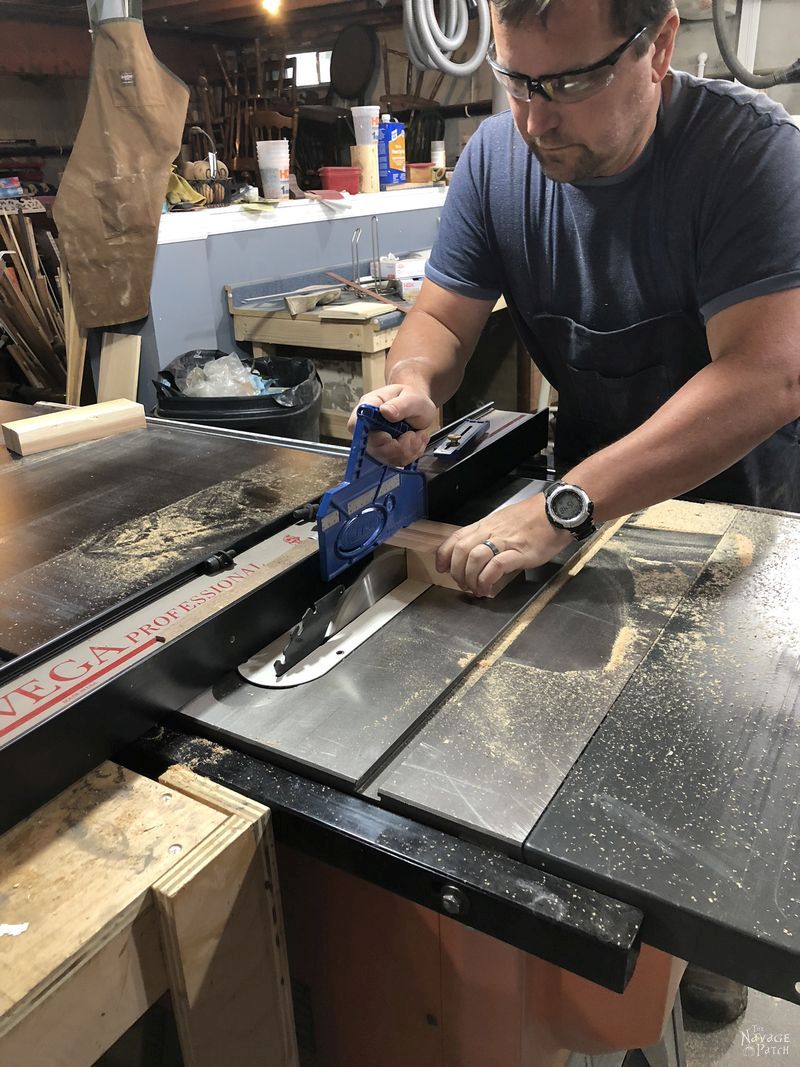
The best way to join these two pieces in a cross shape is to cut a 3/4-inch-deep dado (notch) in each that is 1 5/8 inch wide. I first marked the center of each cross piece, and then I measured out from the center line by half the distance of the width of the piece. In this case, the wood was 1 5/8 inches wide, so I measured out from the center line 13/16 inch in either direction.
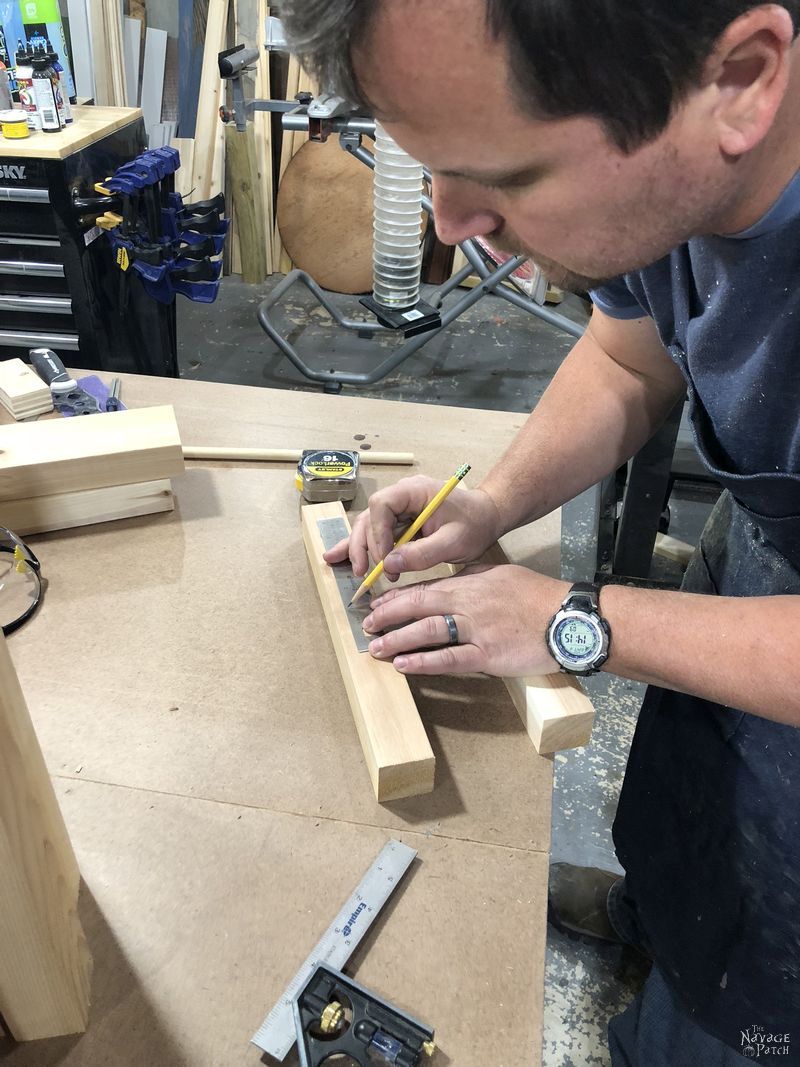
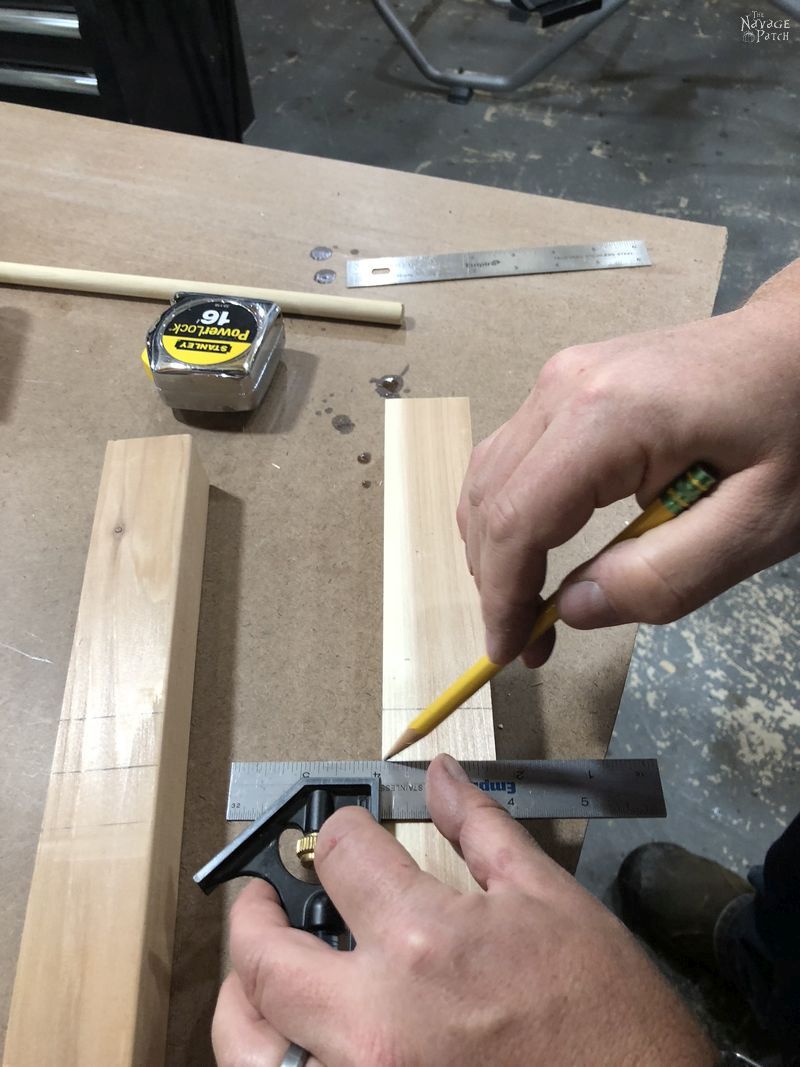
These lines would act as a guide when cutting the dado on my table saw. Since the pieces were 1 1/2 inches thick, I set the height of the table saw blade to 3/4 inch using my Kreg Multi-Mark – one of my absolute favorite tools in my shop.
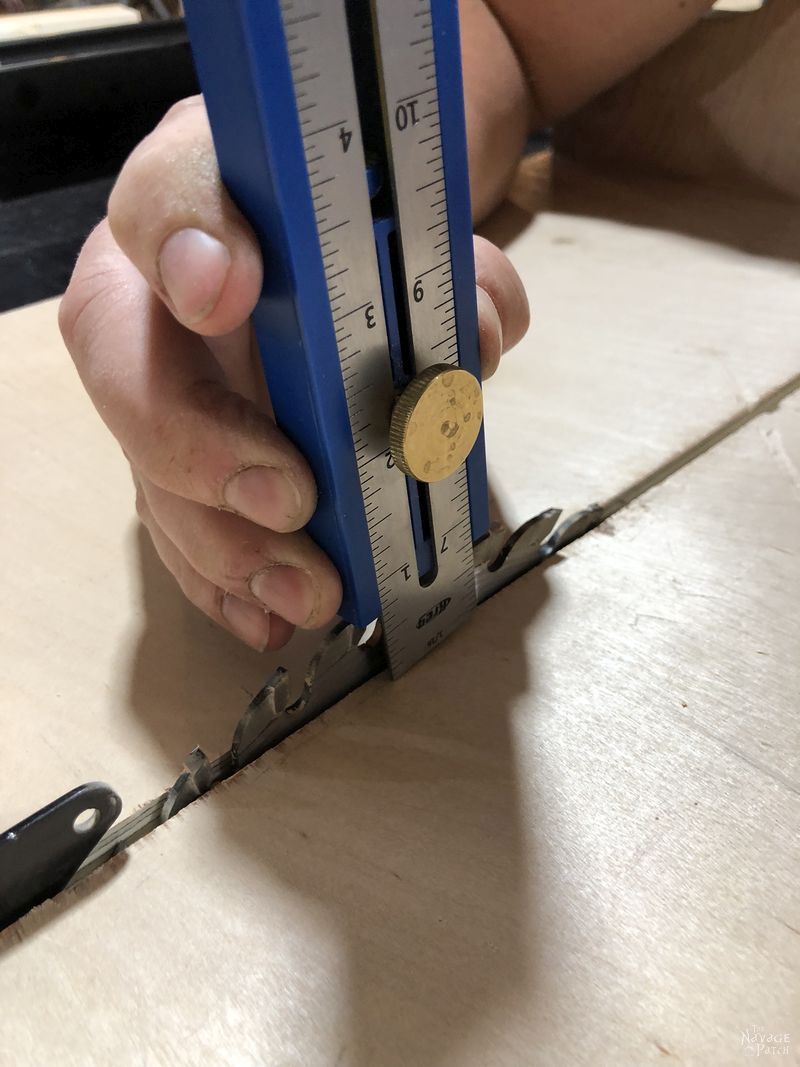
With the blade height set, I cut the dadoes, or notches, in my cross pieces.

Handan even shot a little video of the process.
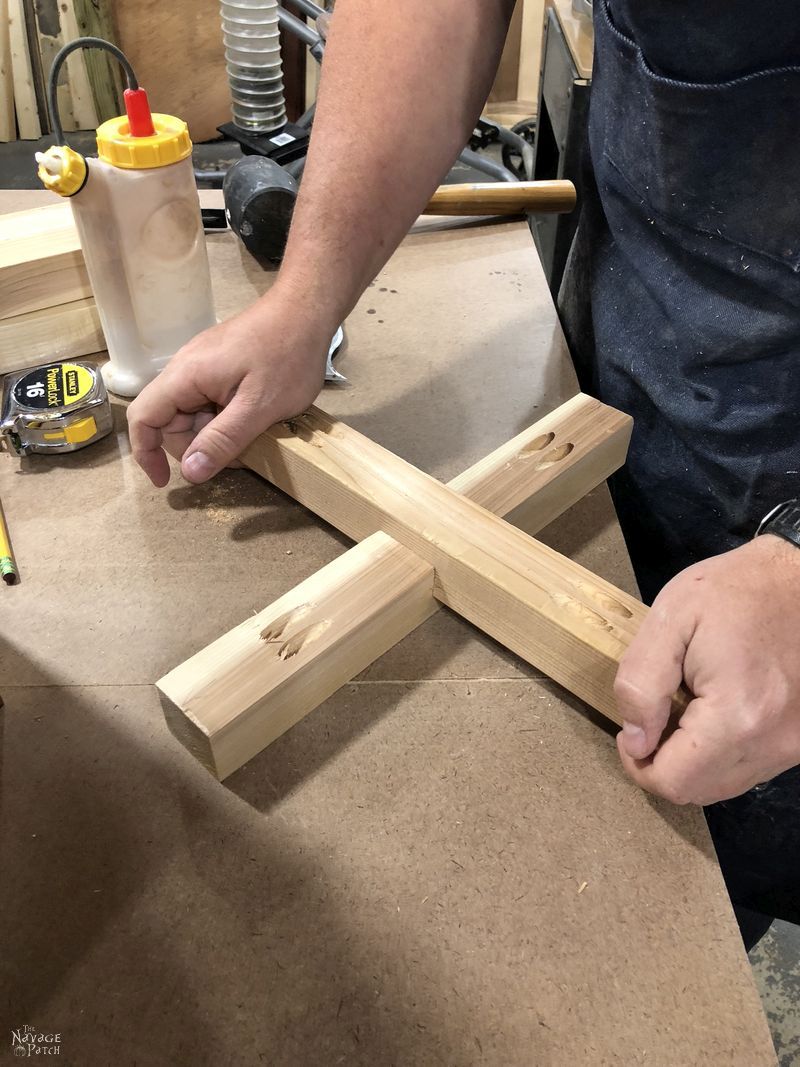
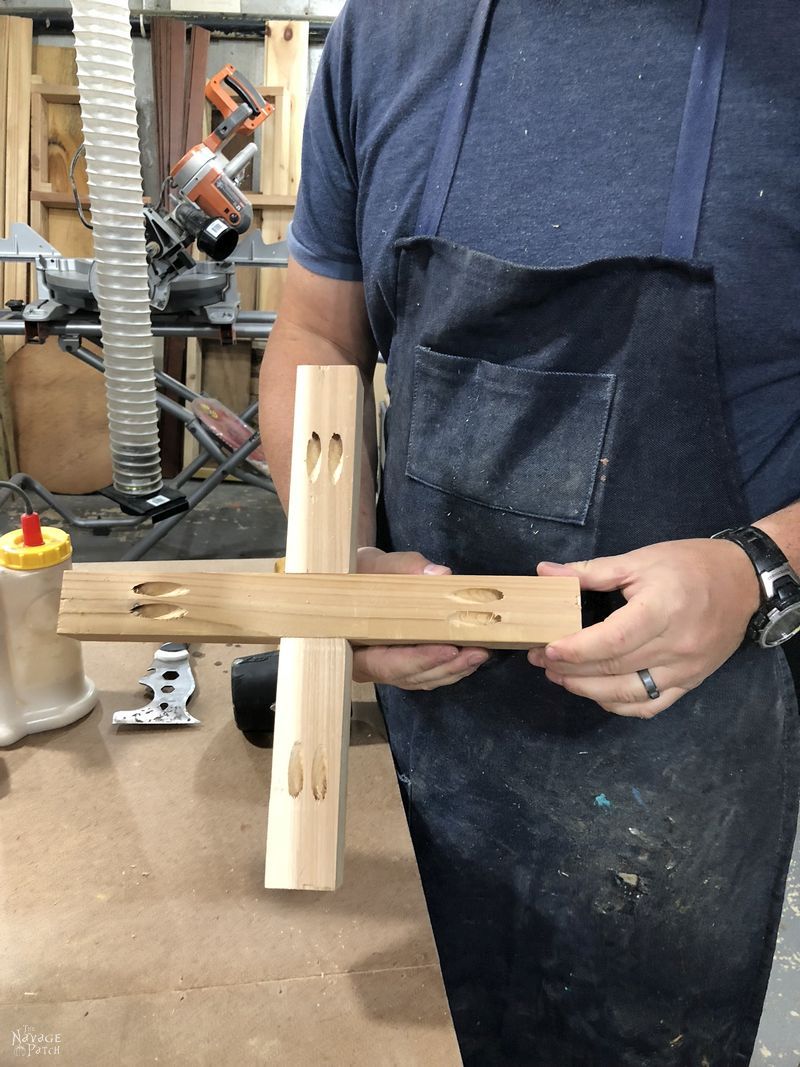
Here are the two cross pieces with the notches cut.
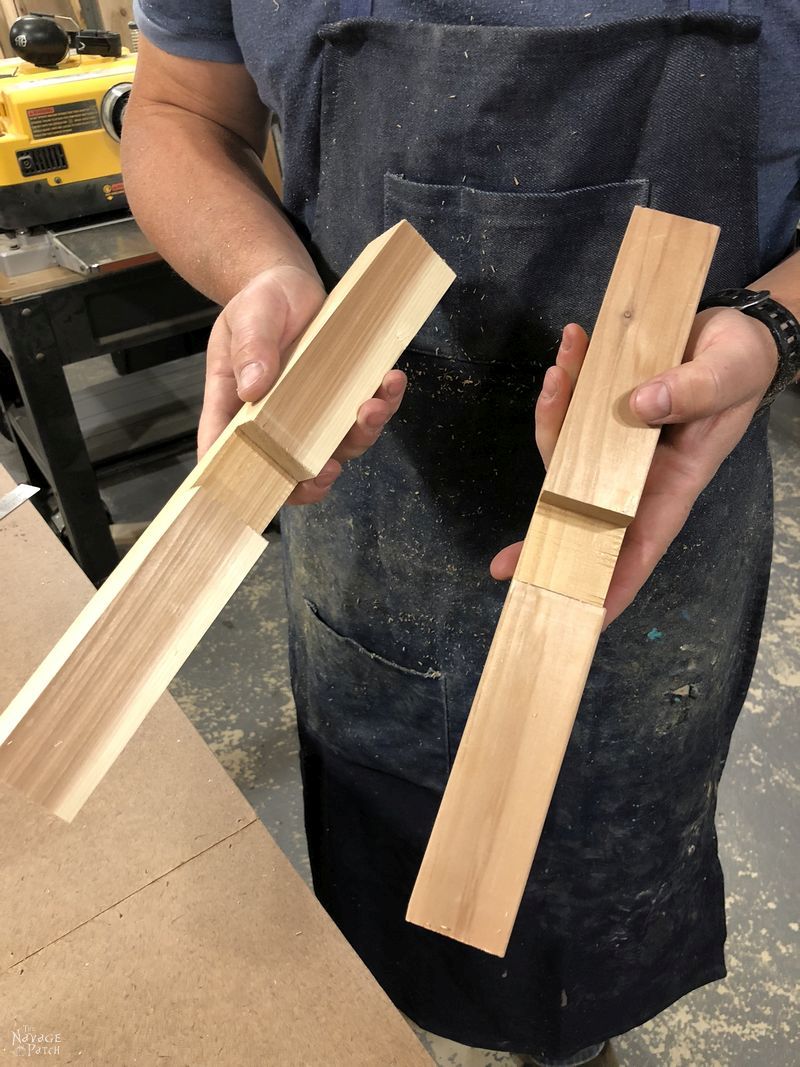
I fit them together to make sure I had measured and cut correctly.
It was a good fit.
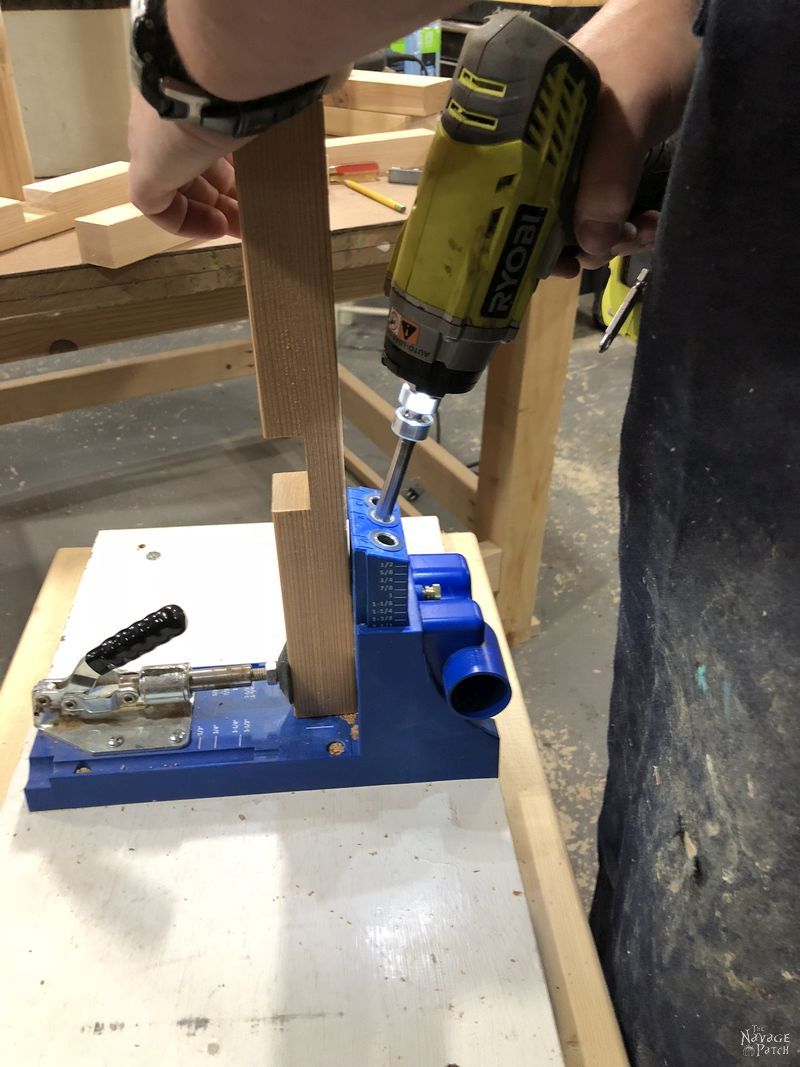
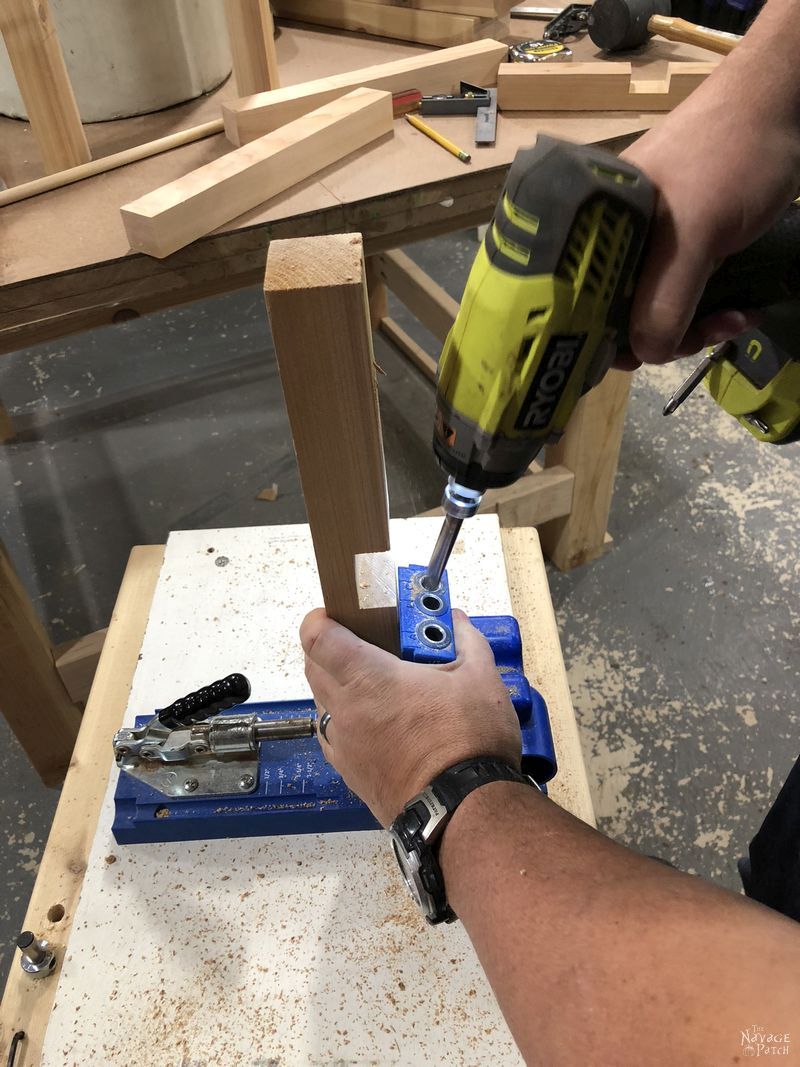
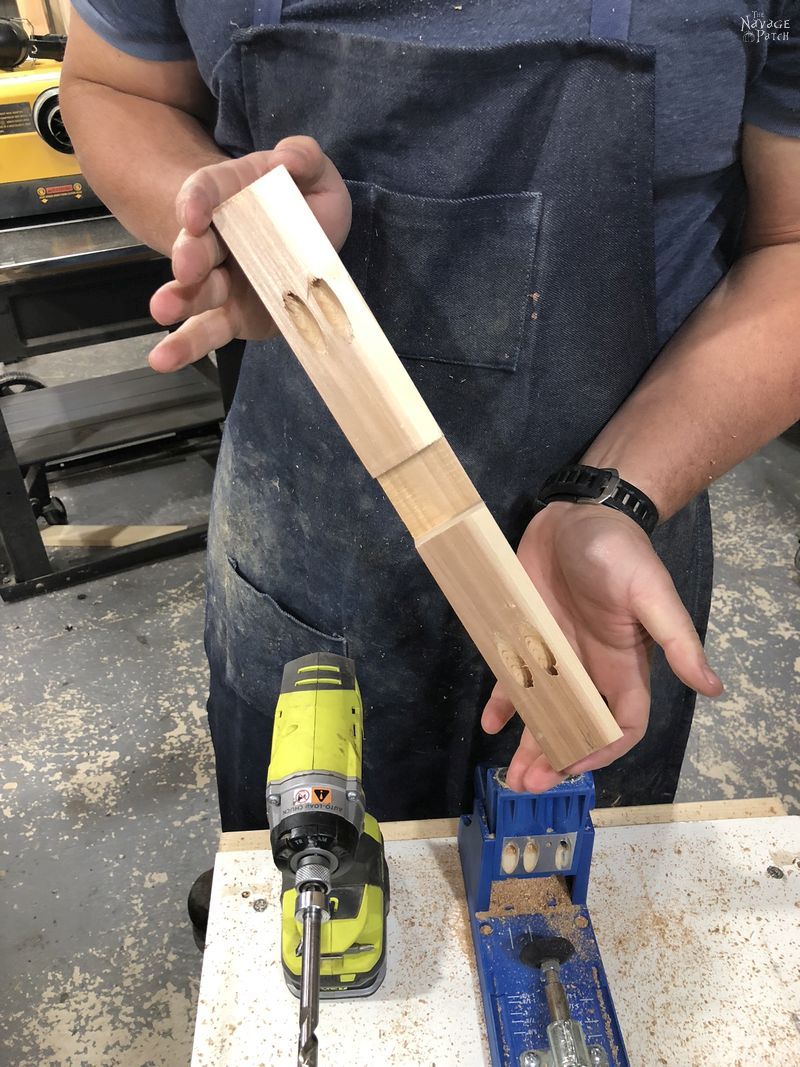
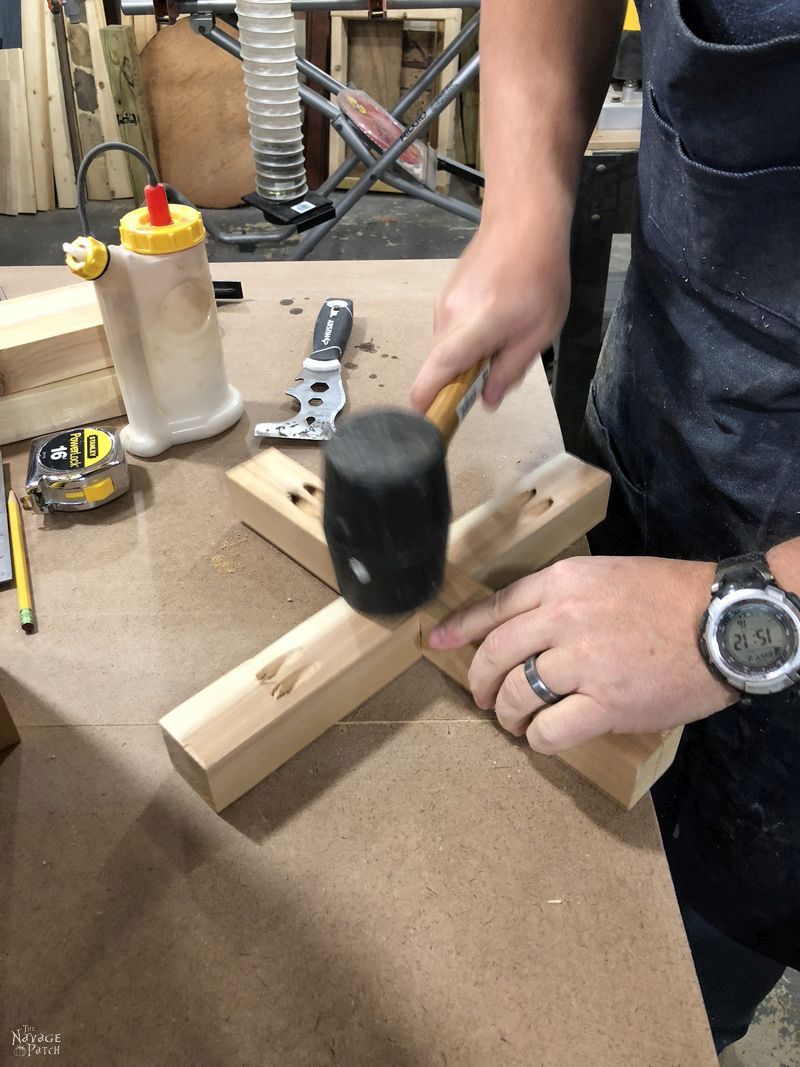
Before taking the cross apart, I chose the least attractive side to be the bottom and marked the ends with a pencil. I then drilled two pocket holes in each of those marked ends with my Kreg Jig.
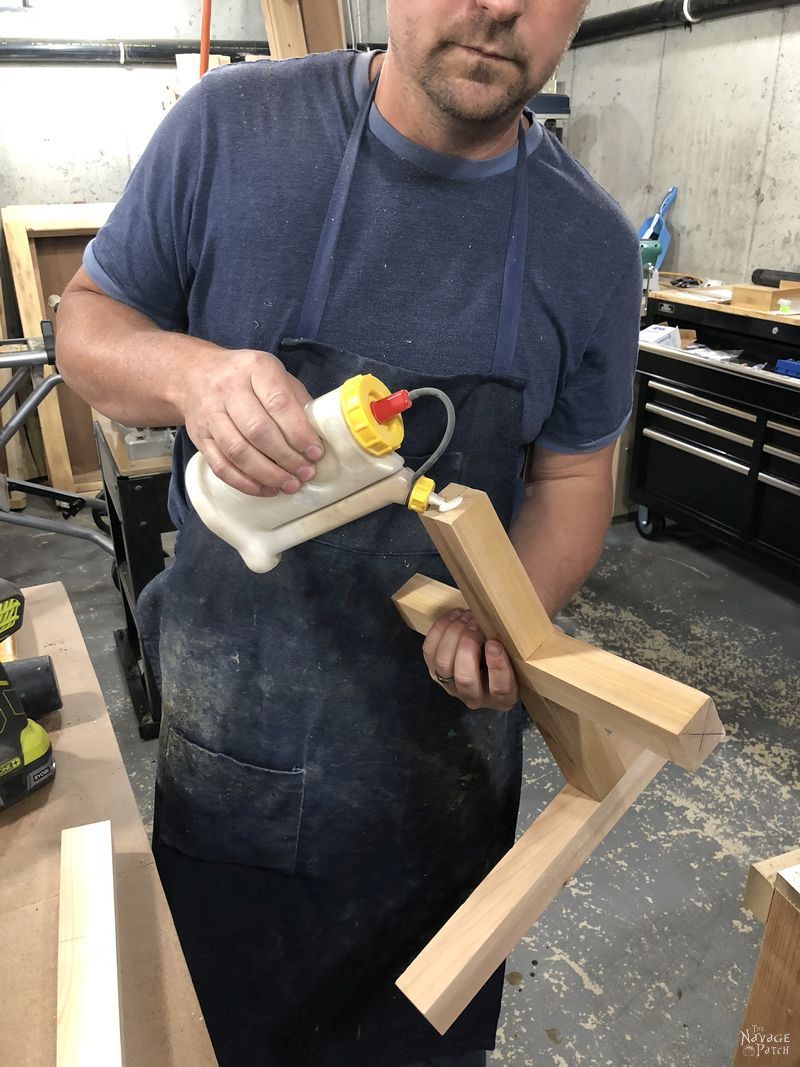
I applied wood glue inside both notches and joined the cross once again.
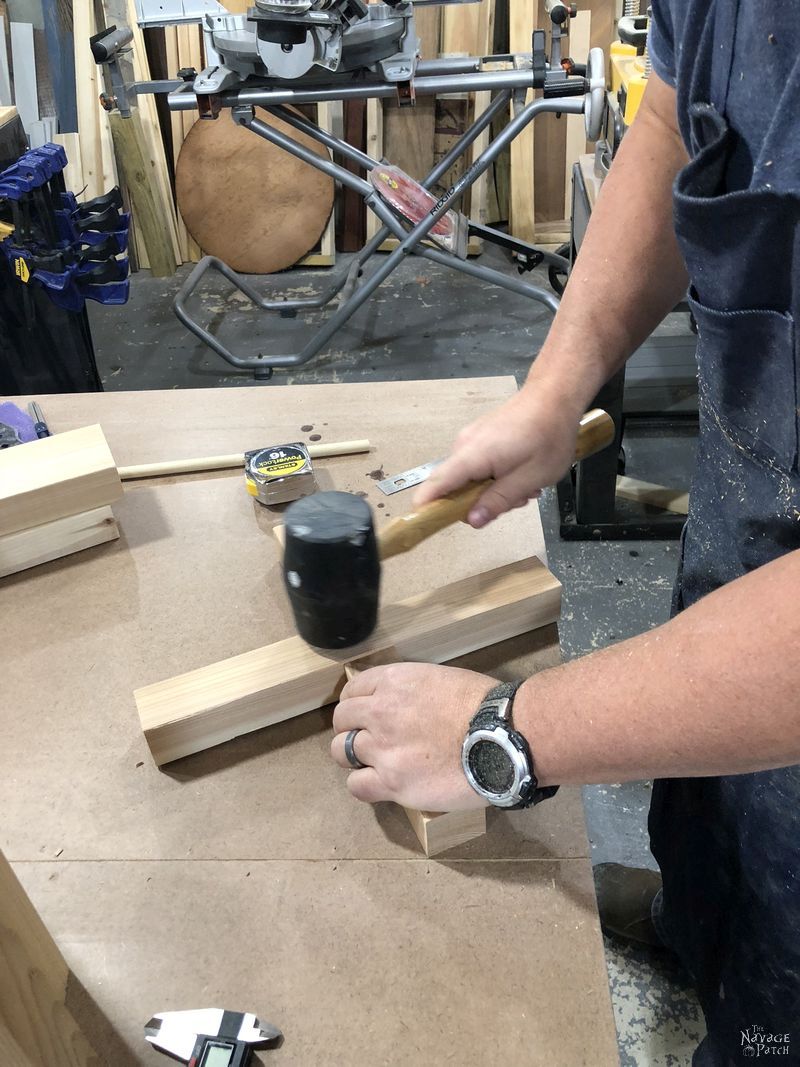
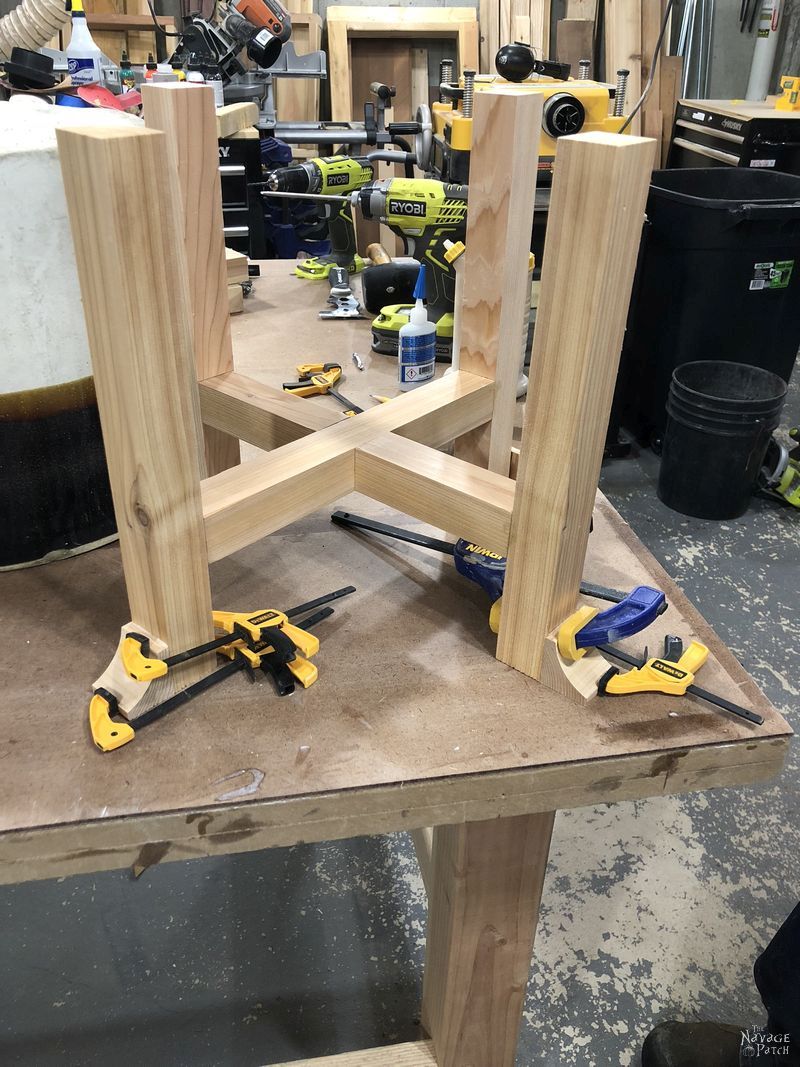
I set the cross aside and marked the legs 9 inches from their tops.

To attach the legs to the cross piece, I first put a dab of wood glue on one of the ends of the cross piece, and then I lined the cross piece up with the mark I made on the leg and screwed it in place with 2 1/2 inch Kreg screws.
Handan helped hold the piece in place while I screwed, so I don’t have any pics of the process, but it’s pretty straightforward. Having now made more than one of these plant stands – some with help and some alone – I can tell you it will go so much smoother with two people! I love when Handan works with me. Our projects are so much more fun and relaxed when we’re both involved.
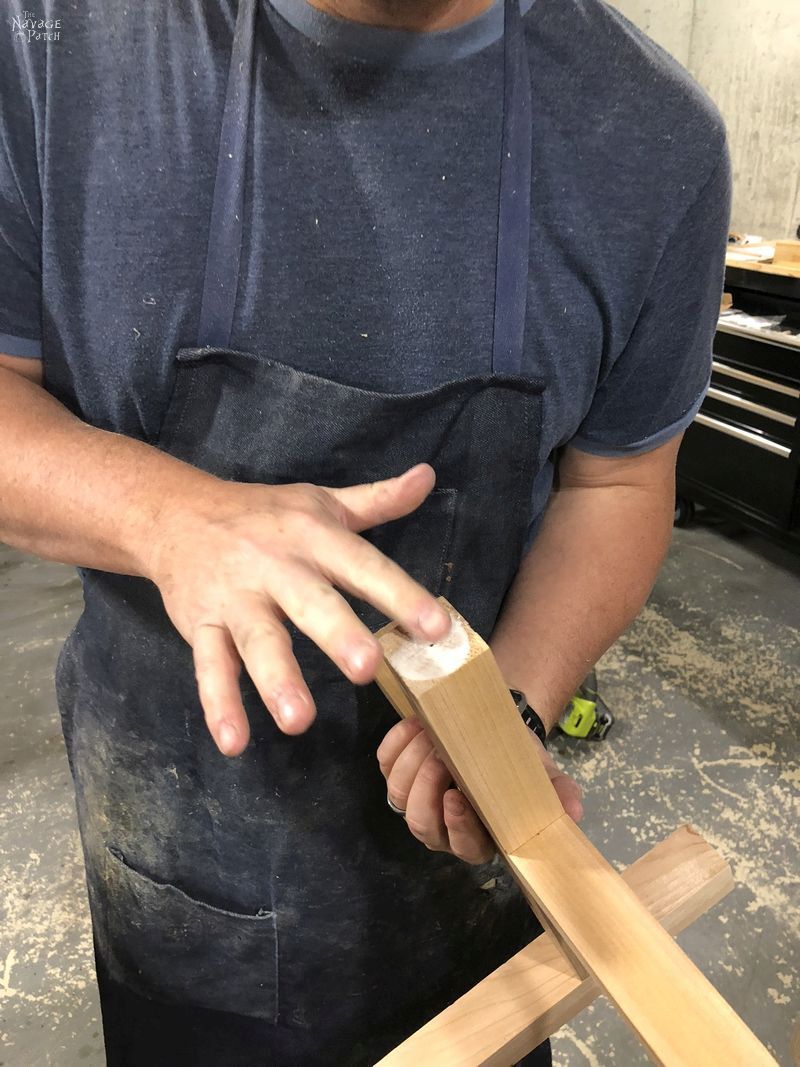
Here’s a pro tip on how to clean a gluey finger.
Need a closer look?
Oh, c’mon now! You all wiped your boogersnots under your desk in school! This is no different, and as a bonus, they don’t dry out and fall to the floor like your little nose nuggets did back in the day. See? It’s actually making the table stronger!
For any last bits of glue, well, that’s why I wear an apron! Moving on.
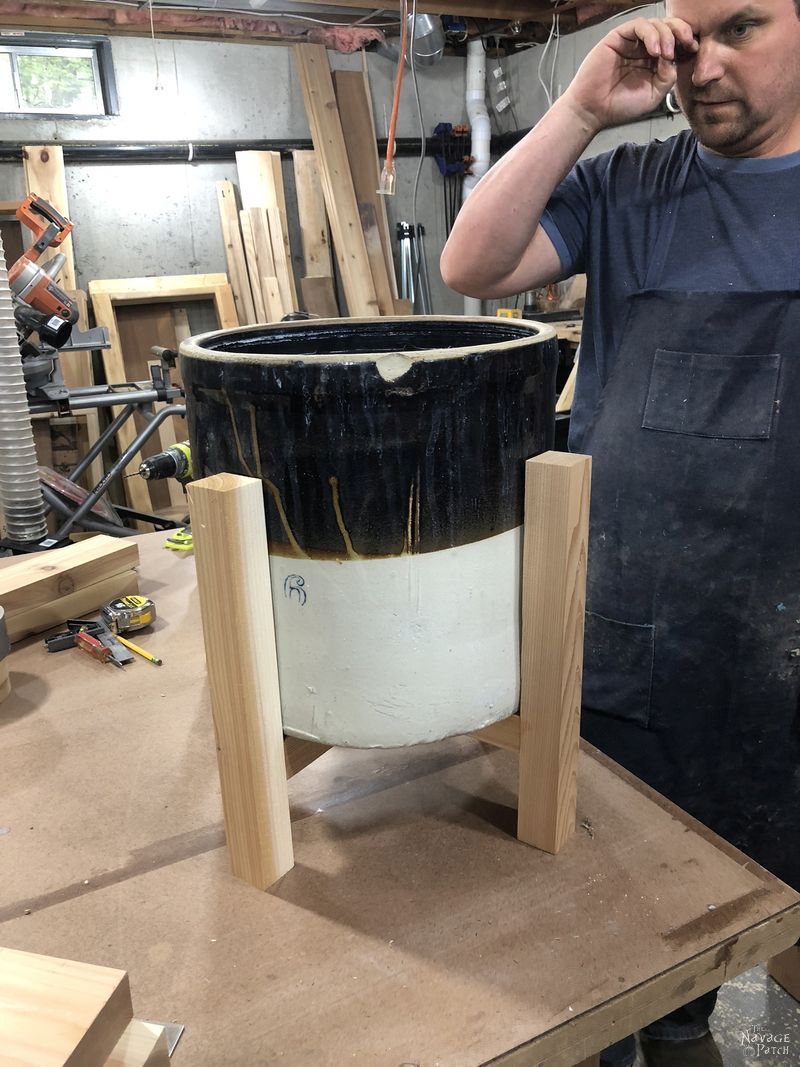
Once we attached the 4 legs to the 4 ends of the cross piece, the stand was ready for a test run with the crock. It was a perfect fit. I don’t know exactly what I’m doing in the picture below, but most likely I was checking out the details with my imaginary pirate telescope.
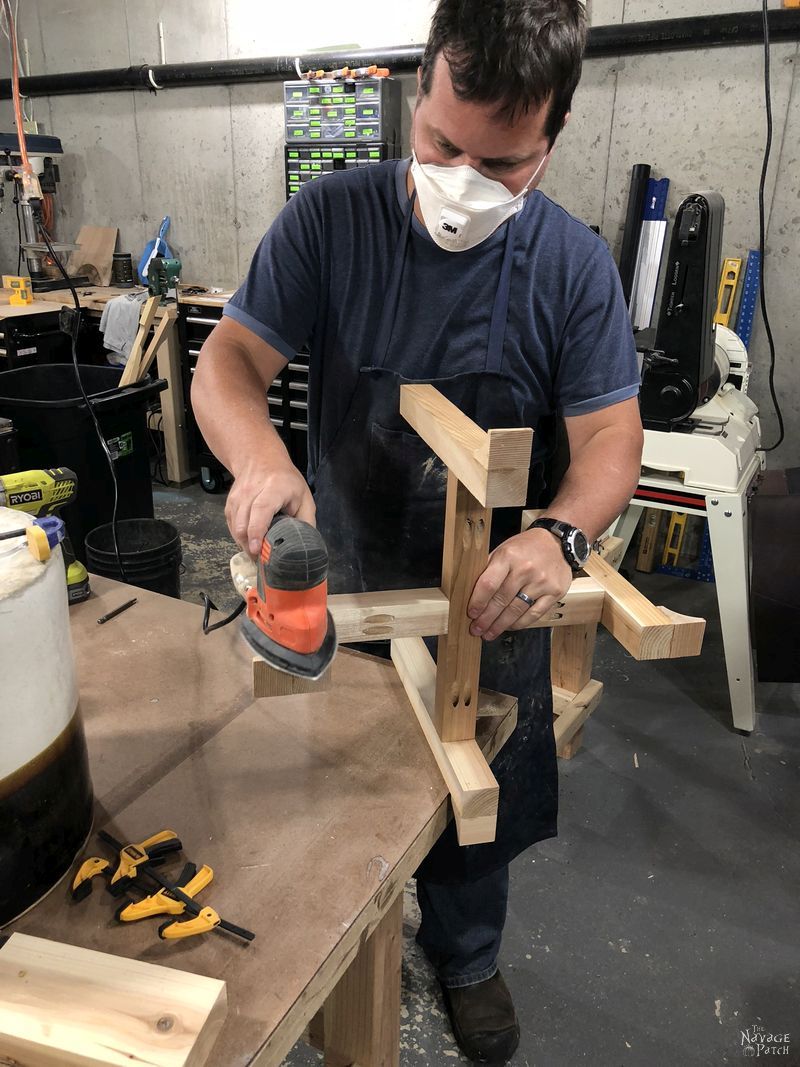
The last part of the build was making and attaching the feet. I cut four 1 5/8 inch blocks.
I tried two ways to get the shape I wanted. For the first way, I put the biggest sanding drum on my spindle sander and just sanded the block down to the right shape.

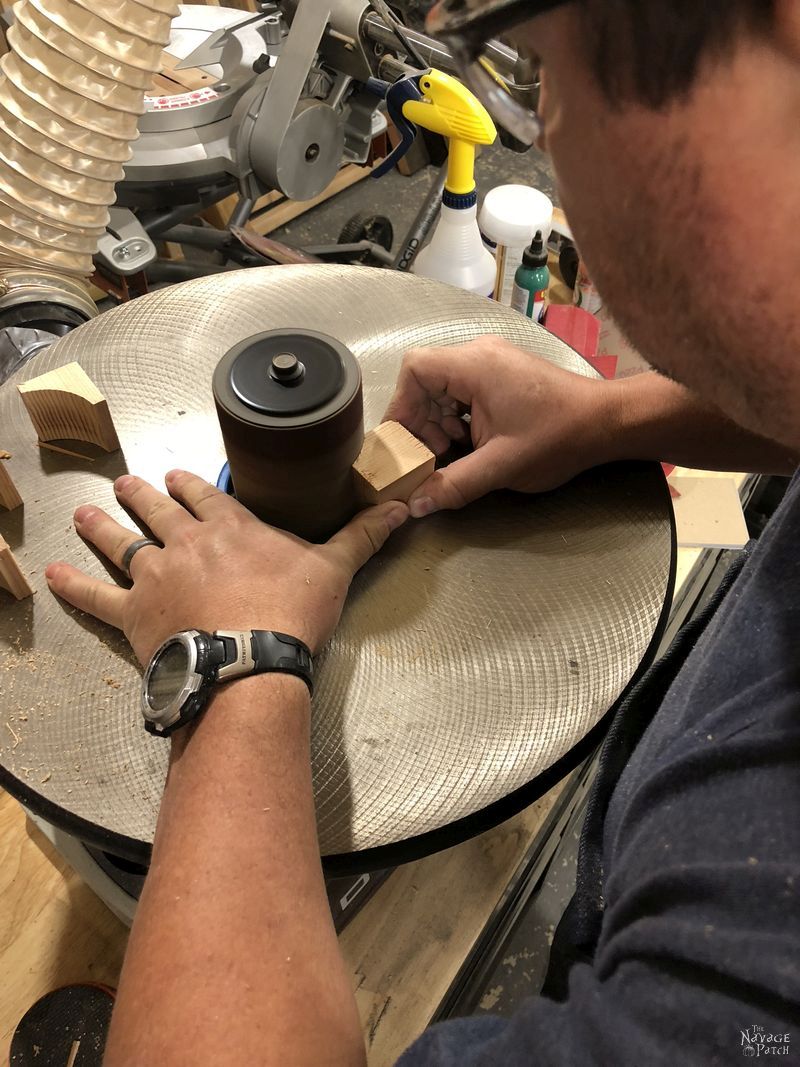
That worked pretty well, but it ate up the sanding drum pretty quick, and it was a little time consuming. The second way was much quicker. I removed the sanding drum from the spindle sander and used it to trace the shape I wanted on each of the blocks. I then cut out the shape with a band saw (a jigsaw will also do) and cleaned it up with the spindle sander. I was working alone while doing it that way, so I didn’t get any pics.
Once I had the feet all cut and sanded, I attached them to the legs with a little wood glue…
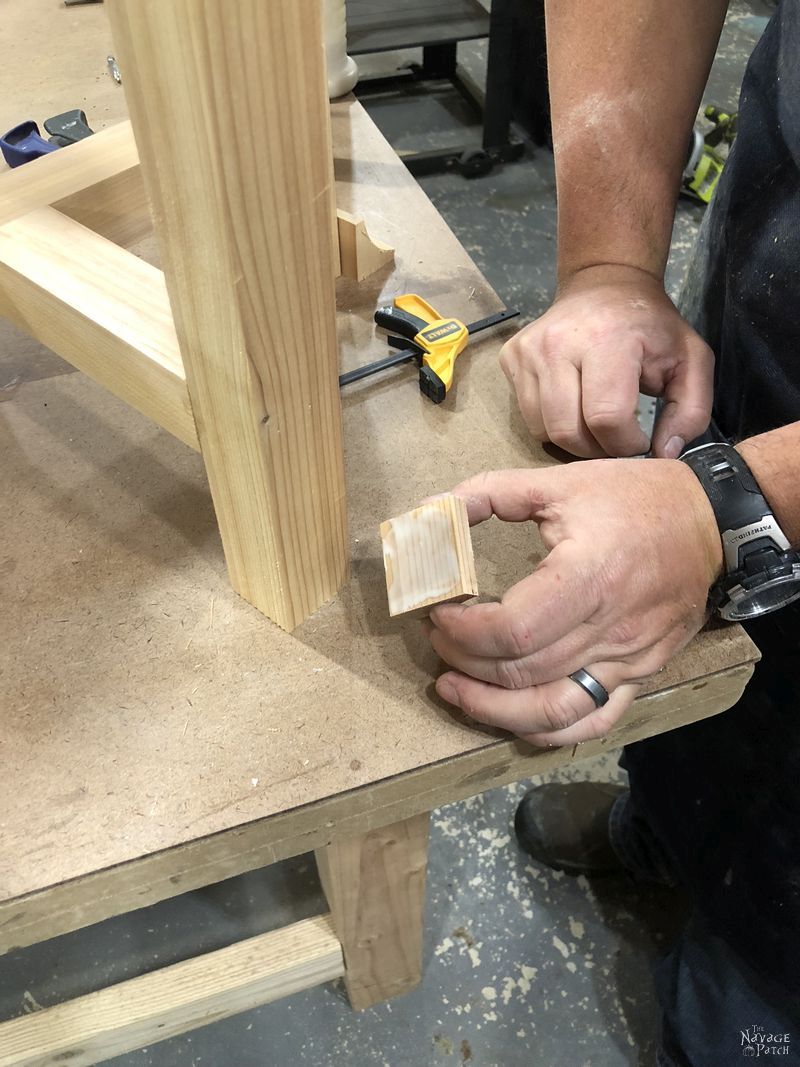
…and then I clamped them in place and let them dry.
I took a break while the glue dried.

When the glue was dry, I gave it a quick sanding with my detail sander…[Hey! That’s my detail sander, you silly bugger! Go get your own! -Handan]
…and then I stained the plant stand with Varathane Kona.
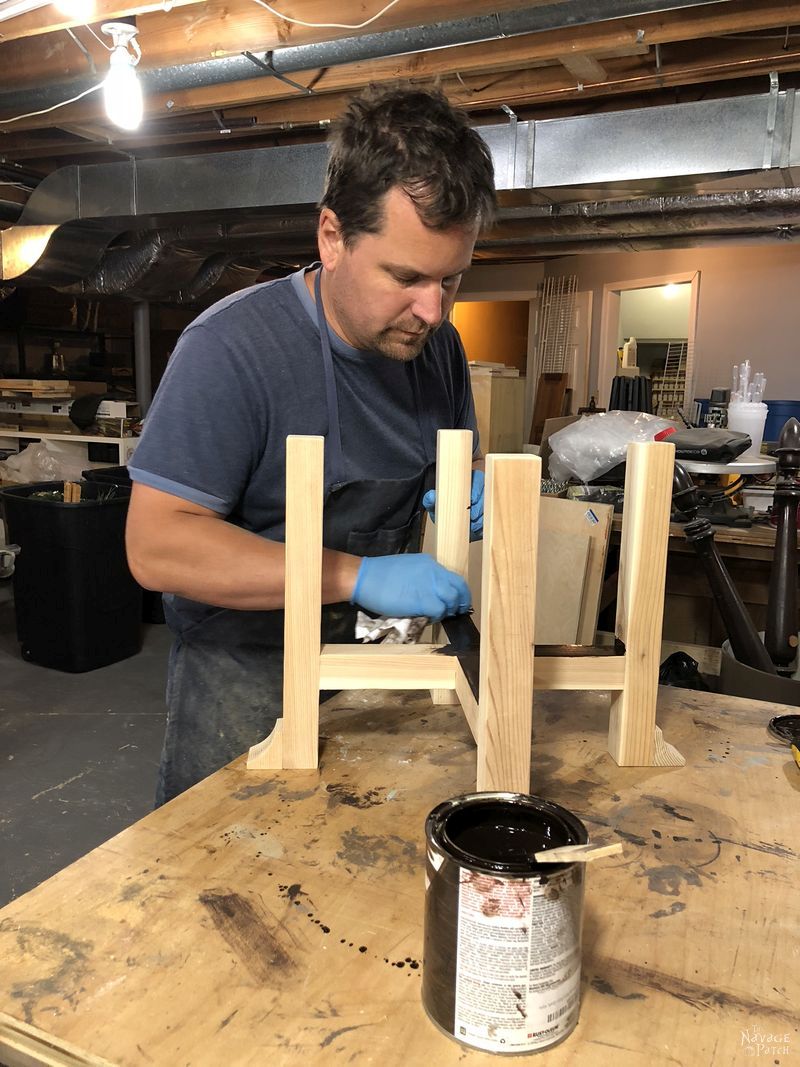
I let the stain dry for a couple of days and then sealed the stand with 3 coats of spray-on spar urethane.

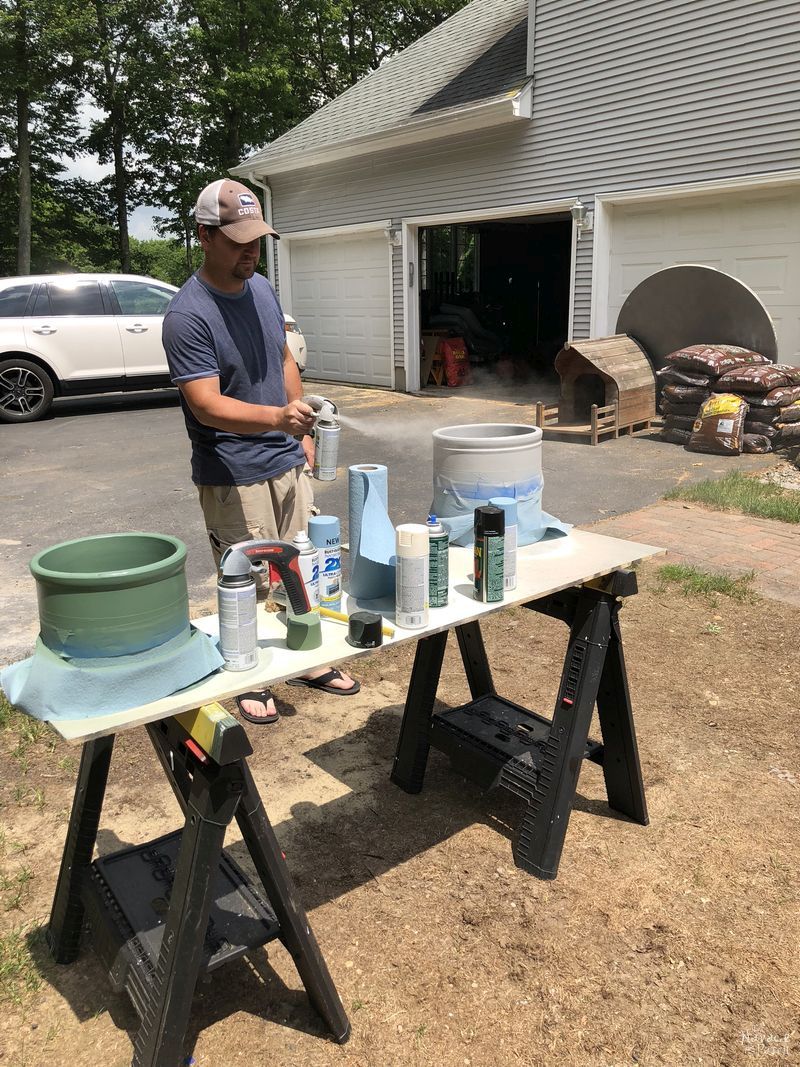
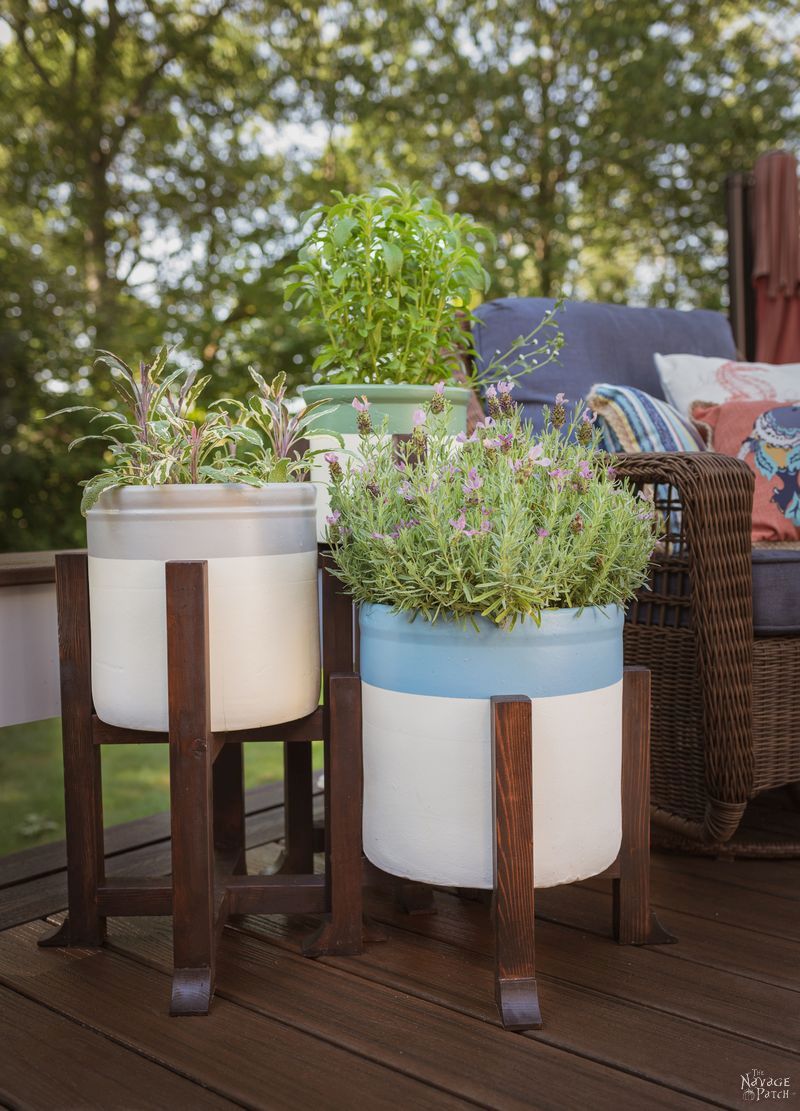
Next, it was time to paint the crock. I went with Rustoleum’s Heirloom White in a satin finish. I would be adding a second color over the Heirloom White. For this planter, I chose Rustoleum’s French Blue.
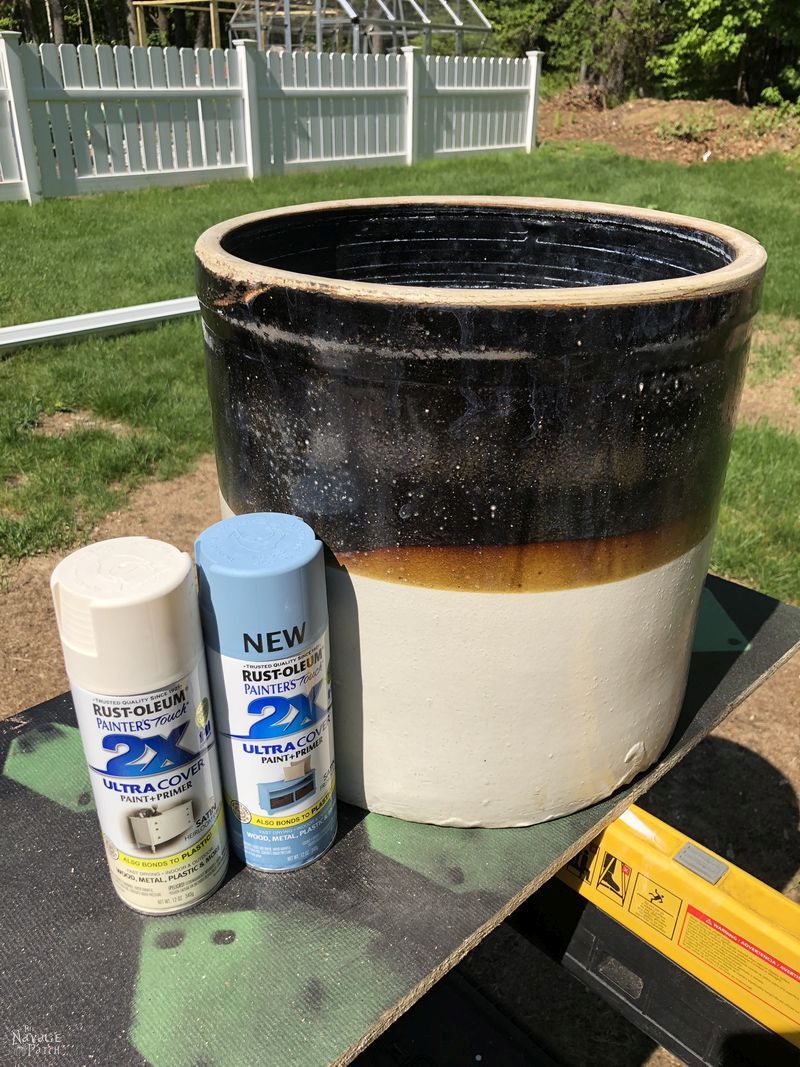
The Heirloom White matched the original light color of the crock. I wasn’t intentionally going for that effect, but there it was!
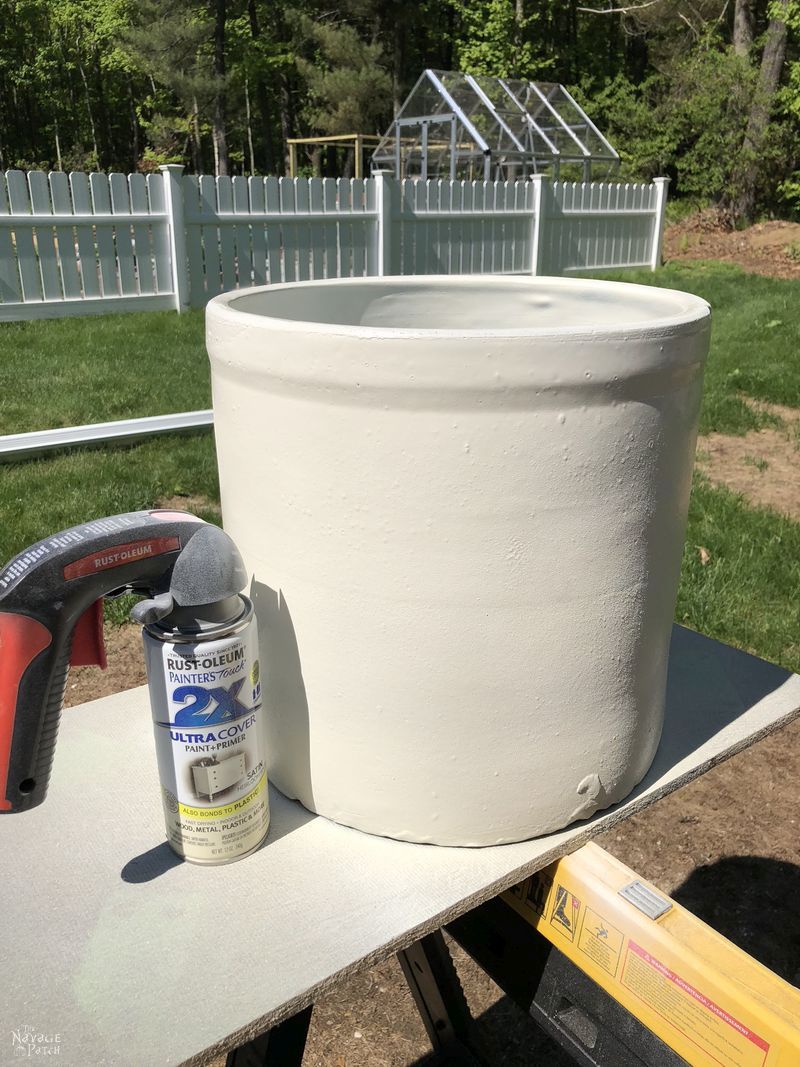
I applied 3 coats of white and let it dry. Then I measured and marked 9 inches up from the bottom of the crock. This was where the tops of the legs would be. I carefully wrapped painter’s tape around the crock, being sure to keep the top edge of the tape at the 9 inch mark. Next I wrapped paper towels around the bottom white area and taped them onto the first ring of tape.

I don’t have pictures of painting this exact crock, but Handan took some of me painting the ones afterward, because nothing is more exhilarating to watch than some middle-aged dude in shorts and sandals with a can of spray paint and two lily-white legs.
Oh, you like that? You want more? Well, here ya go. BAM!
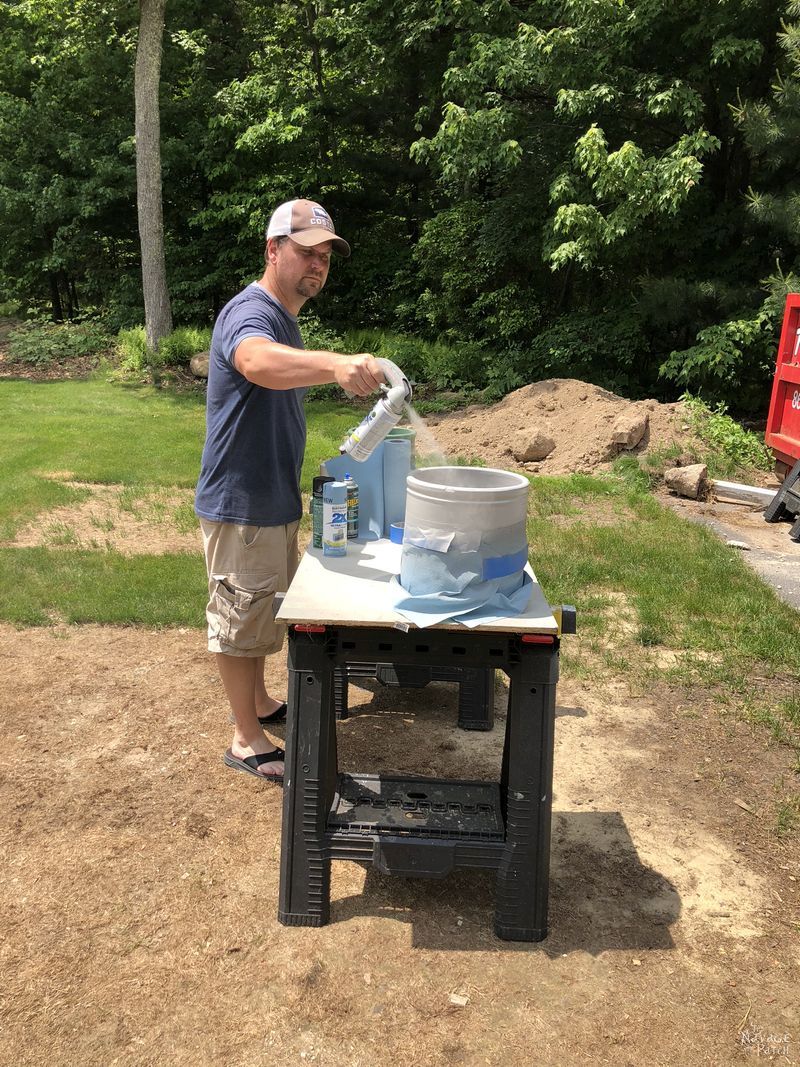
Phew! So much action! So much excitement!
When the paint dried, I hit the crocks with a few coats of spar urethane, and the crowd went wild! It’s probably not the best option if you’re planning on painting these things anything close to a pure white, as it will yellow them immediately. But since Heirloom White is already aged-looking, the yellowing effect isn’t too drastic.
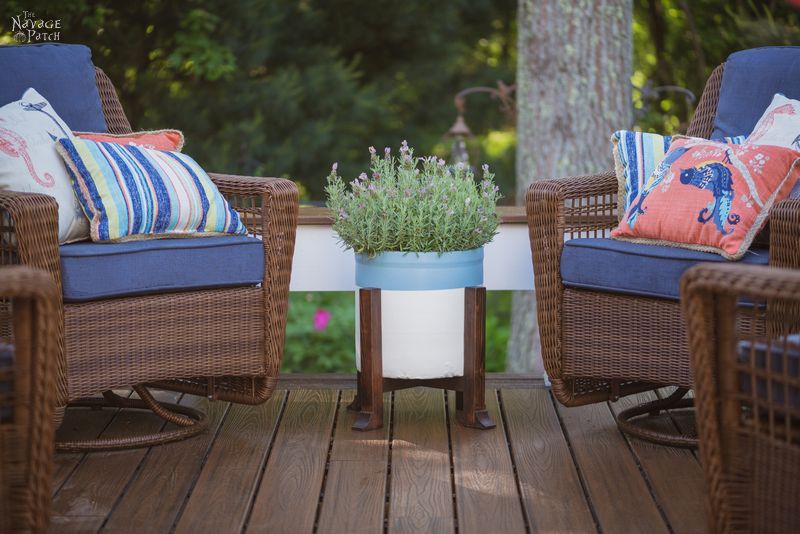
When the urethane had dried, I plopped the planter into the plant stand, and I placed it on the deck. Within moments of sensing an empty vessel (seriously, it’s like she smelled it – she wasn’t even outside!), Handan rushed to fill the void with something green.

I had a sneaking suspicion at the time I finished this one that Handan would also want me to make a tall one, too. What I didn’t anticipate was her request for two more! How many friggin’ crocks do we own??
*Sigh* Okay, back to the basement.
I made two more – one for a number 4 crock with an 11 1/2 inch diameter, and one for a number 2 crock with a 9 inch diameter. Each of those plant stands has two cross pieces. I’ll give the cut list after the photos.
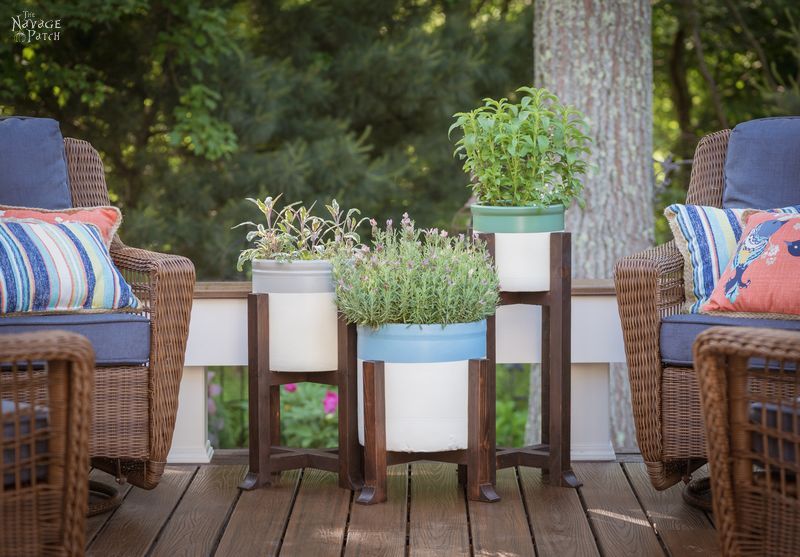

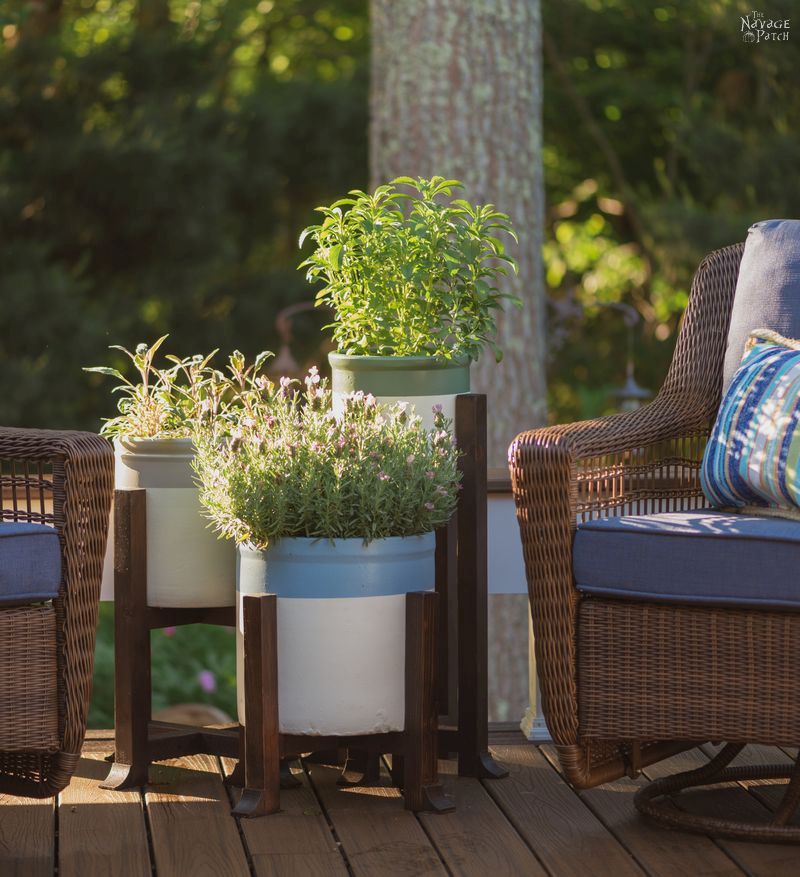
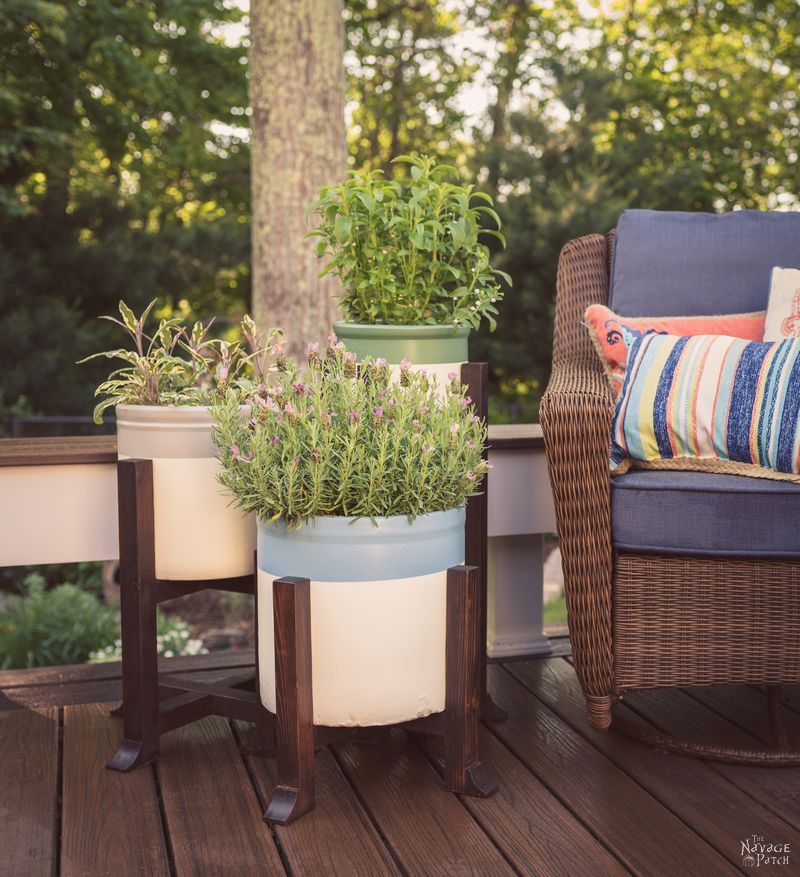
I felt tremendous satisfaction upon finishing these three Pottery Barn inspired planters and plant stands. I sat in the chair next to them with a cold beer in my hand and nestled my head back into the seat cushion. The sound of cascading water drifted over from the pond, while the wrens bickered at the chickadees from the branches of the great oak overhead. I let my eyes close, and a deep calm overtook my body. My mind wandered and floated with the hawks and ravens circling above. A shaft of late afternoon sunshine caressed my face, and a smile formed on my lips, and then…
“HEY BABES!”
Like Ahab’s harpoon, Handan’s voice pierced my reverie.
“Hey Babes?”
She was happy, that much was obvious from her tone. But as we all know, “Hey Babes” means one thing and one thing only: more work.
I lifted my head, and the sun slipped behind a cloud. “Yes, my babes?” I said.
She walked onto the deck with a crock cradled in her arms – a number 4 by the look of it.
“Hey Babes, look what I found! You did such an awesome job on the first three, that I’ll be asking you to make another one for this crock!” She flashed her happiest smile.
Who am I to say no to that smile?
“Yes, my babes. Of course I will.”
Cut list for Pottery Barn Inspired Planter & Plant Stand
Rip cedar 2x4s in half lengthwise to get two strips of 1 1/2 x ~1 5/8 inches.
For number 6 crocks (~13 inch diameter)
(4) 14-inch pieces
(2) 13 1/16-inch pieces
(4) 1 5/8-inch pieces for the feet
For number 4 crocks (~11 1/2 inch diameter)
(4) 20-inch pieces
(4) 11 9/16-inch pieces
(4) 1 5/8-inch pieces for the feet
For number 2 crocks (~9 inch diameter)
(4) 26-inch pieces
(4) 9 1/16-inch pieces
(4) 1 5/8-inch pieces for the feet
We love it when you share our posts on Facebook and Pinterest!


Another impressive creation from the patch, i have a mind much like Handans, unfortunately my old fossil doesn’t have your D I Y skills (how we laughed when a disabled neighbour whose garden we look after bought him a tool box and a few tools for Christmas) he is now known as tool box Tony and to be fair has successfully done a few odd jobs for me.
I think Toolbox Tony is a great name! I wish I had a similar moniker!
You’ve inspired me to make something else. This is the first time I’ve used my Stanley miter saw (a gift for christmas). I’m making a bench with XX’S IN the front and it has two different angle cuts. It’s my first time making the angle cuts and I did it. All my parts are cut, so tomorrow I will put it all together and then paint and chip it and it will go on the front porch as a plant holder. LOVE IT!!!!
Awesome! Go get ‘em, Cheryl, and please send us pics of your creations!
Wonderful!
Thank you, Janice!
Love your projects but the commentary just cracks me up..so funny ?
😀 Thank you, Kaz!
hey babes, hey babes, babeeessss another nice job lmao gunja greg xx
LOL, thanks, Chris! 🙂
You did a fabulous job. I really liked this DIY planter & plant stand. Thanks a lot for sharing this post.
Thank you!
Love, love, LOVE these!! (one love for each planter pictured) The varying heights and sizes are so nice together, great job.
Thanks, April! 🙂
Excellent! I want your workshop and tools Greg, you make such great projects out of there! Handan you made the right call… they look great on the deck! Pinned it!
Thank you, Susan! It’s almost time for them to go back outside. I can’t wait! 🙂
Great job. Love the feet on the stand. Very cool. And the colors you painted the pots, very calming. Great job. I just might have to try this one….. thanks for sharing.
Thank you so much, Nancy! 🙂
So……..
Since those large crocks are just in your way while your strolling around NE….Can you send me a #6, 4 & 2?
I mean I’d be helping out with ALL that clutter,….right?
And I could make my own hubby into my version of…”Hey…my babes…?”
Sure, Susan! And you can send all of that PNW smoked salmon that’s probably just cluttering up the streets out there! 🙂
You did a wonderful job! I love how the colors toned with your deck furniture and camouflauged imperfections in the crocks. Being a purist and New Englander (grew up in NH, now live in Maine), I would have left the crocks “natural”, but that’s only my preference. I am STILL looking for reasonably priced crocks–antique stores here charge a small fortune for them!
The price differences between US regions and even intra-state are incredible, Kathy! We got most of ours either from my mom or at tag sales or thrift stores. Forget about antique shops – total rip off!