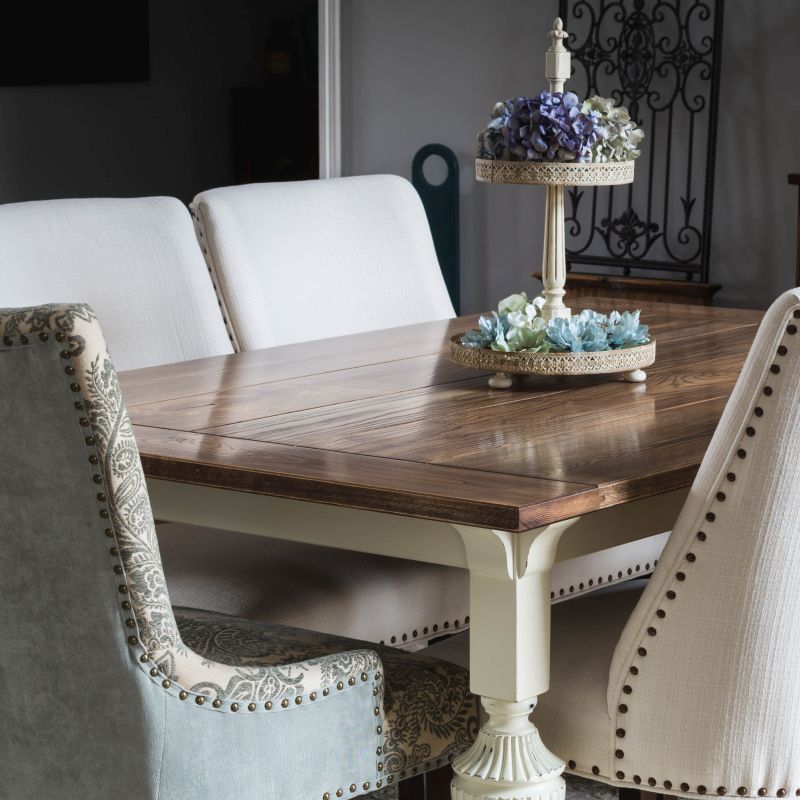
Farmhouse Dining Table with Gothic Revival Legs
You’ve never seen a Farmhouse Dining Table like this one! We made a beautiful upscale farmhouse-style top and paired it with antique Gothic Revival legs!
Part 3 of our Dining Room Makeover Series. For an in-depth look at the colossal failures leading up to this table, please read the introductory post (go on, you know you want to).
It’s ALIVE!
Well, not really. I mean, it’s a table, right? Though that would be kinda cool. Or creepy. Or both. But it’s finally finished! After two years and eight months! It’s done! And you can’t blame me for the Frankenstein reference, because this table has a lot in common with Mary Shelley’s monster. Granted, it’s not a hideous and pitiable beast out to kill its creator for bringing it into the world (good thing for me!), but it was assembled from spare parts, much like Dr. Frankenstein’s creation. And the table from which I harvested the parts hails from the Gothic Revival period. Mary Shelley wrote her novel during the Gothic period. Coincidence? I think not! And the table itself represents the unholy union of two styles that were never meant to coexist in the same room, let alone in the same piece! Farmhouse and Gothic Revival? Are you freaking kidding me? What’s next? Cabbage ice cream? Polished Italian marble floors with orange shag carpet accents? Bubble gum and peanuts?
*Sigh*
Here we go again. Greg, the Unplanned and Unthinking, launches headlong into another half-baked idea…
But this time it’s different! You’ll see! Come…have a look!
Part 1 – The Plan and the Wood Shop
Okay, for anyone here who hasn’t gone back and read the intro post like I asked (you know who you are!), here’s what the table looked like just after I began my first attempt to refinish it:
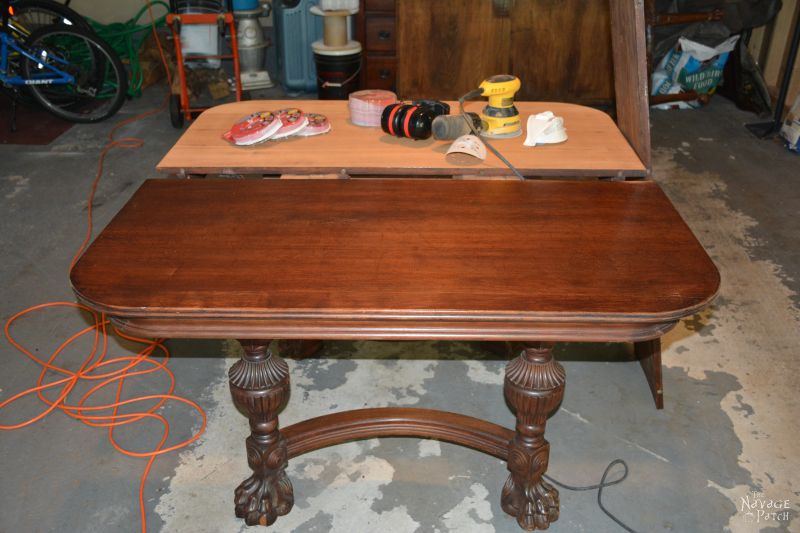
In that post, I called it a Victorian dining table. I was wrong (shocker!). It’s actually a Gothic Revival table. Anyway, without rehashing that post (that you should certainly have read by now, right madam??), I botched the job over and over again and then finally quit in disgust. I pushed the table to the corner of the garage and forgot about it for 2 1/2 years. But Handan had a plan for it. She wanted me to make a new top. A “farmhouse” top. That sure would solve the problem of refinishing the old one!
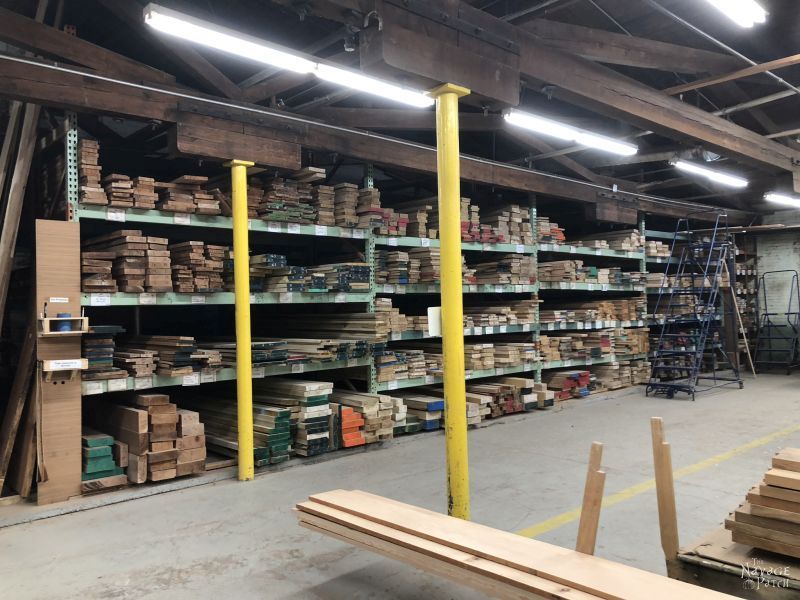
So with new plan in hand, we set about measuring our space to determine how big a tabletop I’d be building. Once we had our measurements, we headed over to Parkerville Wood Products – my source for quality domestic and exotic wood. I know that sounds like a paid plug for them, but I assure you, they don’t know I exist.
Handan had a vision in mind – a pretty standard “Restoration Hardware” kind of vision. You know the look: weathered pine, matte finish, and “farmhousey” out the wazoo. We looked through all the boards, and of course, Handan’s eye naturally fell upon the most expensive exotics like they were calling to her with the sweetest siren song.
“Oooooh, my babes! What is this one? I love it!” Her eyes shined as she stared at it.
“Yeah, that’s teak, my babes. We’d have to take out a second mortgage, sell one of my kidneys and rent Barish out as seasonal farm labor to afford that.” Her smile didn’t falter and the eyeshine didn’t fade. She looked at me, expectantly. Good lord, she was actually considering it!
Fortunately, my kidney and Barish’s back were saved by one of Parkerville’s employees who chose that moment to inform us we couldn’t possibly afford the wood on which my wife had started to drool.
Phew! Dodged a bullet there!
We told him what we were planning, and he no doubt thought we were a couple of total noobs desperately trying to hop on the next trendwagon to Hipsville. I let him keep that notion. Better to let him think I was a total idiot than to open my mouth and confirm it.
When she finally tore herself away from the teak, Handan took a keen interest in a stack of reclaimed wood. Our new friend couldn’t positively identify the species – it was likely over 100 years old – but Handan loved it. It certainly had that “weathered look” in spades. We may have even ended our search right there, but a quick calculation of my needed board feet showed that there wasn’t nearly enough of it for the tabletop. We’d have to pick something else.
Our guy extricated us from the exotic-and-reclaimed room and led us back to the mere mortal domestic woods. After shuffling through several species and being roundly rejected by either Handan or me, he finally suggested ash. It was one of the cheapest species they carried. I’d never worked with it before, but I was willing to have a look. Much of it was pretty boring and unappealing, but some boards had great color and grain. Handan and I looked at each other, shrugged and said, “Yeah, why not?”
We sorted through the stacks of ash, and pulled out the best 12-foot boards we could find. Our guy then cut them in half for us.
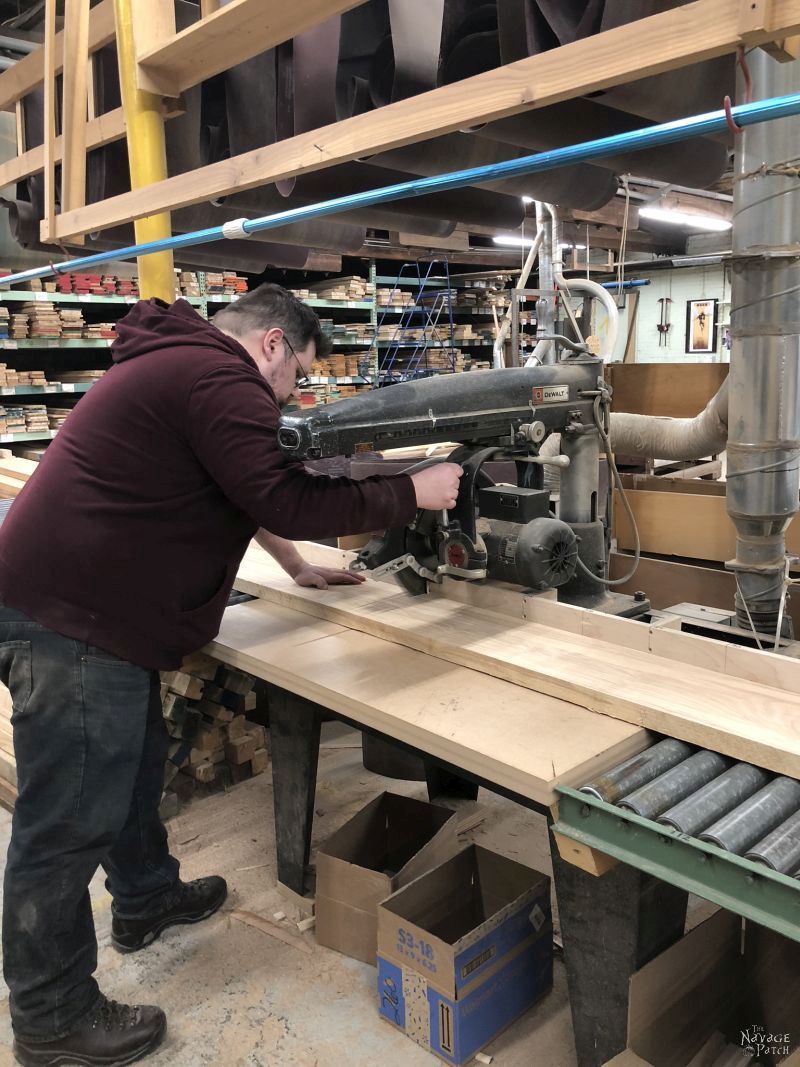
Parkerville is not just a wood store, it’s a full-service, large-scale wood shop, too. Every time I go there, I get a wicked case of machine envy.
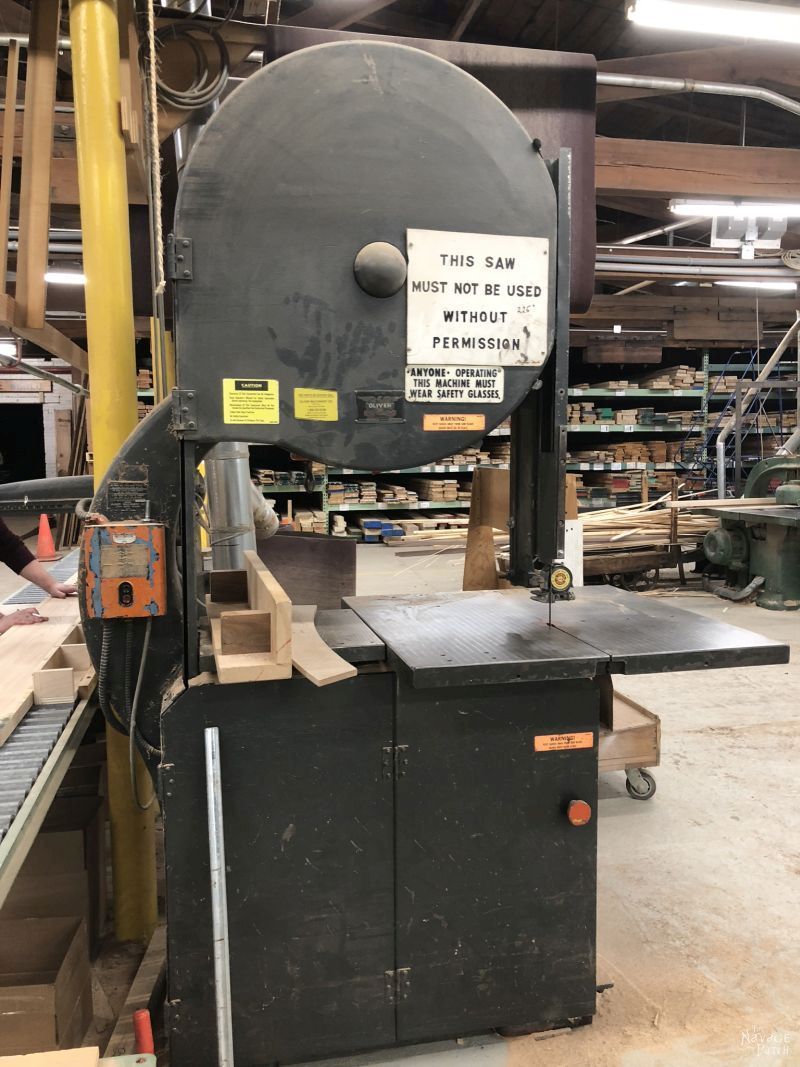
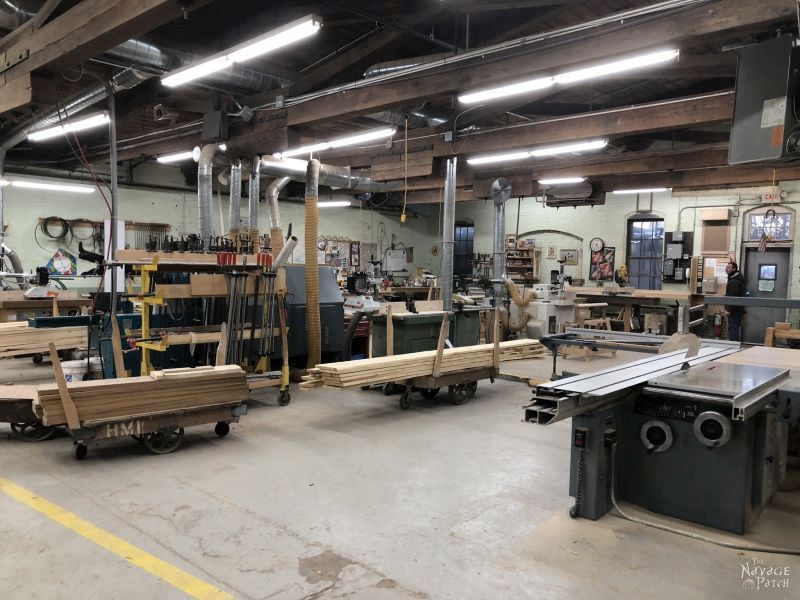
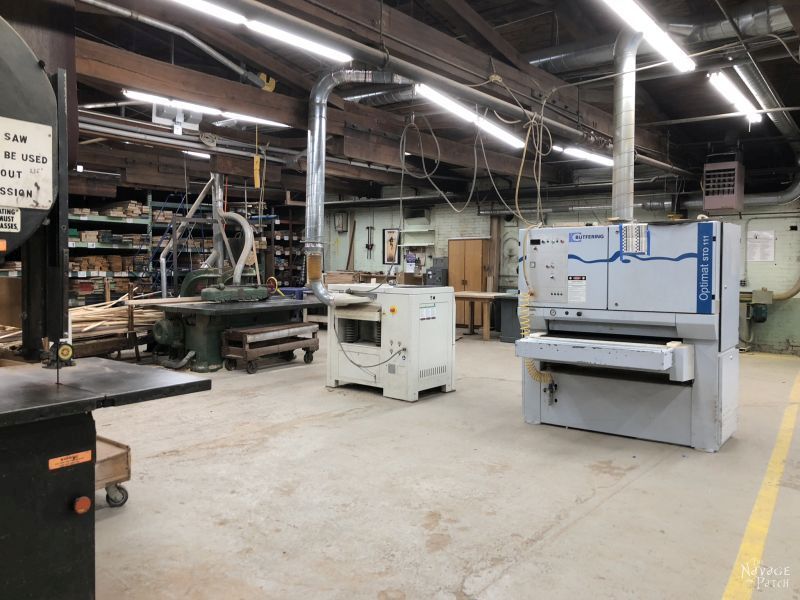
I wiped up my own puddle of drool, paid for the boards (about $250) and hit the road.
Part 2 – Building the Tabletop
Back home, I lined them up for inspection.

Those shorter boards would be the end boards.
They looked pretty good standing at attention, but I wanted to see how they looked horizontally, so I plopped them on my work table. Since my table is only four feet square, the boards ran off the edges. I placed the end boards on top of the others, just to get a rough idea of the final form.
Okay, I could see a table in there. I arranged the boards into a configuration I liked, and then made sure I alternated the grain pattern on the ends.
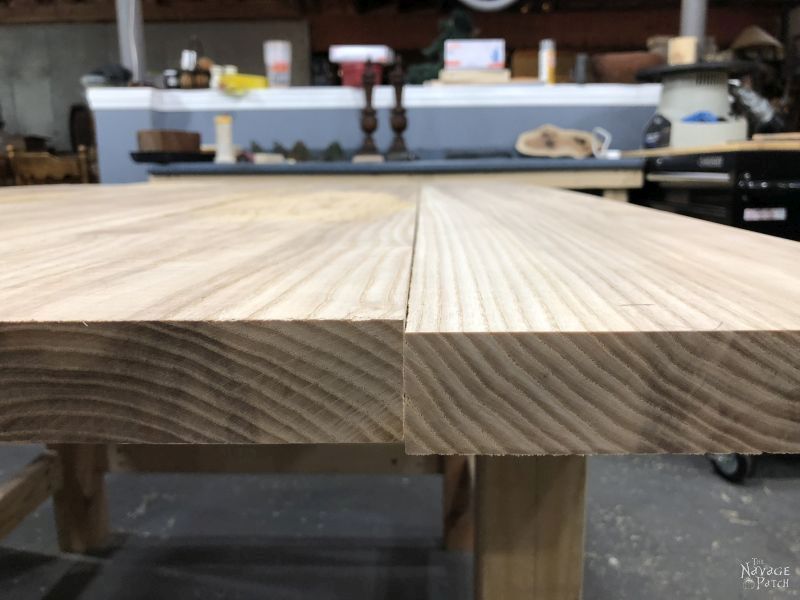
You can see on the two boards shown above that the board on the left has downward cupping grain, and the board on the right has upward cupping grain. Since I would be gluing the boards together, it was important to alternate the grain like that to balance out the wood’s internal stressing, so the table wouldn’t warp.
Everything needed to be planed and cut a bit, so I pulled them off the table for a loooong session of planing.

I told you it was a long session. This was my dust collection bag after planing. The bag was about 1/4 full when I started.

Once the boards were planed, I cut them to the appropriate width and length.
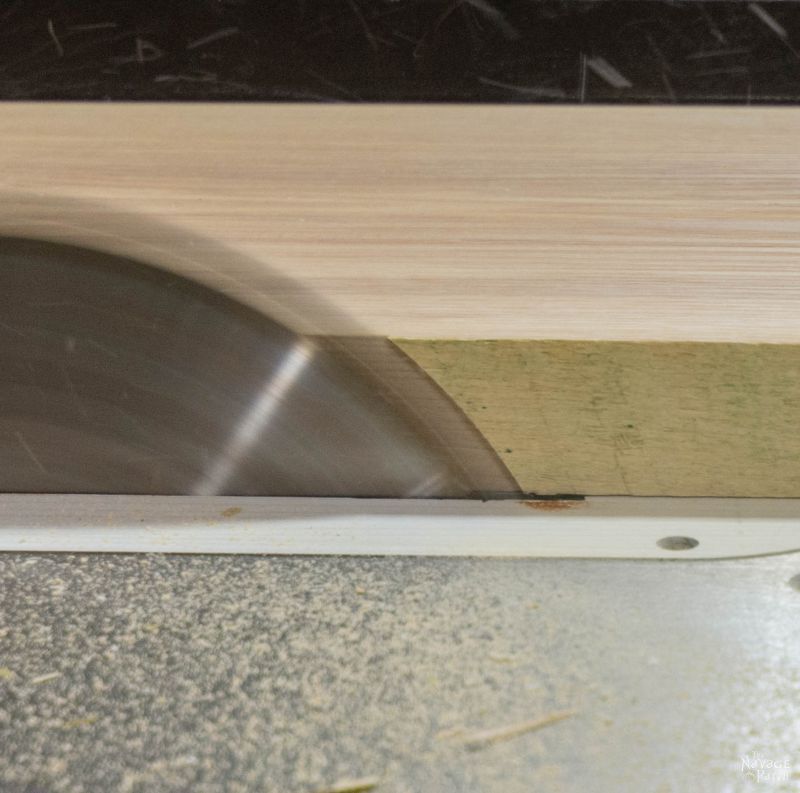
Before gluing them together, I routed the edges with a chamfer bit. In layman’s terms, that means I put a 45 degree bevel on the edges. This would give a slightly “farmhousey” appearance to the table, as if there were a gap between the boards, when in fact there would be none.
The boards were then ready for glue-up. This was exciting! The table was about to start taking shape! I applied glue to the edges.
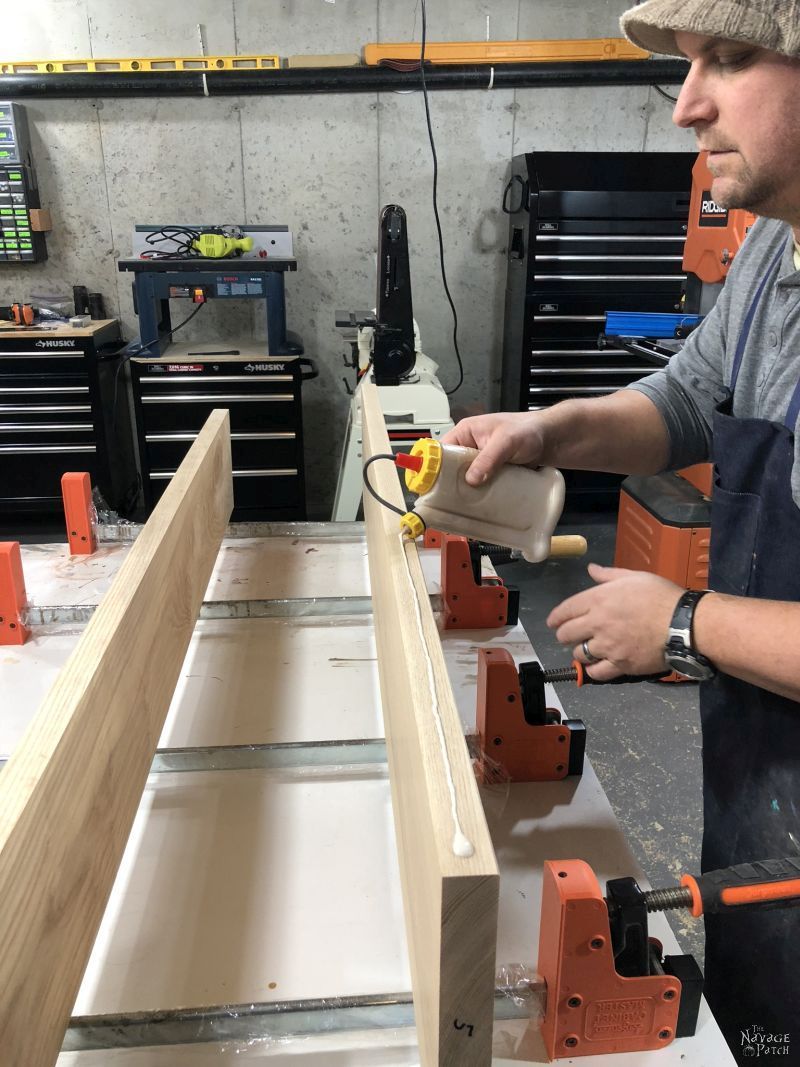
As I put the first two boards together, I realized that they were both a little warped. I don’t know how I missed this earlier, but it was too late for crying. I had glue on the boards, and they were going together, warped or not.
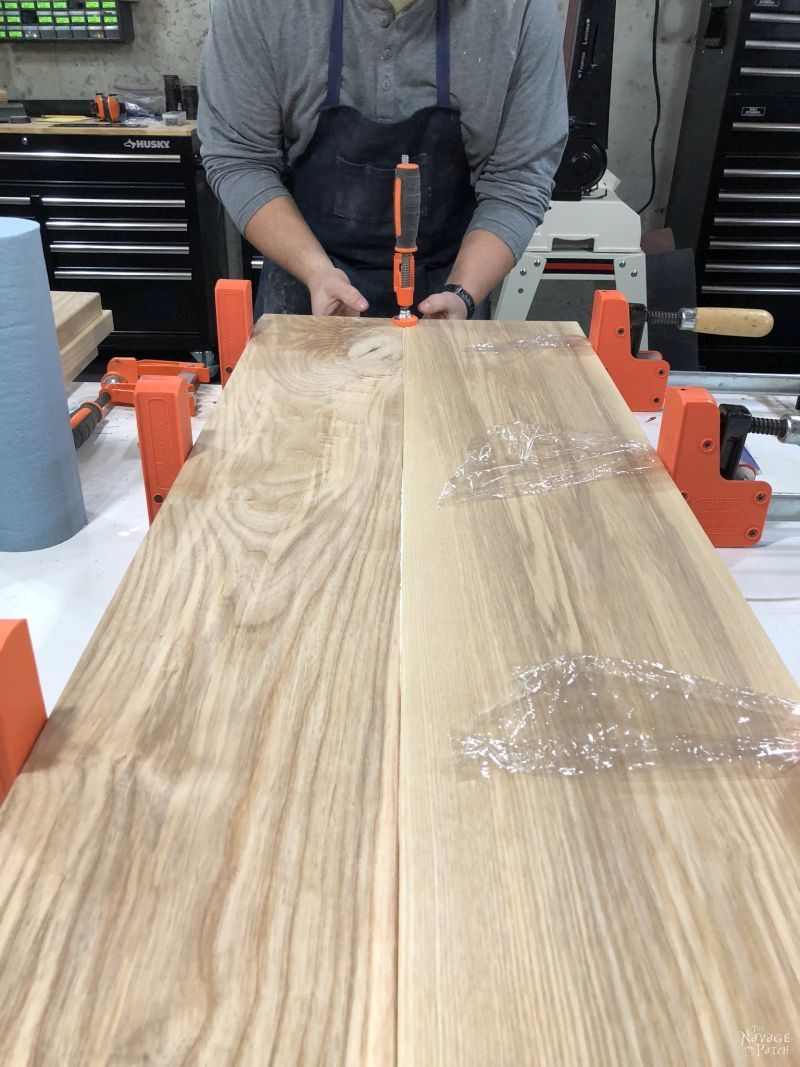
“Babes!” I yelled into the dusty air. “BABES!!”
Handan came running at breakneck speed, thinking I’d severed a limb or lost an eyeball or something. “What is it, my babes?? Are you okay?”
“Quick, climb up on the table! Stand on the boards!”
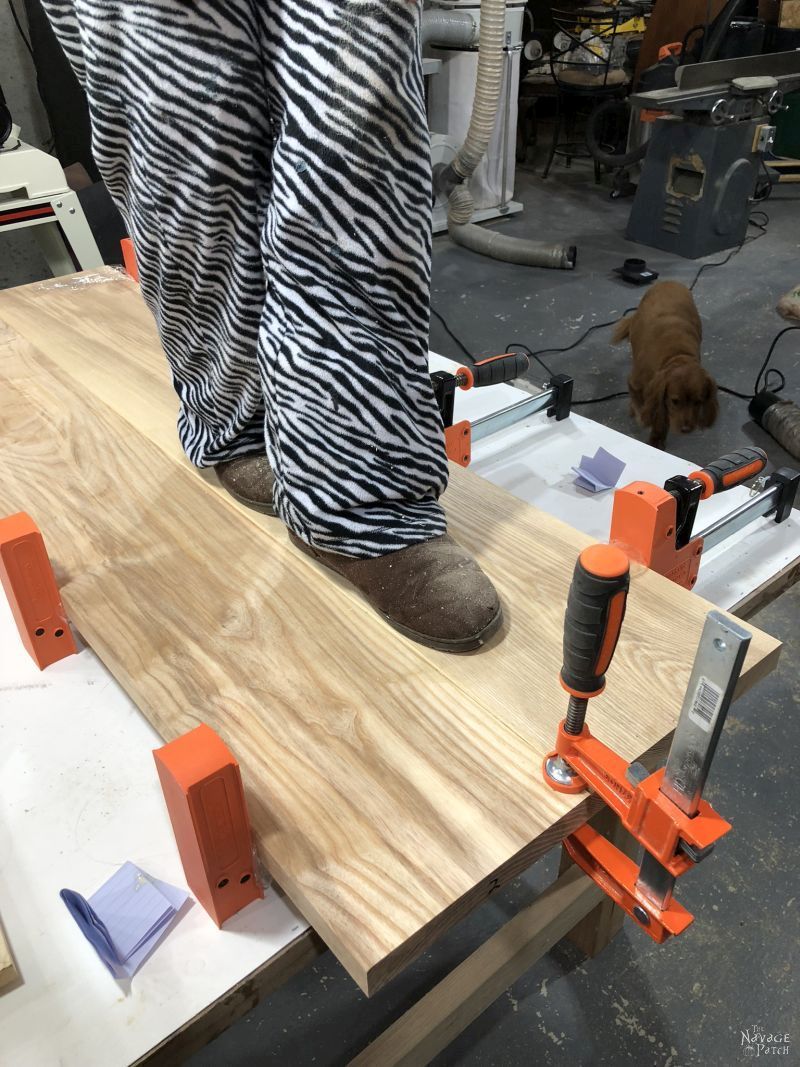
My wife’s bone-crushing weight was more than enough to straighten those boards out, lickety split! Handan’s dainty frame managed to push one of the boards down just enough to be usable. It wasn’t perfect, but it was better than it was going to be otherwise.
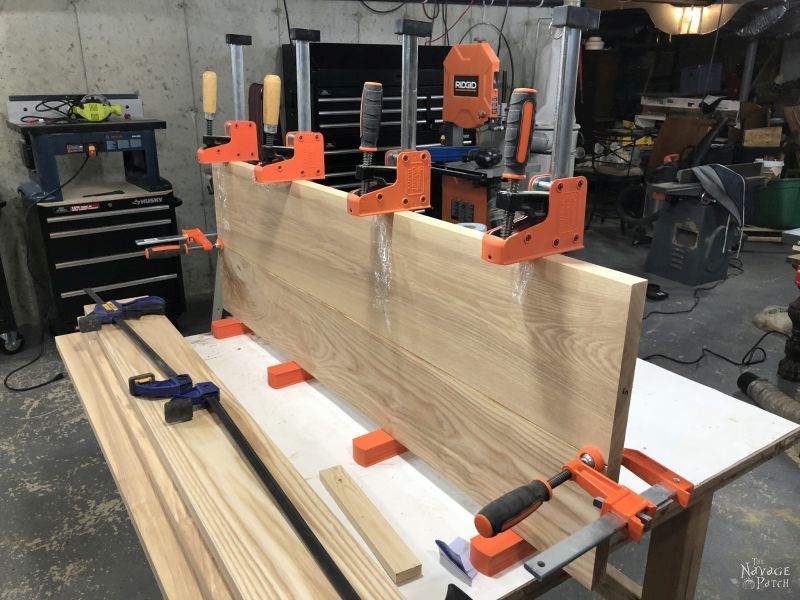
I clamped them tight and set them aside while the glue cured.
This process needed to be repeated the next day as well. She was more prepared the second time, and used the ceiling joists to her advantage.

I’m sure former professional furniture makers all over the world are rolling around in their graves at our techniques. We always seem to do things a little differently here at The Navage Patch. None of my projects ever goes smoothly, a fact Handan finally came to understand with this project, as I often needed her help.
Here was the last glue-up of the main part of the table: the two double sides that Handan helped flatten glued onto the middle board.
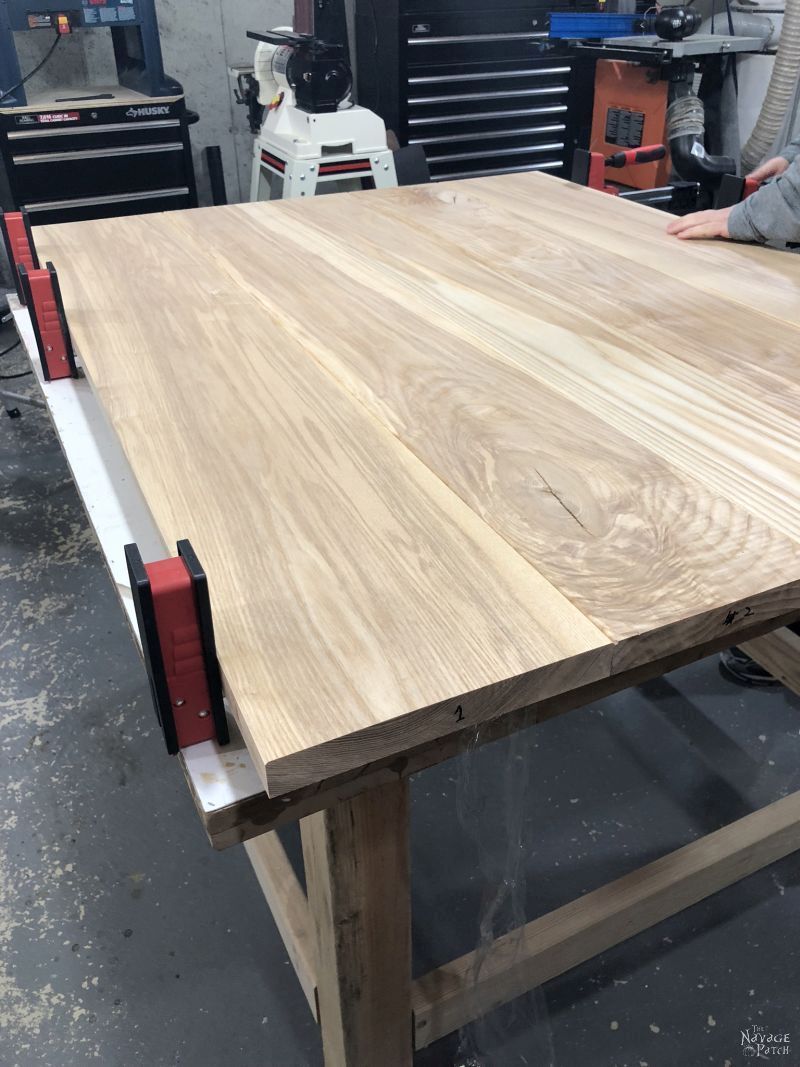
Once everything was cured, I had a look. It wasn’t horrible, but it certainly wasn’t flat. This was going to take a bit of sanding…
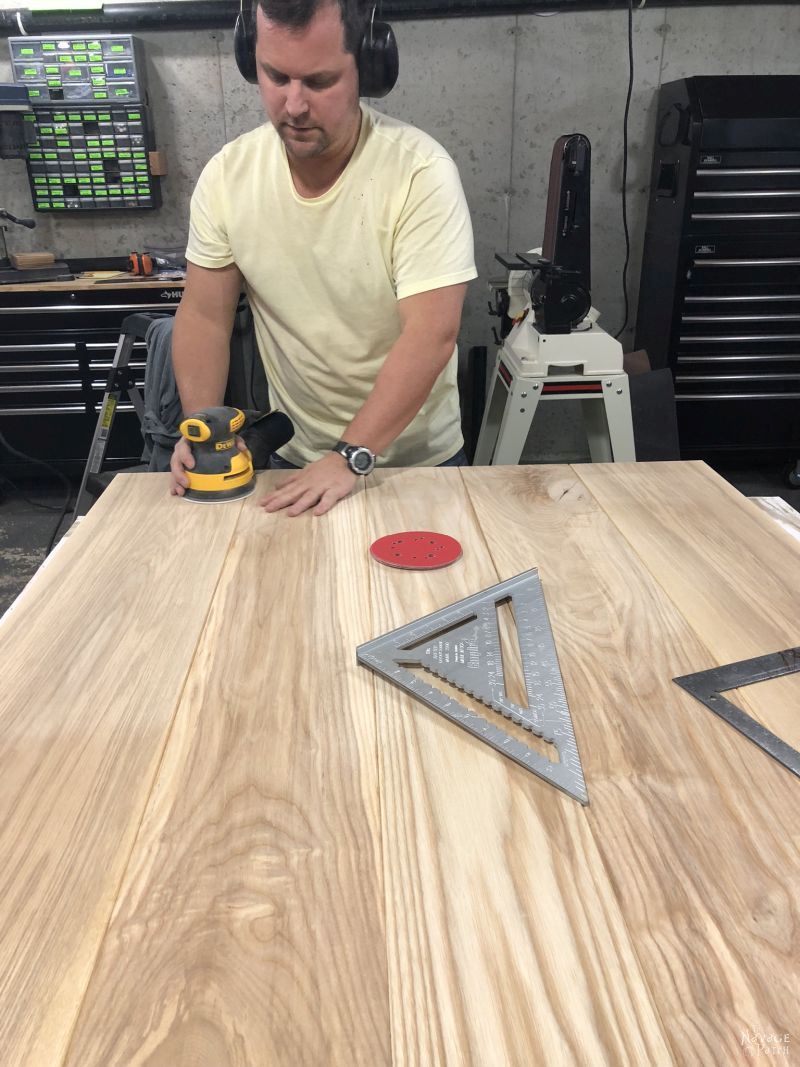
…and periodic checking to see if it was level.
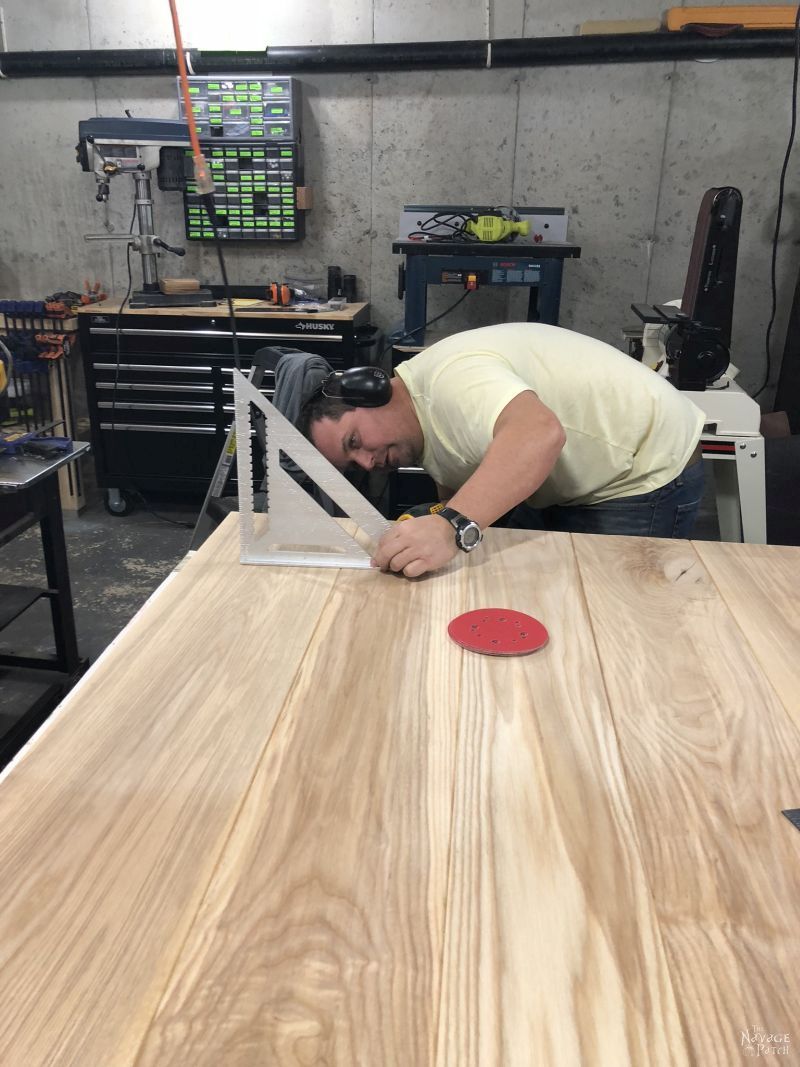
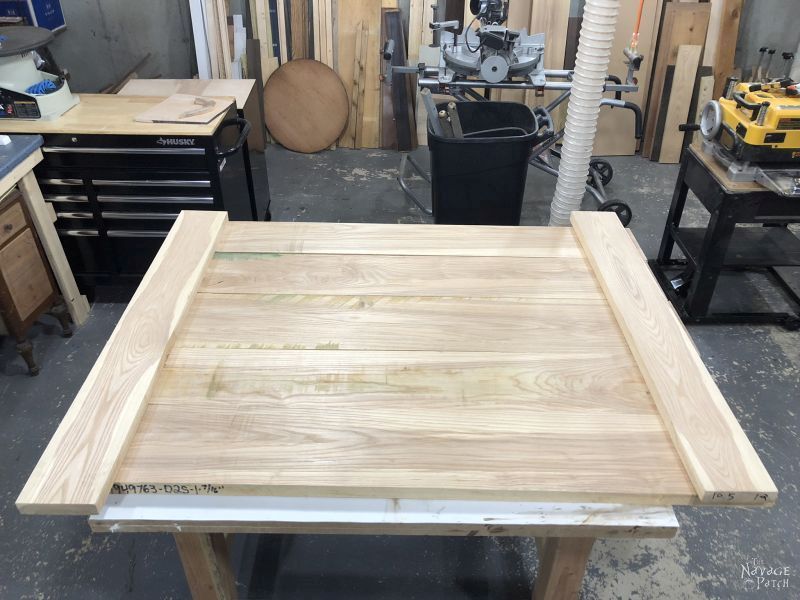
When I thought I had it properly sanded, I trimmed the edges so the end boards would fit flush.

But I just couldn’t get the end boards to match up flush with the end of the table. The board would always have a gap at the end. I tried over and over and over with my circular saw and edge guide, shaving off fractions of an inch each time.
No dice.
Couldn’t get it.
I finally deduced that it must be happening because the top was not, in fact, as flat as I had hoped.
I needed professional help. I admit it. The problem was more than I could solve.
Barish and I loaded the table into the car, and Handan and I drove it to Parkerville so they could run it through their industrial-sized belt sander.
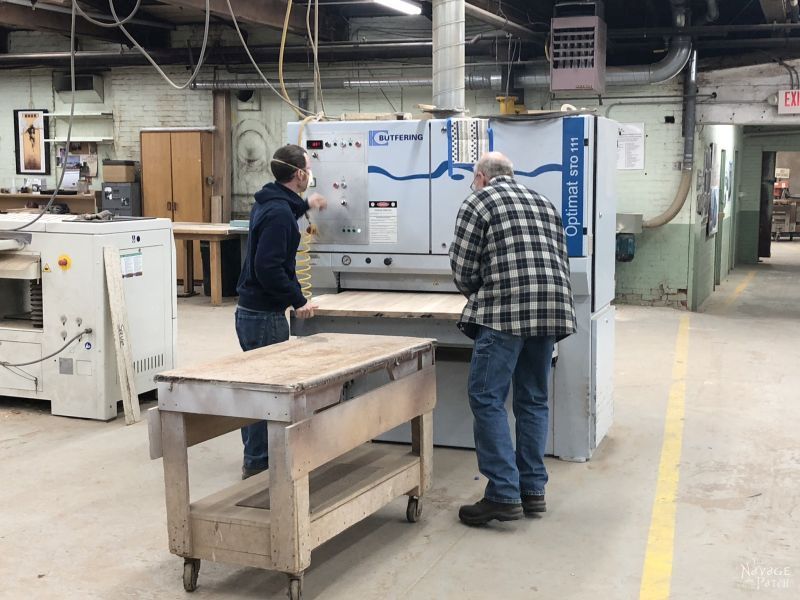
While they were at it, I asked if they could just square up the ends with their industrial-sized table saw.
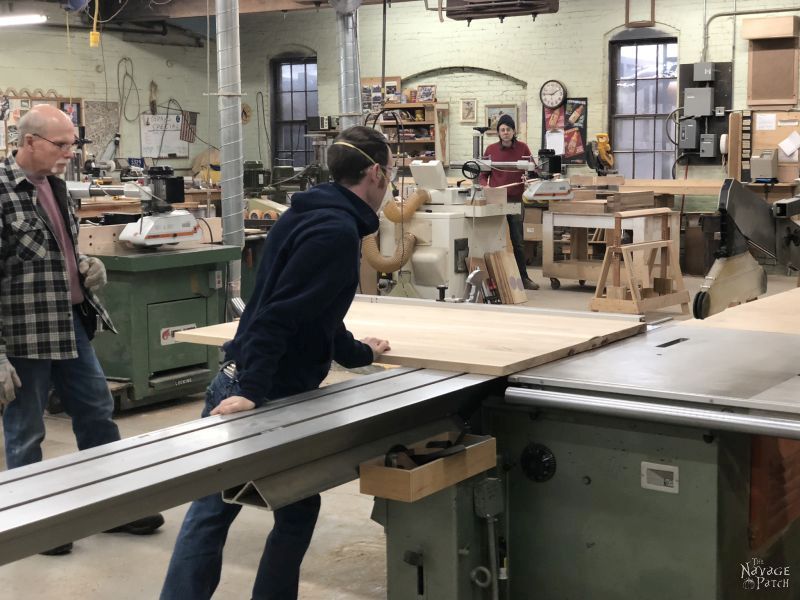
They loaded the table back into my car, and I apologized for the puddle of drool I left in their shop.
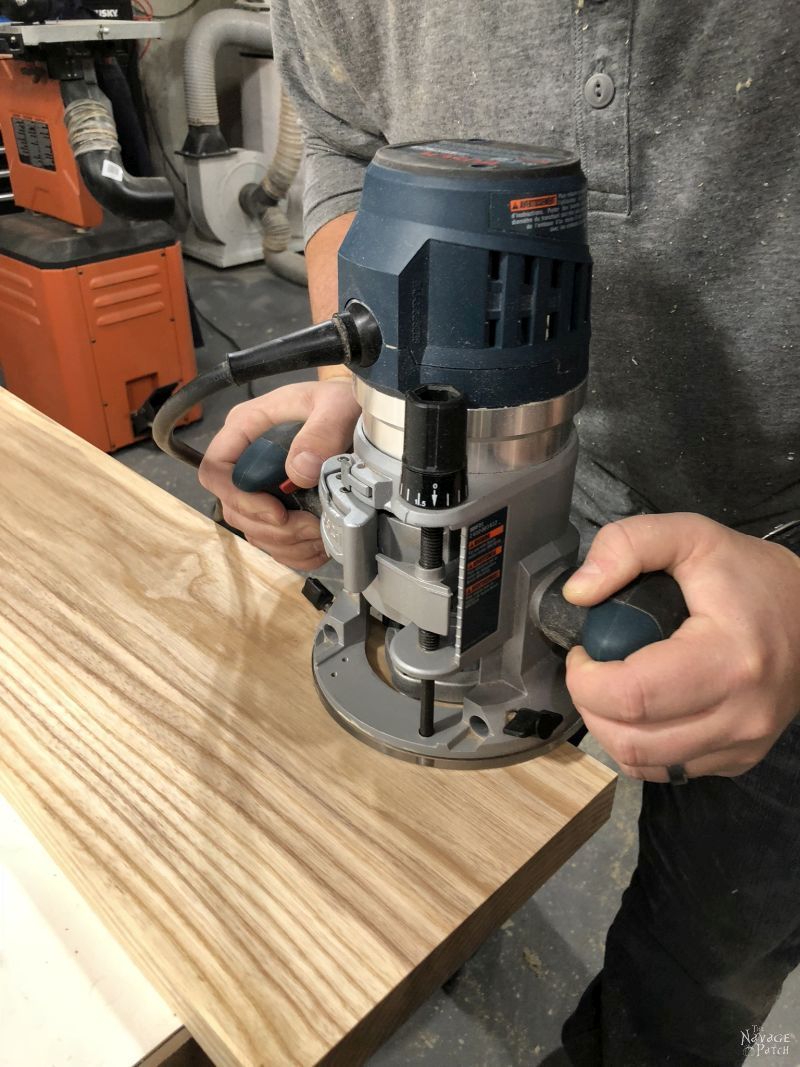
Back home, I checked the fit between the table and the end boards, and it was perfect. I would be connecting them with a spline joint. That means I would be cutting a small groove down the length of the end boards and down the length of the table ends. I would then cut a strip of wood to fit in the groove. This would add strength to the joint. To make the spline joint, I used a router and a 1/4 inch rabbeting bit.

I first routed a small section to see how it was going to look.

Click on “Next” to continue.
OMG! I was laughing so hard throughout this post. You are FUNNY!
Great job on the table. As always, very entertaining. .
😀 Thank you, Revital!
That is a beautiful table. Very well done. Love the chairs too.
You are such a talented writer! Great post. Very entertaining and informative. What a combo.
Thank you so much, Amy! 🙂
Your table turned out beautifully and I love, love, love the chairs you put with it. It’s more country chic! I have to ask where you learned your woodworking skills. I have none and would have nailed the boards together thinking glue wouldn’t be enough! I envy your and Handan’s skills! You should put out a how-to blog for dummies like me!
Thank you so much, Giselle! I learned all my skills through trial and error, YouTube and reading random stuff on the web. Trust me, I had no skills at all when we moved into this house 4 years ago!
Wowza, great storytelling and a gorgeous ending to the Table saga. Well done ?
Thank you so much, Jacqui! 😀
That project turned out gorgeous! What a great way to save beautiful legs from an old table. The entire project is to die for. Love the chairs too!
Thank you, Dawn! I appreciate that very much! 🙂
Gorgeous! What a beautiful table, the finish turned out beautifully. And those chairs….great choice! Handan is right, those little rings on the back really make them special! Perfect match.
Thank you, Claudine! Yep, Handan has a great eye for those kinds of things! 🙂
Great job. I felt your pain with those dark spots.
Love the chairs, too.
As a Brit I find how you measure in inches in the US so, so difficult. aarghh 55 1/16″ – 5 3/8″ Ever thought of going ‘metric’?? So much easier, believe me.
Thank you, Di! Lol, Handan wishes we’d go metric, too. I wouldn’t mind a bit, but until then, the Imperial system doesn’t bother me, either 🙂
BEE-YOU-TEE-FULL work! You have much talent for woodwork as well as writing! Thanks for sharing your efforts! The Dining Room is a stunner.
Thank you, Linda! We are thrilled with the table and with the dining room makeover! 🙂
GORgeous! You tackled a big job and it turned out great. I would have given up a long time ago.
Thank you, Jeanine! I would have given up, too…but Handan would never let me, lol! 😀
WOW!!! WOW WOW WOW!!! It’s fabulous!!!!
Thank you, Derry!
Absolutely beautiful. I did notice the feet are straight on instead of facing the corner of your beautiful tabletop, as they originally did. It looked odd to me so l compared them to your original photos. Any reason why? Great job!
Good eye, Hilary! Yes, there is a reason. If we had the legs facing out from the corners, it would have been impossible to attach them securely to the apron. We decided that facing out towards the ends of the table looked good enough, so we ran with it! 🙂
BEAUTIFUL!!!!! You and Handan made a gorgeous table. That table was special in its time, but you two created something you can be proud of every time you walk by it. I Love it.
Thank you so much, Cheryl! I am so proud of it every time I see it!
The table is gorgeous! Absolutely worth all the blood, sweat and tears! Simply stunning! I am going to have to try both wipe on poly and bondo!
Thank you, Barb! You will love both of those products!
Oh my freaking gawd! I can’t believe it! You have the exact same chair as I do! The green one with the arched back, in the basement. Mind you mine is in the storage shed waiting for a makeover.
Anyways, what a fantastic mammoth effort you did! I can feel the torment of perfectionism!
I love the way you are real and miss bits of the job. All comes good in the end though, hey!
One point; I notice you didn’t use biscuits joiners to join the table, just curious as to why?
Fantastic post and fantastic photos.
Well done!
Great minds think alike, Aletheia! I have four of those chairs that I bought along with a kitchen table back in 1995. It was my first adult furniture purchase! Regarding biscuits – they are not necessary when gluing pieces along the edge grain. A good quality wood glue (like the Titebond III that I use) will give a joint that is actually stronger than the surrounding wood. Things get wonky with end-grain, though. The side grain of the end boards attaches to the end grain of the main table. That is not an ideal joint. Furthermore, there is more stress on that joint than any other on the table. Because of this, I used a spline joint. You can think of a spine as a biscuit that runs the length of the joint. One last note: though biscuits are not needed with edge glue-ups, they can help keep the boards in alignment during clamping. The ash that I used was very dense and rather thick, so I’m wondering if a biscuit would have helped or hurt with my warping problem. If I could have applied enough pressure to straighten the boards and get those biscuits locked, it may have helped a lot. But if I couldn’t get the board straightened enough, then I’d lose my chance at gluing them together. I think for thinner, softer boards like pine, using biscuits might help if some of the boards aren’t perfectly straight. They may also help for those who don’t have clamps.
Amazing work! You guys make a great team.
Thank you, Barbara! We think so too 🙂
I’ m exhausted…I read it TWICE!! First for me and then my hubbie heard me chortling away…and I read it…again to him. He, too, is a “woodworker” and I’m a little bit “Handan.” The table is so “farmish”…it is gorgeous! KUDOS!! (one of those exclamations was from my hubbie.) franki
LOL, thank you, Franki! I’m so happy you guys liked the post 🙂
That table is simply gorgeous! GORGEOUS! I just hope your amazing restoration/makeover will be a sort of inspiration for my hubby, we have 2 more or less “antique” tables waiting for some mercy in our garage…
Thank you so much, Maigwen! If your husband gets inspired, please send us some before & after pictures to greg@thenavagepatch.com.
Oh my goodness! I absolutely love how the table turned out! Is just breathtaking! Plus I read the whole thing and I just love everything in there I definitely laughed out loud a few times!! Hehehe GREAT JOB!!
Thank you very much, Kristy!
Beautiful! What type of brush did you use for the legs? I’m refinishing an ornate piece and am daunted by the details.
Hi Heidi, I usually keep a set of cheap artist brushes handy, and I use them with the ornate pieces, such as these table legs. They sell similar ones also at Michaels, and they end up being cheaper than the ones on Amazon if you use a coupon.
Here is the one I get from Amazon: https://amzn.to/2P040P6.
And here is the one I get from Michaels: https://fave.co/2o4TieB
The table turned out amazing! I was laughing so hard at your commentary throughout the post! I started reading from the failed table attempt post (I feel your pain there). That was SO MUCH hard work! You did a wonderful job. Now I understand why custom tables cost so much HA! I’ll definitely be back to read more about your projects!
Thank you so much, Katt! Oh, what a pain in the ass this project was, but it was worth it in the end! 🙂
Beautiful work on this table! I fretted a bit when you took the corbels off the legs and was so happy to see that you were able to incorporate them into the new design! All my projects have issues, too and there have been many times where cursing has ensued. I am enjoying your blog – loved the adventure stories – you could make those into a book!
Hi Jeanne, thank you so much! I don’t think I’ve completed a single project without some sort of issue or problem. DIY is life, and we figure it out as we go. That means a lot of mistakes and a lot of learning!
I found your blog a few months ago and just have to say, your writing is amazing and the projects incredible!! I literally spit coffee out from bursting into laughter on the horse hair brush comparison.
The table is gorgeous!! Kudos in buckets!!!
I come up with all sorts of projects and let my “babes” in on the plans with “…so, hon, I was thinking…”, at which point hubbie says, “…and I’ll be doing”. We’ve read lots of your posts to prepare with “our” projects…thank you!
Welcome, Andrea! I’m happy to hear that I’ve not only entertained you but have also given some good advice. Good luck with your projects! 🙂
Wow!! I am so impressed with your perfectionist woodworking skills. And your hilarious storytelling abilities got me hooked. What a terrific
team you and Handan are. I do a little furniture refurbishing and I learned a ton from watching this tutorial. I am definitely a fan.
Thank you so much, Barbara! Handan and I are happy to have you along on our adventure! 🙂
Well, I’m a little late to the party but had to comment anyway. I read through the previous nightmare that you had with the original table and honestly, I would have loved it the way it was, horse hair and all. And I nearly cried when I read you were going to use just the legs for another project. But, that said, the final result was just BRILLIANT and I love it so so very much. Far more than the original table. This was truly what I would consider my magnum opus but I know you have many of these types of projects under your belt so you may not agree. I think the spots on it WERE your tears, lol. But you worked it out and I believe it was serendipity. It truly was better BECAUSE of the mistakes and disappointments. This is a lesson in the greatness of perseverance and determination. GREAT job. Just amazing.
That was one heck of a project, Tracy, and I don’t know if I’ll ever make another furniture piece as complicated. Time seems more scarce these days. But I still have the memory of that build, and more importantly, we’re still using the table in our Florida dining room!
That is a table meant to be used for a lifetime and passed on to future generations. I would leave a detailed description of the hell you went through to get it done, and tape it to the bottom of the table, lest someone not appreciate what went into it. I wanted to post some of the things that made me laugh out loud but there were so many, why bore you with your own material? lol It truly was a great read, an amazing job and I felt like I was on this adventure with you. I can appreciate a job well done and this really qualified. Thanks again.
Hi Tracy, thank you for this lovely comment! I love your idea about passing it down with a note. I just may do that! I’ll print out the blog post, seal it in a ziplock and tape it to the bottom! 😂😂😂