Son’s House Entryway Makeover
I made a floating console for my son’s entryway makeover, and it elevated the look while giving a whole bunch of much-needed storage!
The world of art is a crowded place. Everyone with a crayon, pencil and paintbrush in their hand is vying for eyeballs on their latest work. It has been this way since the first scruffy Neanderthal scratched a mark onto a cave wall, and it shows no sign of abating.
From a pre-schooler’s “Pasta on Red Construction Paper” to the craft show hippie who paints letter “m” seagulls onto pastel beachscapes to the insufferable “Banksy,” Art World is filled with wonderous and wonderful creations and creations that just plain make you wonder.
Now and then, a great talent emerges, and the world is forever blessed with miracles of paint on canvas like this naked broad surfing a scallop shell.

And this guy about to heed God’s command to “PULL MY FINGER!”

And this masterpiece of a subject more haunting than the Mona Lisa:
So it is my unique pleasure to inform you that another Captain of Canvas has emerged, ready to explode onto the art scene like a can of fish-n-beans left out in the hot sun.
His name is El Grego (not to be confused with the lesser El Greco), and you’ll see his inaugural work later in the post.
But first, let’s talk about the entry/foyer in Baris’s new house.
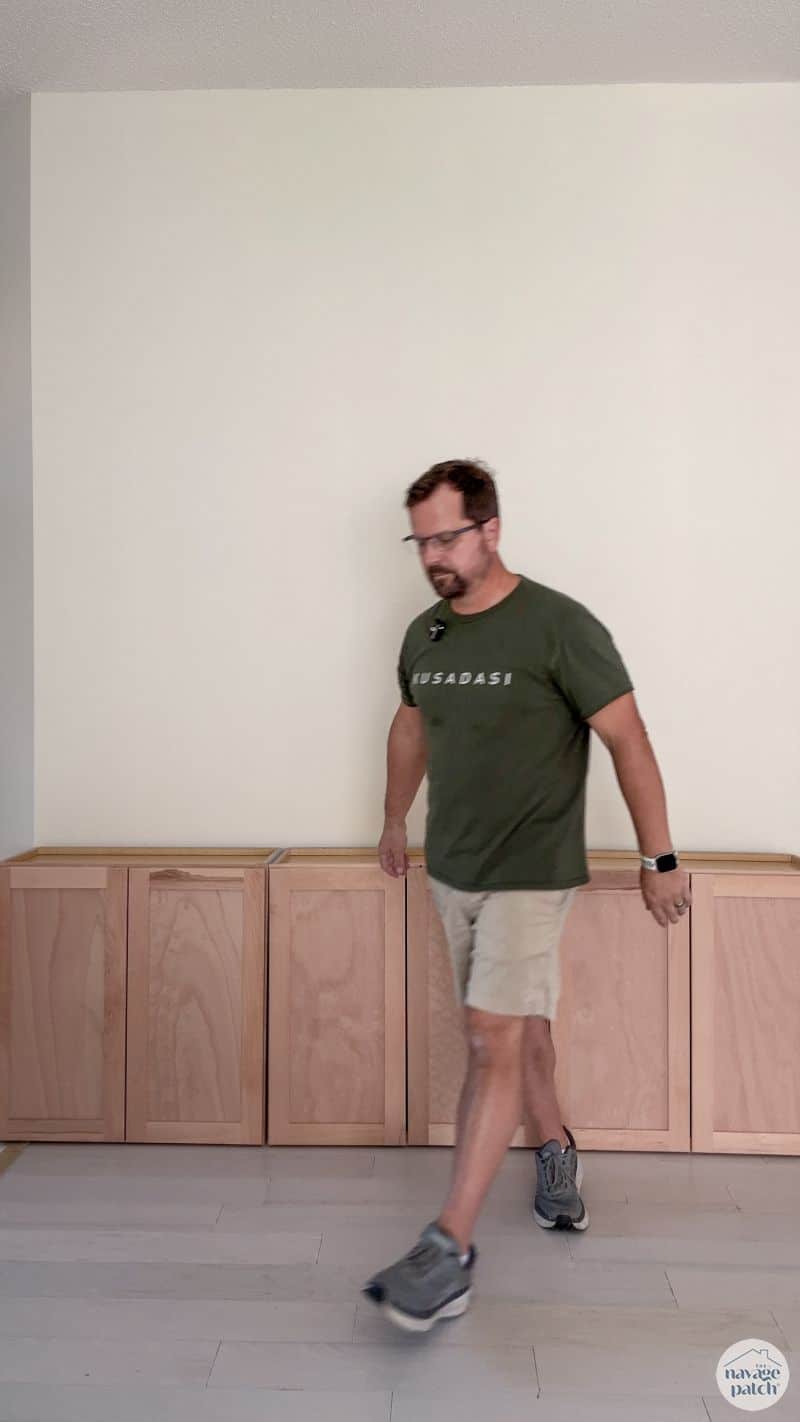
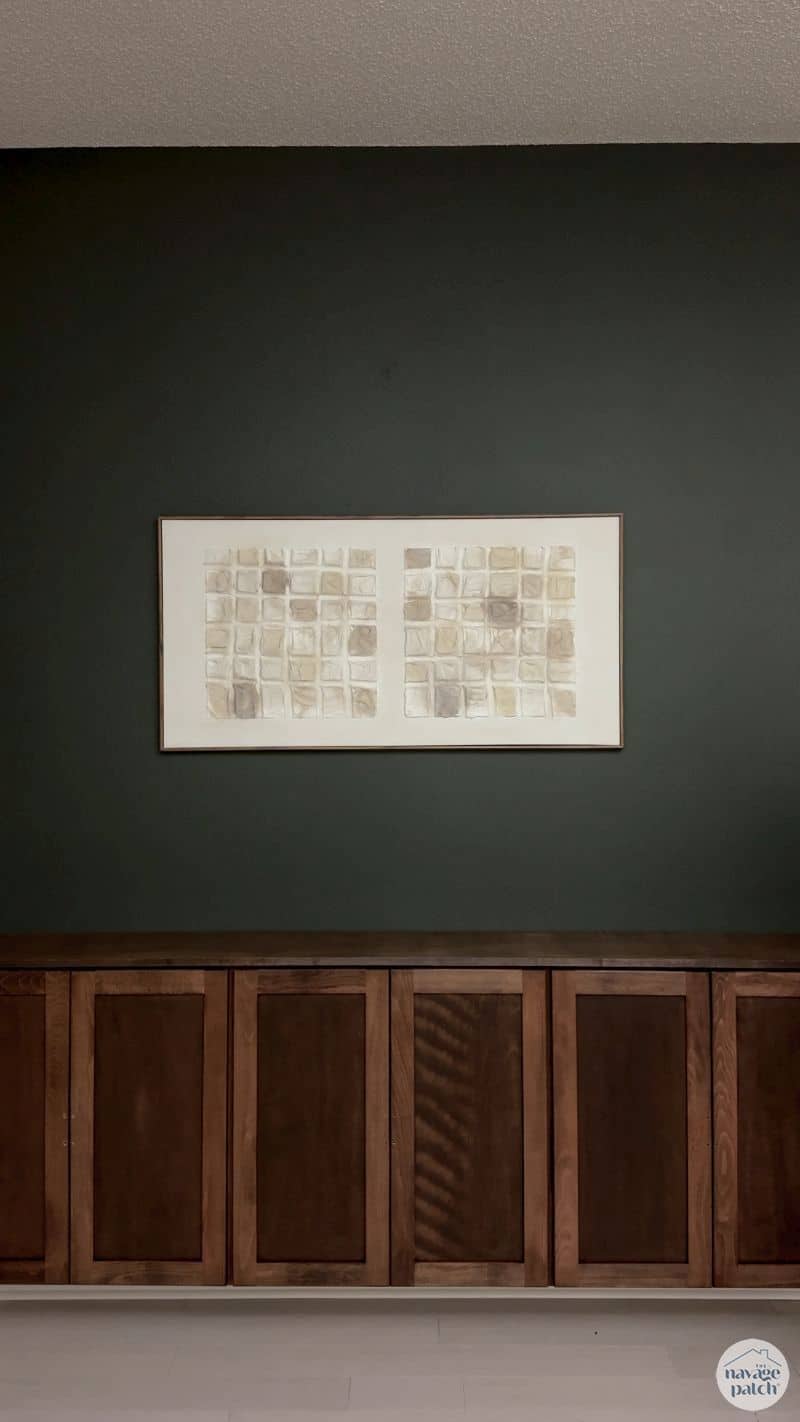
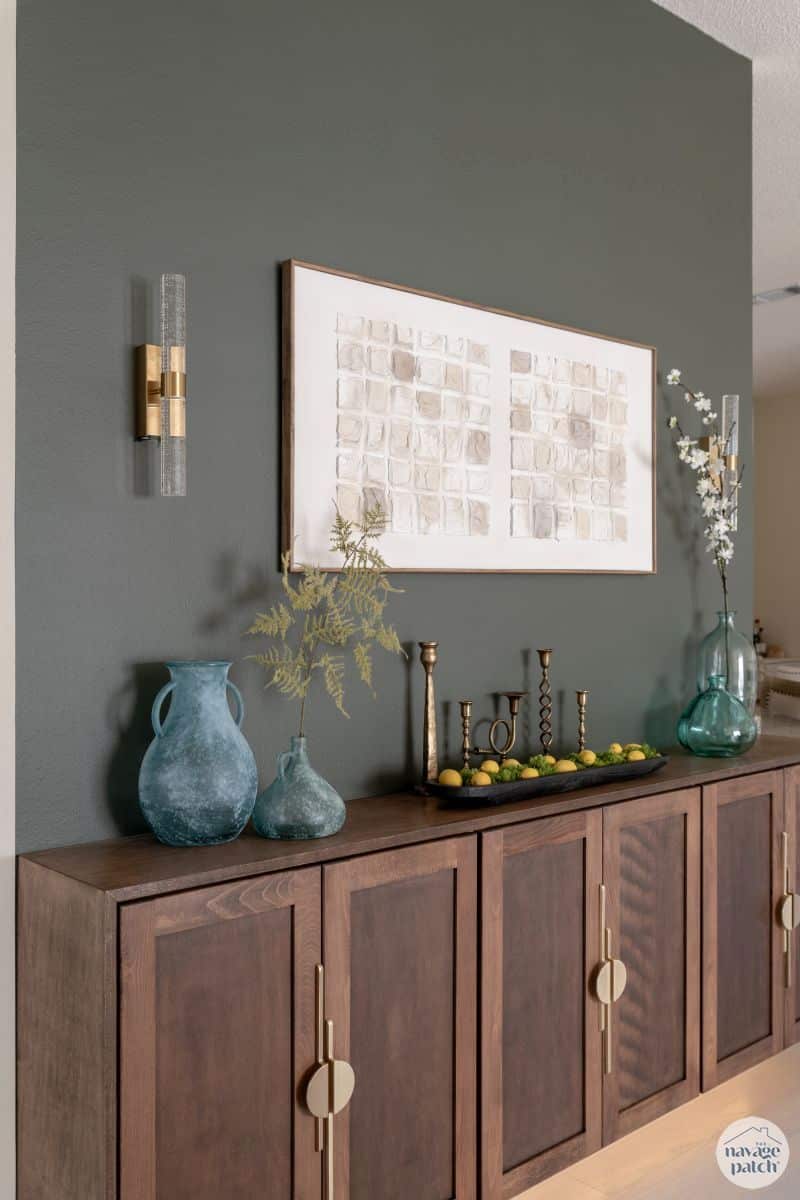
Specifically, there is a wall that separates the living area from the kitchen and houses the kitchen cabinets and range. It is barren on the living room side.
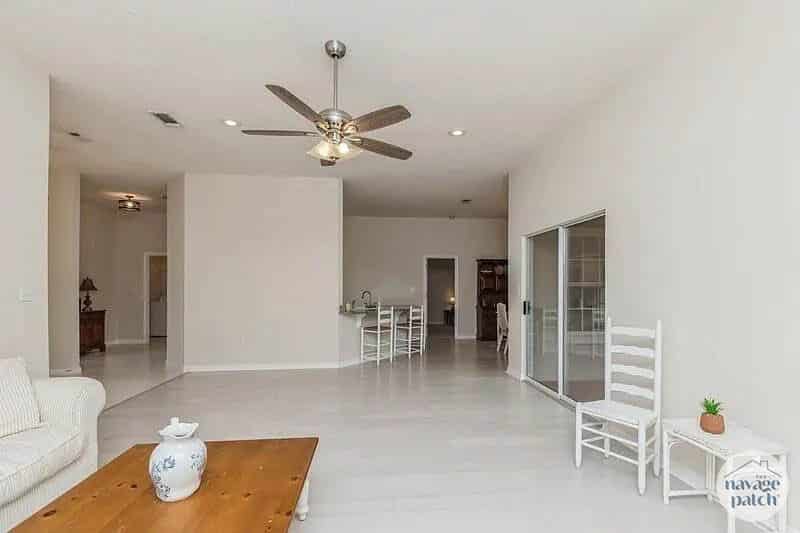
It’s the wall on the right in the image below.
Handan has had her eye on that empty patch of drywall since we did our first tour of the property. As soon as the ink had dried on the closing papers, she was planning her attack.
Entryway Makeover SUPPLIES LIST
Affiliate links are provided below. Full disclosure here.

Son’s Entryway Makeover VIDEO
Watch our short and fun video below for an overview of our son’s entryway makeover before you read the post.
Watch Our video On YouTube
On Tiktok
On Instagram
We love to see our DIY projects out in the wild! If you try this DIY project and take a picture and post it on Instagram, be sure to tag us – thenavagepatch
Floating console Table
If there is one certainty we’ve noticed in Florida houses, it’s a criminal lack of storage space. This crime starts with the lack of a basement and continues throughout the ground (and higher) floors.
It’s as if people down here don’t own anything.
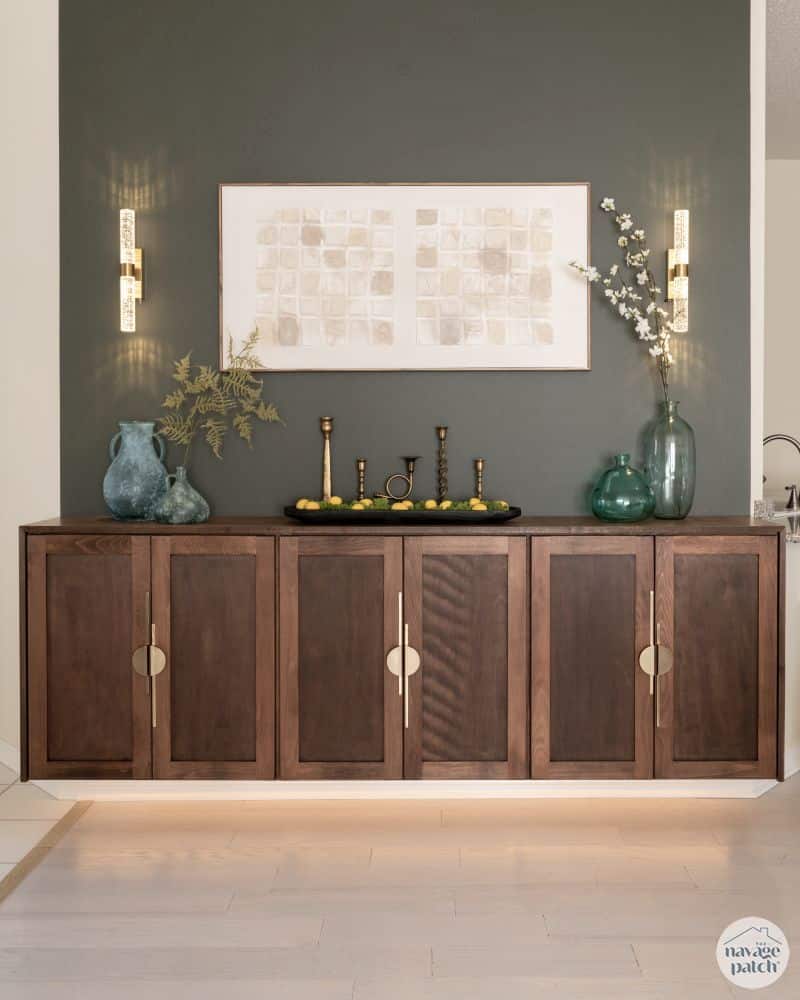
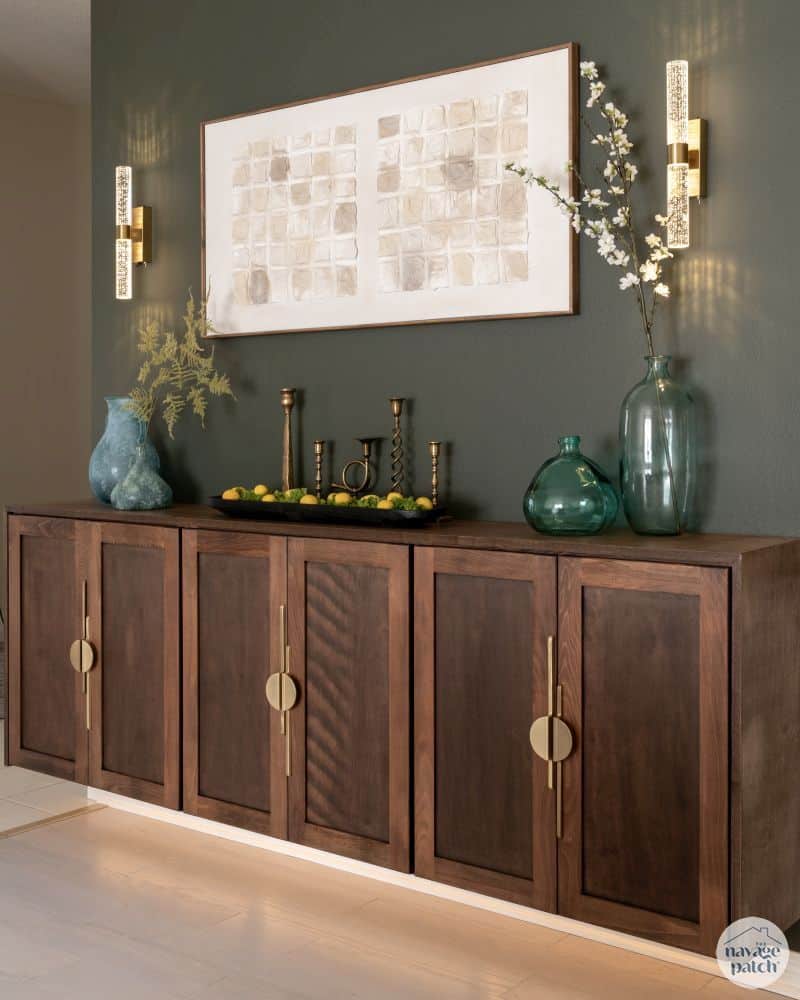
Anyway, that wall was going to become beautiful…and useful.
My babes wanted me to make a floating console table. We did something similar in our house recently, so I guess she had some floating on the brain.
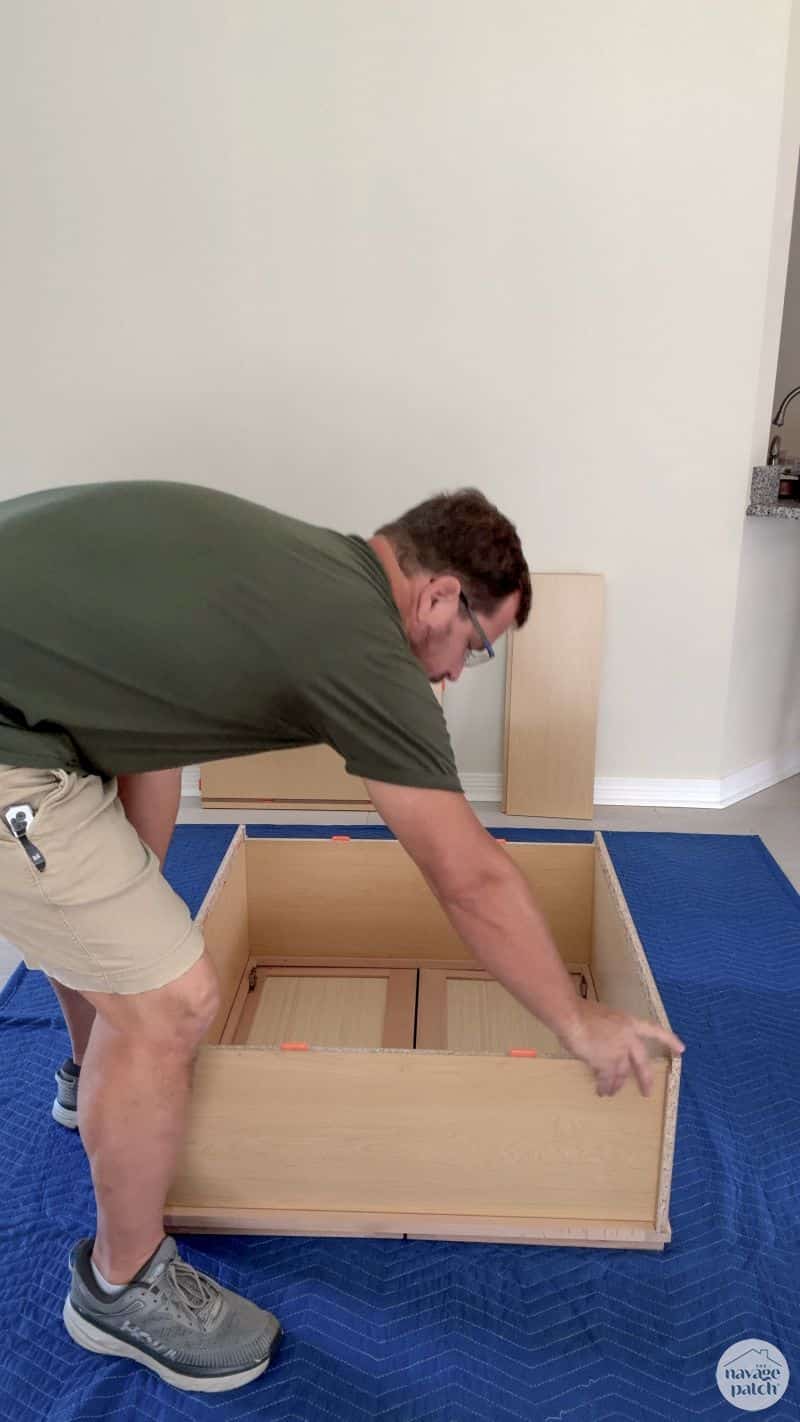
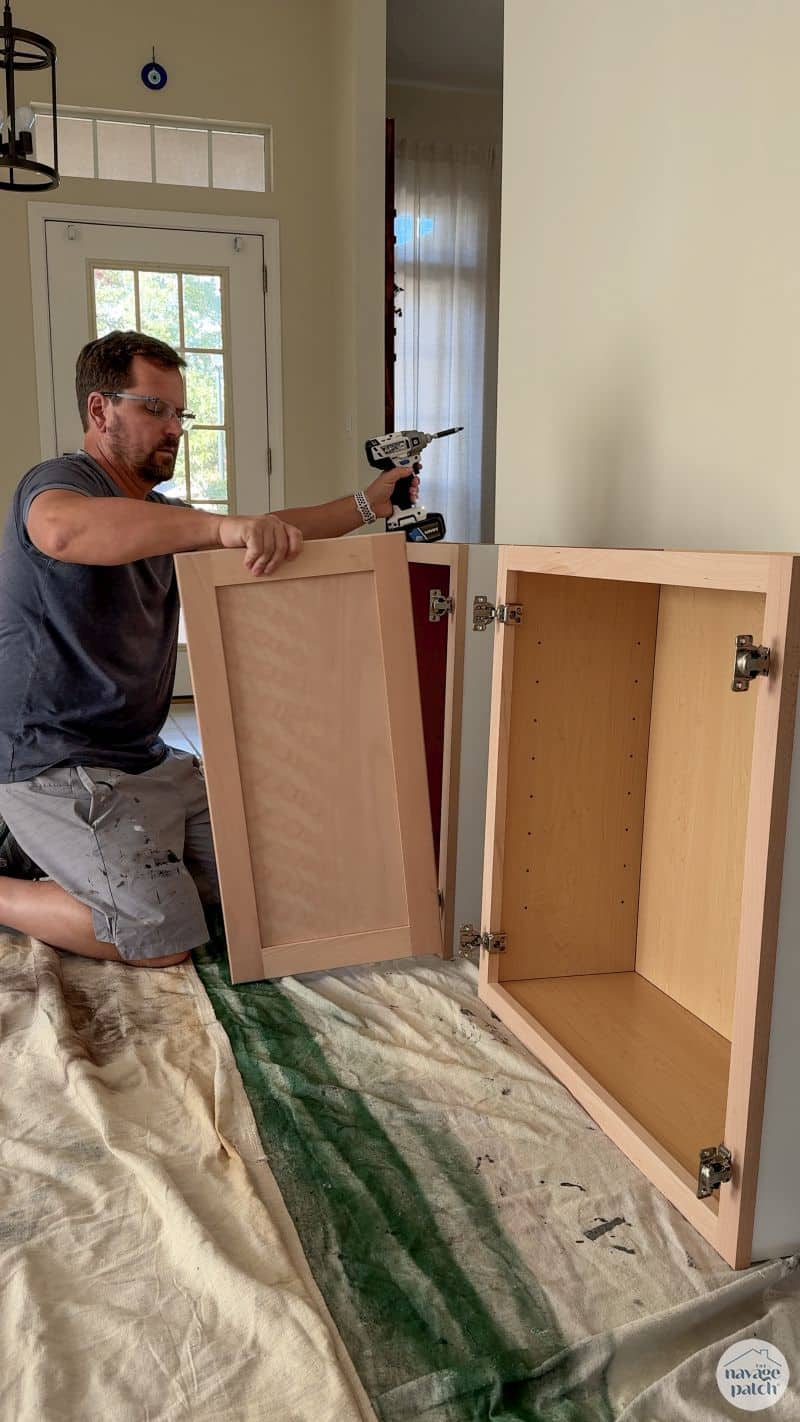
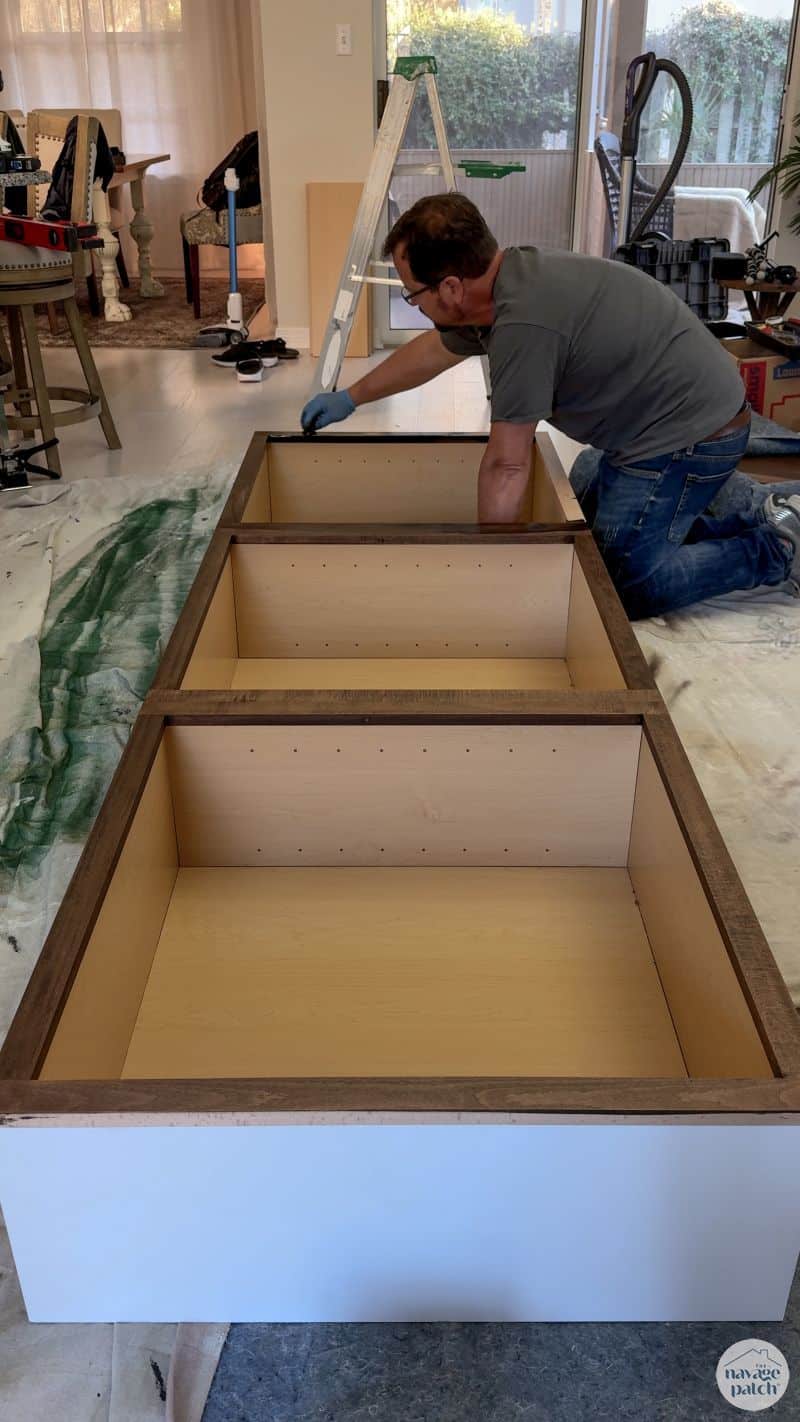
Anyway, Home Depot/Hampton Bay recently came out with a new type of RTA cabinet I was keen to try – one that didn’t require any tools or glue! Everything clicks together with these little plastic things called (obviously) click connectors.
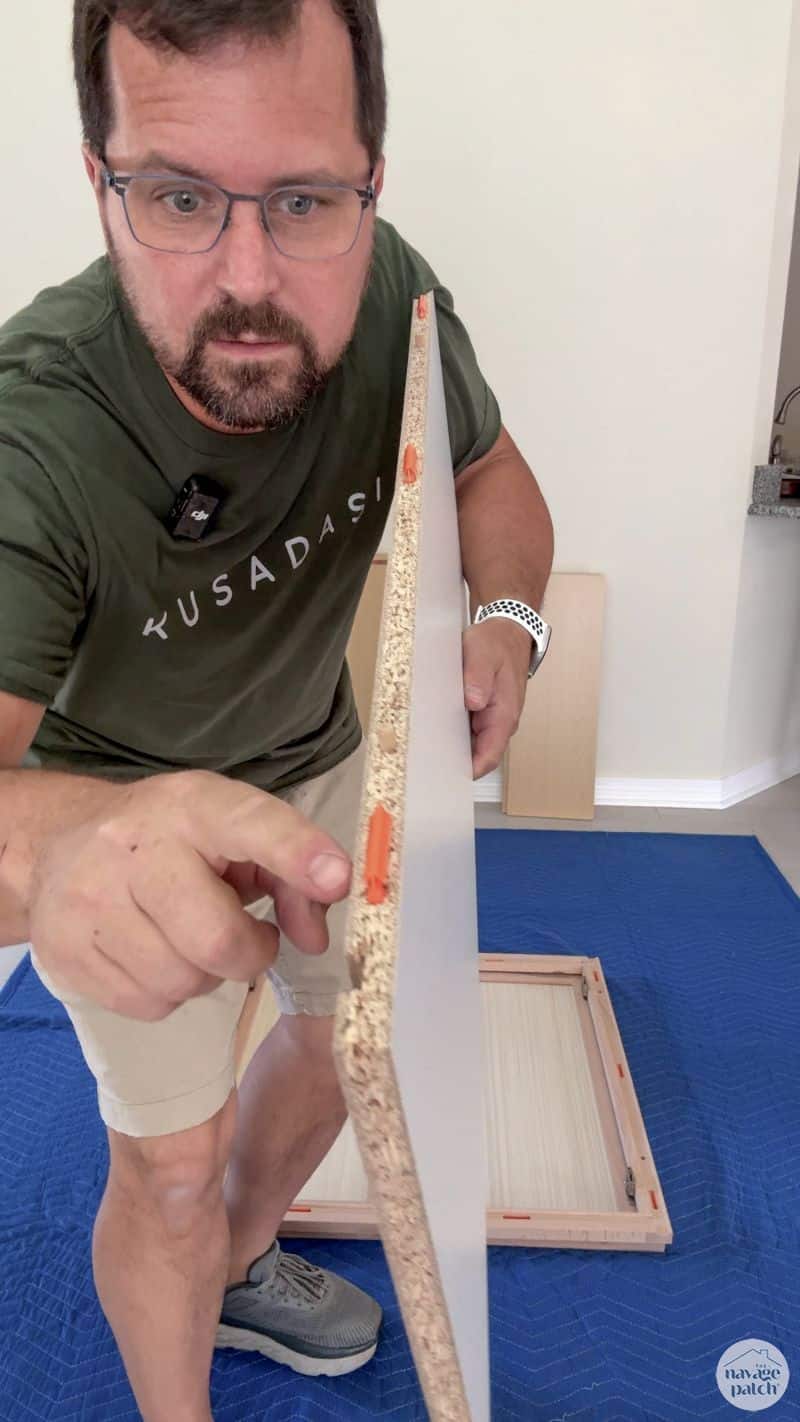
With this system, I was able to build a cabinet in just a couple of minutes. It literally took longer to unpack each of the three cabinets I used than to build them.

It’s worth noting that this clickready system is only available for one type of unfinished cabinet.
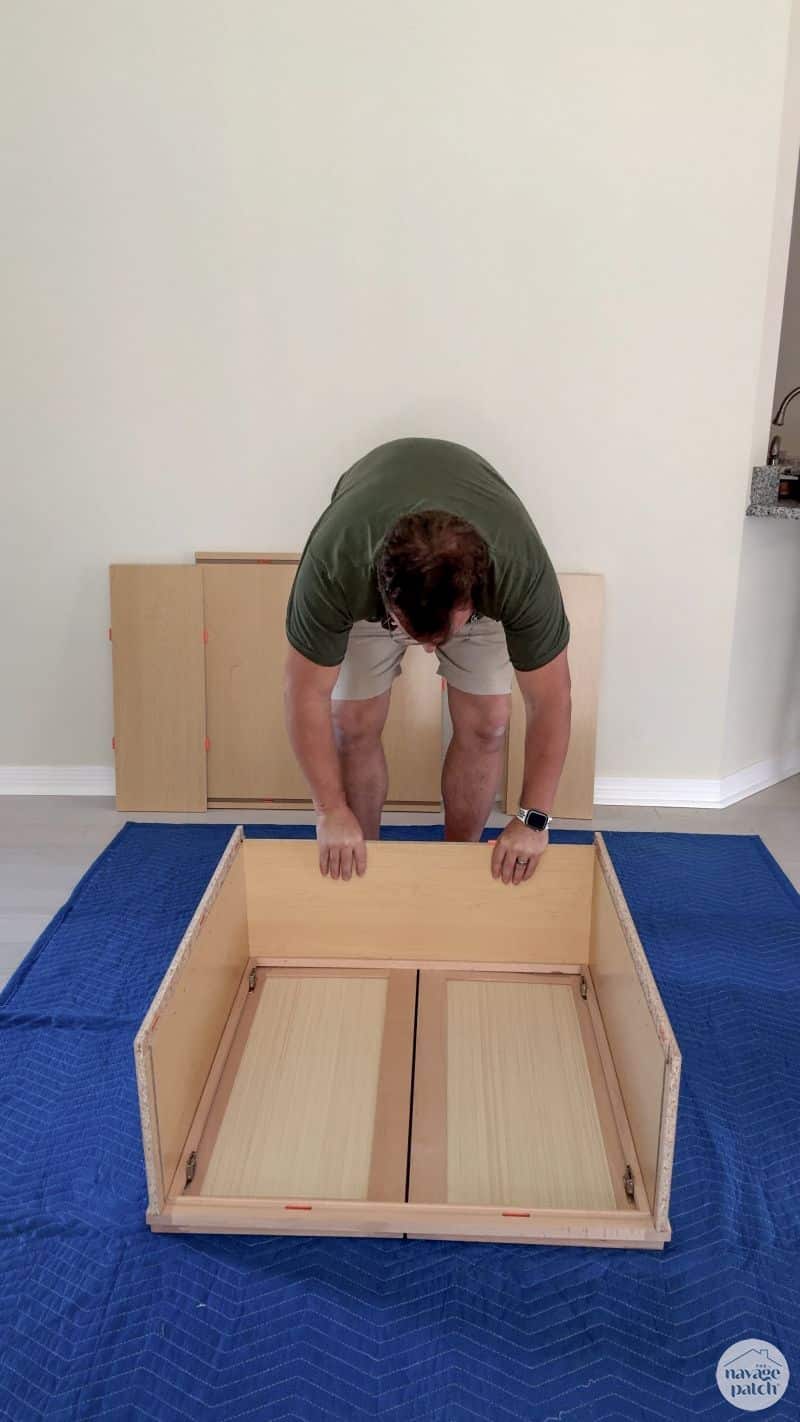
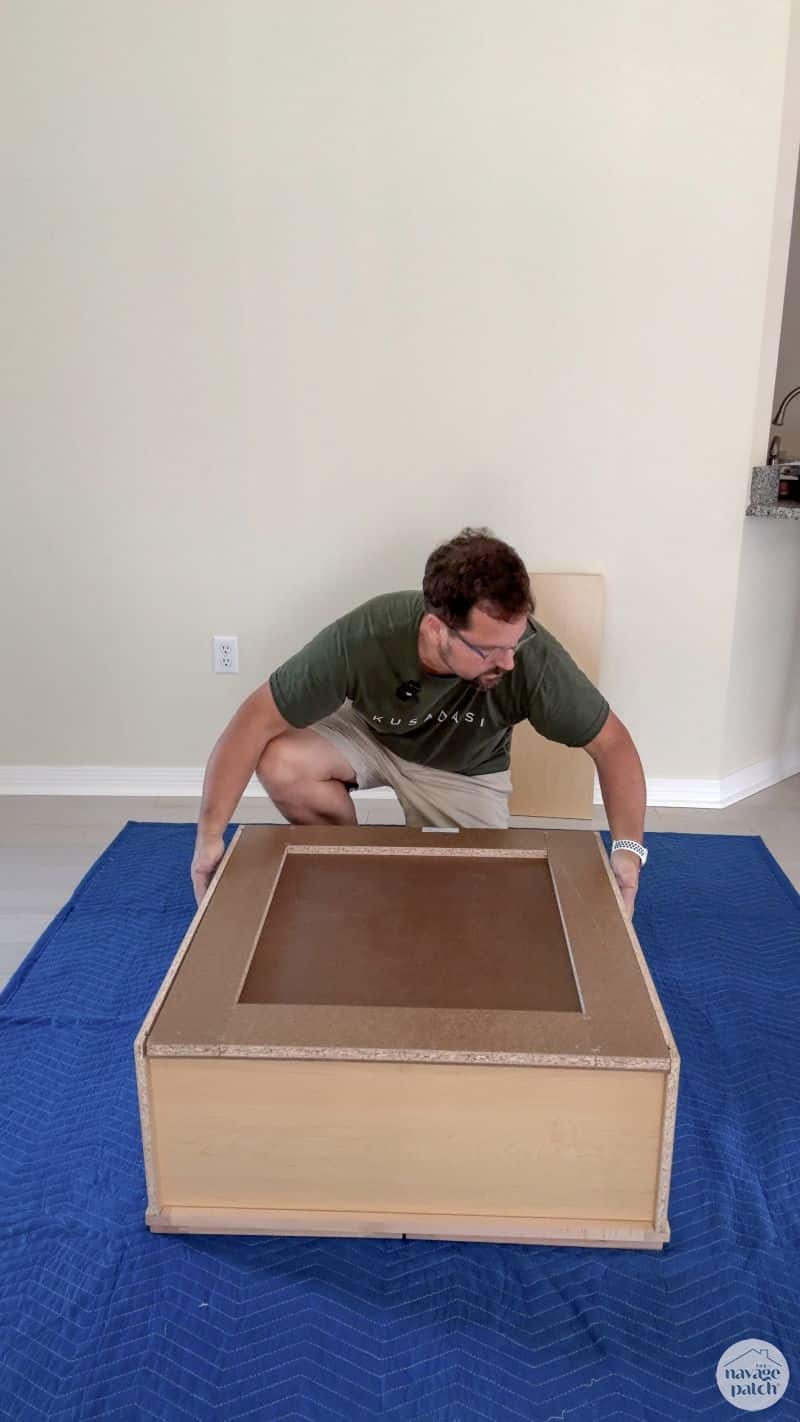
Though the doors are real wood, the rest is particle board, so these fall on the lower end of the cabinet quality spectrum.
What they lack in overall quality, they make up for in convenience, so while we wouldn’t choose these for a new kitchen makeover, they are perfect for a laundry room, perhaps, or anywhere else where they’re not in constant use.
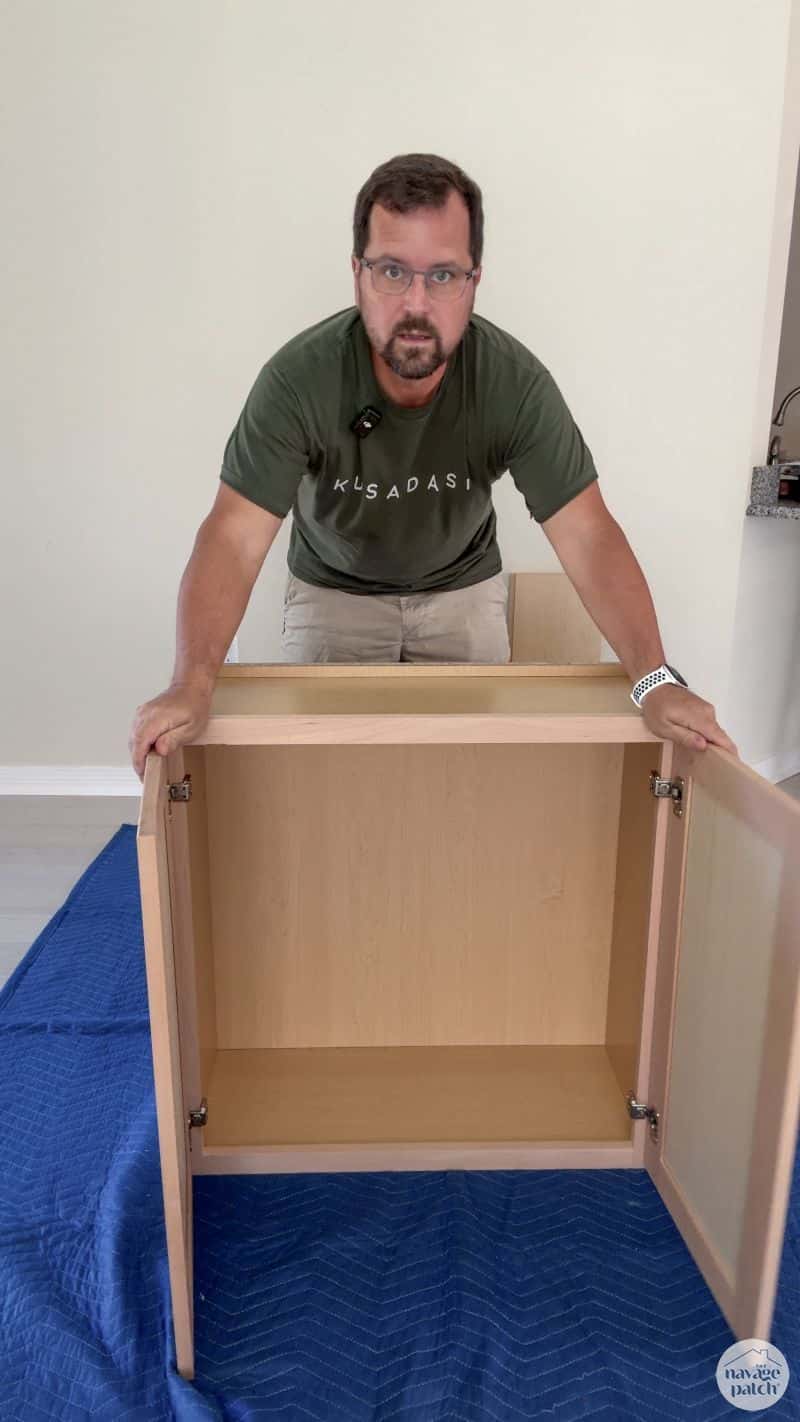
Three cabinets fit perfectly along the wall.
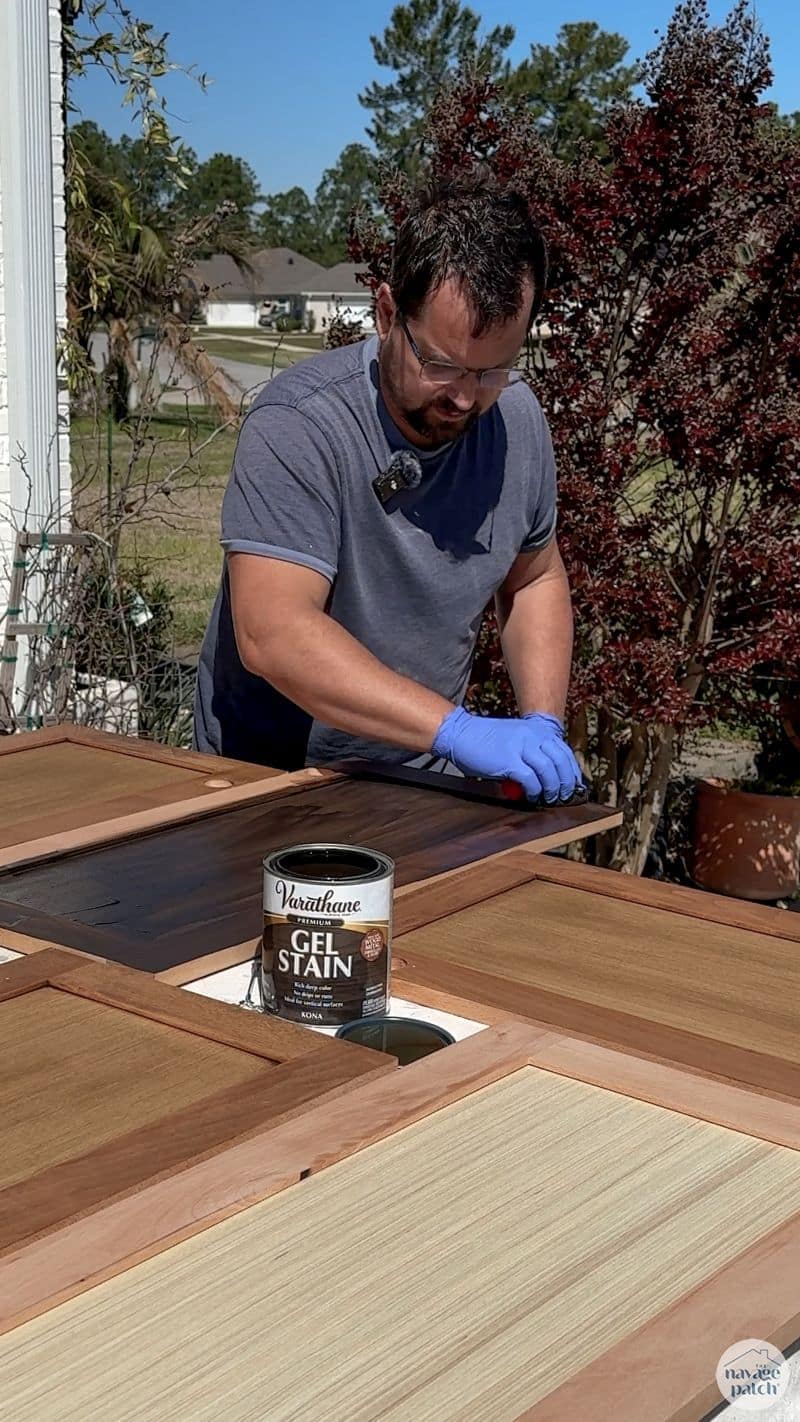
I removed the doors and took them to our house to be stained.
You can see in the picture below my first attempt at staining with a walnut color. It turned out too light and too red, so I went much darker with Kona.
Taco from next door stopped by to see how the work was coming along. He approved.

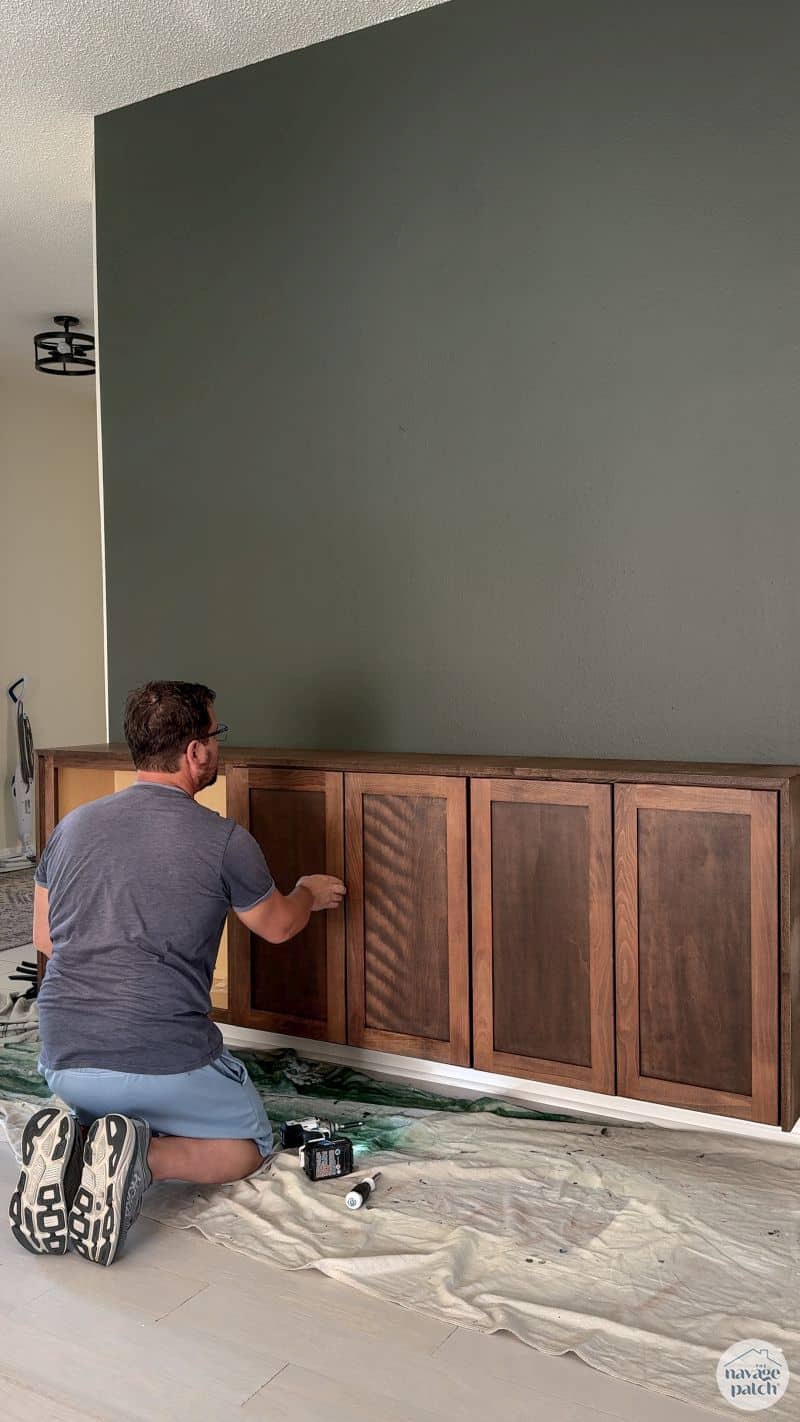
Back at Baris’s house, I screwed the cabinets together and then stained the face frames.
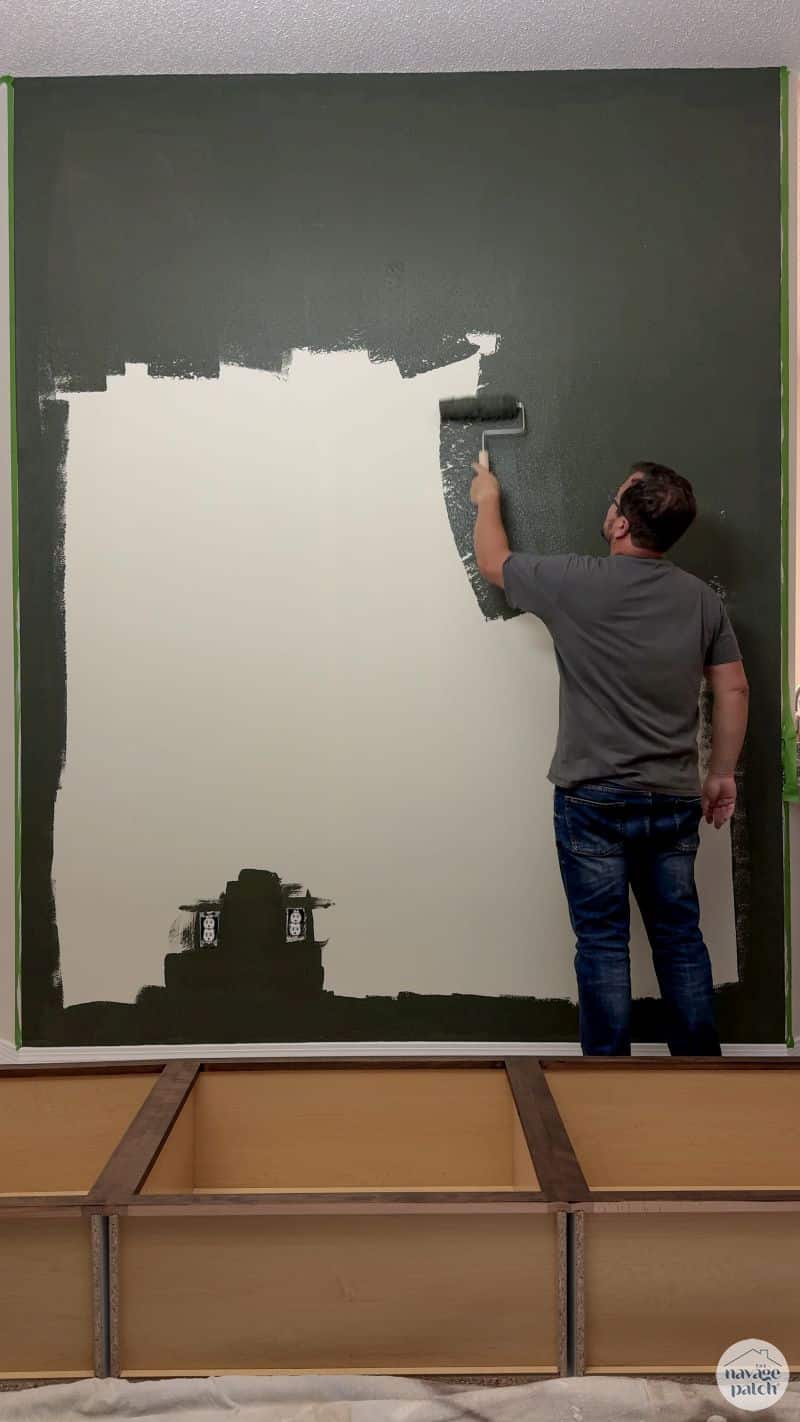
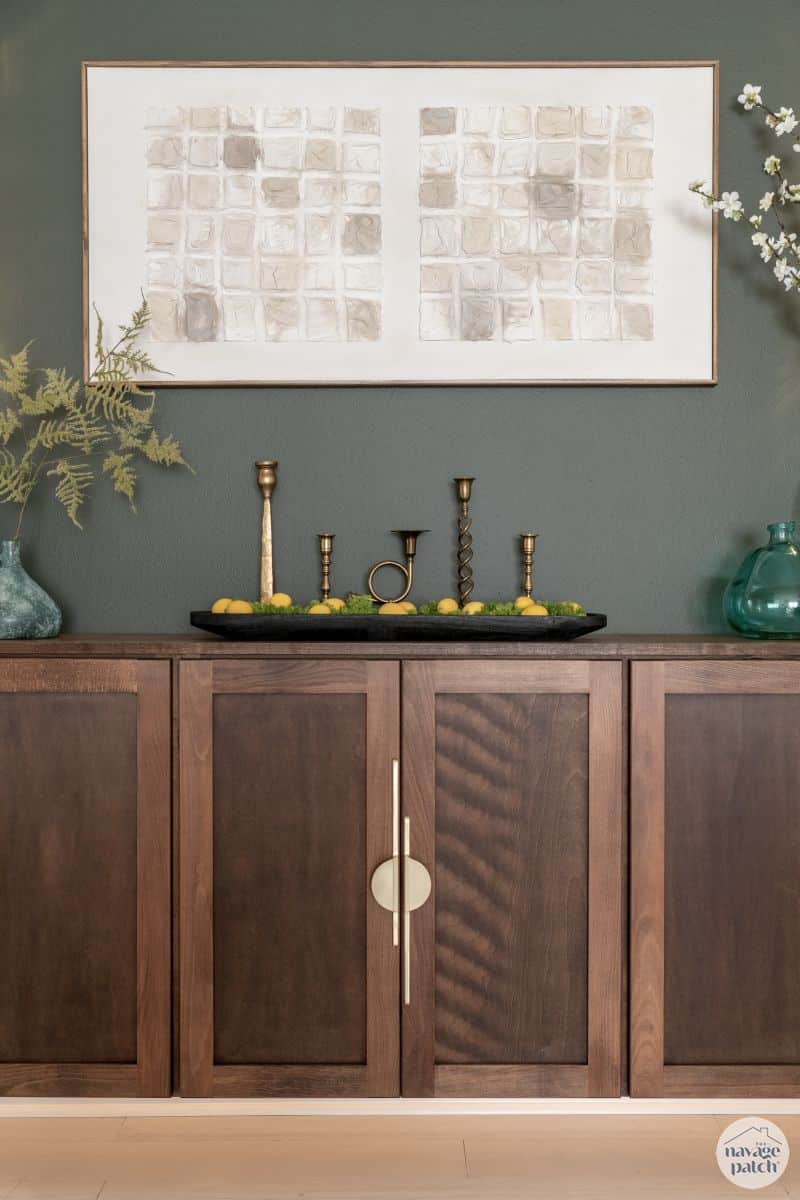
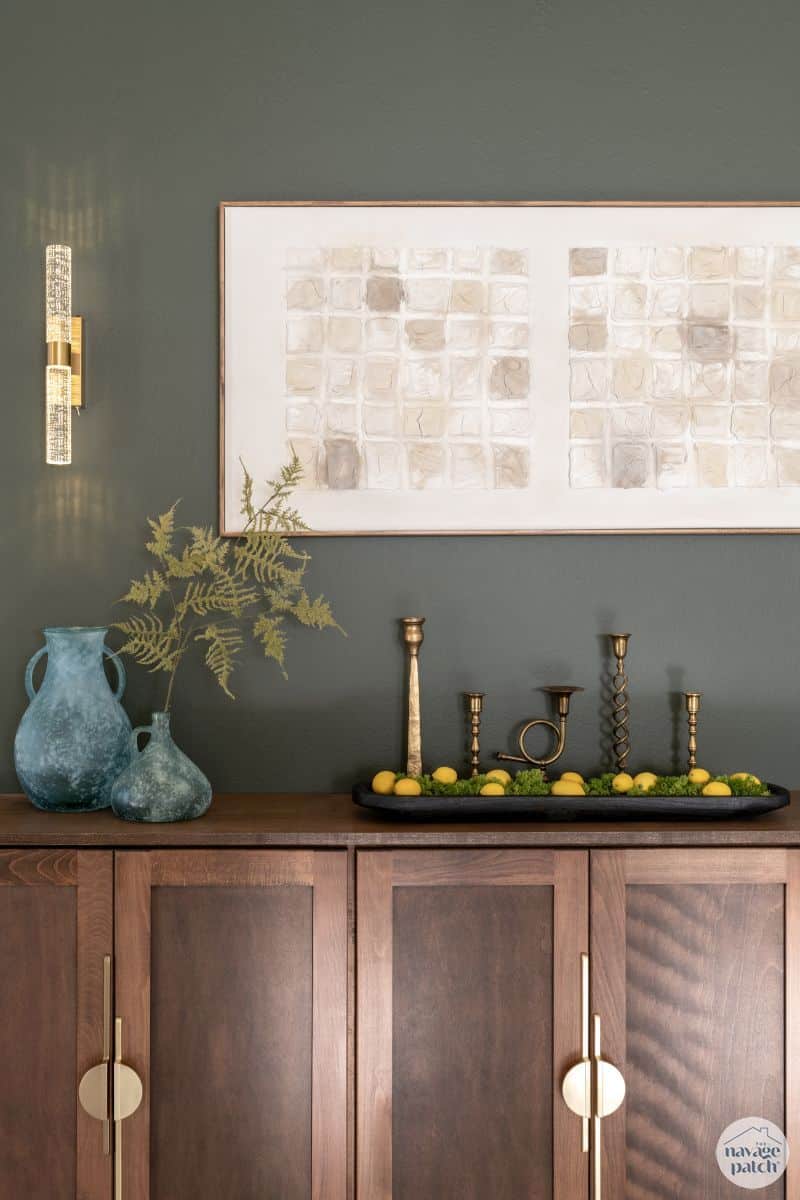
These dark cabinets needed a moody color to complement them. I used Sherwin-Williams Shade-Grown, a color I first used in Baris’s old bathroom makeover.
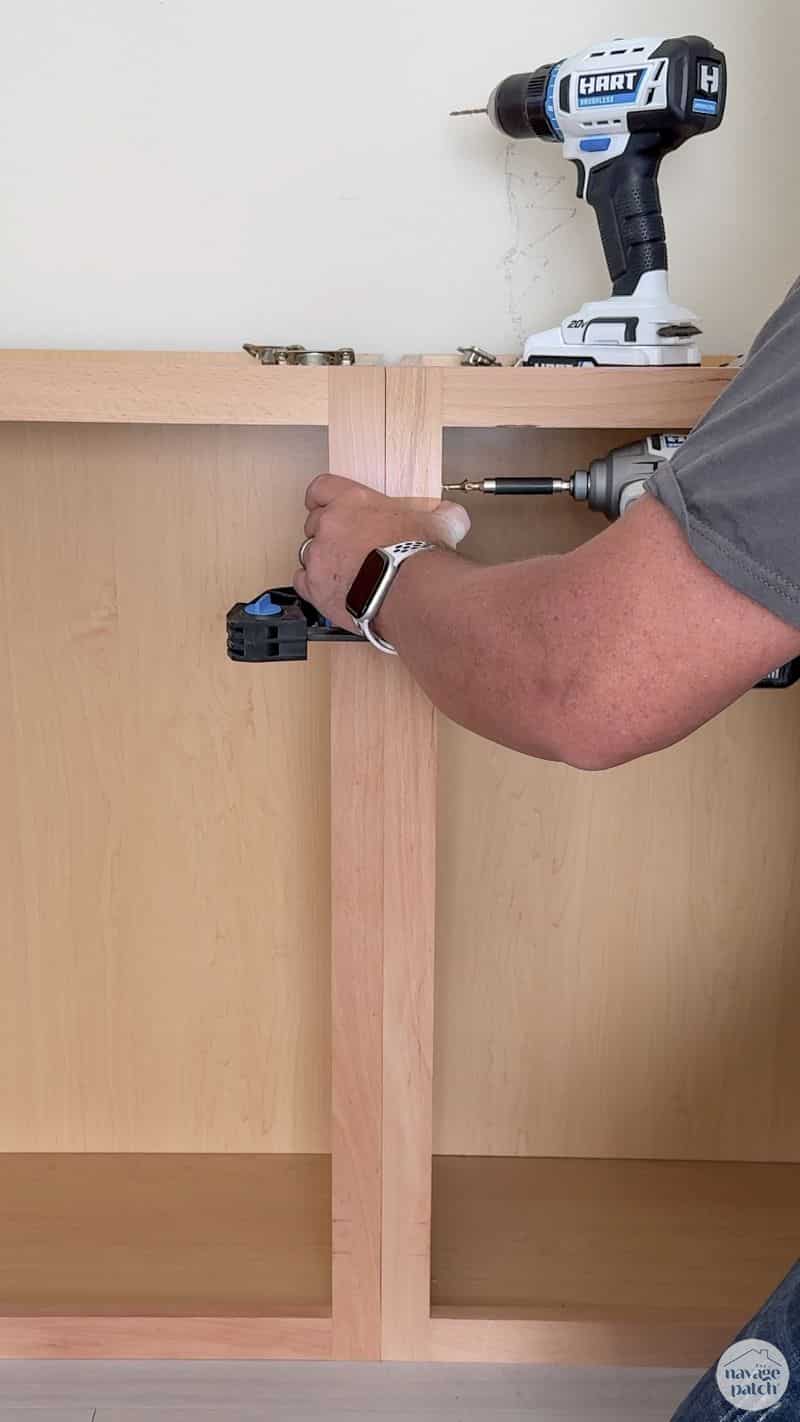
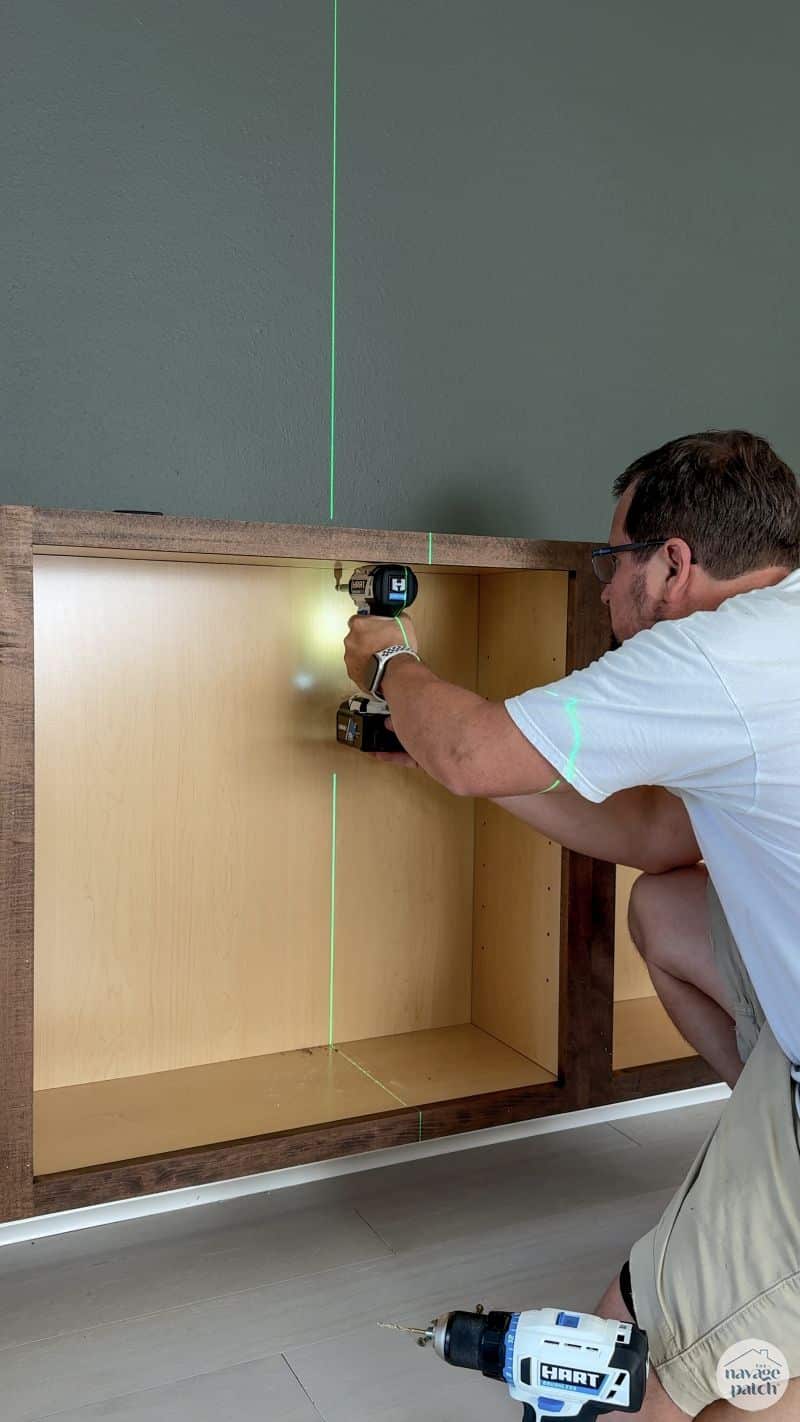
These cabinets can’t very well float while loafing around on the floor, so I helped them into position with a pair of drywall jacks.
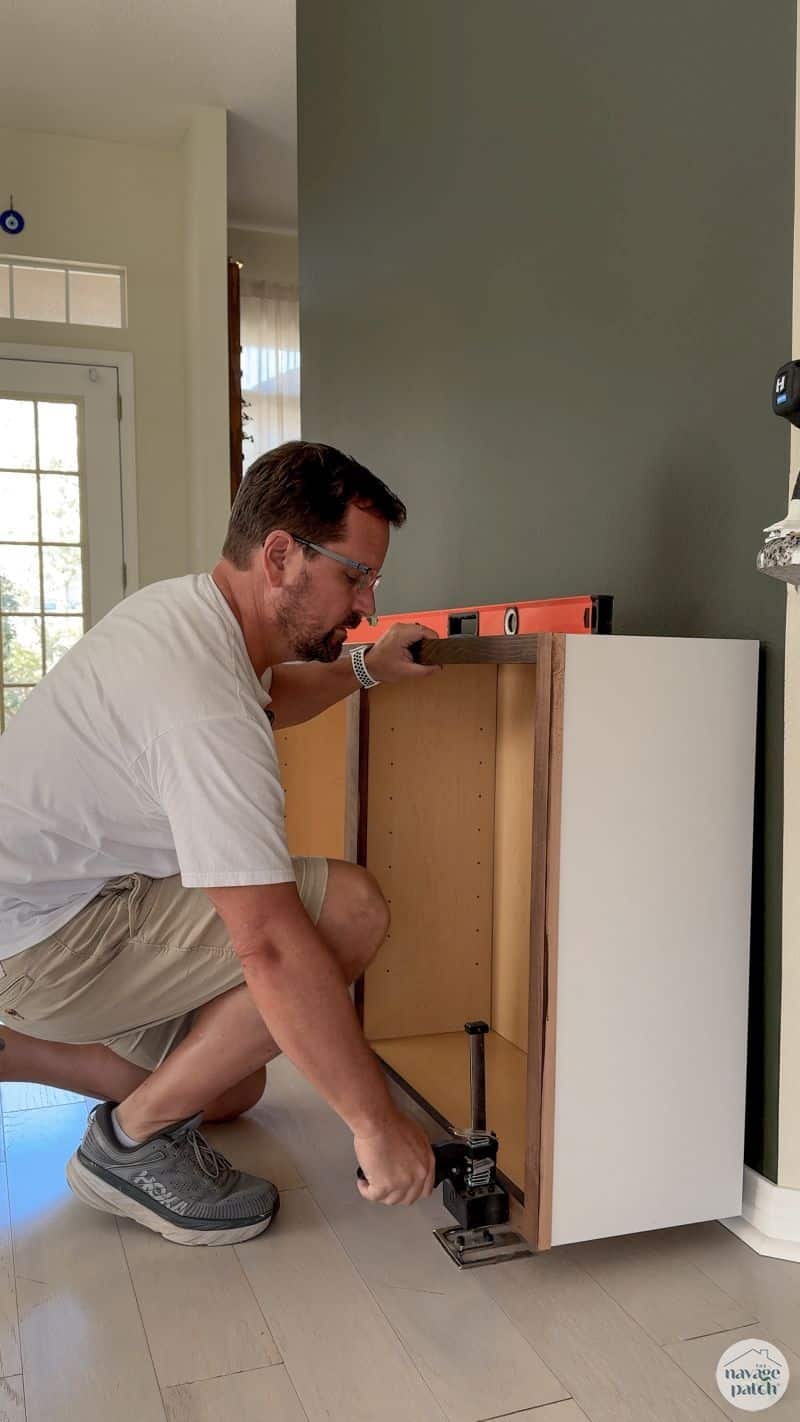
I then screwed them into studs.
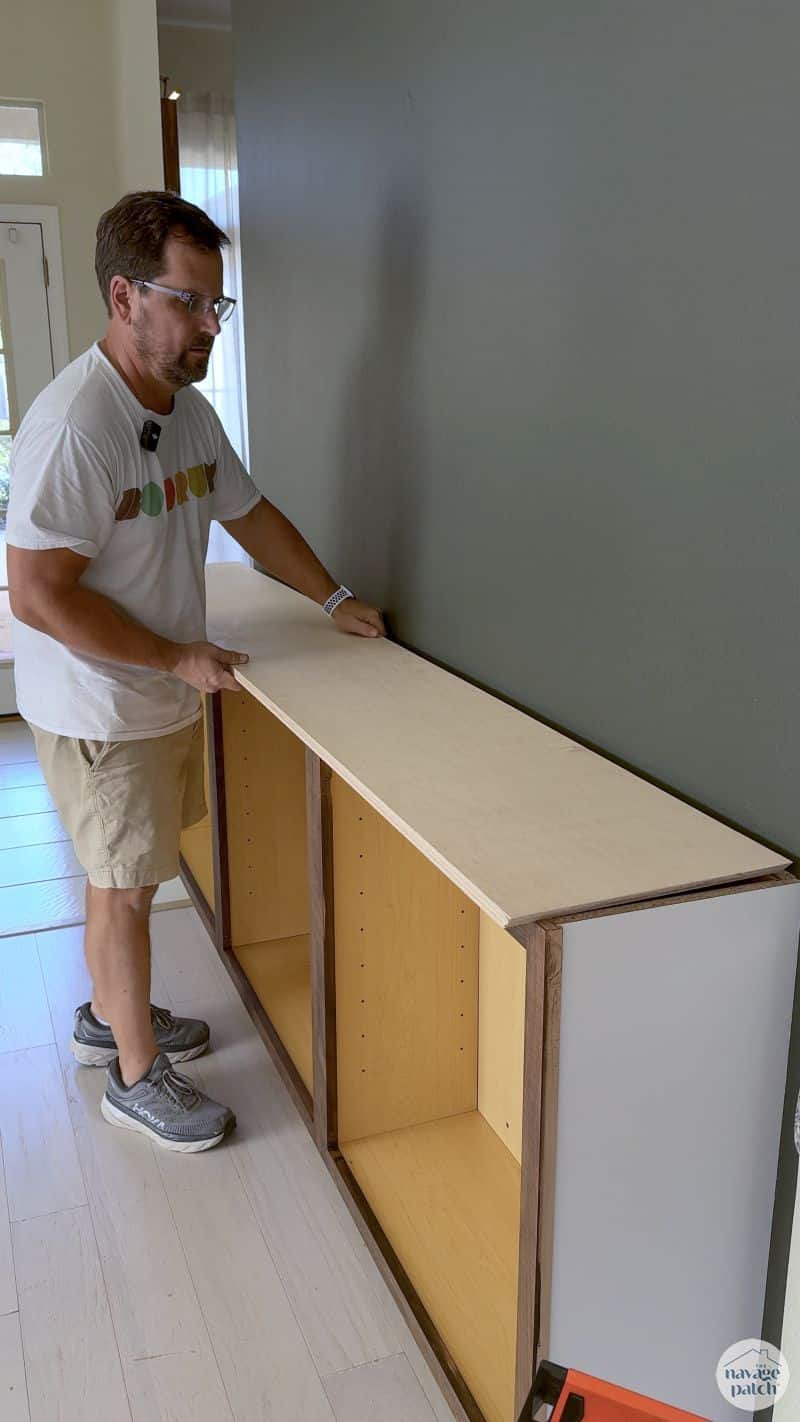
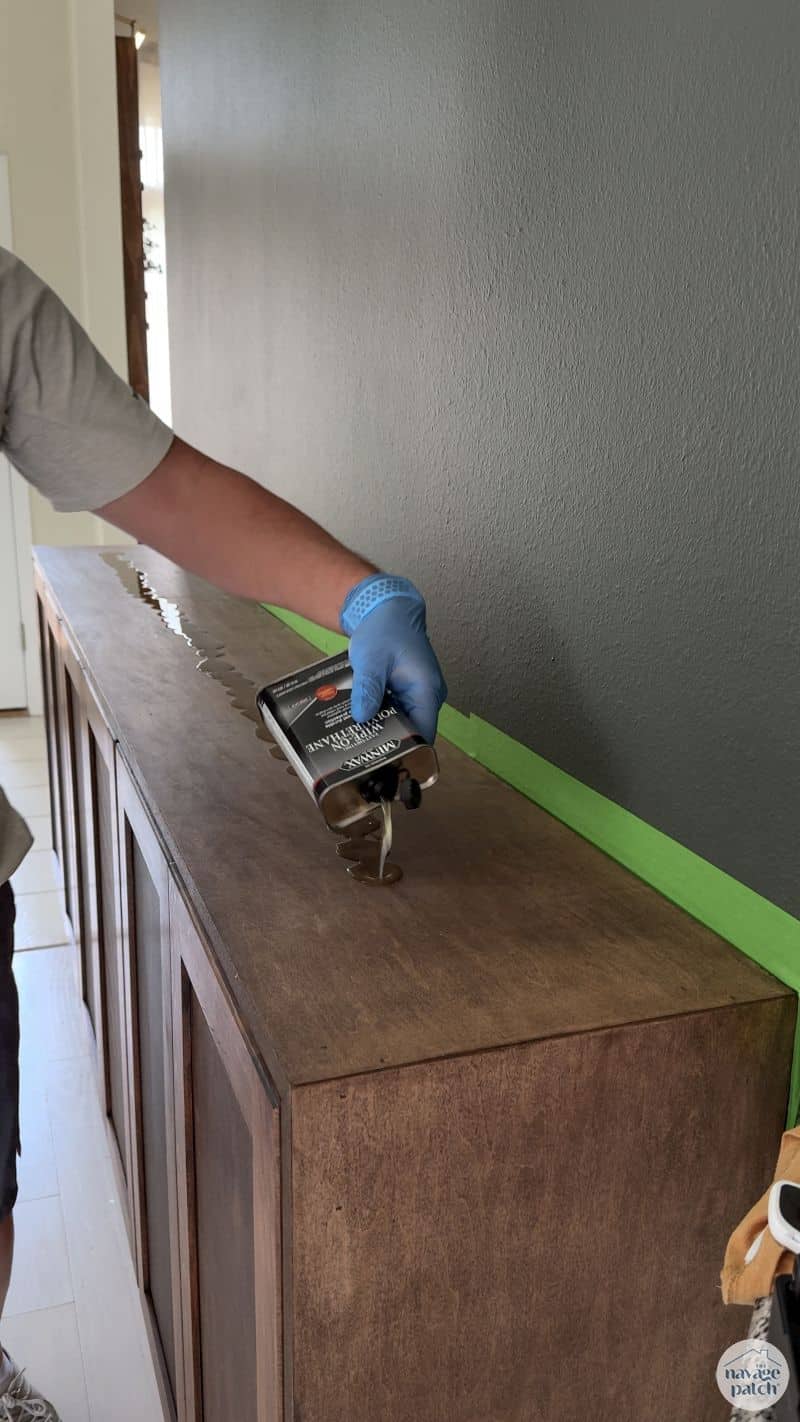
To cover the unfinished top and sides, I made a countertop with waterfall sides from a piece of 3/4 inch plywood.
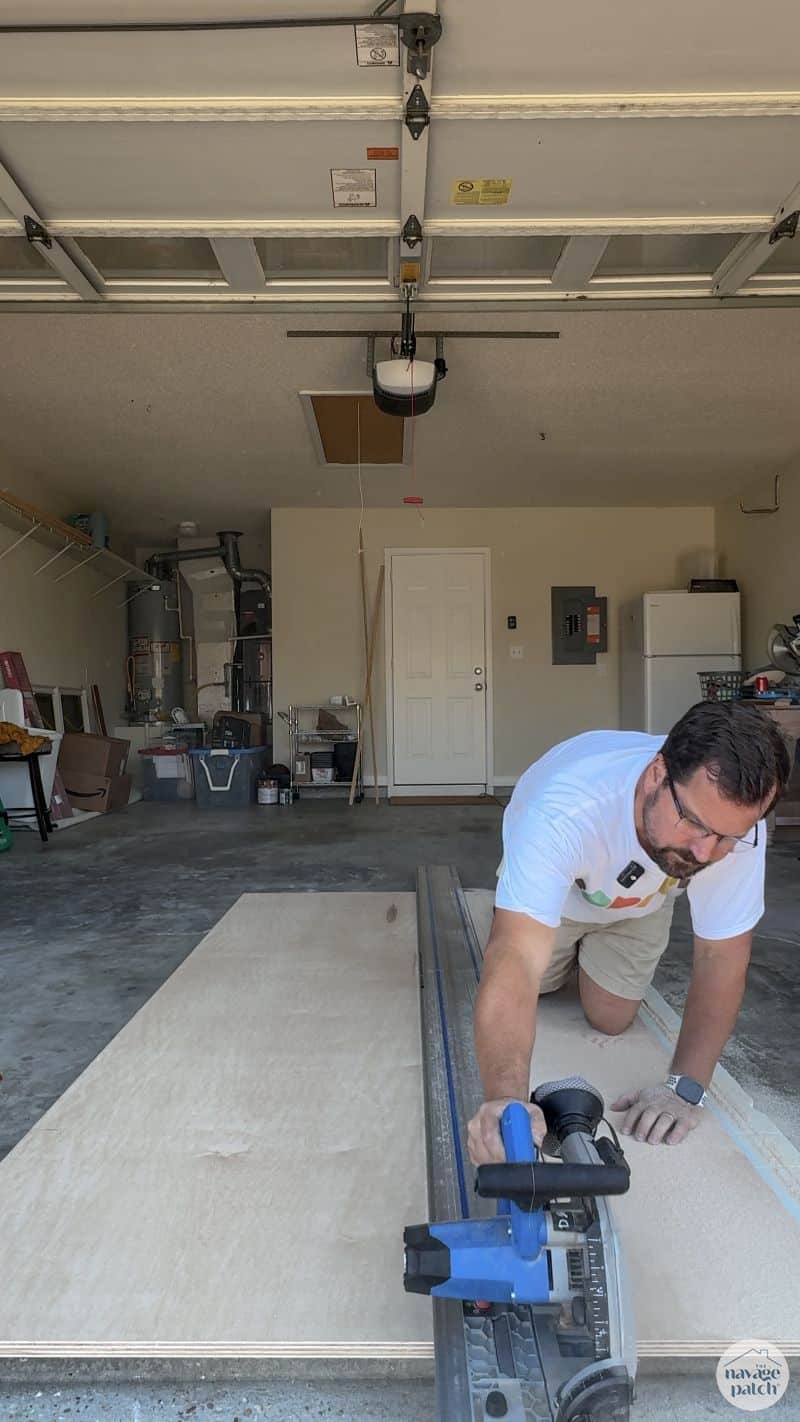
I miter-cut the sides, so the look would be seamless.
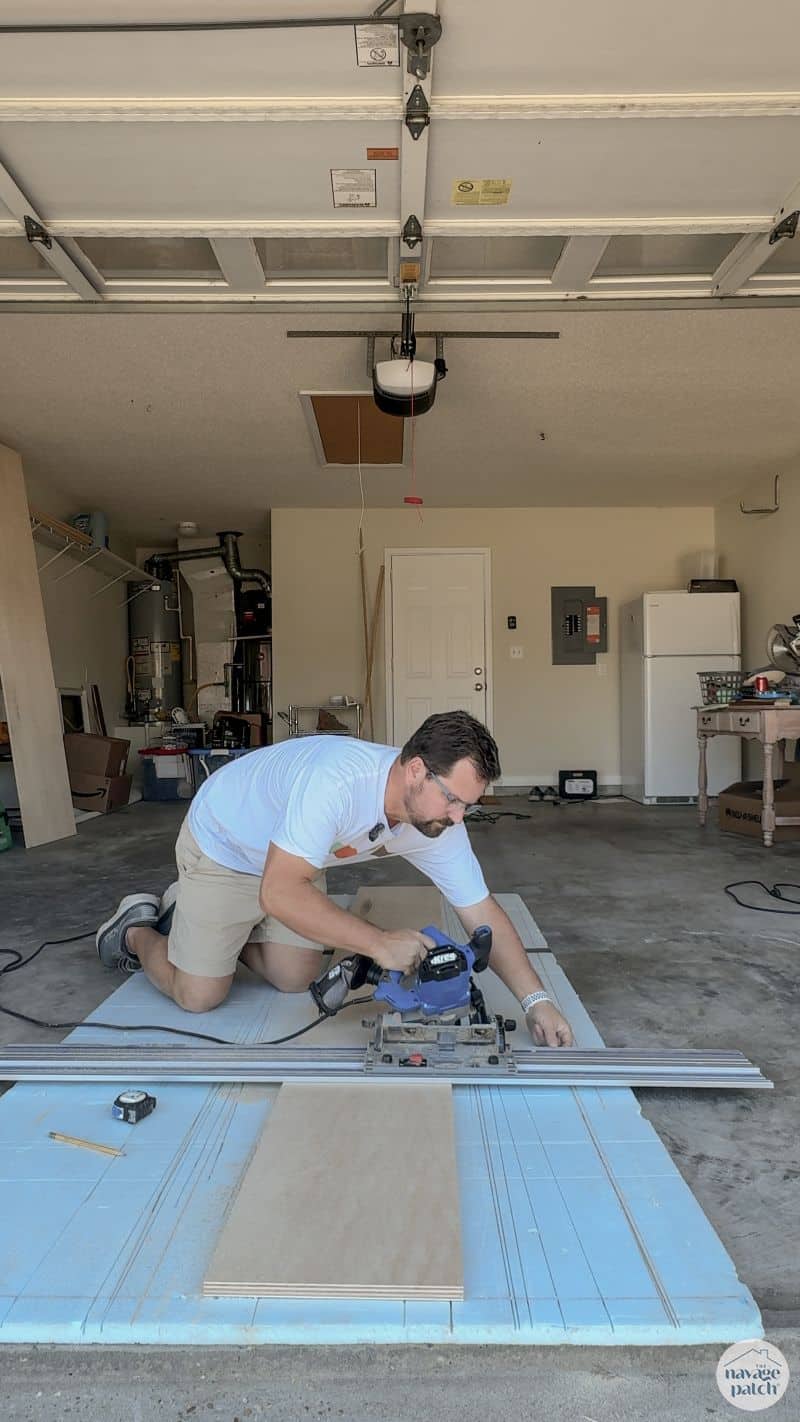

I secured the top with brad nails and the sides with wood glue and brads.
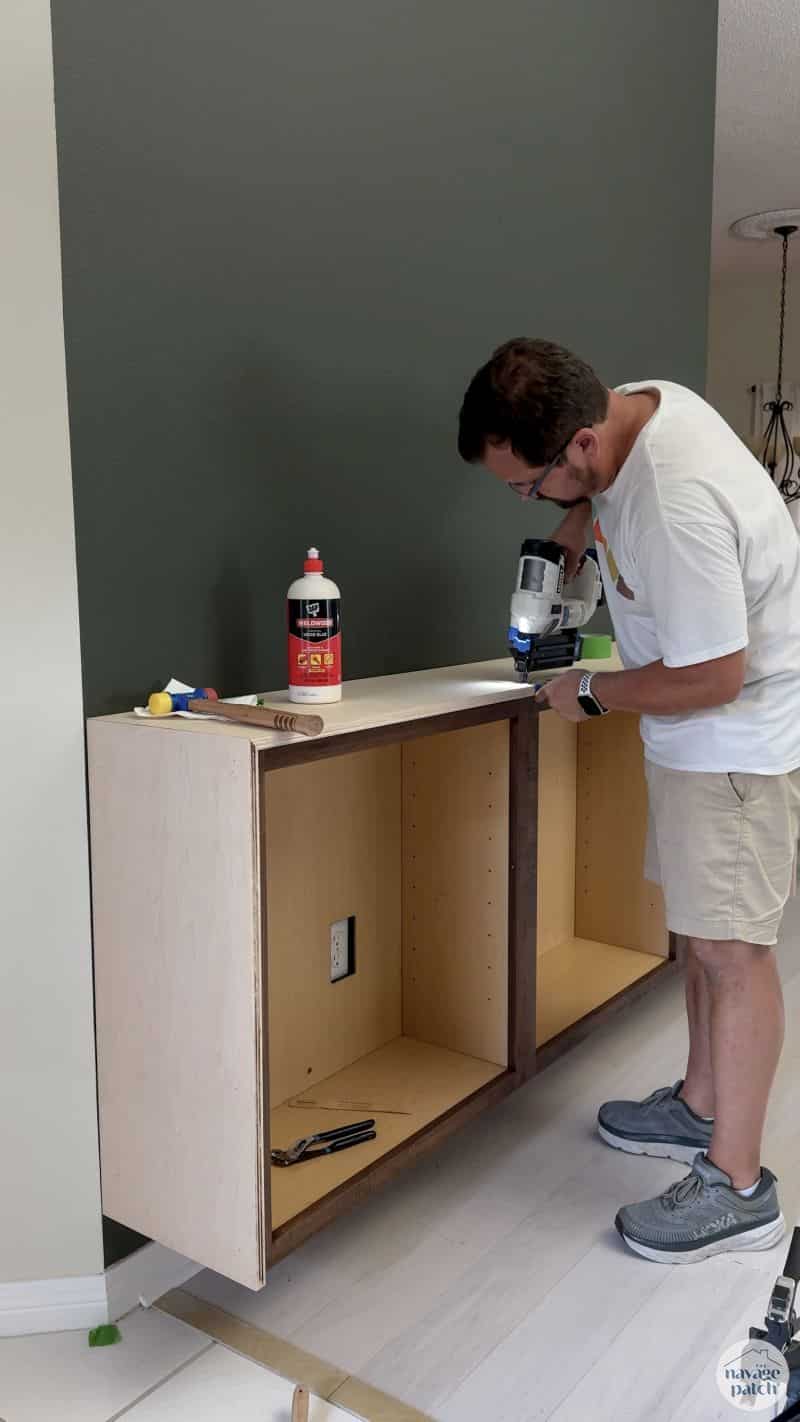
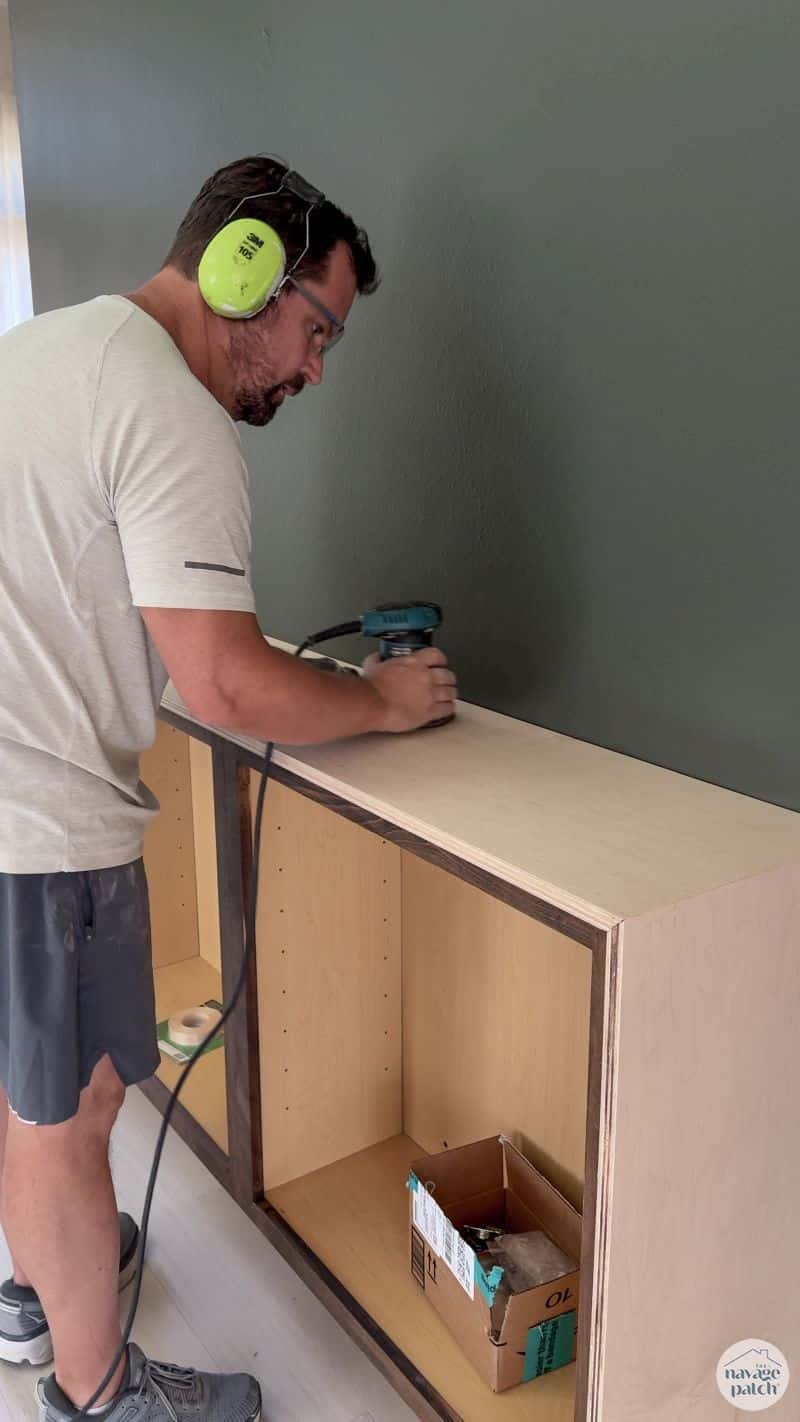
I filled the brad nail holes and sanded the plywood with 220 grit.
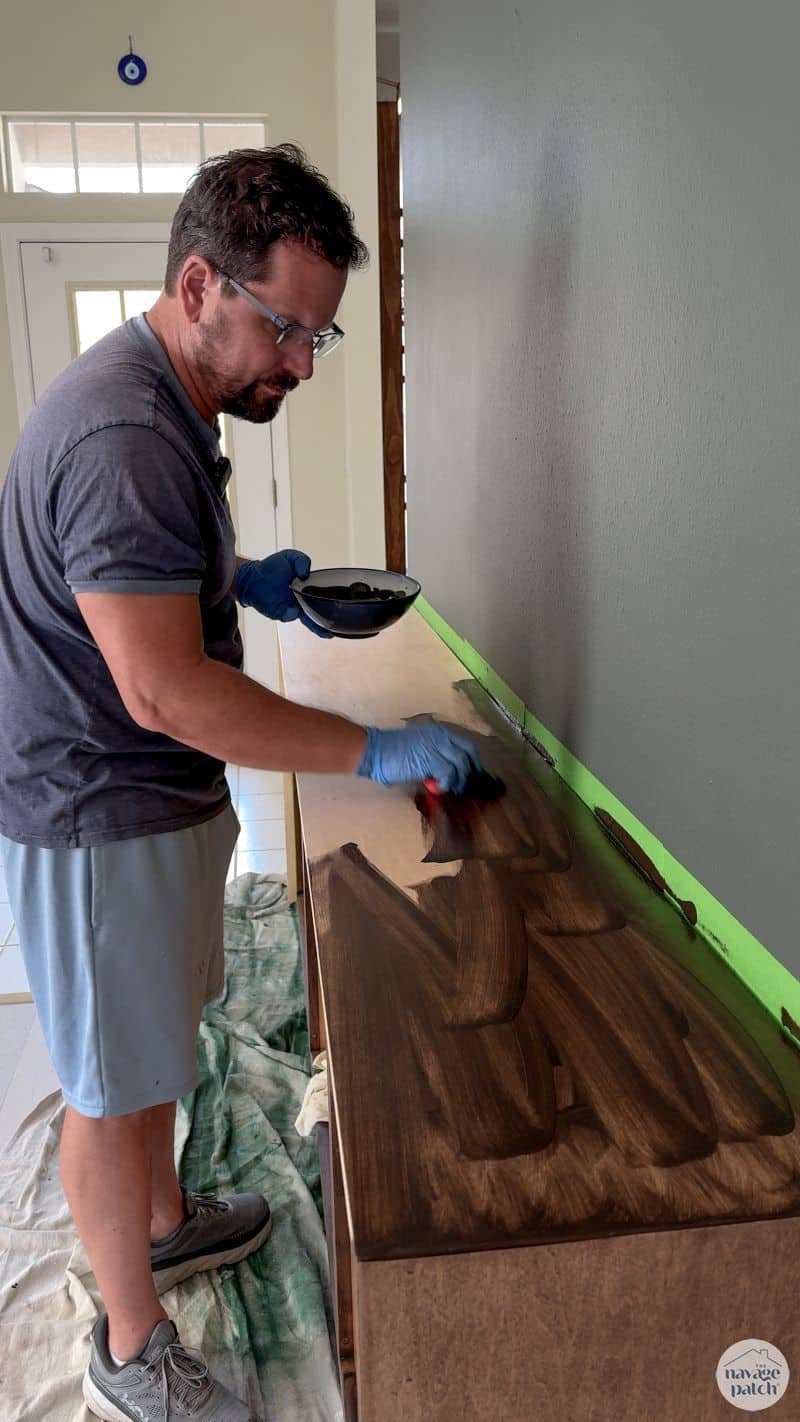
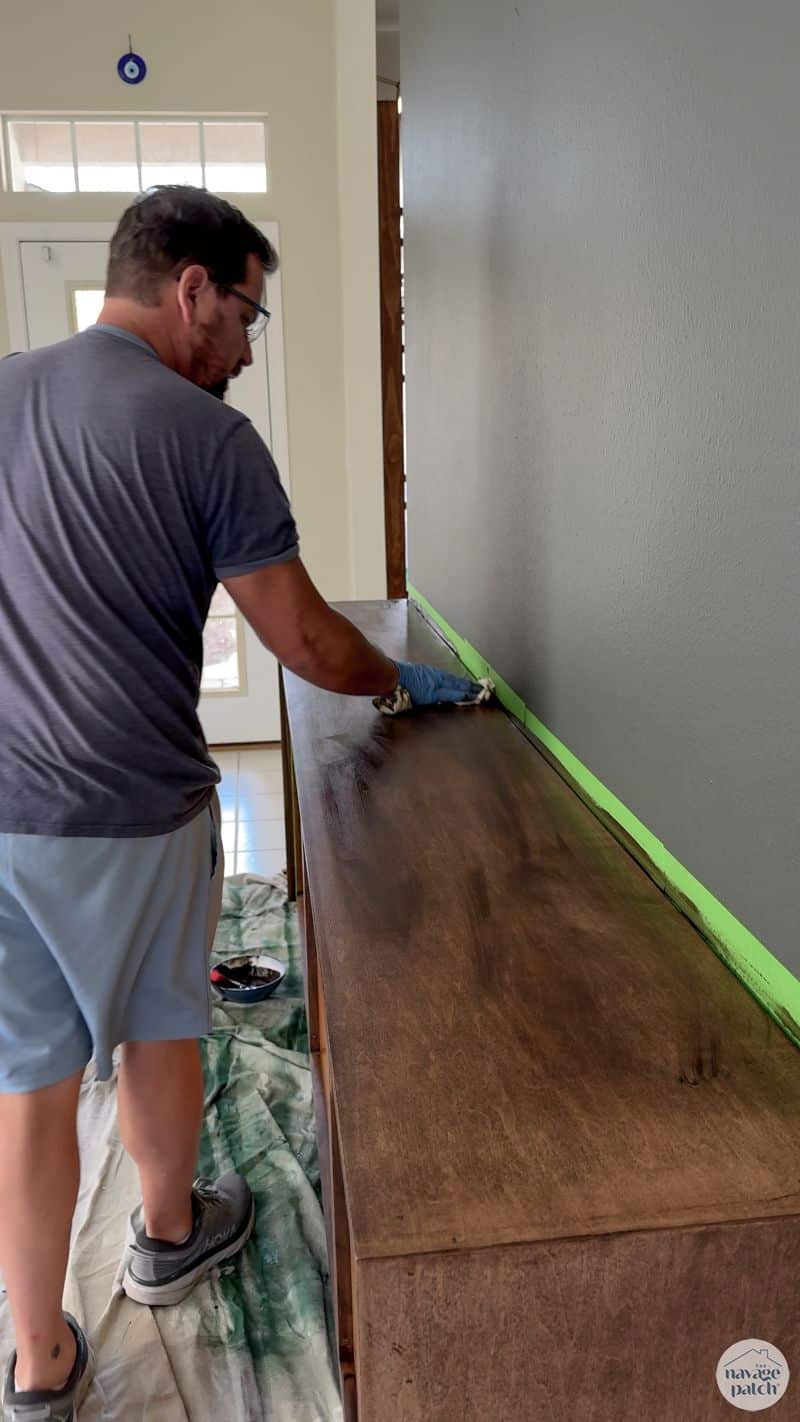
I created my own Frankenstain with Kona, Walnut and one or two others.
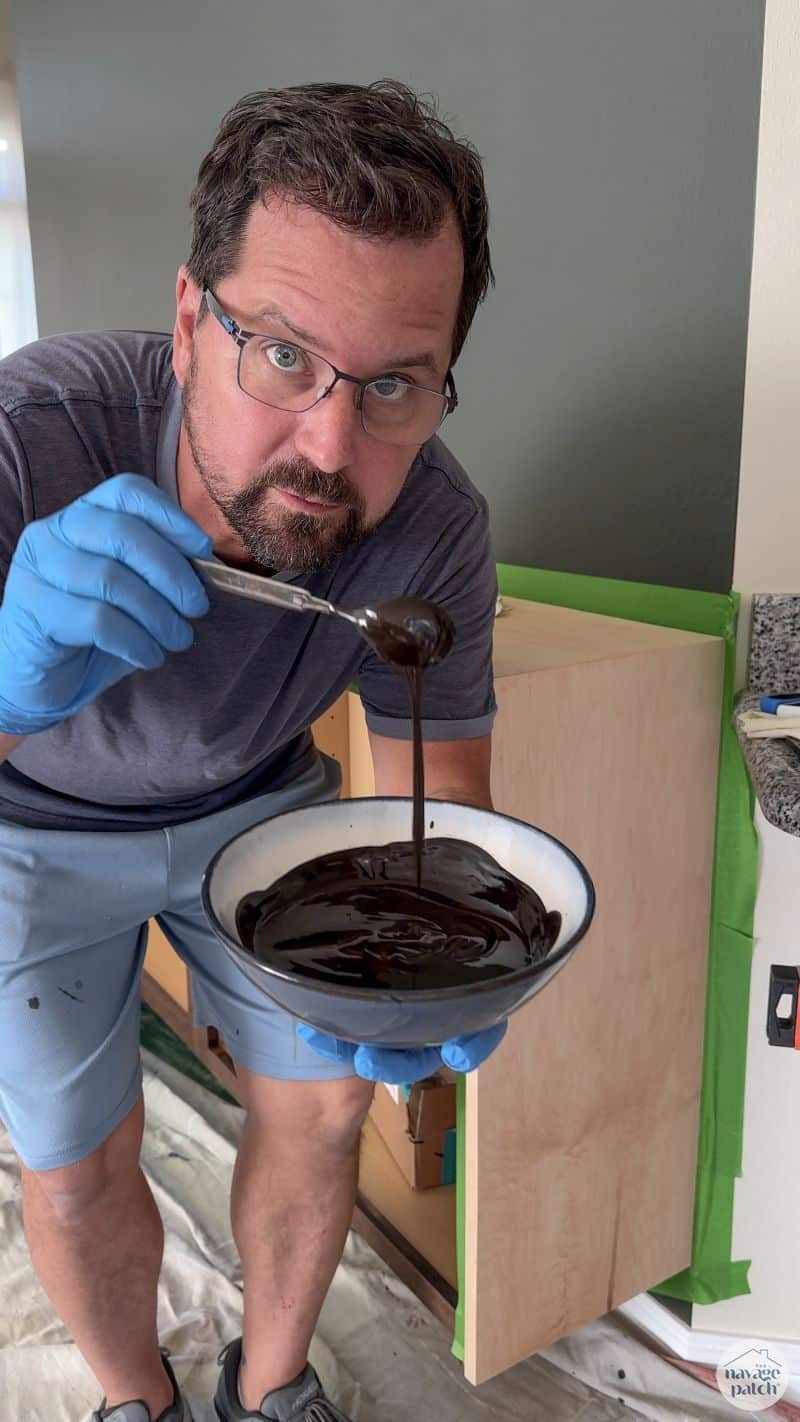
I had to make this blend to match the door stain. That was straight Kona, but because the cabinet door wood had a reddish tone, I needed to adjust the color for the top and sides.
While the stain dried, I reattached the doors. You can see that the doors are two-tone. This was unavoidable, as the wood for the panel is different than the wood for the frames, and they take stain differently. It’s ok though, because I love the two-tone look here. for reference, I matched the countertop stain to the door panels, not the frames.
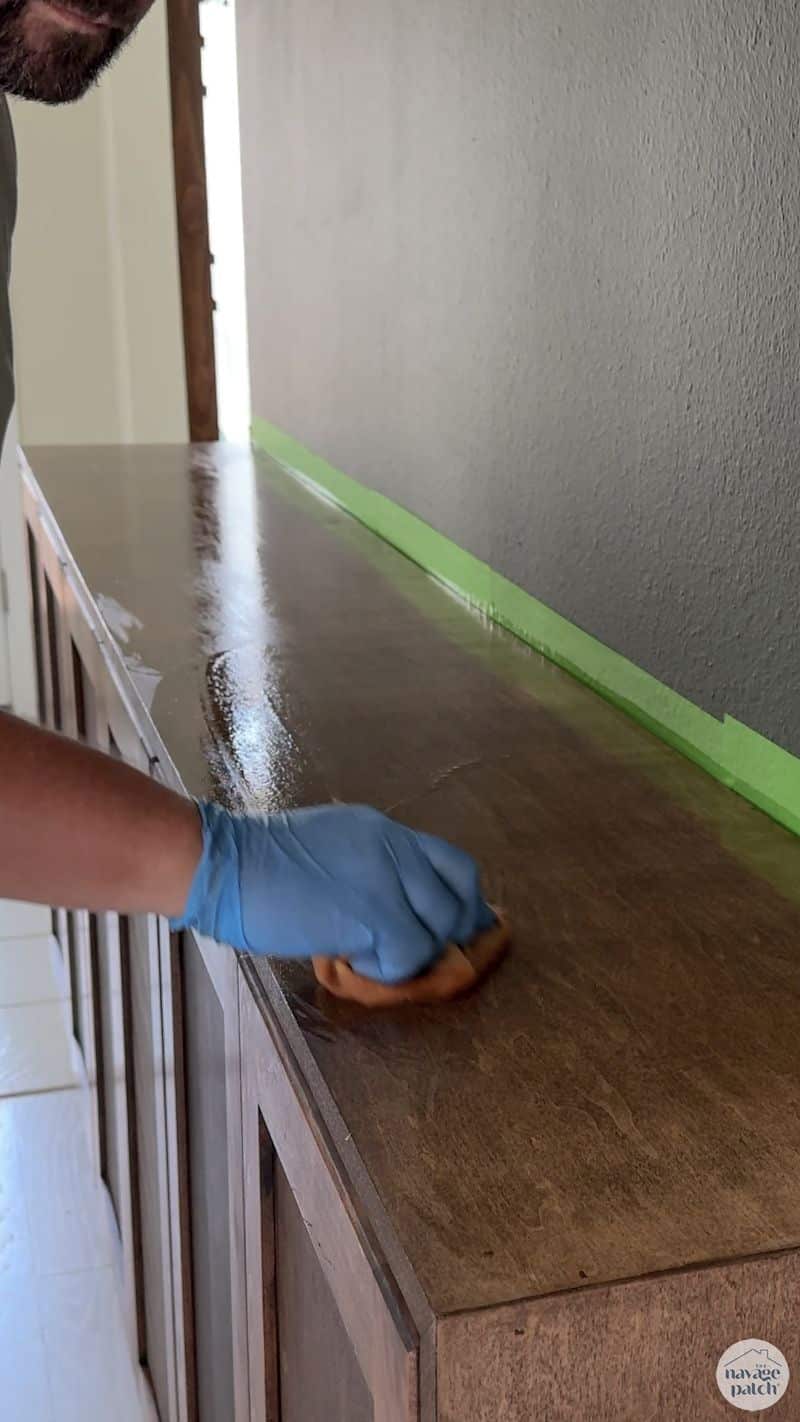
When the stain up top was dry, I applied a few coats of satin wipe-on poly.
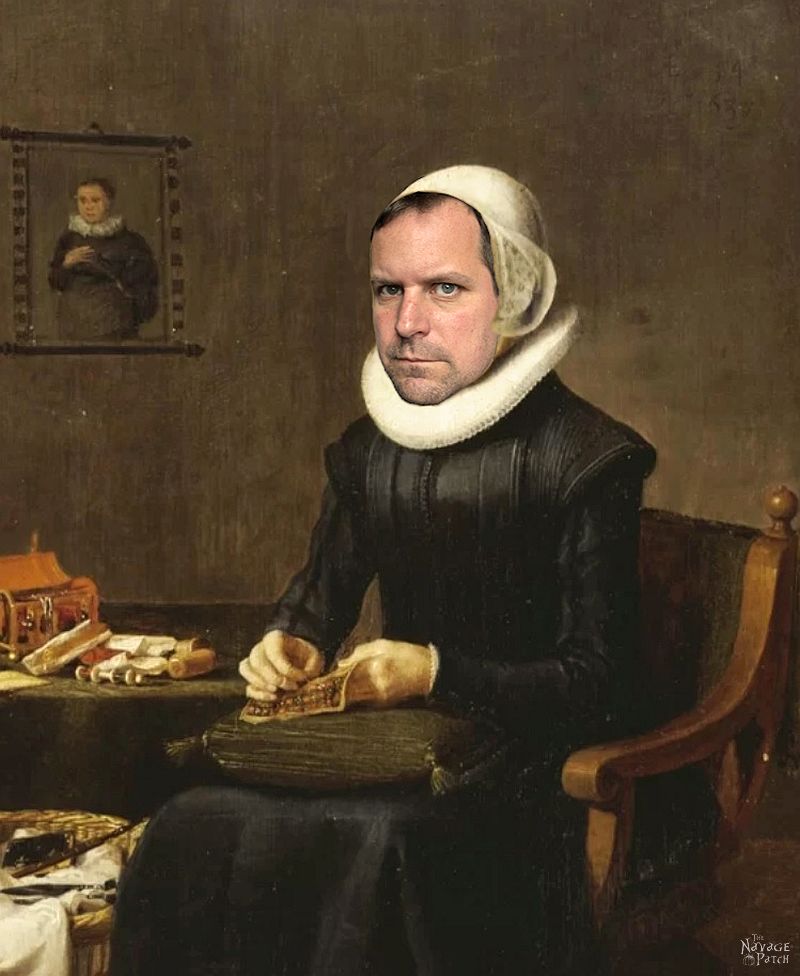
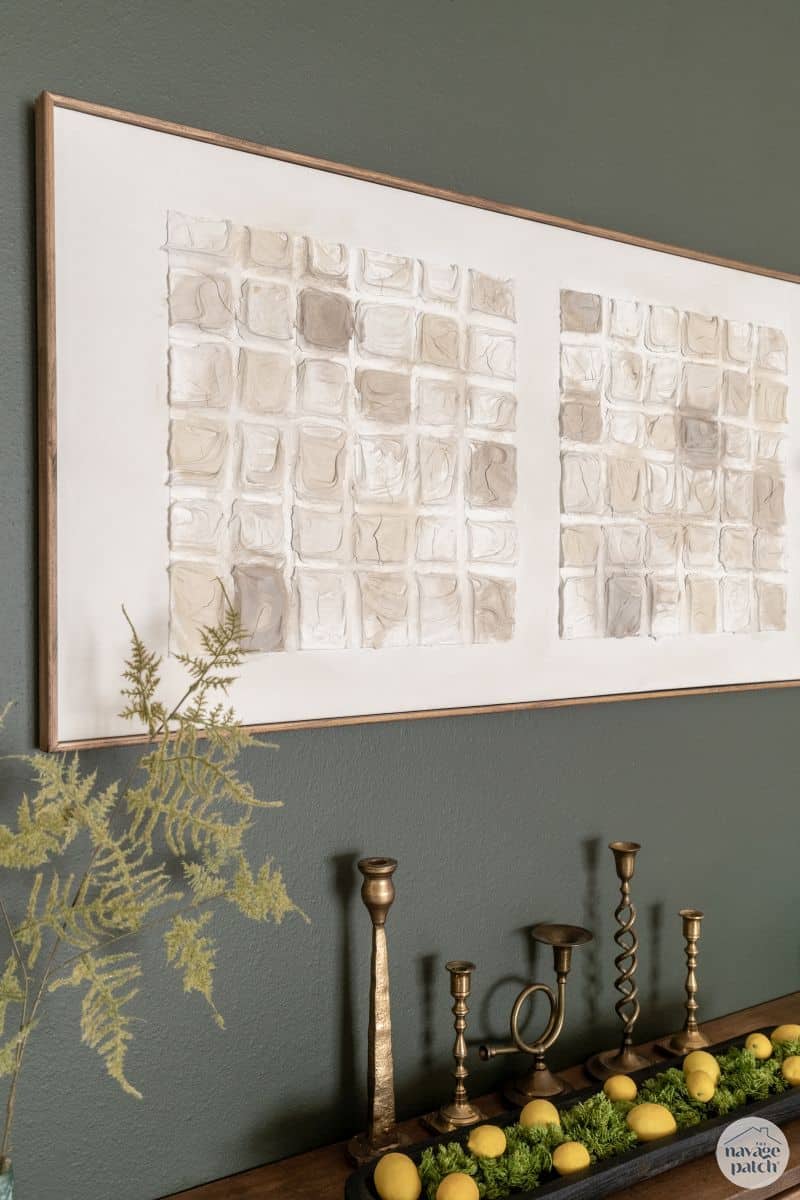
Okay, enough with the building, let’s revisit Art World and the aforementioned El Grego.
El Grego was commissioned by Le Shrimp to create a work of art to hang over the floating console table.
He thought it was the perfect opportunity to use the stretched canvas on a frame the Le Shrimp purchased a few years back that had been collecting dust in a storage room.
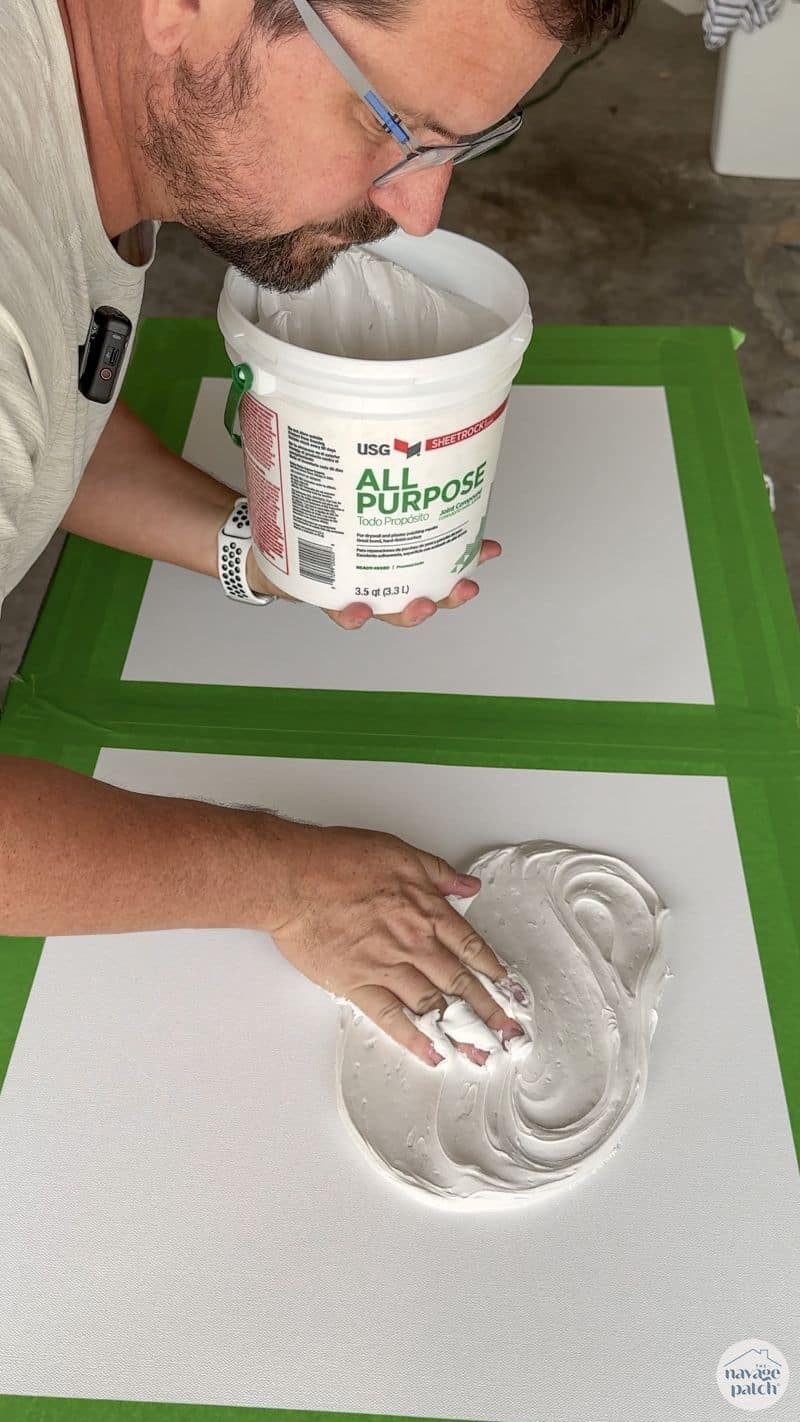
He started with a small bucket of joint compound.
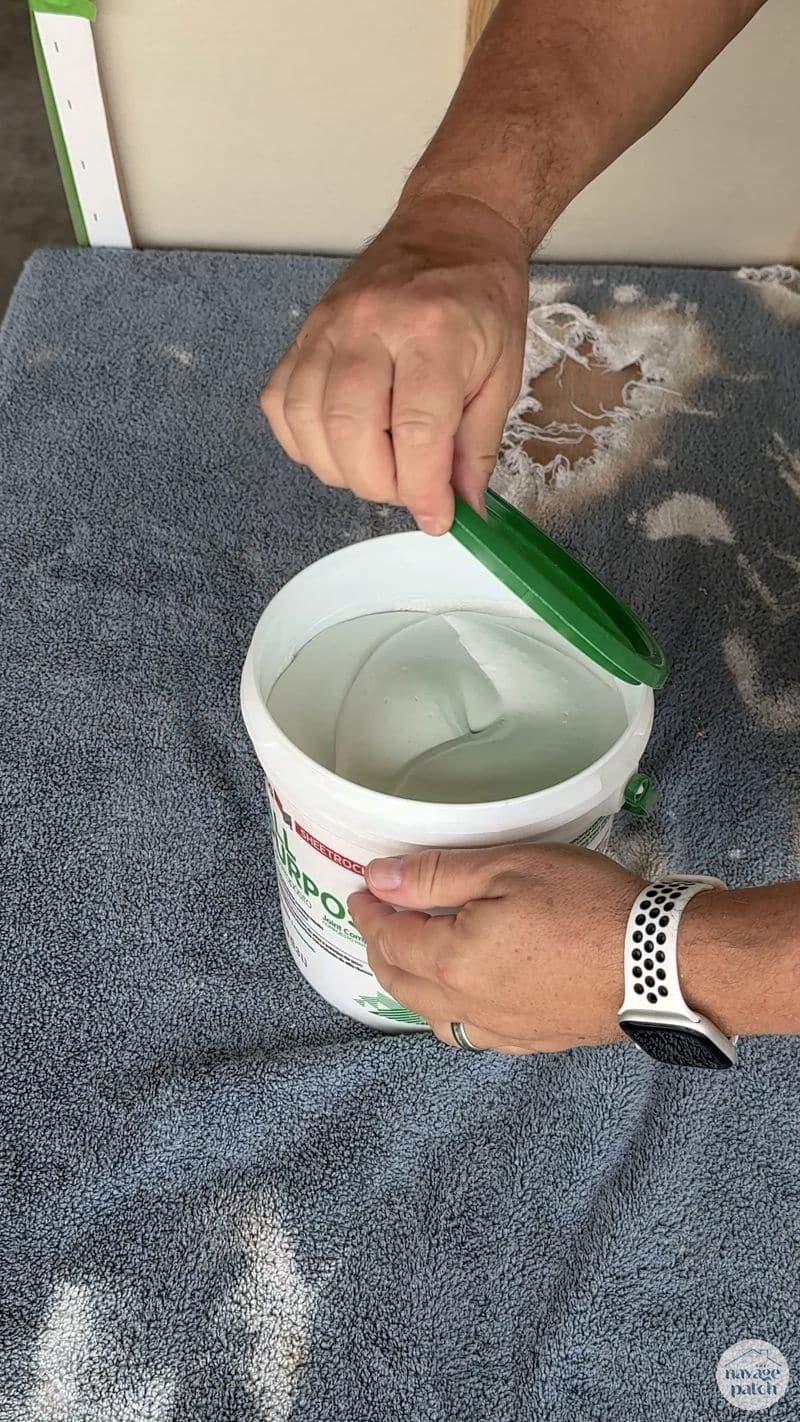
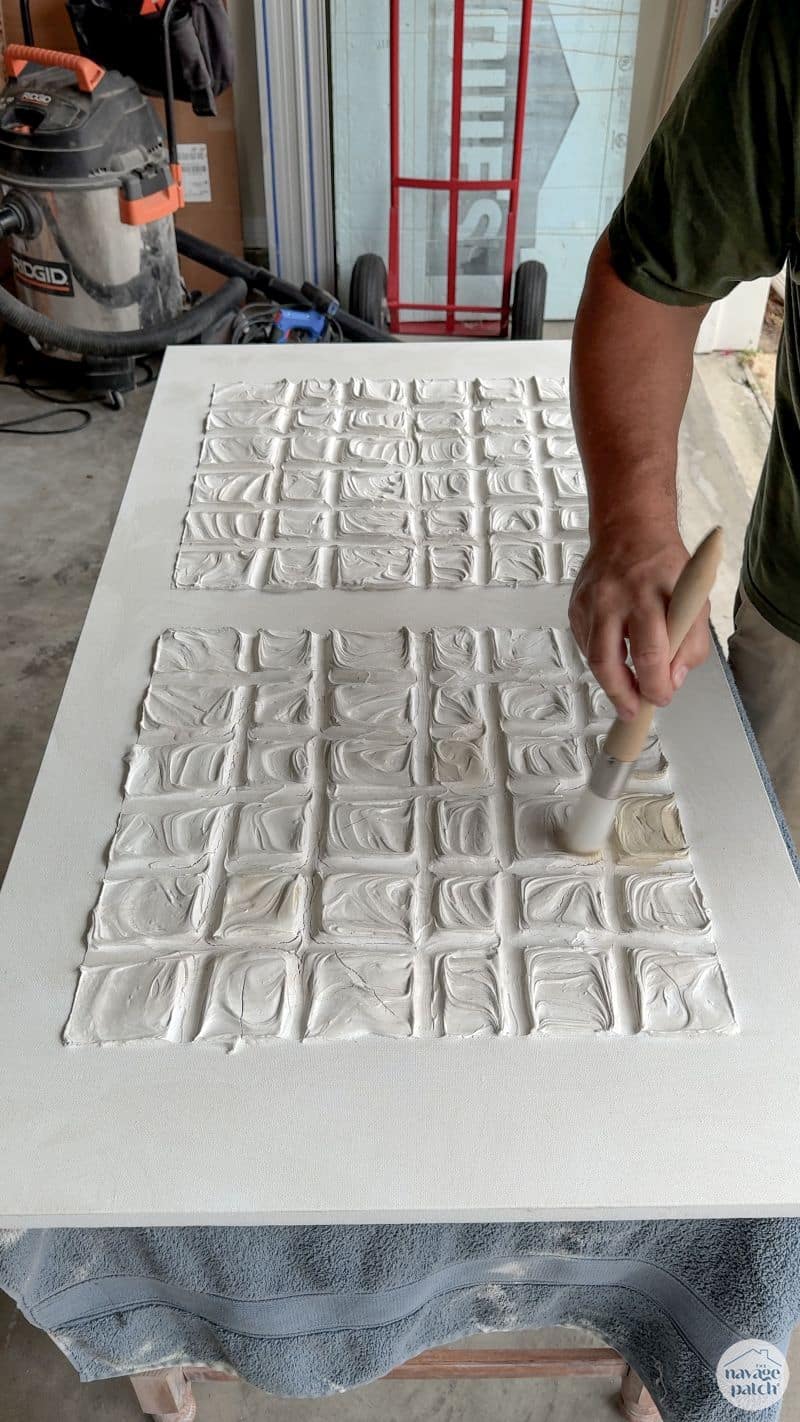
After taping off the canvas to reveal two squares, El Grego plopped some mud onto the canvas.

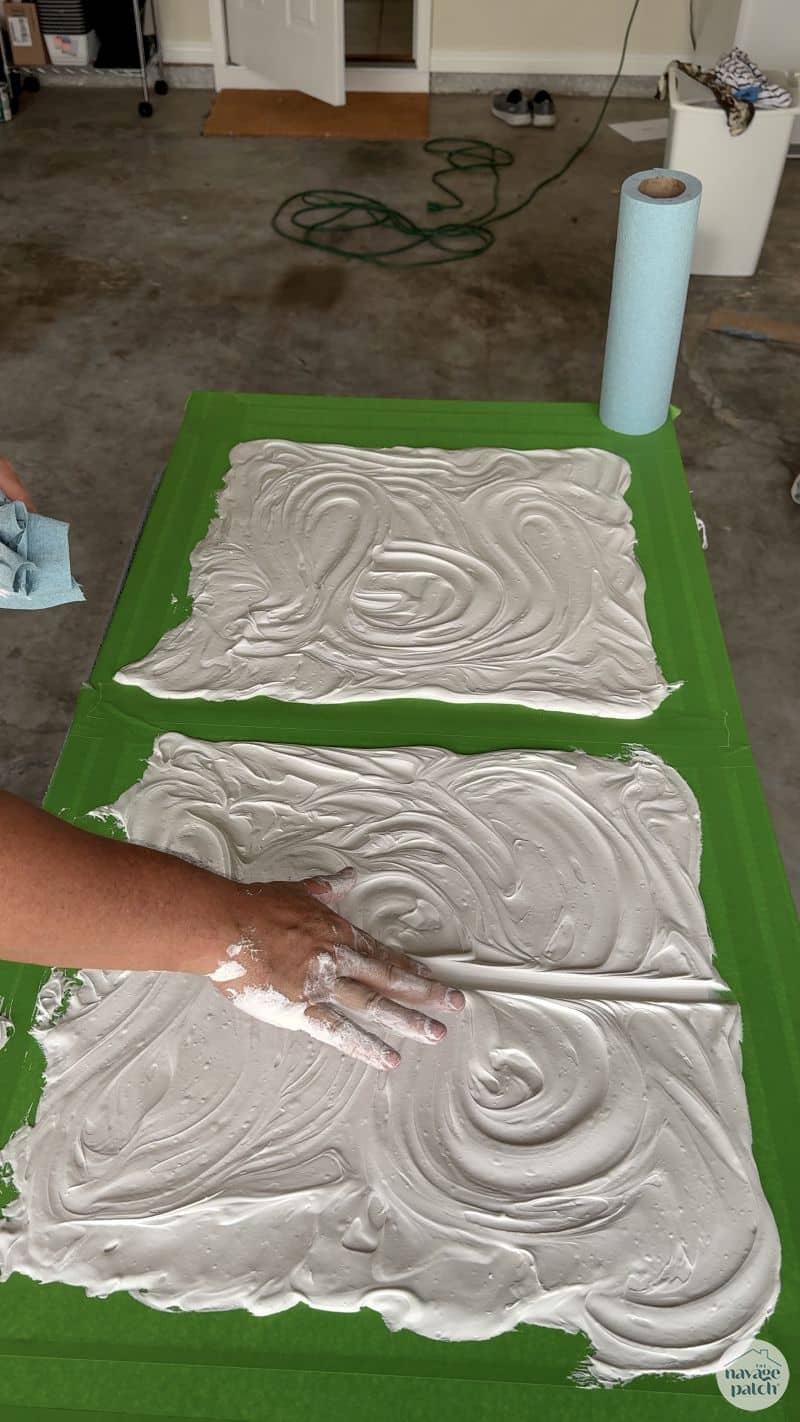
Then, like an ambitious baby confronted with a plate of mashed potatoes, El Grego began to work his magic upon the goop-covered canvas.
It soon became clear that El Grego possessed the skill of at least three babies…perhaps four.
Kindergarten art teachers swoon when his name is mentioned. These fingers are national treasures!

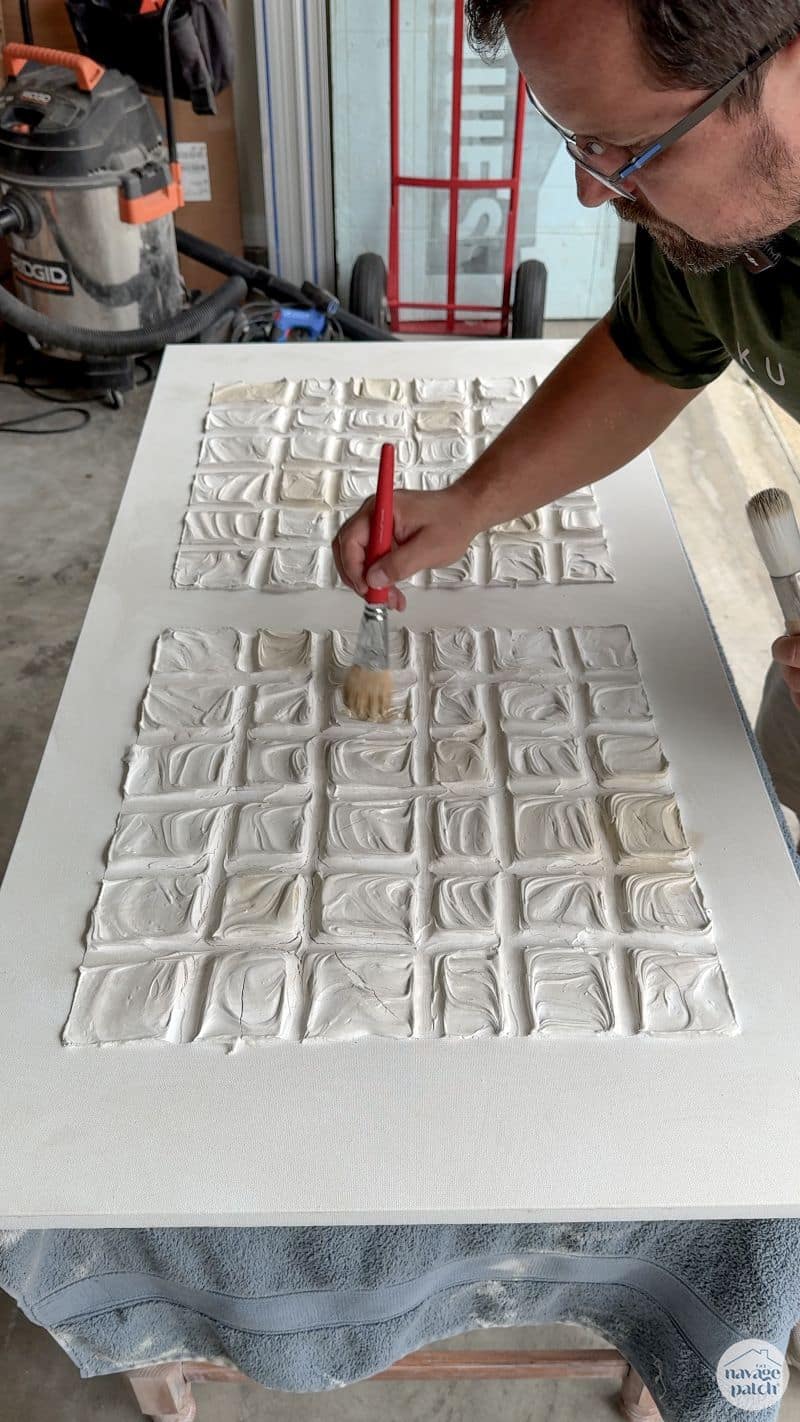
El Grego peeled off the tape and left the masterpiece to dry for a few days. Then he dry brushed with several carefully curated neutral tones of lime paint.
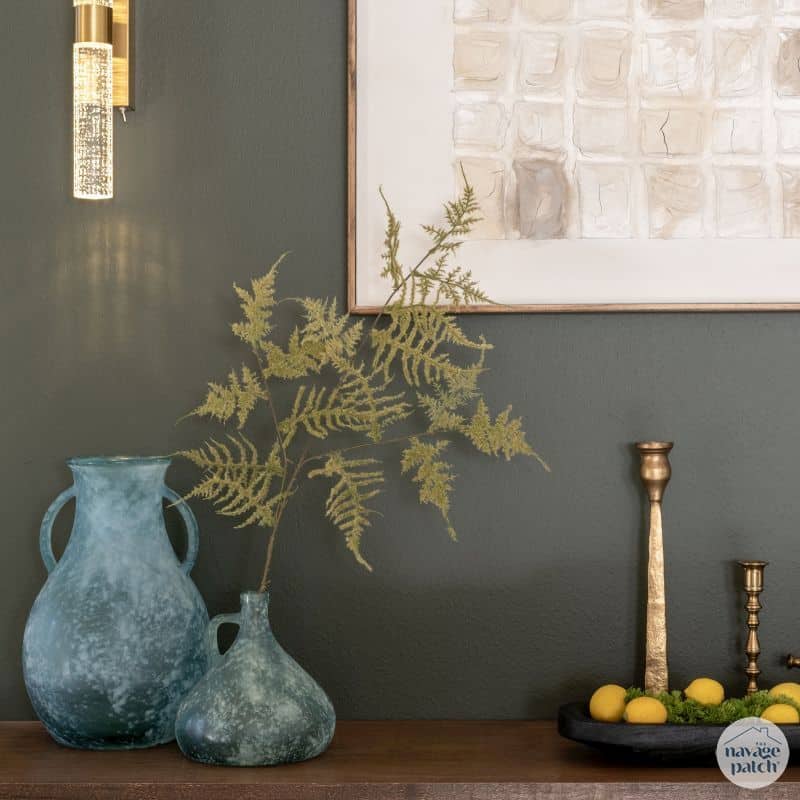
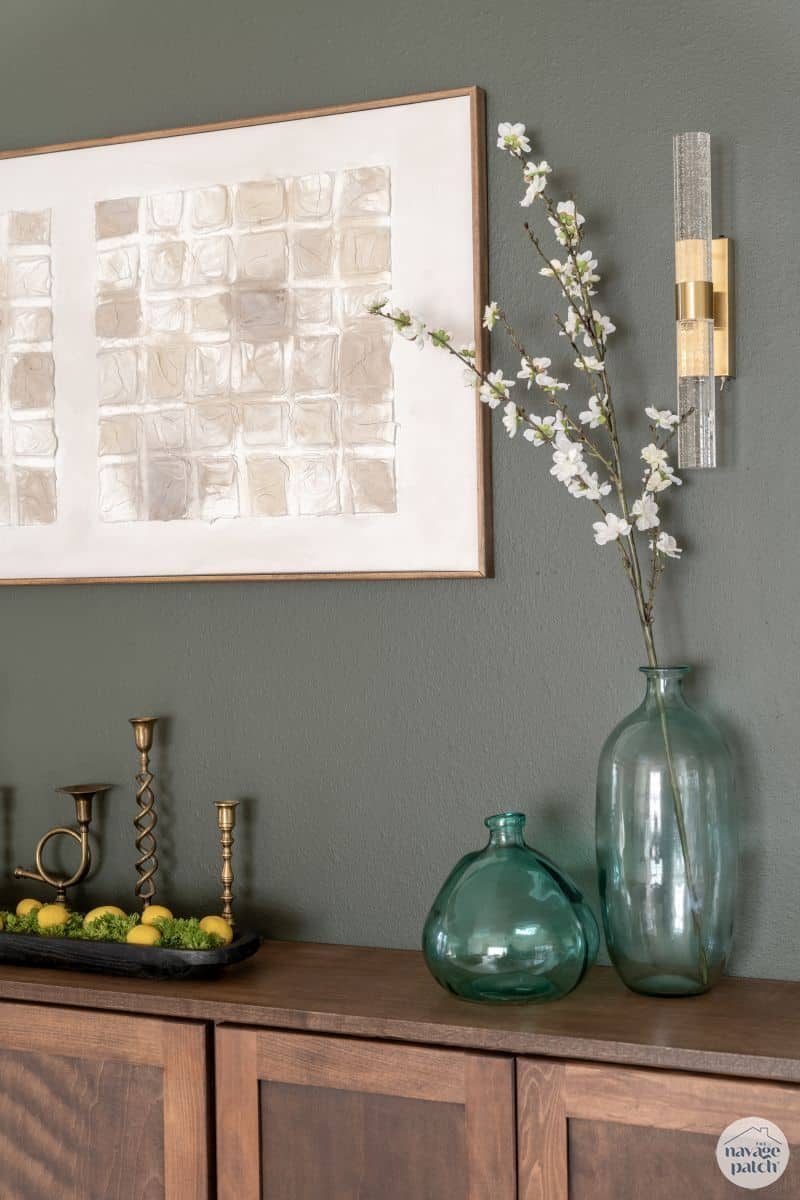
El Grego built a simple frame for his inaugural work and hung it above the floating console.
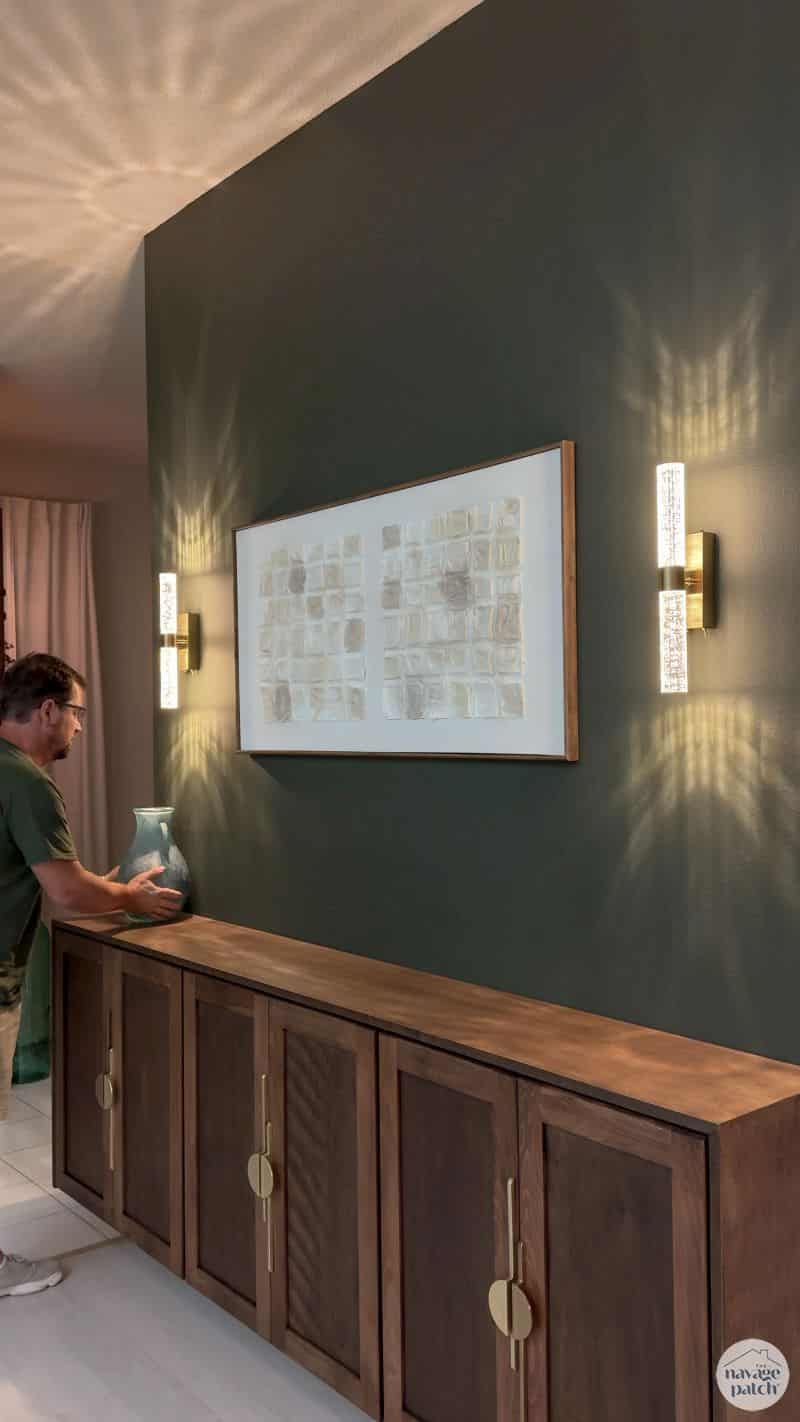
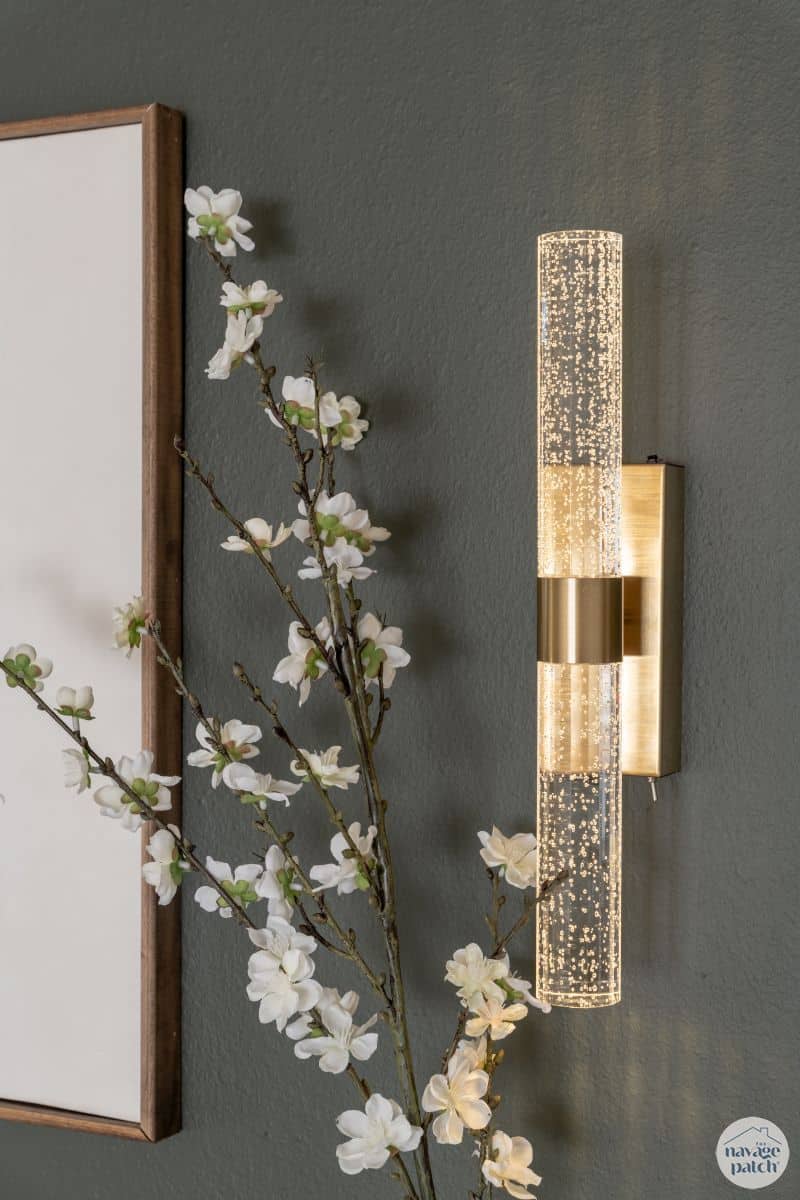
El Grego packed up his mud, stowed his fingers and moseyed off to parts unknown. Meanwhile, I flanked his artwork with some sconce lights.
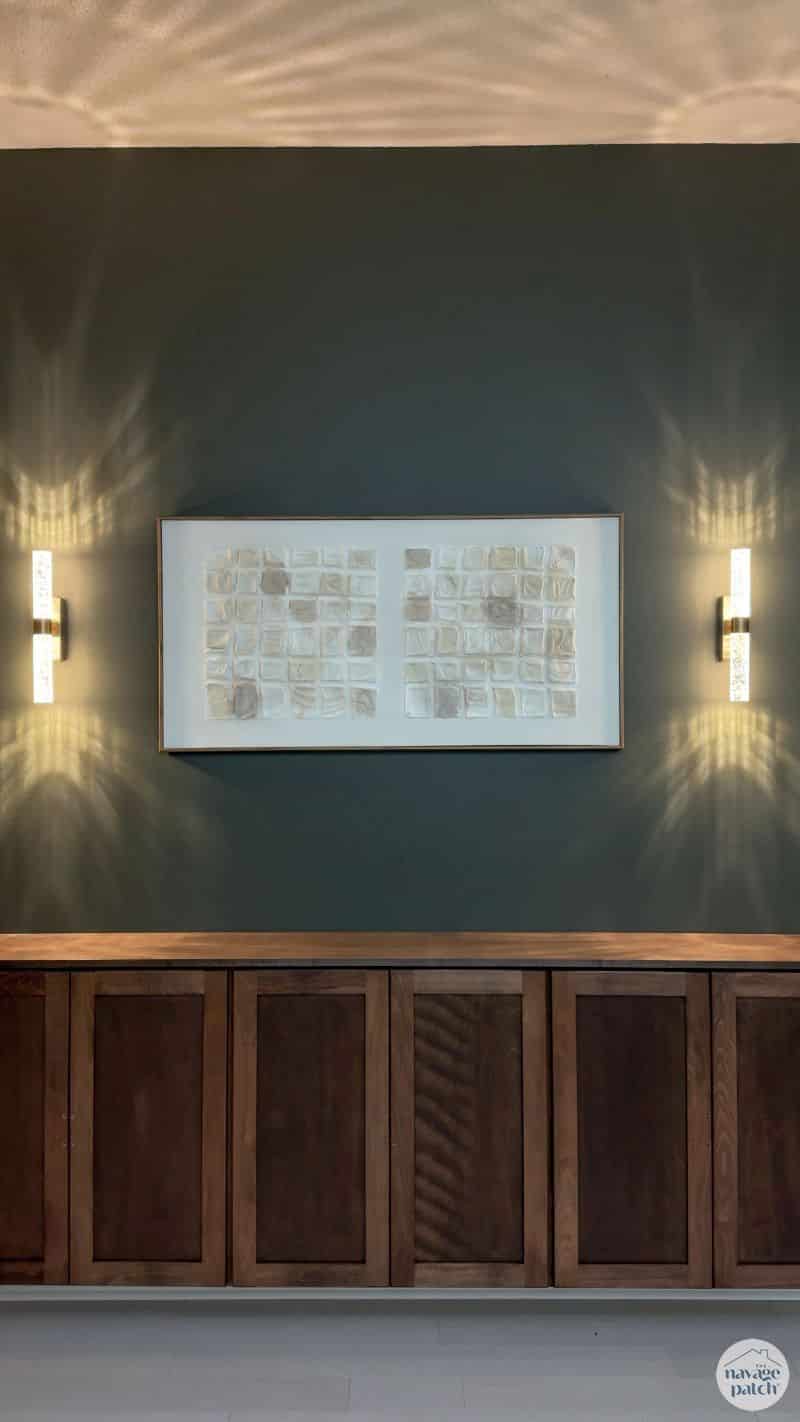
After installing some beautiful gold hardware, I styled to console.
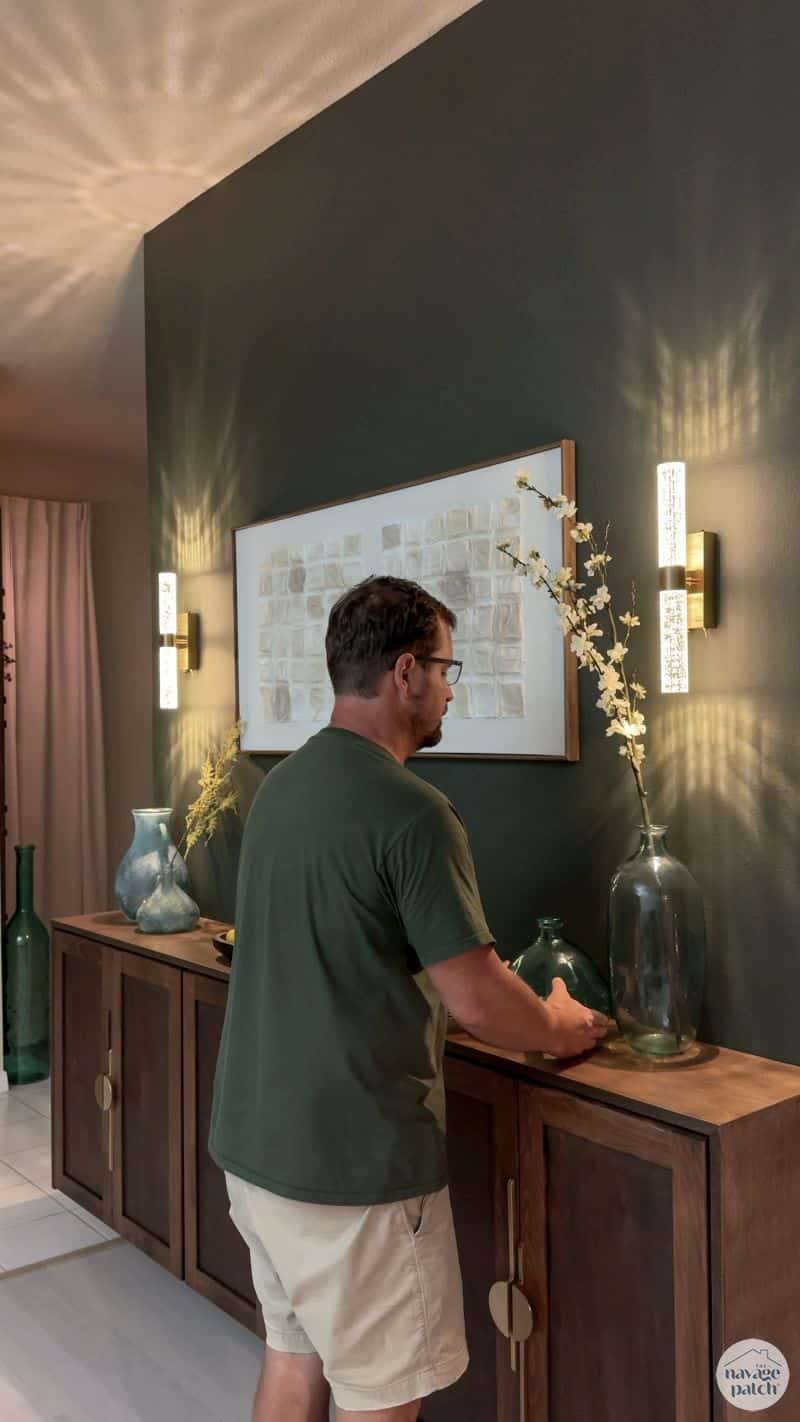
And here it is, finished and ready to turn over to The Boy!
You totally need to sign that! It all came out great!
I signed it Laura! 😀
Definitely sign your artwork. Even date it if only on the back so he’ll have a reference later in life. Your project turned out beautiful as usual. But admit, the Shrimp helped stage?
Of course she did! 😀
That came out beautiful and yes you should sign it !!
Thanks, Pam! 🙂
It looks awesome. What kind of sconce lights are those? And where did you get them?
Hey Sarah, the lights and the Amazon link are in the supplies list toward the top of Greg’s post. And they’re battery operated!
They’re linked in the supplies list Sara!
Are the backs of the cabinets that thin stuff? If so, how do you make sure it won fall off the wall. It looks great. And you should sign your art work.
the backs are thin but there is a thick border around as well – that’s what I drilled into 🙂
I love your work & your description of the journey is always a joy. Each time I read a new blog I experience a short-lived fantasy that I, too, could do that and make my house look awesome (sort of like that irrational feeling when you buy a lottery ticket).
The artwork in particular is really cool.
My one observation of the latest projects is that the staging looks like Greg & Handan; I’d love to see the house with Baris’ imprint :-). We need to update our house and I am wondering how to achieve a younger/fresher look than what we currently have.
Thank you Deb! To be perfectly blunt, Baris has yet to find his style or even the desire to find a style. When he gets there, the house is at his command! 😂
One of my favorite projects! You definitely need to put your name and date at least on the back of it. Maybe just your initials on the front. The simplicity of it demands a simple acknowledgement of the artist. I’m also going to go right out and buy a canvas and attemp my own version. From art piece, to cabinets, to styling, the whole thing is attainable perfection!
Thank you Leslie! You’re going to love making art like this – it’s so easy to get results you’d pay hundreds (or more) for from an art gallery!
Very Very Nice!
You do great work!
Thank you Teena!
I agree with your son. Sign the art! You made it, you should own it.
I will! 🙂
I always thought El Grego was holding out on us! Sign that baby and be proud!
Love the hardware and you share?
Will do, Terry! 😀
I would say that your son is a very lucky boy! The art piece is Amazing and also gorgeous! I love the color on the wall and the cabinet is beautiful as well! Once again, you nailed it! Well Done Greg!
Thank you so much, Terri! He is lucky, but at least he knows it! 😂