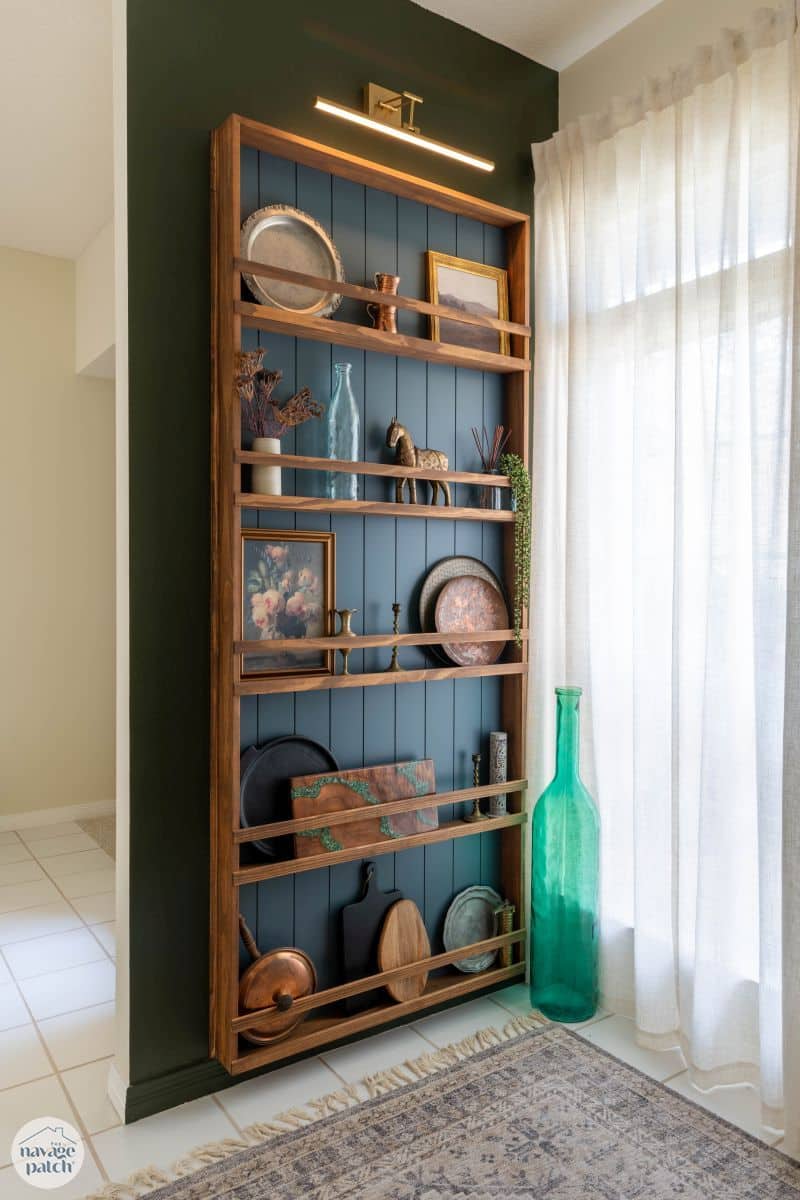
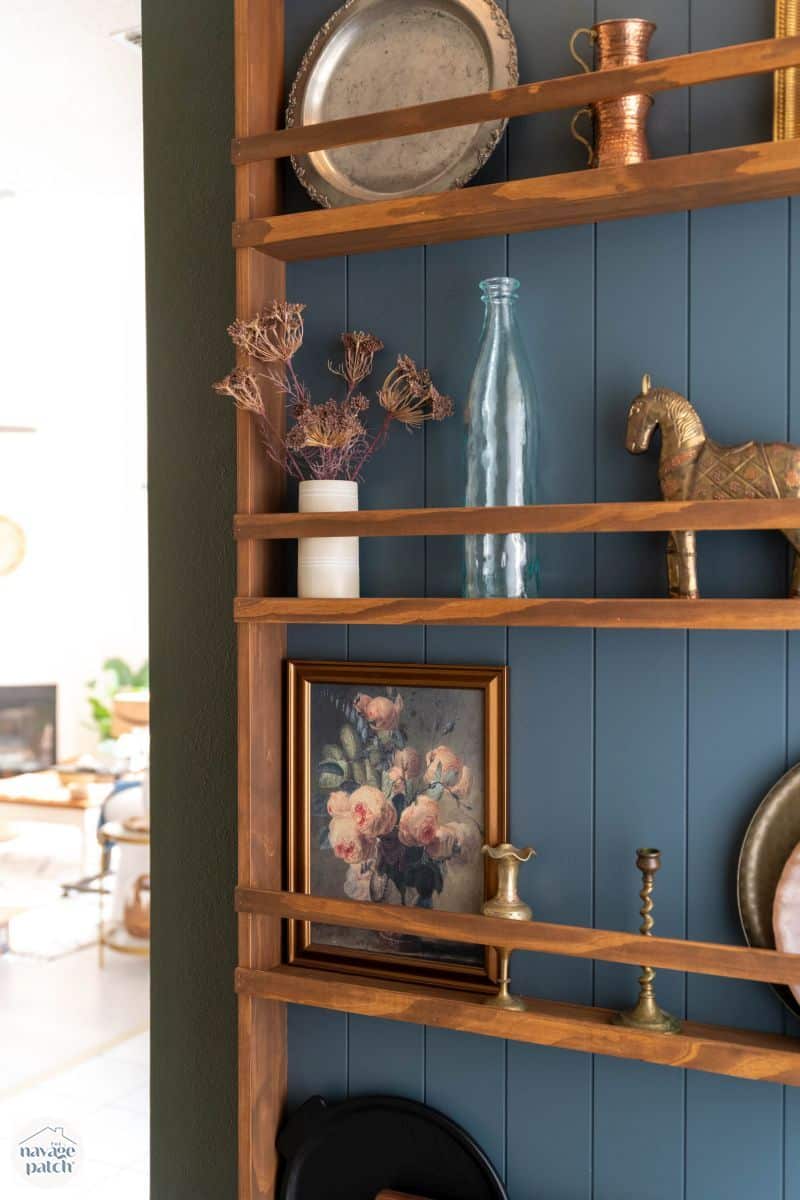
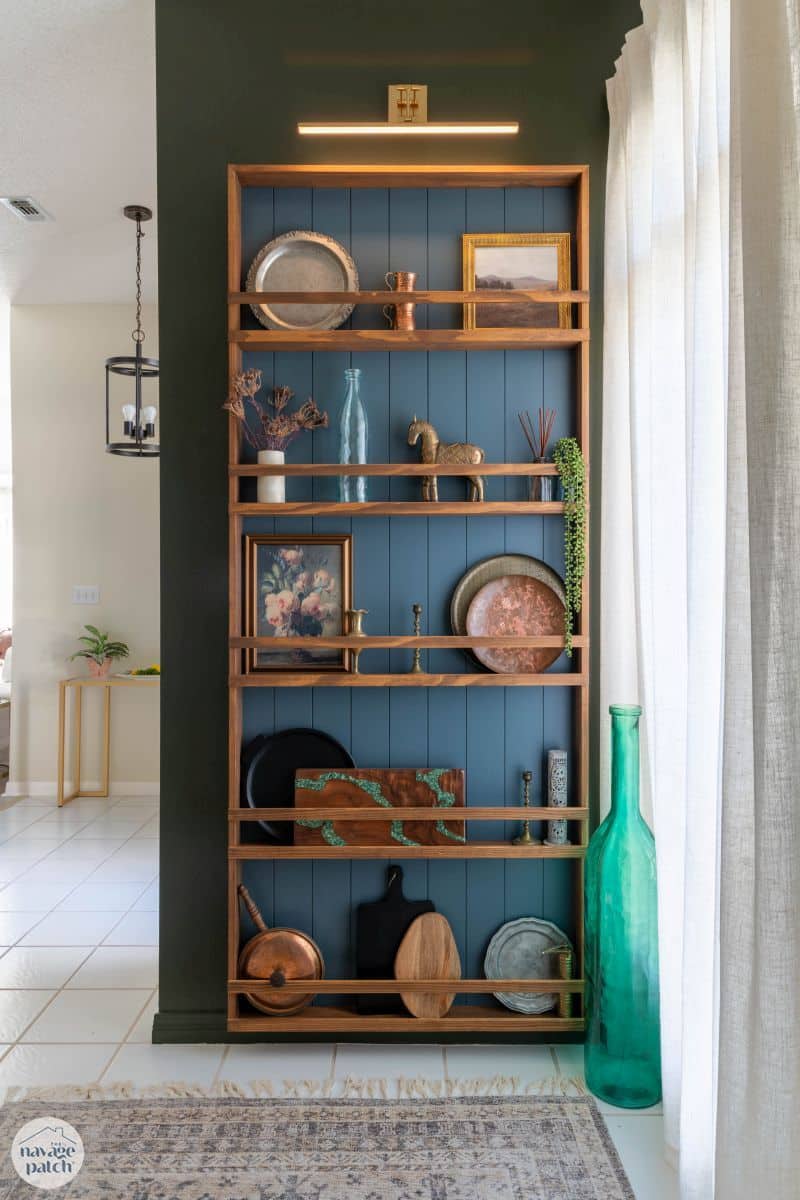
Stunning DIY Plate Rack
This DIY Plate Rack turned out so beautiful, we couldn’t justify putting ordinary plates in it, so we use it as a stunning display rack!
It may be our son’s home, but it’s our playground. 😁
I’m sure after signing his closing documents, all Baris had in mind was to throw some clothes around the floor and get busy with the three “L”s of young-mandom: Loafing, Lounging and Layin’ about. This would (of course) be interrupted by the three “G”s: Gaming, Gobbling and Goofing off.
Instead, he got his mother, tape measure in hand, tearing through his house like a Category 5 Her-icane (see what I did there). She was an F5 shrimpnado fiercely focused on the three Ds of home ownership: Design, Demolition and DIY.
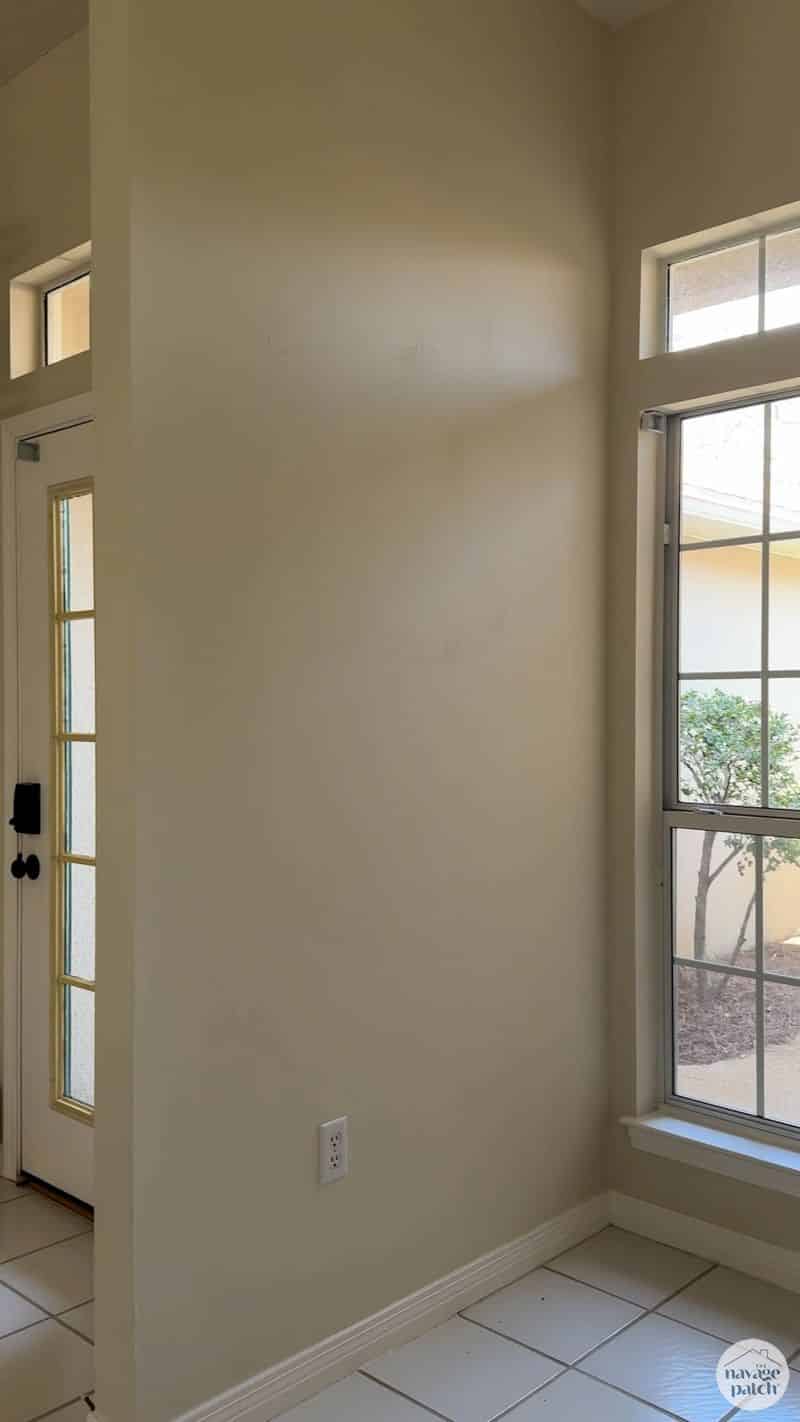
I might have expected a kitchen reno or a bathroom makeover as the first project – even a bedroom painting – but instead she focused her thoughts and energy on this dinky little wall next to the entrance.
Instead of kitchen cabinets and countertops, my babes decided that The Boy’s house needed…(drum roll)… a plate rack.
Of course it did. It’s every man’s dream.
My first step was to remove the outlet pictured above and move it to the other side of the wall. I also ran wire up near the top center of the wall. There would be light involved later on.
Now let’s get to the plate rack build. Mistakes were made and lessons learned, but that will only help me out when I use this idea for a different project back at our house that I’m about to start.
More on those mistakes coming right up!
DIY Plate rack SUPPLIES LIST
Affiliate links are provided below. Full disclosure here.
- 4×8 shiplap wall panel (Home Depot)
- 1×4 select pine lumber
- Trim moulding
- Construction adhesive
- Brad Nailer
- Sherwin-Williams Rain Cloud
- Sherwin Williams Ripe Olive
- Picture light

DIY Plate Rack VIDEO Tutorial
Watch our short and fun video below for an overview of our Plate Rack before you read the detailed step-by-step tutorial.
Watch Our Tutorial On YouTube
On Tiktok
On Instagram
We love to see our DIY projects out in the wild! If you try this DIY project and take a picture and post it on Instagram, be sure to tag us – thenavagepatch
DIY Plate Rack Tutorial
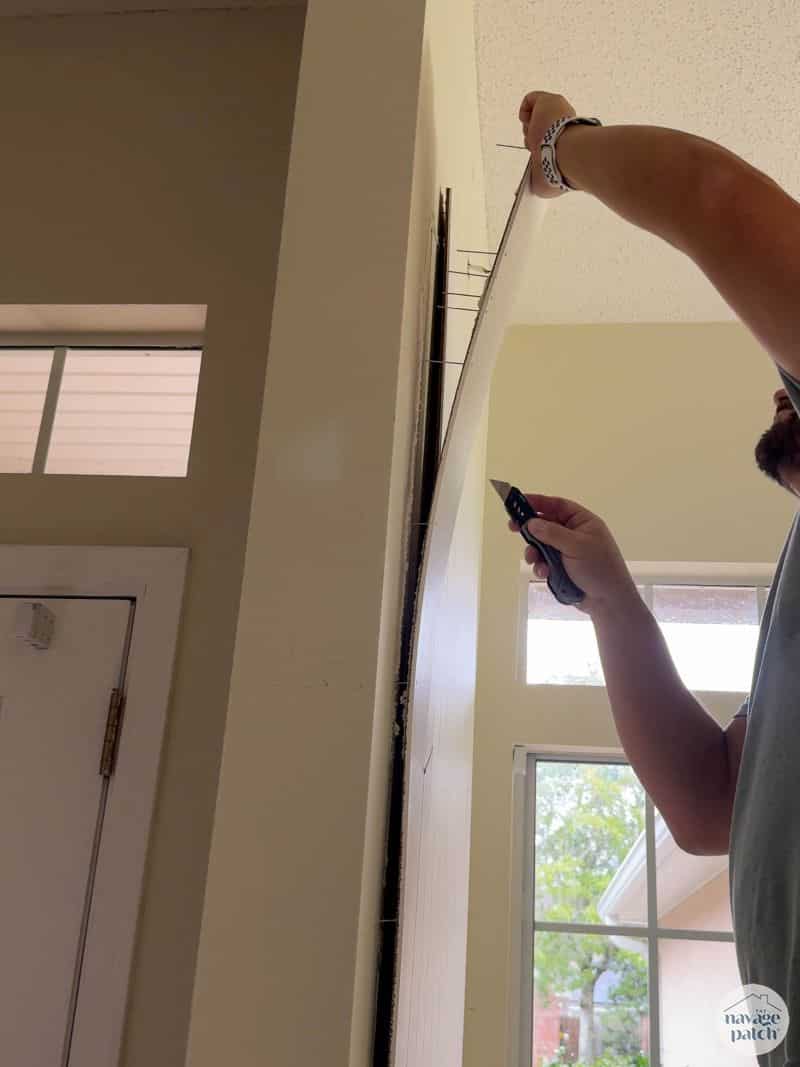
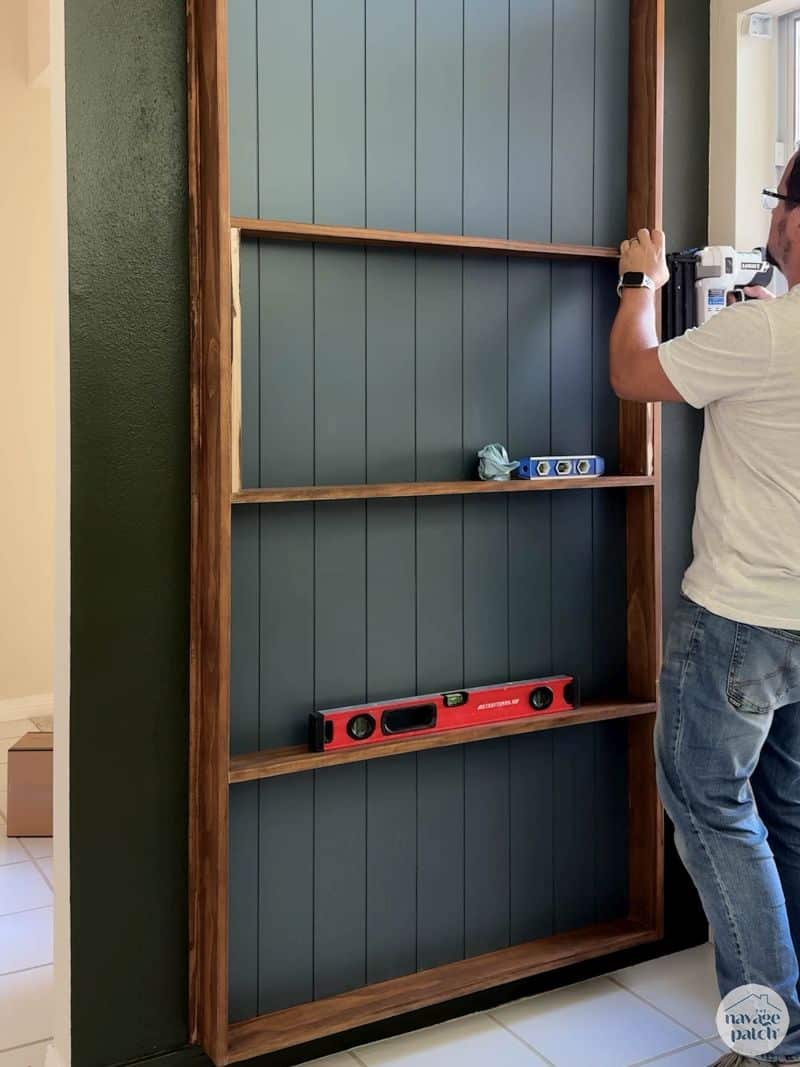
My plan for this plate rack was to build it in place. In other words, I’d first attach the back panel to the wall and then build the shelves out from there. In theory it’s not a bad plan…if your walls aren’t bowed like a cowboy’s legs.
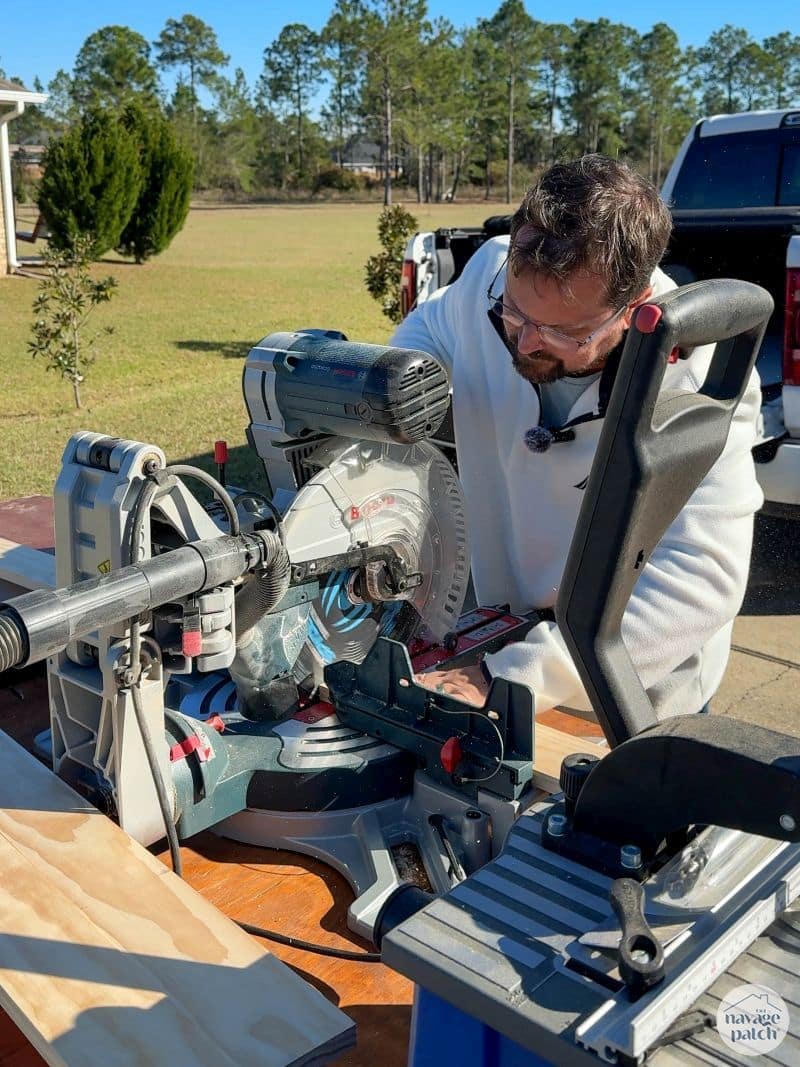
Of course, I didn’t know this when I started cutting the panel.
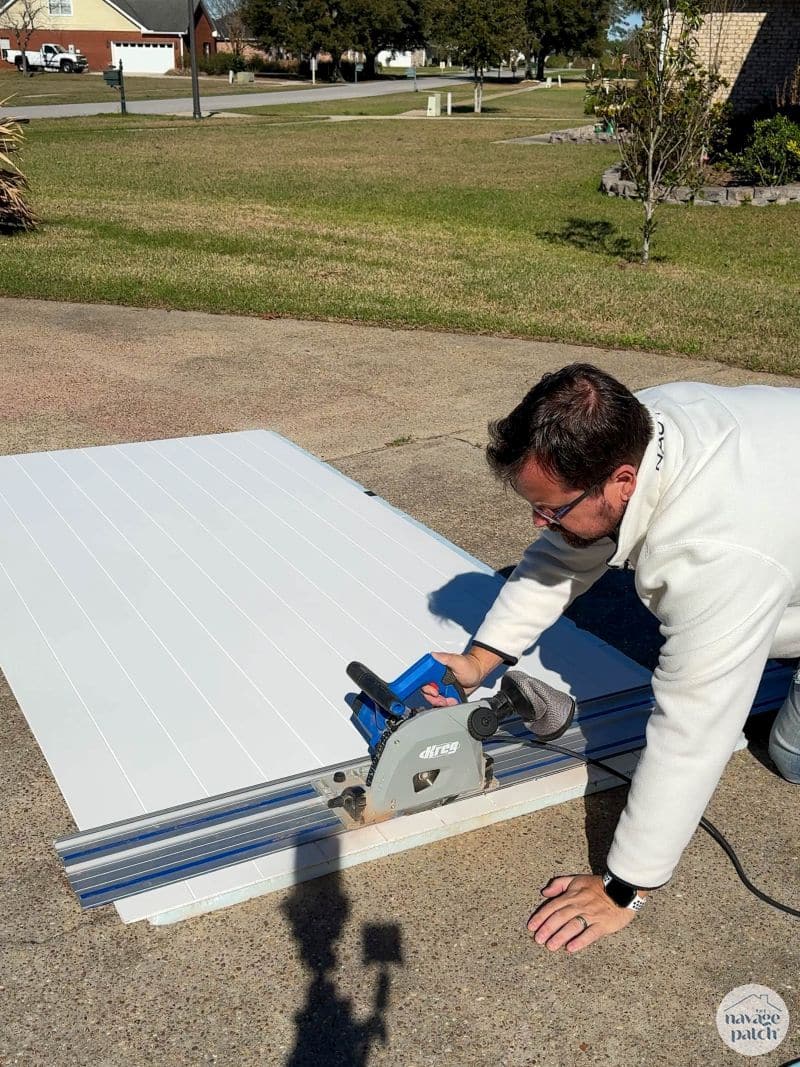
Nor did I know it when I began chopping up pine boards.
And I sure as hell didn’t know it when I started squeezing construction adhesive all over the wall like toothpaste for the Jolly Green Giant.

Because if I had known how stupendously warped this pathetic excuse for a wall was…
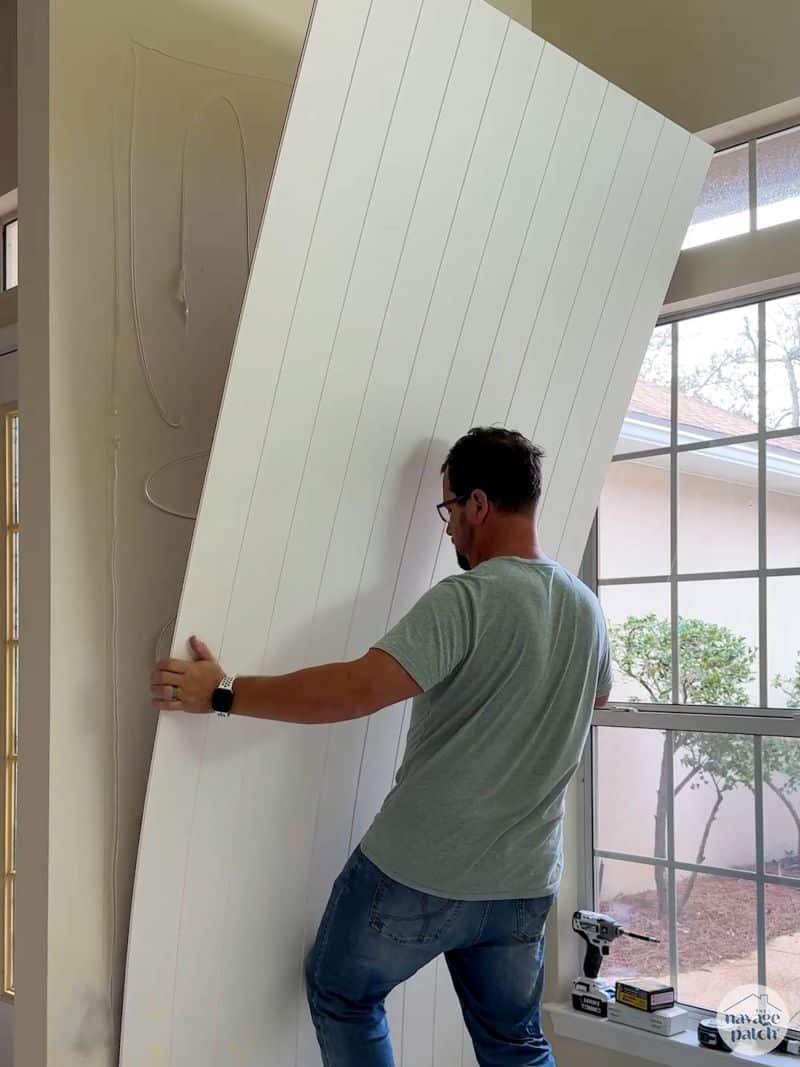
I never would have glued the panel on!
And I sure as shit wouldn’t have followed up the glue with a gazillion brad nails!
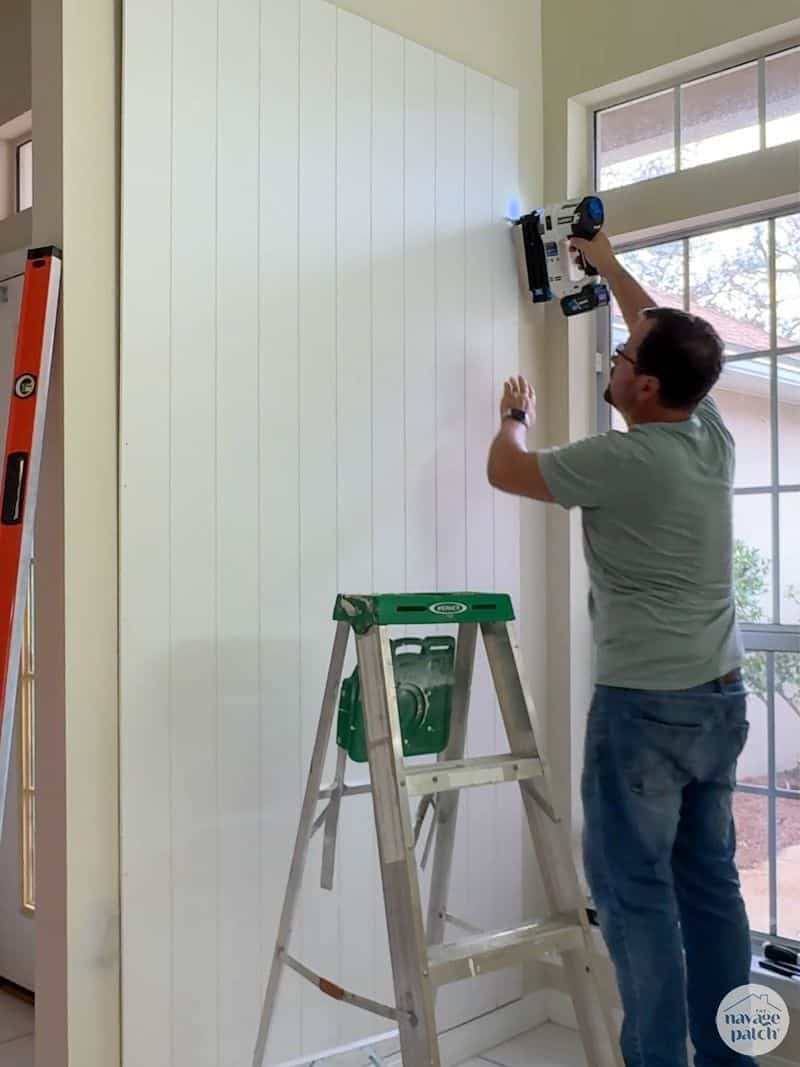
Now all this could have been avoided if only I did what you see me doing in the picture below BEFORE I did all of the stuff pictured above!
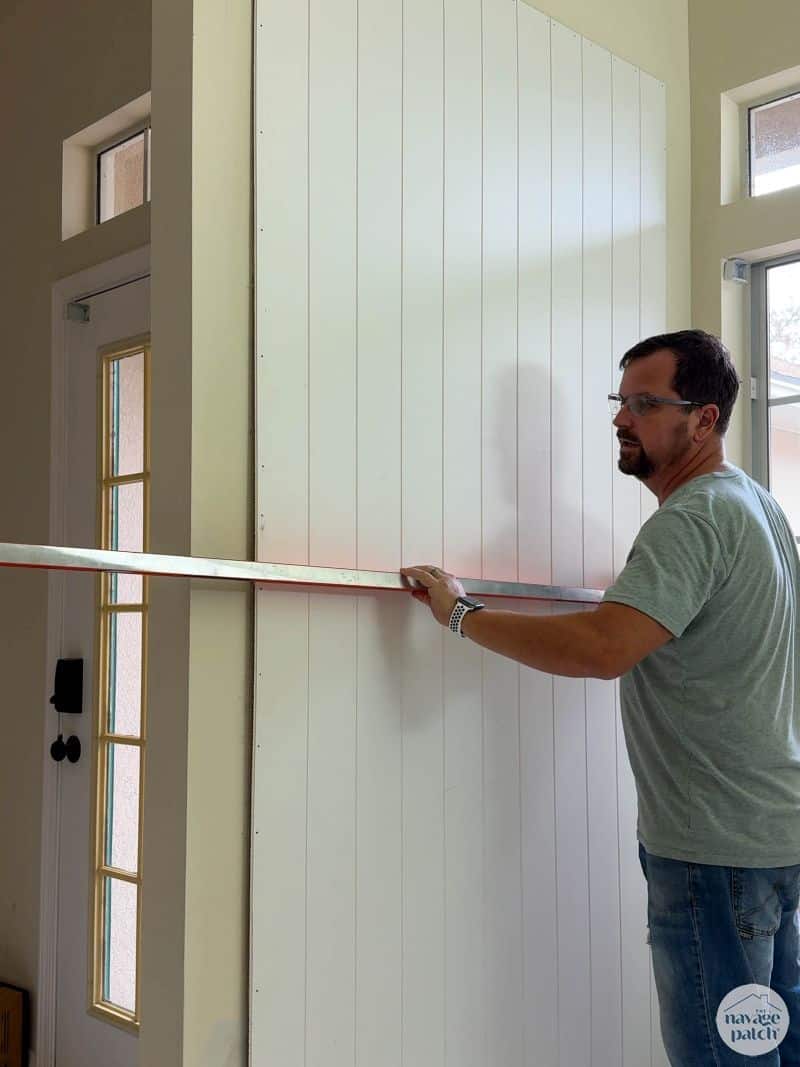
So it was here at this point, with my level teetering back and forth like grampa Jed’s porch rocker, that I understood what a Grade-A Doofus I was. I needed to attach a wood frame to that warped, now-panel-covered wall, and there was no way it was happening without enough space showing to drive a small foreign car through.
I had to straighten out the panel, but the warp was so severe I don’t think I could have hidden the gap even with a big piece of trim.
I racked my brain for a solution to this plate rack conundrum.
A-HA!
If I made the panel (and thus the plate rack) narrower, the gap would be lessened – small enough to be hidden with a little sleight of hand and skill.
These shiplap panels are meant to look like 11 shiplap boards together. I sliced off one “board” from each side – simple with a utility knife – and then I pried them off the wall, nails and adhesive be damned!

Next I painted the faux shiplap. Sherwin-Williams’ Rain Cloud is the perfect complement to the stain I had planned and the color we chose for the wall.

And that wall color is Sherwin Williams’ Ripe Olive. I love this green-blue/gray combo.

The plate rack frame should have been the easiest thing in the world – literally an overgrown picture frame. Sadly, a small detail evaded my notice until it came time to assemble it: one of the boards was twisted. Normally, this would have been a Defcon 5 profanity-laced freakout based on where Shrimp and I live in the far end of East Banana Peel. Fortunately, The Boy lives like 5 minutes from the entire universe.
No, I’m not jealous.
Why do you ask??
Anyway, a quick trip to Lowe’s and a stain job later, and I was back on track.
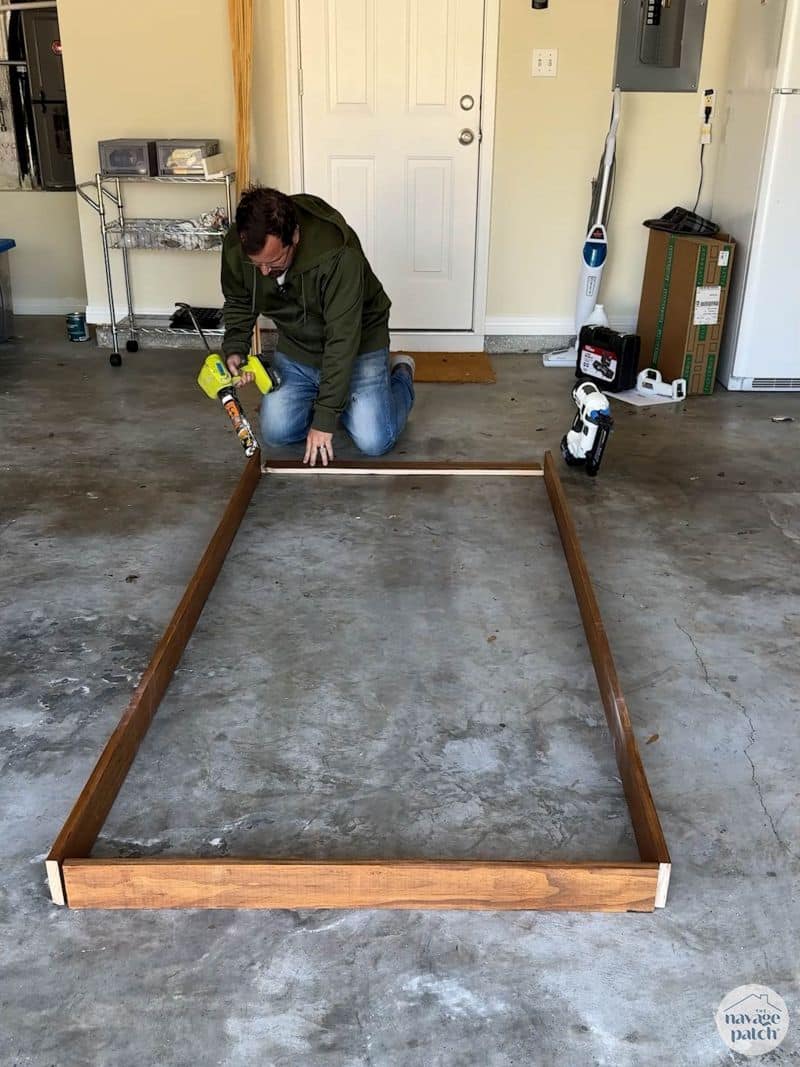
Back inside, I ran a line of adhesive around the back of the frame to prepare it for mounting onto the shiplap panel.
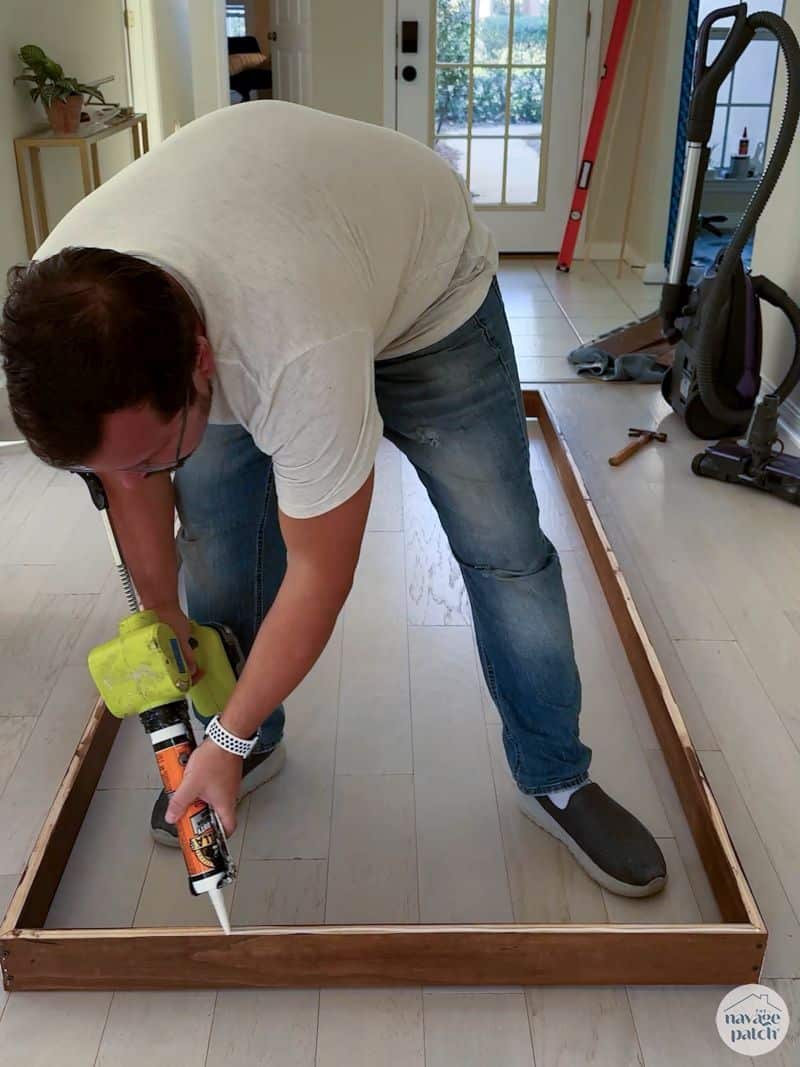
Here’s where I will again say I built this plate rack in the wrong sequence. I should have built the entire rack and then hung/attached it to the wall. Instead, I did it like this. It worked, but it wasn’t the most efficient method.
I mounted the frame onto the panel and then secured it with a few pocket screws up top.

I hid the glaring (but manageable) gap with some cove moulding.

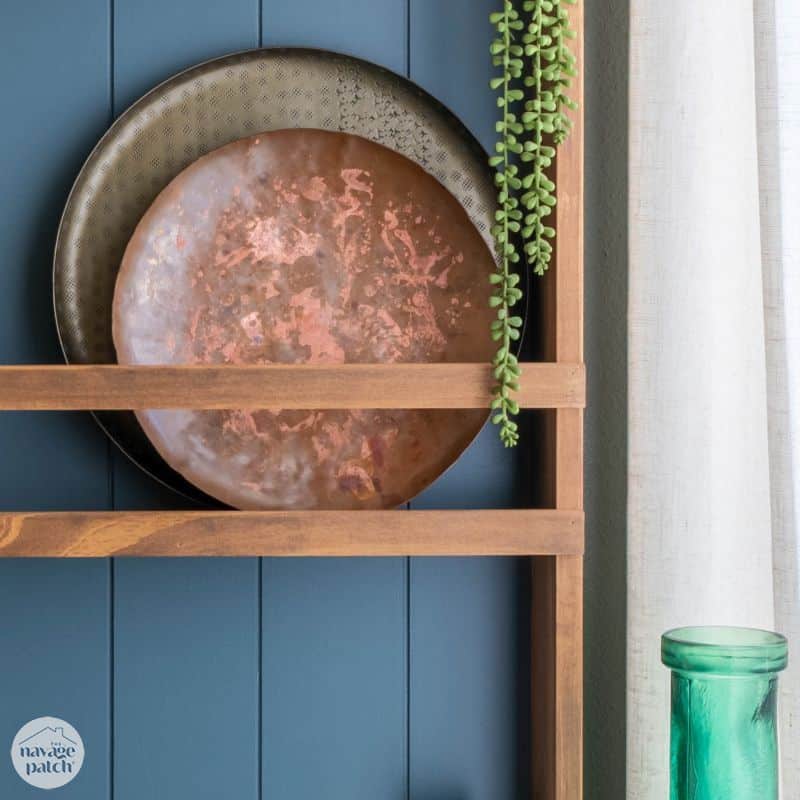
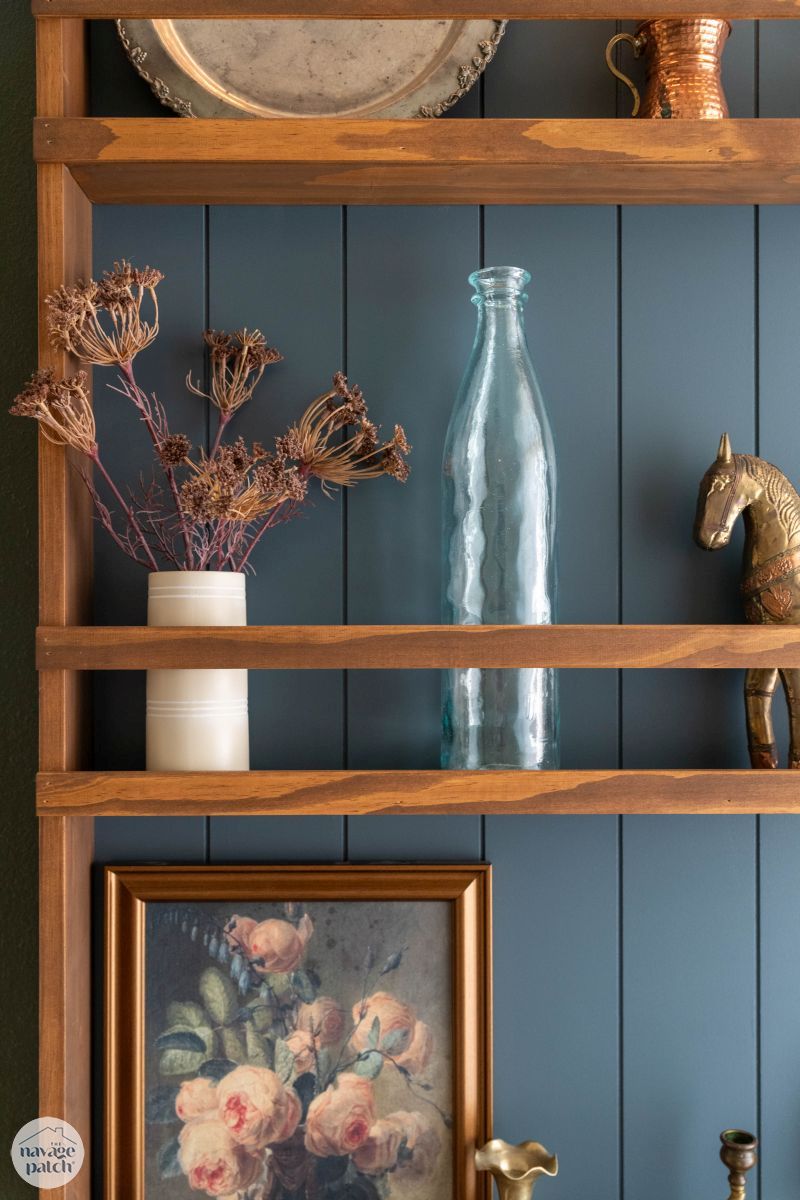
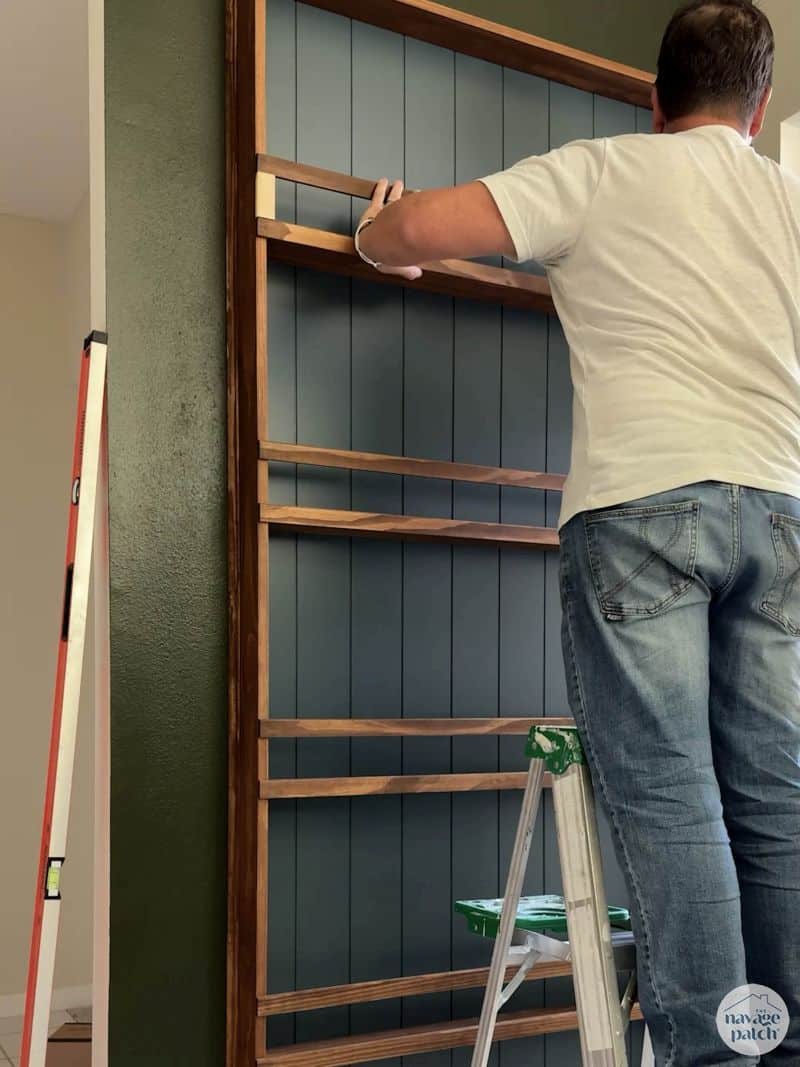
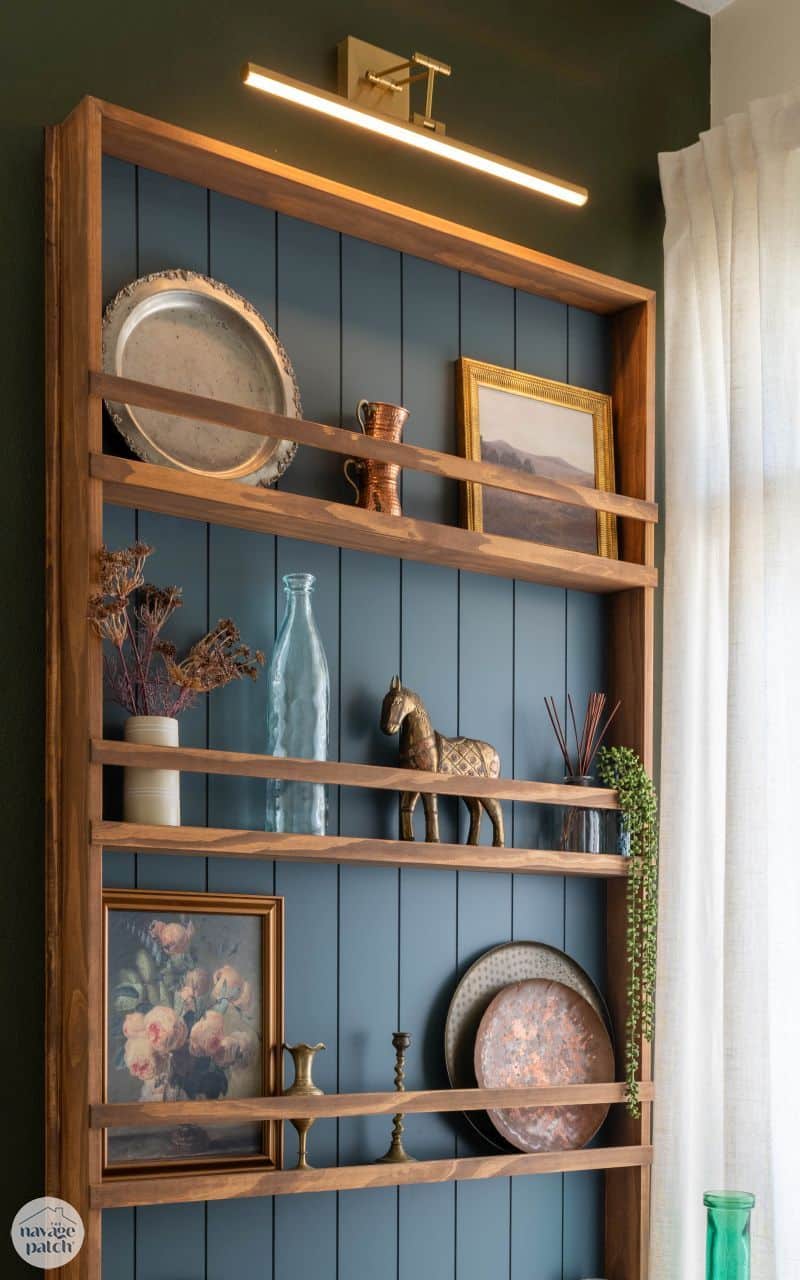
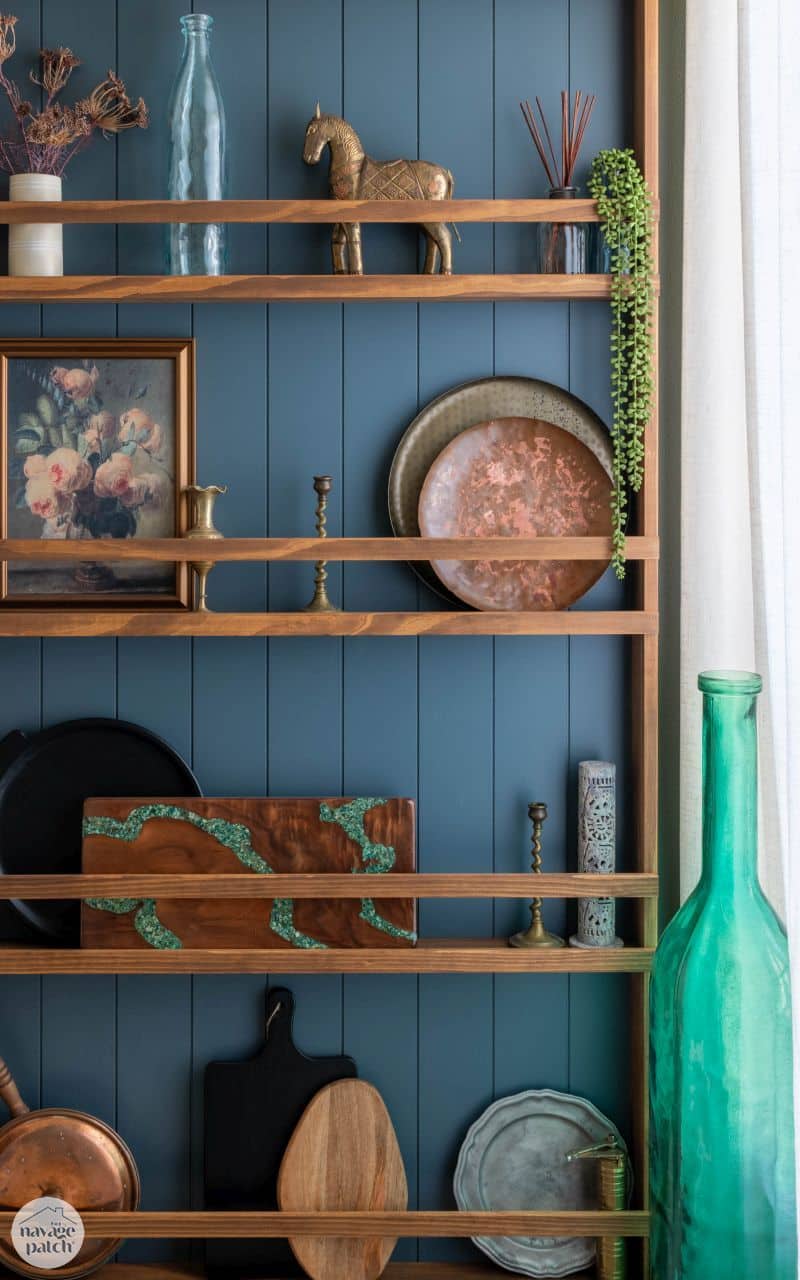
Next, I added shelves that I secured with construction adhesive and brad nails.

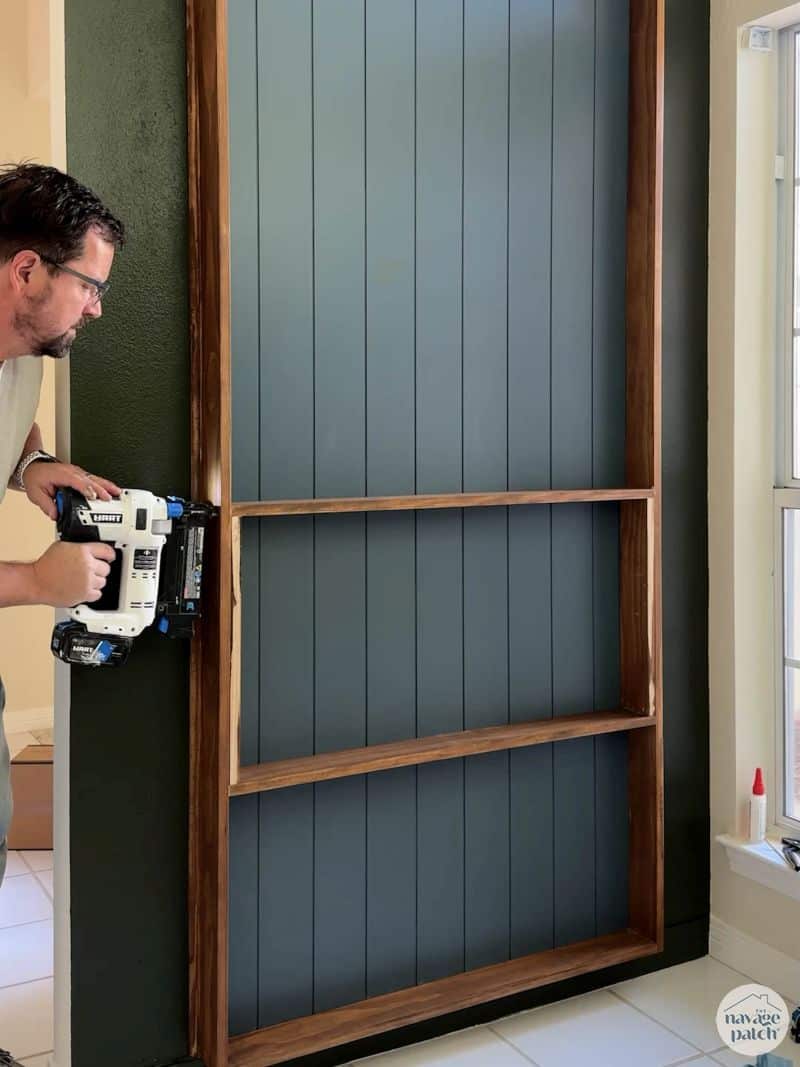
To keep things secure, I added two strips of simple wood trim to each shelf for gallery rail.

The final step was to add the picture light.

With my part of the work finished, I turned this project over to The Shrimp for filling and staging. Yes, I know it’s Baris’s house, but let’s be real here – I’m not sure he knows where his plates and cutting boards are. And let’s be even more real – do you really think Handan is going to allow ordinary plates into this beauty?? 😂

It’s kind of a shrine now at his house. He doesn’t dare touch it lest he bring the wrath of the gods down upon him. I’ll wager this will forever be the cleanest part of his home.
Barish bought a HOUSE?! Isn’t he like……10?! Good grief….where does the time go? 😀
Ok, I admit I haven’t been paying attention lately (OBVIously, ha!) so I’m off to check out recent posts and catch up. Cool plate rack. I have a GREAT place for one of those in my house, actually. *Calls up the hubby to give him a shopping list.
Time flies, Brigitte! He graduated in December from Virginia Tech (3 1/2 years), and is working as a civil engineer just like his mama!
❤️ ❤️ ❤️ it!!!
franki
Thanks Franki!
We’re having a garage sale this weekend. Among the things to be sold is a plate rack. I may just sneak into the garage tonight and remove that…
Looks fabulous!
Thanks Hanneke! 🙌
I love this!
Thanks Lisa!
Something tells me Baris didn’t bring those knick knacks home from college.
😂We finally get to offload decades of accumulation!
Beautiful!😍
Thanks, Cindy!
The plate rack looks awesome, love the colors. Congratulations on the new home Barish! How cool.
Thank you so much, Michelle – it’s exciting! 🙂
Great job and you’d never know the walls had more waves than spaghetti had noodles! Perfect stain and perfect paint colors. You ALWAYS do a great job!
Thank you so much, Melody – I’m really happy with this one! 🙂
aaaaaahahahahaha – did this bring back memories !!
We live in a house built in the late 1700’s and there is not a straight ANYTHING in this house so we learned very quickly throw out all the levels etc and go with what the house gives you – this saved a lot of time building level walls only to rip them back out and rebuild with the angles in the house !
love the plate rack – great job !!
sue
It’s so frustrating! But I guess if you just know it’s going to be a struggle going in then it wouldn’t be so bad!