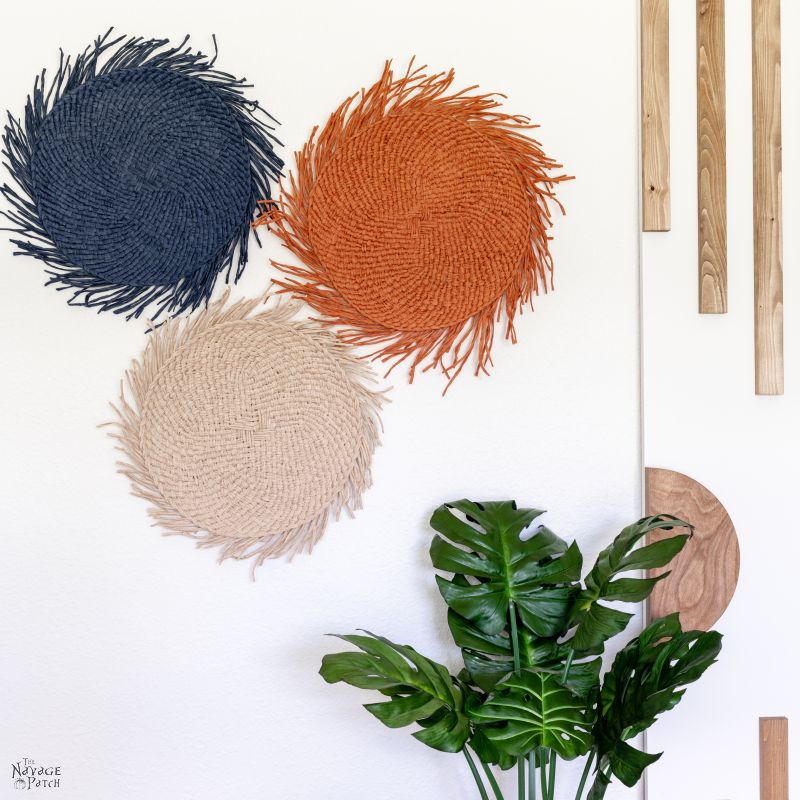
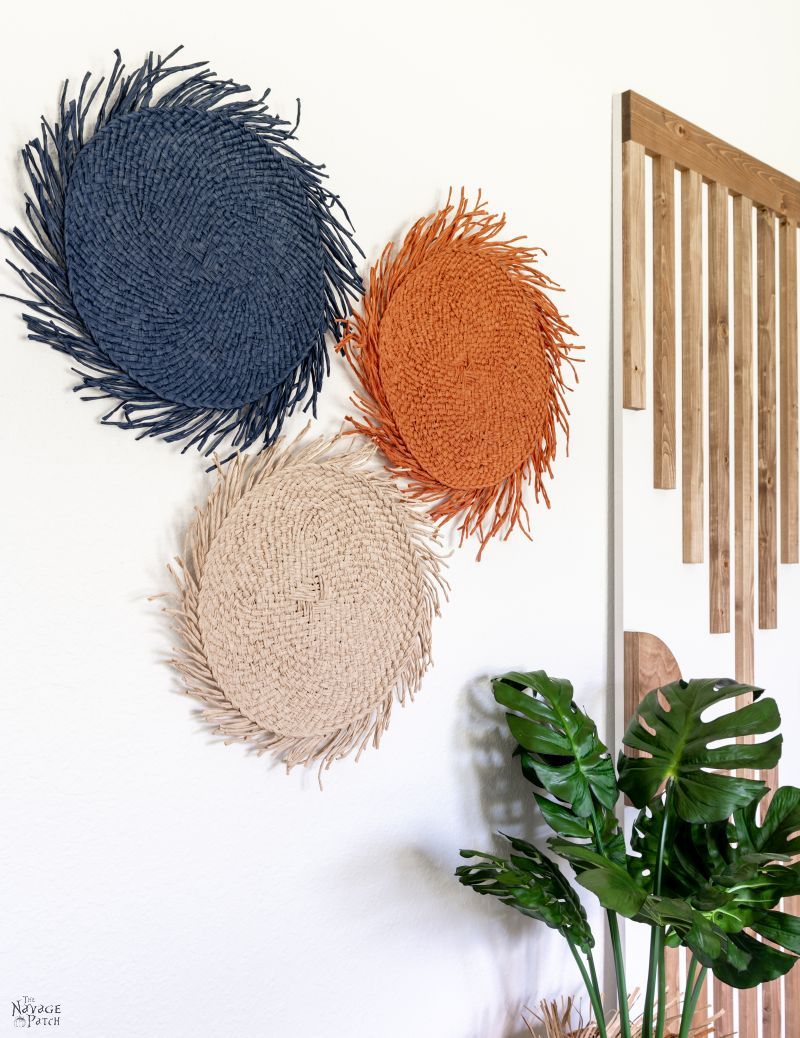
DIY Placemat Wall Decor
This DIY Placemat Wall Decor is a quick and easy way to fill in some empty wall space with color without breaking the bank!
No trip to Target is ever complete without a ceremonial visit to the temples of Gaines and McGee nestled deep in the heart of the store. From candles to greenery and pillows to footstools, there’s a little bit of everything on their shelves. But just outside those celebrity-branded aisles, there are the Rows of Threshold, and that’s where my babes spends most of her Target time.
Target really figured things out back in 2013 when they launched their Threshold line of home decor. It always looks good – the style is nearly universal, the quality is great – and even more so considering the affordable price!
Every time we set foot in a Target store, another Threshold product enters our home.
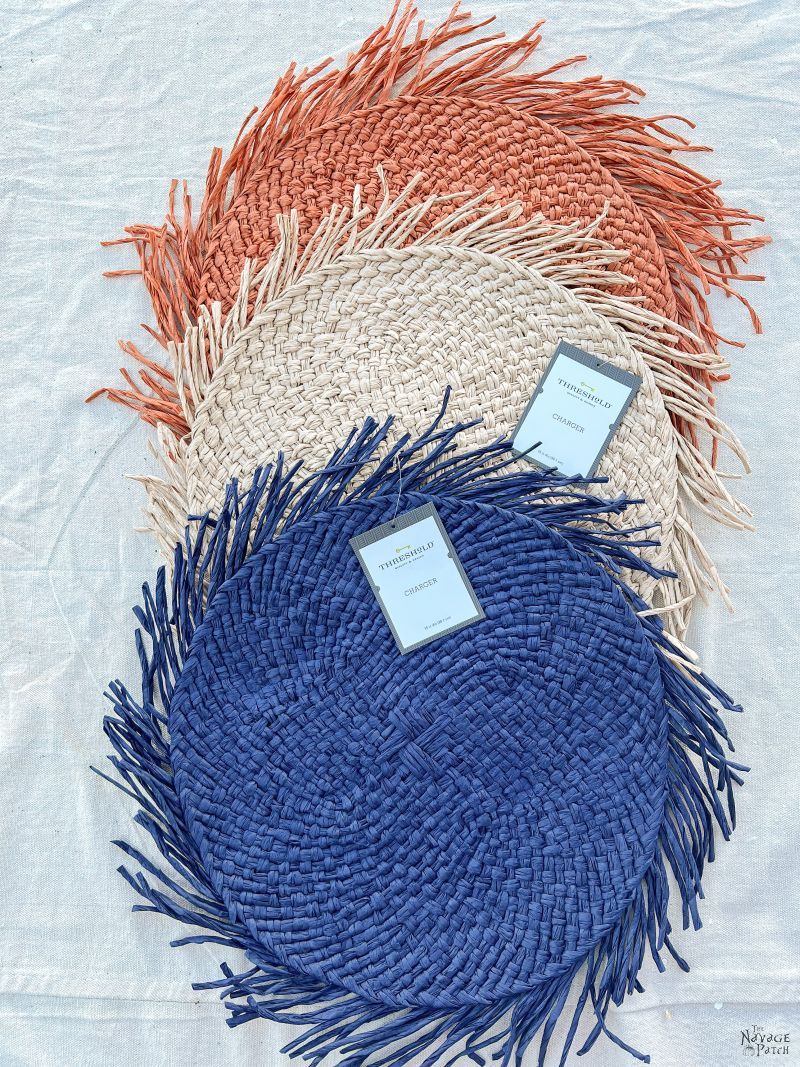
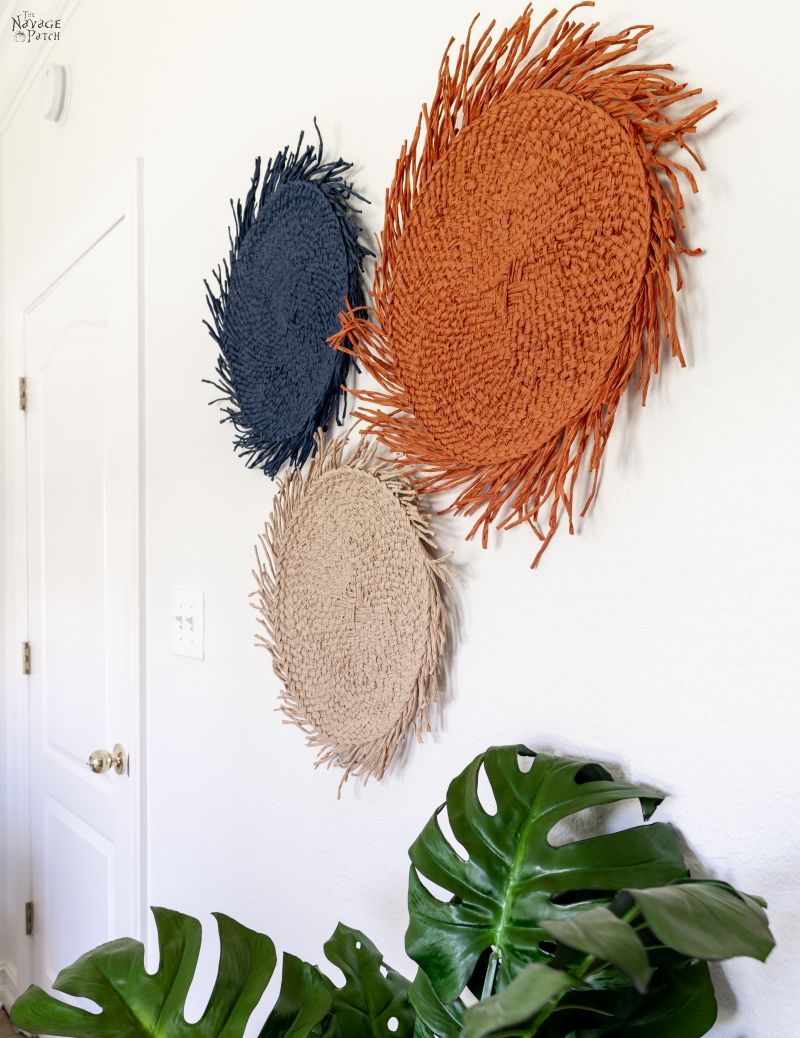
On our most recent trip, we were searching for pillows and bedsheets for Baris’s bedroom (and some other goodies I’ll be sharing with you soon). While Handan and Baris made their way towards Threshold Haven, I veered off into the food aisles. I’d never really checked them out before, so I was curious to see their prices for meat and fresh vegetables. When I caught back up with my babes and The Boy, I saw that they were hunting for variously-colored raffia chargers. There were already three in the cart, and Baris had just found a fourth color when I rejoined them.
“Do you like these colors,” Handan said, holding up the placemats for inspection.
“I do,” I said, sensing that these particular rounds of raffia weren’t destined for a dinner table. “They all go well together, though these are my favorites.” I pointed at three of them.
“Good,” she said, “You’ll be making placemat wall decor for Baris’s room.”
“Of course I will be!” I said, “Why would we ever use them on a table?”
Placemats on a table? What an absurd thought!

DIY Placemat Wall Decor SUPPLIES LIST
Affiliate links are provided below. Full disclosure here.
- Round raffia placemats or chargers
- Chipboard or cardboard (an Amazon box would be perfect)
- Dinner plate
- X-Acto knife or scissors
- Super glue gel
- Double-sided mounting tape or small 3M command strips

DIY placemat wall decor tutorial
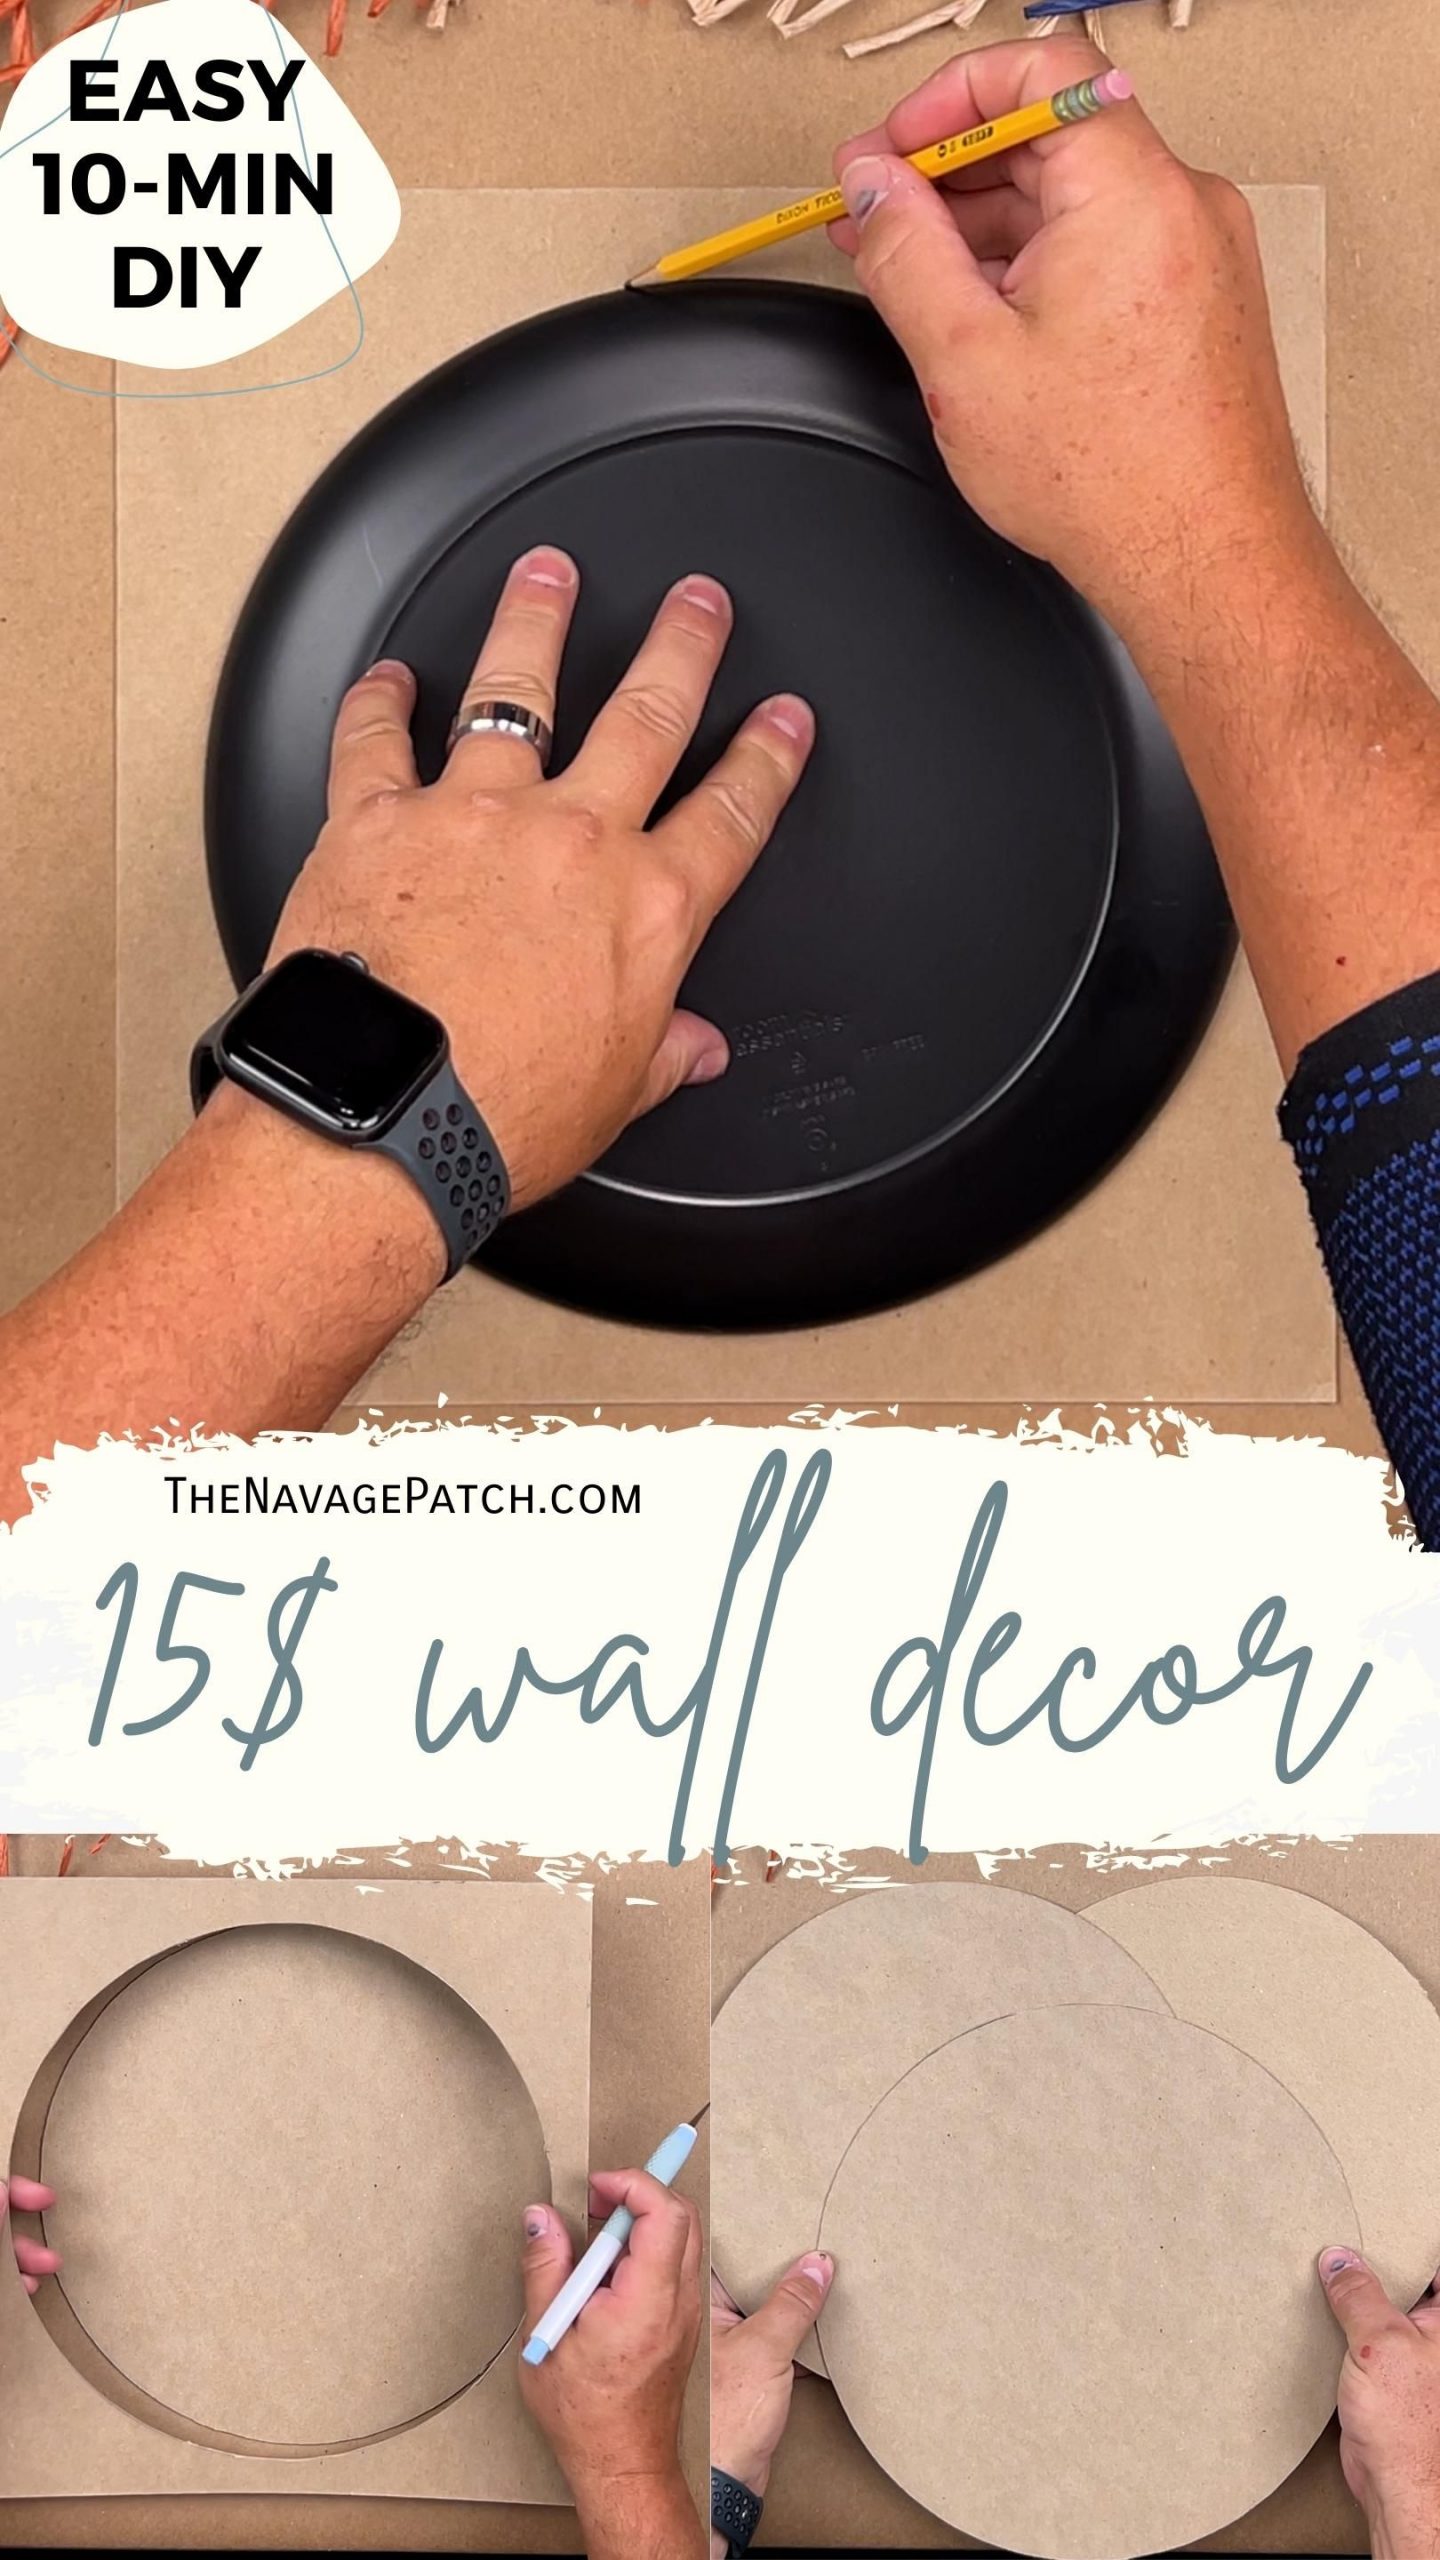
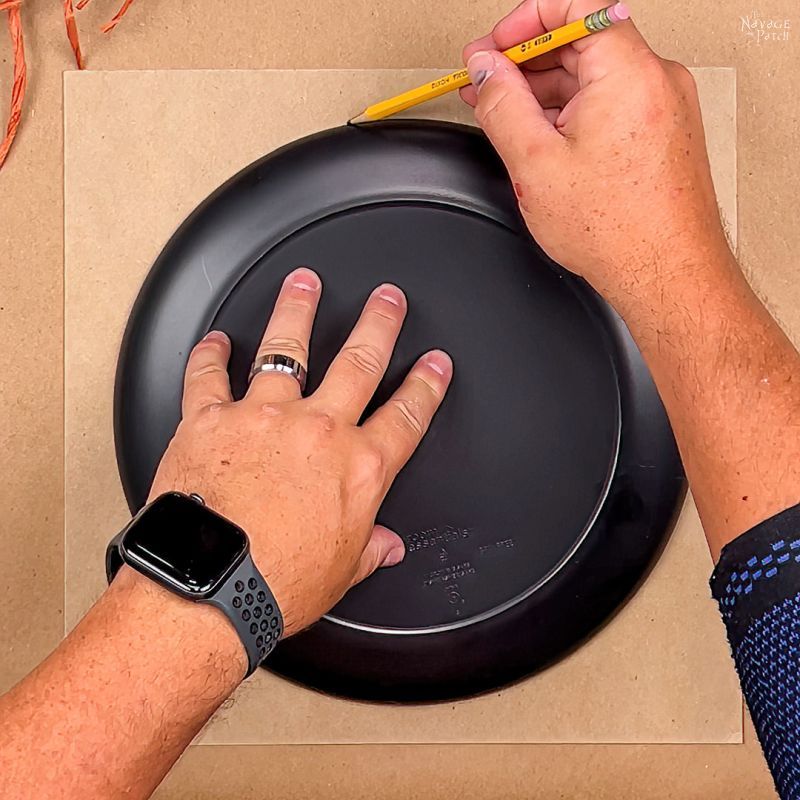
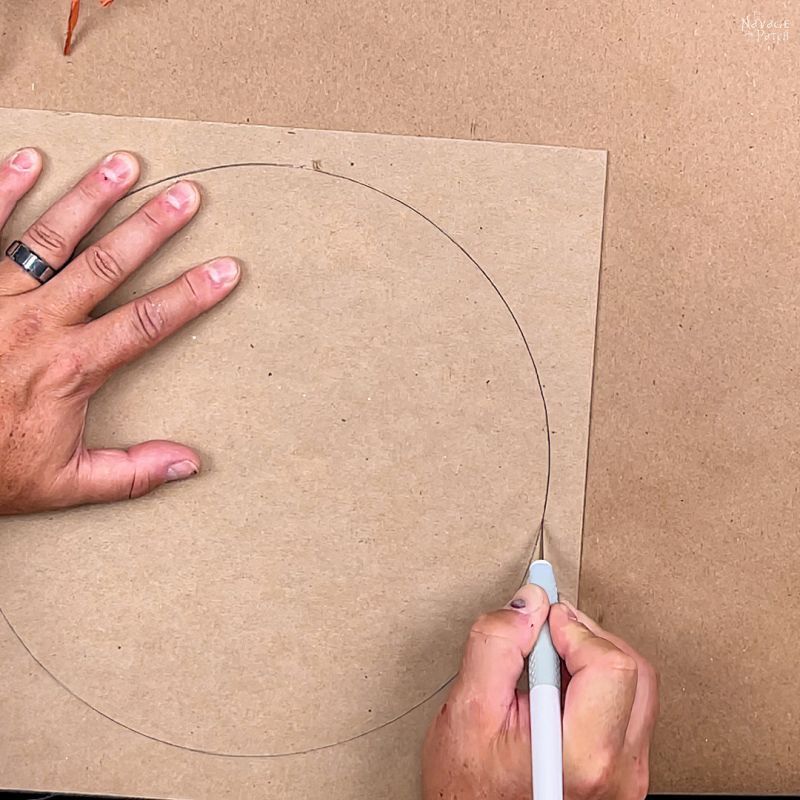
Step 1 – Trace a circle
The chipboard (or cardboard) is used to help the raffia placemats hold their shape when hung on the wall.

I used a dinner plate smaller than the placemat to trace a circle onto the chipboard.


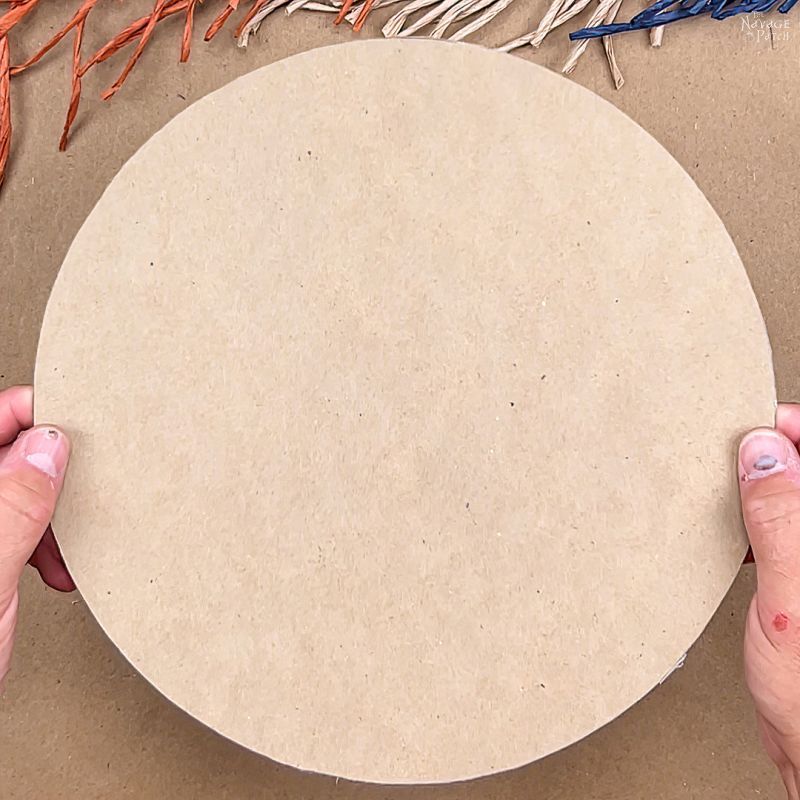
Step 2 – Cut the circle
I used an X-Acto knife to cut the circle, but scissors would work just as well.


This circle doesn’t have to be as perfect as the one I cut. It won’t be seen through the placemat. On a side note, it appears I’ve wasted my life. With scalpel skills like these, I could have been a kick-ass surgeon!
Hmmmm, I wonder if it’s too late to apply to medical school?
After this circle, I deftly cut two more with my trusty craft scalpel.
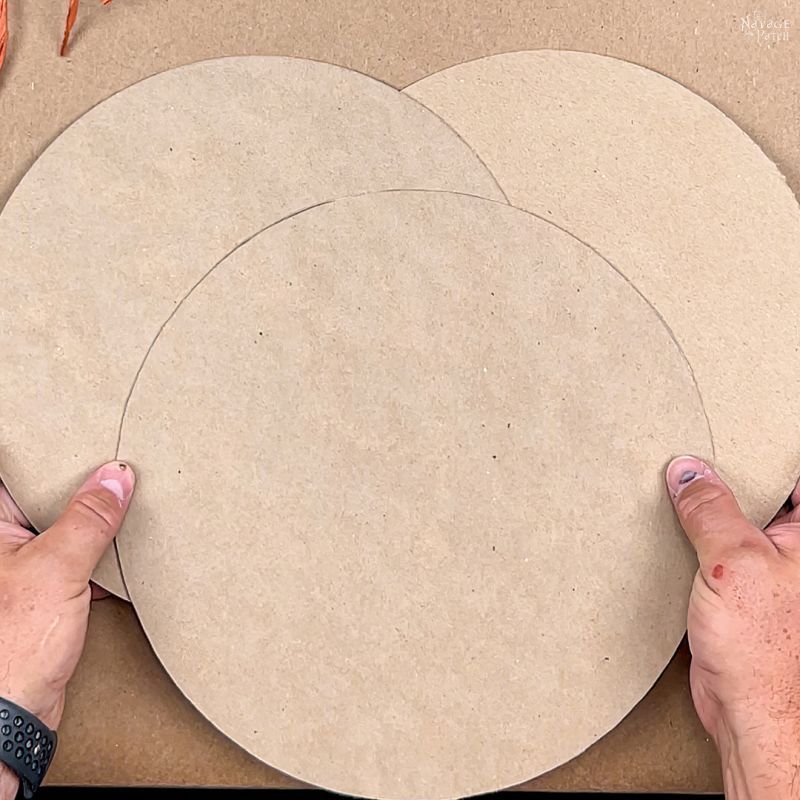
Okay, fine! I cut the other two with my Cricut Maker 3 to save time. But I did cut one of them by hand!
Step 3 – Glue the circle
Next, I squeezed super glue gel all over the chipboard.


Then I pressed the glue-covered circle onto the back of the raffia placemat.

To prevent any excess glue seeping down through the placemat, I carefully flipped it over and waited for the super glue to set.

Step 4 – Attach mounting tape
After a few minutes, I flipped it over again and put two strips of double-sided mounting tape on the chipboard. But if you have non-textured walls using small 3M command strips will work much better.


Step 5 – Hang your DIY Placemat Wall Decor and admire your handiwork
Arrange them however you’d like – overlapping or non-overlapping, in a line or as a triangle.

The best part about this placemat wall decor is that it only cost $15, yet it adds a ton of color and interest to the room.
And Baris likes it too, insomuch as an 18-year-old guy can get excited about such things. I think he grunted his approval (or perhaps tolerance) in between levels of his video game.
That’s high praise!

We love to see our DIY projects out in the wild! If you try this DIY project and take a picture and post it on Instagram, be sure to tag us – thenavagepatch
Share it on Pinterest & Facebook!

I love this idea! It looks perfect for a boys room or any room. On another note I had to laugh at the picture that had a close up of your thumbs. Your hands (thumbs)look like my husbands, always a battle scar from a DIY project! Love your posts.
Thank you! Yeah, I currently have both thumbs recovering from smashes, lol!
So cute! I am MUCH lazier than you when it comes to hanging small, lightweight pictures/flat baskets, etc. I use my needlenose pliers to insert a pearl headed pin on a slight upward angle into my sheetrock walls, then hang my picture! Hole is minimal and can be filled in with white toothpaste. I’d punch holes in my round cardboard before gluing them to the chargers and voila! As a kid, I caught h—- for hanging my beloved picture of Paul McCartney on my busy floral wallpapered wall with one pin!
That’s a great technique for lightweight items, Kathy!
Genius! I’ve been wanting to hang some baskets for decor and a natural element, but they are SO expensive – even the “cheap” ones. I’m inspired :-).
Thanks, Becca! 🙂