Epic DIY Raised Garden Bed Reveal
My epic raised garden beds are finished and ready for primetime. Come check out the reveal and let me know what you think!
Continued from How to Make a Round Raised Garden Bed
With the grunt work almost over, it was almost time to shift gears from the donkey work to the delicate work.
Almost.
First, I had a date with a shovel and a wheelbarrow.
DIY Raised Garden Bed SUPPLIES LIST
Affiliate links are provided below. Full disclosure here.
- (11) Pressure-treated 4x4x8 pine posts
- (56) 5/8x6x6 cedar fence pickets
- (56) 3/4x6x6 treated-pine fence pickets
- (4) 3/4x6x8 treated-pine fence pickets
- Circular saw or miter saw
- Table saw with dado blade stack
- 4×4 Ground spikes (optional depending on where you live)
- Deck Stain (I used Cabot Heartwood)
- Exterior primer
- Exterior black paint (I used SW Tricorn)
- Black plastic lattice
- Lattice caps
- (17) Flickering flame solar post caps
- Solar string lights
- Solar deck lights

Epic DIY Raised Garden Bed Reveal VIDEO
Watch our short and fun video below for an overview of our raised garden beds before you read the reveal!
Watch Our Tutorial On YouTube
On Tiktok
We love to see our DIY projects out in the wild! If you try this DIY project and take a picture and post it on Instagram, be sure to tag us – thenavagepatch
When I began this little garden-building adventure, I had emptied two old metal raised beds on the other side of the yard and piled the sandy soil just off the lawn. Who am I kidding, it was literally just sand, which is why nothing but weeds grew in those damn beds.

After filling the wheelbarrow about halfway, I puffed out my chest and gorilla-walked across the yard while my heart protested each step and my arms threatened to unionize and secede from my torso.

This bullshit was for the birds, if, that is, birds were hulking behemoths with brains even smaller than the ones employed by one-ounce sparrows.
Obviously, I wasn’t about to repeat the same mistakes I made with the old metal beds. Sand is for lying on at the beach and washing out of your buttcrack when you get home. It doesn’t make for good vegetables.

But it was great filler for the bottom of my raised beds, so I humped load after load across the yard while my back threw hissy fits and my pores hemorrhaged water like China’s Three Gorges Dam.
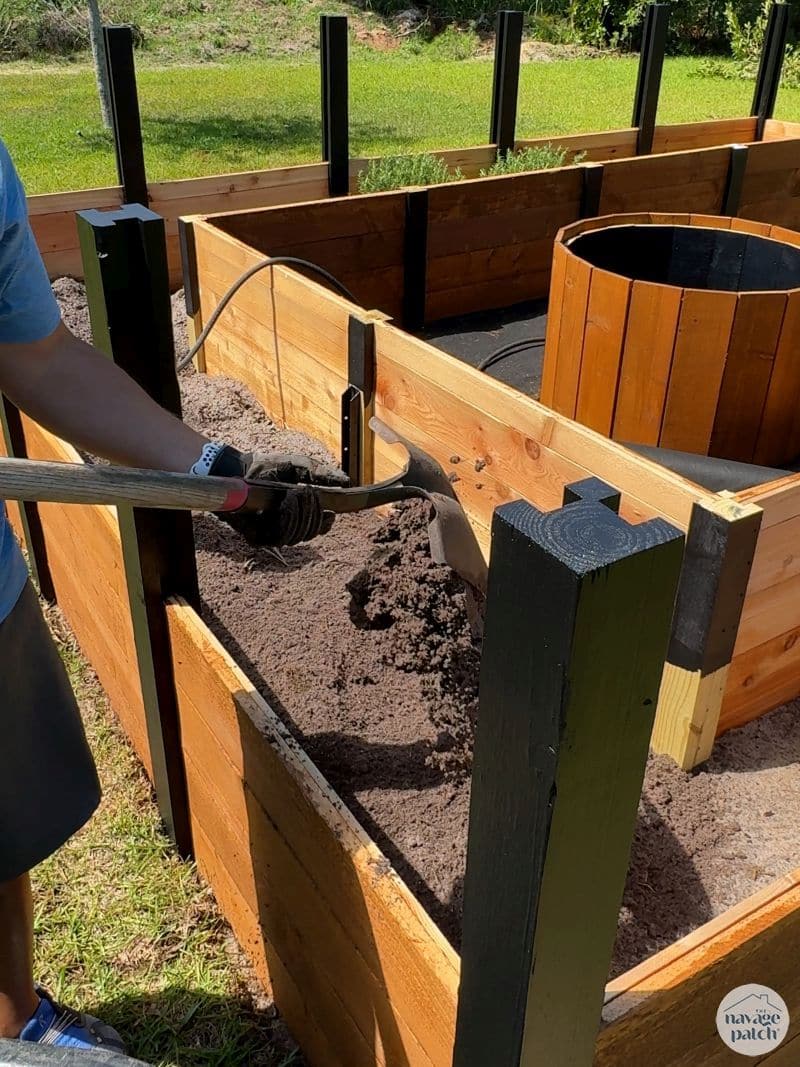
When the sand pile ran…dry, I switched to bags of sweet, nutritious soil, full of all the laboratory and factory-infused goodness today’s modern plants crave. Better living through chemistry!

Seriously though, this was a bitchin’ deal at Lowe’s I just couldn’t pass up!

Soooooo…I ordered 210 bags. 😁

I was only off by a pallet…so what? I’m stockpiling those bags…wait for it…inside the old metal raised beds! (It’s perfect)
The bed wasn’t completely finished yet, so don’t get any ideas about that when you see me planting in the pictures below.

It’s just that when I went to get soil, all these veggie plants were on sale too!
What was I supposed to do? Not buy them?

Astute madams who’ve been lingering around the Navage Patch for a while should understand that when I’ve been saying “I,” I really mean “my babes.”

My babes is the reason we have plants in plastic containers strewn about the yard waiting to be deposited into the earth each spring.
Every year I make her promise not to overbuy on the first lot and inform her that she’s forbidden from buying more plants until the ones she just bought are all safely tucked into the soil.
Every year she agrees.
And every year she breaks the promise on the second shopping trip.
It’s a delightful game we play that drives me up the frickin wall.

After schlepping the whole sand pile across the yard in the wheelbarrow and then busting my lily white butt humping bags of soil from the driveway to the garden, my (nearly) 52-year-old body finally called a powwow with my my bird-sized brain.
My body argued that I’m a Moron of the Highest Order and demanded an immediate cease and desist on the donkey work. My brain couldn’t argue the obvious, but since the work had to get done, it offered to search for a better way.
And it found one.
Its name is Chore Warrior, and it’s a battery-powered, rechargeable, power-assisted wheelbarrow.

In other words, it’s a certified Life Saver.
This marvel allows me to haul 2x to 3x what I could with my wimpy geezer muscles alone.

Just press the thumb throttle and go!

So easy!
This company is fantastic! They’re a small outfit based in St. Paul, Minnesota, and their PAW (power assisted wheelbarrow) has extended my usefulness by decades!
I got in touch with the company, and they offered to give me a discount code to share with you guys.
If you’re in the market for a game-changing and body-saving wheelbarrow, go to the Chore Warrior website and enter discount code NAVAGE120 to get $120 off your order.

I carried the soil for the round raised beds with my Chore Warrior. Can’t you see how much happier I look?? 😂


While my plants drank up the nutrients, I worked to finish beautifying the beds. I capped the inner walls with 8-foot treated-pine pickets.

I ran a bead of construction adhesive down the line…

…and then I laid on the cap. I ripped the original 6-inch-wide picket down to 4-inches wide.


I shot brads into the 4×4 posts to keep the cap in place.
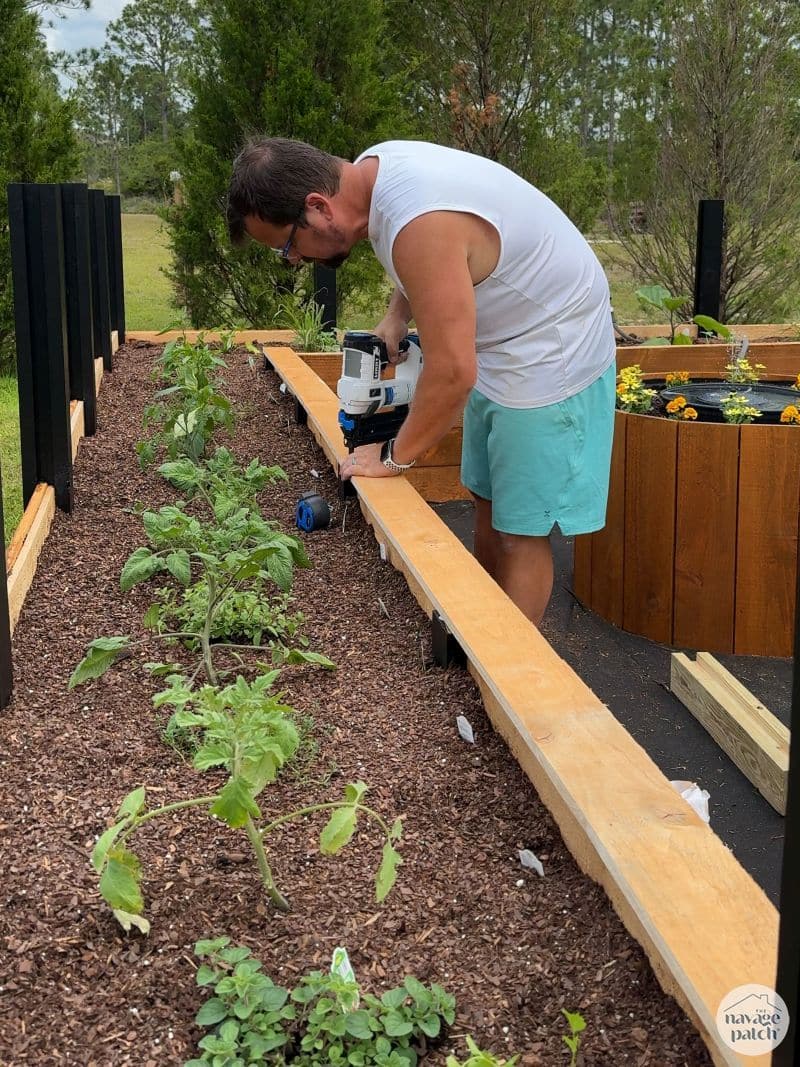
I didn’t film it, but after installation, I stained them with Cabot Heartwood like the rest of the beds.

I took this opportunity to modify my irrigation system. I was about to install the irrigation timer when it dawned on me that I needed another dedicated spigot for a hose! Fortunately, I’ve become proficient at irrigation pipe work, so I added another spigot off the back.

Up top, I assembled the components to keep The Shrimp’s veggies watered and healthy.

I won’t bore you with the details, but the irrigation took wayyyyy longer than I anticipated due to pressure loss from the dinky 1/4 inch tubing. I solved this by adding some regular garden hose into the mix. In the end, I got 3 zones up and running with these miniature spray heads.

While the plants bathed in cool waters, I toiled under the merciless Florida sun to cut pieces of black vinyl lattice.


I really should have done this in the shade. Without gloves, I wouldn’t have been able to touch the black lattice without suffering painful first degree burns.
I installed the lattice between the posts.

I even got the fancy caps for the tops and bottoms.

I tacked the whole shebang together with brads. So far, so good. It’s been about a month, and they’re still holding up and not warping.


The only modification I had to do was zip tie the bottom cap to the lattice in two places on each section.

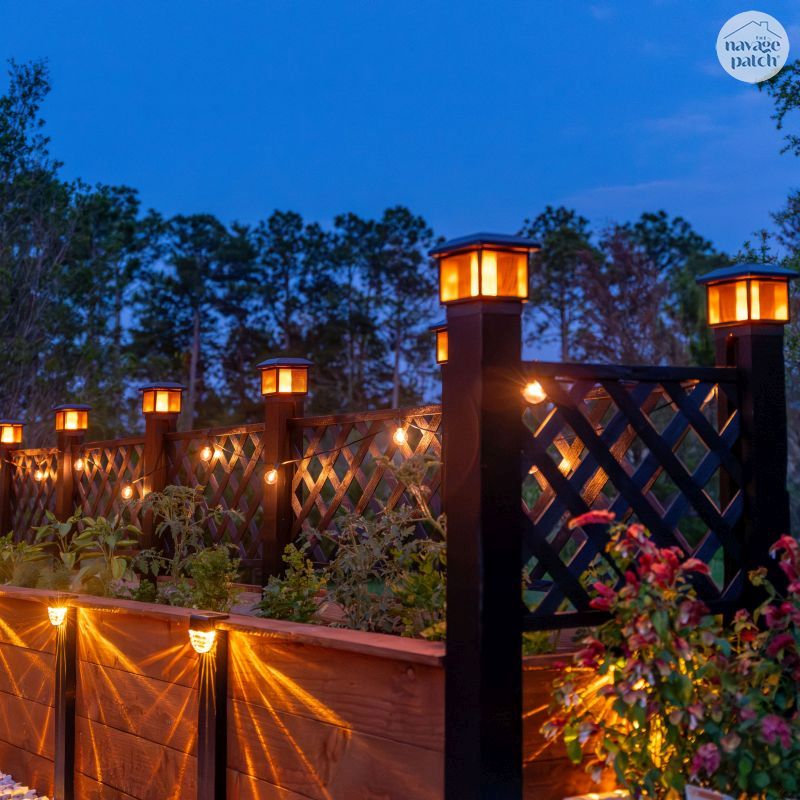
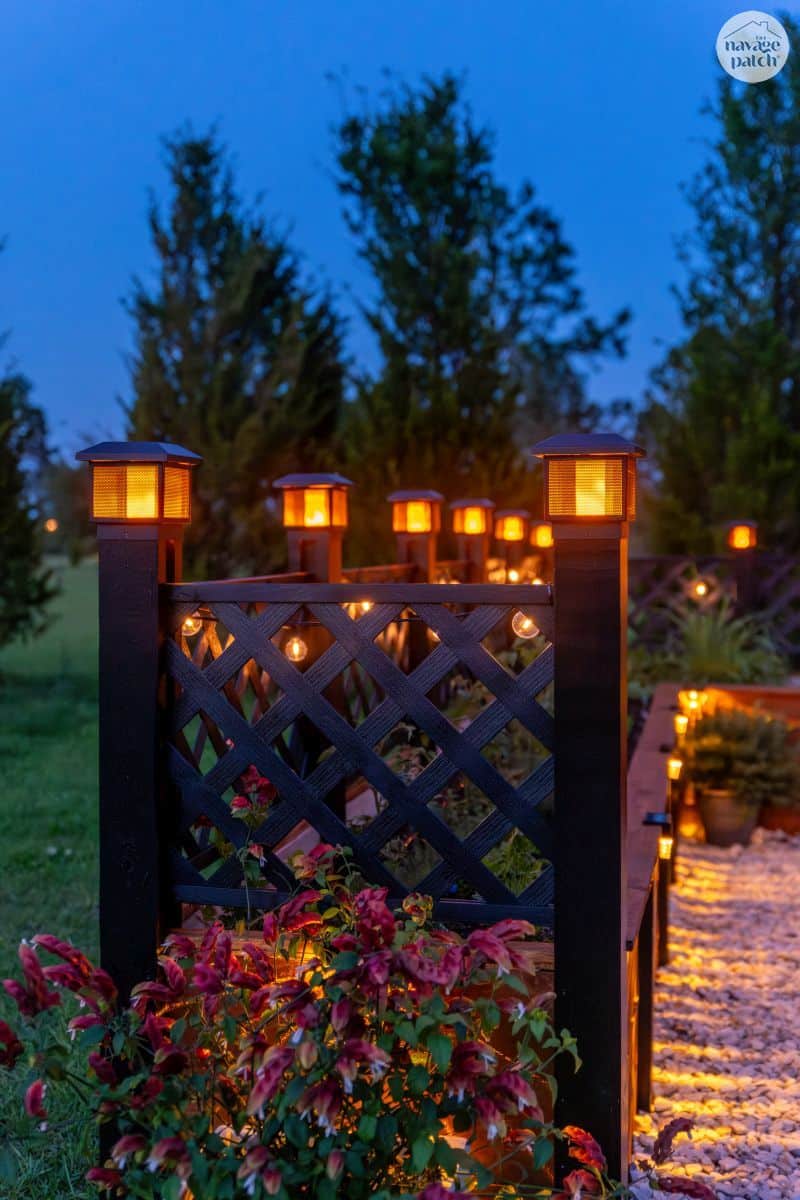
My last step was to add lights, because that’s just what we do here at The Navage Patch. Lights make everything better. Well, lights and a dry martini, but you catch my drift.

After the post caps, I hung solar string lights and then I added deck lights to the cap.
Seriously, this power wheelbarrow makes me almost feel like a 20-something again.
Almost.

Go get one for yourself and thank me later. Don’t worry, I’m not making a dime from those guys. It’s just one of those rare products that is so incredible, I want to shout about it from the rooftops.
Not that anyone would hear me here in one-story Florida, but you get my point.
And now it’s time for the proper reveal. Let’s have a look at this epic raised garden bed.

The little sprinklers in action!

Here’s an iPhone shot of Penny looking fabulous in front of the beds that Daddy just built.

You know my two nicknames for Handan are My Babes and The Shrimp. Would you believe we found Shrimp Flowers at Lowe’s??


Just wait until the night!

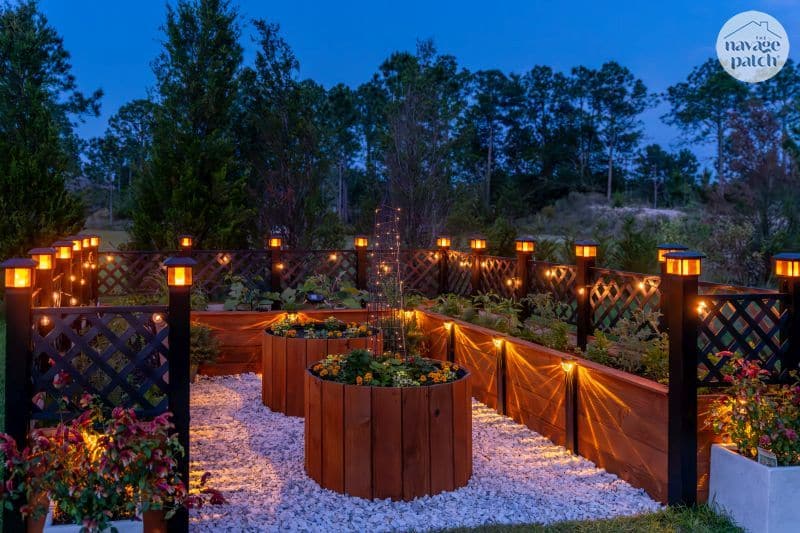
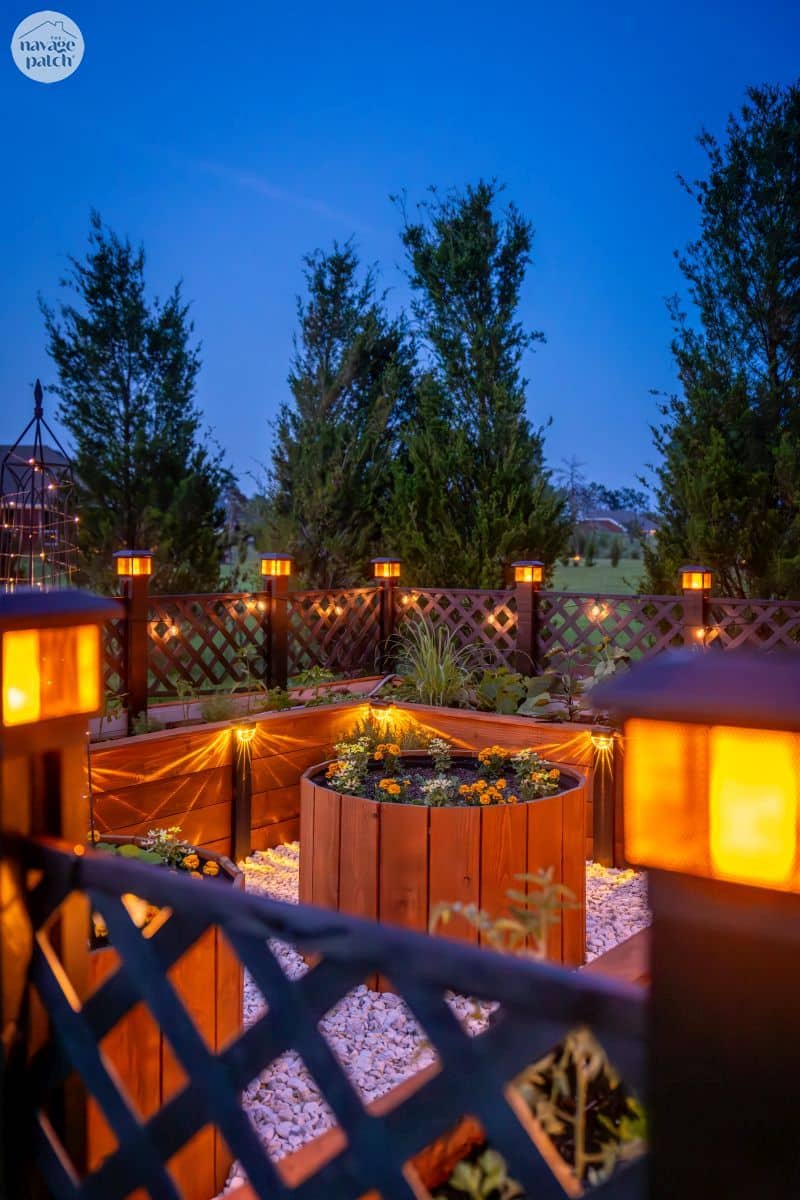
The round beds turned out amazing – a perfect counterpoint to the main bed!

This eggplant is about to GROW!

These are special melons, the seeds for which came from Handan’s dad. He’s been eating melon for 80 years, but this particular one was the sweetest he’s ever tasted, so he set aside the seeds for us to grow. I can’t wait!


At night, this garden comes ALIVE!
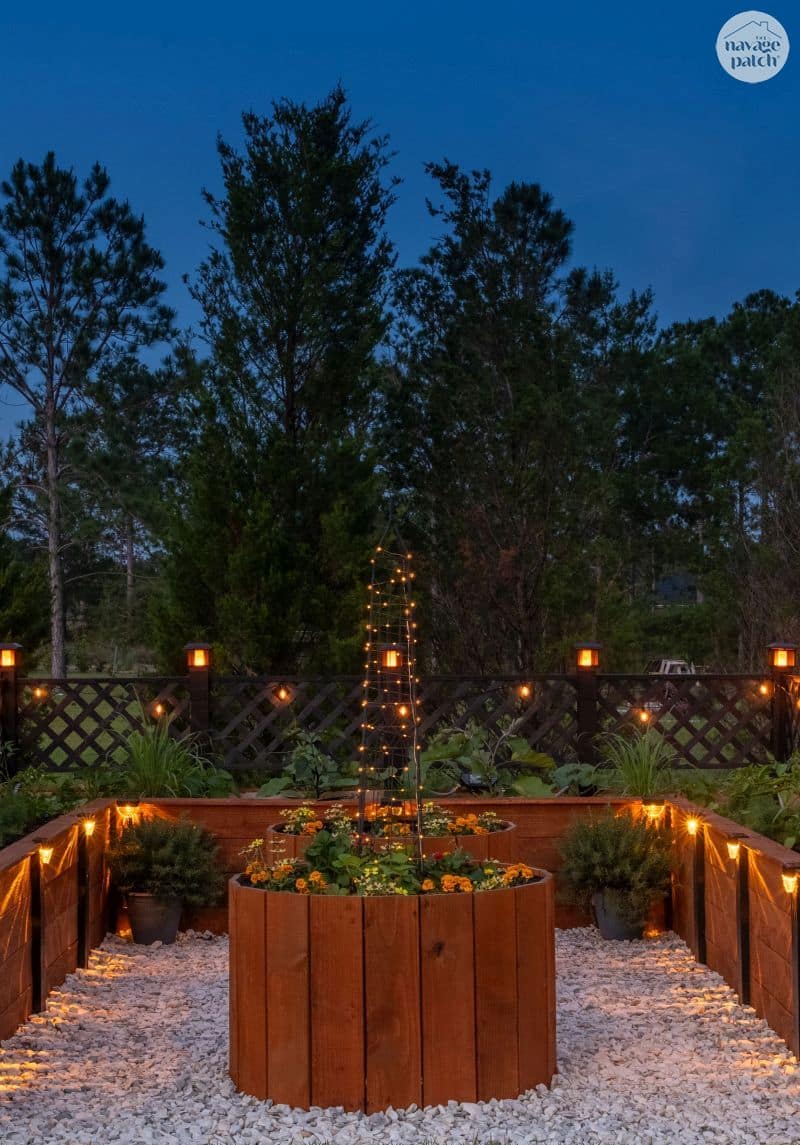
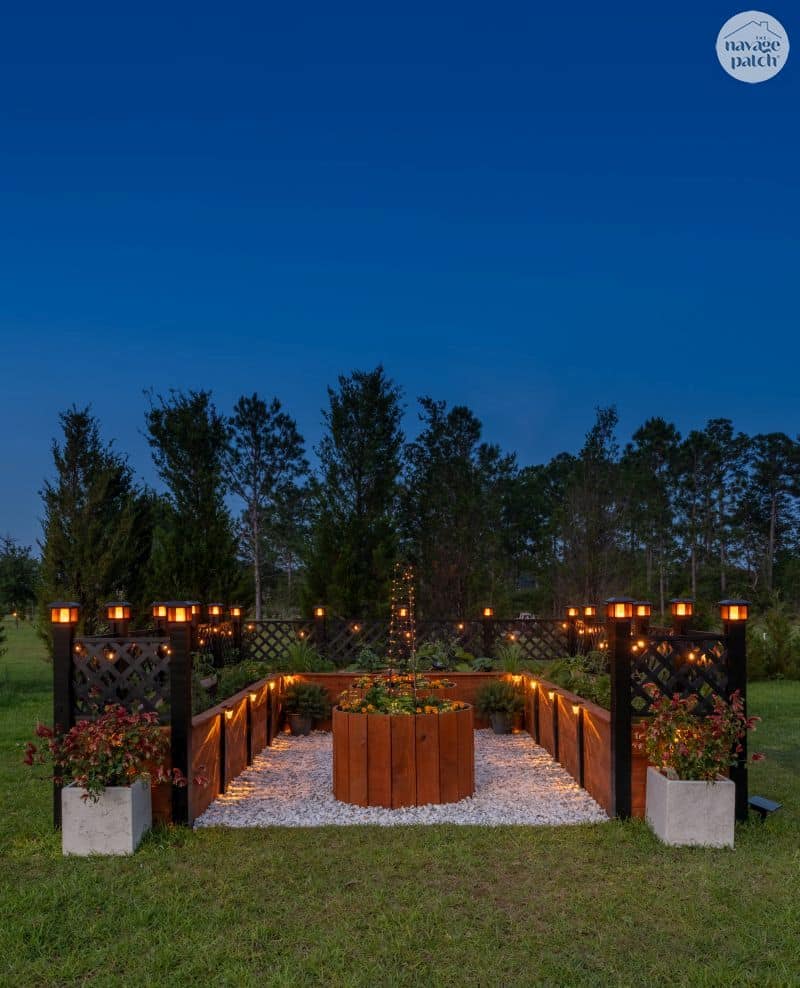

I’ll let the rest of the pictures speak for themselves.


Please let us know what you think about our new garden in the comments!
fantastic job ! well done. It is obvious though that money is not a issue for you as it might be for others , Still if you’ve got it might as well use it cuz you can’t take it with you.
You sure can’t! We build what we love and use it well! 🙂
Just amazing! This is so gorgeous and now I’m casting an eye on my own raised beds! Wait until my hubs gets home tonight. I think the lighting is the crowning touch!
Thank you, Sheri! Lighting makes everything magical!
What a stunning raised bed garden! I’d venture to say it’s the nicest one I’ve ever seen anywhere! Was curious if you’d share a breakdown of the .costs for this masterpiece?
Hi Karen, I made a video on Instagram for that. Check it out!
Very nice. You might want to put the marjoram/oregano in a pot before it takes over your entire bed.
I will before it’s too late, lol!
Wow! It looks fantastic and as an avid gardener I approve!! I put in a lot of raised beds this year, however, I have found that they are “just” high enough to pull on my lower back, they needed to be taller. Oh well, I have a long hoe and I will use that on any weeds I get. We mixed acres of dirt to fill them so I feel your pain with moving all of those bags! It was a job well done and looks beautiful!
Thank you, Jean! Look into a power assisted wheelbarrow – it’s a real life saver! 🙂
Very nice work, but totally unrealisic to the average home owner. I have been reading your projects for years and this one is a definite MISS
Can’t win ’em all! 😛
I have been in awe as you created this garden. It is so beautiful. I would want a small table and chair in there so I could just sit and stare at it. Shrimp is a lucky gal. I have the same problem buying too many flowers and plants. Although there is no such thing as too many flowers. I keep buying them, especially if they are on clearance. I made myself plant everything before buying more this year. It has worked so far. But is hasn’t been terribly hot yet. I have a yellow and white shrimp plant. I love it.
I wanted to put a table and chairs in there too! But in the end, I went with more planting space – we still love to stand around harvesting though! 🙂
Greg. Just wow.
Thank you, Kimberly! 🙂
What an incredible garden! That was a lot of intense work, and it turned out beautifully. Enjoy the fruits (and veggies) of your labour! 🙂
Thank you so much, Claudine! We’re already enjoying eggplants, cukes, squash, strawberries, peppers, radishes and herbs!
OUTSTANDING JOB!!
You NEVER cease to amaze me.
Well done YOU!
Thank you so much, Donna! 🙂
Beautiful! Here’s to a massive harvest!!
Thank you, Cynthia! We’re already harvesting a ton! 🙂
That looks absolutely freaking amazing!
I wish I can clone you and bring one here. My yard is actually pretty crappy and all concrete. I would love to rip it all up and do something like that.
I love watching all your work. Nice job pats off to the shrimp.!🫶
If you dream it, you can do it! There’s nothing time, money and muscle can’t fix! 😀
OMGosh, you’re not kidding you may have outdone yourself!! This project turned out uh-may-zing 🤩 I already forwarded this to the Hubby to see about doing something similar next spring. Our current beds are already going for the season.
Thank you for providing such a thorough how to! You guys rawk!!
Hey Mo! Thank you, it was a heck of a project, but it’s already paying off with veggies! 🙂
Absolutely glorious!!
Thank you, Lisa!
Once again my hat goes off to you and here’s another reminder to Your Babes to count her lucky stars. Most men I know would have no idea how to do something like this, or WANT to. Some of us have to plead to get a picture hung! Bravo Greg!
Thank you, Barbara! We both count our lucky stars every single day! 🙂
Stunning! What labor of love!
Thank you so much, Patty! 🙂
Another Amazing creation!!! Looks awesome! I wish you were my neighbor. But then, you’ d have to move to Oregon and give up that beautiful garden and house! lol.
Thanks, Tracy! You could always move to sunny Florida! 😀
Truly amazing. You’ve really outdone yourself with this project. This look straight out of a magazine. I agree with Karen that this is the nicest raised bed I’ve ever seen, and it’s also true that this project might not be for everyone in terms of yard space, skills or money, but one can most certainly get inspire and adapt it to its needs and means. I have one raised bed in my, a lot smaller , Quebec yard and wanted to add two more but did not know how to make them fit with everything else design wise. You just provide me with great ideas, as since ouf colour palette are very similar, I can easily picture it. Thanks for or the inspiration and your always so helpful tutorial.
Thank you! Yes, it’s not for everyone as I built it, but like you said, it can be done much more cheaply with the same ideas!
I have to send out a huge thank you to you both. Yeah, you did all that work, but you did it for (with and most likely because of her😊). If not for you both this gorgeous spot would never have come into fruition…and I absolutely appreciate the ideas on how to be able to build a healthy garden to grow healthy food for my family. So many people are using treated wood right with their plants and its so not safe…Incorporating natural options in your design that are healthier than all those chemicals with the fruits and veggies has been the topping on the cake for me.
Not to mention your detailed plans, pics, links, and your comical commentary. I hope to make something half as beautiful and functional as your creation once I’m able to take on another project and because of your tutorial/walk-through I feel way more confident in that. So, thanks for that as well.
Also, I know it was a pain for the irrigation, but your set up is wonderful. I don’t have any pipes underground but it’d be great if you ever do a video on how to set that up in the garden bed maybe using a mulit-hose connection off a spigot on the side of a house, and how to make that blend in somehow underground maybe…
Anyway, you created a truly beautiful gardening space…Great lighting, much better height, and so many smart ideas that most other people don’t really think about. Honestly that’s what I was looking for when I ran across your videos on YouTube. I was super excited that you have your own website cause you have great taste in design and puns. I love watching your videos with all my kiddos, as they love to create things and they get a kick out of your puns as well.
I plan to share more of your content and website with their dad as well since your work is the reason for my ideas as well…lol.
Hi Karen, thank you so much! This garden had been an amazing learning experience. Last year most of our veggies were stolen by birds or fell victim to the extreme heat. This year, we’ve taken measures to protect from critters and heat, but we’ve discovered a much more sobering problem: all the bees are gone. Last year we had thousands all around the yard. This year – zero. Colony collapse disorder has hit the Florida panhandle, and it’s scary.
Hi Greg,
I have followed you for many years, and have been in awe your many projects. But this amazing garden is definitely one of the best I have ever seen, and I am a gardening blog, magazine, tv show junkie. You are such a wonderful husband! My husband is going to build us something similar but with a top to keep out the many deer we have in the Pacific Northwest. I plan to assist.
You guys are awesome. I hope you like living in Florida. Thanks for all of the inspiration!