Ringu Girl (a Life-size Scary Halloween Prop)
If you like scary Halloween props, then Ringu Girl is for you! But don’t let her creepy looks fool you, she’s actually quite budget-friendly and easy to make! Happy haunting!
I can’t believe it’s October already! It’s the one time of the year that I get goosebumps just walking out of the bedroom each morning. Hahaha…I know, right? I’m the one who starts planning our Halloween props when the clock strikes midnight on January 1st, and I’m the one who makes these Halloween props, so I should be fine with them, right? But the thing is, it is the Creepmaster and his Minion (aka Greg and Barish) who actually decorate and stage the house for Halloween. And they do it in such a way that I can’t even recognize my own Halloween props – no kidding! Ok, I shouldn’t really be giving any spoilers about this project, but you’ll see what I mean with “my own props give me the goosebumps” when you see the beauty shots of our Ringu Girl. All I can say is that it’s not gory or scary, but it is a bit creepy, if the word fits, since it is inspired by the famous Japanese horror movie, Ringu. 😉 Anyway… Let’s get on with the tutorial, and you can see what I mean 🙂
For our Ringu Girl I used:
Supplies List for Our Scary Halloween Prop
- A faceless styrofoam head – You may try it with a normal foam head, but please note, the faceless foam head is what makes the ringu girl prop really creepy.
- Black paint.
- Dark Burgundy color paint – I mixed mine from all different dark reds and browns.
- Paint brushes.
- Hot glue.
- Duct tape.
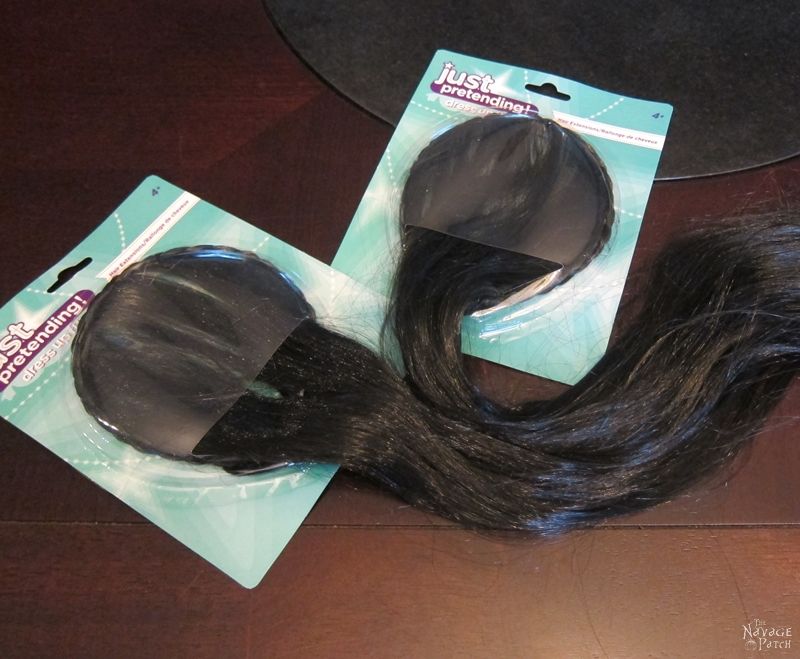
- 2 or 4 Dollar Store hair
- Foam – If you don’t have foam, you can also create the same thing with some chicken wire, or some cardboard and black contractor trash bags. More on this in the tutorial.
- Scrap wood or plastic pipes to create the body.
- Girls Princess Costume from a thrift store – As we get closer to Halloween all the thrift stores generally start bringing in these beautiful princess dresses for affordable prices. We bought ours for 4 dollars (it was originally 8 dollars, but we got it during a 50% off sale.)
How to Make This Scary Halloween Prop
Now that we got the materials list out of the way, let’s get on with our tutorial. I painted the back half of the faceless Styrofoam head with black paint.
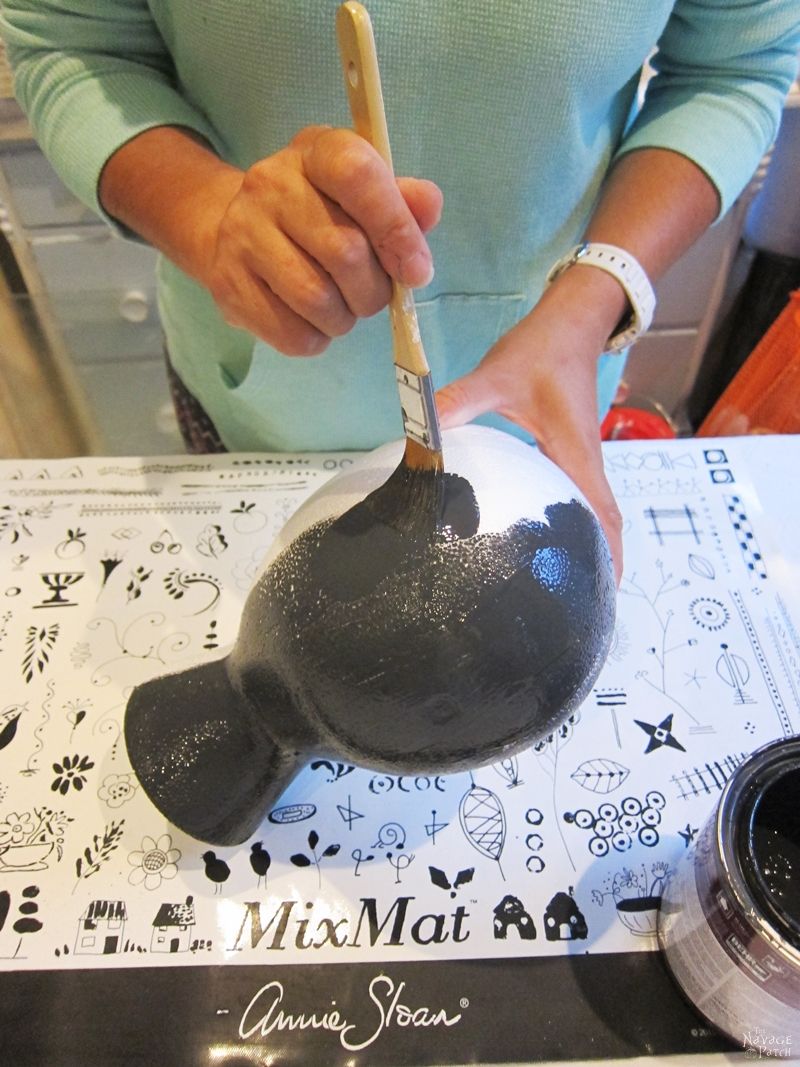
Once the black paint dried, I painted the front-half of the faceless Styrofoam head with dark burgundy color which I achieved by mixing burnt sienna, dark brown and some burgundy craft paint. After I finished painting the Styrofoam head, I left it aside for the paint to dry.

Next, I asked Greg to build a base for the body. He cut an old fence post about 2-3 inches shorter than the dress’s height. Then, using scrap wood and a brad nailer, he made a stand for the fence post.
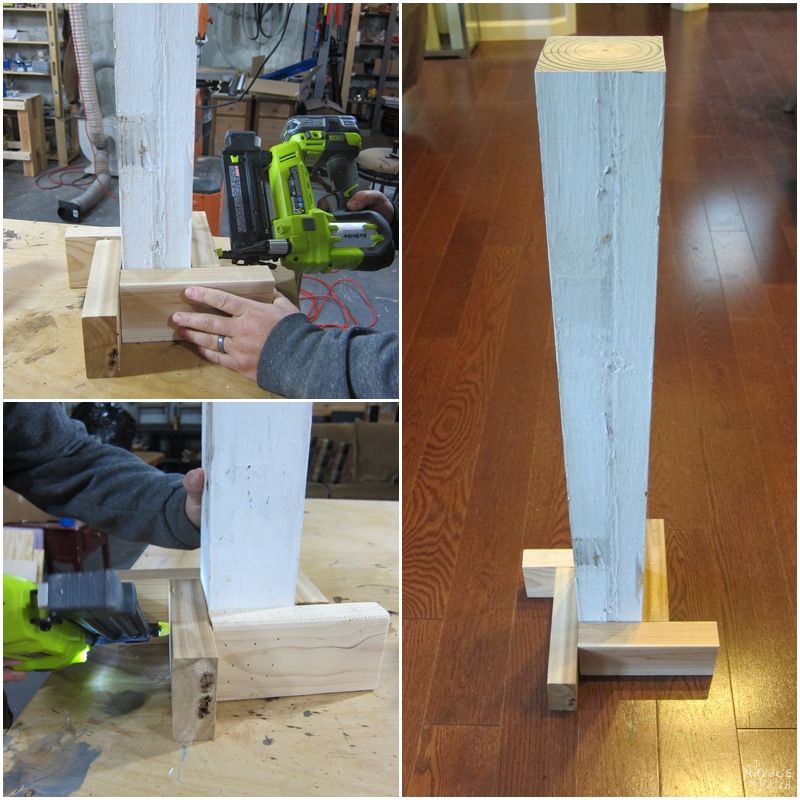
As an alternative to a wooden base for the body, you can build a base for the body using plastic pipes as shown in the schema below.

After Greg built me the stand for the body, I started working on creating the torso. I had some leftover upholstery foam from Greg’s wine bar project. None of the pieces were big enough to use for anything else. so I used them to create the torso.
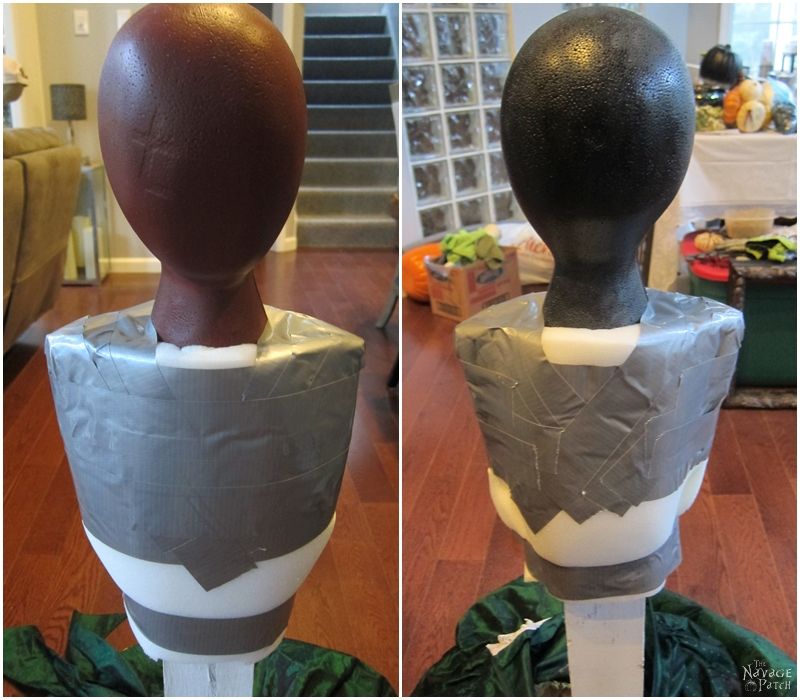
I first put some glue on the two opposite sides of the wood and placed the foam pieces on the glued surface, making sure I had about 2 inches of foam above the top of the post. Then, I duct taped the bottom part, which was going to act as the waist of the body. Then, as shown in the pictures below, I clamped the top part for the foam pieces so they would adhere to the wood much better.
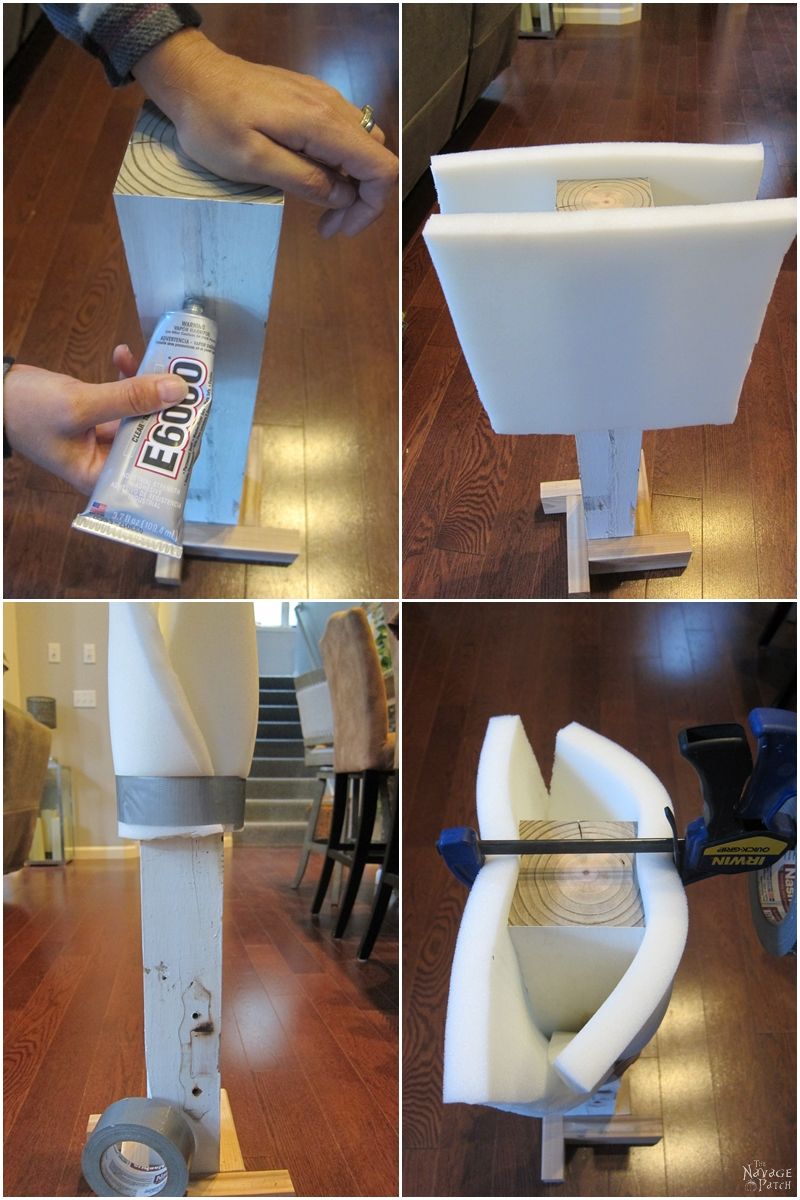
After about an hour, I took the clamp off and duct taped the foam in such a way as to create that triangle torso shape. If you don’t have foam on hand, then you can create the same shape with cardboard. To make it suitable for outdoors, you can put a contractor bag over the cardboard torso and whole thing should be good to put outdoors. 😉

Next, I hot glued the head on top of the post.
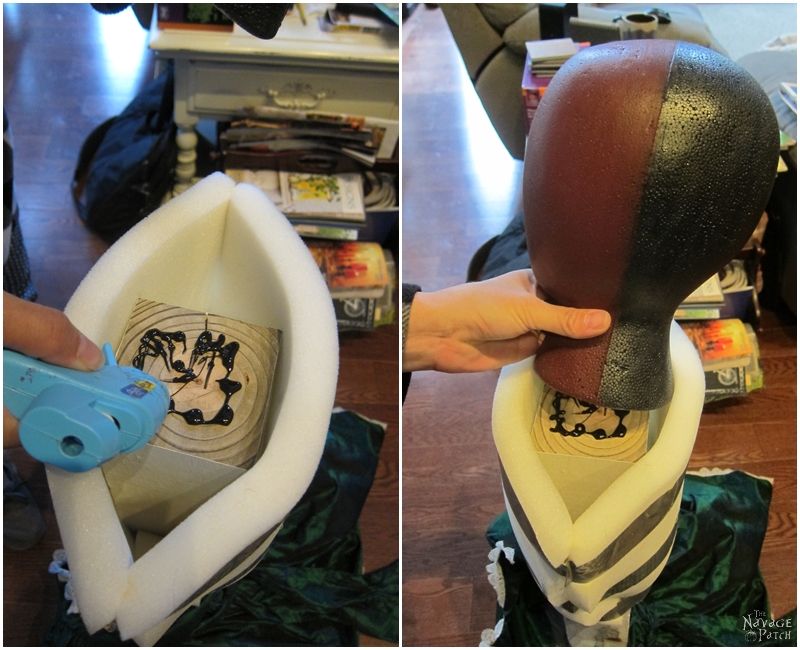
Then I duct taped the shoulder parts to round the corners of the foam, because when you put the dress on, you don’t want weird corners sticking out. In the pictures below, you can see both the front and the back views of the torso.
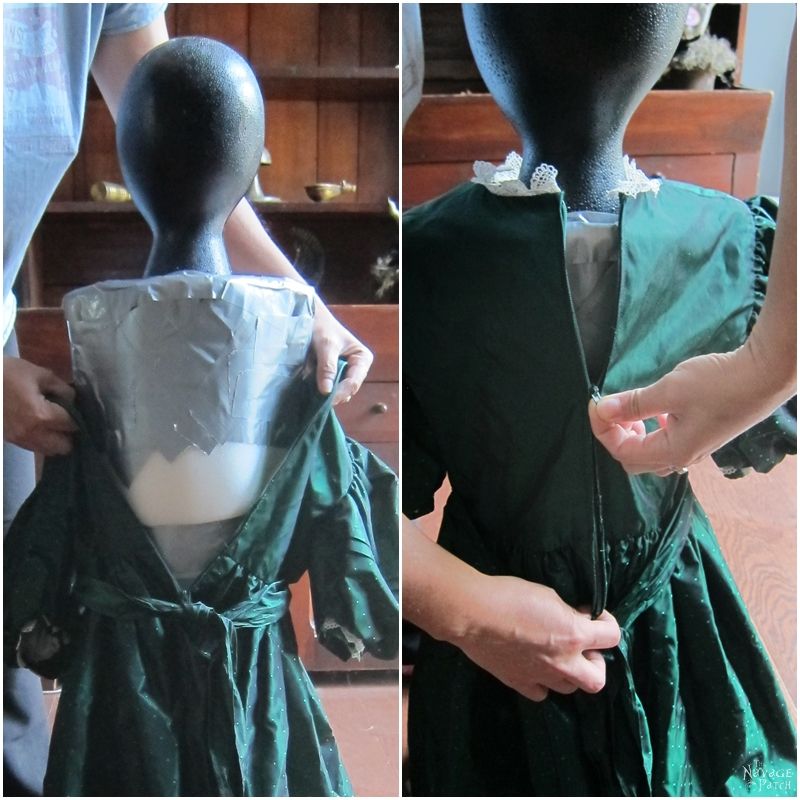
Next, I dressed her up – what a perfect fit! 🙂
Once she was dressed, I picked the Dollar Store hair and put a little hot glue on the inner part of the plastic head band.
Then I placed that first hair in the front part of the head – right at the boundary of the red paint. Once the first one was glued, I picked the second hair and glued it to the back of the head this time – right at the boundary of the black paint.
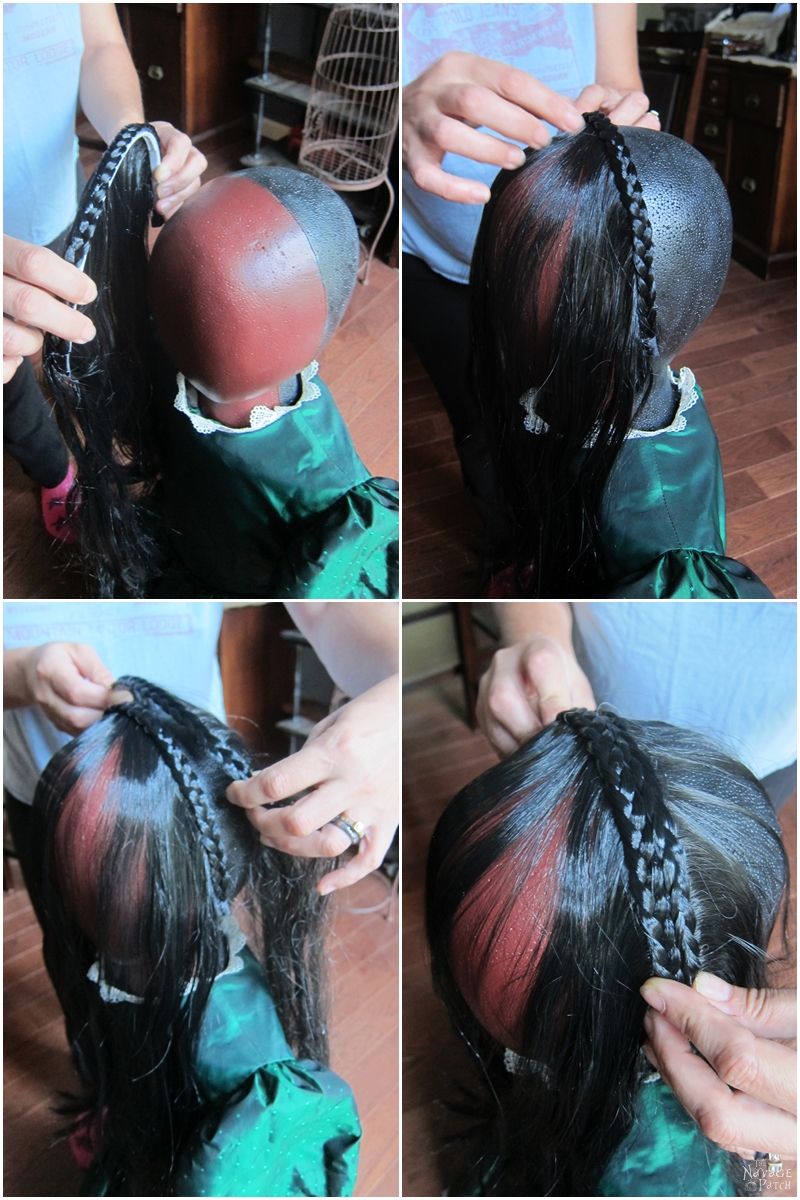
Depending on your choice, you can use 2 or 4 sets of Dollar Store hair. As I had 4 sets on hand, I glued another two sets right on top of the first two. And with that, our Ringu Girl was complete.
Are you ready for the beauty shots? Giving a second thought, these are more like creepy shots, LOL.

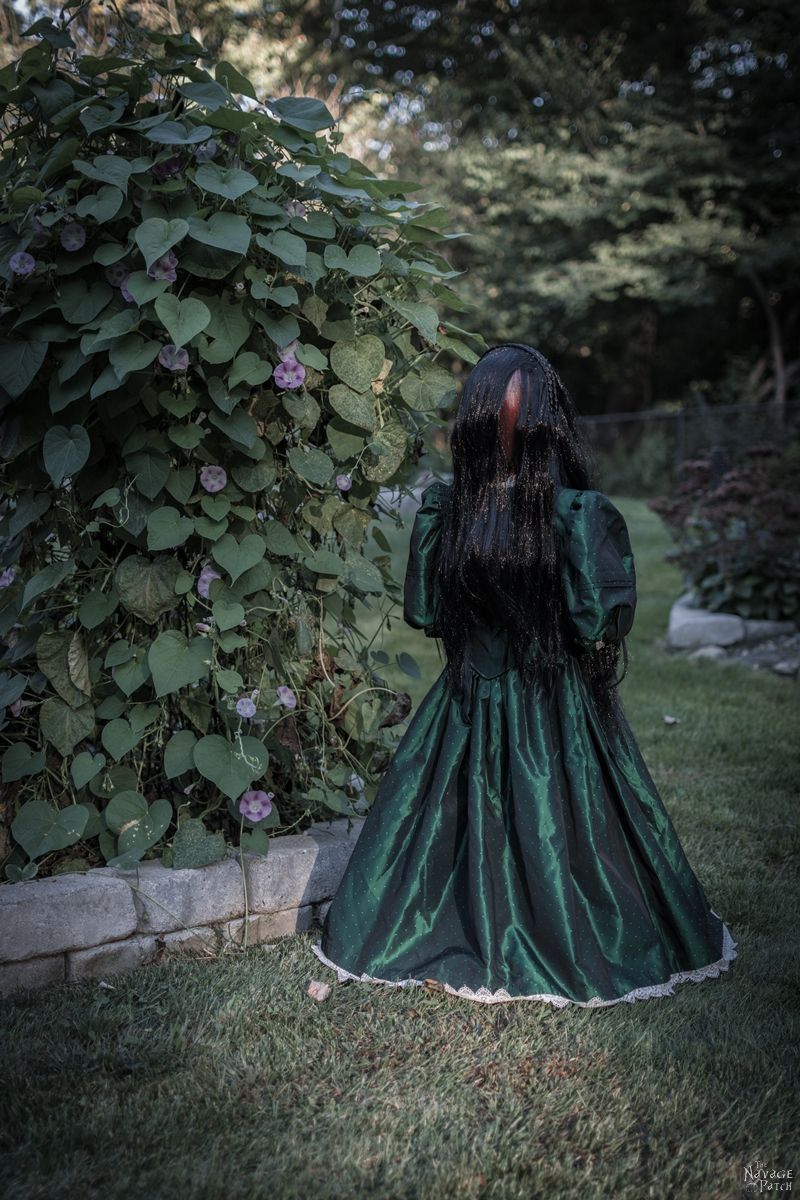
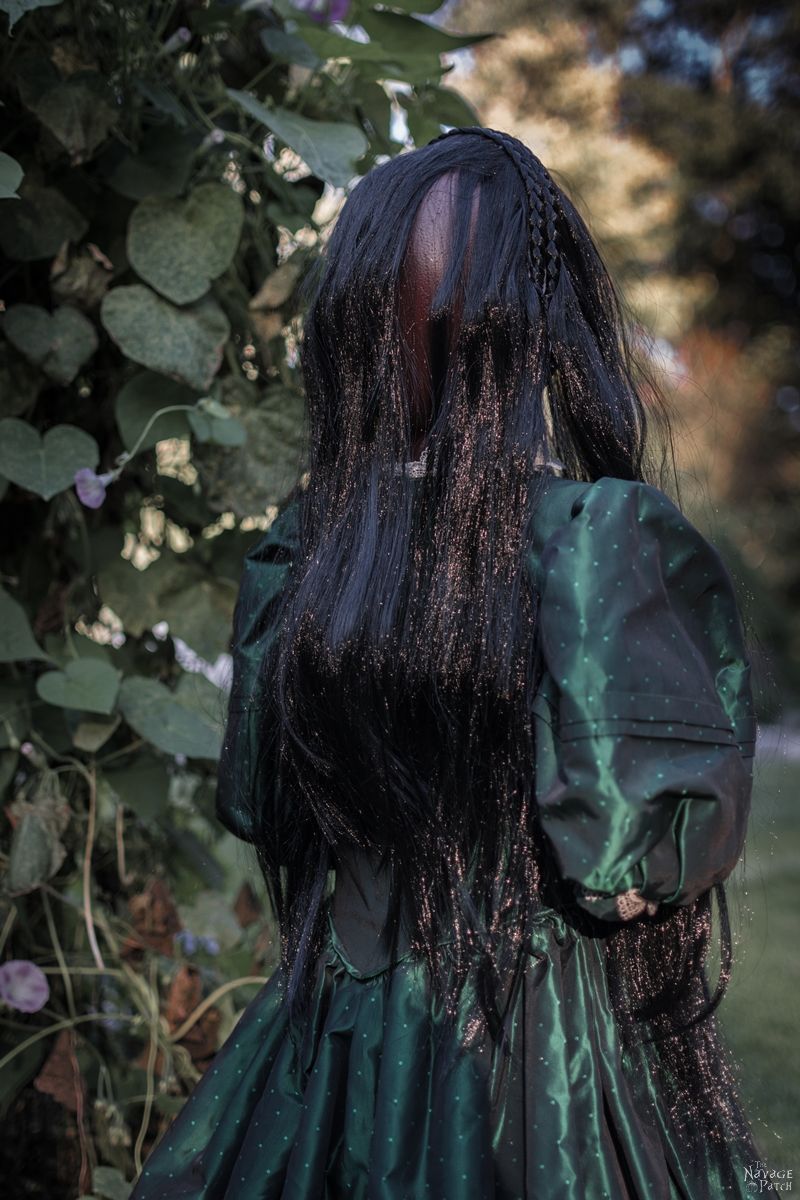
The photos above was in our backyard. Now let’s have a walk in our woods together 😉
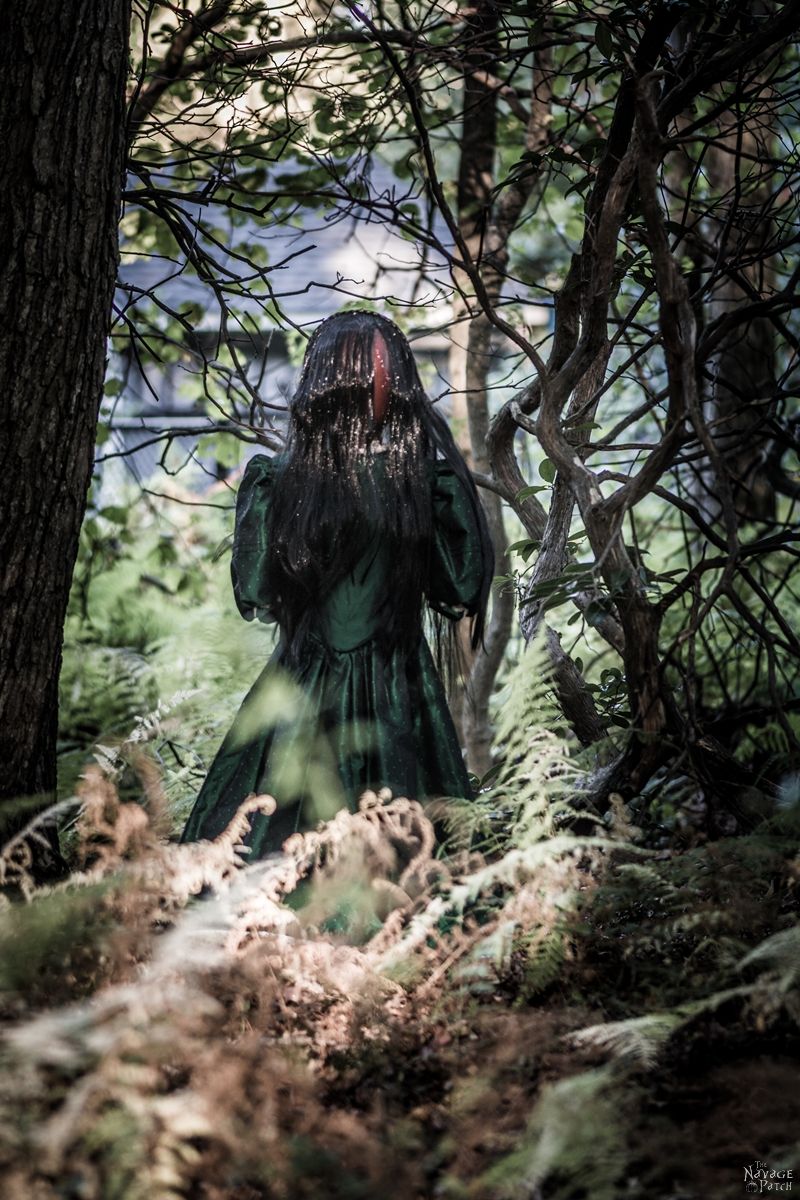


So what do you think? Creepy right? Greg did an awesome job with these photos – both staging and shooting the pictures. Now you know why I get goosebumps every time I walk out of our bedroom – hahaha 😀
As of yet, I am not sure where we will stage our Ringu Girl on Halloween night, but I know she will get staged only after 8.00 PM, as that is when our young trick-or-treaters finish their tour, while older kids start touring the neighborhood 😉
Handan, xo
We love it when you share our posts on Facebook and Pinterest!



Wow. That movie scared the crap out of me.. Your “Creation” is spot on… Great Creepy Work!!
Back in the day, I was ok with horror movies. I happen to watch Ringu alone in 2002 and had nightmares for a week. That was it for me. I never watch horror movies alone ever since. LOL.
THAT IS CREEPY!! I’d love to see the reactions of passersby! As always, excellent work!
It is indeed creepy! Greg and Barish are having a great laugh every morning seeing me having a jump scare. She is in the same spot always, so I should expect to run into her, but the thing is, I see her before having my morning coffee, so my mind never properly registers her as a prop – hahahaha.
most of the time i wished i lived next door to you but, at this time of the year i am glad i am states and states away ha ha that is the creepiest xx
LOL – it gives me the creeps every morning. I guess using the faceless head did the trick, because the unknown scares everyone. That is why she won’t be staged until the little pumpkins finish their touring in our neighborhood. 🙂
I would have a heart attack right then and there if I had to bump into your Ringu girl Handan. Good thing she’s only coming out after dark when the little ones have had all their sweets.
Hahaha – that is how I get every morning Michelle! Just imagine: she stands right in front of our bedroom door…a little bit hidden in the corner…I get up, walk out of the door to get my coffee to wake myself, then bam! I am face to face with her. I let out a funny weird screech and Greg falls into burst of laughter. This happens almost every morning – LOL.
EEEK thats creepy Handan, what goes on in that mind of yours? I love it!
LOL – I know, right? It looks so creepy when Greg stages it. But when I put it next to a furniture, then it is just a still prop 😀