
Antique China Cabinet Restoration
We picked up an antique china cabinet a few years ago with the intention of turning it into something beautiful and unique. It took a long time for us to get around to starting the project, but now that it’s done, this restoration has given us something to cherish.
Back in the summer of 2015, Handan and I spent some time combing through the wares of a little vintage/antique furniture shop in northern Connecticut. The owners, a husband and wife team, collected old pieces of furniture and other odds ‘n’ ends and either sold them as is if they were antique or vintage and in good shape, or they restored them a bit with paint and then sold them.
The Navage Patch hadn’t been born yet, but the seed was firmly planted. Handan and I were on a mission to collect old things to work on with the notion that we’d be writing about them someday soon. We found a few great pieces in that shop that got us excited – they’d make excellent projects and hopefully excellent posts for the future blog.
One piece we bought that day turned into my epic adventure in veneering known as Veneer & Loathing. You can read all about that long and harrowing odyssey here. For those who think that’s a weird title for a post, it’s a play off of Hunter S. Thompson’s book, Fear and Loathing in Las Vegas.
We bought a few more things that day that I don’t remember. Handan would, though. She remembers everything that she’s ever bought, where she bought it and how much she paid for it. She can look at our pile of crap neat stacks of future projects in the basement and list off every tag sale, vintage store, dump, road, classified ad, Craigslist post, or thrift store that contributed to the slag heap fine collection.
The other piece I remember is the subject of this post. It was an antique…something. Bookcase? Cabinet? Wardrobe? I can’t say for sure. Whatever it was, it had seen better days. It obviously had doors at one point in its life. Hinge holes gave testament to that. It also had movable shelves, as evidenced by the shelf pin holes that dotted the interior. But what really grabbed me were the big wooden boobs fancy corbels and intricately carved lintel.
The couple wanted $750 for it. It was pretty awesome, but it wasn’t $750 awesome.
We asked the husband if he could come down on the price since we were buying some other stuff. Without hesitation, he came down to $500. His wife perked her head up from what she was doing.
Still too much. But we wanted it. I turned the floor over to Handan.
Within seconds, she had the price down to $300, providing we bought the vintage desk (Veneer & Loathing) and a few other things.
Handan and I walked out with big smiles.
The wife watched us go with a frown. Then her eyes turned on her husband.
The poor guy. I’d been on the receiving end of that look before. I didn’t envy the evening he had ahead of him.
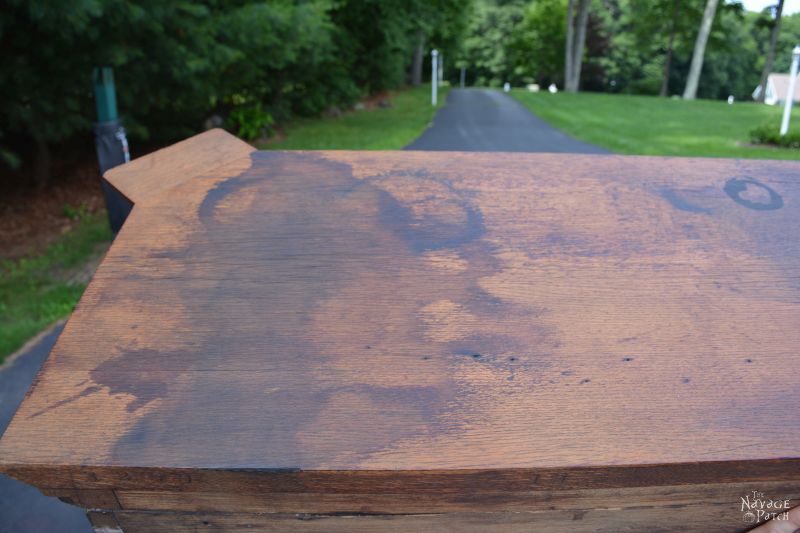
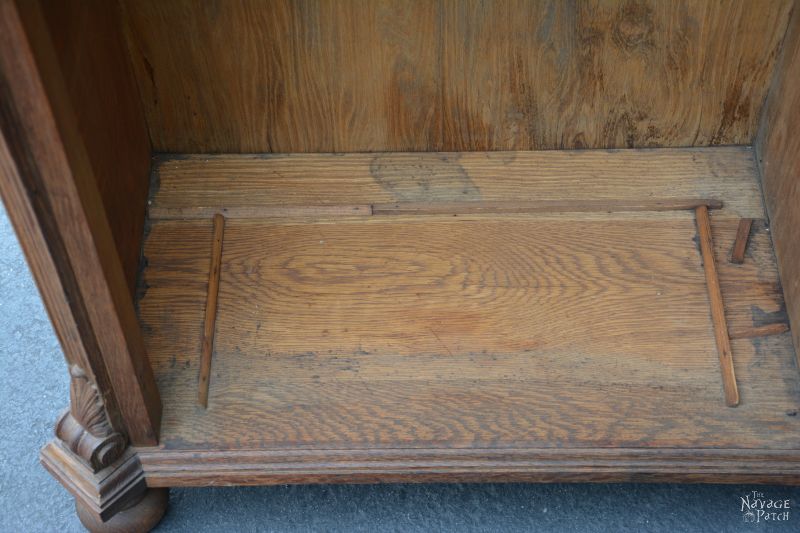
When we got the thing home, we unloaded it into the driveway, and I took a few “before” photos.
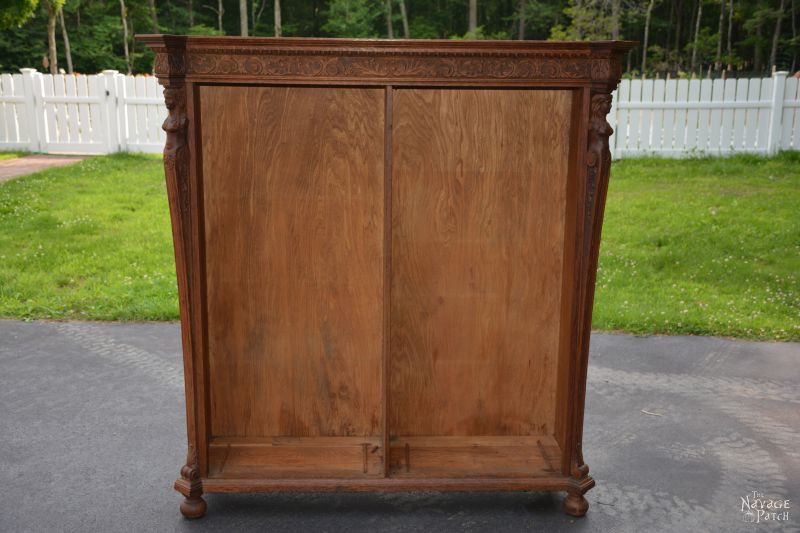
The thin backing was warped and stained.

The top looked like it been spit on by charcoal-chewing giants.

The inside bottom had a few half-round dowels nailed into it that looked like some disinterested brat had made a half-assed attempt at a Lincoln Log house.
We moved it inside, and there it sat, incomplete, but full of promise.
Could we turn it into a bar?
Would we make it into a bookcase?
How about an entertainment center?
A fireplace?
The ideas flew, but none stayed to roost. After a time, we stopped talking about it.
Soon it became a dumping ground for random crap.

When the pile of random crap grew taller and started to teeter, I built some temporary plywood shelves…

…so we could pile even more crap into it.
And that’s how it would have stayed indefinitely were it not for Handan pushing me to get off my ass and do something about it. She wanted to see it with glass doors, glass shelves and lights. And she wanted it now.
Yet still it sat there, burdened by junk I just couldn’t be bothered to put away.
Months later, the ultimatum arrived. We were planning the dining room makeover, and this cabinet would be a prominent feature in the new room. Either I built the cabinet, or I could find myself a cozy one-bedroom apartment on the dark side of the moon.
Hmmmmm…the dark side is supposed to be lovely this time of year, but I decided the wisest course of action would be to build the damn cabinet and impress the hell out of my wife. I’ve successfully completed at least one of those tasks.
Our first task was to remove the old backing. It was too warped to save. Handan and I made quick work of it.


My next job was to sand some of the old finish and re-stain it. That was a job best done outside, so we moved it into the garage to await a day warm enough to work without freezing to death.
When that day arrived, I sanded all of the flat surfaces with a random orbital sander and a detail sander.
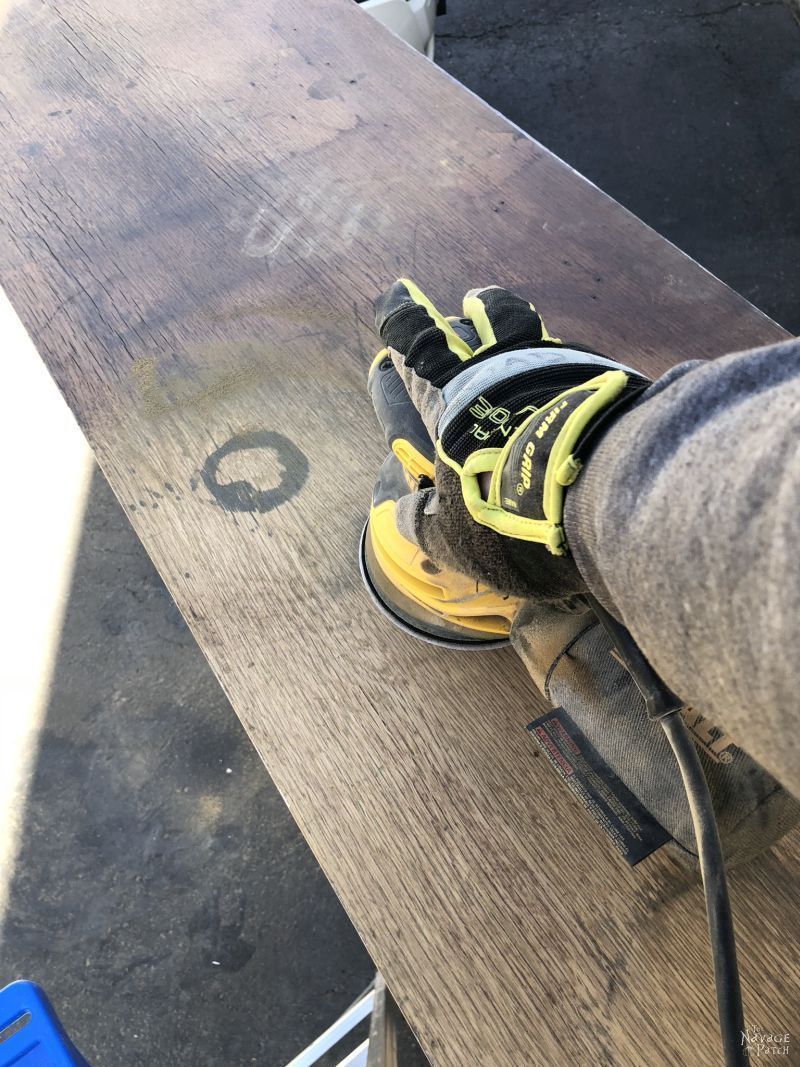
Some of those stains on top had penetrated too deep to be sanded out, so I let them be. The stain we were planning to use should cover them.
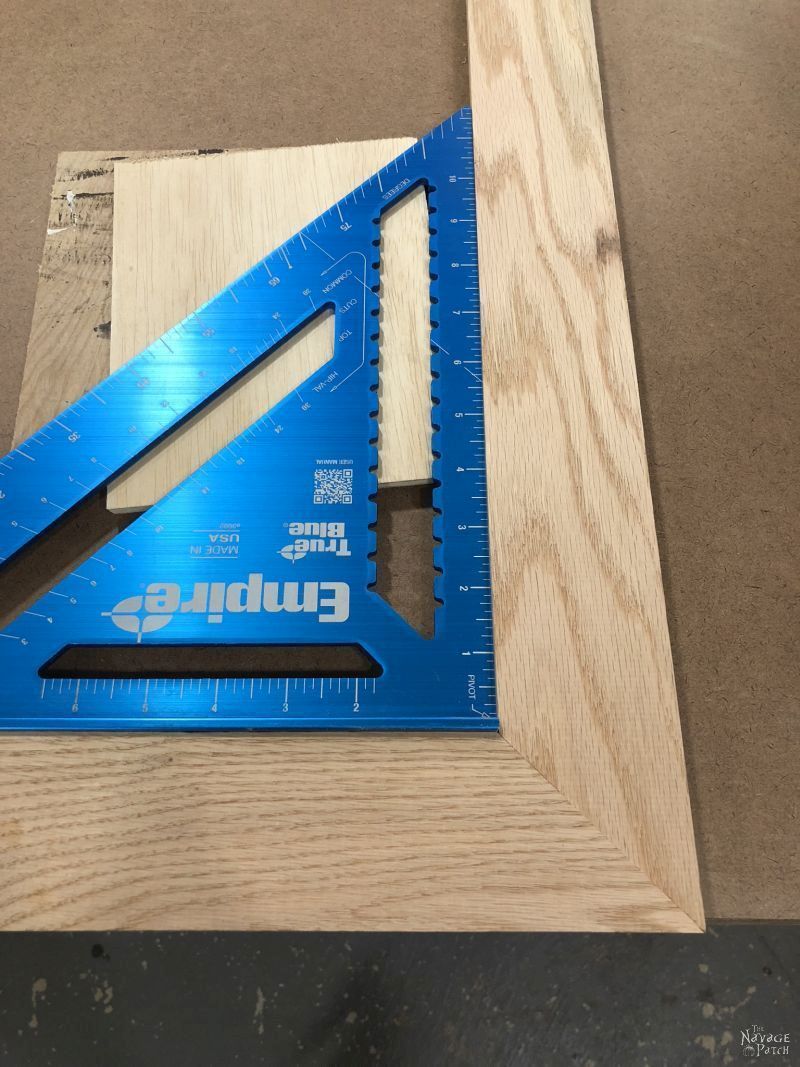
While we waited for a warmer day to stain, I started building the doors Handan wanted. I used white oak from Home Depot, as the grain pattern looked similar to what the cabinet already had. My plan was to build a simple mitered frame.
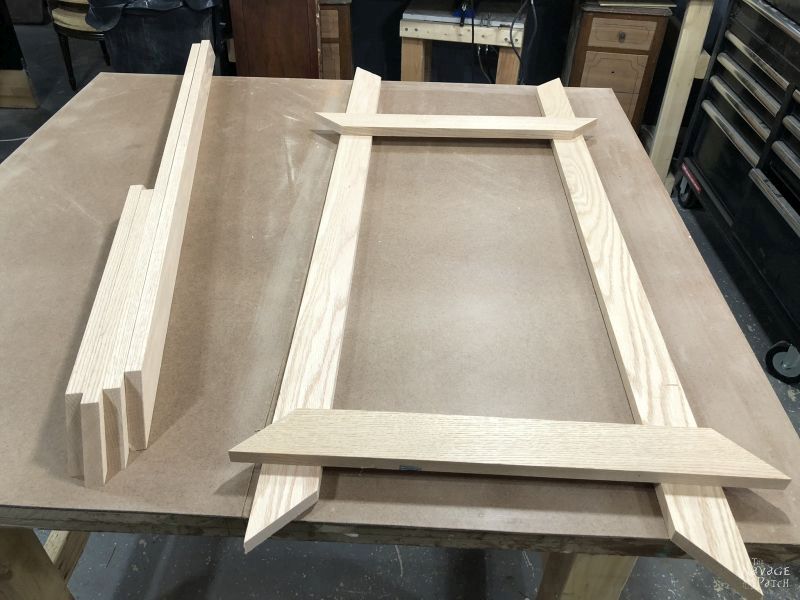
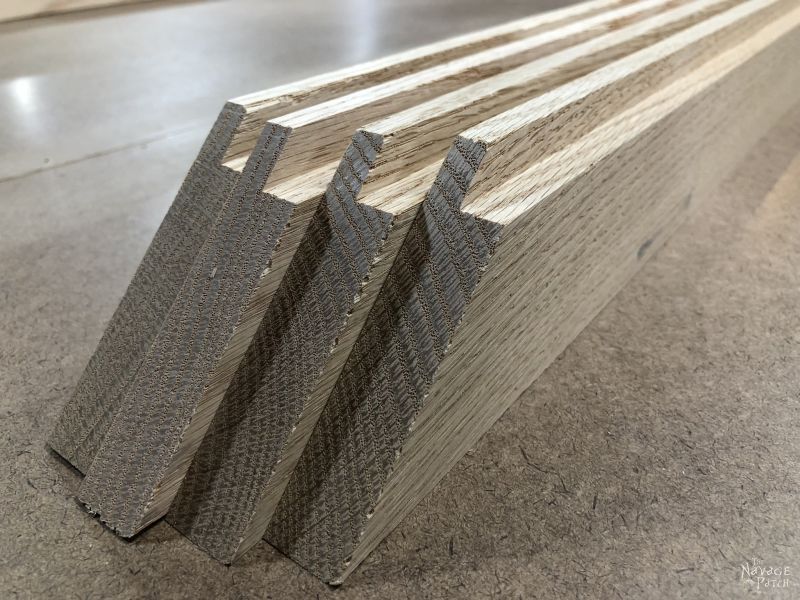
But before gluing the frame together, I routed the inside edges of the back to give a 1/2 inch recess that was 3/8 inch deep. This is where the glass panel would sit.
I glued the frame together and secured the corners with clamps while the glue dried (clamps not pictured). I always check for squareness during glue up using a speed square.
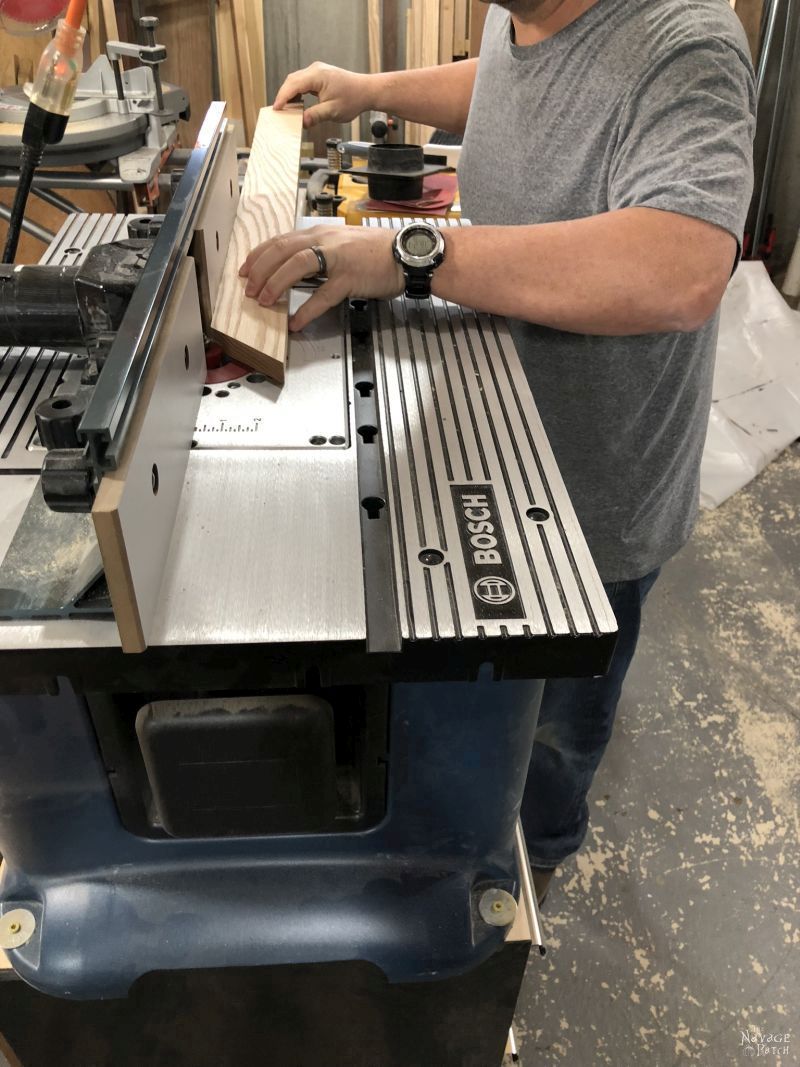
When the frame was fully assembled, I cut some trim pieces to fit on the front. Professional window makers and glass cabinet makers will scoff at my DIY method. They use special router bit kits specially designed for window installations. But those router bits are fairly expensive, and the process gets a little more complicated. The method we chose worked well, and it allowed us to pick a trim that closely matched a decorative pattern that was already in use on the cabinet.
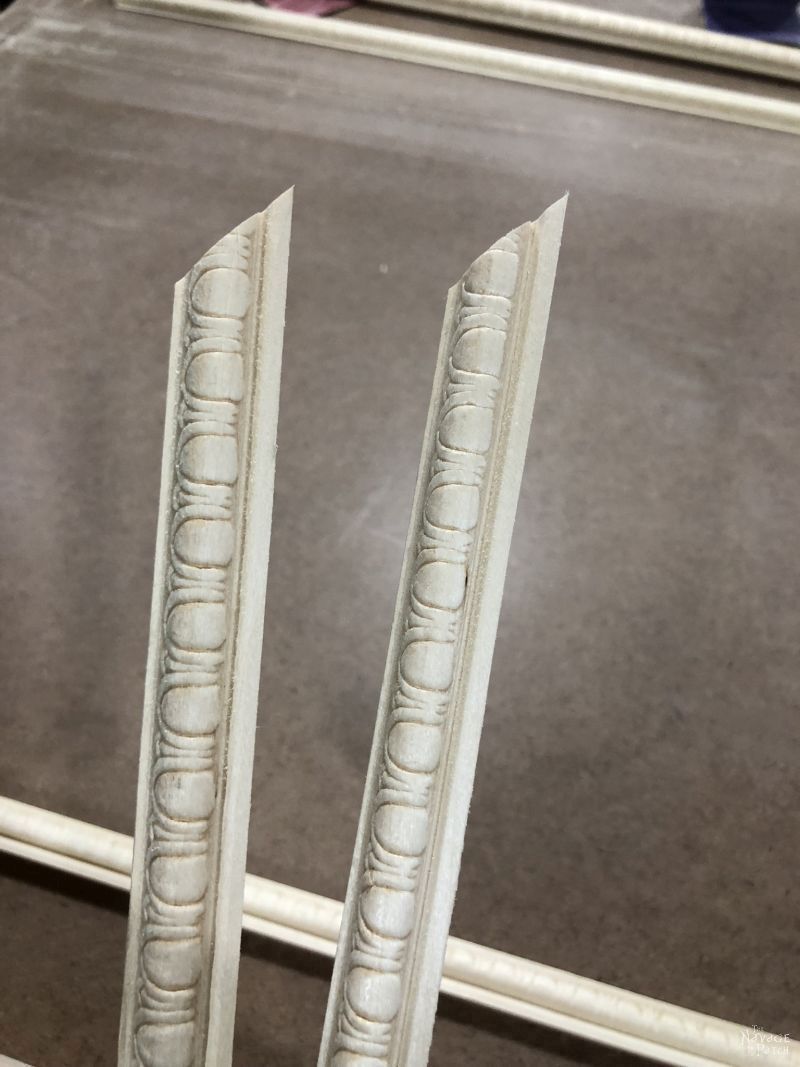
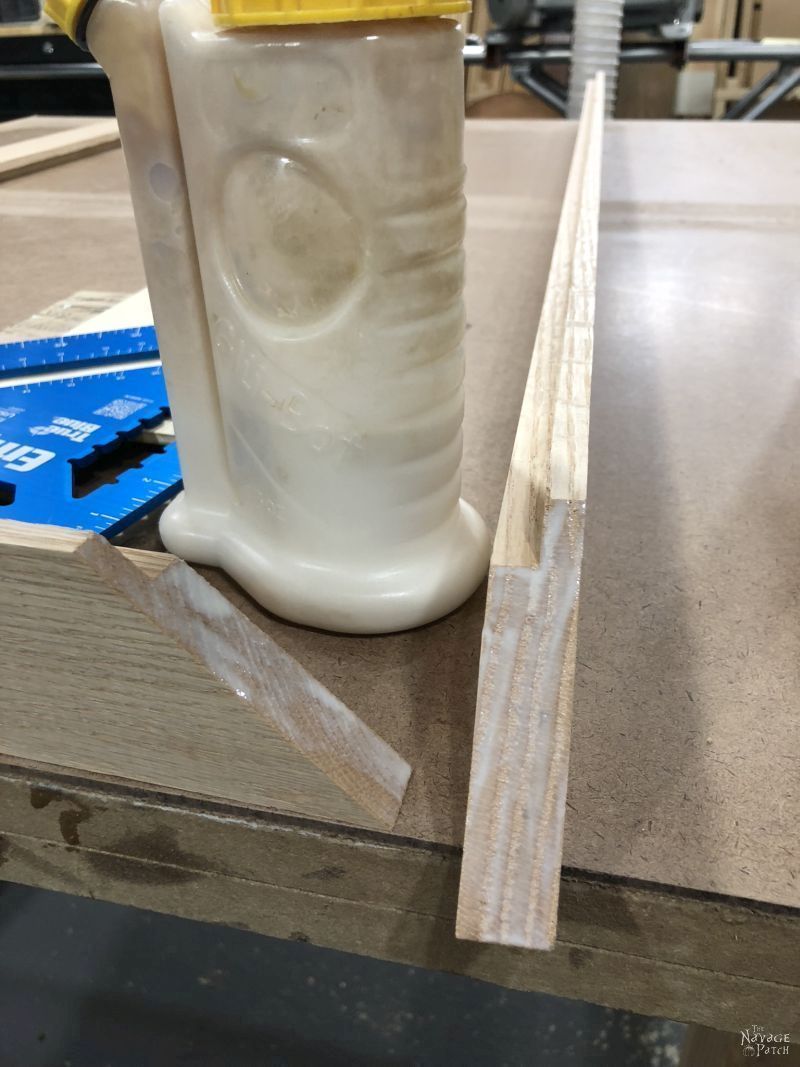
I first needed to trim the trim (wait, what?) a little so it would be the exact thickness I needed. I then measure the lengths I needed, cut them and mitered the ends. When I had all the pieces cut and trimmed, I glued them around the interior of my door frame.

Notice in the picture above that the trim is flush with the recessed face. When the glass is inserted into the frame, it will also rest against the back of the trim piece.
Below is the front view. You may be wondering how it will turn out with an oak frame and pine trim. Normally, with regular stain, it would look pretty noticable and crappy. But with gel stain, you have a lot more color and shade control, so it’s easier to blend two different species of wood.

Here’s a corner with one piece of trim.

Click on ‘Next’ to continue.
Wow. That looks spectacular!
Thank you, Nicole!
Wow this is a showstopper! Great work and a stunning addition to your home!
Thank you, Sara! We love it! 🙂
Absolutely beautiful! A one of a kind treasure. I just love your posts!?
Thank you so much, Susan!
You’re a great writer. Thanks for the entertainment. And welcome to the “Monkey Do, Monkey See” Club, one I originated. The piece looks great by the way.
Thank you, Teddee! 😀
I absolutely LOVE it! Great job!
I cannot believe you work in the garage however – it has been soooo cold in CT lately! Hope you have a heat source! I have to work on the porch so not one project has been done yet this year. Hopefully we won’t go right from winter into summer. 🙂
Thank you, Laura! Oh no, I don’t work in the garage usually. My workshop is in the basement, but this piece was too big and clunky to carry down, so some work had to be done outside or in the garage. 🙂
Magnificent!
Thanks, Derry! 🙂
Well…IF I can stop laughing (tears) from Page three to type this…it turned out FABULOUS!!! Send a photo to that antiques place and address it to the wife…nah. franki
Lol, thanks, Franki! Oh, I don’t think she’d be too happy with that photo! 😀
Wow. Just Wow. That looks absolutely amazing, and all of your souvenirs are fantastic! (Handan, I am a little disappointed in you, after all, you weren’t wearing pajamas in any of the pictures! As a happy, pajama-wearing woman, I thought I’d found a partner! LOL!) Good job, both of you! I can’t wait to hear the story of the garage renovation. (That should prove to have lots to keep us entertained!)
She was wearing pajamas, Terra! I guess none of those pics made the cut, though, lol.
I swear that woman with the boobs has a bigger smile on her face now that she’s been refinished!!!
I think you’re right, Cheryl 😉
Greg, what a story! Well, it turned out fantastic! You are an awesome carpenter. Congrats on a job well done!
Thank you so much, Melva! 🙂
this is freaking awesome and i do not even like antiques very much lol, these are great posts, a story inside a diy,you guys are the best xx
Thank you, Chris! Everything is better with a good story! 🙂
You two always do such great work and this is no exception! She’s a stunner!
Thank you, Barb! She sure is!
It is absolutely gorgeous!! Great job.
Thank you, Shirley! 🙂
Wow! It turned out beautiful. Well done!
Thank you so much, Janice!
Wow!! Great job bringing an old piece back to life. It looks beautiful with all your treasures in it.
Thank you, Sandy! It really does!
Wow! It turned out amazing!
Thank you, Revital!
Absolutely gorgeous! I love the hinges!
Thanks, Giselle! Yes, those hinges are awesome. House of Antique Hardware has really cool stuff.
That is an amazing blog. And a GORGEOUS Piece! Love that you brought it back to it’s beautiful self!
Thank you so much, Dawn! 🙂
WOWZA! Gorgeous. Happy birthday Handan!
Thank you, Karen! 🙂
Thank you so much, Karen! 🙂
Wow! That cabinet looks fabulous!!! When can I hire you two to come to my house? LOL! Love all your posts! 🙂
Thank you, Jennifer! We should be finished in our house in about 2037, so we’ll be right over after that! 😀
Wow. That looks absolutely amazing, and all of your souvenirs are fantastic. Great job bringing an old piece back to life. You two do such great work and this is no exception. Hope so your experience will helpful for all and thanks for the sharing with all of us.
Thank you, Jason! It was worth the effort!
Stunning!! You all did an amazing restoration job. What a unique piece that deserved nothing by the best, and that’s what it received. Haven’t used the GF gel stain, but thanks for the user tips. I’d like to try it sometime.
Thank you, Amy! The General Finishes Gel stain is a wonder – you’ll love it!
That’s the best boob job I’ve ever seen guys. It looks amazing
LoL, thanks, Michelle! 🙂
That china cabinet is a treasure which is housing treasures. Beautifully and lovingly restored. And Greg we all make mistakes. So many measurements and so many numbers to remember. What matters is that it turned out brilliant in the end.
Thank you, Mary! You know, as it turned out – I was correct in my measurements! The glass shop made the error. They made the new glass for no charge. I never bothered to update the post with the new info, lol.
I went through all four pages but never saw the finished Cabinet. Where is it?
That’s odd, Russell. The finished cabinet pictures are all there on page 4. Perhaps try again?
Have to say, that’s one best way to restore old cabinet. Thanks for sharing the tips….
Thank you, Amir!
Wow, what beautiful piece of furniture. I understand why you wanted it so badly. Gorgeous fine! Your work also, gorgeous. Thank you for sharing.
Thank you, Ivory – that one was a labor of love! 🙂
Wowza! Wowza!! Wowza!! I love gel stain. I used it to refinish an old dresser and I think that java is so warm and the perfect shade for your project! It’s a gorgeous addition to your home. Keep the fun projects and the amusing blogs coming! You and Handan are inspiring all of us do-it-yourselfers.
Thank you so much, Barb! Have a wonderful holiday weekend! 🙂