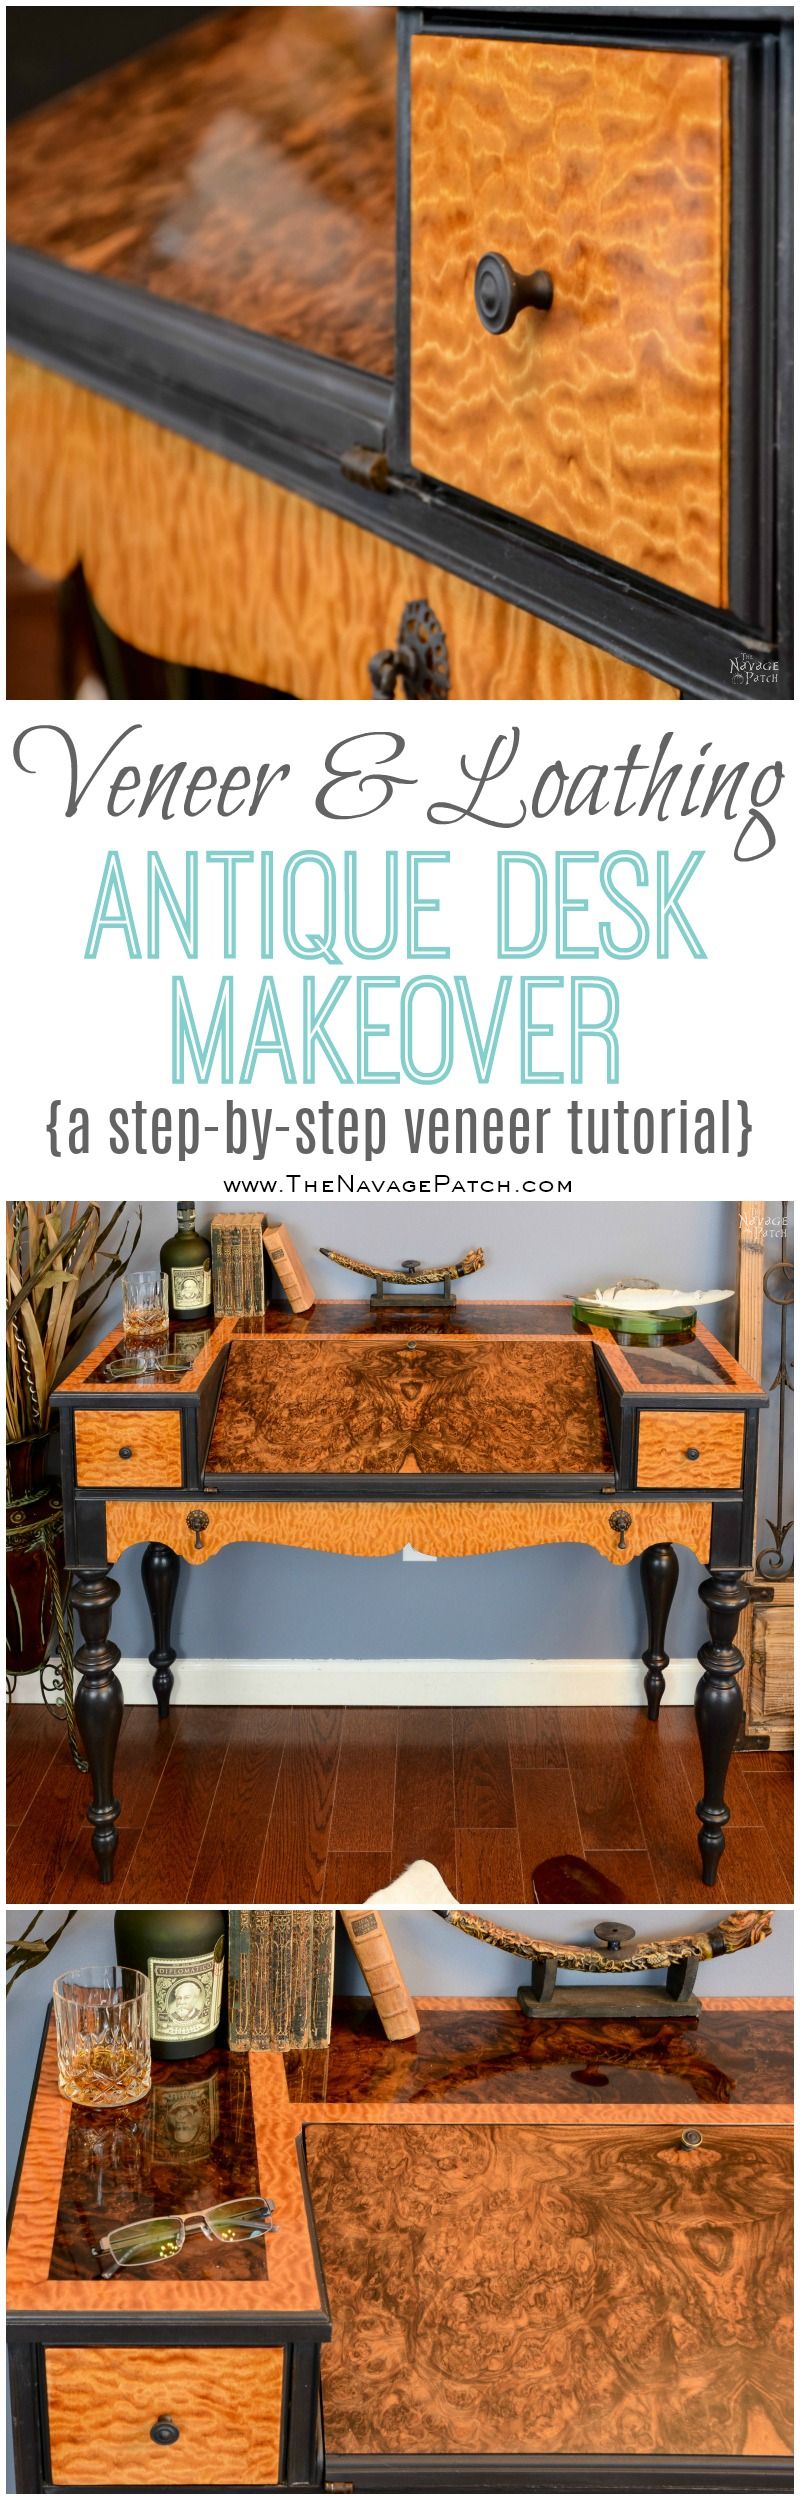
Veneer & Loathing (Antique Desk Makeover)
At some point in the not-too-distant past, the word “veneer” became synonymous with “crap” in the minds of most Americans. It’s not hard to understand why. Just go to any national furniture chain today and look at all the shiny junk they’re hawking: cheap wood (or plastic) veneers over even cheaper wood (or particleboard) frames.
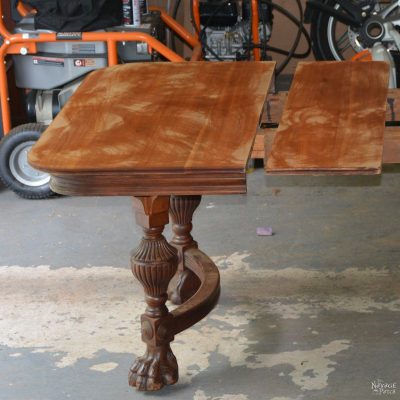
It wasn’t always like this though. Veneer has been used for centuries by the finest woodworkers and furniture makers. It allows the craftsman to use exotic and beautifully figured pieces of wood that might otherwise be too expensive. Because veneers are so thin, they can be curved and bent and cajoled into all sort of different shapes. They can also be used to inlay a pattern or design on an existing piece. That said, I never had any thought of working with veneer, nor did I particularly want to. But then we found this antique writing desk at a shop in northern CT.
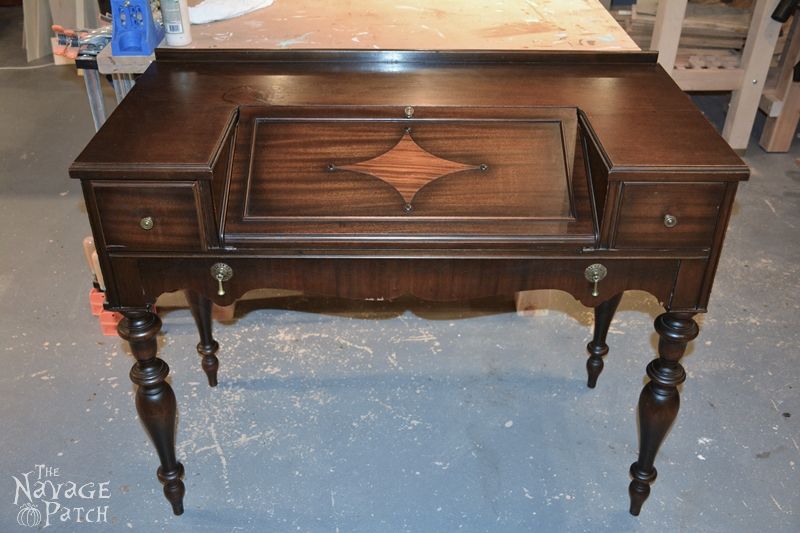
It was made by the Grand Rapids Chair Company. It’s a nice little piece that looks to have mahogany veneer over a hardwood skeleton. There is a raised diamond-shaped onlay of mahogany on the fold-down desk. The desktop was in pretty good condition – a few scratches and a stain ring, but the sides had some peeling veneer.

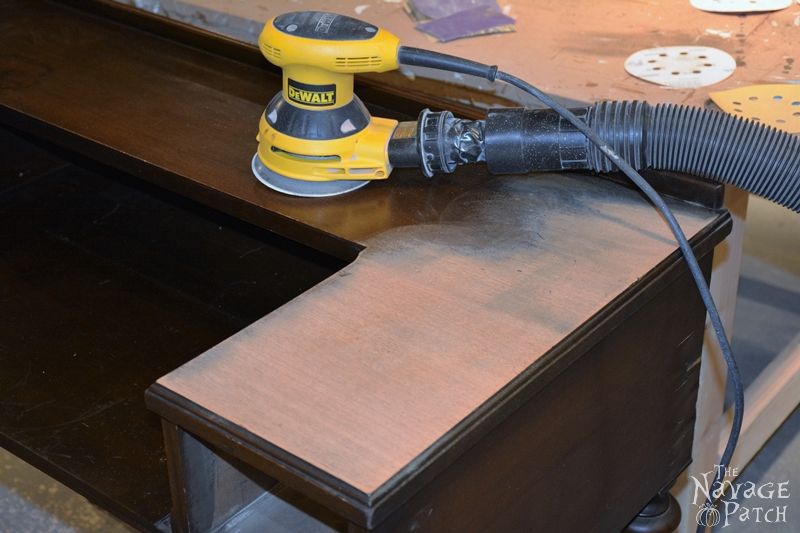
My plan was to sand and re-stain the top, then either repair the side veneer or peel it off and paint. Like most of my plans, this one flew off the rails almost immediately. I don’t didn’t have a ton of experience with veneer (just north of none), so I approached the desktop as I would any solid piece of wood: I loaded my sander with 60 grit and went berserk.
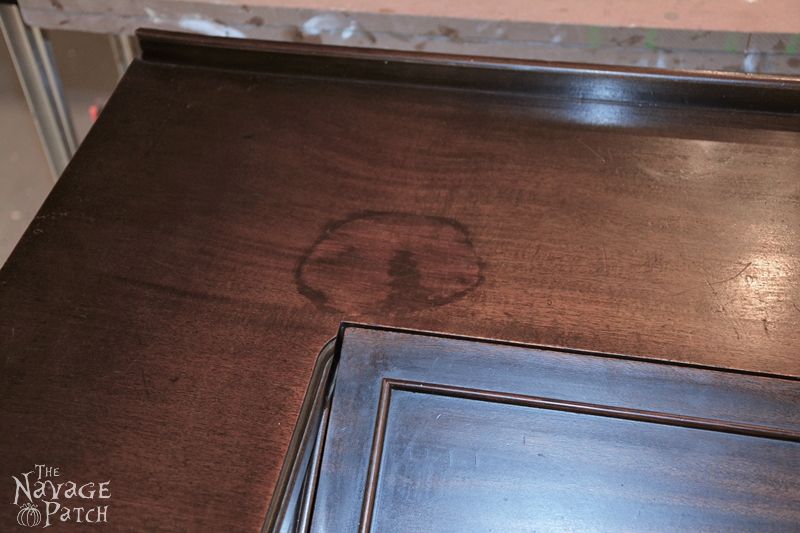
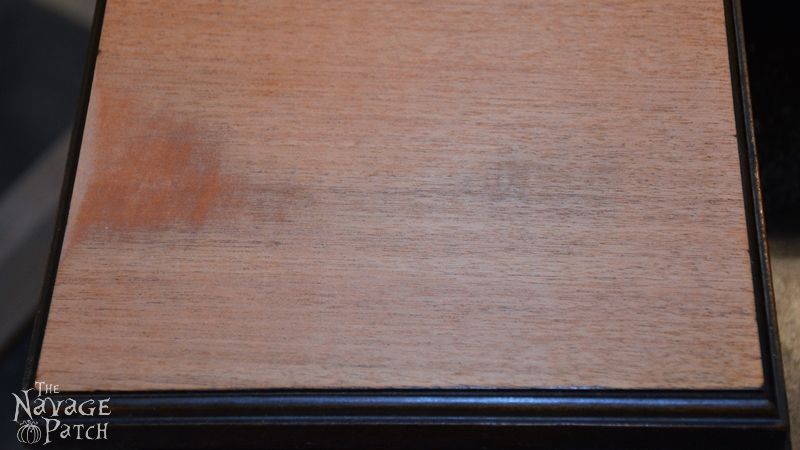
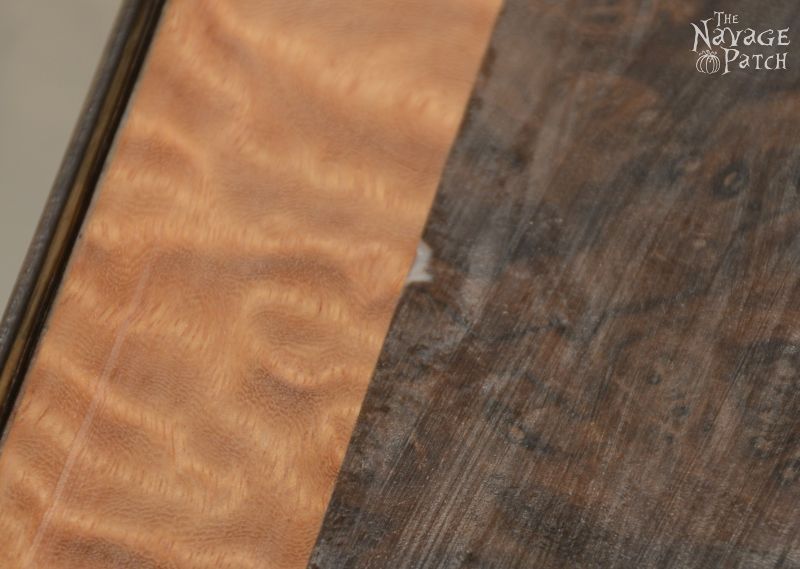
Things went well at first. The scratches and gouges that marred the surface melted away beneath my orbital machine. But, whoa! What the hell was happening in that corner? Why was the wood turning color? Maybe it would sand out? Better hit it harder. Nope. That just made it bigger. And why was the grain different?
The light bulb switches on…
The palm hits the forehead…
The spreading splotch was the wood underneath the veneer. Actually, it, too, is veneer. It’s what is called a backing layer. Rewind to when I started sanding: I did have the presence of mind to look at the thickness of the veneer to see how much room I had to sand.
But of the thickness I was looking at (maybe 2-2.5mm), only about 0.6-0.8mm was the nice mahogany veneer. The rest was a substrate, a backing veneer devoid of beauty, applied only to strengthen the gossamer sheet atop it.
Well, sh!t.
It is during these times of failure and ruin that new plans stampede into my head with all the grace and subtlety of a wildebeest migration in the Serengeti.
Rip off all the veneer!
Re-veneer it yourself!
How hard can it be???
A plan hatched without careful consideration is a plan doomed to setbacks and mistakes, if not outright failure. My plan to re-veneer the desk was conceived while panicking over a sanding error, with absolutely no thought given to what the job may entail. Before I really started any work, I had found a veneer supplier online (www.veneersupplies.com – awesome site!) and bought two different lots of veneer – a lot of European burled walnut and a lot of cedar bosse. A lot is a group of consecutive slices of veneer. Lots of two or more sheets are required for bookmatching or other designs made by joining identical sheets in different ways.
So down to the basement workshop I went, fancy veneers in hand. The first thing I noticed when I unrolled the veneer was how unbelievably thin it was. This stuff was like paper. But brittle!

Okay, no big deal. I’d figure it out. I put the veneer aside and got to work prepping the piece.
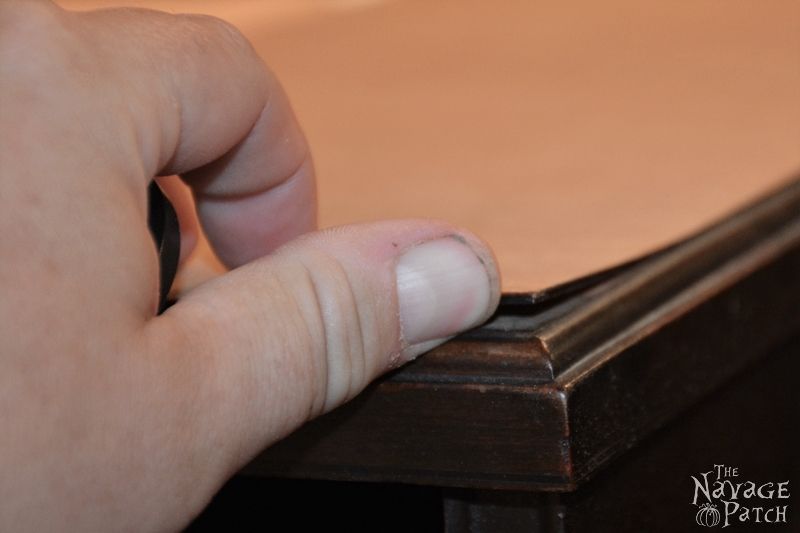
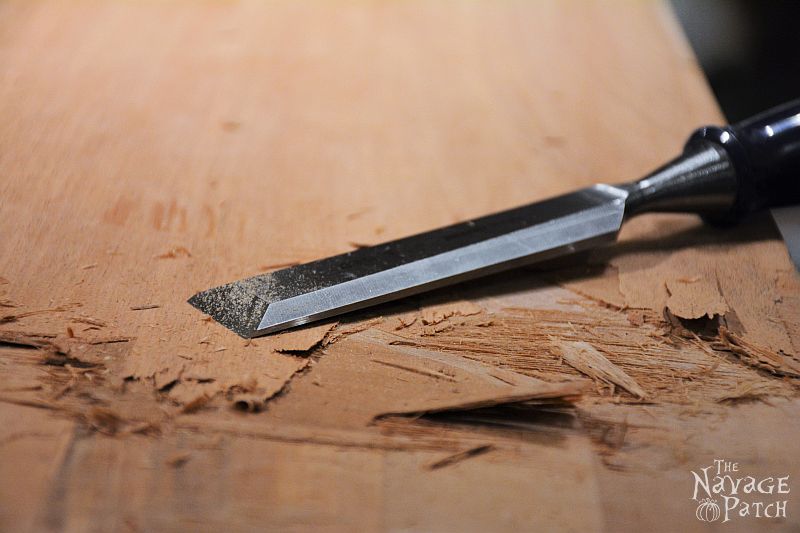
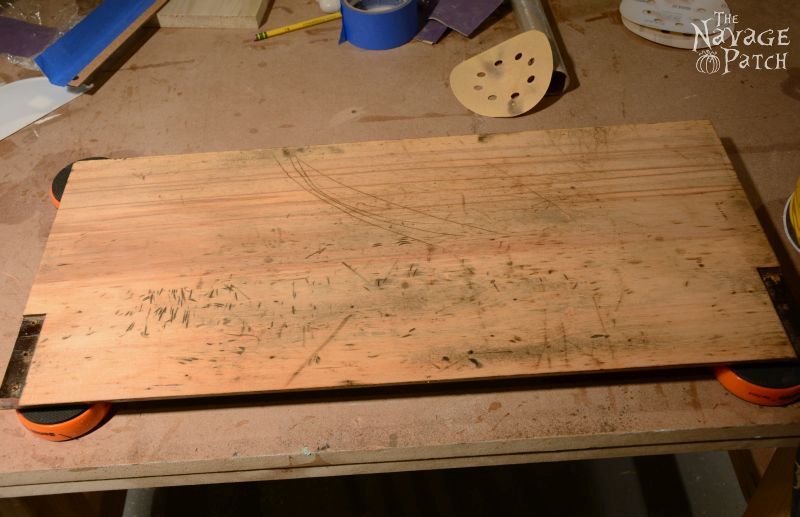
My first mistake was the method I chose to remove the old veneer. Had I spent some time at the computer researching the topic, I would have found all sorts of helpful tips such as ironing the old veneer to loosen the glue. But I didn’t, so there I was, chisel in hand, chipping and prying the old veneer off of the desktop.
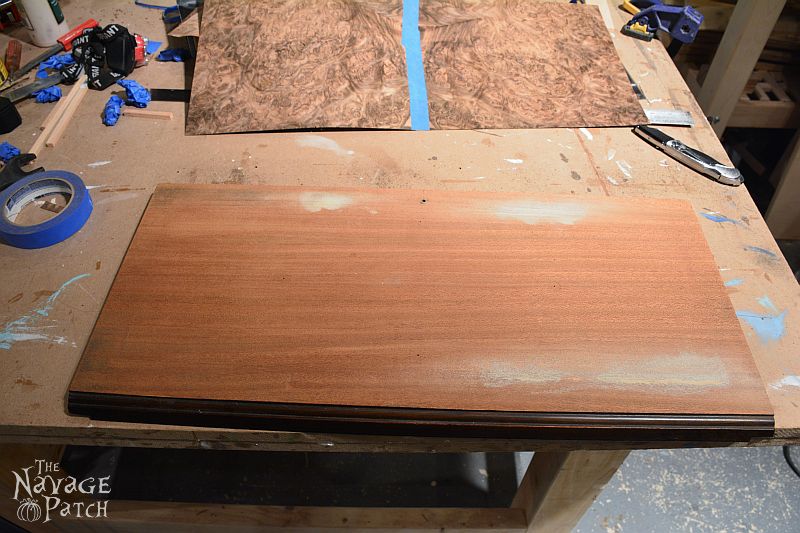
I got the job done, but not without some damage to the desktop.
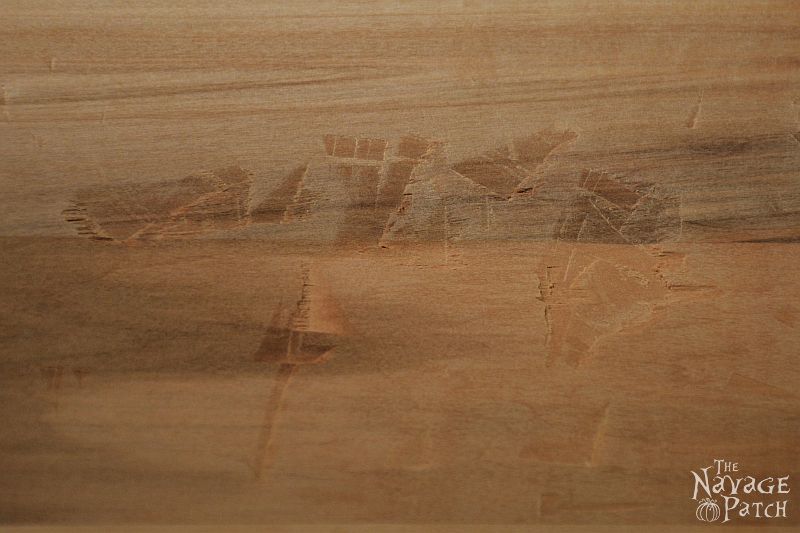
The gouges were not too deep, but the veneer I would be using is thin, so even these small imperfections would show through the veneer.
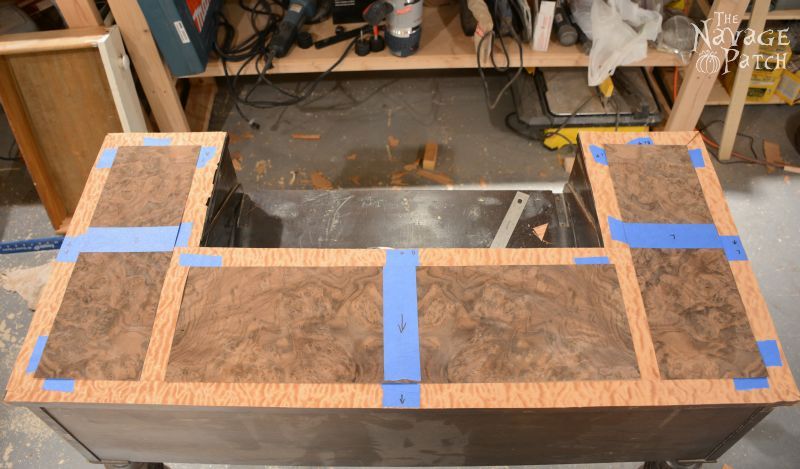
Here is the desk with the old veneer removed.
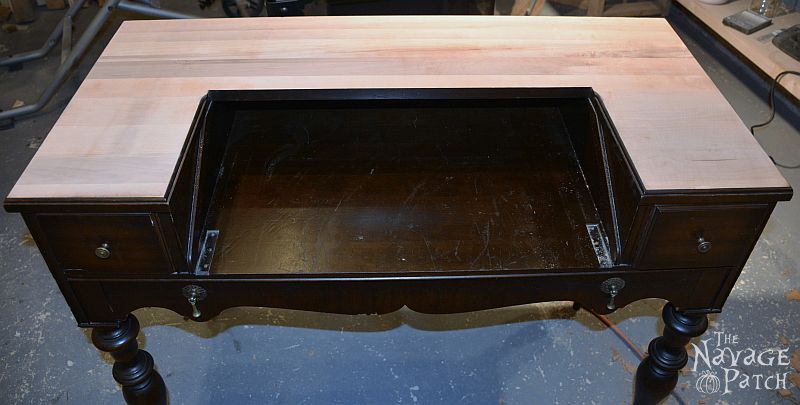
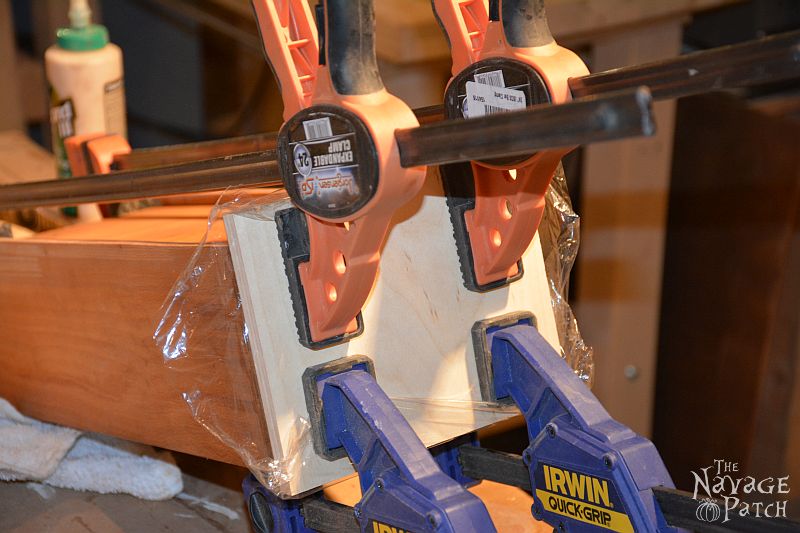
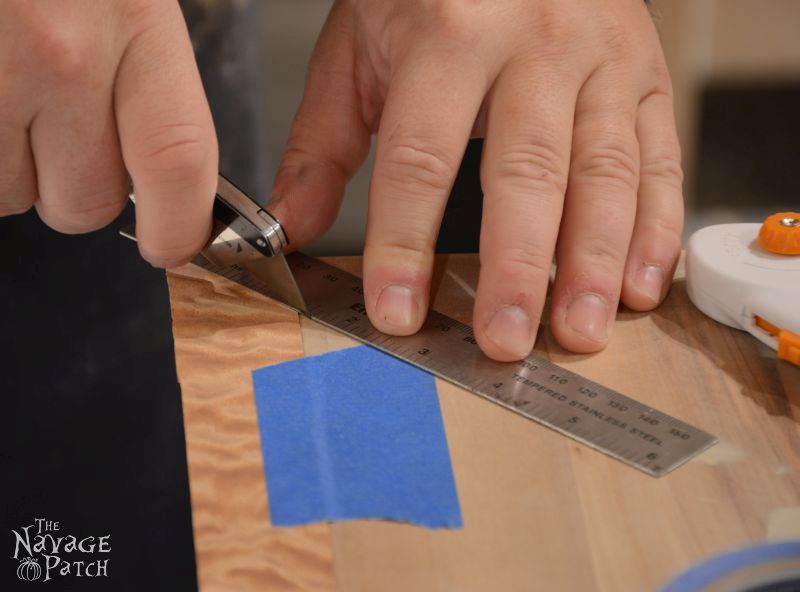
Veneering the top is a big job, and since this was my first time, I decided I’d start with the drawers, then move on to the fold-down desk (not pictured above), and finish with the desktop. Since I had such a difficult time removing the old veneer from the desktop (and since I hadn’t yet learned easier ways to do it) I decided to leave the old veneer on the drawers and just sand them down a bit before gluing on the new veneer. It is recommended to use a backing veneer with the new veneer, but since I hadn’t ordered any, and I was really impatient to get cracking, I just said “eh, probably not important.” I first measured the drawers, then carefully cut the veneer with a metal straightedge and a razor blade. I cut the veneer slightly larger than the drawer face, figuring I would sand down the excess. I applied wood glue to the drawer face and placed the veneer. The most critical part of gluing veneer is getting it perfectly flat. For the small drawers, it was easy. I covered the entire veneered area with a piece of scrap plywood and clamped everything down tight. I first laid a piece of cling film over the glued veneer so it wouldn’t stick to the plywood. The veneer is so thin that the wood glue seeps right through it.
Once it dried, I had a peek.
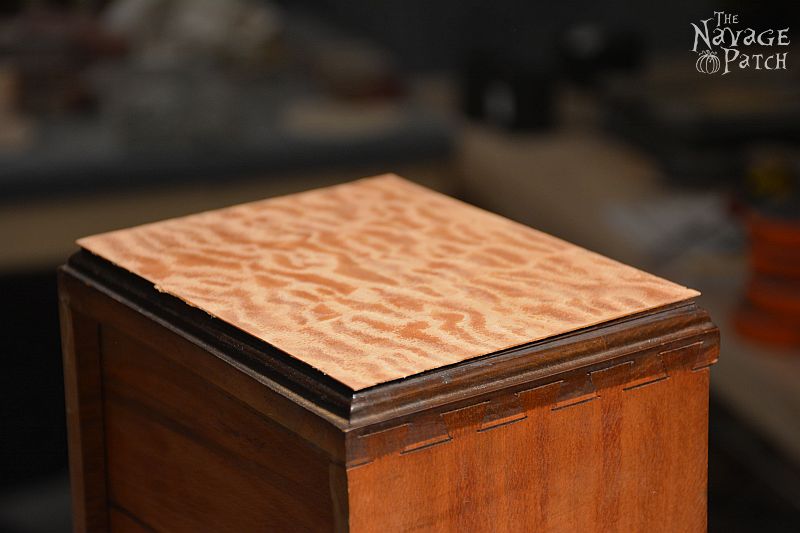
Wow, not bad! I sanded it down with 100 grit in a block until flush, then smoothed it out with 220.
I repeated the same process for the other small drawer, then turned my attention to the long drawer. This drawer posed a greater challenge since it not only required me to cut out a curved pattern, but I also wanted to bookmatch it.
That is, I wanted the left and right sides to be mirror images of each other. I had four consecutive sheets of the cedar bosse, so I played around with two of the sheets until I found a mirrored pattern I liked. I made two straight cuts where the pieces would join, fit them together, then taped the joint with painter’s tape. I then placed the drawer front on top of the veneer and traced its pattern.
Cutting this piece was much harder than it was for the small drawers. I just took it nice and slow. When the piece was fully cut out, I repeated the steps from earlier: glue, cling film, scrap wood (this time a piece of maple), and clamp.
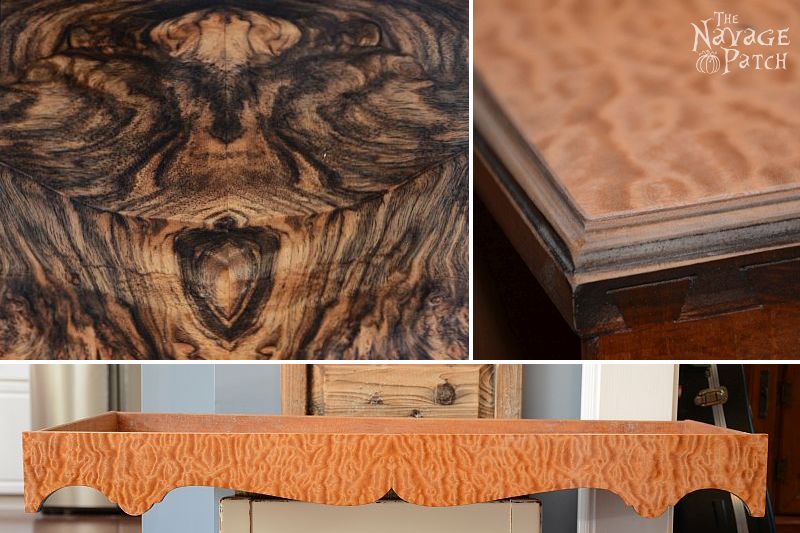
Like an idiot, I forgot to take a picture when I unclamped it. Like a bigger idiot, I forgot to take a picture after I sanded it down. But I have the following pictures which show the drawer after several coats of poly.
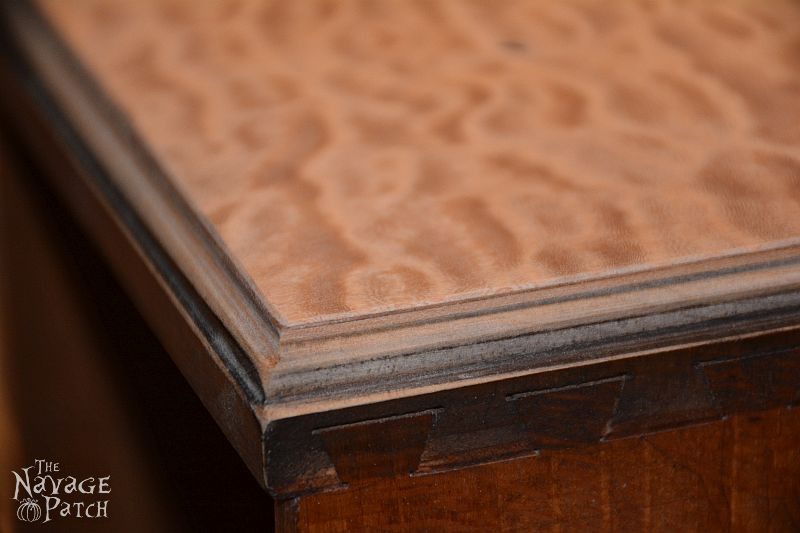
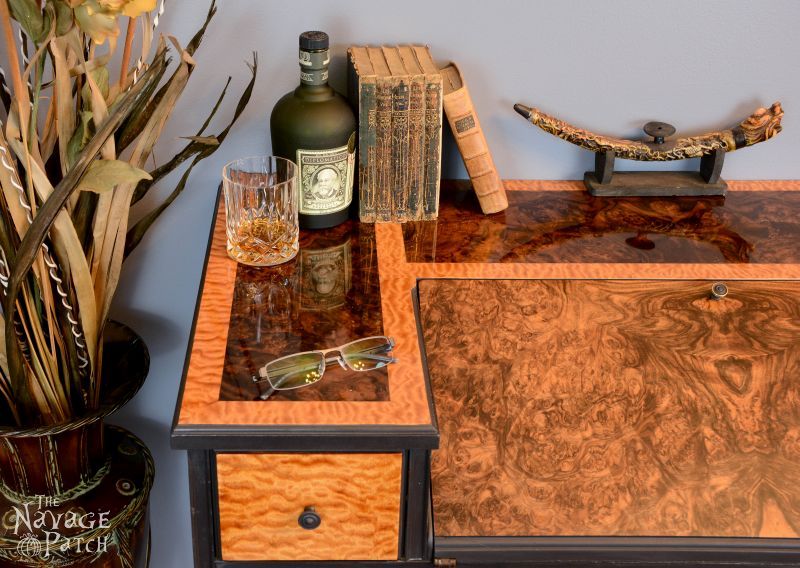
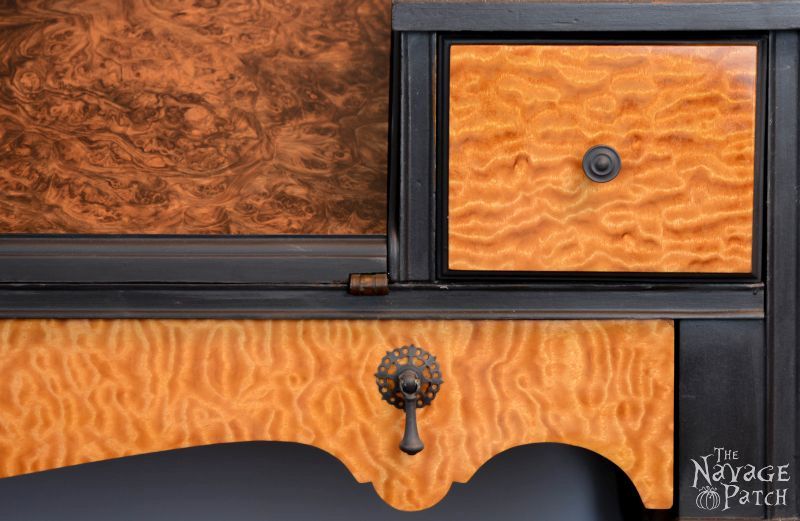
It’s a beautiful veneer and shows incredible three dimensional depth.
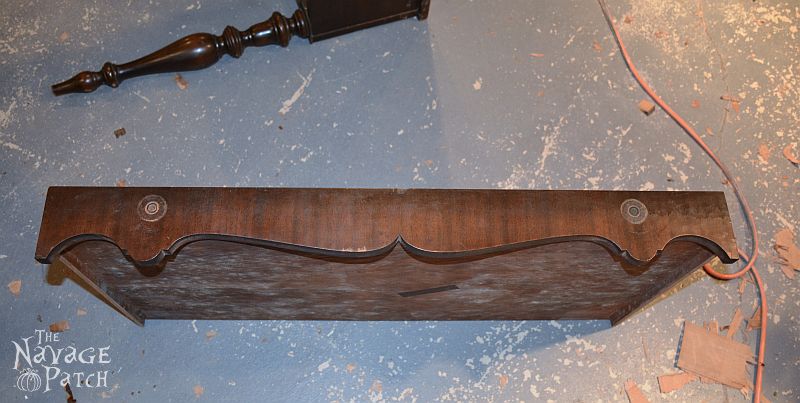
The next piece to be veneered was the front of the pull-down desk. Remember it looked like this when we bought it:
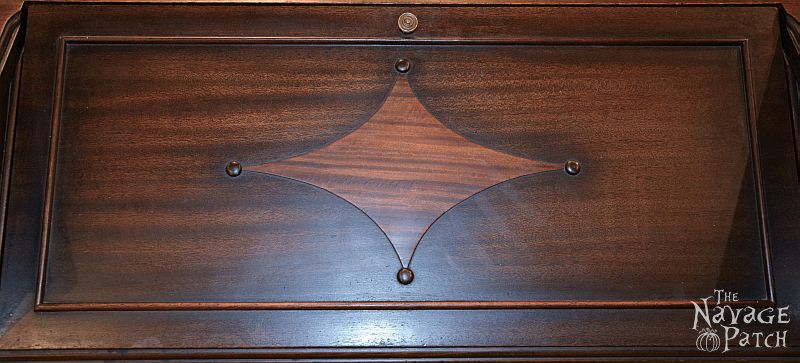
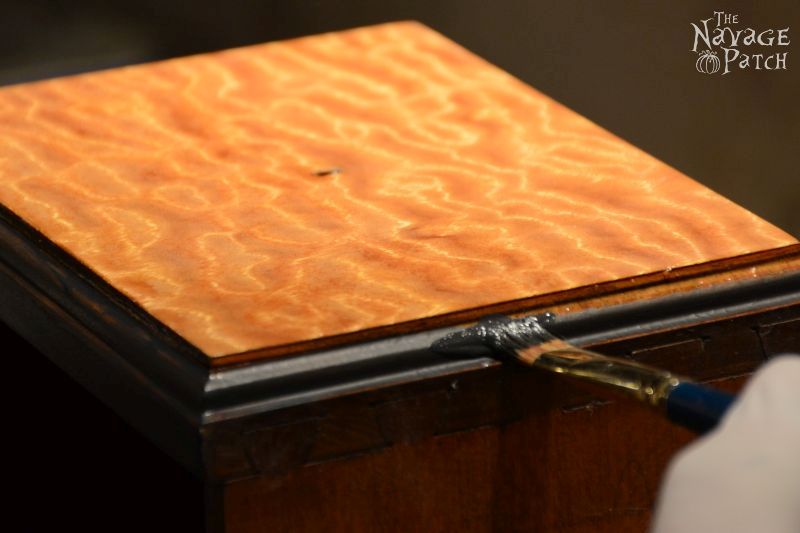
I pulled out the four circles with a pair of pliers. They were just glorified thumbtacks. I pried off the rectangular trim and sanded the diamond. It was a glued-on piece of veneer. After filling in some damage from removing the trim, it looked like this:
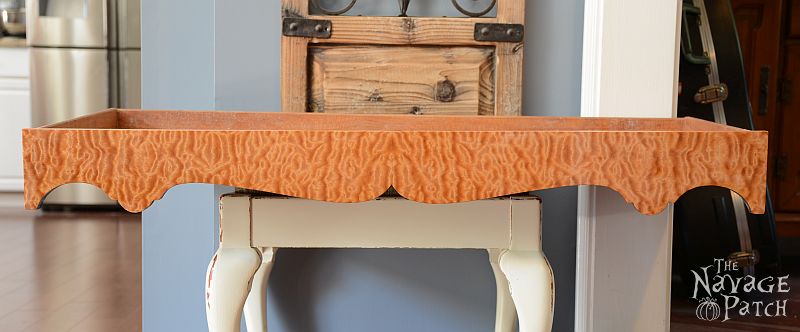
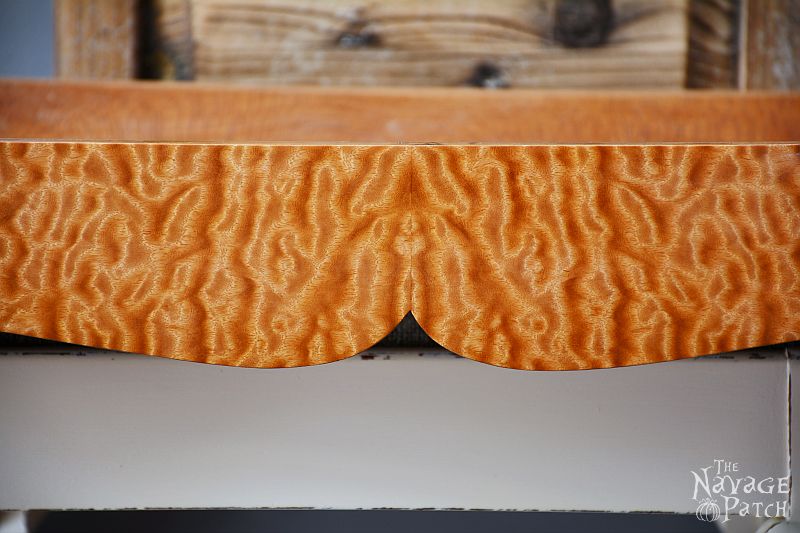
In the top of the frame you’ll notice that walnut veneer, already bookmatched, joined and trimmed. I applied glue and repeated the process I used for the other drawers. This one was harder since it was so much bigger. I had to make some cauls to lay across the top of the scrap wood, so I could evenly apply pressure with the clamps. The difficulty of gluing this piece made me start to get nervous about gluing the big top piece. How the hell was I going to do that?

Well, that was a question for another day. The pieces I had done so far all came out pretty good. I was so curious how they would look when finished that I decided to put some polyurethane on. I used several coats of Minwax Clear Gloss Wipe-On Polyurethane![]() . I lightly sanded with 1500 or 2000 between coats, applying just enough pressure to smooth the surface. The results were pretty awesome.
. I lightly sanded with 1500 or 2000 between coats, applying just enough pressure to smooth the surface. The results were pretty awesome.
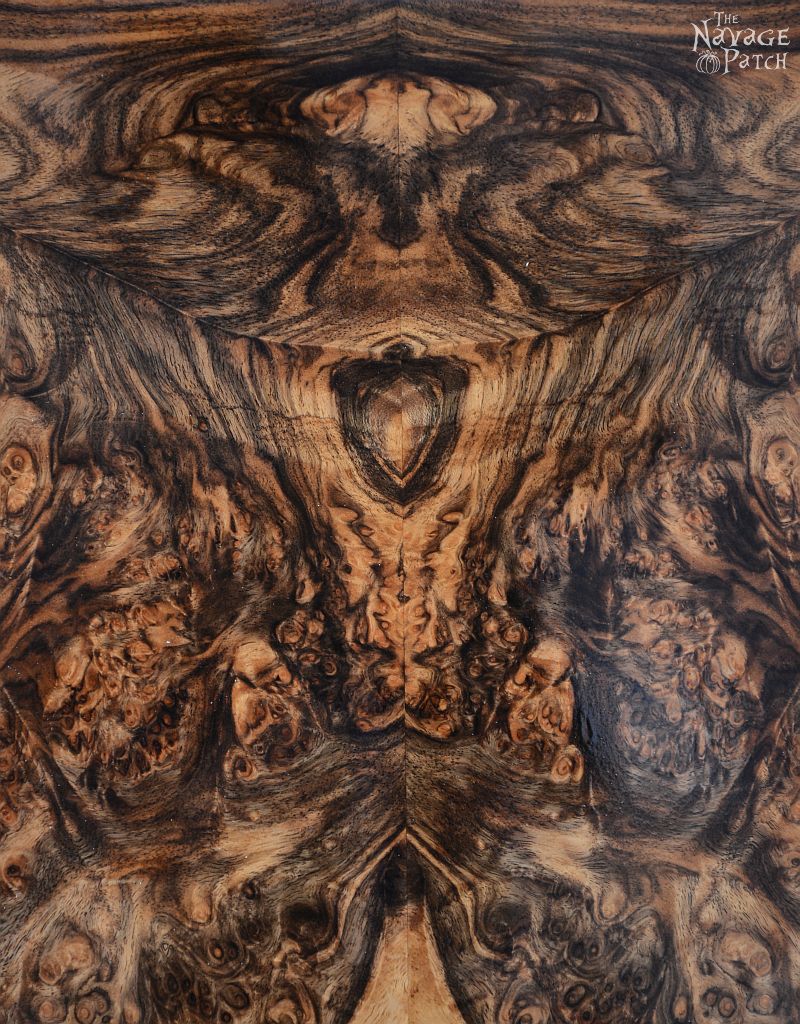
I love how this turned out. I think the shape in the center looks like some sort of bird-man.
I sanded them once again starting with 600 grit and going up through 2000, then finished with some automotive polishes.
With the drawer faces nearly done (in typical fashion, I would sand and re-poly those pieces a few more times in that elusive hunt for perfection), it was time to turn my full attention to the desk body. This was the part I had been dreading since we bought the piece months before. While I was confident in my ability to apply veneer to a small area, that confidence splintered like…well…like veneer when it came to larger areas not easily clamped. But I had a job to do and a blog post to finish, so up with the mainsail and into the eye of the storm.
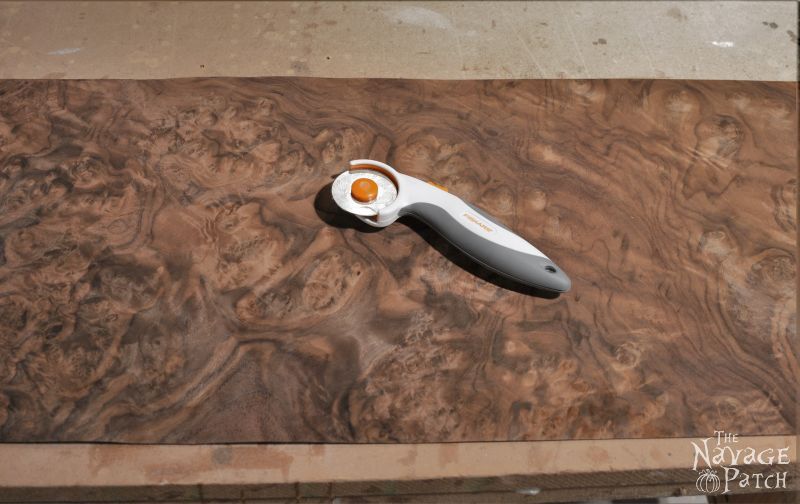
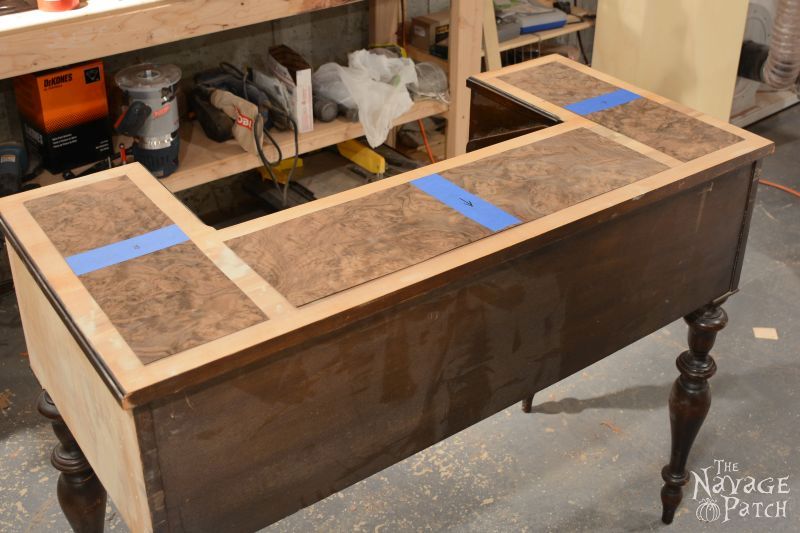
I decided to use two types of veneer on the desktop: a walnut burl (American walnut this time, not European) and cedar bosse (pronounced boss-SAY). Using a long straight-edge and a pencil, I marked out where the pieces would go. This would require a lot of precision cutting. Gulp.
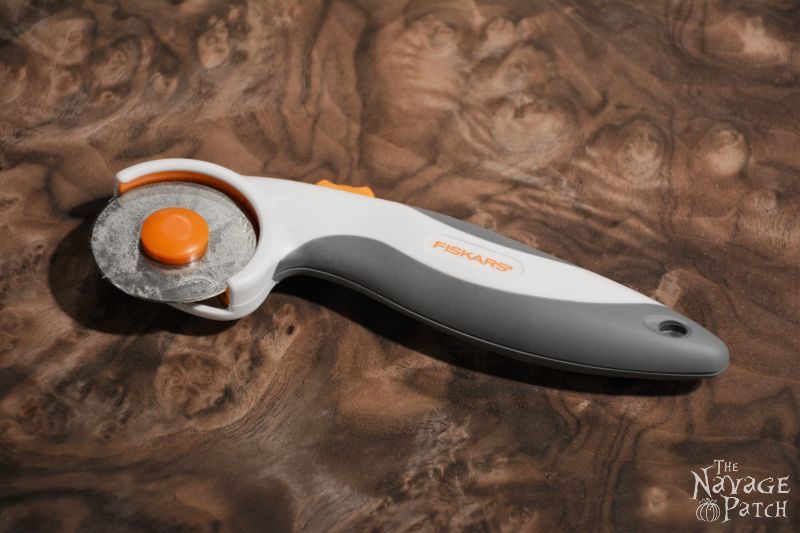
Fortunately Handan suggested I try her Fiskars Rotary Cutter![]() . What a life-saver this became!
. What a life-saver this became!
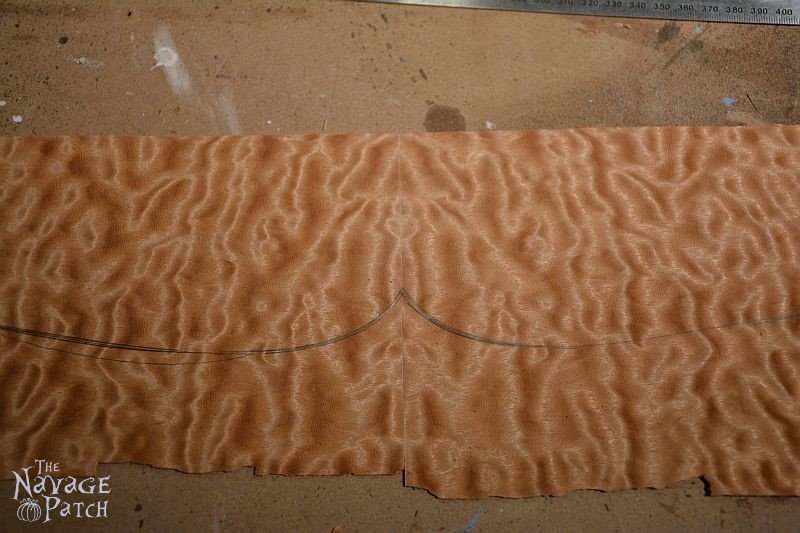
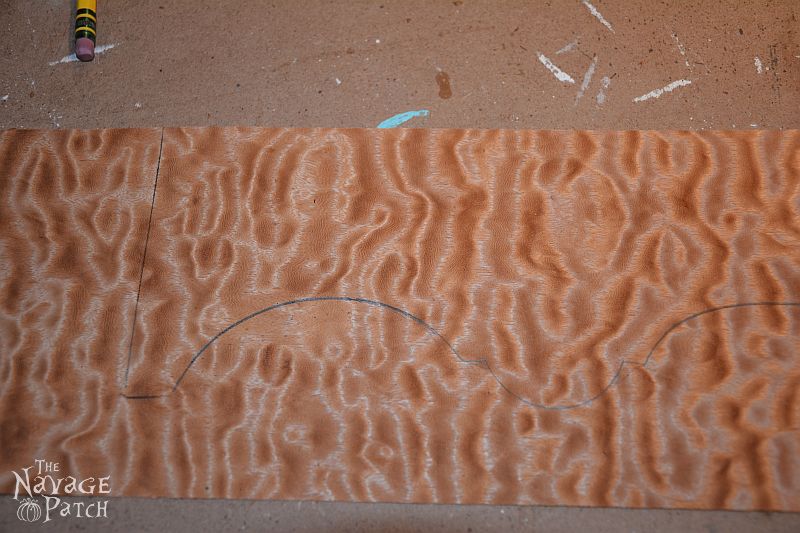
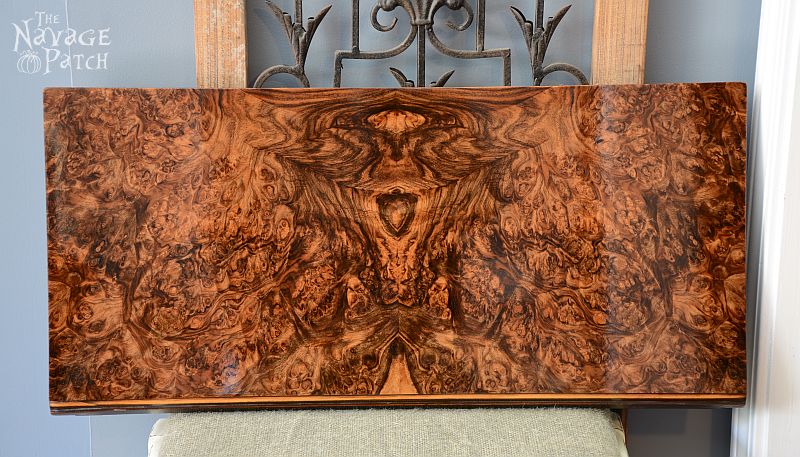
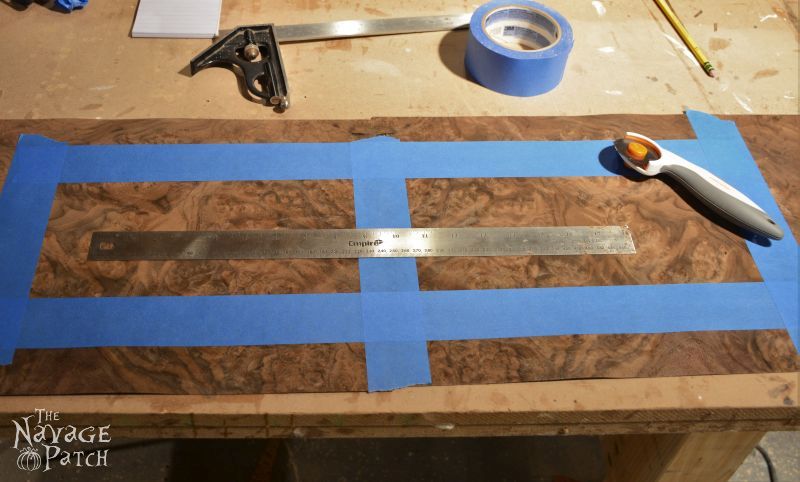
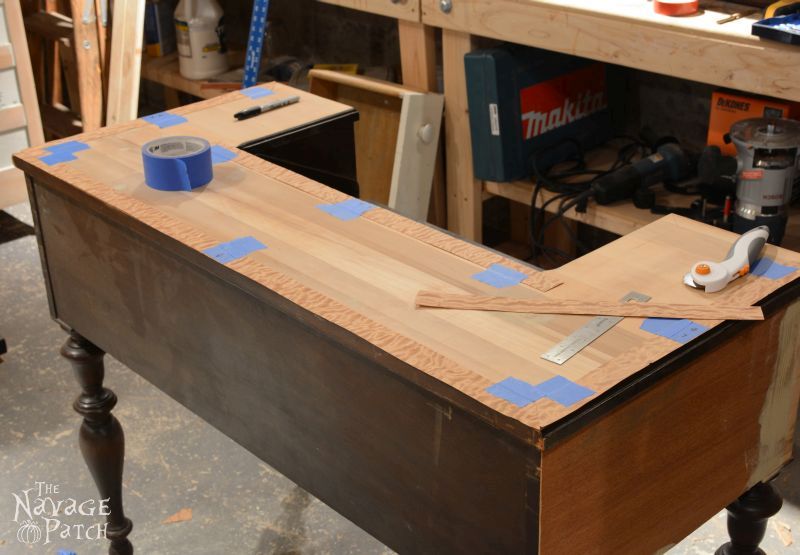
I started work on the largest panel which would be made from two bookmatched pieces of the walnut burl.
Once I found a pattern that I liked, I cut the pieces and joined them with blue painters tape. I then taped the outline of the final shape of the piece. Taping the underside of veneer to be cut helps prevent unwanted splintering of the wood. Thus, in the photo below, I would flip this piece over and cut the veneer tape-side-down.
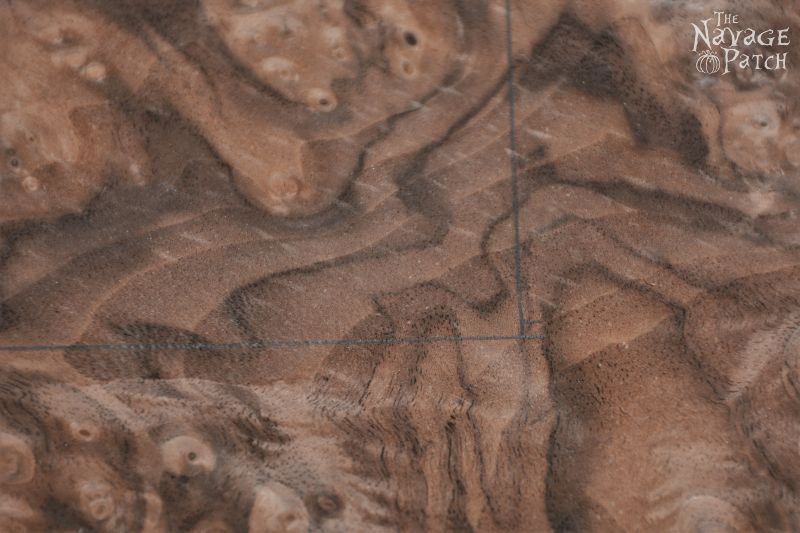
I marked the outline with pencil.
As I’m a feeble forty-something, I enlisted the aid of my Magnifying Headset![]() . This is a must-have if you work with small things and are over the age of 30.
. This is a must-have if you work with small things and are over the age of 30.

I brought the finished piece over to the desk to see how well it fit into its assigned spot. It didn’t, so I took the opportunity to hurl invectives at the desk in general and the piece of veneer in particular. Once I regained my composure, I started over. This time, I cut the piece in its place on the desk. I cut the top edge, aligned it with my pencil-marked line and taped it down. I also taped the sides, then cut the piece to the proper length using the rotary cutter and a straight edge.
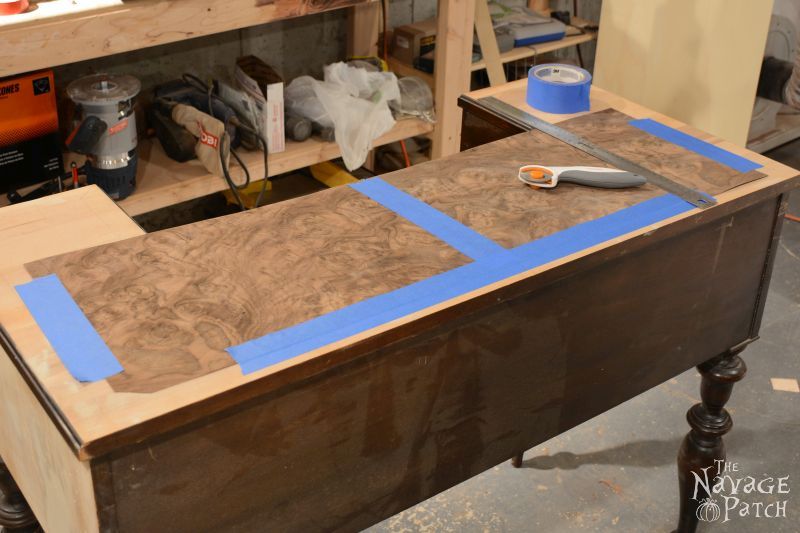
To cut it down to its proper width, I used a drywall T-square and taped it down so it wouldn’t move.

I repeated this process for the two side panels, each also made from bookmatched walnut burl.
With the walnut panels finished, it was time to move on to the cedar bosse stripping. This was the part I was really dreading. The cedar has a very pronounced grain, and cutting across that grain tends to leave a splintered mess if not done carefully and slowly. I again employed the technique of cutting in place. The corners were a pain in the butt. I’m pretty sure I broke them all off while trimming them. Fortunately, I left enough overhang that I could salvage most without having to start over.
Making progress. Those top and bottom pieces are bookmatched. The sides are too, and they were a real bitch to make because of the wood grain. And after all that work on the sides, I had to toss them in the end because they didn’t fit. More on that later.
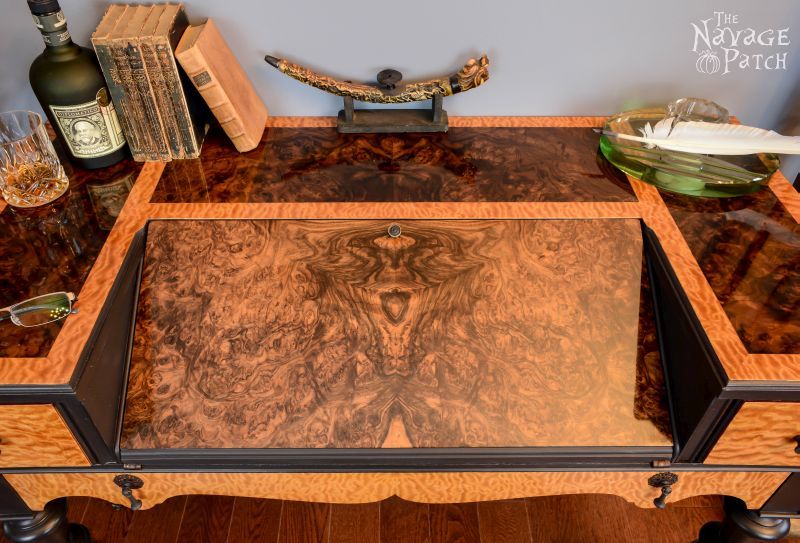
And here we are, all the pieces cut and laid in their proper places. Everything fit perfectly. Little did I know at the time that this was a colossal mistake which would add hours of work and vigilance to an already over-long project.
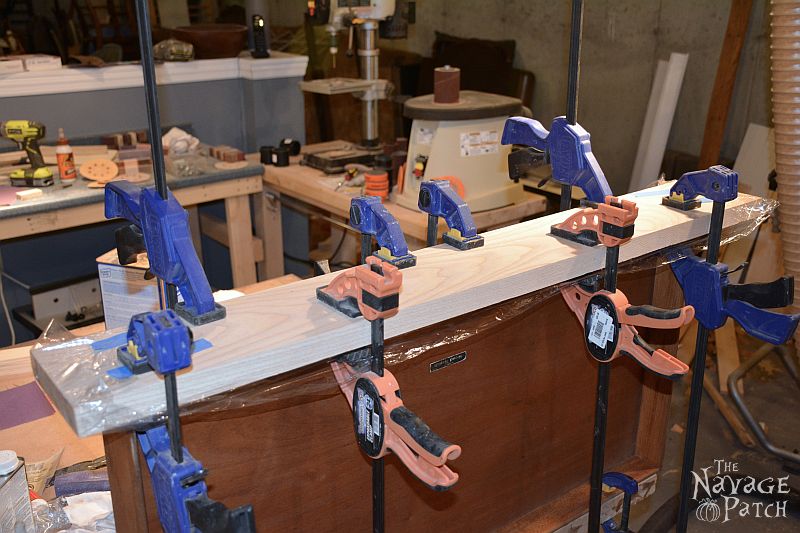
It was time to start gluing the veneer to the desk. I started with the back edge. I applied wood glue to the veneer, laid it in its place, covered it with cling film, laid a piece of hardwood on top of the cling film, and clamped the whole thing down tight. I let the glue set, then un-clamped it a few hours later.
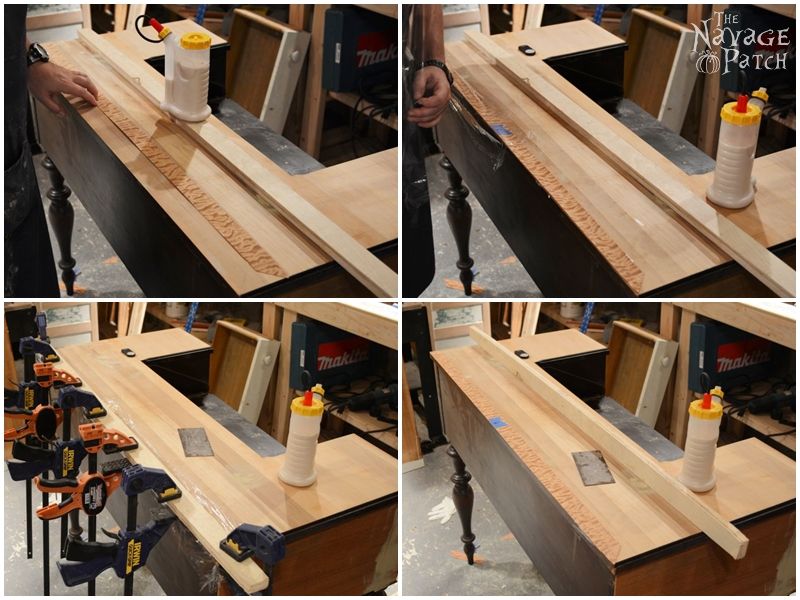
Next I glued the main panel in place.

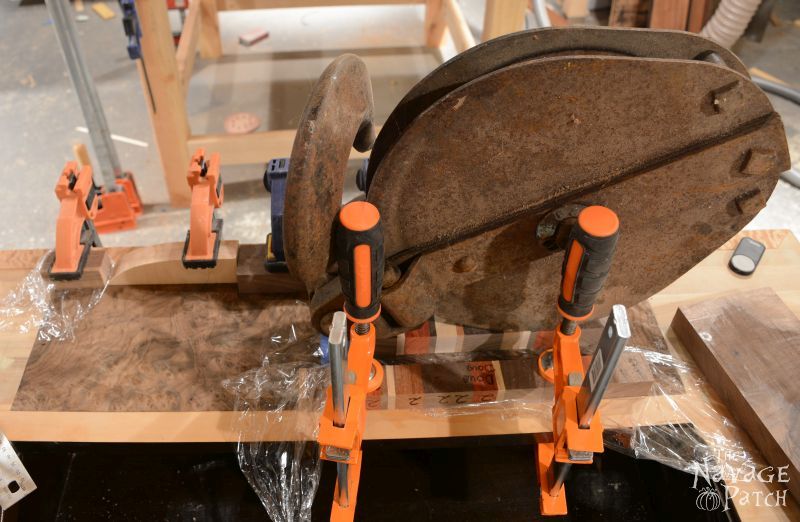
My clamps did not give enough clamping force to the middle of the piece, so when I took them off (fortunately the glue was not 100% dry), there was an air bubble under the veneer. There were also a couple of spots near the edges that weren’t properly adhered. I solved this by placing scraps of hardwood on the bubbles and clamping the ones near the edges. But since the clamps couldn’t reach the middle spot, I used an old iron hook and pulley that must weigh about 50 or 60 pounds.
I noticed something after gluing that piece of walnut. It was something that I also noticed with the first piece I glued, but I dismissed it then as random error. The glued pieces of veneer that I oh-so-carefully measured, cut and placed had surpassed their penciled constraints in all directions. It didn’t take long for the “ah-ha” moment, followed immediately by the “ah, sh!t” moment. Veneer is wood. Glue has water. Water makes wood swell. I may have cried then. I may have swore. I may have just closed my eyes and accepted my fate. I don’t recall. But what I needed to do was trim all of the pieces after I glued them. To do that in the least painful manner would mean timing the glue-curing cycle so that I could un-clamp each piece before the glue had fully set and turned rock-hard, so I could make those cuts a little easier.
Moving on, I glued on and sliced away, making slow and steady progress. I got creative with clamps and weights when needed.

A final word about gluing the veneer: for almost all of the pieces I glued to the desktop, I applied the glue to the veneer, and then placed the veneer onto its spot. As I mentioned, I had problems with the veneer swelling, but I also had problems, especially with the long strips, with the veneer curling. This made it very difficult to align the veneer properly and to get it to lay flat on the desk. I mentioned this to Handan when I was all but done with the veneering, and she said that I should apply the glue to the desktop, and lay the veneer on top of that. She told me that she had learned this method by trial and error when she was first learning how to decoupage. Her pieces always turned out better when she would apply Mod Podge to the work surface, and then stick the pieces of paper onto the glue. The reason I hadn’t used this method until then is that I was trying to keep my pieces of veneer within the lines of the pattern I had drawn on the desk, and putting glue on the desk obscured those lines. But I only had a few more small pieces to glue, so I tried her method, and you know, it seemed to work much better! I noticed less swelling of the veneer, and it was certainly easier to place since it wasn’t curled from the water in the glue. By spreading the glue carefully on the desk, I was still able to see my guide lines.
Of course there were more problems along the way. Sometimes a piece would shift while I was trying to clamp it. Two arms were not always enough for this job. I was left with a few gaps. One I filled with tiny strips of veneer.

For the others, I relied on an old woodworker’s hack: fill the crack with a paste made from the sawdust of the wood you’re using and wood glue and sand it down when dry.
After the cracks were filled, I sanded the whole desktop with a random orbital sander with 150 and 220 grit. This had to be done lightly and carefully lest I burn through the veneer I just spent month applying. This was, after all, how this whole business got started, as you may recall.
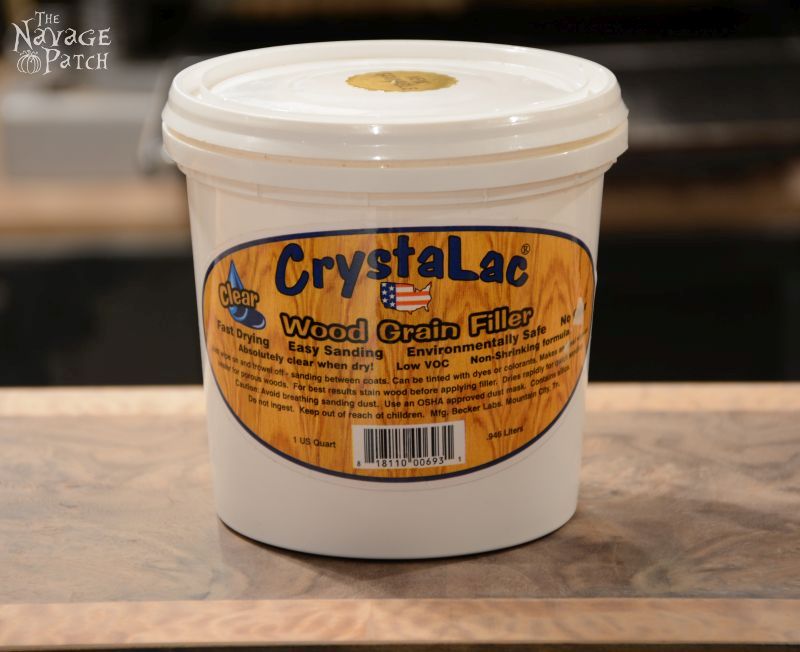
In keeping with my long and storied tradition of making sh!t up as I go along, I decided to try using some grain filler before applying polyurethane. One of my main problems with the fold-down desk panel was that the grain of the walnut was so pronounced that it sucked up the polyurethane and left dimples and ridges all over the surface. Sealing those pores with grain filler would solve this problem, I hoped. I opted for CrystaLac Wood Grain Filler![]() as it dries clear, is stainable (not important for this particular project), and has good ratings on Amazon.
as it dries clear, is stainable (not important for this particular project), and has good ratings on Amazon.
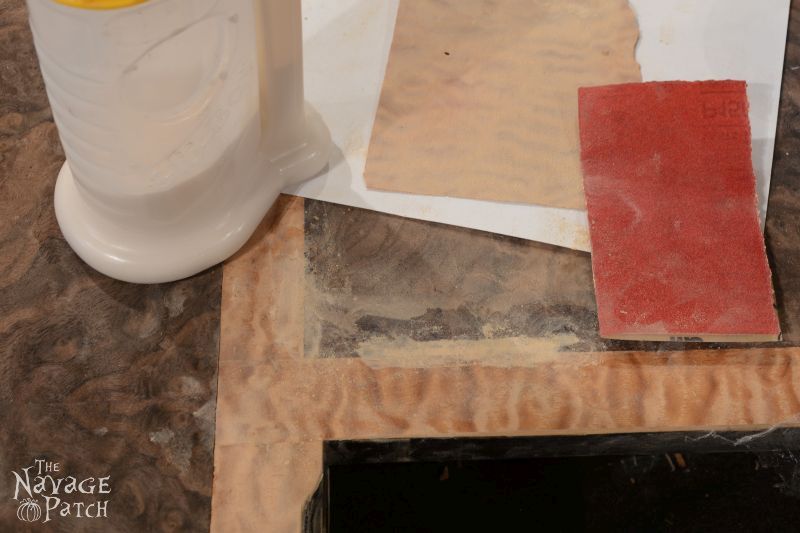
This stuff is like mayonnaise, so what better way to apply it than with my hands. Um…right? I slathered it on, troweled off the excess and let it dry.

Dries clear, except for big holes, like this one that I missed with my sawdust and glue hack.
After lightly sanding and cleaning the veneer with mineral spirits, I was ready to start finishing with Minwax Clear Gloss Wipe-on Polyurethane![]() . I really love this stuff. It is easy to apply and gives very good results. Like all things, it takes a bit of practice to get it perfect, but for smaller pieces, you can’t beat it.
. I really love this stuff. It is easy to apply and gives very good results. Like all things, it takes a bit of practice to get it perfect, but for smaller pieces, you can’t beat it.
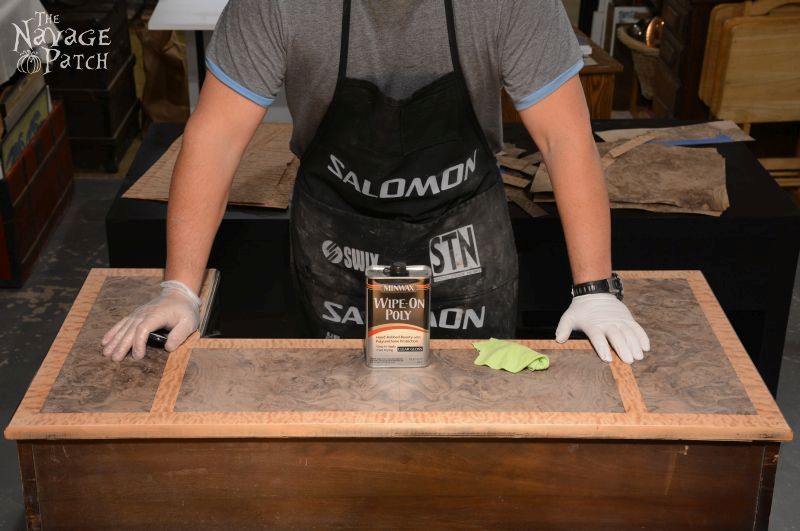
I poured on some poly and spread it around. This is okay when applying the first coat, but after that, I prefer to add a little to the rag and wipe it on.
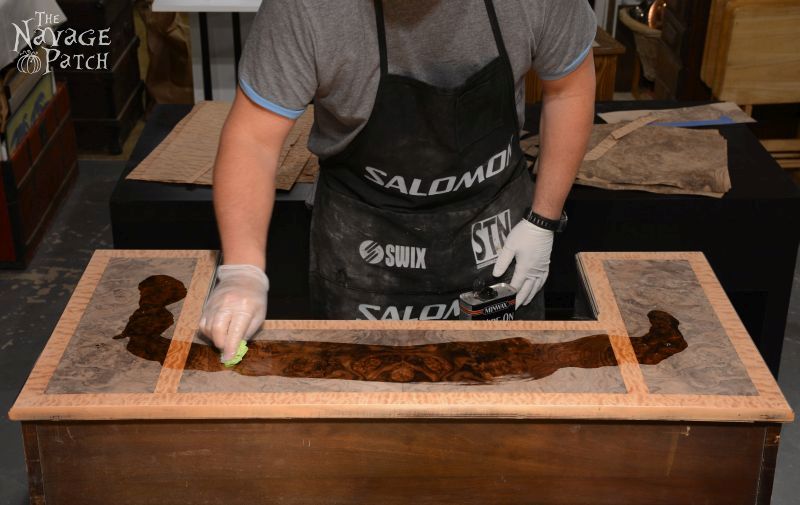
Here is the first coat finished. As a note, I will say that I refinished this top 3 or 4 times before I was satisfied. I sanded up to 1500 grit with the orbital sander, both wet and dry. I kept chasing that elusive perfectly flat finish. I came very close. By my last time finishing it, I only need one coat of poly, applied sparingly from the rag.

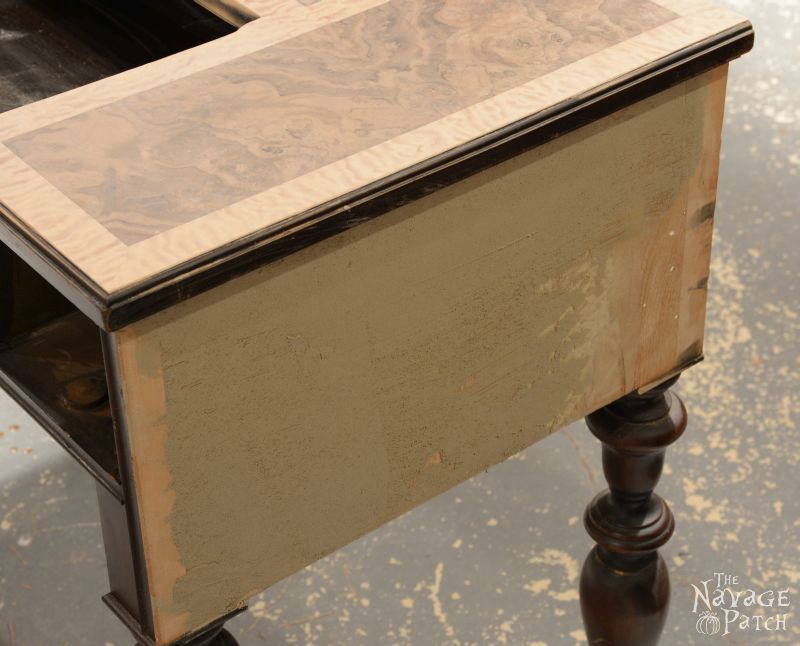
While the poly cured, I worked on the fold-down desk. One side was finished, but the inner side needed to be sanded before I painted it.
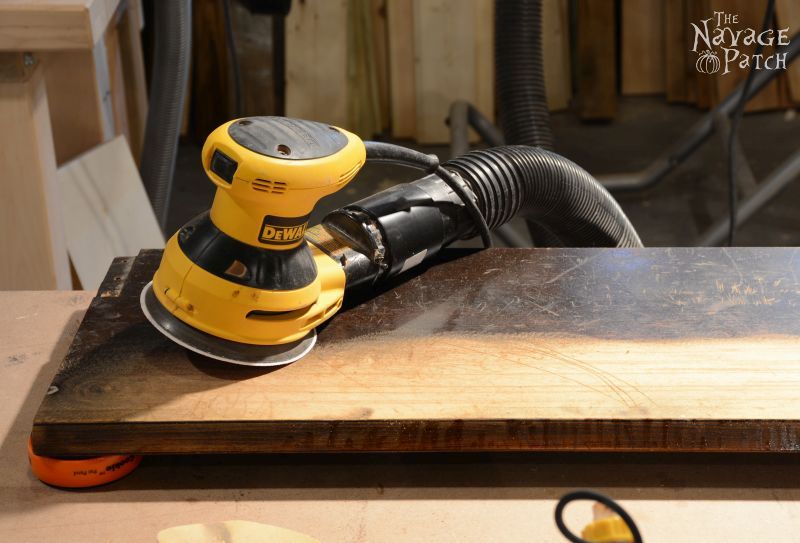
The nicks and scratches were quite deep. I continued sanding until I got them all out.
The sides needed some wood filler where I peeled off the old veneer. If I had to do this project again, I would probably re-veneer the sides with a cheap veneer and paint over it.
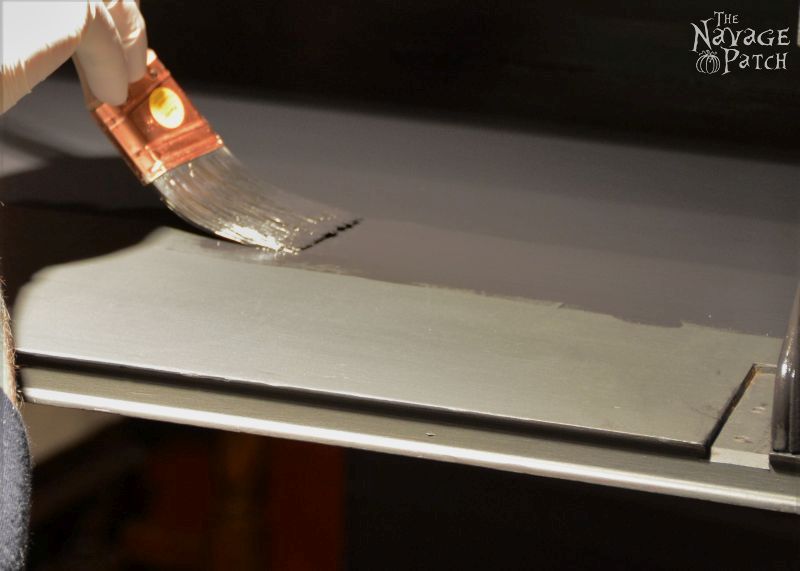
I was in the home stretch now. It was time to paint. I grabbed a can of latex that we had previously color-matched to Annie Sloan’s graphite color. I used it to mix up a batch of homemade chalk paint using Handan’s recipe for chalk type paint.
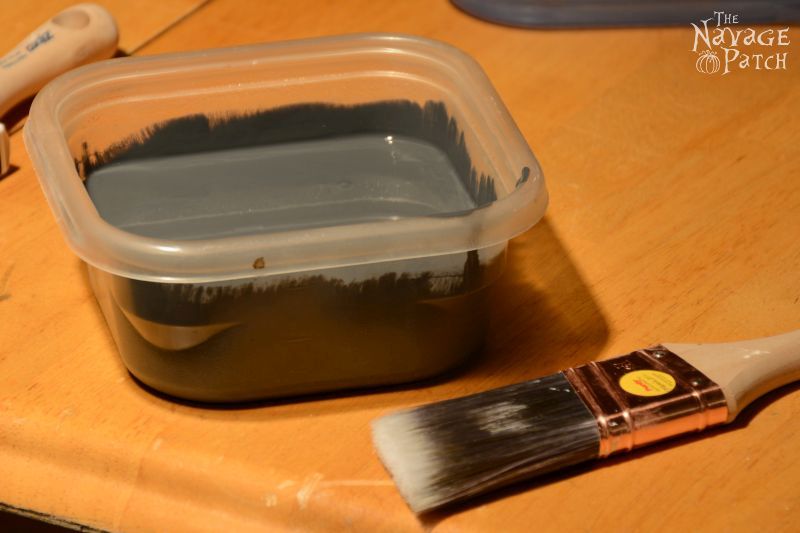
I finished the first coat and confirmed what I thought after the first few brush strokes: this is not the color I was looking for.
I wanted more black. Much more black. Not this grey…this…this…*ahem*…graphite. Yeah, well it looked WAY more black on the little blob they smeared on the paint can lid! Back upstairs to the paint lab kitchen. I added some pure black paint and more chalky ingredients, then blended them together. Back down to the paint shop basement to try again. Much better!
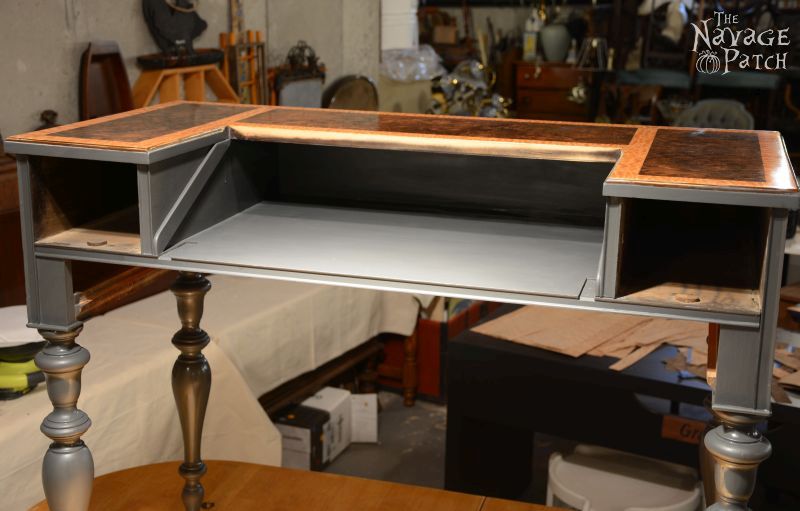
I painted the sides, the back, and the legs. Nothing too exciting to report on that front. I also painted some detail work around the drawers.
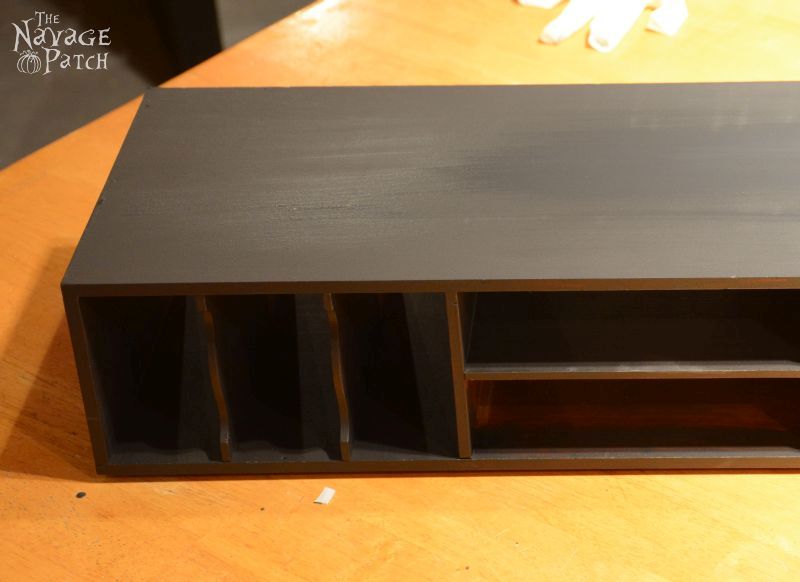
I painted the removable desk organizer.
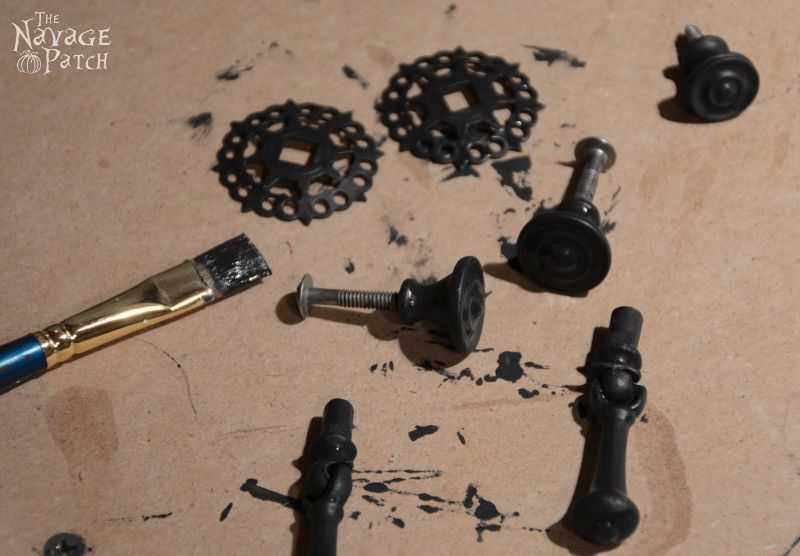
I painted the hardware.
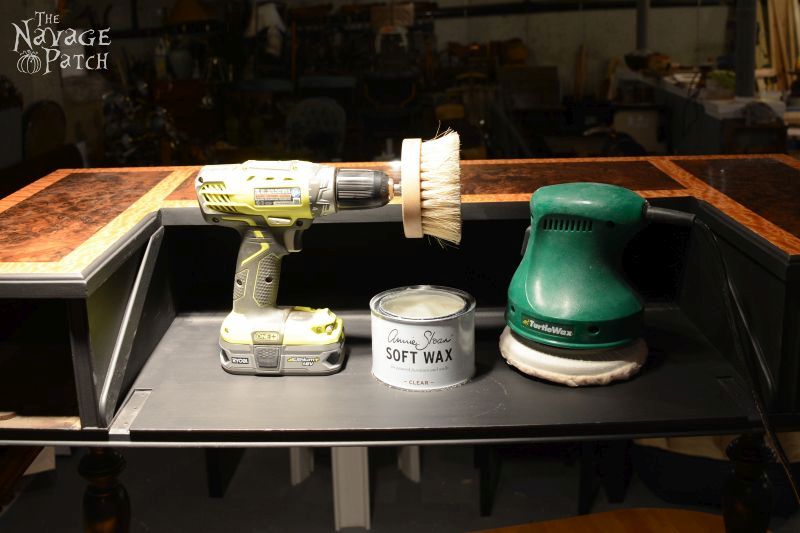
Then I waxed the paint with Annie Sloan’s soft clear wax. This brought out a nice soft sheen. I used this Wax Buffing Brush Drill Attachment![]() to apply the wax and a power buffer to shine. I highly recommend the buffing brush.
to apply the wax and a power buffer to shine. I highly recommend the buffing brush.
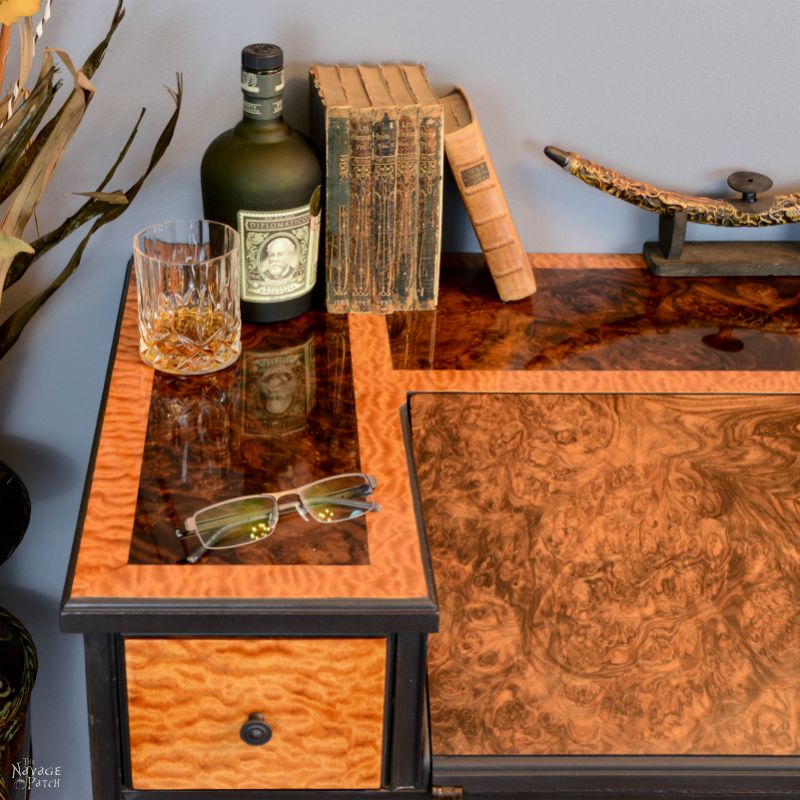
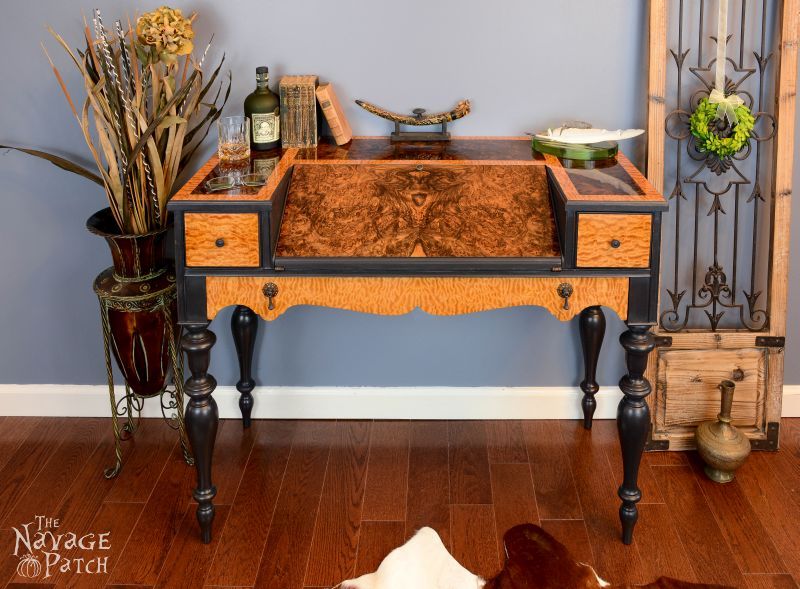
Once the piece was waxed, I reattached all the hardware and reassembled the desk. The results are stunning. This desk took a long time, a ton of effort and the occasional heartbreak, but the final piece speaks for itself.

We love it when you share our posts on Facebook and Pinterest!


Gorgeous and I love your comments along the way Greg!
Thanks, Leigh!
Wow…
This labor of love (and invective) became one of those monster projects that eat all available time and patience, with no promise of reward. Thanks for feeding the beast until it became a beauty! Very inspiring.
Thanks also for your words to the uninitiated when it comes to veneer work – much appreciated.
Thank you, Heather! Best of luck if you’re thinking of tackling a veneer project. It can be challenging, but it is also fun, and certainly rewarding.
om my word greg you could teach patience to job there is not a chance in the world i would ever tackle this but i am glad you did the desk is stunning xx
Thank you, Chris. It was a a very trying project!
Absolutely awesome. You really should think about teaching this stuff!! Actually you could teach a writing course as well!!! Love your work and you !
Thanks, Aunt Nedra! I’ll leave the teaching to the professionals 🙂
What a stunningly beautiful make-over!
I am in awe – all your hard work really paid off, Greg, and I hope you are enjoying using the desk.
Oh. My.Gosh. What a tremendous amount of work! You did an incredible job, it is absolutely stunning!
Thank you, Tara! This project was a ton of work and took months and months of off-and-on work, but I’m pretty happy with the results! -Greg
Greg, that is quite the labor of love! And it shows, how beautiful.
Thank you, Brittany! -Greg
This is fantastic.
I”m a travel writer and am working on a NC story for several local counties right now that are putting together the 301 Endless Yard Sale which will be down one road in several N.C. counties in June. I asked the other day, what people were looking for when I was in a planning meeting, and they gave examples of taking older things and doing just what you are doing with them. Would you mind giving me a quote or two of what you look for when finding older treasures?
HinesSightBlog@gmail.com. I will be happy to link your blog into the piece.
Thank you, Leigh!! I’ll be sending you an email shortly… -Greg
I followed all three of your posts…what an excellent tutorial. Learning by trial and error is the best way. The desk is gorgeous…and I’m sure you will enjoy your work for years to come. Thanks so much, will pin this for futre reference, Sandi
Thank you so much, Sandi! How right you are about learning by trial and error. I have the error part nailed down! I used to get so upset when I screwed something up, but it’s happened so much this past year, that I’ve learned to take it in stride!
WOW! that is a beautiful piece!!! I’m so impressed you can do things like this! Thanks for sharing it with us on From The Archives Friday!
Thank you so much, Ashley!
This looks so great! I love that you included so many pictures of this process! Thanks for linking this post up for the Best of the Blogosphere Linky Party!
Thank you, Chelsee!
Awesome project! But I won’t lie, I clicked on it because of the post name. Love it!
Thank you, Sarah! I’m so happy you like the name. I wonder how many people get it 🙂
What an amazing project, this one had to be a labor of love, the veneer is gorgeous and the finished desk is beautiful! Pinned to share
Thanks for sharing on the #OMHGFF this week!
Have a great weekend!
Thank you, Karren! It was a labor of love and frustration! 🙂
Oh my gosh, this is crazy gorgeous! You did an amazing job!!
Thank you, Meg! 🙂
What a beautiful piece of furniture you created. I kept saying “Wow” to myself as I read through. It is amazing.
Thank you, Debra! 🙂
Wow!!!! Amazing! I love that veneer, amazing transformation. I have never applied my own veneer before, have just worked with restoring existing burled wood veneer when I find it. If I ever want to though, this will be the post I refer to! Excellent how-to 🙂 Thanks so much for linking up to Friday’s Furniture Fix!
Thank you, so much, Melanie! 🙂
I’m late to the comment party, but am so glad I came! I just can’t believe the miracle I see spanning from the before to the after. And…always…I learn so much from your posts. Thanks so much for linking to Friday’s Furniture Fix. We love having your amazing skills and unique processes shared with us. I see I will be the first to Stumble this great project. It’s my pleasure. Susie from The Chelsea Project
Stumbled, Pinned, and Shared to FB…..Thanks.
😀
Thank you thank you thank you, Susie! I’m so happy you like it!
Wow! That is absolutely beautiful. Love the colour you chose to go with the burled wood. It’s perfect! Thanks so much for sharing it at Vintage Charm.
Thank you, Tuula!
Oh my goodness!!! The time and effort you put into this piece really shows! It is so well done! I love that you left the burled wood and graced it with a frame of black! Stunning piece! I hope you have a great day! If you would like to inspire some more, Making Broken Beautiful is starting right now over at The Curator’s Collection and I would love to host you amazing talent!
Smiles!
Terry
The Curator’s Collection & Making Broken Beautiful Thursday
http://thecuratorscollection.wordpress.com
Thank you, Terry!
Also, thank you for the invitation! Handan will be linking up!
That is one GORGEOUS desk!!! I am super impressed with the makeover you did with it.
Thank you for sharing on the #HomeMattersParty. We hope to see you again when we open our doors at 12 AM EST on Friday.
Thank you, Crystal!
Featuring your amazing piece at Making Broken Beautiful tomorrow! Thank you so much for sharing your inspiration! I hope you have an amazing day!
Smiles!
Terry
Thank you, Terry! 🙂
Wow! I am pretty speechless. This desk is gorgeous. I love the pattern of the veneer you used and the bookmarking technique is amazing. I love how the mirrored look just pops.
Even more amazing, the steps it took to get to the end. Of course I had to go back and read Parts One and Two, to see what you were up against and how you overcame. What an intense project. But the end result is stunning! I don’t know that I would have the patience to have kept going. But then again, I have no skill in this area, I never would have even thought to tackle such an immense project! Impressed!
Thanks, Nikki! Believe me, I almost walked away so many times. If it weren’t for winter, I probably wouldn’t have finished it!
I will just sit here in the corner with my mouth gaping open Greg! Amazing job. Kudos to you for your tenacity. This is a piece worthy of a museum!
Thank you, Mary! It was a tough one, for sure, but I’m happy with the result!
Such a beautiful desk. The end product is amazing!
Thank you, Mistie!
Not a project for the easily annoyed, it seems! It looks so good after all that work. I have thought from time to time about trying a veneer project, but haven’t looked into it much beyond veneering edges of boards. The detail of your project was fantastic and let me see what I might be in for. Thanks!
Thank you so much, Jen. Good luck if you try it…it takes patience, but it is worth it in the end!
I commented earlier, your work is exquisite and the Grand Rapids Chair Company would be proud! I note that someone asked where you get the veneers and you said go to your blog. I’ve looked everywhere but still don’t see the answer. I’m not as ambitious as you but I have a tiny box I need to repair!
Thank you so much, Karen!:) I get my veneer from http://www.veneersupplies.com
ABSOLUTELY AMAZING!!! We veneered a pool table and it is peeling. After reading your blog a now know why 1) no underlayment veneer and 2) glue applied to veneer rather than piece we were veneering. For now it will have peel because I am NOT interested in taking the table apart again. But, when we do embark upon that journey, I will feel more confident about the process having learned from your post! Thank you ?
Oh wow! That sounds like a big undertaking! Good luck to you if you tackle it again!
Allow me to be late to this party… This is just a beautiful piece.
I found this because I was looking at your loop wreath.
Thank you so much, Cecelia! Better late than never, right? I’m so glad you found us, and I hope you’ll poke around the Patch a little more! 🙂