Coat Closet to Linen Closet Conversion
I transformed a useless coat closet into a functional and beautiful linen closet, and I did it all with wood I had on hand!
Of all the nonsensical perplexities in this house, perhaps the most vexing and incomprehensible is the “coat closet.”
Now, call me old-fashioned, but when I enter a house wearing a coat, I enjoy having the option and ability to remove the coat, open a nearby door and hang the coat in a closet alongside its warm and cozy brothers and sisters.
I don’t like looking around for a jacket depository like a meerkat in the Kalahari scanning for predators.

In this house, not only isn’t there a closet for even the smallest scarf or tiniest glove, but should I need to remove anything larger than a t-shirt, I sometimes need to hail an Uber, tame a stallion or book passage on an ocean steamer just to beat a path to the nearest coat closet…on the opposite end of the house!
I needed a map to find it when we first moved in.
And of course, when you put a coat closet that far from someone this lazy…well, let’s just say the floor becomes a viable and entirely acceptable “closet.”
Unfortunately, there’s no solution for relocating the closet closer to the front door, nor is there sufficient space to carve one out of the existing floor plan. I am forever cursed to walk to the master closet (half the distance to the coat closet – thank god for small mercies) and hang my jacket next to my normal clothing.
Let’s just pray they get along. Outdoor clothing is a little rough around the edges and might not peacefully comingle with my rose-scented and innocent socks and underwear.
Anyway, that has left us with a useless coat closet stranded halfway down a hallway between two guest bedrooms. Lately, it has been a favorite hangout for a gang of unruly hangers. I found a couple of guitar cases in there, too, so they must be listening to the “rock’n’roll” and probably drinking beer and getting tattoos.

Well, such a blatant waste of space by such undesirable inhabitants wouldn’t stand, and my babes finally had enough.
“Hey babes!” she announced to the house and me in particular, “Do you know what you’re going to build here?”
I took a gander and tried to envision the myriad possibilities.
Panic Room? Very small bar? Even smaller man cave? Wine cabinet?
None seemed likely.
Before I had the chance to blabber some sort of response, my babes answered her own question. “You’re going to make a linen closet with thick shelves.”
Thick.
Sounded right up my alley.

Coat Closet to Linen Closet VIDEO
On Tiktok
We love to see our DIY projects out in the wild! If you try this DIY project and take a picture and post it on Instagram, be sure to tag us – thenavagepatch
Coat Closet to Linen Closet Conversion
My only regret was that this makeover didn’t afford me the opportunity to destroy some wire shelving – nothing gives me greater pleasure!
After emptying the contents and evicting the unruly hangers, I was left with…just one measly closet pole.

This closet would have fit perfectly into a Puritan home in colonial-era Massachusetts.
Well, more time for shelf-making, I suppose!
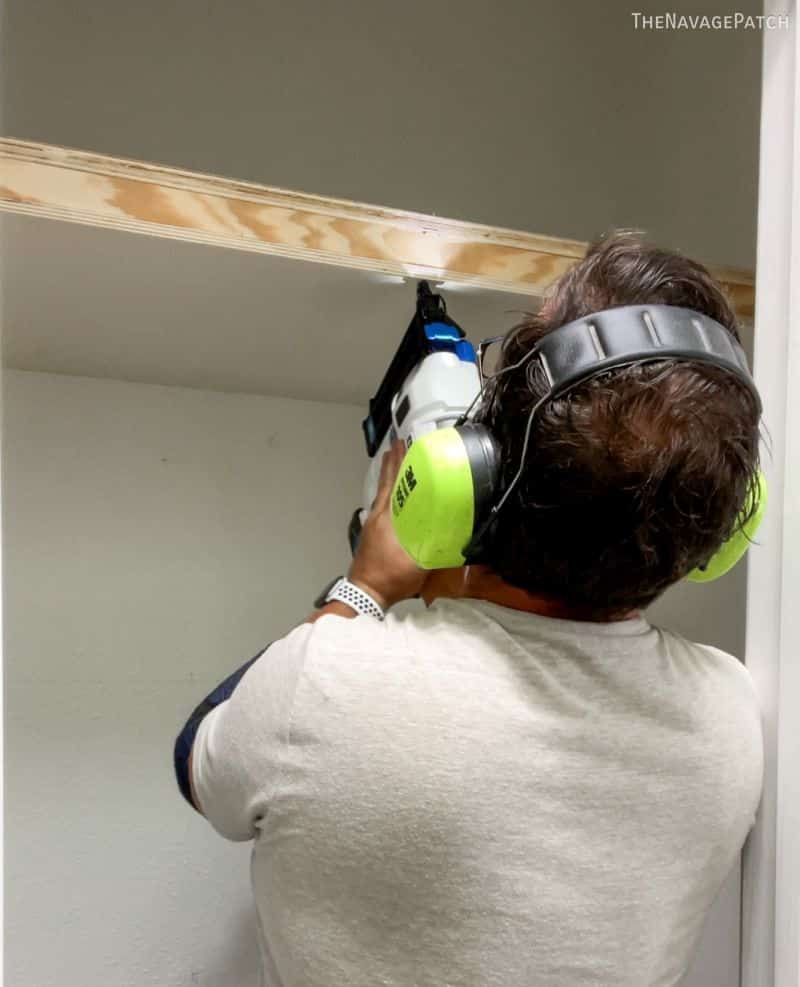
I got on with the business of prep by removing the closet pole and brackets. With all the IKEA we’ve built around here, we wanted a better way to screw than manual screwdrivers. And because IKEA is a little too delicate for an impact driver (in the wrong hands, that is), my babes wanted a gentler, but still powerful, solution. Behold HART Tools’ two power screwdrivers.

The one that looks like a cute mini impact driver is perfect for light-duty screwing in hard-to-reach places (o_0), and the long one is perfect for power-screwing. 😳
Oh, c’mon! Who writes this stuff??
Oh…
I do…
Moving on.
After a quick wall repair, I painted the closet with Swiss Coffee – our new go-to white in this house.

I measured the interior space and then set out to construct some shelf frames. I approached this shelf build differently than my recent builds. Instead of installing shelves on wood brackets that ran around the walls, this time, I’d make a shelf carcass that would act as bracket (floating shelf bracket), and then place a board top, board bottom and front skin. The result would be beefy shelves that would make Arnold Schwarzenegger swoon.
Since we’re still trying to bring the garage into a more civilized era, I wanted to make these shelves entirely from plywood I already had on hand to free up more space. This would mean using 3/4-inch, 1/2-inch, and 1/8-inch utility panel. It would also mean that I’d be using different grades of plywood, but since the shelves would be painted, this wouldn’t be an issue.
I built four frames from 3/4-inch plywood held together with pocket screws.


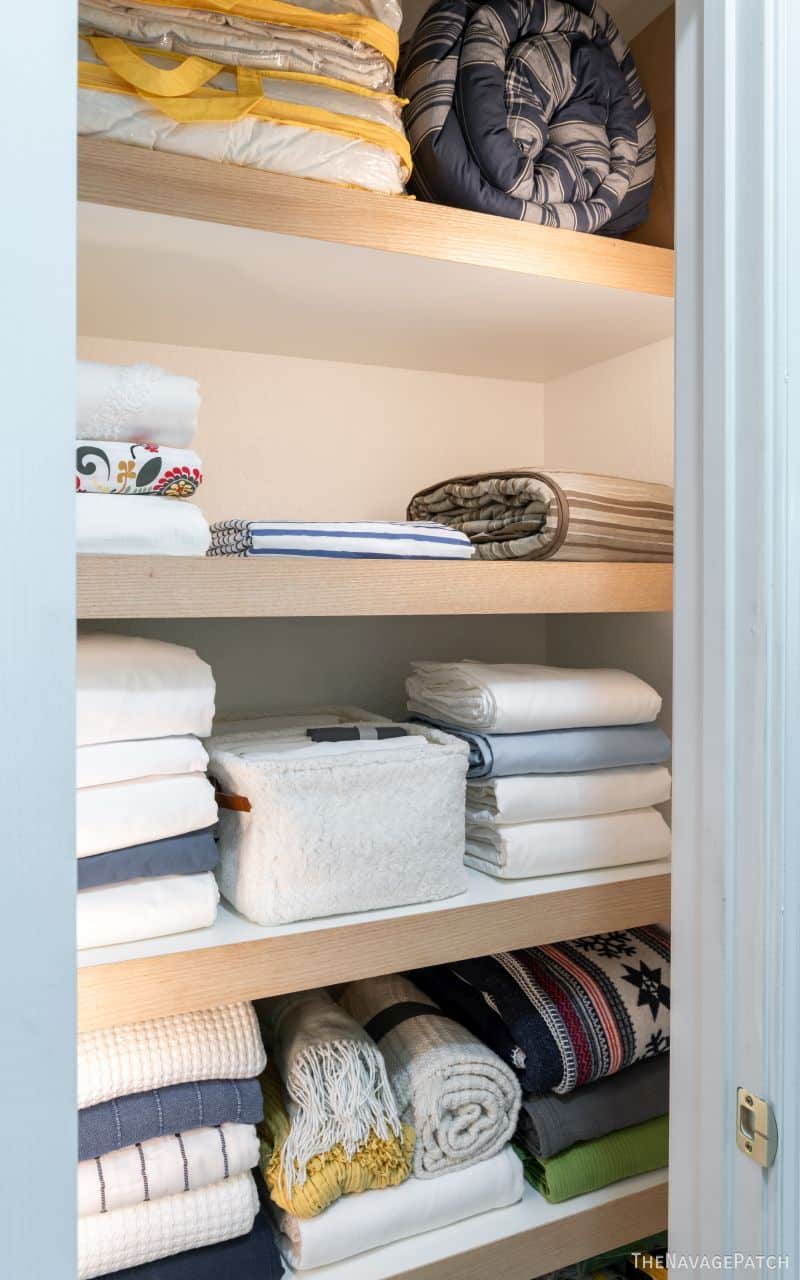
I marked where my babes wanted her four linen closet shelves, and then I located the studs and drew level lines on three walls.

Starting with the top shelf and working down, I put a frame in place and then tapped it here and there until it was level.

I shot a few brads to hold the frame in place while I permanently secured it with screws into studs. To avoid splitting the plywood, I pre-drilled before screwing.

Once the frame was secure, I placed a 3/4-inch piece of plywood on top and secured it with brad nails.
Then I ran a line of construction adhesive around the bottom edges of the frame.

I used 1/2-inch plywood for the shelf bottom (remember, I was trying to use up as much plywood as I could without buying more). I tapped the bottom into place with a mallet (it was a tight fit), and then I secured it with brads while the adhesive set.

One shelf down, three to go. I repeated the same process for the others.


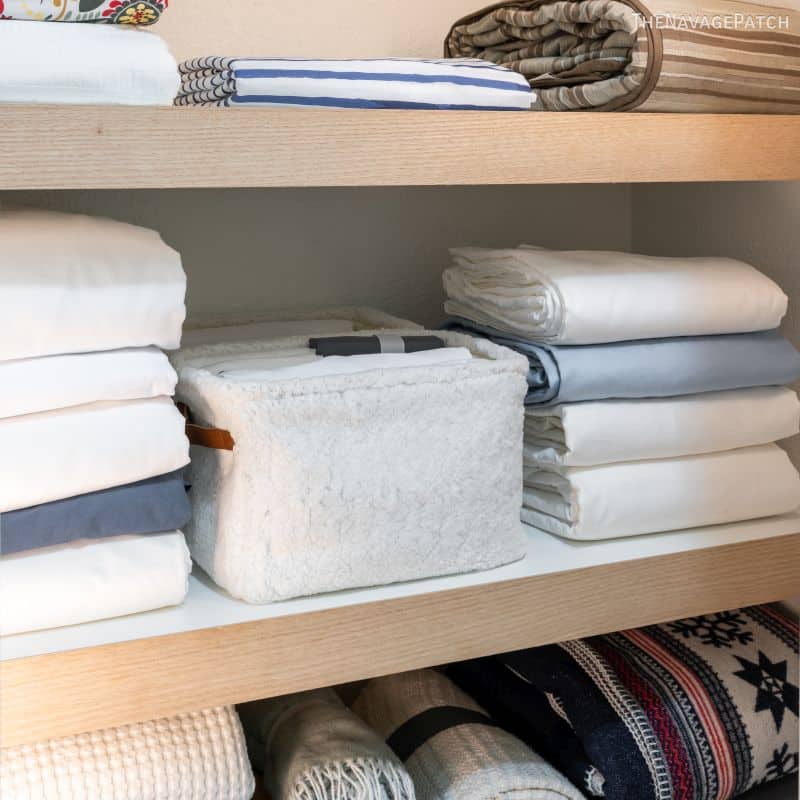
Once I had the four shelves installed, I caulked all the edges, filled the brad nail holes, caulked and painted them the same color as the walls.
The final step was to glue strips of utility panel along the front edge to hide the frame and top and bottom plywood edges. These strips give the shelves a thick, unified look.

The build was finished…

…but before I turned this closet over to my babes’ meticulous and mathematically-perfect folded sheets, there was just one more step.
Lights!
Specifically, these rechargeable, removable, LED, motion-activated lights!

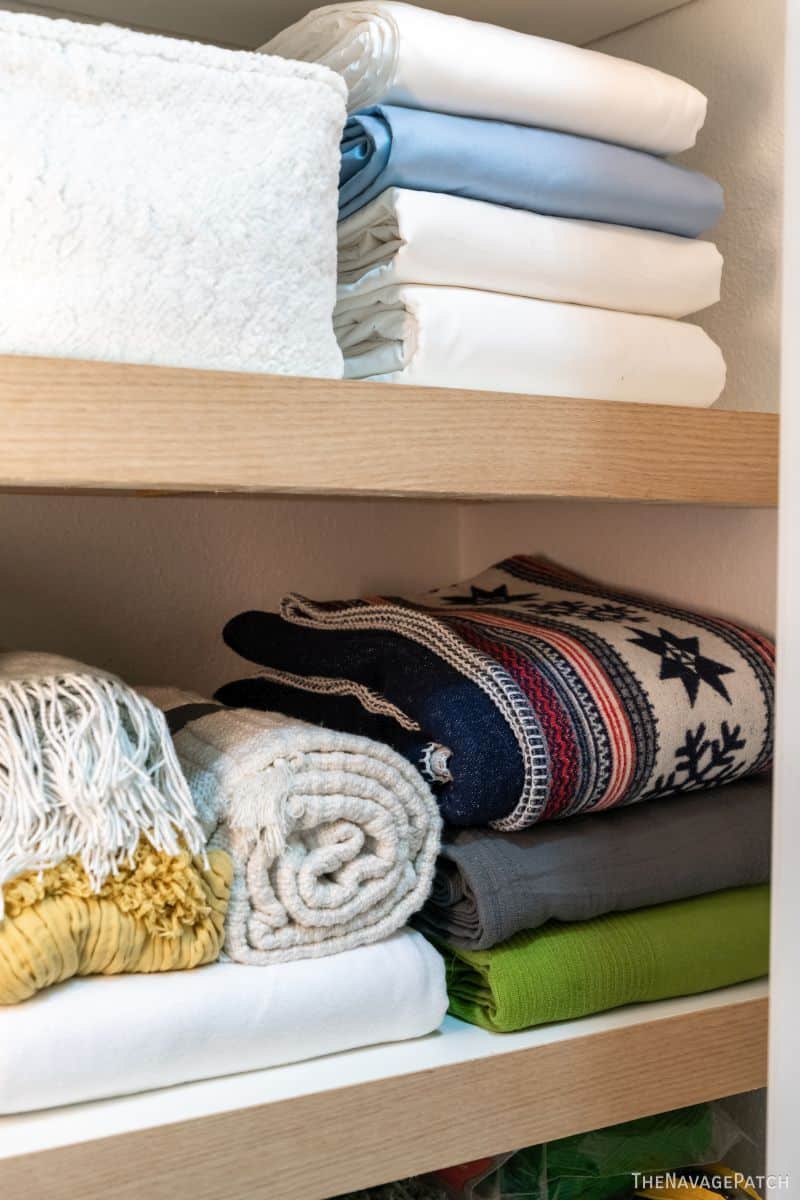
I installed them to the inner door frame, and officially turned the linen closet over to Handan. As you might have guessed, she filled it in about 17 seconds.

I’m pretty pleased with our new linen closet, and my babes loves it!

What do you think? Let us know in the comments!
FABULOUS as always Gregg!!!
Thank you so much, Dee! Couldn’t do it without Handan though! 🙂
We like your new linen closet y’all have done a great job.
We have a beautiful linen closet, we made our tiny coat closet into a bar, using paint, mirror tiles on the walls, industrial carpet on the floor, a countertop, shelves and room for a large ice bucket, shelf for glasses and bar ware, and liquor bottles.
We enjoy our bar-closet.
A coat-tree found on Craigslist holds our coats, when company arrives, we place the coats on our bed.
Kevin
Bar-closet is a fantastic idea! 👊👊👊
Hi Greg,
Another really great job done! I wish my husband was such a good carpenter. Too bad you didn’t live close by, I might be asking Handan to send you over to built various things in our house….I’d pay you with a case of beer!😉 I love your projects!
M
You can pay me in beer, wine or martinis! 😁
You two are amazing!
Thank you so much, Nancy! 🙂
OMG!! What will you think of next ( or Handan), just love that idea. Can you ask Handan to do a tutorial on how to fold sheets, i just waddle them up. lol
Thank You
Waddling up is a perfectly acceptable practice among humans, Mary! What Handan does is witchcraft! 😂
My sheets are jealous.
😂
When will we see Handan’s in-depth folding tutorial?? She rivals Marie Kondo! I must be taught!
Everyone on TikTok and Instagram keeps asking, too, Mari, but she’s so very shy!
My guess is that it was originally intended to be a linen closet due to its location but the previous owners were from up north and had more coats than they knew what to do with so his Handan wanted a coat closet. Mystery solved!
You’re probably right, Debi! 🙂
wish you posted more on my email feed
trying to access anything anywhere else just doesn’t work for the limited time i have available
having said that, really look forward to your postings
Thank you, Susan! Much more on the way! We’ve been busy busy busy, and that has left too little time for me to write!
I love these shelves and pretty much all of your diy projects not to mention your humorous descriptions😀Where exactly did you install the lights? Are they easy to take out to recharge? Thanks! Tammy
Hi Tammy, thank you so much! The lights are installed to the inner door frame, and they come off easily to recharge. 🙂
Ditto on the sheet folding comment and the one about installing and charging the lights. And I always wish I was as inventive as Handan and my hubby was as resourceful/handy/creative as you 😝😝. He does make a great martini tho ☺️🍸
A great martini is a skill of its own! Cheers!
The shelves look great. I could see doing this but with melamine on top to hand a smooth surface. My only fear would be that this is a very permanent setup, and to convert it to something else later would mean serious demolition given that the shelves cannot be disassembled or removed without destroying the connecting walls.
It is permanent, but it works for us.