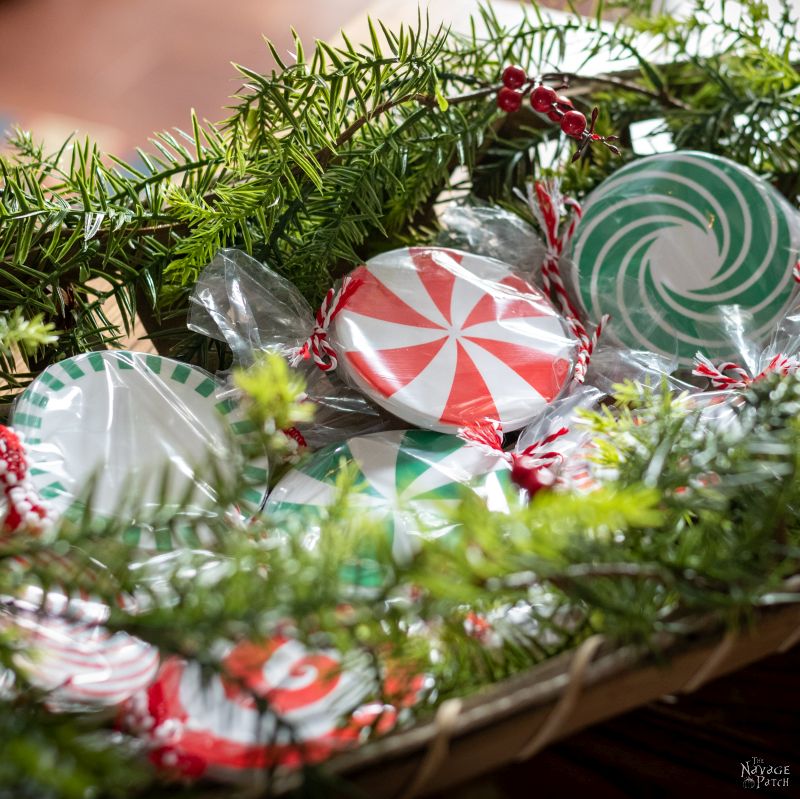
DIY Peppermint Candy Coasters
Peppermint candy coasters are a quick and easy Infusible Ink project with our free SVG files, and they make a perfect holiday gift!
Sometimes Handan comes up with an idea so original that she gets spooked by it.
The idea gnaws at her, and it makes her uneasy.
No one else has done this! Why hasn’t anyone thought of this yet?
We’ve got to do this NOW!
“Hey Babes!” The call came as it usually does—interrupting a small non-blog-related joy I was attempting to have. I had just poured a nice, dry martini, and I was looking forward to some primo zombie time staring blankly at the soul-sucking void of social media.
No dice.
The call.
“Hey Babes!!” Again. Excited. Panicked? Both? Footsteps now. Coming my way.
She must have thought of something new. Next thing, she’ll be re-arranging our posting schedule.

“Hey Babes, we need to do this project and post it as soon as possible!” She announced as she rounded the corner into the living room.
I had anticipated this turn, so I already had Google Calendar open on my phone.
I looked at our posting scheduled and mentally shuffled some things around. She hadn’t even told me her idea yet, but I knew from her tone I’d be posting about it soon.
“My babes,” She said, “I can’t believe no one has thought of this!” There it was. The excitement of a new idea mixed with the panic that someone somewhere was having the exact epiphany she was and might beat her to the punch.
“My babes, do you know what we’re going to do?” She always asks that. Why does she always ask that? Of course I don’t know! I was about to get busy with a dry martini and pictures of everyone’s fake lives on social media!
“Vacation? A new car? Oooh, oooh, I know! You’re finally going to buy me the solid gold toilet I’ve always dreamed about!” Heheheh, may as well have some fun with it, right?
“Don’t be a jerk!” She was excited. That much was clear. “We’re going to make peppermint candy coasters!” She beamed.

I took a sip of my martini and briefly mourned the death of my free time.
“Peppermint candy coasters, eh?” I had no earthly idea what this loon was warbling about, but I decided to play along. “Great idea, my babes!”
“I know! I can’t believe no one has done it before! We need to make them now, and get this post out fast!” Yep, she was excited, alright.
“So, uhhhh…how are we going to make these peppermint candy coasters?” I said.
“With Infusible Ink, you silly!” She said.
Ahhhh, yes, I could see it!
“My babes, Infusible Ink is pretty new.” I said. “That’s probably why no one has done it yet.” Seemed logical to me.
“I know, my babes. But someone will think of it. We need to do it now!” She said.
She had a point there.
So. You know the drill, right?
If my babes wants peppermint candy coasters, what is my babes gonna get?
Yep, you got it!

DIY Peppermint Candy Coasters SUPPLIES LIST
Affiliate links are provided below. Full disclosure here.
- Cricut Maker or Explore
- Cricut EasyPress 2
- Cricut EasyPress Mat
- Cricut Infusible Ink transfer sheets in red and green
- Brayer
- Cricut round ceramic coaster blanks
- Free Peppermint Candy Coaster SVG files (available in The VIP Patch)
- Cellophane treat bags (we got ours at Party City)
- Colored or patterned ribbon or string (optional)
We love to see our craft projects out in the wild! If you try this seasonal craft project, take a picture and post it on Instagram, be sure to tag us – thenavagepatch
DIY Peppermint Candy Coasters
Okay, first things first. We normally wouldn’t hit you with another Cricut project so soon after our paper snowflake trees, but as I wrote above, Handan really wanted to get this idea out into the world as quickly as possible, so let’s get to it!
I uploaded the SVG files to Cricut Design Space and resized them to 3.5 by 3.5 inches. Next, I cut and weeded the designs and then trimmed them with scissors.

After cleaning my coasters with an alcohol wipe, I positioned the design.


For Infusible Ink transfers to ceramic coasters, I first laid a piece of cardstock on the EasyPress mat and then put the coaster face-down on the cardstock. I put a piece of butcher paper on top of the coaster and then pressed for 240 seconds at 400 degrees.


These coasters are hot! hot! hot! after transfer, so I like to give them 10-15 minutes to cool before peeling. During that time, I prepared the “wrappers” by cutting the bottoms from the treat bags.

When the coaster was cool enough to touch, I peeled the transfer sheet.

Ooooohhhh….

Ahhhhhhh! Brilliant color!

Next, I inserted the coaster into the treat bag.


I used the twist ties provided with the treat bags to tie off each end.


I then trimmed the excess from the twist ties and ta-da!

Handan thought it needed a little something extra, so she tied some Christmas ribbon and string on top of the twist ties.
I made the rest of the peppermint candy coasters in two more pressings. If you have a big enough EasyPress 2, you can press 4 or more coasters at a time. That’s a big time-saver for a 4 minute transfer!

Not bad for a super easy Cricut project!

These peppermint candy coasters would make a great hostess gift. Or….

Make some homemade cocoa mix – you know the kind with marshmallows and crushed candy canes or peppermint candies – and bundle it up with these coasters for a great gift for teachers.


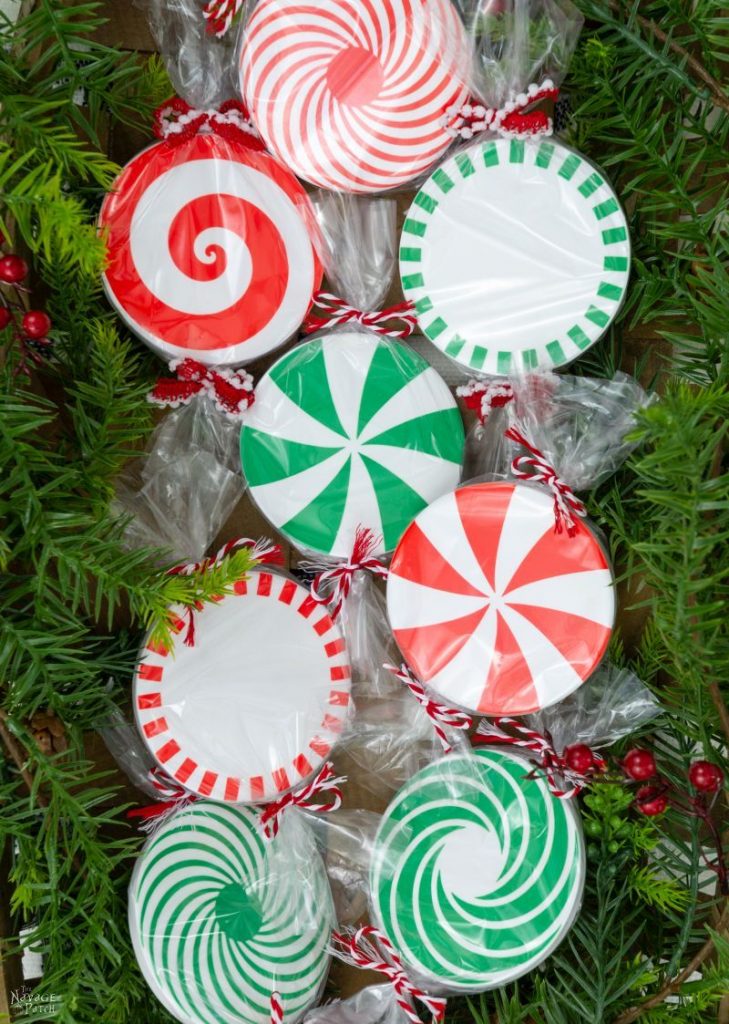
Free DIY Peppermint Candy SVGs
Now it’s time to click on the button below to download today’s freebies – these 5 peppermint candy SVG files are all in the “Christmas” and “SVGs – Stencils” section of The VIP Patch.
take me to your
amazing freebies library
If you’re not a Navage Patch VIP, you won’t be able to access our Freebies Library. But that can be easily fixed! Subscribe for free on the form below and become a Navage Patch VIP. Once you subscribe, a password will be sent to you in our Welcome email, and that will give you access to The VIP Patch [Freebies Library].

Love free SVGs? Then check out our guide on Where to Find the BEST Free SVG Files!
Love these. Those would make great gifts and stocking stuffers. I had no idea Cricut made ceramic coasters. Another think learned on your blog.
Thank you, Laurie! Yep, we’ll be giving some of these out this year! Cricut has a whole line of blanks for their Infusible Ink products with more on the way. 🙂
I love these! I have a Cricut machine, but I do not have the press. Is it possible to use an iron? I cannot see spending money an an item (even the small press) that I would rarely use. I really do enjoy your blog. It’s chalked full of wonderful ideas!
Hi Penny, Cricut doesn’t recommend an iron because the infusible ink needs temps higher than most irons are capable of. That said, I’ve read many success stories with irons and infusible ink. I think as long as your design is smaller than your iron, if you press long enough at the iron’s highest setting, you should be ok.
I’m trying to get access to your free winter printable and even though I subscribed to your site months ago, I can’t print anything. What am I doing wrong?
Hi Sue, are you using the most current password? Check today’s email – the password is written near the top. Also, check out our Printables FAQ page, as most common problems are answered there: https://www.thenavagepatch.com/printables-faq/
If you are still having trouble, shoot me an email greg@thenavagepatch.com so I can help you further.
So cute! Hope Santa brings me a Cricut ?!
I hope so too! 🙂
So cute, but again, no Circut machine. Trying to think of a way to create without the Circut. Great gift idea.
Hi Dorothy, you could use our design as a stencil and then paint and seal the coasters. 🙂
This are a sweet treat for the eyes. For an added sensory pleasure, you could add a drop of peppermint essential oil to the back of the coaster and it would be a great fragrance as you unpack it.
Ooooh, dang, Janine, that is a fantastic idea!! 🙂
Soo cute! I love these!
Thank you, Giselle! 🙂
Greg & Handan,
Thank you for accepting me into the patch. Love all of it.
A suggestion on the packaging of the coasters. After you get them wrapped, take a scissors and cut V’s into the ends. Will give them a “finishing touch”.
Hi Laurene – that is a great idea!! Thank you! 🙂
So cute; I can see why Handan wanted to do it immediately!
Thank you, Kathy! 🙂
Another awesome project! I’m glad Handen uses her talent for good instead of evil.
Me too, lol! 😀
Great idea, Handan! These are adorable! So simple but very effective design. And the colors from that ink? Wow. It would be fun to paint your own but even the neatest artist could never get those clean lines and crisp colors.
I’m hoping Santa will bring me a Cricut for Christmas, because I’ve been a very good boy all year and I asked very nicely ? (as long as Santa has selective memory, I’m golden!)