DIY Shim Trees
Shim trees are some of the most inexpensive and beautiful DIY Christmas decorations! Can you imagine how much these would sell for?
It’s the shimple things in life that keep me going, and these trees are one of life’s shimple pleasures.
I can carry on in a shimilar manner, you know. Shim pun after shim pun until your eyeballs surrender and retreat back into the safety of your skull.
But it’s the Christmas season and I’m feeling magnanimous, so I’ll spare you that indignity and keep my puns to myself where they belong.
*******
What’s old is new again. Isn’t that how it works? It’s just that here in blogland (and in an even more accelerated timeframe, on social media), “old” is anything farther back than, oh, say three years ago.
So for this post, I dug way back into the moldy old year of 2019 (ah, what a kinder, gentler world it was back then) and took a good look at a post I thought was going to blow the doors off planet earth.
It blew alright. It blew hard.
Just not doors.
Oats, perhaps.
But not doors.
Back in those halcyon pre-pandemic days of my youth, I thought that in the world of DIY & crafting the end always justified the means.
I thought that no matter how ridiculously hard and complicated the craft, project or DIY was, if the end result was beautiful, all the pain, sweat, blood, tears, agony and profanity was worth it.
Moreover, I thought that this would hold true for everyone else who may watch it online.
Welp, I was wrong (gasp!). It turns out most people don’t want difficult and complicated, no matter how glorious the payoff.
It turns out, that most people want simple, quick and easy. Shocker, I know.

So while the world (or those few in it who happened to read that post) may have been impressed with those light-up epoxy shim trees, very few actually tried it.
Well, a few years and many many lessons later, and I now understand the true way of things.
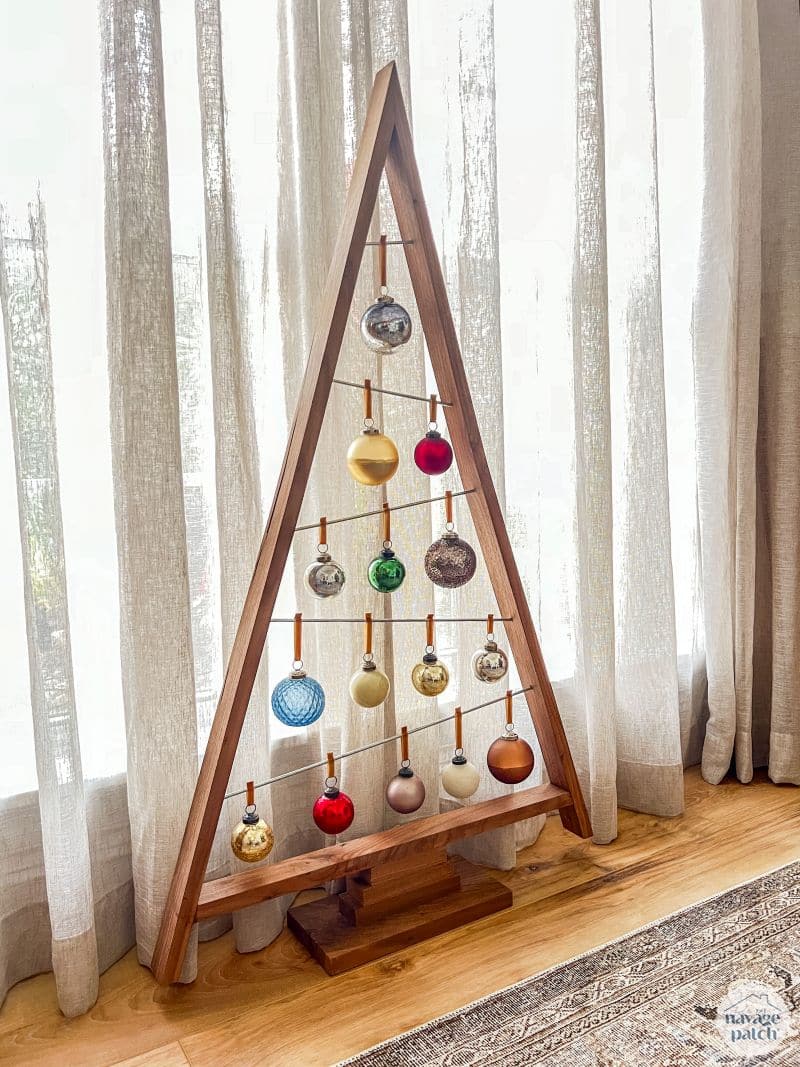
So now’s the time to revisit that old post and give it a modern twist. That is to say, it’s time to MISS (make it simple, stupid). The inspiration for this update of an old classic comes from an even older classic I made for my babes way back in the long long ago before there was a Navage Patch: this walnut Christmas tree with metal dowels and ornaments.
The beauty of these DIY shim trees is that in their most basic form, one can currently be made for 37 cents. Yes, cents! Lowe’s has shims on sale for 37 cents per 12-pack. Even off sale, they’re only about a buck per pack, so a great deal either way.

As for gussying them up, the sky’s the limit. I used Dollar Tree skewers for the cross pieces, and a combination of small bells and small ornaments.
Let’s get to it!

DIY Shim Trees SUPPLIES LIST
Affiliate links are provided below. Full disclosure here.
- Shims
- Bamboo skewers (some Dollar Trees have these marshmallow sticks in a 12-pack)
- Black spray paint or acrylic paint
- Dark green spray paint
- Small cow bells
- Small ornaments (similar to ours) or Dollar tree ornaments
- Hot glue and hot glue gun
We love to see our craft projects out in the wild! If you try this seasonal craft project, take a picture and post it on Instagram, be sure to tag us – thenavagepatch
Shim Trees VIDEO Tutorial
Watch our short and fun video below for an overview of our DIY Shim Trees before you read the detailed step-by-step tutorial.
Watch Our Tutorial On YouTube
On Tiktok
DIY Shim Trees Tutorial
Step 1 – Make a base
First I hot glued two shims together to make a base.


I set the base aside and built the sides.
Step 2 – Make the sides
Each side is made from 5 shims, and I glued them together as shown below, leaving about 2 inches of non-overlapped space. Note that unlike the base, the shims for the sides are all oriented the same way – that is to say the fat part is on the bottom and the skinny part is up top.
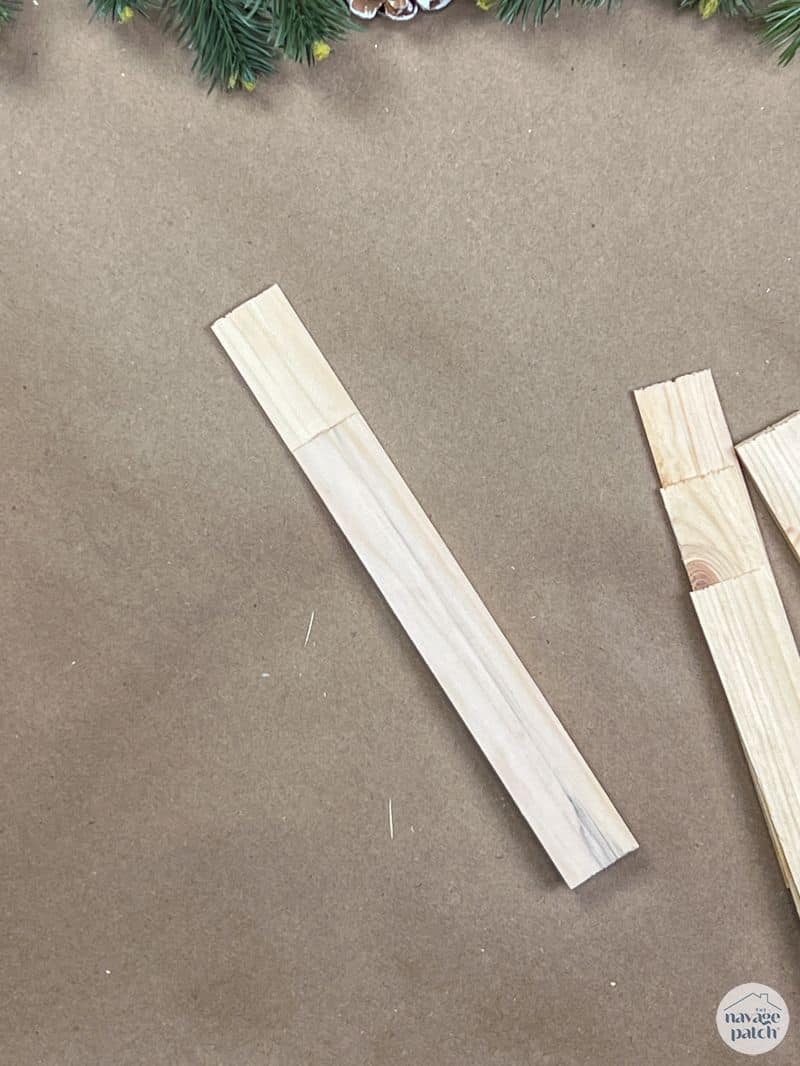
Put on some hot glue and follow it up with a shim.
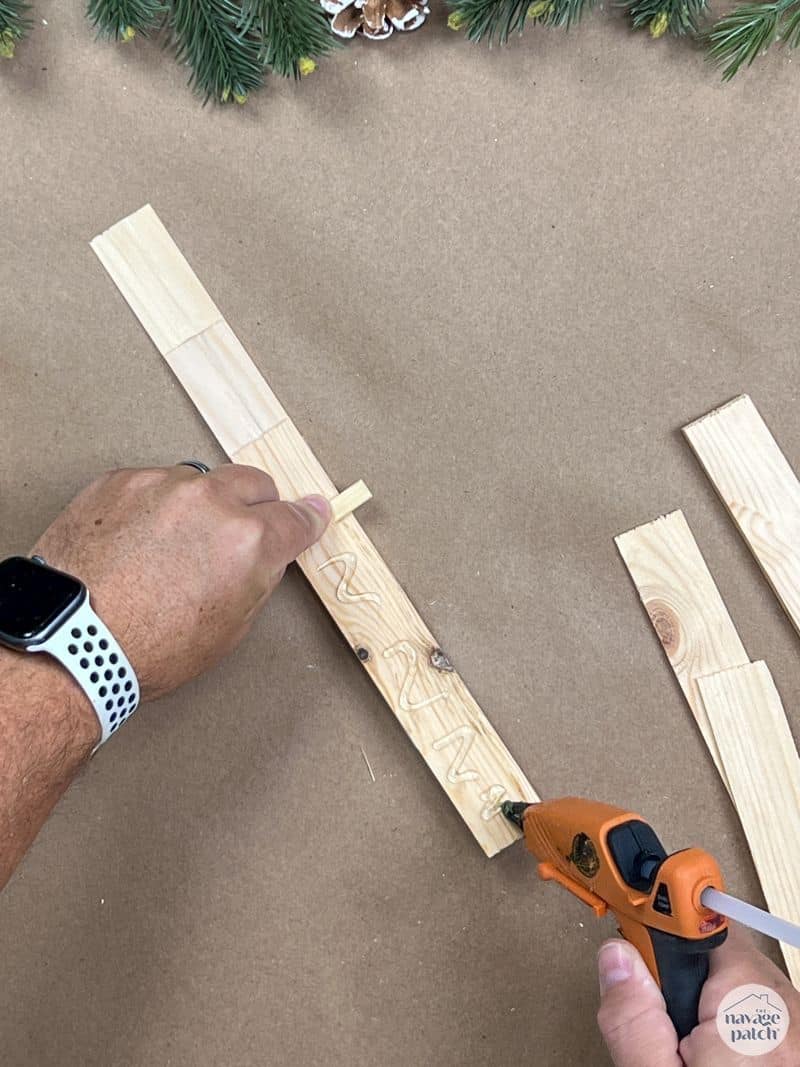

When I had one side finished, I made the other side by holding a shim against the bottom piece of the completed side and then gluing the shims in a symmetrical manner.


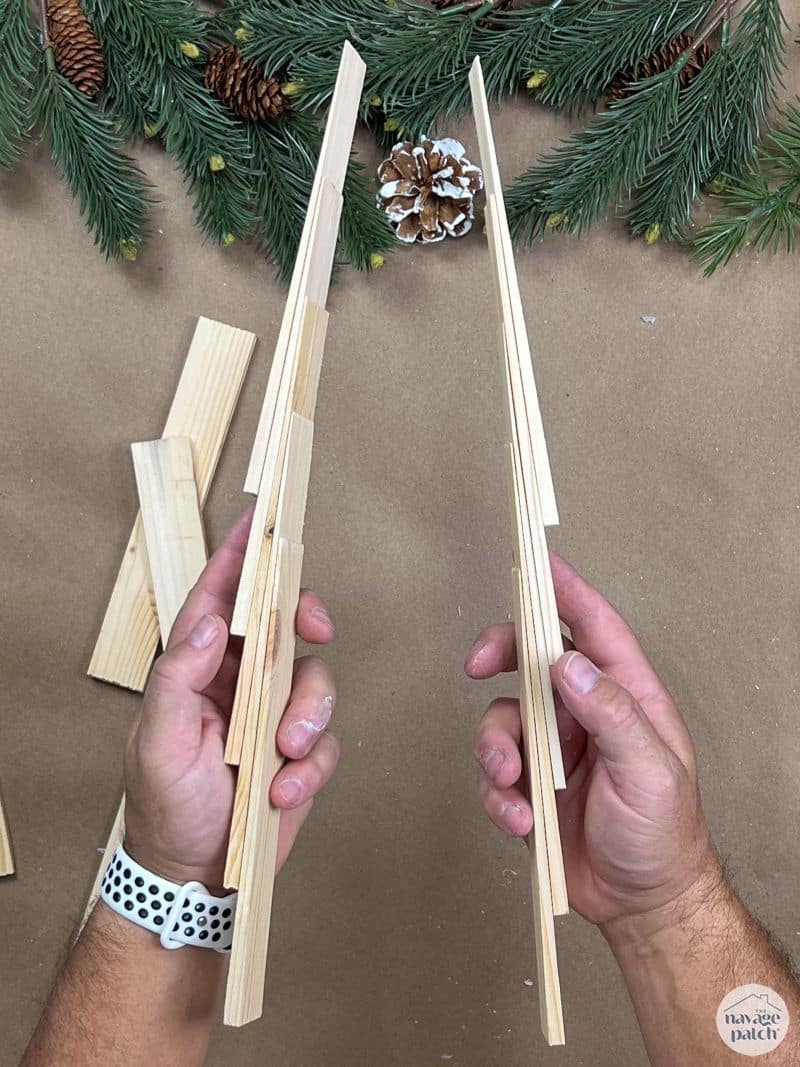
And here are two sides finished.
You can make smaller trees by either cutting each shim a little shorter or using fewer shims for the sides. I prefer cutting the shims as 5 shims per side looks the best.
Step 3 – Glue the sides to the base
I added some hot glue to one end of the base.

And then I pressed it against the bottom of one side.

Next I put a line of hot glue along the bottom of the other side and then pressed it against the base.


Step 5 – Glue the top
I turned the tree upside down and squeezed a line of glue along the apex and held the two sides until the glue set.


My basic shim tree was built.

Now you can leave it here and have yourself a 37 cent tree that looks just fine and dandy! Or you can take it a few steps further with some paint and ornaments. Let’s check it out!
Step 6 – Paint
If you choose to paint your shim trees, you can use any old paint you want. I found it easiest to spray them, and I used Behr Black Evergreen and Rustoleum Flat Black.

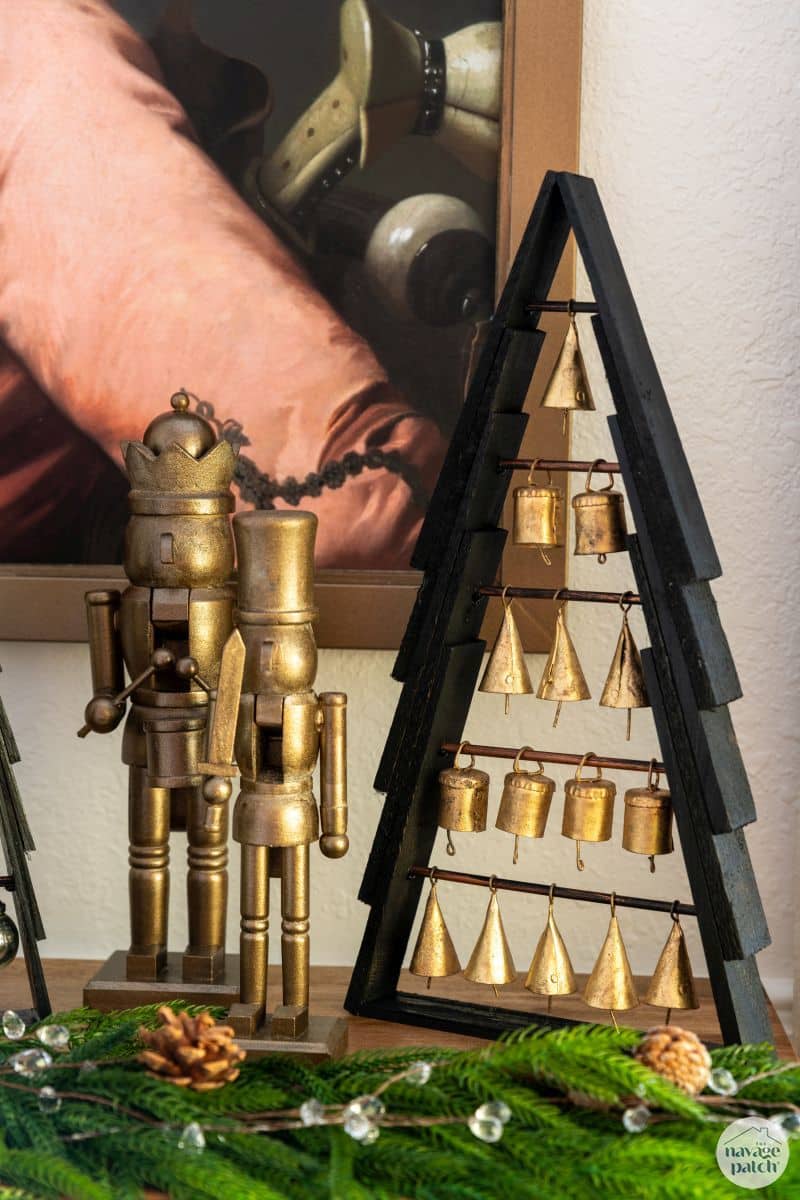
Back inside, I planned to use the Black Evergreen tree with the brass bells.

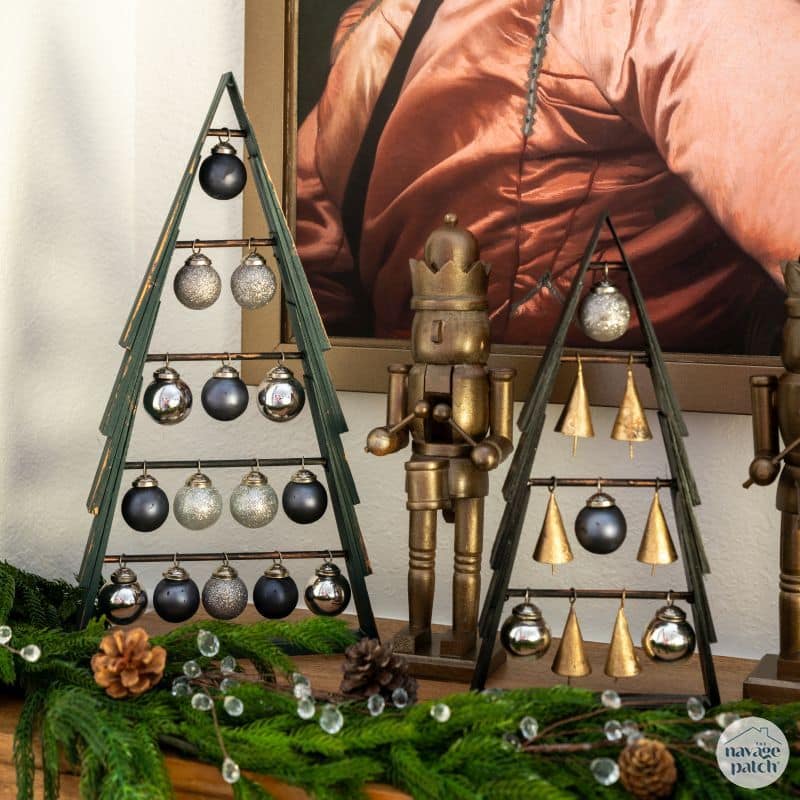
But The Shrimp had other ideas, so I swapped it out for a black tree. I had also painted a few Dollar Tree skewers black, and in a moment of “why not?” I highlighted them with Rub’n Buff.

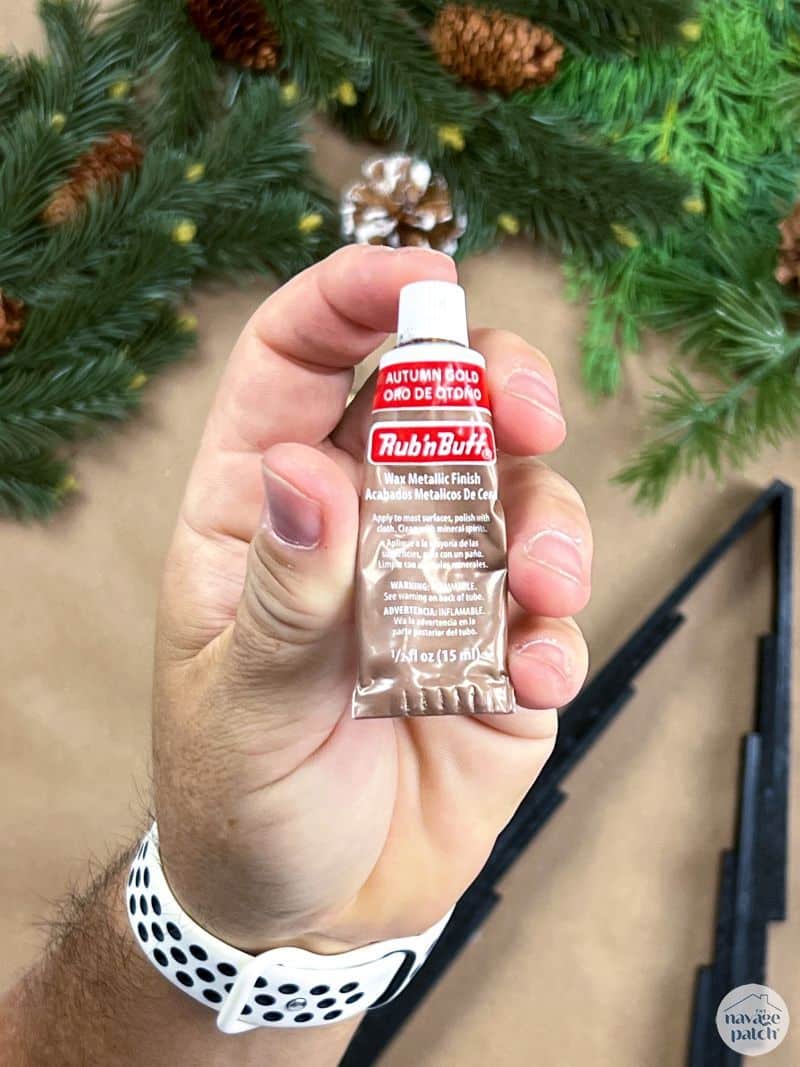

And just to keep it classy, I highlighted the green tree with Rub’n Buff.
Step 7 – Add bells and ornaments
I threaded 5 bells onto the skewer and then found the height at which I wanted them to hang.

I marked the length with my finger and then cut the skewer to size.


I then re-threaded the bells and pressed the skewer into its place. To secure it, I added a blob of hot glue underneath each end of the skewer.


I repeated these steps with one fewer bell for each new row until I reached the top.
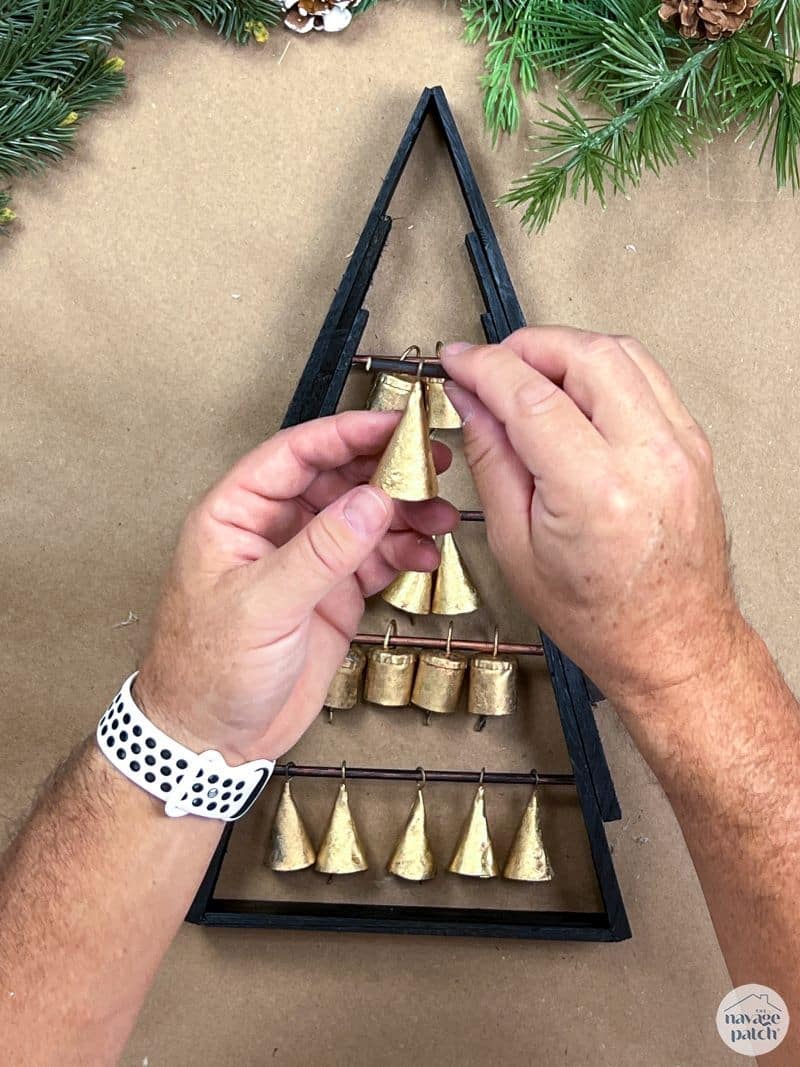
For the green tree, I used small ornaments instead of bells, and for the smaller tree, I used a combination of the two.

These shim trees are a far more accessible craft than my ridiculous light-up epoxy shim trees from yesteryear, and I think they look just as good!


Simple and cheap describes me to a ‘T’. I just spent 2 hours yesterday searching for a cheap alternative to those ‘A’ shaped trees that I could hang those bells on. Every one I found had to be made with a table saw or jigsaw or needed holes made with a jig. I just gave up. I never thought to look at your previous projects in your blog. Today I received your blog and low and behold there were the cheap and easy ‘A’ shaped Christmas trees. Cheaper and easier to make than I thought possible. So, this will be my project for next week. This is really ‘shock’ and ‘awe’!! Thank you both for all you make and share with us. Have a wonderful Christmas and a happy New Year.
Awesome! So happy you found this post! Merry Christmas, Mona!
These are just beautiful. Thank you for sharing.
Thank you, Julia, it is my pleasure!
I love simple ways to display pierced earrings. I think these trees would make an awesome way to display my Christmas earwire earrings! What a great project! Maybe next year I could make a few and “start the tree off” with several pairs of my home made creations for gifts! Here in Maine (the Pine Tree State) these could be used year round! Merry Christmas!
Merry Christmas, Kathy! So many great possibilities!
I love these!!!! So pretty!!!!! Noone would ever know they are not Pottery Barn pricey!
Thanks, Audra! They really do look so much more than the sum of their parts!