How to Install a Pocket Door
Part 4 of our guest bathroom renovation continues with tearing down the hallway wall, how to install a pocket door and wall framing.
CONTINUED FROM>>
There’s a cool cinematic technique you’ve likely seen, but may not be aware of, called the dolly zoom. Also known as the Vertigo zoom, it is performed by moving the camera away from (or towards) a subject while simultaneously zooming in (or out) so that the subject remains the same size in the frame. It is often used to create a sense of tension, vertigo or to represent the moment when a character discovers information that causes him to reassess his previously-held beliefs.
Here is the technique put to good use in the movie Jaws, when police chief Brody sees a boy attacked by the toothy eating machine on Memorial Day weekend after being assured there was no chance of that happening.
The next example from Poltergeist showcases the classic “never-ending hallway” dolly zoom effect, as Diane rushes to help her daughter, Carol Anne, trapped in her bedroom at the end of the hall.
And here is a longer cut of each scene to help better put them into context. If blood in the water bothers you, you may want to skip this one.
If you don’t know me, right about now, you’re thinking, why the hell is he yammering on about movie filming techniques? I came here for some DIY!
Those of you who know me are thinking one of two things:
- Oh, yay, he’s off on another one of his informative tangents! I can’t wait to see how he ties this one into their current project. Oh, and I should probably send him five dollars because he’s so handsome!
- Good lord, here we go again! You know, Handan should really put a muzzle on him. What a barking lunatic!
Well, I may be a handsome yammering lunatic, but I assure you this lesson on the dolly zoom is relevant, because as Handan and I were working on the guest bathroom renovation this past weekend, I had two real-life dolly zoom moments.
The first came on Saturday morning. I awoke before the roosters, as usual, and shuffled into the kitchen for an iced coffee and some video games. But the game couldn’t hold my attention. I was distracted by the project, and I was eager to get started, so I casually went back into the bedroom and made some noise. When Handan’s eyes cracked open, I feigned surprise.
“Oh, you’re up? Good! C’mon, I’ll make you some coffee!”
She stumbled into the kitchen, and I shoved a hot latte into her hands. She wanted to relax a bit and ease into the day, but for me the day was already two hours old. I picked up some tools and started working. That was sure to draw her in, hehehe.
Sure enough, the sound of work being done without her lifted Handan out of her seat and over to the bathroom where I was toiling. Our project for the day was to install the frame for the pocket door. I had ordered the frame online earlier in the week and was thrilled that it came in time for the weekend. I was busy prepping for the frame install. My plan was to try to leave the drywall on the bathroom side of the pocket door wall intact and install the frame against it. I saw some difficulties with this plan. Handan saw more.
“Babes, you’re going to have to remove that drywall as well.” She said. I’m a great selective listener, so I carried on as if she hadn’t spoken. After a time, I started to see that my way wouldn’t work. She watched as I came to grips with that reality.
“Babes, it’s okay. You’re going to have to take down that wall. I will help you putting up the new one, okay?”
And that is when I had my Poltergeist dolly zoom moment. I saw the end of this project in my mind, but every time I made a move to get closer, it would recede farther away from me. The project kept getting more complex. I thought it would take a weekend or two, and here we are now, almost a month later, and still the end is so far off that it’s hard to see!
Diane runs towards Carol Anne’s bedroom. The hallway stretches, the door just out of reach.
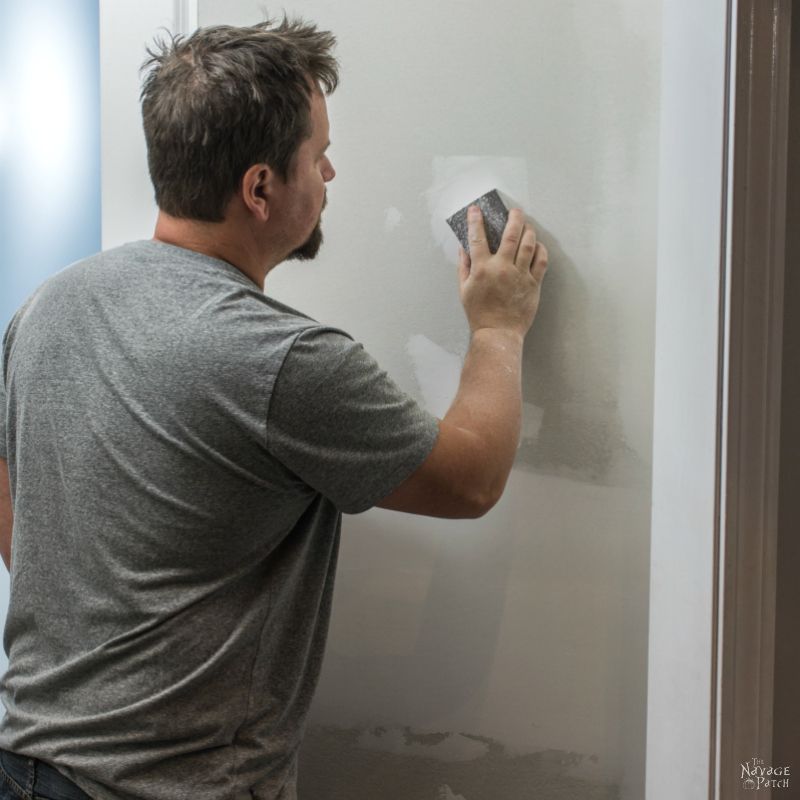
I would be putting up even more drywall. And more drywall meant more taping.
Taping.
It’s a DiYer’s worst nightmare. (“Taping” is the term for applying drywall tape to joints and corners, then covering with drywall mud and sanding it smooth)
It seems so simple when you plan it. How hard could it be? All those people bitching about it are just wimps. They’re not tough like I am!
And then you do it, and you find yourself balled up in a corner, crying, whimpering, rocking back and forth…
I accepted my fate as a condemned felon must when he has run out of appeals.
I opened the box that held the pocket door frame.

The frame header had a plastic bag full of hardware stapled to it. The bag contained a stern warning. I don’t care for warnings…

The surest way for me to remove a bag of screws is to tell me NOT to remove the bag of screws.
I didn’t choose the rebellion.
The rebellion chose me.
I began dismantling the wall by first de-energizing the circuit that feeds the bathroom and then removing the light switches and outlet.

Before I started ripping out wires all willy-nilly, I took a few photos of the existing wiring in case I will need to reference them when re-installing the switches and outlet.
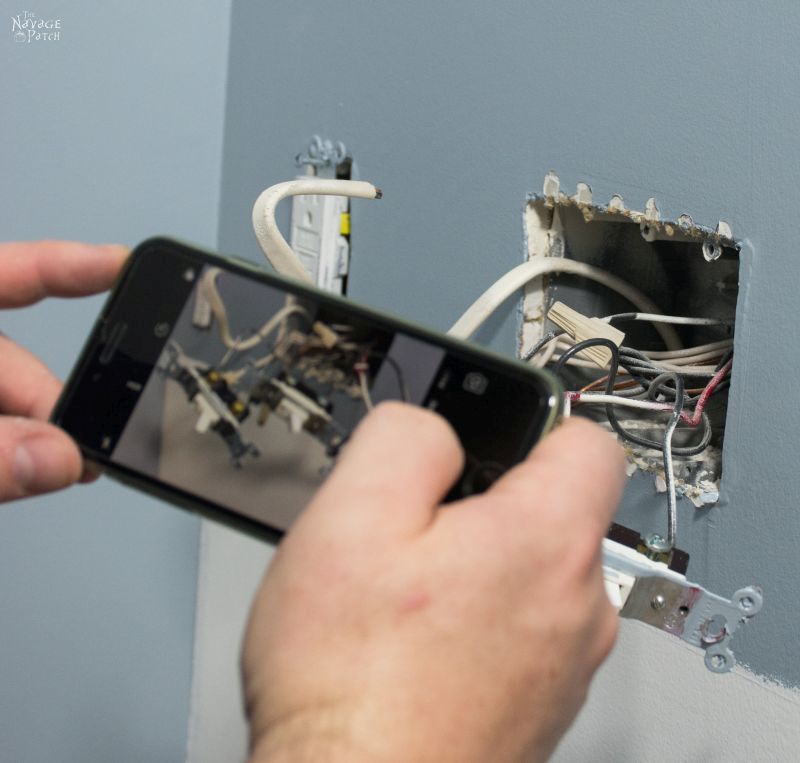
I also labeled every wire as a backup precaution.

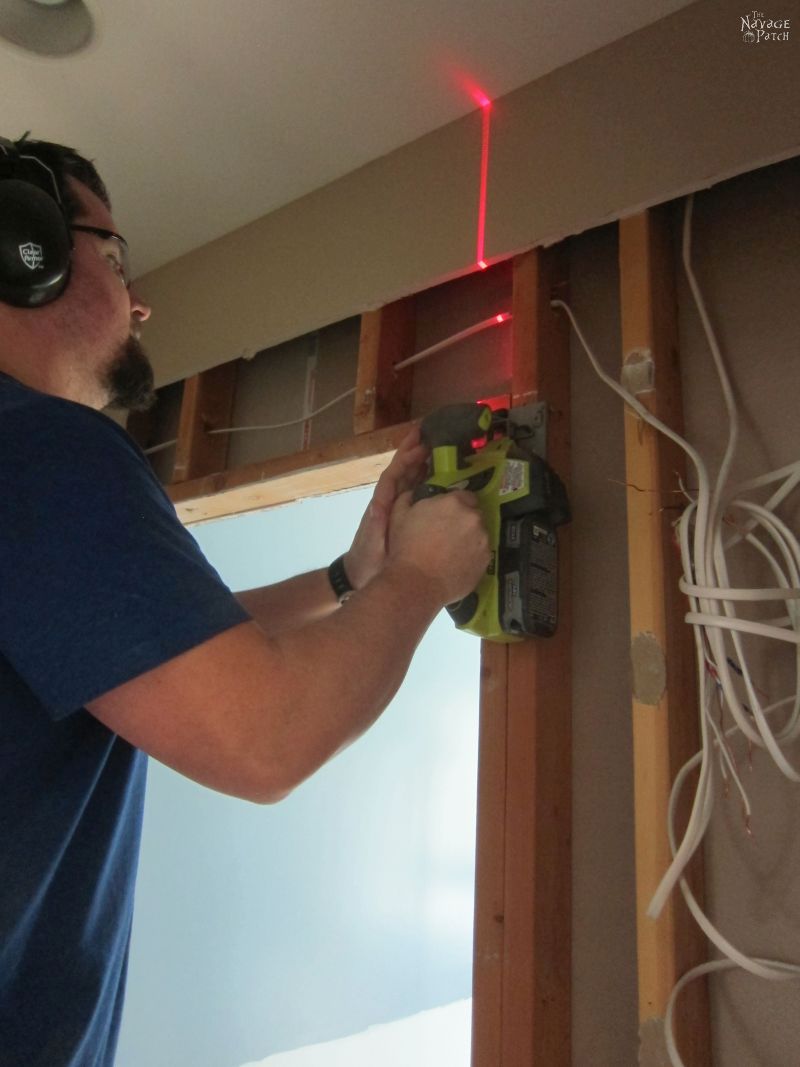
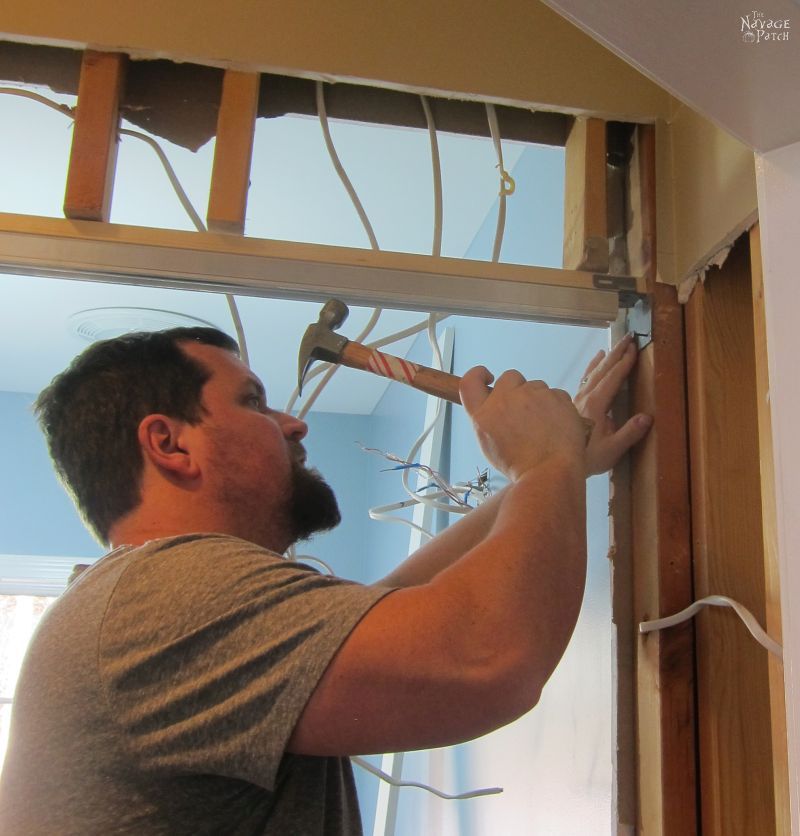
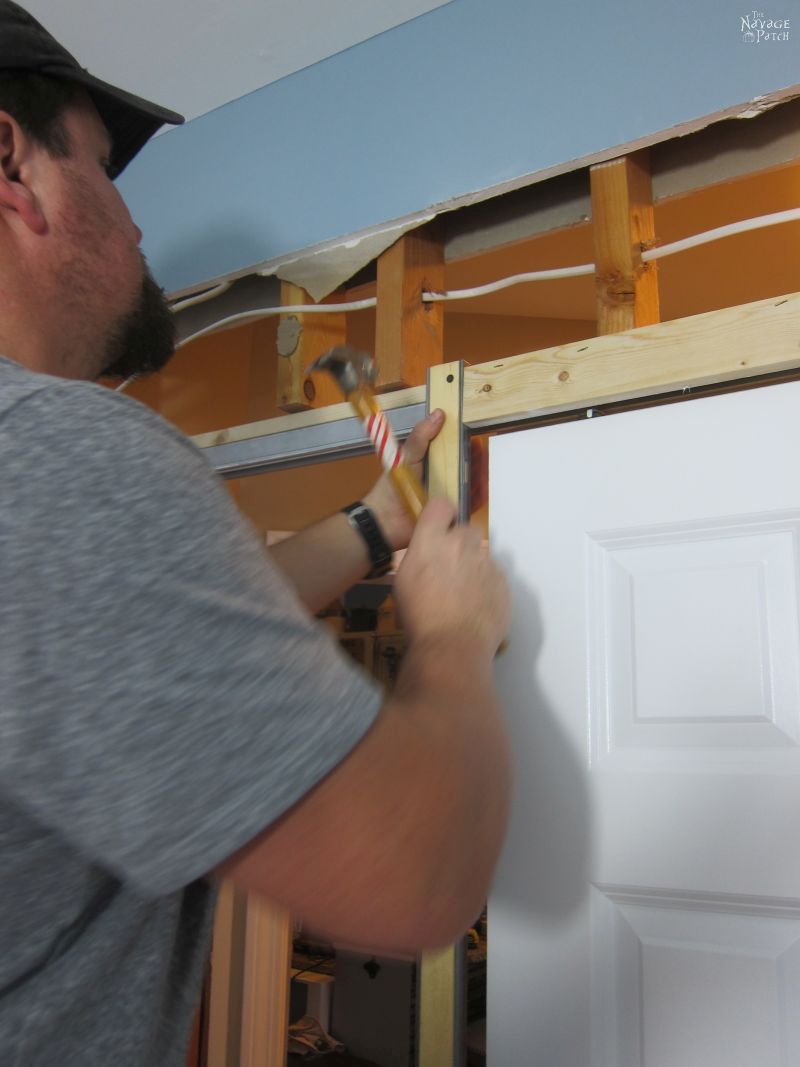
The frame header for the pocket door needed to be mounted higher than the existing door frame, so I removed the old door header by cutting through the ends and hammering it down off the small studs above it.
Then I cut and removed the drywall from the inner wall. We didn’t get pics of me tearing out the drywall since Handan was helping me.

With the last of the drywall removed, the space really opened up.

Next, I removed the central vac pipe – a useless appendage of a system that never worked (no one thought to actually install the vacuum part of the central vacuum system when they built the house).

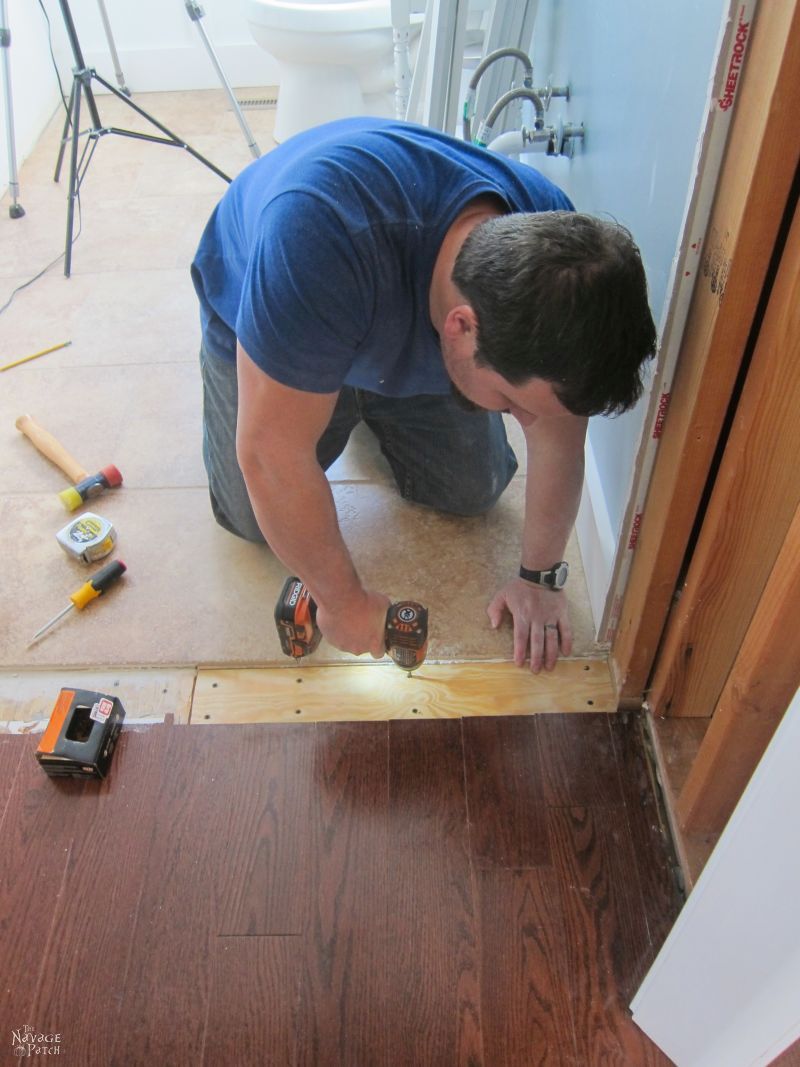
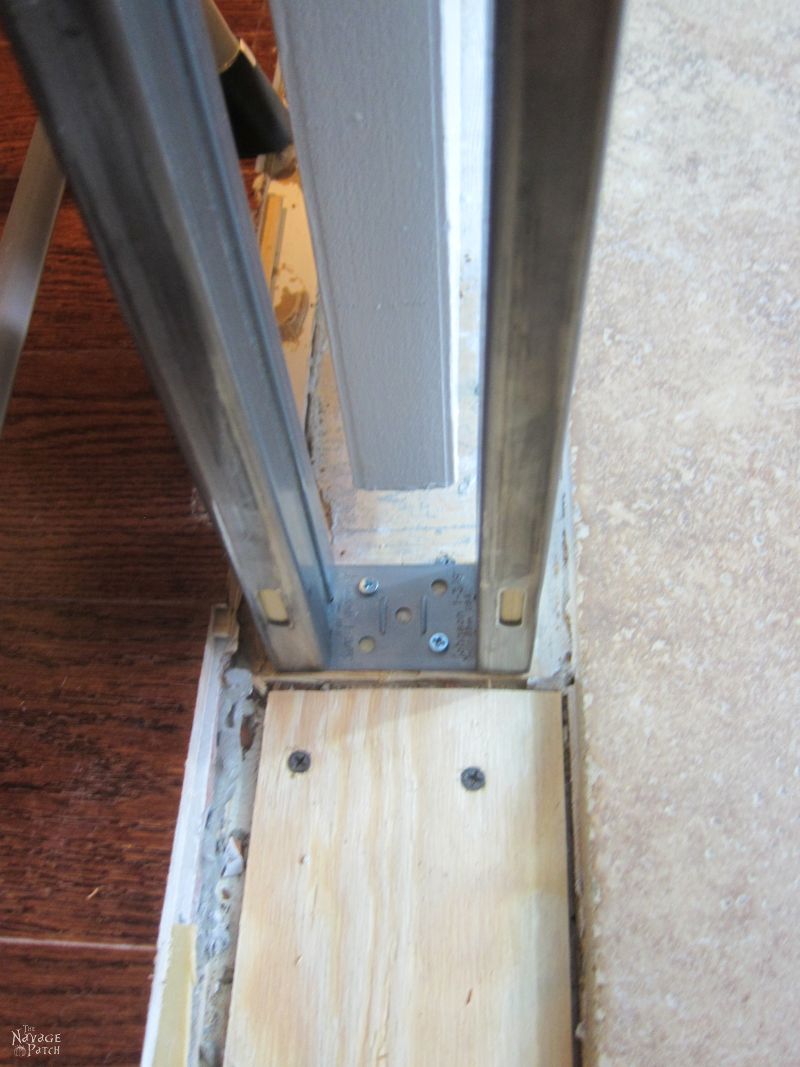
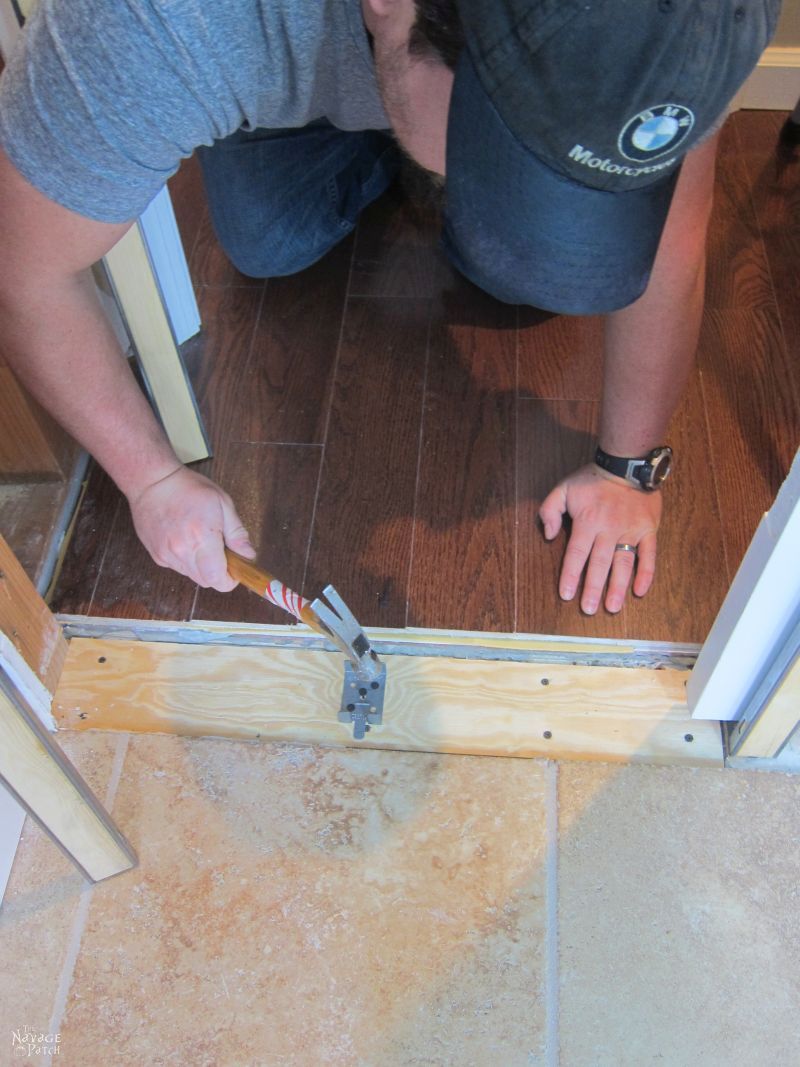
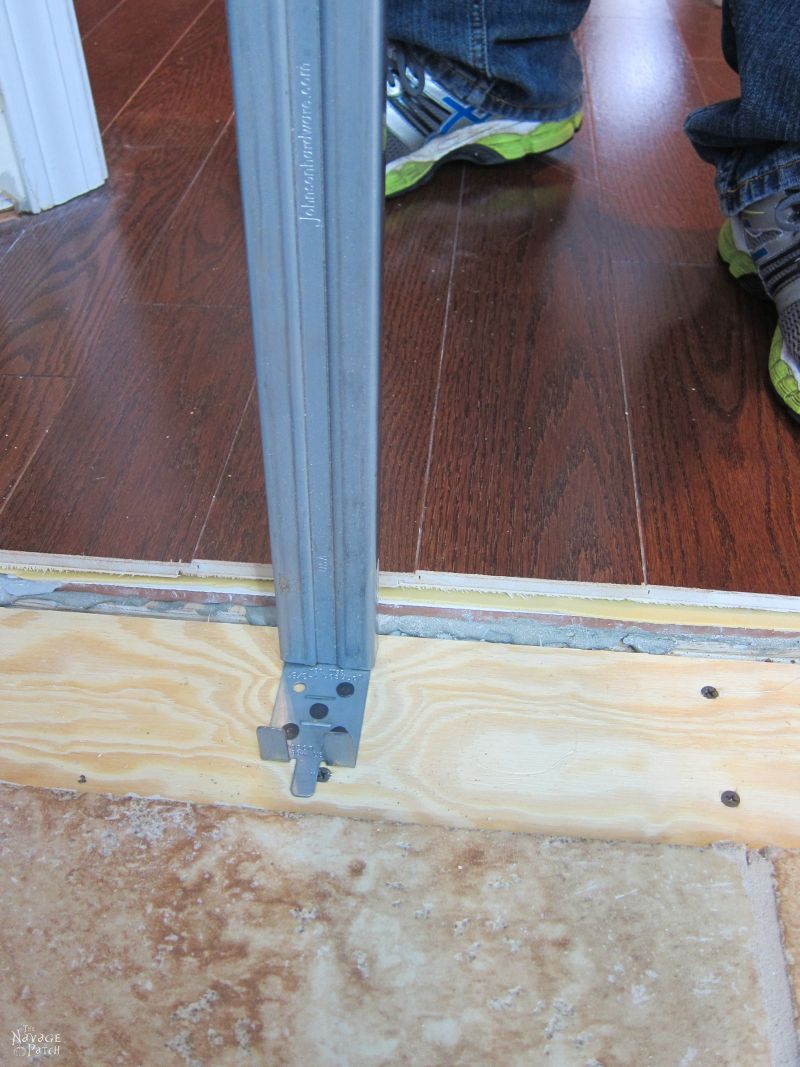
Handan and I marked the needed height for the pocket door frame header on the studs, and then I cut them with a circular saw.


We removed the studs and the base plate they were nailed into. This left a small section of the floor slab exposed. I cut a piece of 1/4 inch plywood and screwed it in as sub-flooring.
This marked the end of work for Saturday. Here’s how it looked.

On Sunday morning, things went a little sideways, and I had my second dolly zoom moment.
Handan was looking at the wiring with a furrowed brow.
“Babes. What are you going to do with the wires?” She said.
“I’ll run them down this side of the wall.” I said, indicating the bathroom side.
“Babes.” She said, “This is going to be the hardest part of the job.”
I looked at her like she had sprouted a second nose. “Are you nuts? It’s going to be totally easy!”
“Babes.” She said, “How are you going to secure the wires so they don’t stick into the door cavity?”
“I, uhhhhh…” I said.
“Babes.” She said, “This is electric work. The wires need to be properly secured. You can’t take chances with electricity.”
“Ummmmmm…” I said.
“Babes.” She said, “We may want to have a contractor finish this project, so it gets done right and in a timely manner. It’s okay.”
And that is when I had my Jaws dolly zoom moment.
A contractor? Give up?
I admit there was a certain appeal, as this project was dragging. But…
A contractor? Give up?
Handan is usually anti-contractor, with their ridiculous prices and often-mediocre work. What was going on here? Why would she willingly offer to pay for one?
A contractor? Give up?
I mumbled a few half-hearted agreements, but my mind was reeling. How could we stop?
I sat for a few moments and tried to process it.
“No, dammit!” I said, “I want to finish this. Babes, we can do it. We are so close!” We weren’t that close, but…
“Babes, I can see this is a big job and a big stress for you. We don’t have to do it.” She said.
“Thank you, my babes. I appreciate you offering. But we can do it. We can finish this!”
She took a few moments to re-assess the situation. We discussed the wiring problem. We outlined our remaining work.
“Okay, my babes.” She said, “Let’s carry on.”
*****
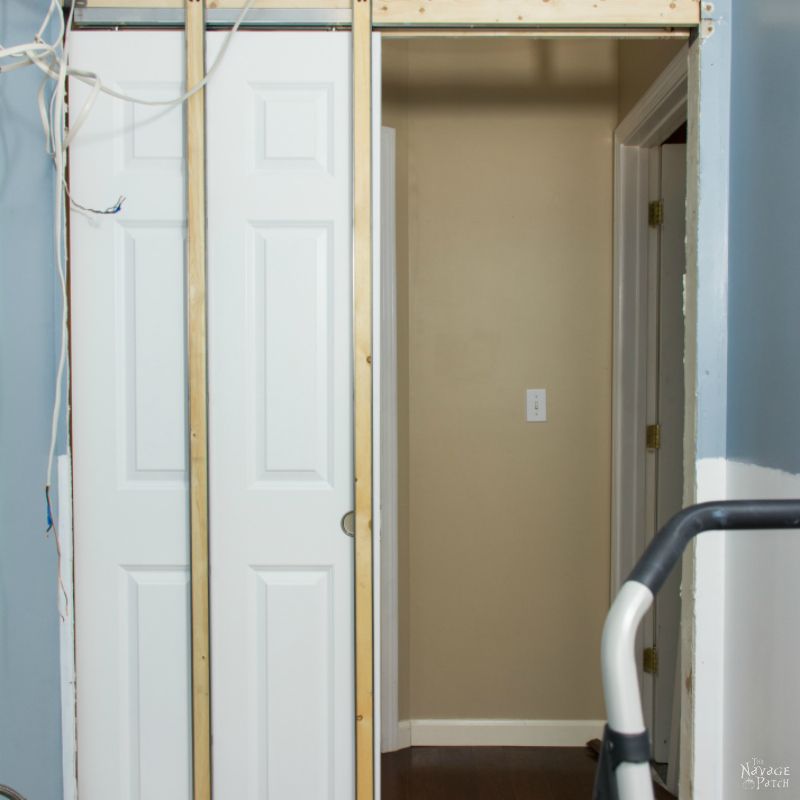
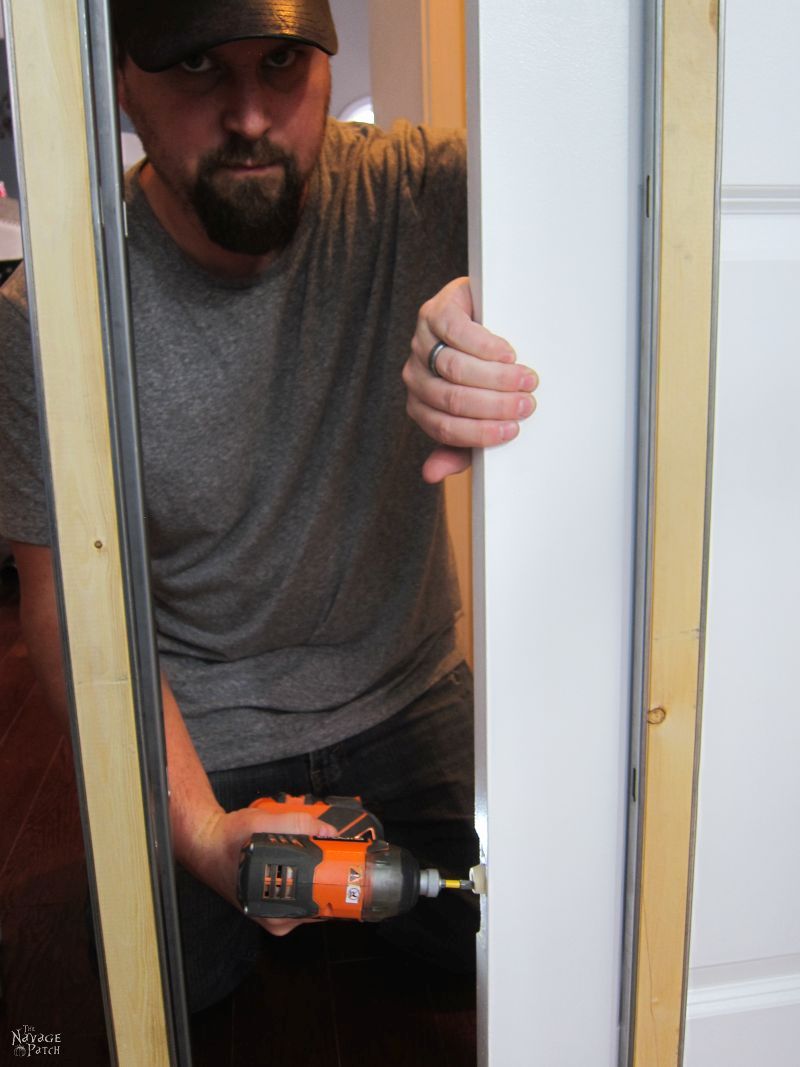
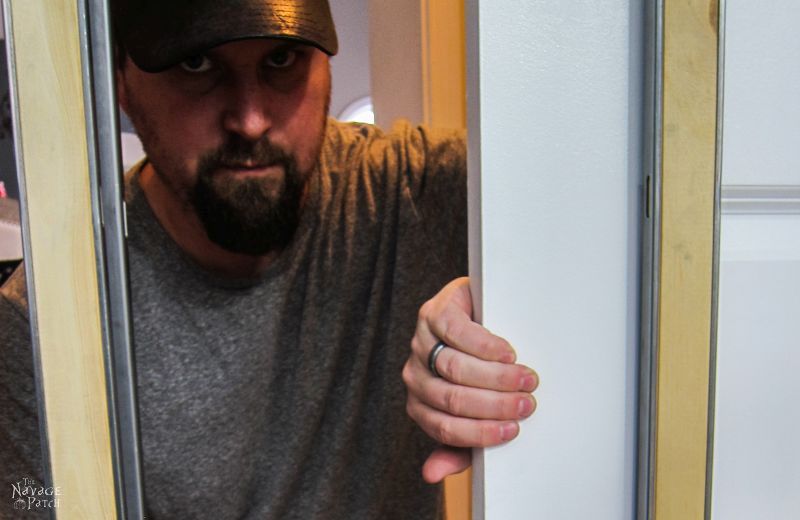
Our first task was to install the pocket door frame header.
We hung the door, and it worked great! Then we realized that we should probably leave it hanging, because we could only reach the hanging clasps when the door was on the pocket (in-wall) side. No big deal.

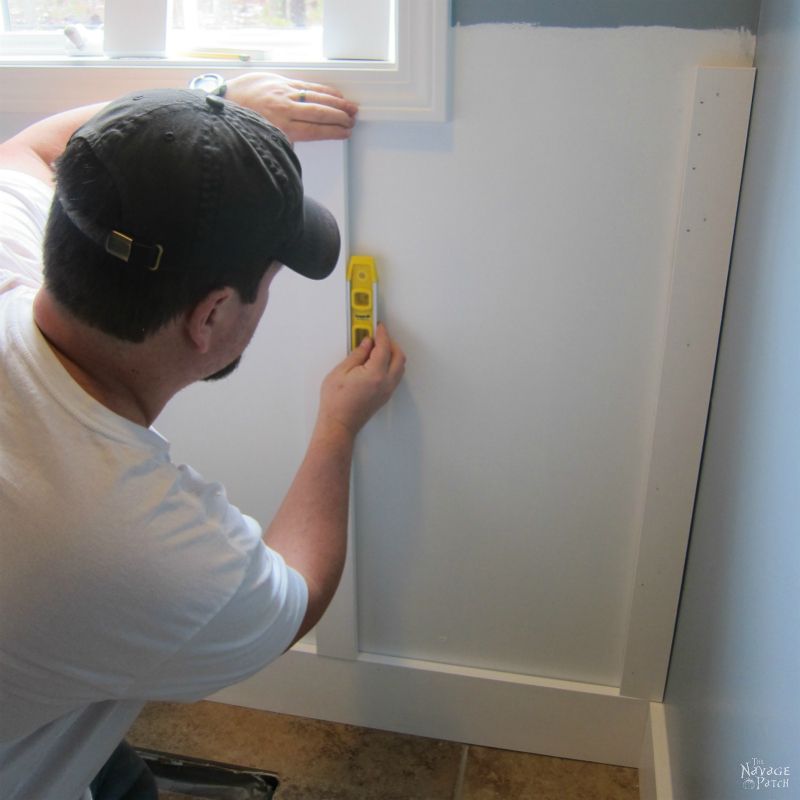
Leaving it hanging would also make Handan’s painting job a lot easier. The door had accumulated 20 years of grime, and it looked like it had been painted at some point in the past, but the “new” paint hadn’t fully covered the original. It was in desperate need of a refresh. Handan started with a deep cleaning and de-glossing.

Then she painted the door with ultra pure white – our white color of choice for this project.

Check out the difference between the ultra pure white and the old white!
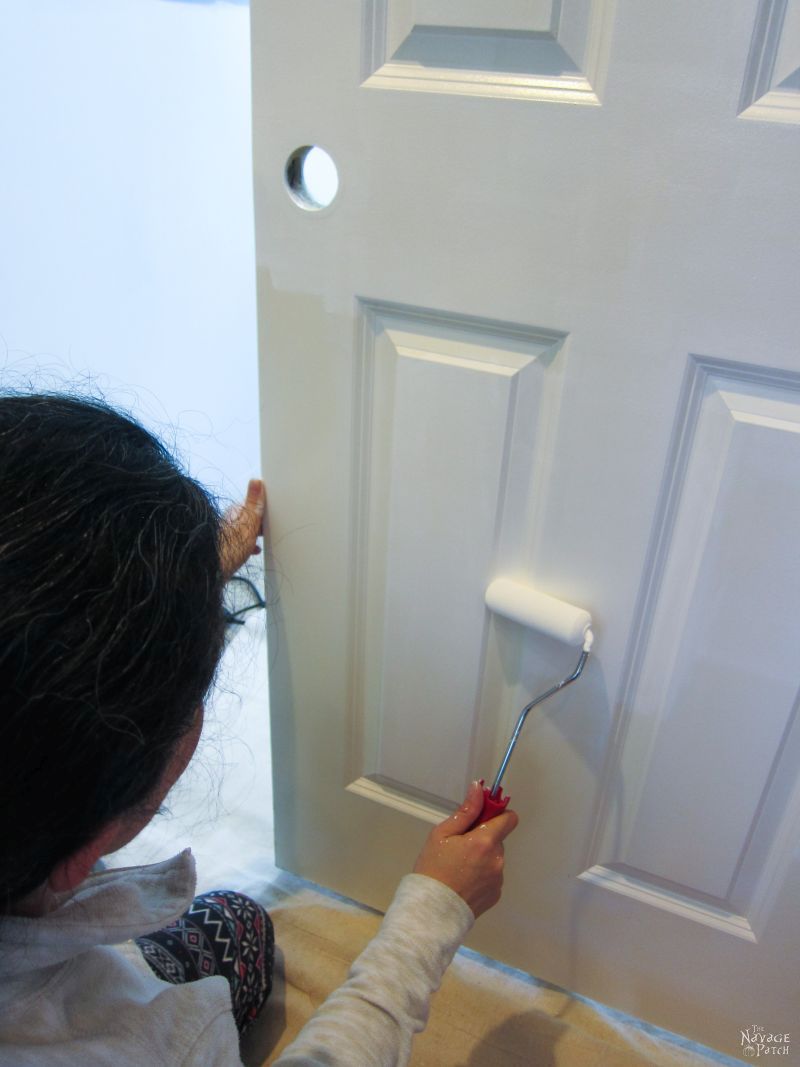
Handan applied several coats of paint, slowly building up the layers until the door shone pure white. When the paint had dried, I installed the door hardware. I still need to fill in the gaps left from the old hardware cavity.

The pocket door frame kit came with four split studs that we attached to either side of the door.
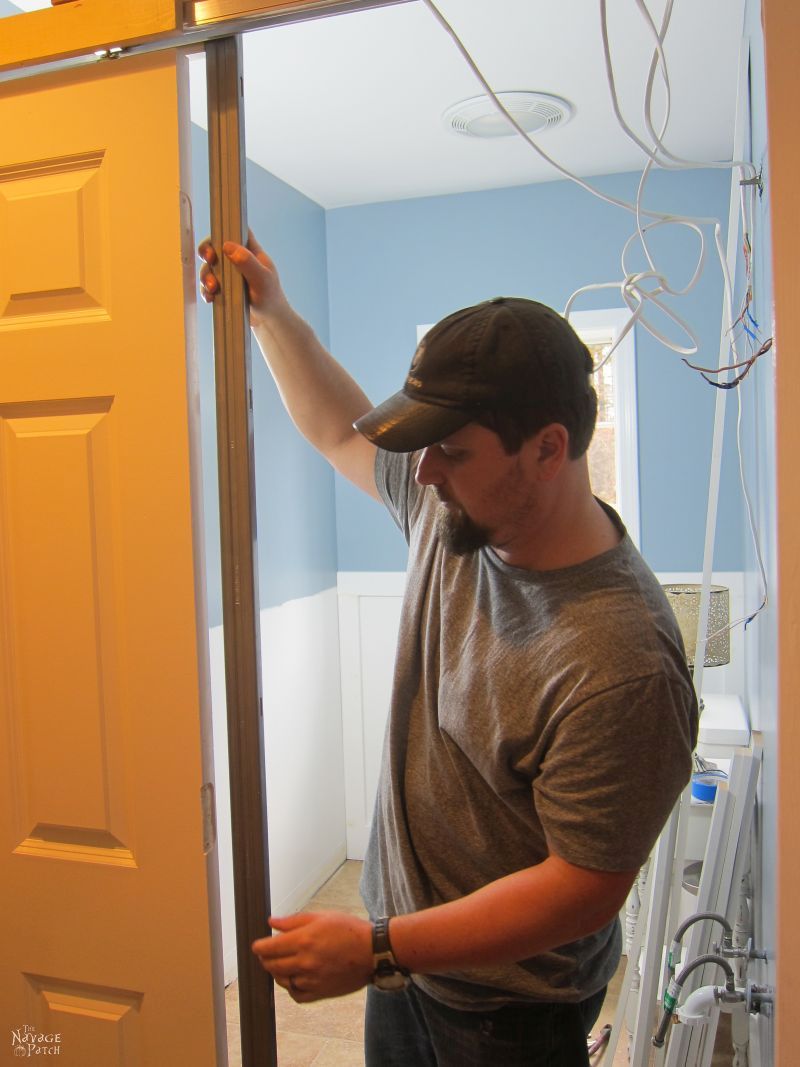

I installed a rubber bumper to the back of the door, and that was it for Sunday.
Wait, what the hell? I look like I’m auditioning for a horror movie!
Let Me In, starring Greg Navage.
Yikes. Anyway, our next step is to put up the drywall and secure those wires. We’ll get a good start on that this weekend, and I’ll have another installment next week.
Here’s how we look right now.

I finished the day in my pajamas with a dry martini.


CONTINUE ON TO>>
Another entertaining blog from the patch,BRILLIANT! You two are so clever and entertaining ,just what i needed after a stressful day. Was helping an elderly friend tidy her home before her son comes to visit when i got a call to say my elderly stepdad had fallen and had to rush off , after half an hour still no sign of ambulance so got him in car and took him to hospital.Nasty bump on head and black eye but he’s ok.Staff are threatening to name the emergency room after him as this was his third visit in two years. i’m threatening to make him a bubble wrap suit so he bounces back up.
Thank you, Catherine! I am so happy to hear that we helped ease the burden of a stressful day. I hope your weekend improved, and I hope you have a brilliant week!
oh my do i smell trouble coming on, can’t wait for the next installment lmao xx
Going to skip this week, as i’m focused on taping the drywall and working outside. The end is in sight, though!!