How to Make a Brick House POP with Limewash Paint
Limewash paint is an affordable way to liven up a dull and lifeless brick house, and it’s an easy DIY almost anyone can tackle!
For something that’s been around at least since the time of Egyptian Pharaohs, limewash is often misunderstood and occasionally maligned. And as we all know, misunderstanding leads to misinformation under the guise of knowledge and instruction.
We’ve been amused and baffled reading blog posts on limewash and watching videos on social media. Some folks contradict themselves within the same article!
So, if you’ll indulge me, I’m going to set the record straight. Let’s have a look at what limewash is, how it’s used and why you should consider it for your brick house.
Is Limewash Paint really a paint?
First, let’s settle this burning question once and for all.
Yes, Limewash is most definitely a paint! Oxford Languages defines paint as “a colored substance which is spread over a surface and dries to leave a thin decorative or protective coating.”
Limewash paint fits that definition to the letter, and don’t let anyone tell you otherwise!
But…
Limewash is different than modern latex, acrylic or other paints most of us are familiar with. Modern paints cure into a non-permeable film. Limewash paint, in contrast, calcifies onto and into the brick (or other porous cementitious material) in a permeable manner that allows air and water to pass back and forth.
Okay great, Poindexter, but who cares?
Benefits of Limewash Paint vs “Regular” Paint for Brick Houses
Before I answer this, I’d like to mention that limewash paint has benefits far beyond brick and masonry, both inside the house and out. But lest I get too broad in scope, I’m just going to focus on brick houses.
Brick, as a construction material or a non-structural cladding, breathes. It draws water in when it rains and then allows that water to evaporate out. This is the natural way of brick, and it needs to take place for the brick to retain its integrity.
Modern paint suffocates the brick, as the latex (or other) film forms a barrier that interrupts its natural breathing cycle.
If this sounds a bit murderous to you, well, it is!
By suffocating the brick, you quicken its demise. Trapped moisture weakens the brick over time, and the freeze/thaw cycle hastens deterioration in cold climates.
Limewash paint, as noted above, allows air and water to flow in and out of the brick unimpeded, just as nature intended. As a bonus, the calcified coating of lime further acts to preserve the brick and extend its useful life.
On top of that, lime is naturally alkaline, with a pH around 12. This alkalinity makes it an inhospitable environment for bugs and other pests.
So What is Limewash?
Limewash has been used for millennia – largely unchanged for most of that time because at its core, it requires only two ingredients: hydrated (slaked) lime and water.
Great. Slaked lime. Got it!
Okay, let’s dig a little deeper, because science is cool and knowledge rules!
How is Limewash made?
It all starts with limestone. Despite the marketing efforts of certain brands, limestone is nothing exotic, and the limestone from this mountain range [points finger in this direction] is no better than the limestone from that mounting range [points finger in that direction]. Limestone is primarily calcium carbonate (CaCO3) – the very same ingredient we use for our beloved DIY Chalk Paint Recipe.
Calcium carbonate, while helpful in making chalk paint and about a thousand other things, is not enough to make limewash paint.
Calcination
First, the calcium carbonate needs to undergo a calcination reaction, or put simply, you gotta cook the crap outta the rock at about 1300 degrees Fahrenheit until it decomposes into calcium oxide (CaO) and carbon dioxide (CO2). This resulting calcium oxide, known as quicklime, is a highly caustic and alkaline substance.
Fun Fact!
Back in the crummy old days of unhinged tyrants, mass graves and gangsters who loved nothing more than to “moider da rat bastid,” quicklime was often sprinkled over the recently deceased to speed decomposition and help the bad guys get away with their crimes. What those goons and despots got wrong was that quicklime is actually a preservative – it didn’t help decomposition one bit! But it did help control the odor, so after they filled in the graves, they wrongly assumed they’d destroyed the evidence of their wrongdoing.
Okay, we’re almost there, so stay with me!
Slaking
To get a step closer to limewash paint, water is added to the quicklime in a process called slaking. This is a massively exothermic process, meaning it gives off heat. With the right amount of water, quicklime will almost instantly reach 300 degrees Fahrenheit. But with a little more water added, a more optimal lower temperature results – perfect for slaking. The result of the slaking process is the conversion of the CaO (calcium oxide) into Ca(OH)2 (calcium hydroxide).
The calcium hydroxide remains stored in water for up to two years. This aging period improves its binding properties, and this is what plain old calcium carbonate lacks.
I’ve read some articles by other DIYers claiming this brand or that brand “ages the slaked lime to perfection” like it’s some sort of fine wine or cheese. This is a bunch of hooey. All commercially available limewashes contain aged slaked lime!
Did you know?
There is a way to make limewash on-the-spot with unaged slaked lime, but it is well beyond the scope of this article and a far more involved process for the DIYer. It’s called “hot limewash,” and it’s making a comeback in certain restorative construction circles. The quality is said to be far superior to aged-slake limewash.
Now the calcium hydroxide – called slaked lime, hydrated lime and a few other names – can be mixed with water to form limewash paint!
Of course, you don’t have to go through all that gobbledygook! You can buy hydrated lime at the hardware store and mix it with water yourself! I’ll address that and other pre-mixed brands a little later in the post. For now, let’s carry on and talk about the versatility of a limewash paint finish.
Types of limewash paint finishes on brick
Limewash paint can yield a slight translucent whitewash look all the way up to completely opaque coverage. Most people tend to favor a distressed look achieved by applying one coat of limewash paint and then selectively removing areas of limewash with a garden hose. By doing so, they’re trying to replicate how a single coat of limewash would naturally distress over time, but to my eye, when done indiscriminately, it can look just as awful as those overly-distressed “shabby chic” pieces of furniture that polluted everyone’s social media feeds last decade. You remember – the ones that looked like they got caught in the middle of a three-way gorilla fight.
With two or more coats (like we did), you get an opaque finish that won’t readily weather. In fact, according to the Technical Data Sheet of the brand we used, a two-coat application will be good for “20-30+ years.” But you know how it goes – they promise the moon and deliver a hunk of blue cheese – so we’ll see how this stuff holds up over time!
How to DIY limewash a brick house
You, sir or madam, are a rock star and a scholar for making it through my chemistry lesson. Now let’s get painting!
Tools and Supplies for Limewashing a Brick House
Brick House limewash painting SUPPLIES LIST
Affiliate links are provided below. Full disclosure here.
- Limewash paint
- Masonry brush
- Power washer
- Telescoping extension wand (optional)
- Drill with mixer attachment
- 5-gallon plastic bucket
- 1-gallon buckets (we used Dollar Tree buckets)
- Spatula
- Measuring cups
- Latex or nitrile gloves
- Safety glasses
- Drop Cloth(s)
Limewash prep
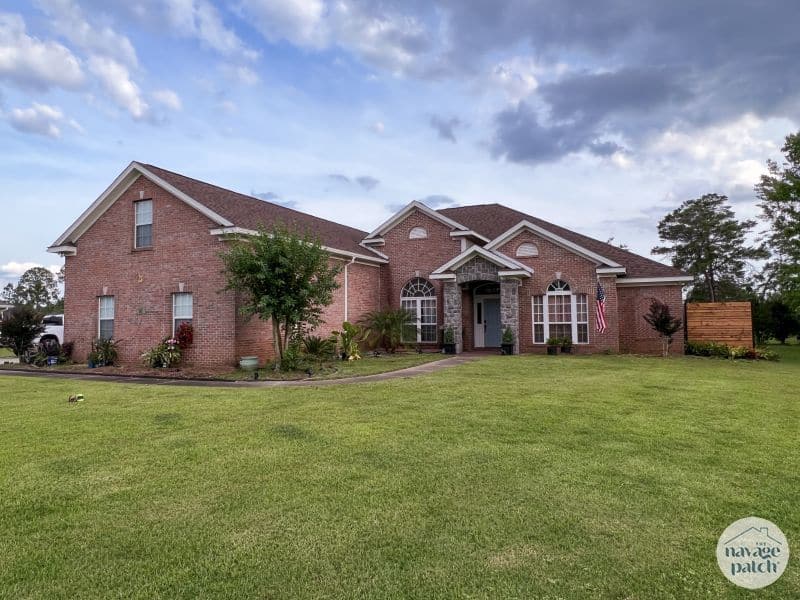
First, let’s see a before pic. Actually, I’ll show you two. Here’s the beforiest of them all – from the month we moved in.
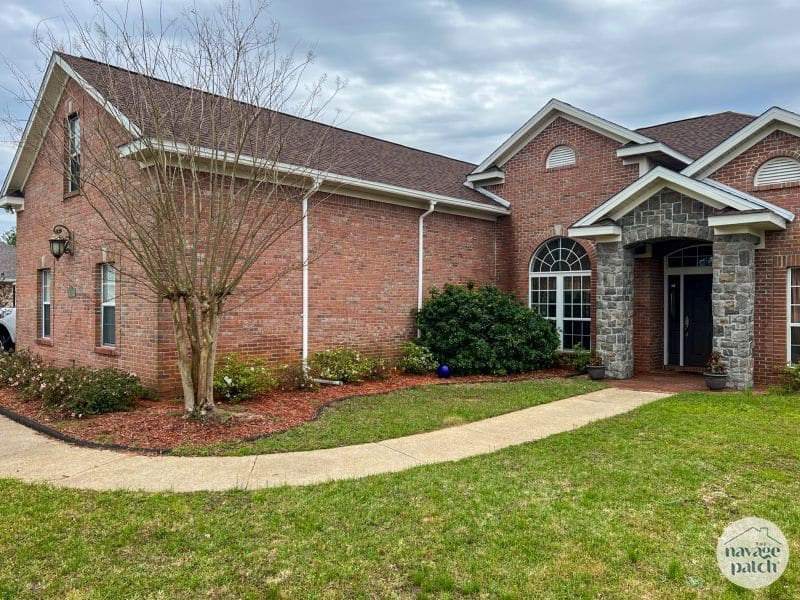
And a year later after we started to improve the landscaping.
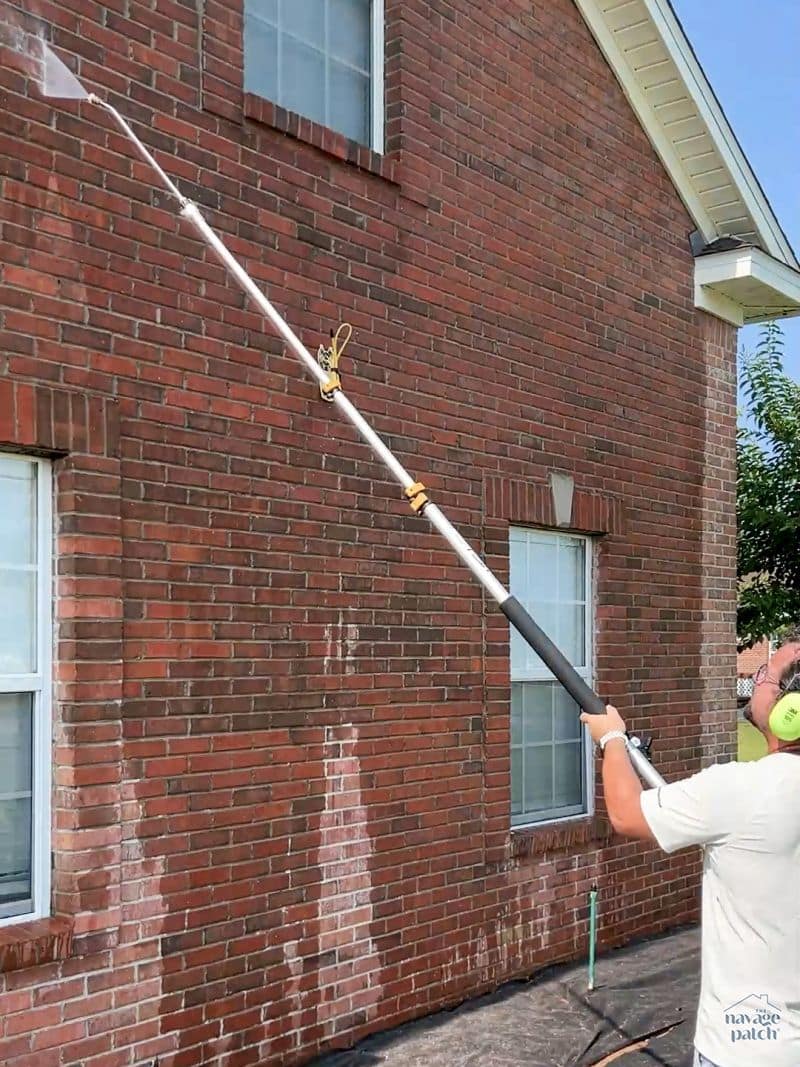
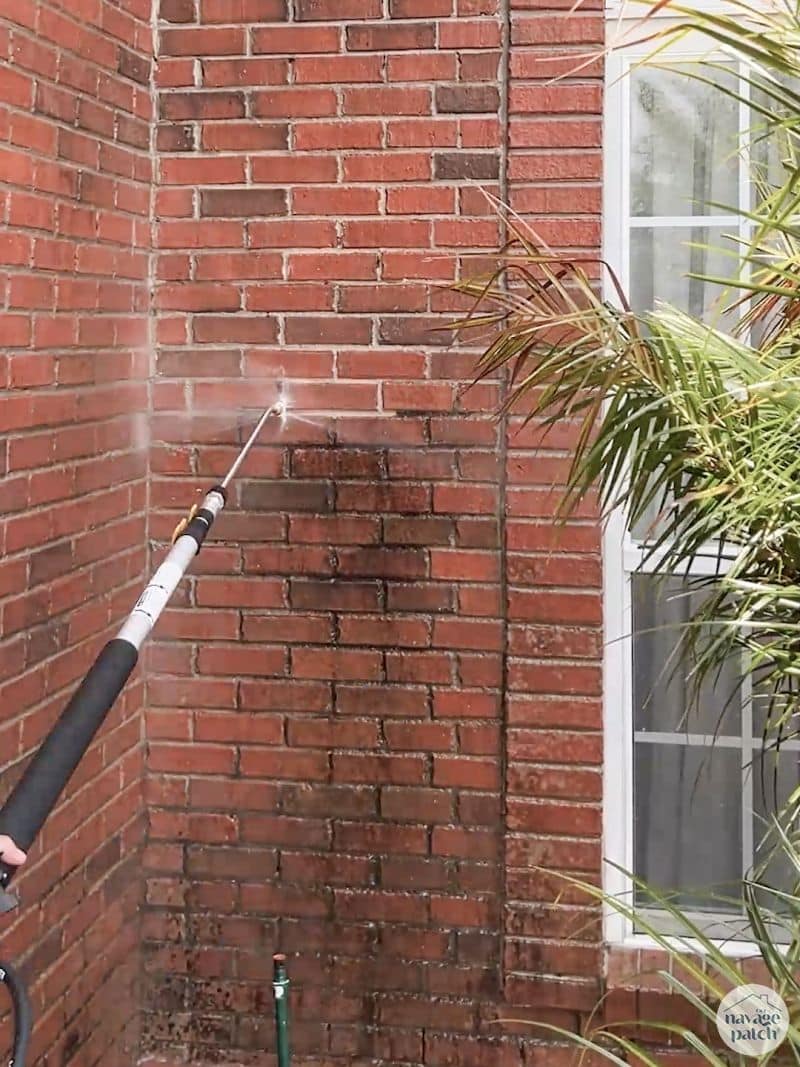
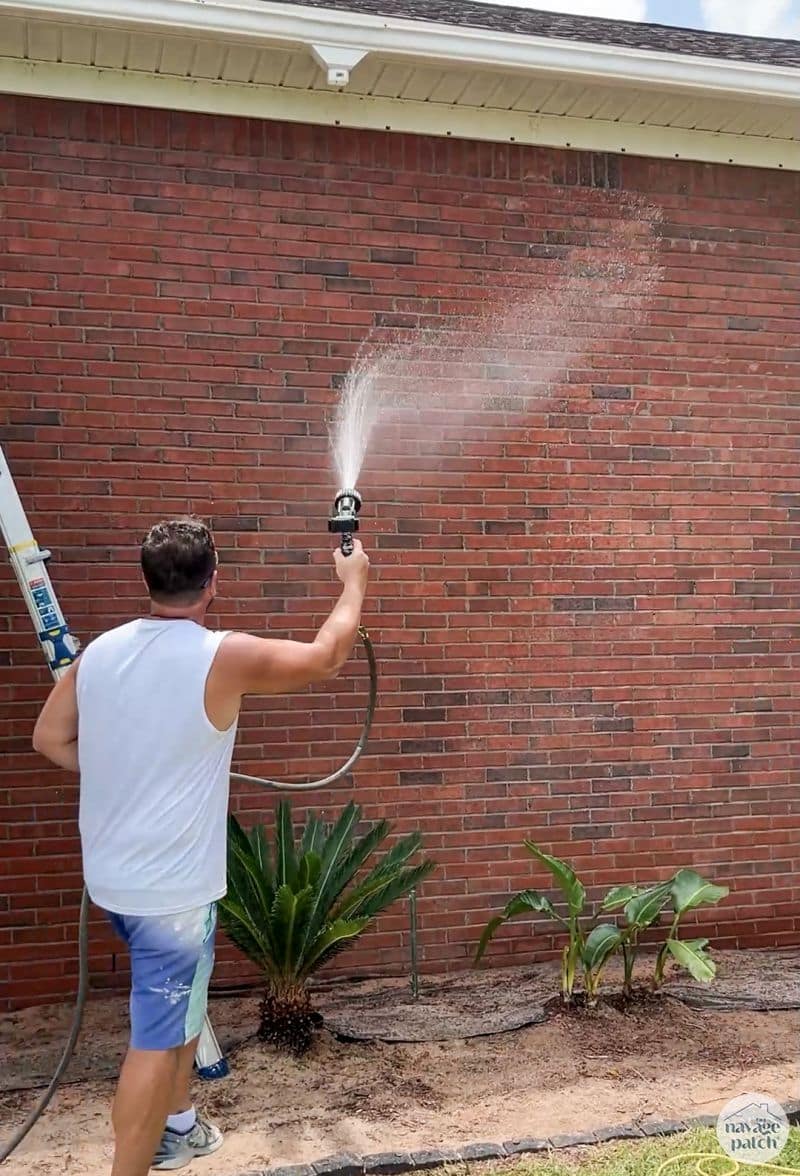
Limewash paint works best on clean brick with open pores, so that means power washing. To reach the highest peaks, I used a telescoping extension wand, and I hit every square inch not only to clean the brick and mortar, but to remove the sandy patina that most bricks had. It was like a sand-colored German Smear, but the power washer blasted it right off. I probably could have left it, but I didn’t want to risk the sand flaking off and carrying calcified lime with it.
Power washing was a slow and tedious process – especially with the wand fully extended. But it needed to be done, so there were no shortcuts.
The joke of a gutter system created areas of algae – very satisfying to wash!
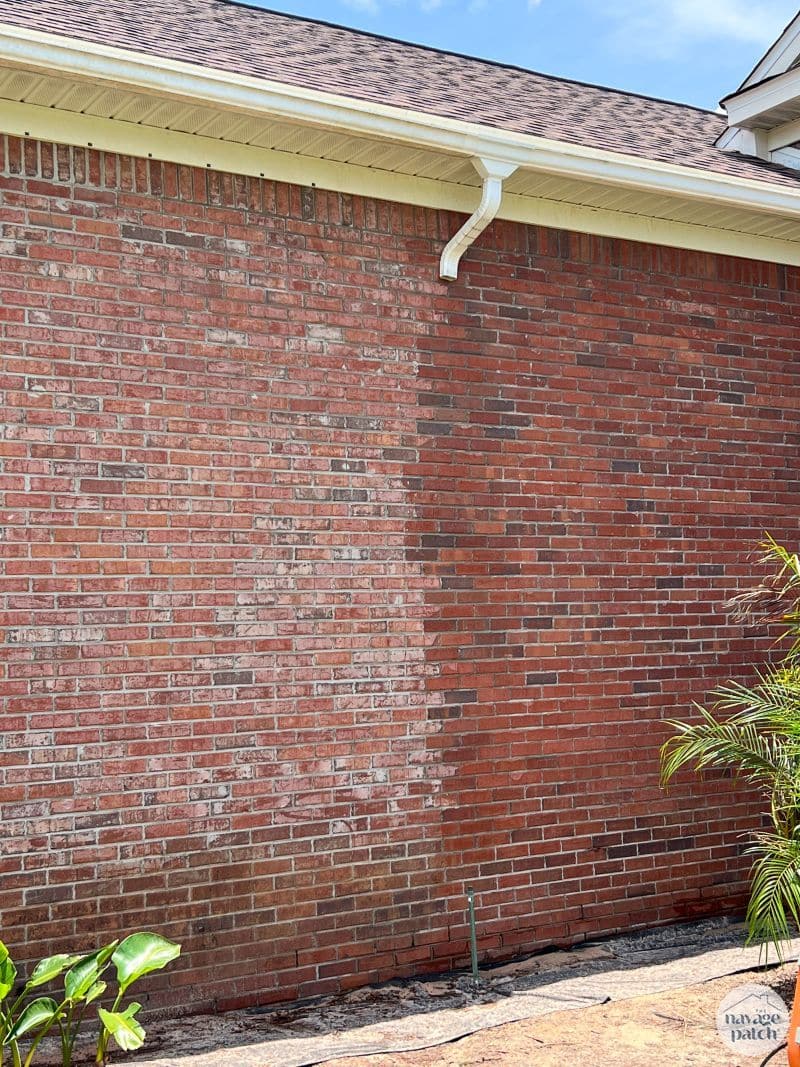
Sandy smear on the left, cleaned wall on the right.
Making the Limewash Paint
There are two ways to make the paint for your brick house – make it yourself from hydrated lime and water or make it from lime putty available from several companies.
The former is by far the cheapest method, but you’re stuck with one color – pure white. The latter is more expensive, but you have the option to tint the limewash to your desired shade. I’ve studied the Material Safety Data Sheets for several brands, and unlike the hydrated lime + water limewash, the lime putty brands are made from 10-40% hydrated lime with calcium carbonate and chemical binders making up the rest.
The buckets of lime putty need to be diluted before use, but before that, they require mixing, as the slaked lime putty and water readily separate.
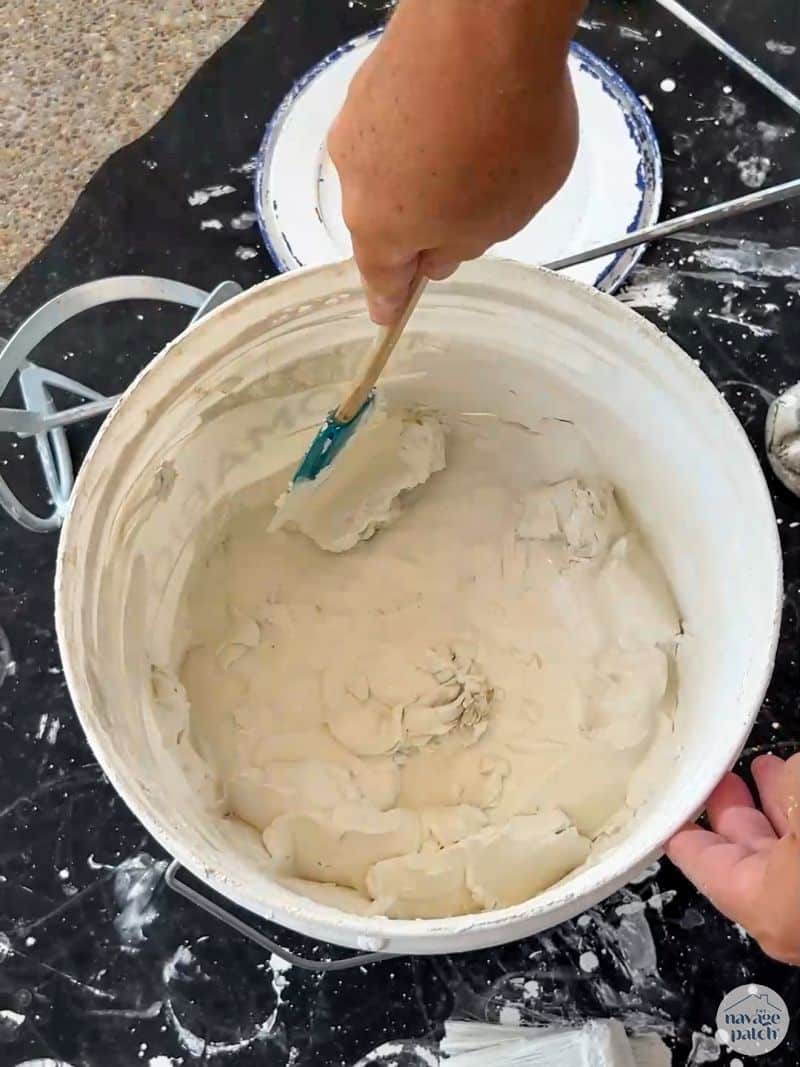
I used a large mixing paddle with my drill to mix the putty and water back to a uniform consistency. It resembles sour cream when properly mixed.
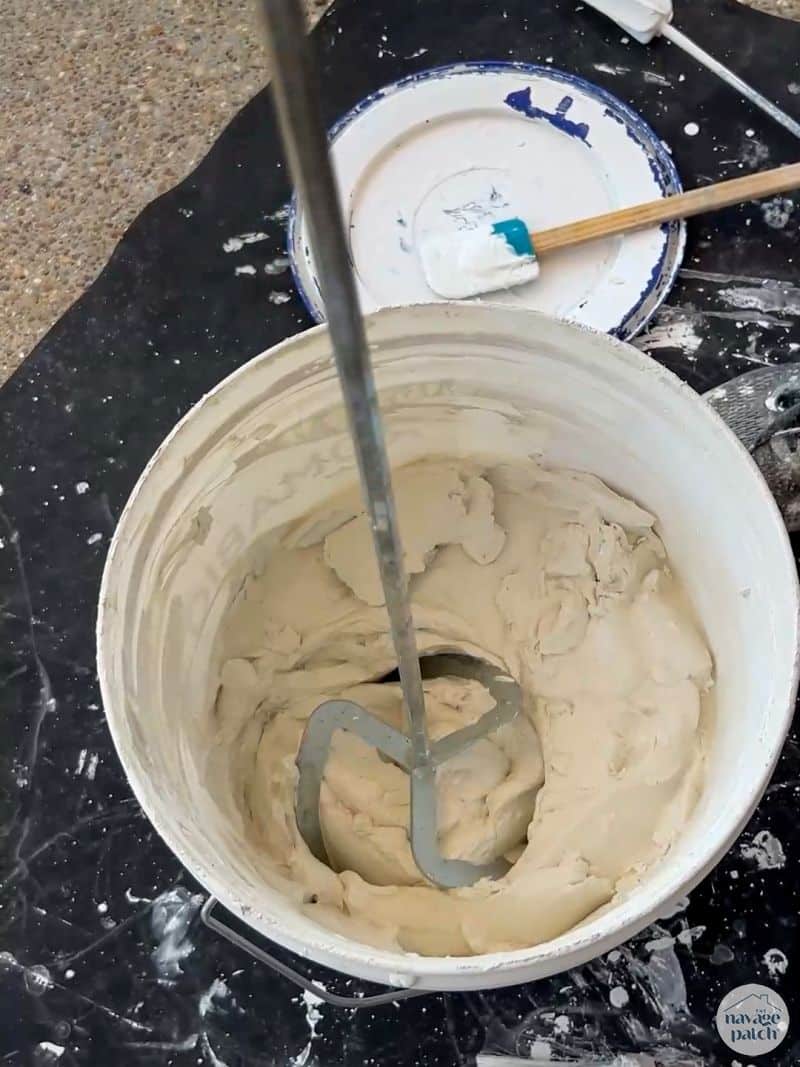
Here is the mixed lime putty.
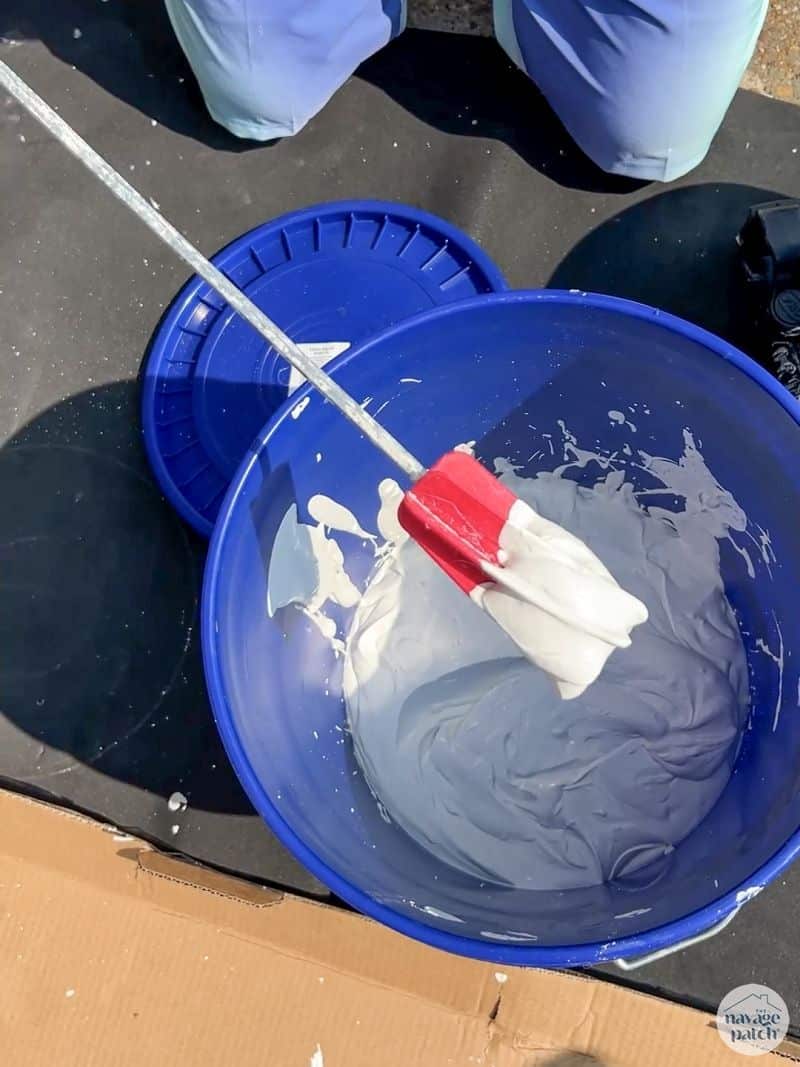
The desired finish – whitewash, distressed, or opaque – dictates the level of dilution.
For full coverage opaque, we found that a dilution of 50% worked best. That means 1 part water to 2 parts concentrate. And yes, I wrote that correctly. Dilution is different than mix ratio. A 50% mix ratio would be 1:1. A 50% dilution is 1:2.
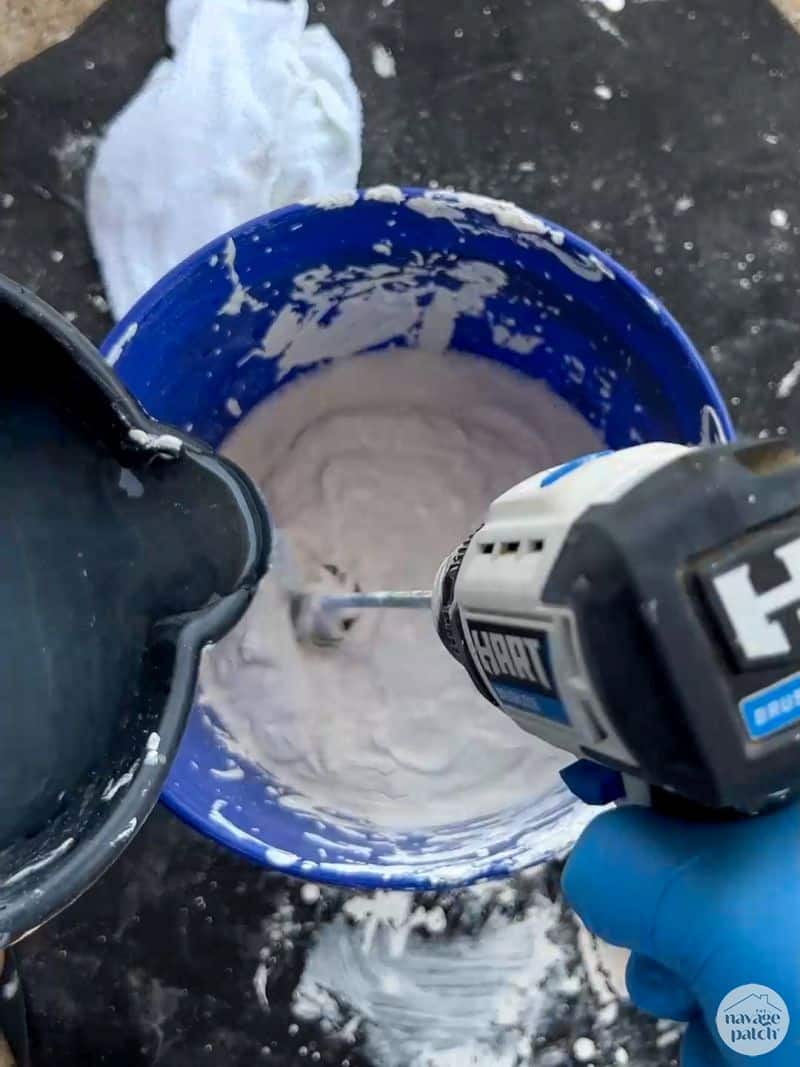
I mixed the limewash paint in a separate 5-gallon bucket with a smaller paint-mixing attachment on my drill.
Limewashing the House
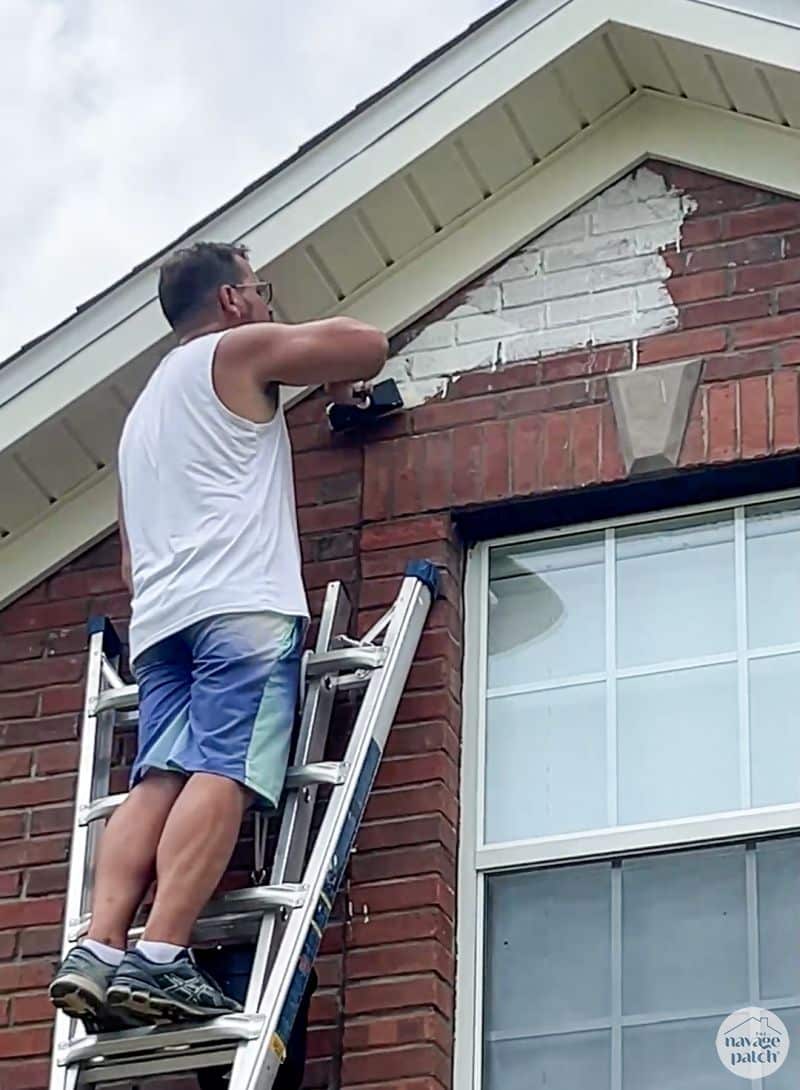
A test patch helps to understand how the limewash paint goes on the brick, how it dries, and how it distresses.
This is one coat, still wet. Limewash paint goes on translucent and becomes opaque as it dries.
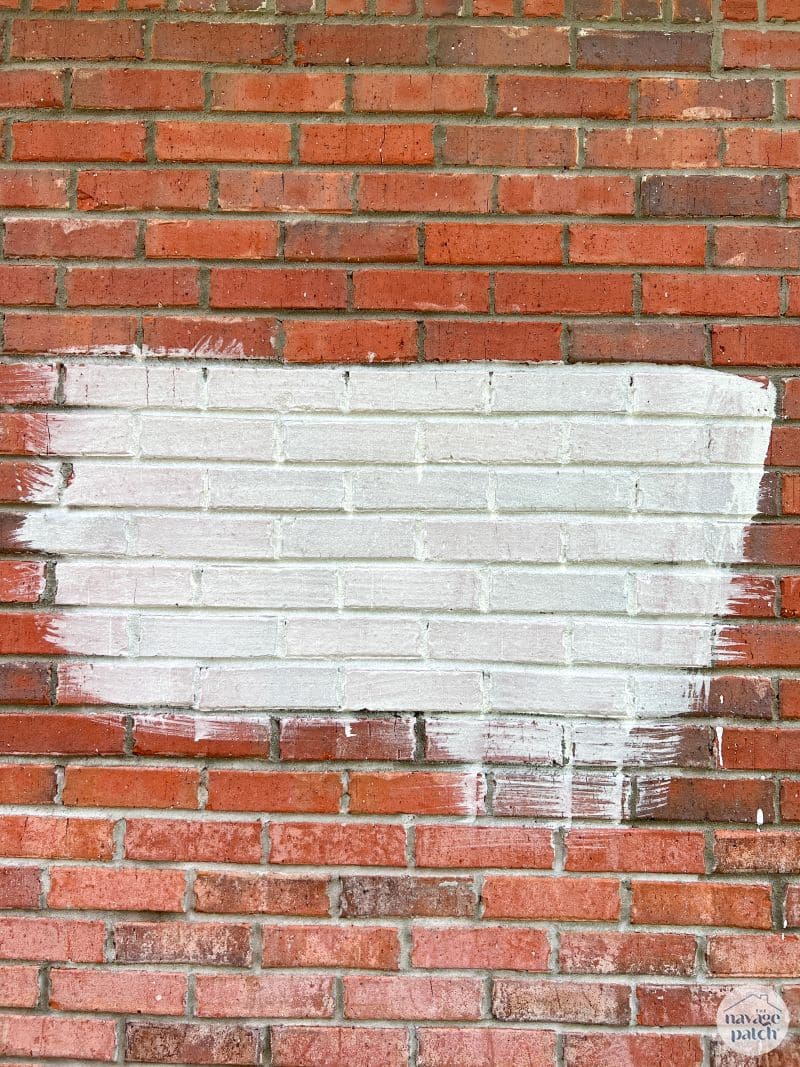
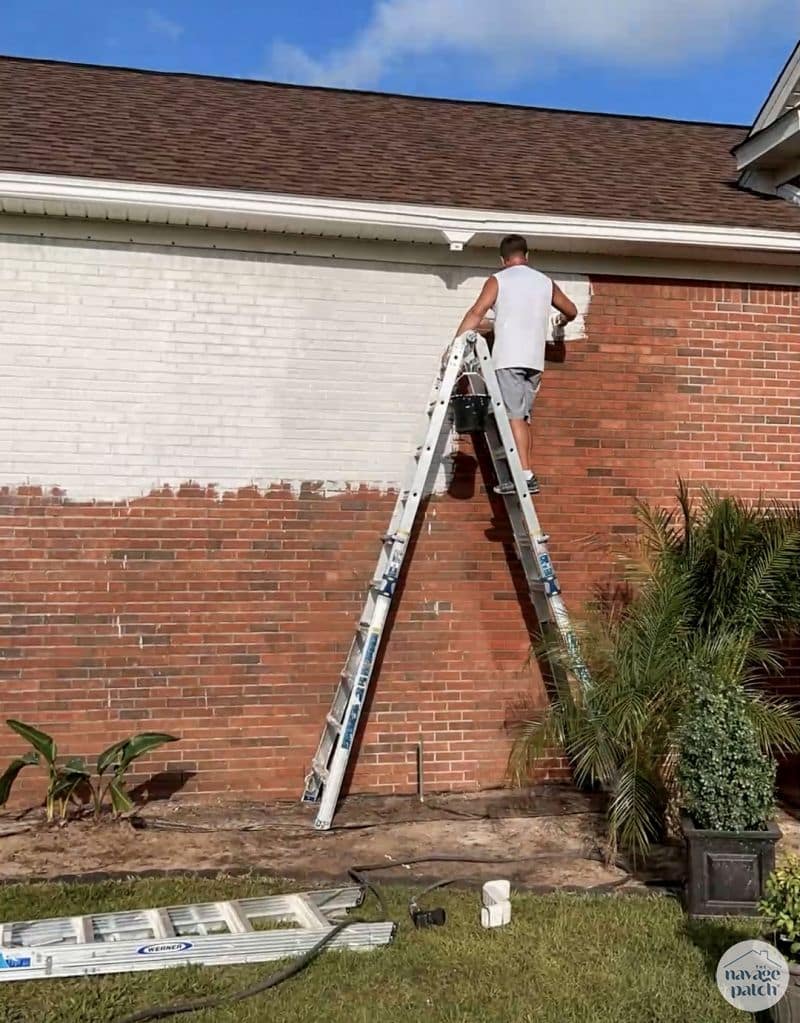
Before I applied the limewash, I first sprayed the section of brick with a garden hose. This is a crucial step, as damp brick allows the limewash paint to dry more slowly which increases absorption of lime into the brick.
The limewash paint gave me no surprises, so I started in on the main front face of the house – nothing like living on the edge!
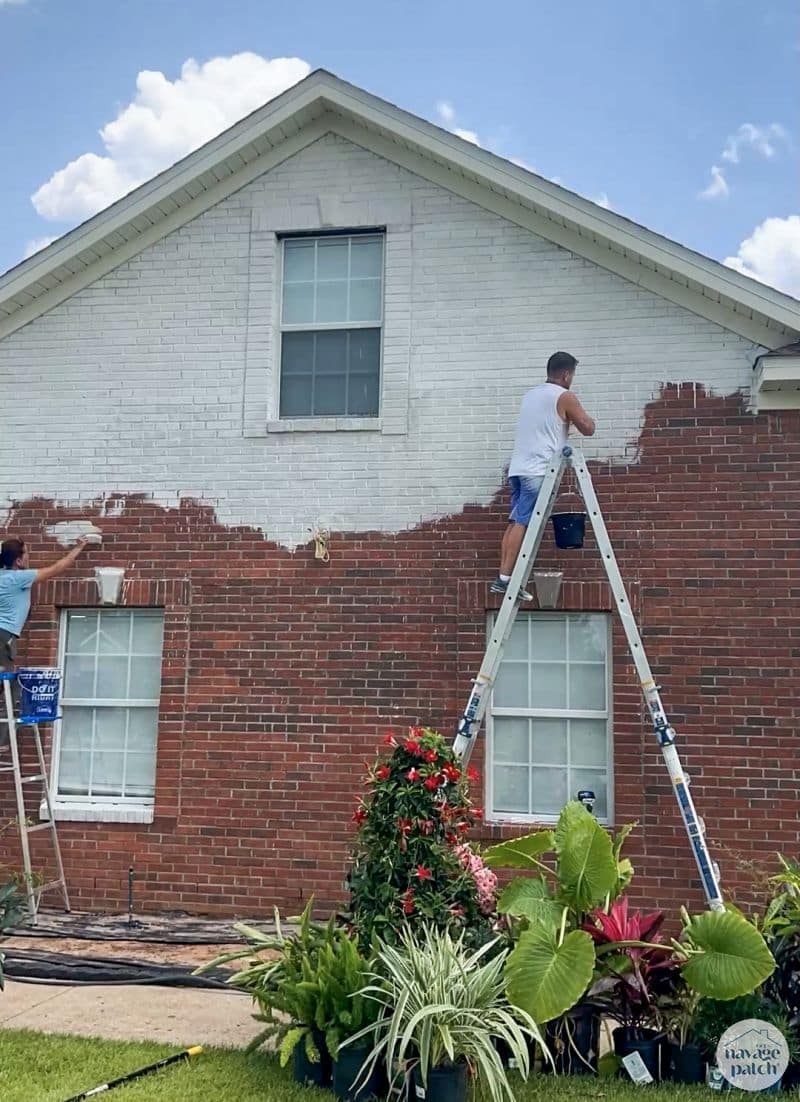
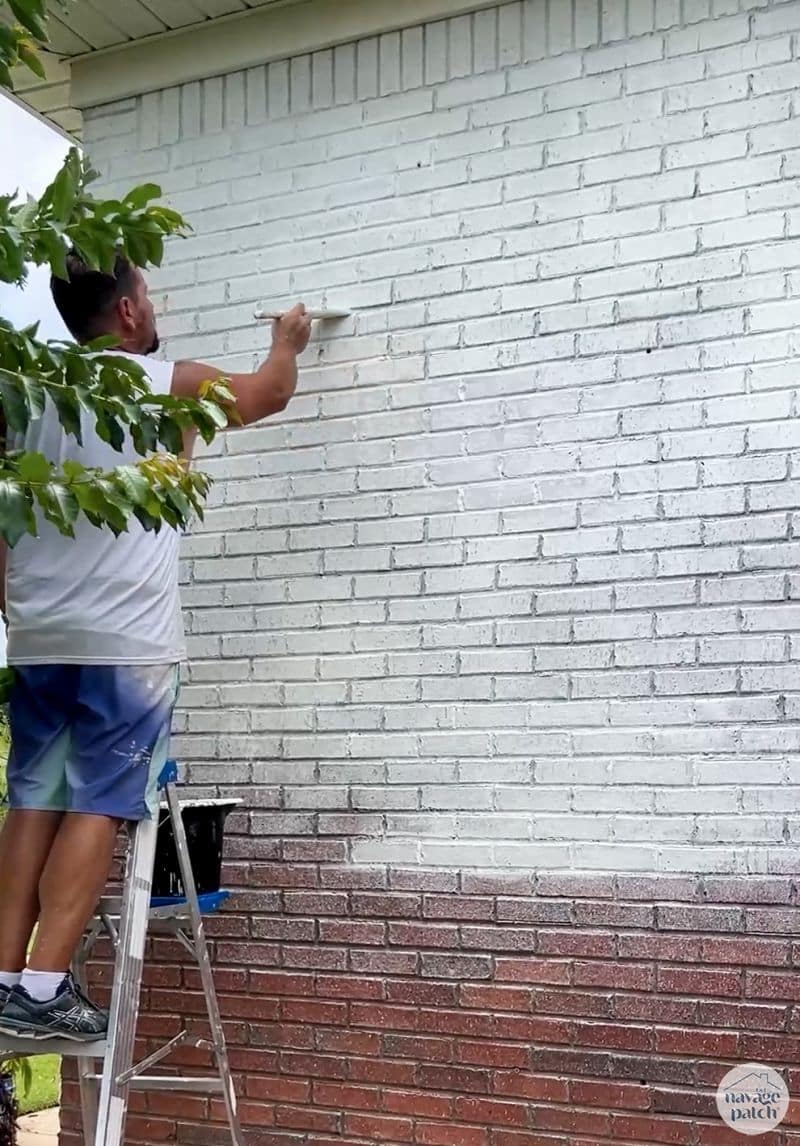
I used a large, soft-bristle masonry brush to apply the limewash paint. The dense, soft bristles hold a huge amount of the watery paint. With my babes’ help, we knocked out 1 coat on the huge garage face on the first day. We could have possibly finished two coats, but we had two rain delays.
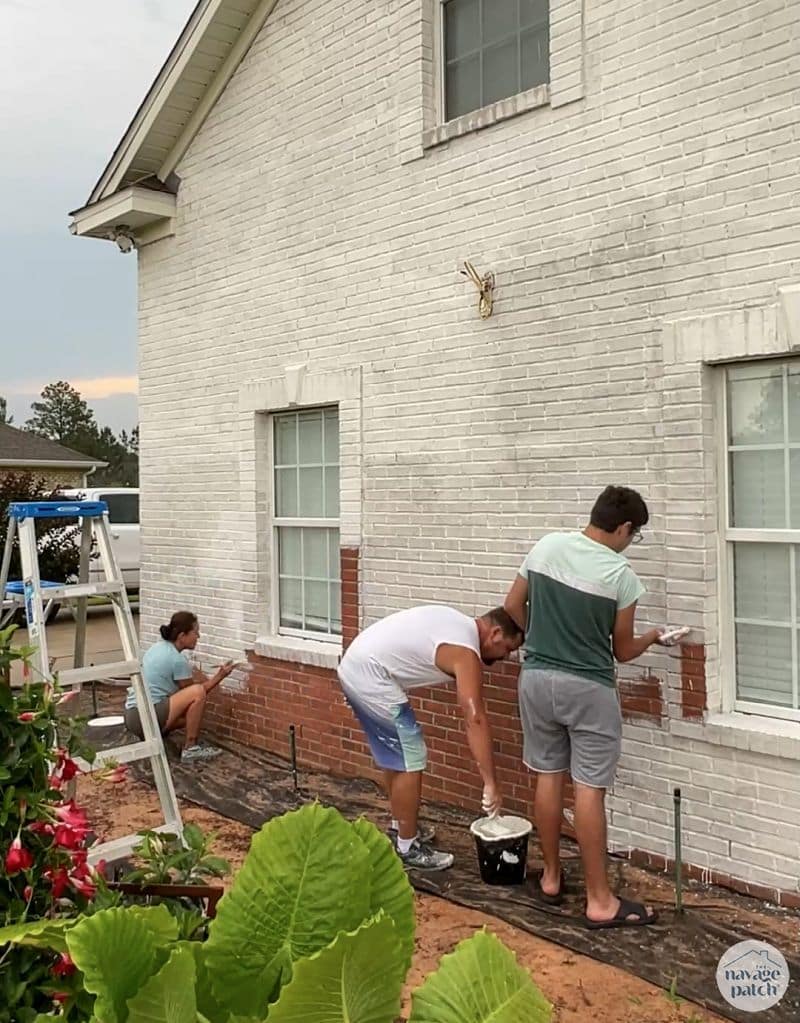
Finishing up the wall before sunset after the second rain delay with Baris’s help.
My preferred method to apply the limewash is to load up the brush and then focus on the mortar lines. The deep mortar requires a heavy coat of paint, and by focusing on those lines, the brick faces got ample coverage in the process.
The second day, we again focused on the garage wall, and again we had rain delays, so we only finished the second coat.
Can You Spray Limewash Paint?
On the third day, I wanted to try a paint sprayer to see if it would speed things up a bit.
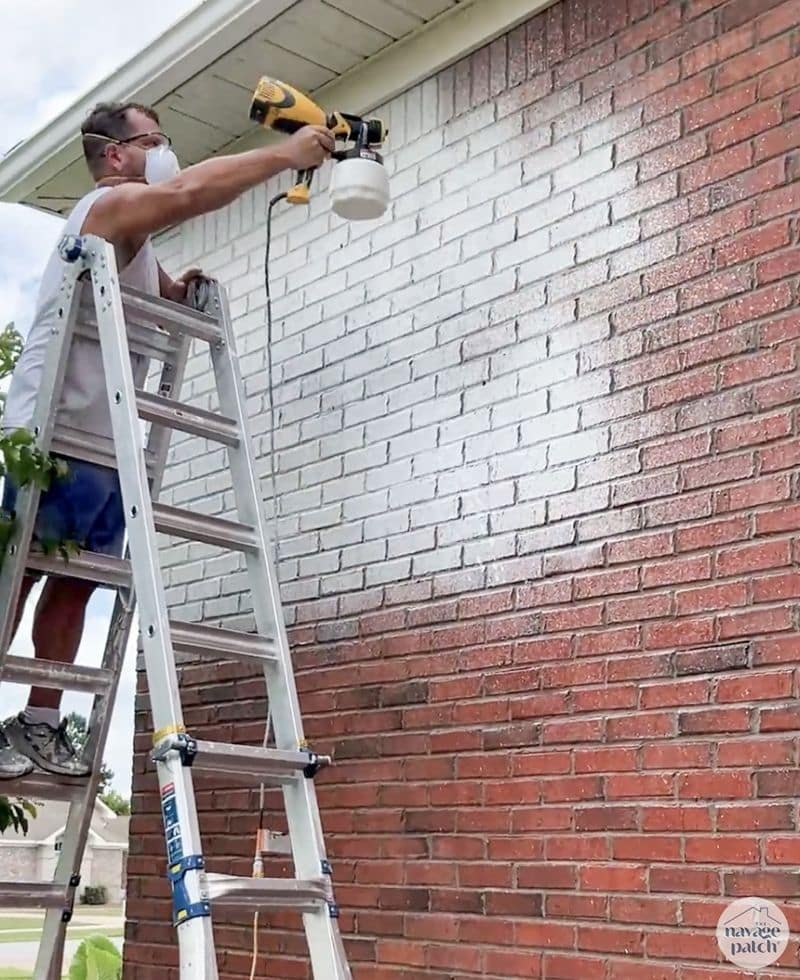
But the sprayer couldn’t get enough limewash paint into the mortar lines without overspraying the brick faces. I quickly gave up on the idea and had to go back over the mortar with a brush in the sprayed area.
For the rest of the house, I used the masonry brush. With a little practice, I nailed down my technique and hummed right along!
If we wanted a distressed look, l would have sprayed the bricks here and there after the first coat. But for the full coverage opaque look, the Technical Data Sheet recommends two coats. The first coat needs about 3 hours to dry before second coat application.
Cleanup
Limewashing is a messy business, make no mistake. But most spills and drips clean easily with a hose or a damp cloth if caught early. If not, a wire brush helps to remove it from sidewalks, driveways and shingles.
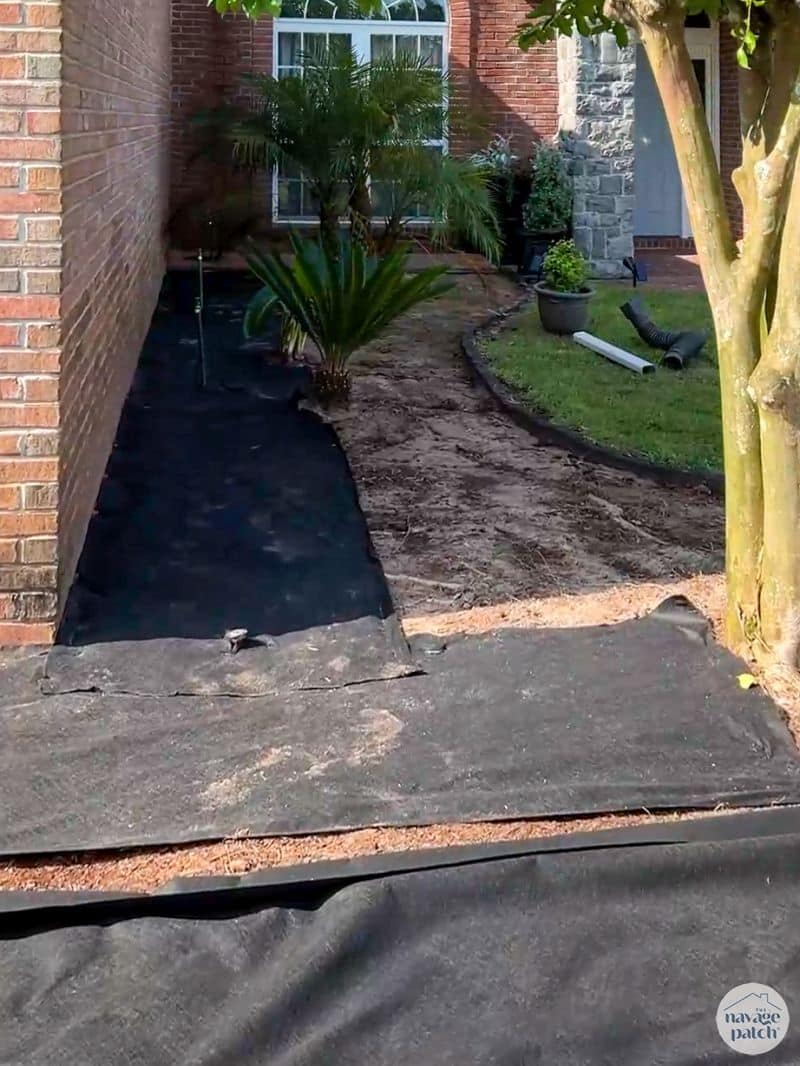
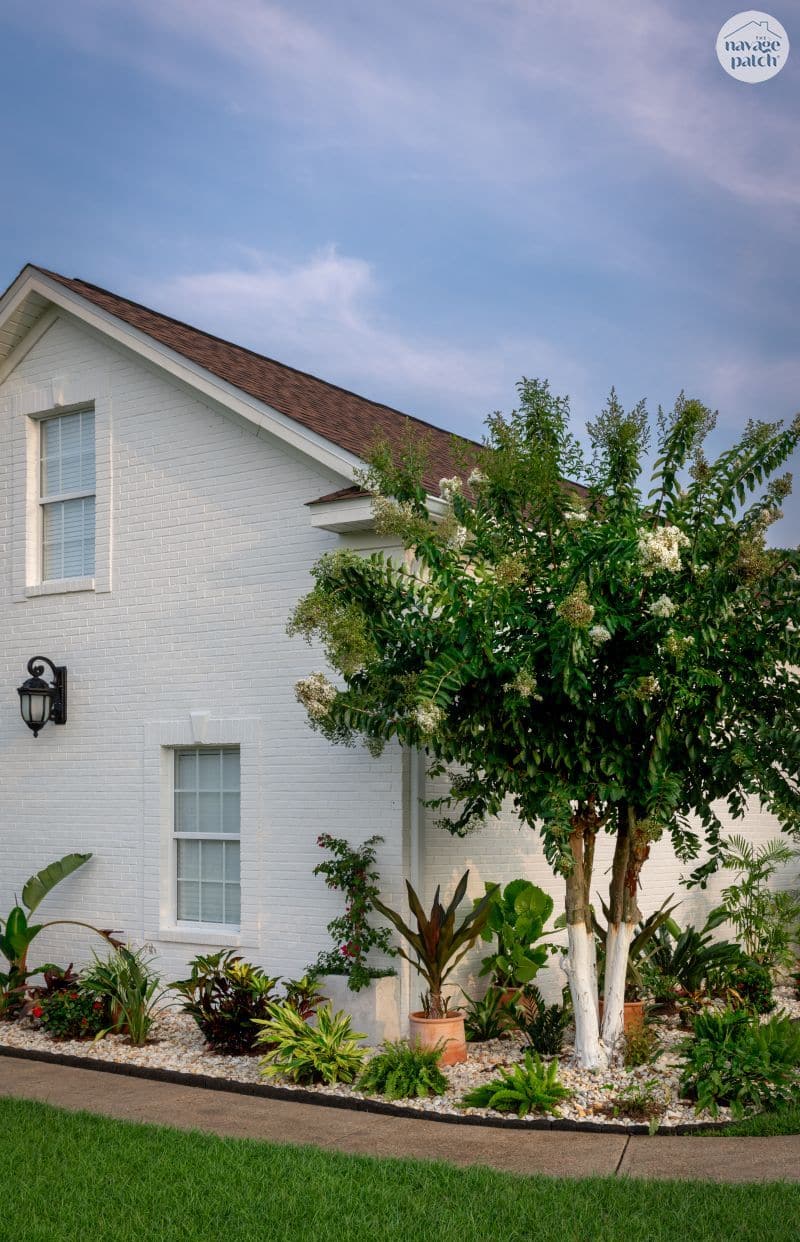
Some Additional Work
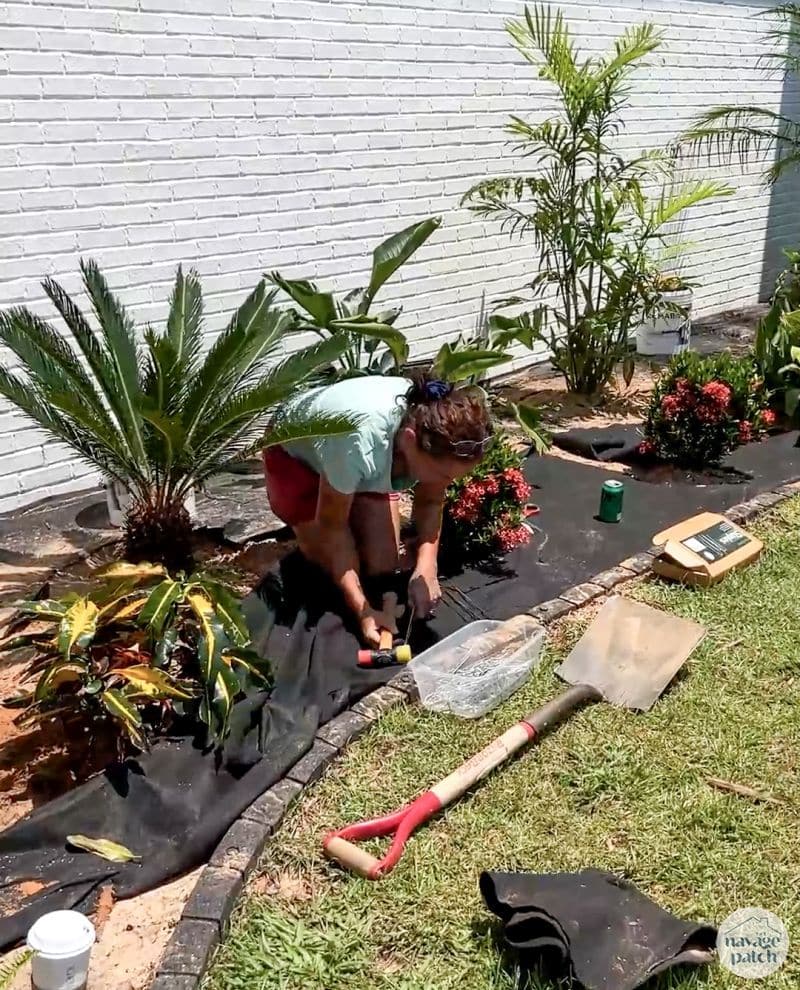
With all the work we put into the house, we couldn’t just leave the crappy landscaping as-is, so we removed all the old shrubbery (before limewashing), and prepared the beds with landscape fabric.
Handan bought a huge swath of jungle from various garden centers, and she and The Boy inserted those plants into the ground.
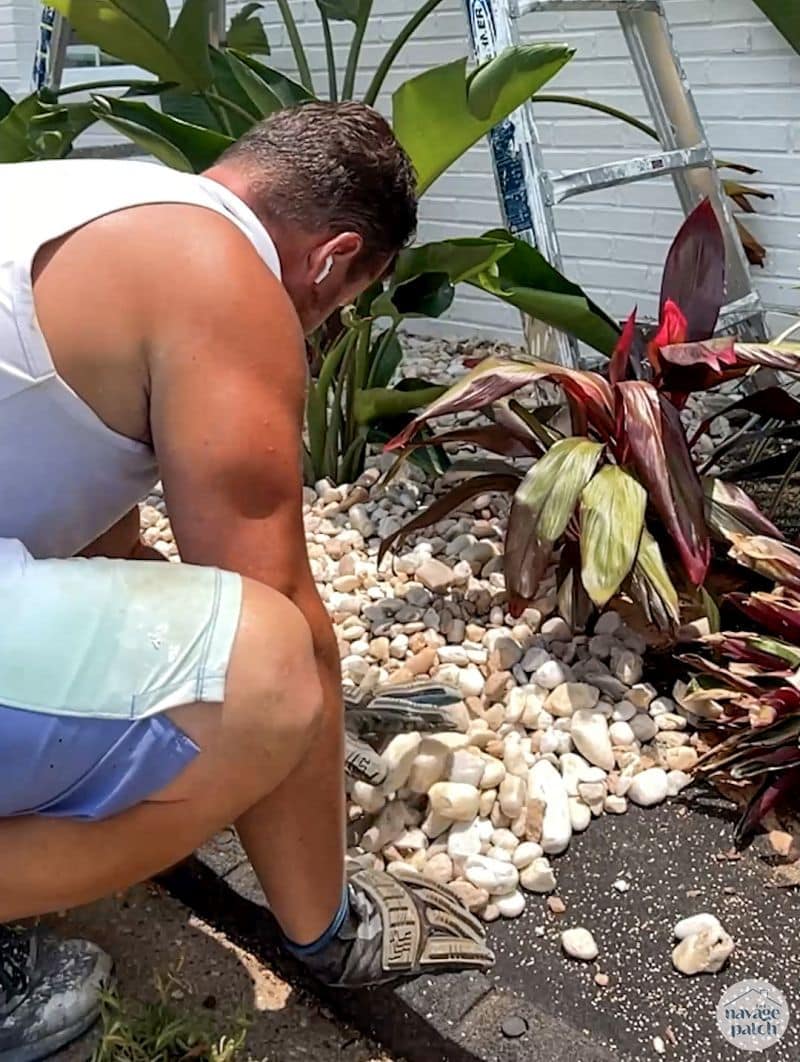
Meanwhile, I hauled wheelbarrow loads of river rock from the 7 tons we had delivered.
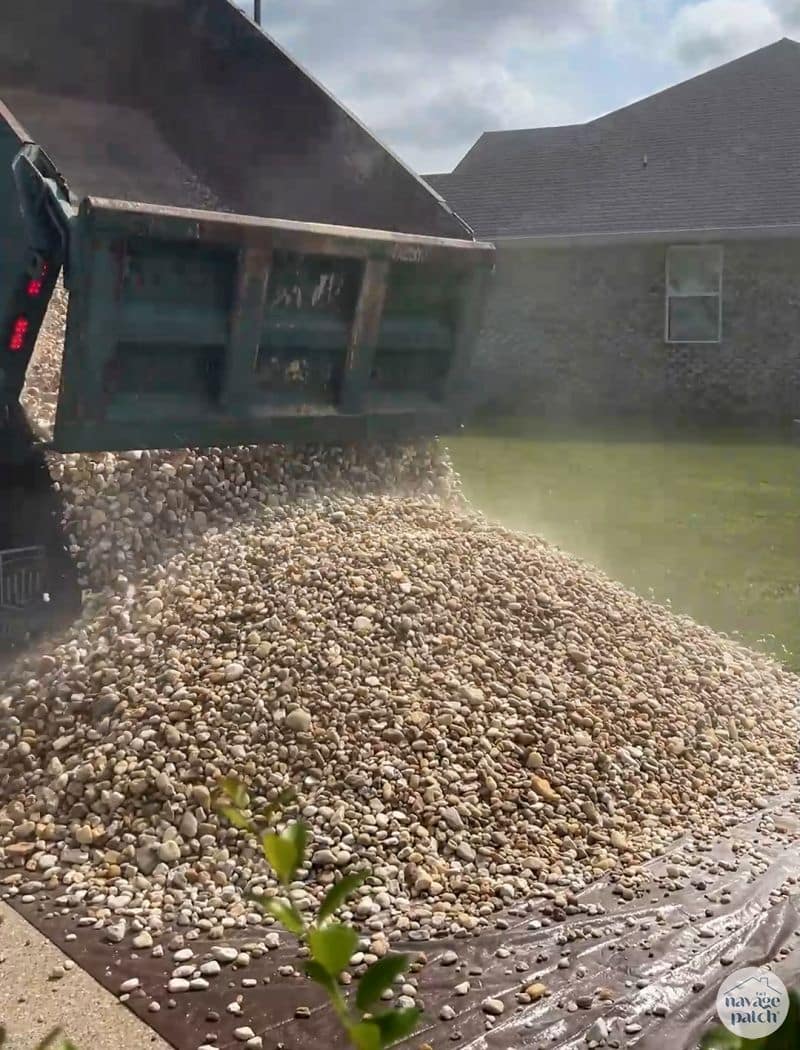
I spread the rock around the beds. To keep the plants cool, we later moved the rock away from the stems and trunks and placed a nest of pine straw around each.
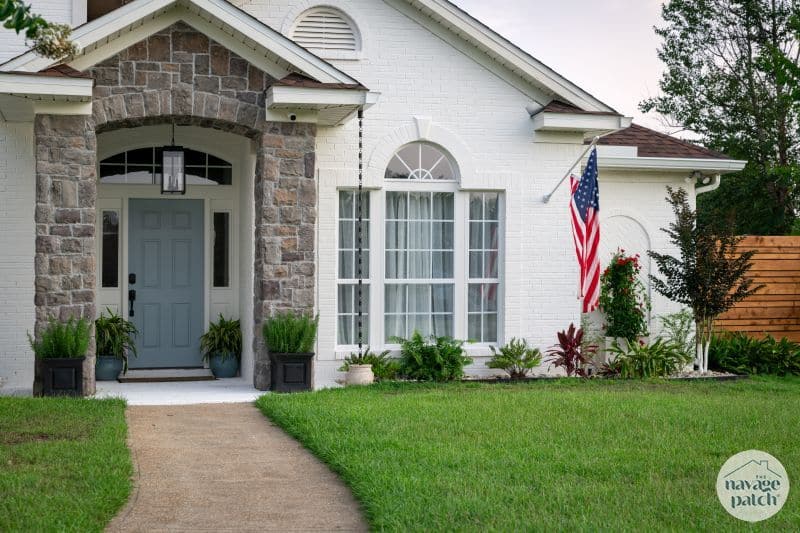
We hung a new pendant in the portico. Well, to be fair, I dropped and smashed it while trying to hang it. After I got the glass replaced by a local glass shop, my babes insisted on hanging it herself…and she nailed it!


During this whole process, we hired some pros to tear out the crappy DIY gutter system the previous owner had installed and replace it with a proper 6-inch system complete with rain chains for the front portico.

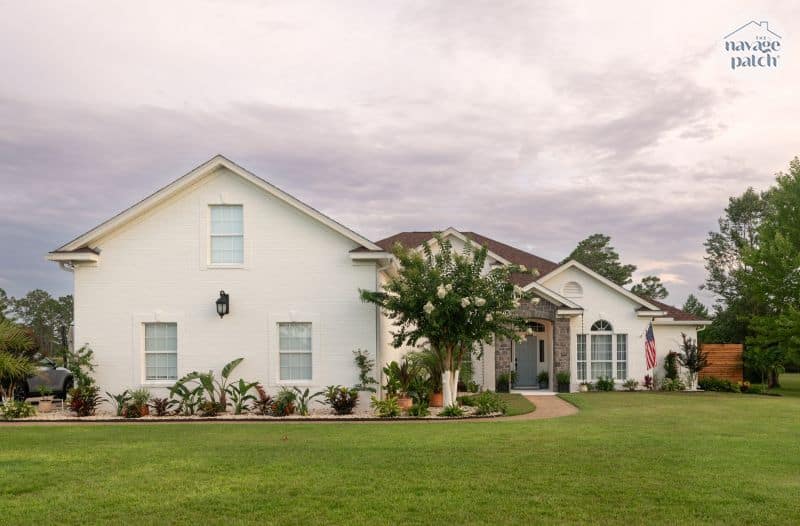
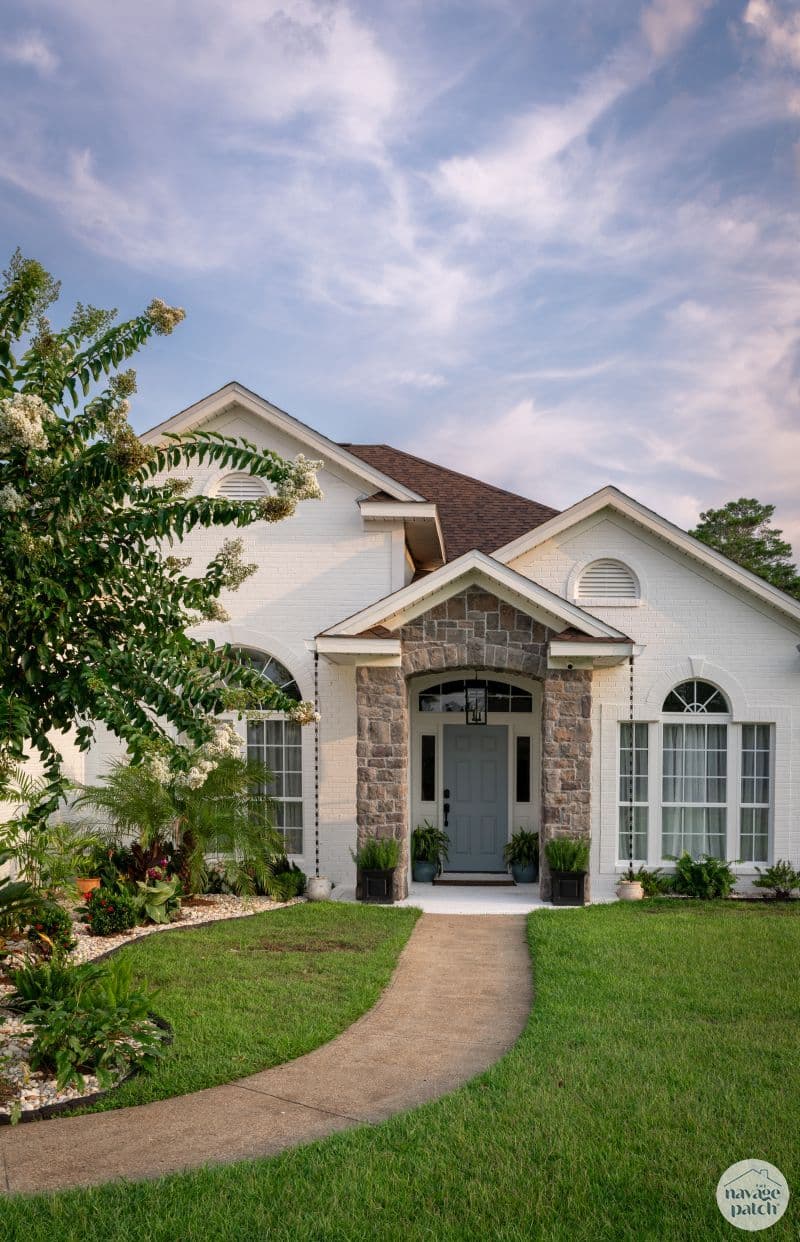
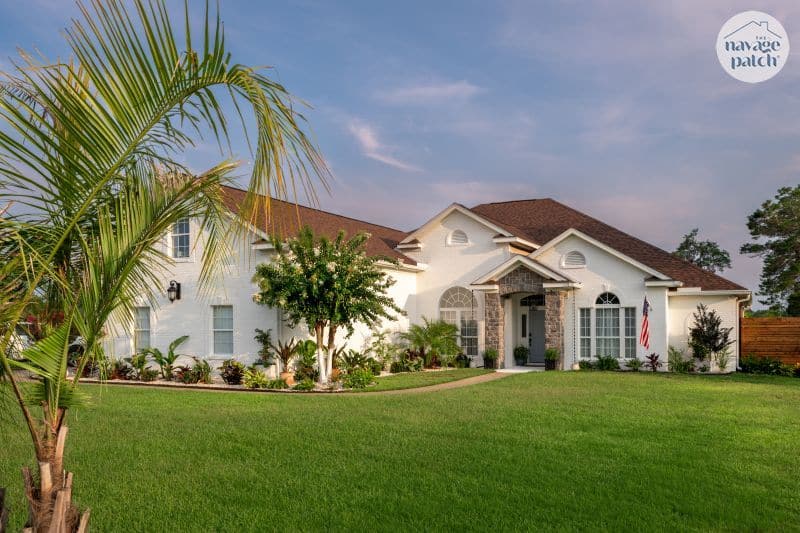
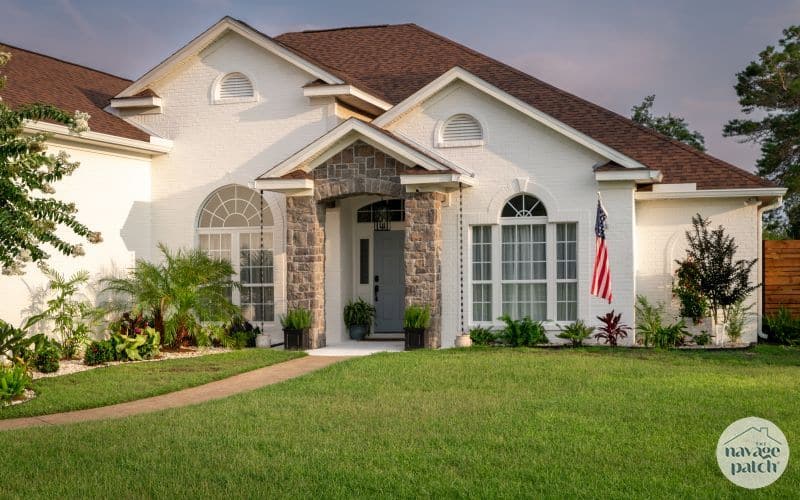
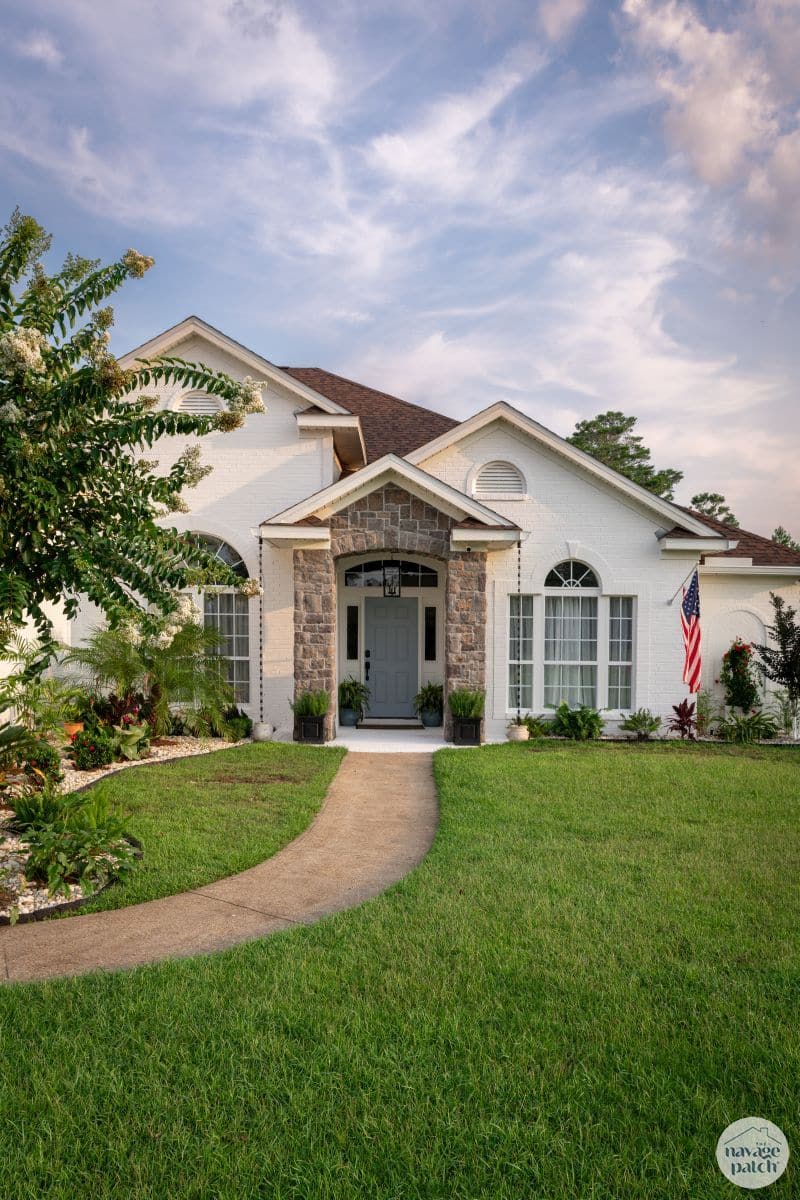
Our Limewashed Brick House
Okay, enough yapping, let’s see the finished product! But first let’s have another look at the before pic.
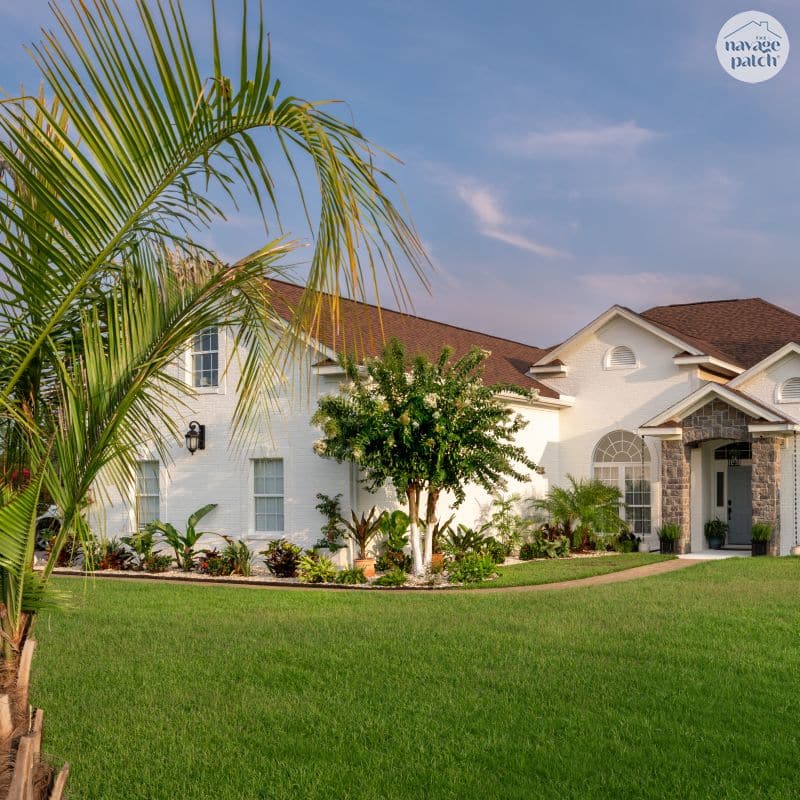
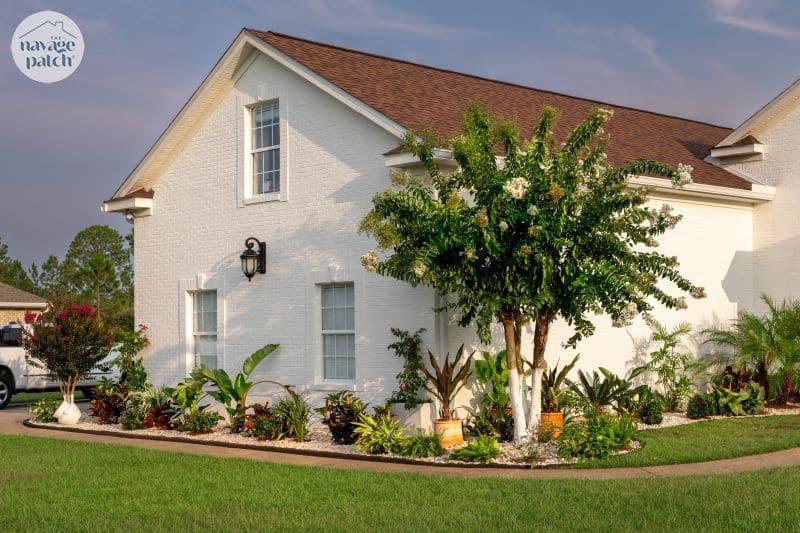
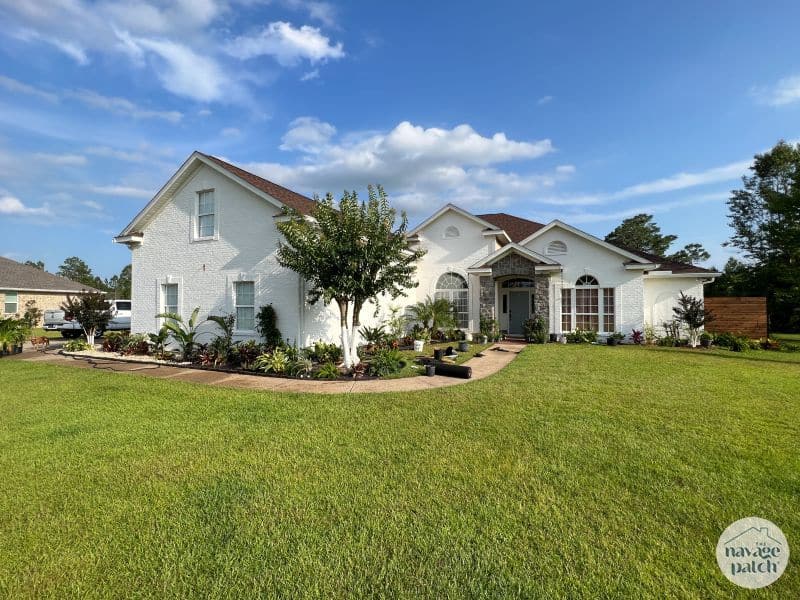
And the after…
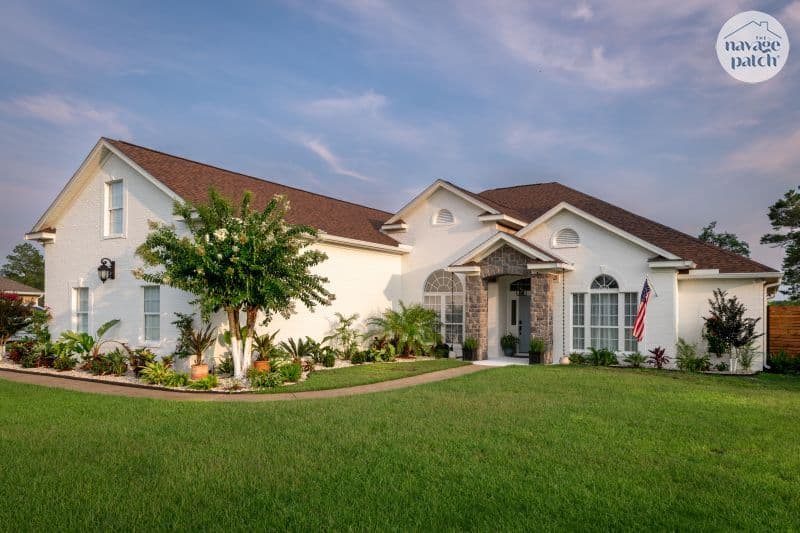
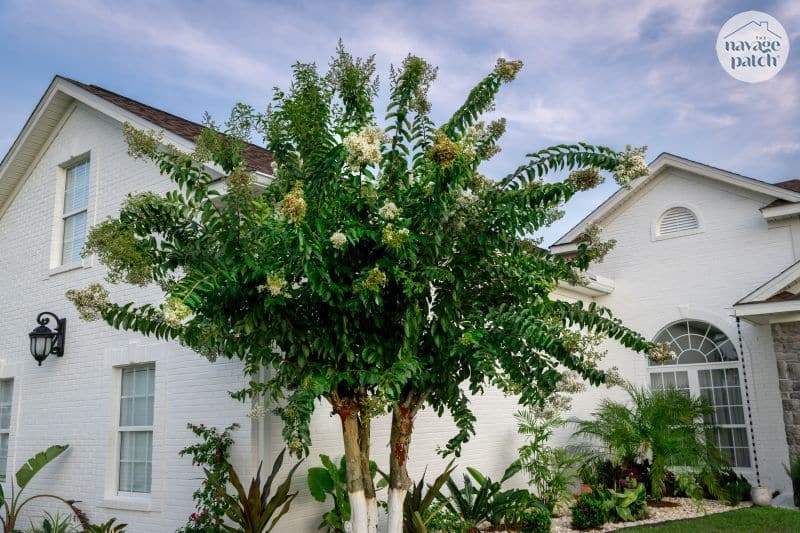
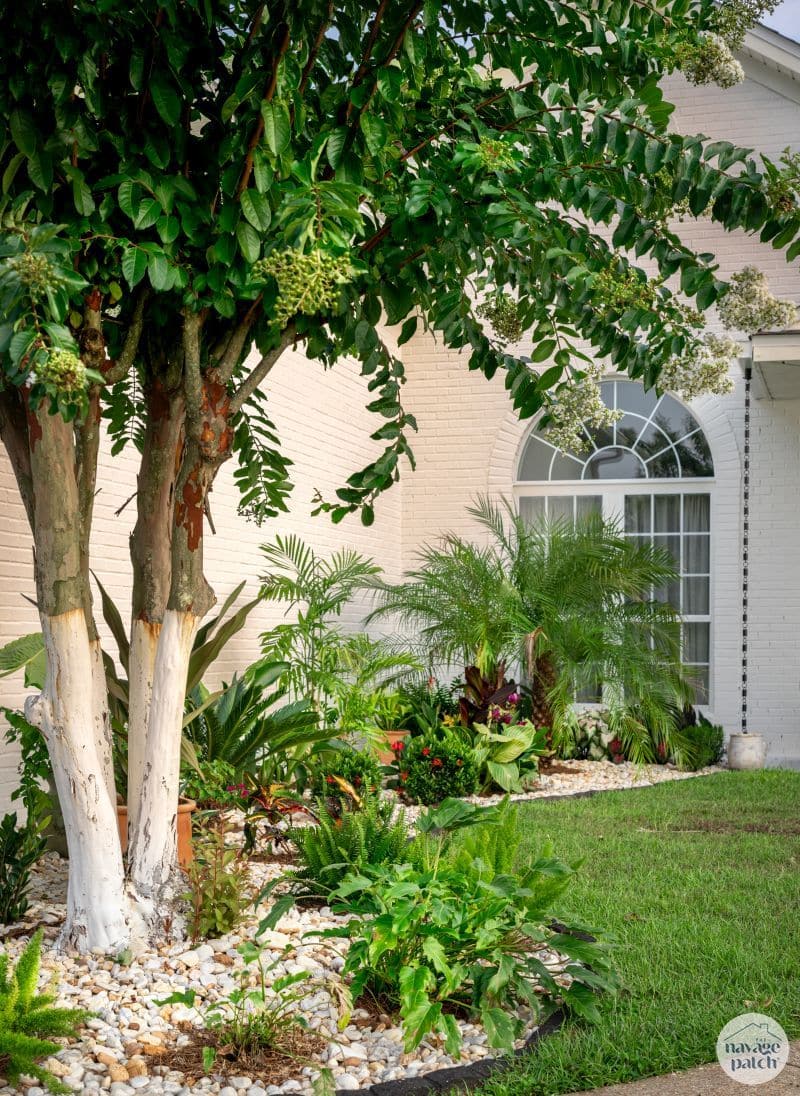
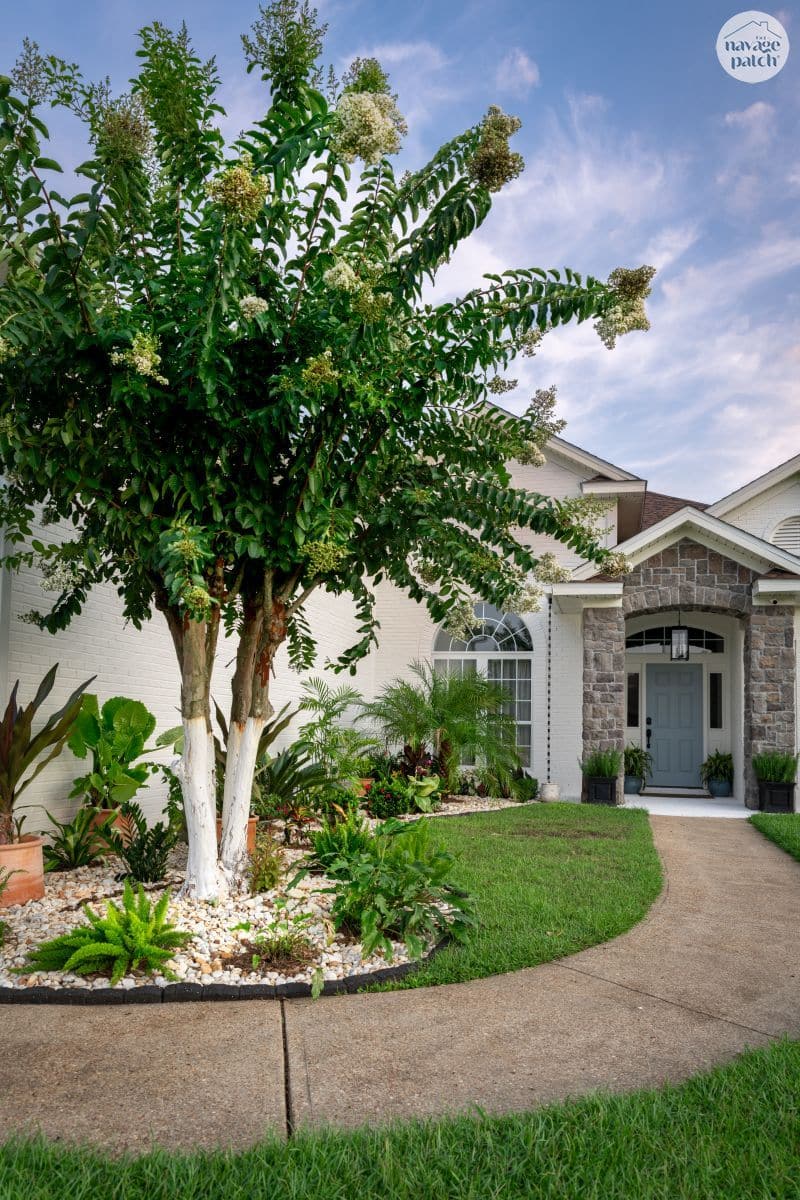
If you’re wondering why the trees look painted, it’s because they are…with limewash paint.
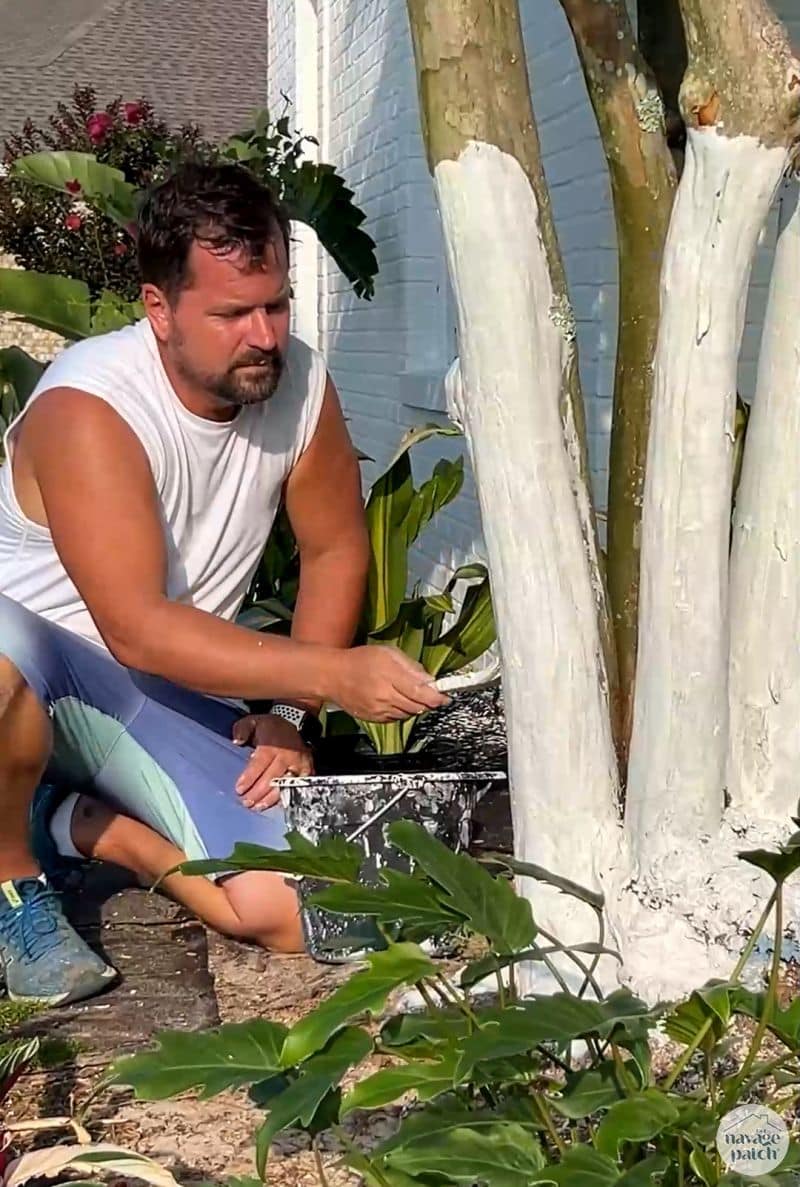
Limewashing trees is a centuries-old practice known in just about every country in the world. It protects against sunburn, sun scald, frost, disease and many wood-boring pests. These crape myrtles shed their bark like crazy, as they take the full brunt of the afternoon sun. Since limewashing the trunks of three crape myrtles, the peeling has slowed, and the blooms have increased threefold!

Where to Buy Limewash Paint
Here are four options for limewash paint suitable for a brick house.
You did an awesome job (that includes your wife and son) I love how it looks. I know there are people that dislike painting brick but let’s face it can’t please everyone. Everyone has different tastes that’s why there are so many flavours of ice cream LOL. I enjoy reading your wonderful DIY always fun and enjoy all your work.
I agree! If we all liked the same things/styles, the world would be a boring place.
Also, thanks for the information regarding limewash (including about the trees!) – really informative!
Thank you, Bunny! You are so correct. As we like to say – Diff’rent Strokes!
It looks awesome, Greg and Handan!
May I ask who did your gutters? The lovely people who renovated my house (before I bought it) didn’t think gutters were essential. And since I’m right down the road from you, they probably serve my area.
Thanks, Donna! We used On Time Gutters – he’s local – lives in HB.
Love the lime wash on the house! Now you need to replace the roof with a Mediterranean blue metal one and add matching shutters. Thanks for the tip about lime washing trees, etc. I didn’t know that and am going to do it to ours.
Thanks, Judi! Gotta save some money for that!
Wow! It makes such a difference. Modern brick houses look so dated within 10 years. Heavy and squat. Whitewashing it really updated the exterior.
Thanks, Cynthia – we couldn’t agree more!
What can I say…it truly looks marvelous!!! WELL DONE!!! franki
Thank you so much, Franki!
The house looks amazing! I have seen lime washed houses done in the “weathered” look and I am not fond of it at all, you & Handan (and Baris) have done a beautiful job here. Hats off to you!
Thank you, Claudine! I agree on the weathered look – it’s rarely done in a pleasing manner!
BEAUTIFUL! Love the finished look.
Well done and well worth all the effort.
Thank you so much, Lois!
Love it and read your WHOLE post. Interesting and informative. Handan, you are so fortunate that Greg can do everything.
I will have to hire someone to paint my red brick home and I can already imagine trying to get someone to use limewash paint and with a BRUSH, no less!! I just see $$$’s.
I’ve seen painted tree trunks b/4, but never knew what they used to paint them with.
Hooray, keep up your entertaining posts.
Thank you, Ruth! I can’t imagine how much it would cost – at least $20,000 I’d think! Much better for me to do it!
Greg, y’all’s house looks more Floridian with the lime wash. The landscaping pops. Red brick has its place but Florida calls for whites and pastels.
We painted our brick house butter yellow, lol. Hopefully by the time the brick is too compromised, my husband and I will be long gone.
I totally agree, Ju! I’m not a huge fan of all the brick here in the panhandle!
Great post and love the new look on the house! It looks amazing!! You all did a fantastic job.
Thank you so much, Autumn – we love it!
I watched it as you did it, but truly the transformation is magical. OMGoodness. It looks gorgeous
Thanks, Gail, we think so too! 🙂
Great job!
I think the chemical binders in the lime putty provide the longevity of the current limewash paint. My grandparents used hydrated lime + water inside and outside the house, but outside it had to be renewed every year, as it naturally distressed.
You are probably right about that, Valentina!
Another job well done by Greg and Handan! Love the new, fresh look!!!
Thank you, Davene!
Fabulous redo! The house now looks more Floridian-white, not brick-and it complements the stone entry so much better than the red brick.
Great design choice 🙂
Thanks, Terri! Agreed about the stone columns. They were lost before, but now they look great!
It looks beautiful, great job!
Thank you, Debbie! 🙂
I love the finished look! Your hard work paid off!
Just curious about what brand you went with or did you mix your own limewash paint? Did you go pure white or did you get a tinted color from the purchased pre-made paint? If you bought the paint, which color did you go with?
I enjoy your posts and learning from you!
Hi Shelley, we used Classico limewash in Avorio white. 🙂
Thanks!
Fantastic change from the bricks. It looks fresh and wonderful. Congratulations on a great looking house.
Thank you, Deirdre! 🙂
Looks great! A lot of work, though. Congrats!
Thanks, Teddee! 😀
Your house looks absolutely beautiful!! ❤️❤️
Thank you so much, Pam! 🙂
I can’t believe the difference in your home.
It’s absolutely beautiful.
Enjoy !!
Rose
We can’t either, Rose! 😀
I absolutely LOVE the new look of the house! I’ve never been much of a brick fan anyway. I especially dislike red standard brick and yellowed brick the most. I think it really brightened up your home and made it much more interesting and I bet it really stands out in a neighborhood that is probably predominantly regular brick. Your landscaping is perfection! Handan really outdid herself on that part! It’s tropical, interesting, variated, and so much more interesting than what was originally there. If I were the previous homeowner, I’d be thrilled with the changes you’ve made to the property! It is just stunning!
Thank you, Karen! I agree about brick, and yes, the house now pops on our street. About 98% of the houses in this subdivision are some color of brick. The other 2% are stucco. I don’t mind the newer brick houses because they’re almost white brick, but I’m just not a fan of red brick!
All your hard work paid off, it looks wonderful.
Thank you, Regina!
Love it! It doesn’t even look like the same house–it kind of looks bigger! Did not know that about painting the trees (but I have several crapes and should try it). Thanks for the interesting info about lime wash. (And now we know why you were waiting to post the entire process with the chemistry lesson, which I found fascinating.) Thanks for sharing!
Thanks, Deb! Painting the crapes made them explode with blooms! And you should hear the buzz around them – they are now filled with hundreds of bees of all kinds, which is fantastic!
All I can say is, “WOW”!
Thanks, Pat!
I LOVE the lime painting! Didn’t know what the white stuff was on all the trees I’d seen forever. Quite an edumacation! And I just heard about German smear last weekend on TV & here it is again. So many things to learn, so little time. I can appreciate all the hours in that awful heat, working like stevedores. Of course, it goes without saying that you couldn’t afford to have someone else do it.
I know you all love your front door color, but perhaps you’ll consider the suggestion of a sage green or even glossy black in the near future (?)
– Thank you for all your inspiration,
Lauren S.
Thanks, Lauren! We will be changing the front door, but it won’t be black – we want to stay away from modern farmhouse. I’ll also be painting the garage doors, so stay tuned!
Great Job! House is lovely and as usual, your information is outstanding.
The house looks gorgeous!! Great job guys♥️
Thank you so much, Marjie!
Thank you, Judy!
Holy Transformation, Batman! I’m floored at how much of an improvement you’ve made by limewashing your home and changing out the landscaping. The rock entry features really stand out now and the new, foundation plantings give it a fresh, Floridian vibe. If, God forbid, you should ever have to move again, your curb appeal has just increased a thousand percent. Way to go, Navage family!
Thank you, Julie, we agree! We love coming home now and seeing our house approach, where before, we were like, blaaaahhhhhh. 😀
The house looks amazing! I absolutely love the fresh look of the white. I will admit, I knew about painting trees, but I looked up the spelling for your ‘crape’ myrtle—because I only knew it as ‘crepe’ and found out that the spelling is a Southern thing! 😂 The things we learn from the Navages! I do have a question—about the rain chains, because I really like them. Looking at the pics, there isn’t a downspout, so all of the rain goes down the chain into that small urn? Then what? Do you have a hole in the bottom that uses an underground drip irrigation system?
Thank you, Tina! The rain chains flow into the urns and then overflow onto the ground. The chains just replace ugly downspouts right at the entry of the house, and the urns soften the impact of the water. When we get heavy rain here, there’s water everywhere, but since the soil is so sandy, it’s all gone in an hour or two!
Add me to team limewash. It is just stunning. What a transformation. Our house has yellow wood siding above red brick with dark grout. I hate the brick. You have inspired me to do this to our house.
I’ve read that you can limewash wood as well as brick. Food for thought, Lyn!
Your house looks amazing! As hot as it has been, I’m not sure I could have done that! Kudos to all of you for surviving the heat and transforming an average looking brick house into a drop dead gorgeous home. My red brick very small house has combed finish bricks, otherwise I would be jumping on the lime wash wagon. Not sure it would be possible to cover that surface but I would love to limewash mine. Glad you are enjoying the weather, Georgia has been awful too…
Hi Anne, i don’t see why you couldn’t limewash combed-brick. The limewash paint is pretty runny, and with a big soft masonry brush, you should be able to get the paint into the crevices.
Maybe I’ll give one of my old extra bricks a try and see how it goes!
Your home is stunning, really like the modern vibe of the limewash. In my opinion the limewash gives the exterior of your home a cool (temperature) feeling to the exterior/yard. The landscaping is perfection against the backdrop of the updated look.
Thank you, Judy, we agree! I can’t get over how good it looks!
So lovely. You and your family do amazing work.
Thank you, Valerie!
Greg
The house looks amazing! You have all done a great job on the paint work, and the landscaping really pops now, so well done!!
Thank you so much, Carmel! We absolutely love it! 🙂
BEAUTIFUL!!! I also hate red brick – unless it’s a pizza oven, or vintage interiors on factories/mills that have been converted to condos. Did you do the entire house or just the front? Show us pics of the other sides if you lime washed – especially the back where you did such an amazing job.
Exactly! I’m doing three sides of the house – the back will remain brick. I’m sorry to say I haven’t finished the sides yet – so much heat and other projects!
I have always loved the look of a painted brick house. But I’ve seen them when they really needed repainting, and….not so nice. But you are not going to get that with lime washing. And THANK YOU for that tutorial. I had no idea the difference, or that painting actually damages the brick.
It looks stunning, just spectacularly elegant. Congratulations.
Thank you so much, Michelle! Limewash is better than paint on all levels for brick! 🙂
I don’t care what those grumpy people said about lime washing you brick house. I love it! It looks so fresh and clean. Great job!
Thank you so much, Kathy!
Greg, this article made me think of you & your limewashing explanation:
https://www.sciencealert.com/we-finally-know-why-ancient-roman-concrete-stood-the-test-of-time
Cool stuff!
Thank you, Julie, that was an awesome read!
Uh designed it really well the whole house is looking amazing and I also wanna such nice and decent coloring ways on my house to make it look even better.
Thank you!
It’s absolutely perfect!!! I love it!! Especially the painted trees!! Great job!!
Thank you so much, Carol! 🙂
What color lime wash putty did you use? I just found the video of your project and am obsessed’
Romabio Avorio White
WOW!! Looks lovely!
Thank you! 🙂
Great advice. Lots of work, well worth it.
Question I’m after a look that still shows the red brick but dulling the colour, a similar look to the photo shown on the left where I believe you are washing down the walls before applying the first coat. If the wash was very watery could thus be an option?
Absolutely Helen. You can water it down as much as you need. Practice on a small section of wall until you get the look you want. You can always was it all off as long as it doesn’t stay too long.