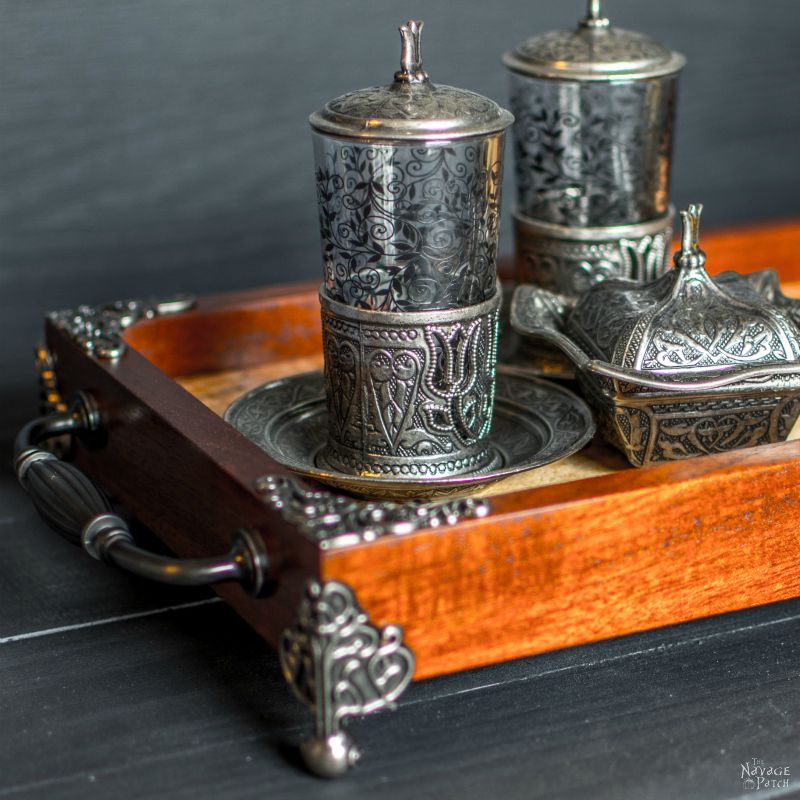
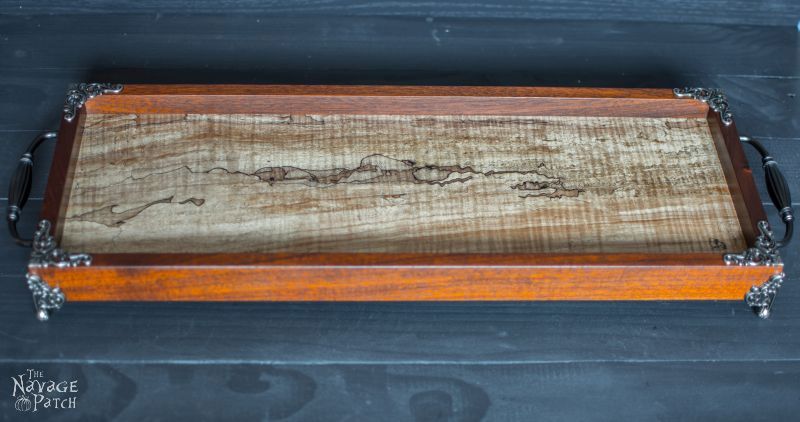
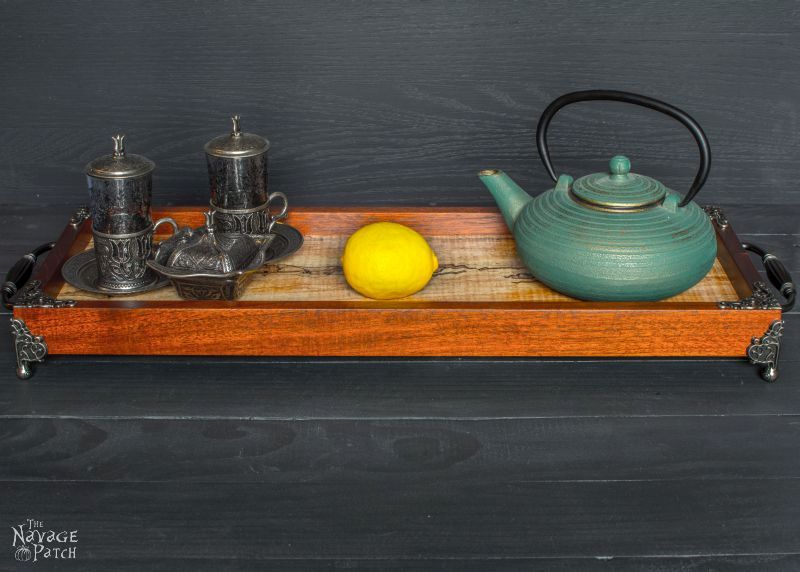
Spalted Maple & Mahogany Tea Tray
Believe it or not, Handan and I made some pretty cool projects long ago in the Days Before The Navage Patch! The problem with those projects is that we didn’t take a lot of process pictures, because, well, there really wasn’t a reason to!
But somehow, deep down inside, we must have known there was a blog in our future, because we did take some pictures while we were building and making!
This is one such project.
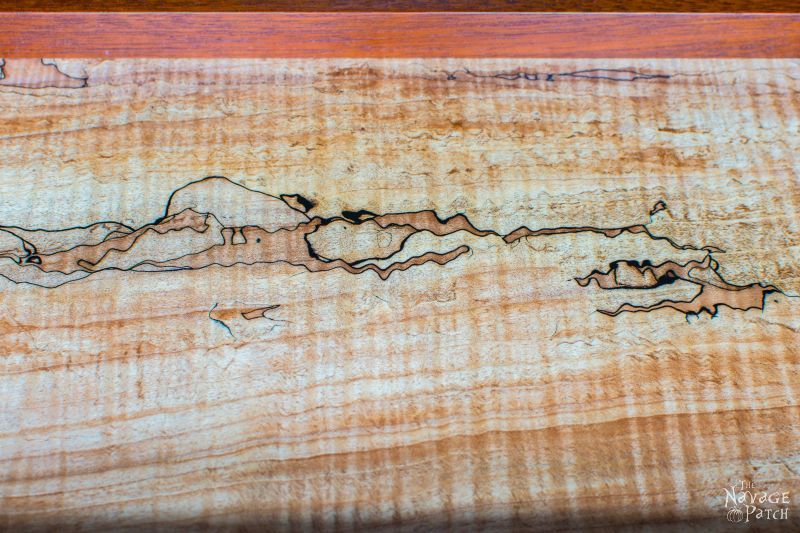
I had some leftover wood from my Beauty in the Beast project (also made before the blog), and I had a couple of thin pieces of spalted maple that I had been itching to put to good use. Spalted maple is fascinating.
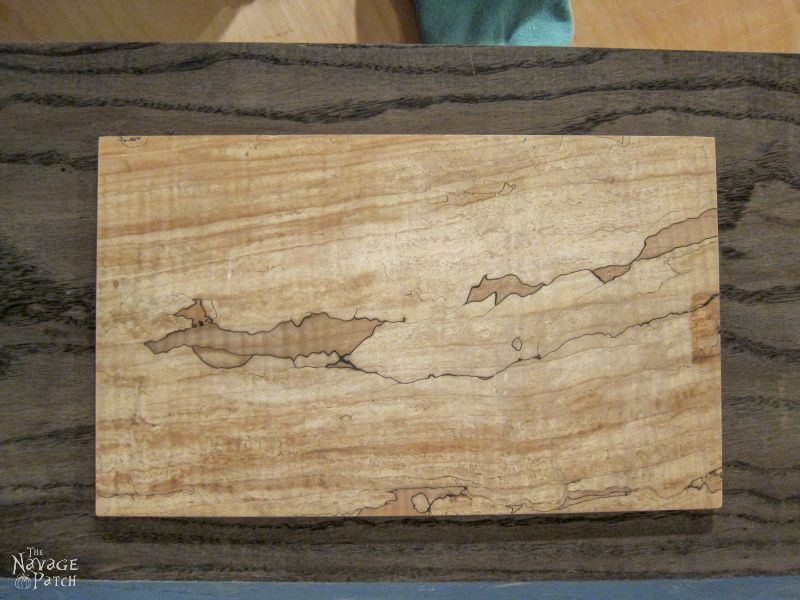
Those black lines are the “spalted” areas, and they are caused by a fungus that attacks the living tree. Spalted wood can be breathtaking.
I had a couple of small pieces, and I wanted to showcase them.
A tray seemed like a good way to show off the spalting, so I started out making two – one with mahogany sides, and one with stained hard maple. I never finished the one with the maple sides, so I took some pics of the remnants to help explain the process.
I started by cutting my spalted maple into a proper rectangle, as the original pieces did not have squared corners. For my first attempt, I sanded the piece up to 2000 grit, and then stained it with Minwax Ebony stain. I rubbed the stain off immediately. This is a technique I’ve used to good effect on pine.
Though I liked the look, I feared it would be too dark to match well with the mahogany and the stained hard maple sides.

I flipped the piece over and sanded again. When sanded, I measured the spalted maple’s thickness.
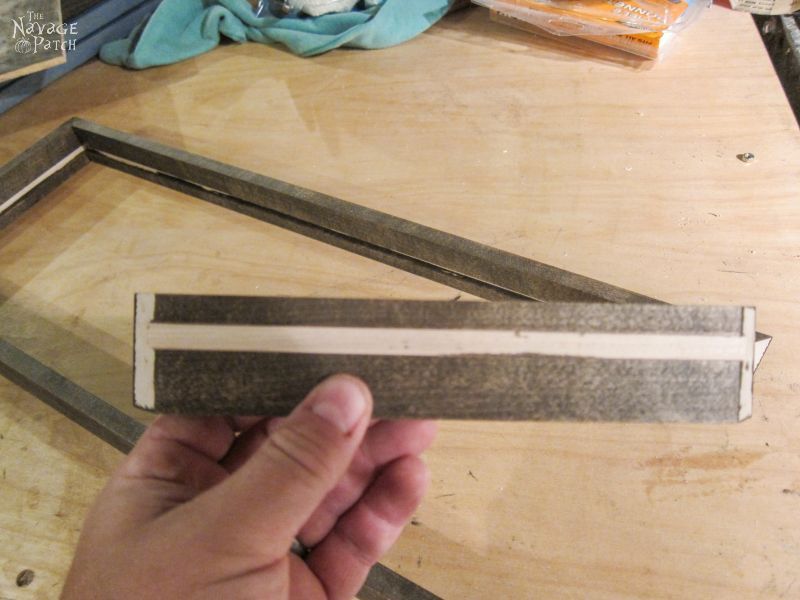
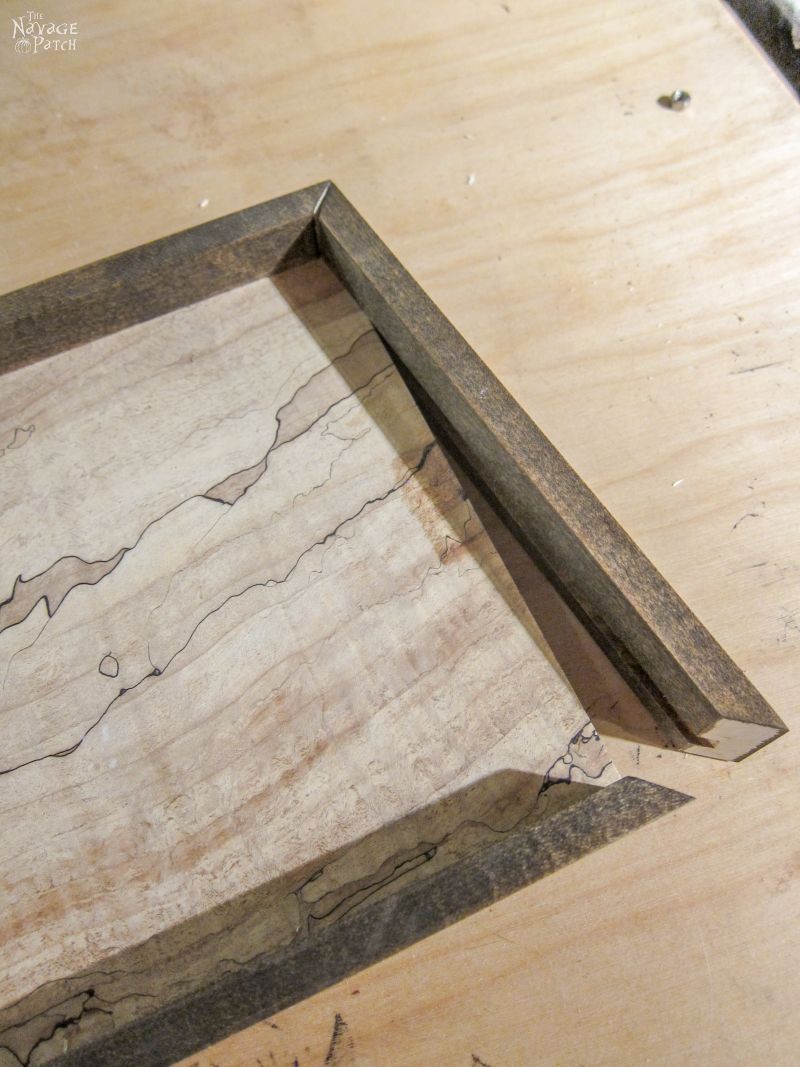
To build the frame, I cut strips of maple and mahogany and mitered the corners to 45 degrees. Before gluing them into a frame, I set the blade of my table saw to a height of about 1/8 inch and cut a groove the length of all the pieces the same width as the thickness of the spalted maple.
I then glued three sides of the frame together.
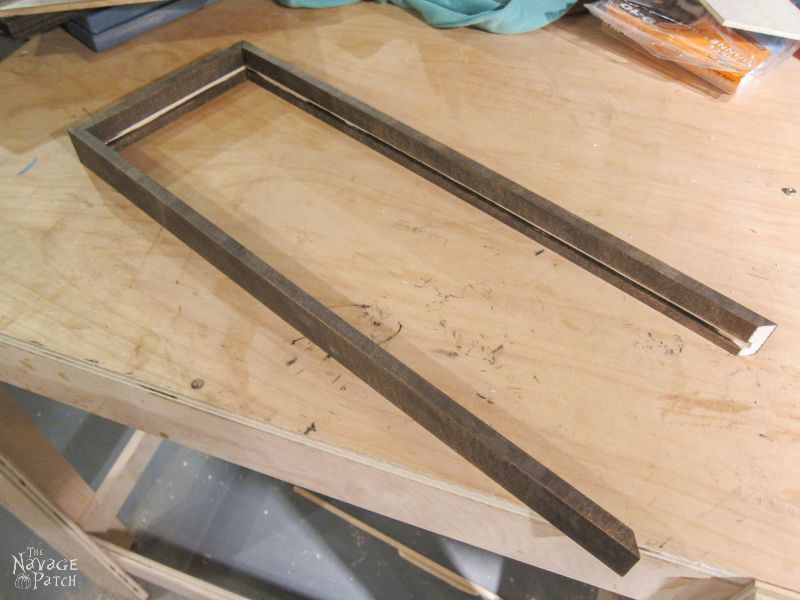
When the glue was dry, I inserted the piece of spalted maple and secured it in place by gluing on the last piece of the frame.
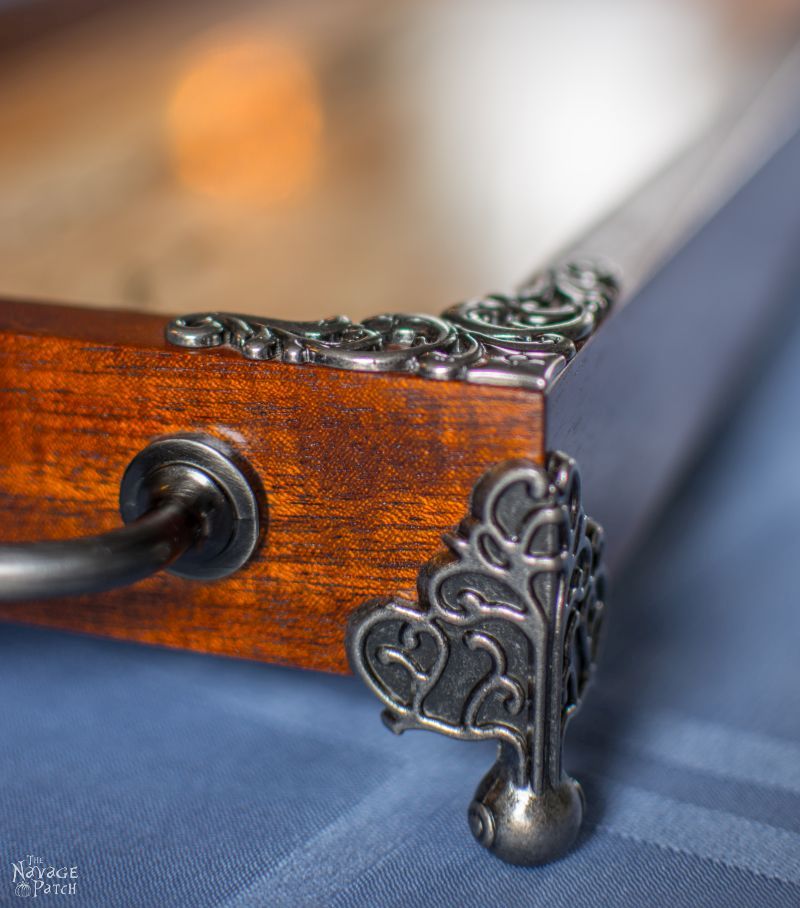
I sealed the wood with General Finishes Salad Bowl Finish – the same food-safe varnish I used on my cutting board.
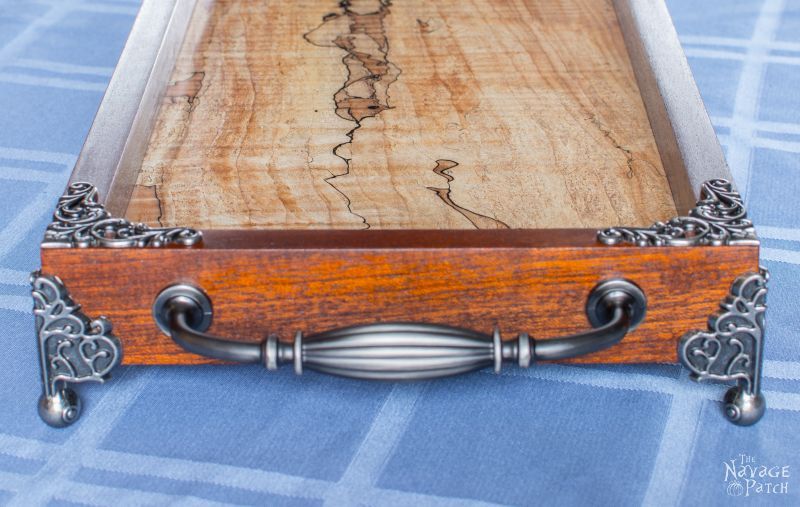
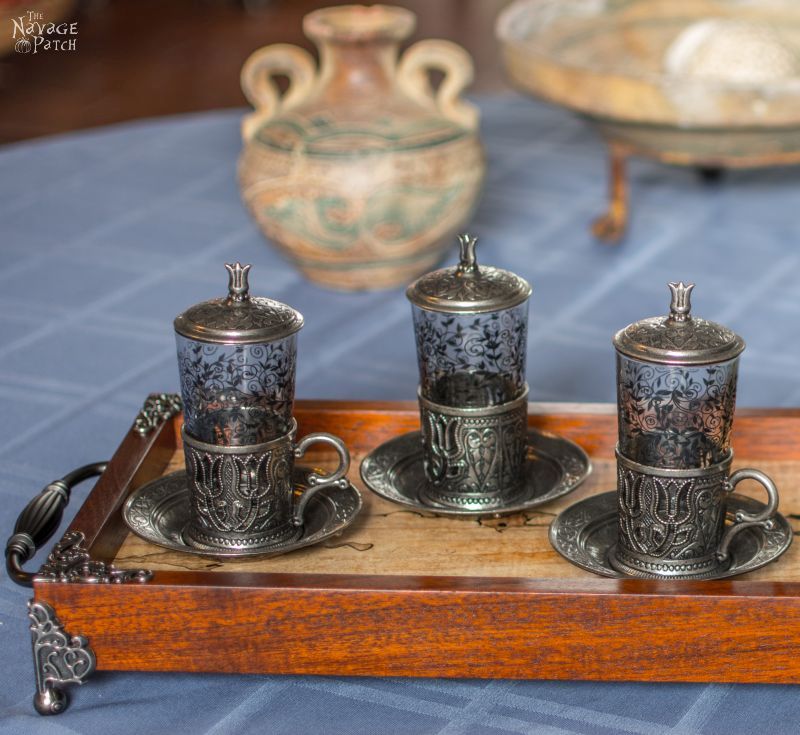
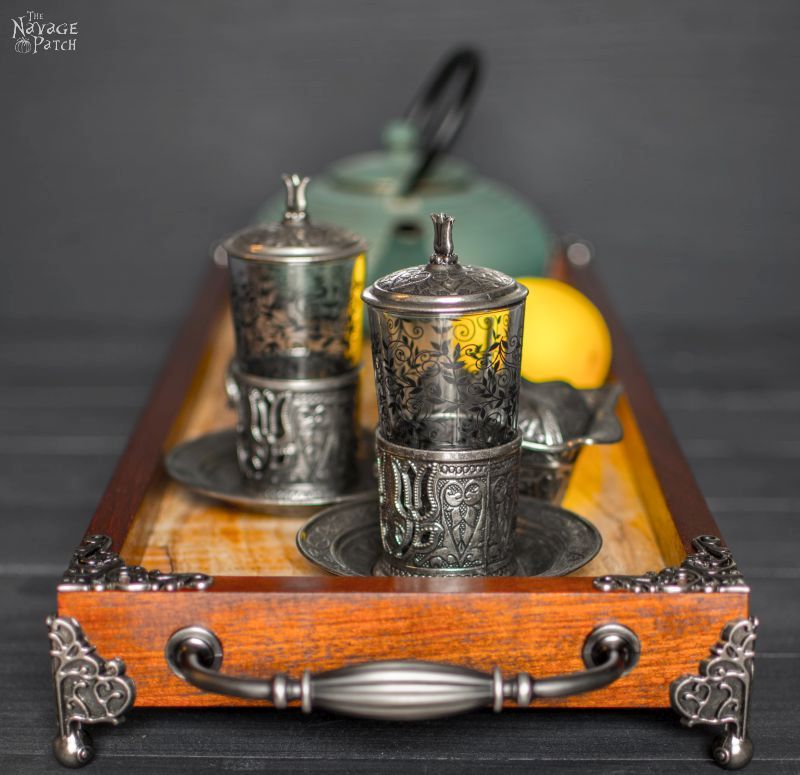
Once I had it shining to my satisfaction, Handan gave me some metal ornates for the corners and some fancy little feet for the bottom. The only thing missing was handles.
We searched Amazon.
We searched Home Depot.
We searched Lowe’s.
We scoured Hobby Lobby.
We looked at a thousand websites.
Then we gave up.
A year later, we took up the search again, and this time Handan found some that worked. She found them at Amazon – the very first place we tried the year before.
Doh!
My tea tray was complete. I’ve been wanting to share it with you, but I’d been putting off writing about it because I didn’t have many process pics.
No more putting it off.
Here she is.

The tray is gorgeous. Glad you decided to get back to work to wow us. You are too talented to rut!
Thank you, Nadine! I think I’m back in the saddle! 🙂
It is Beautiful! It is Stunning and I Love It!
Thank you so much, Kat! 🙂
The tray is incredibly beautiful! Get back on the horse! I miss your posts.
Thank you, Tammy! You guys helping me with your encouragement. I appreciate it!
Very creative Greg, patience always wins in the end you found the right hard wear for it and it looks great. I think with your blog don’t strive, I find that with mine as well, I hit a wall, or other things take priority. They say even the best authors hit a slump. Cheer up !! Have a great day!!
Thank you, Sandra! 🙂 You’re right – when I hit that creative slump, it is best to step away and focus on something else for a while.
Hey Greg! I know that feeling, we all have it now and then. I love, love this tea tray. Do tell, sir, where did you find the gorgeous corner embellishments? This is too beautiful. Way away from the norm. Glad to see you are riding high again! lol
Hi Linda! Thank you so much! Of course I didn’t find those embellishments – that was Handan’s find! Here’s the link: http://amzn.to/2eZkODG 🙂
Beautiful tray, thanks for sharing. Also, it’s nice to hear that you have those blah days. I think of everyone else beig creative and energetic all the time and I’m the only person who just wants to crawl under the blankets and hide from the world for a while.
Thank you, Georgia! I think we all have those days – even the ones who seem to be all sunshine and smiles 100% of the time. If there’s one thing Handan and I strive for with this blog, it’s honesty. We don’t hide our mistakes and we don’t try to present ourselves as perfect little homemakers. People would be shocked, or maybe just relieved, to see our day-to-day 🙂
she is awesome, I’ve never heard of spalted wood before, and you had to get back in the saddle before handan kicked your butt up over your shoulders ha ha, like someone else said you are way too talented to lay on the couch eating bon bons xx
Chris, I’ll never lay on the sofa eating bon bons. Martinis and chicken wings maybe, but not bon bons! That said, you are correct, and I’m back in the saddle!
When will you finish making my’s? Truly, this tray is breathtaking . I simply adore it! Thank you for sharing.
Jeez, Ivory, I sent yours weeks ago! You mean you didn’t get it yet??? 😀
Its gorgeous! So glad you decided to share it, and I’m not worried about your rut, I’m sure you are already moving on and creating, after all the holiday season is almost here and I’m sure that alone will get you inspired. Thanks for sharing on craft schooling Sunday!
Thank you, Sara! Yep, I’m out of the rut, and Handan has my life planned until the new year! 🙂
This is really a lovely piece!
Thank you, Kristin!
Oh wow – that is absolutely beautiful! I’m showing this to my woodworking husband!! I mean – gorgeous (and I love spalted maple) – Thanks for sharing on the Pleasures of the NW’s DIY Party!
Thank you so much, Helen! I hope your husband likes it!
The tray is beautiful. I love all of the details. Thanks for sharing at Snickerdoodle. Pinning.
Thank you, Beverly!
This turned out beautifully! Wonderful job 🙂 Thanks for sharing at #DIDI
Thank you, Angie!
Just came across your blog…I enjoy the way you tell your story, very creative writing. .. I like the tea tray very much.. where did you get those just credibly beautiful teacups? I have viewed your other DIY projects and enjoyed them too.
I like to re-use items and give them a new life too…thanks for a wonderful down to earth blog!!
Thank you, Linda! I saw your email before I saw this comment, so I answered you there about the cups. But in case others are reading, we got those cups in Turkey 🙂
This is gorgeous — can’t believe you actually made it yourself. It looks like an antique tray from the last Russian Czar, or something. ha-ha- But, really, the wood is beautiful and you finished it so nicely, then the hardware gives it an amazing uniqueness. Great job!
Thank you so much, Carol!
This is really beautiful Greg! It almost looks like an etched mountain range in the wood. I’m glad you shared your pre blogging projects.
Thank you, Mary! I also think it looks like a mountain 🙂
Hi, I look at that hardware every time I go to the local craftstore—but couldn’t imagine how gorgeous it would look on a piece. You outdid yourself on this project and the photos are stunning, Thanks, Sandi
Thank you so much, Sandi!
Hi Greg. This is an amazing tray. You taught me what spalted means. The pattern in that little piece of wood are gorgeous. Thanks for the inspiration.
Thank you so much, Leanna!
That piece of wood is gorgeous and the tray is beautiful you are talented!
Thank you, Amber!
Beautiful work….i envy you your ability?
For a huge selection of hardware and much much more, look up –
Leevalley.com
This is a Canadian store but has an internatoinal order policy. It is an amazing store and you can download their catalogue ‘on a bookshelf’ if you so desire,
Thank you so much, Renee! I have heard of Lee Valley, but haven’t yet checked them out. I will do so for my next project that needs hardware!
Absolutely beautiful workmanship!!!! The finish is perfect and Handan’s corner medallions finished it perfectly! It looks like and heirloom! ♥
Thank you so much, Frani! It too a while to finish, but the result is pretty awesome! 🙂