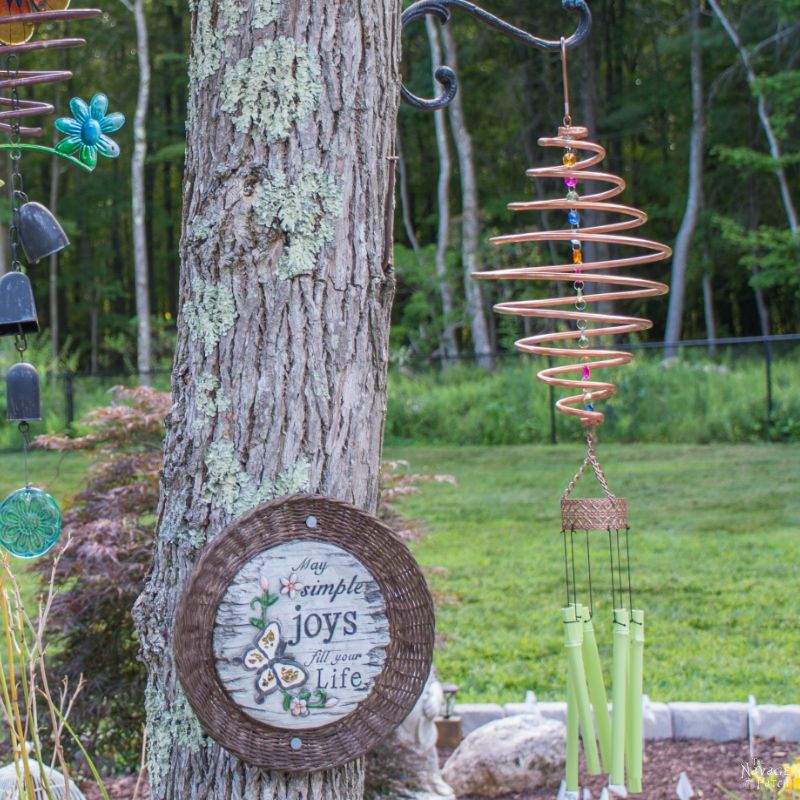
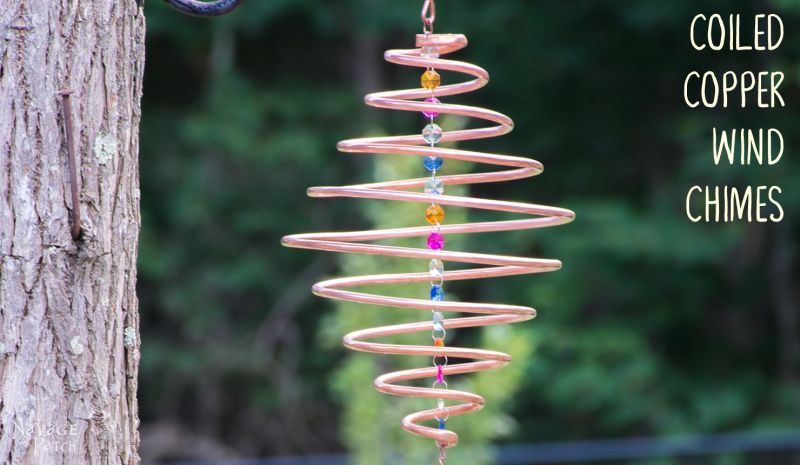
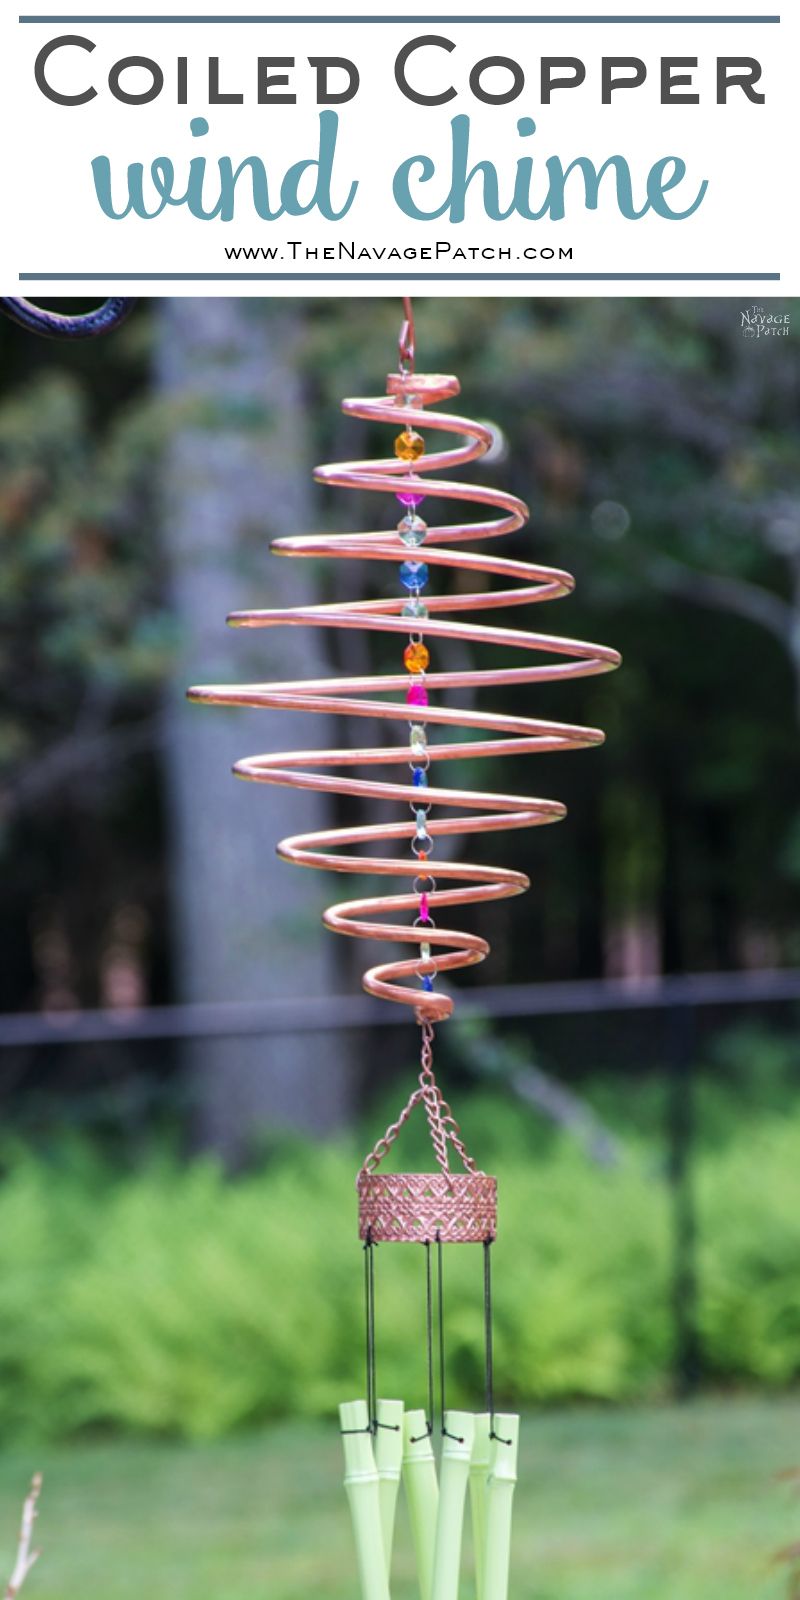
Coiled Copper Wind Chimes
I can’t tell you how happy I am to finally write this post. I’ve been wanting to do it for 2 weeks now. But the things is, the weekends are the best time for me to finish projects and write the posts, and last weekend I had an urgent matter to take care of. To be more specific, on a beautiful Saturday morning, I woke up to this scene.
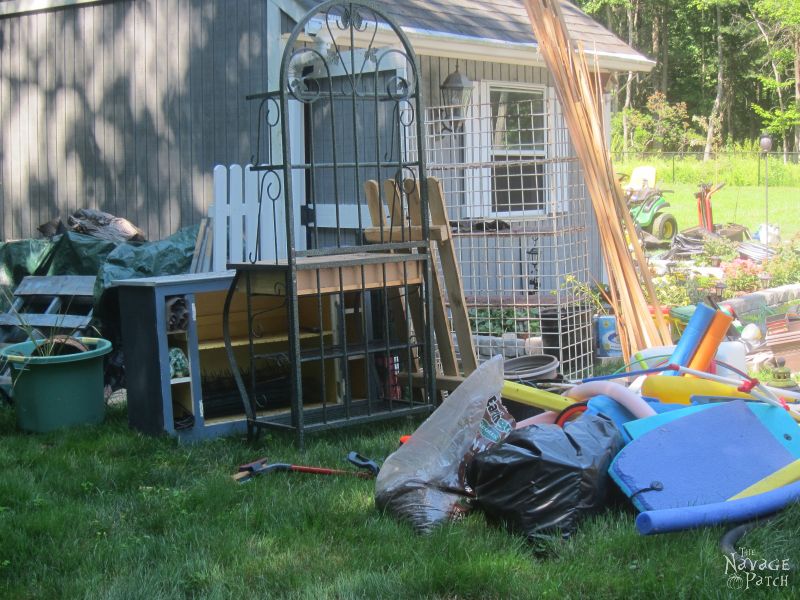
I turned my head and saw more…
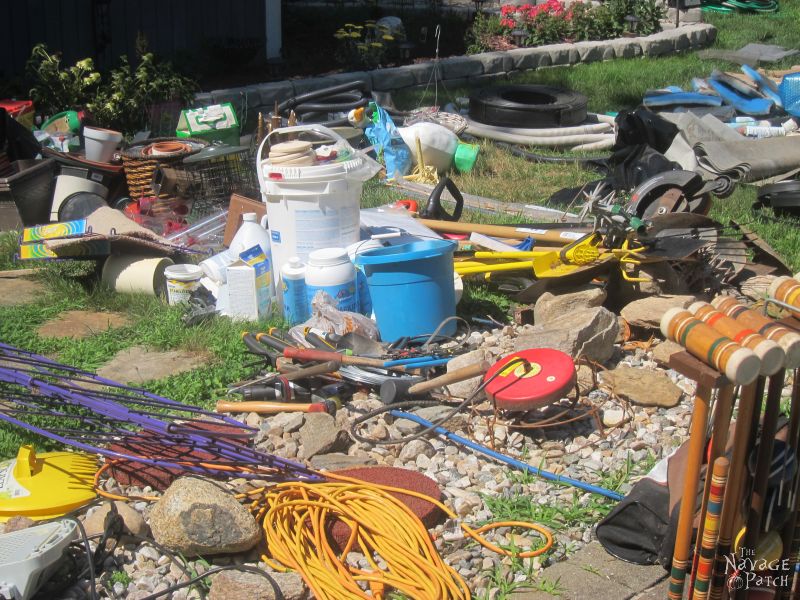
…and more…
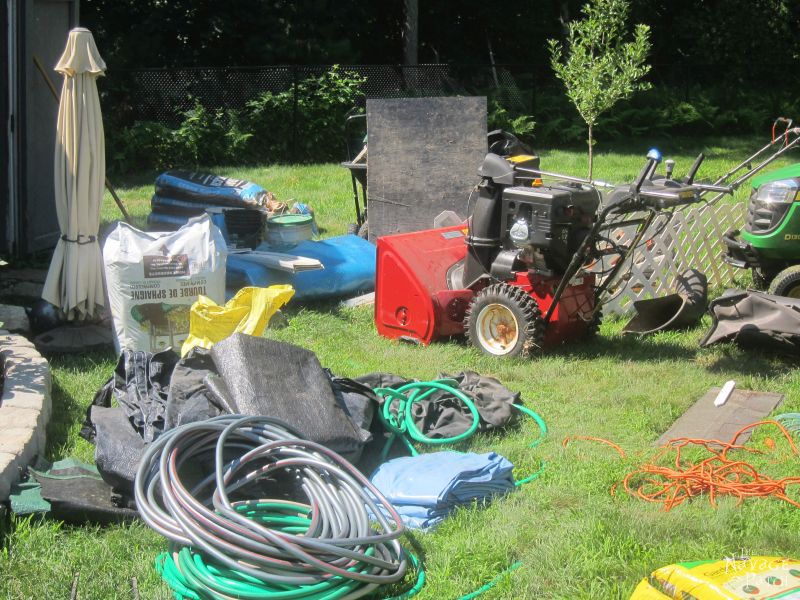
…and more…
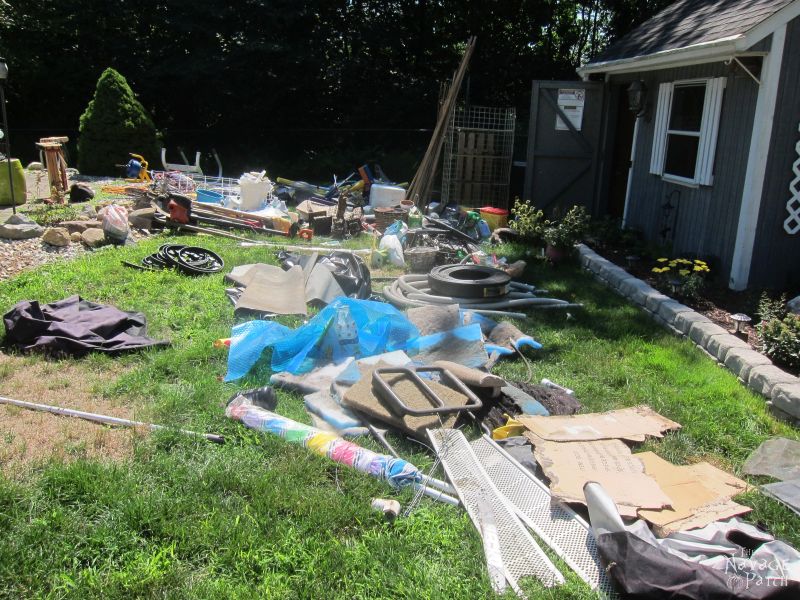
No, we are not moving! And thank God, no, it wasn’t a flooding or anything like that. Apparently, Greg just wanted to organize the shed. LOL.
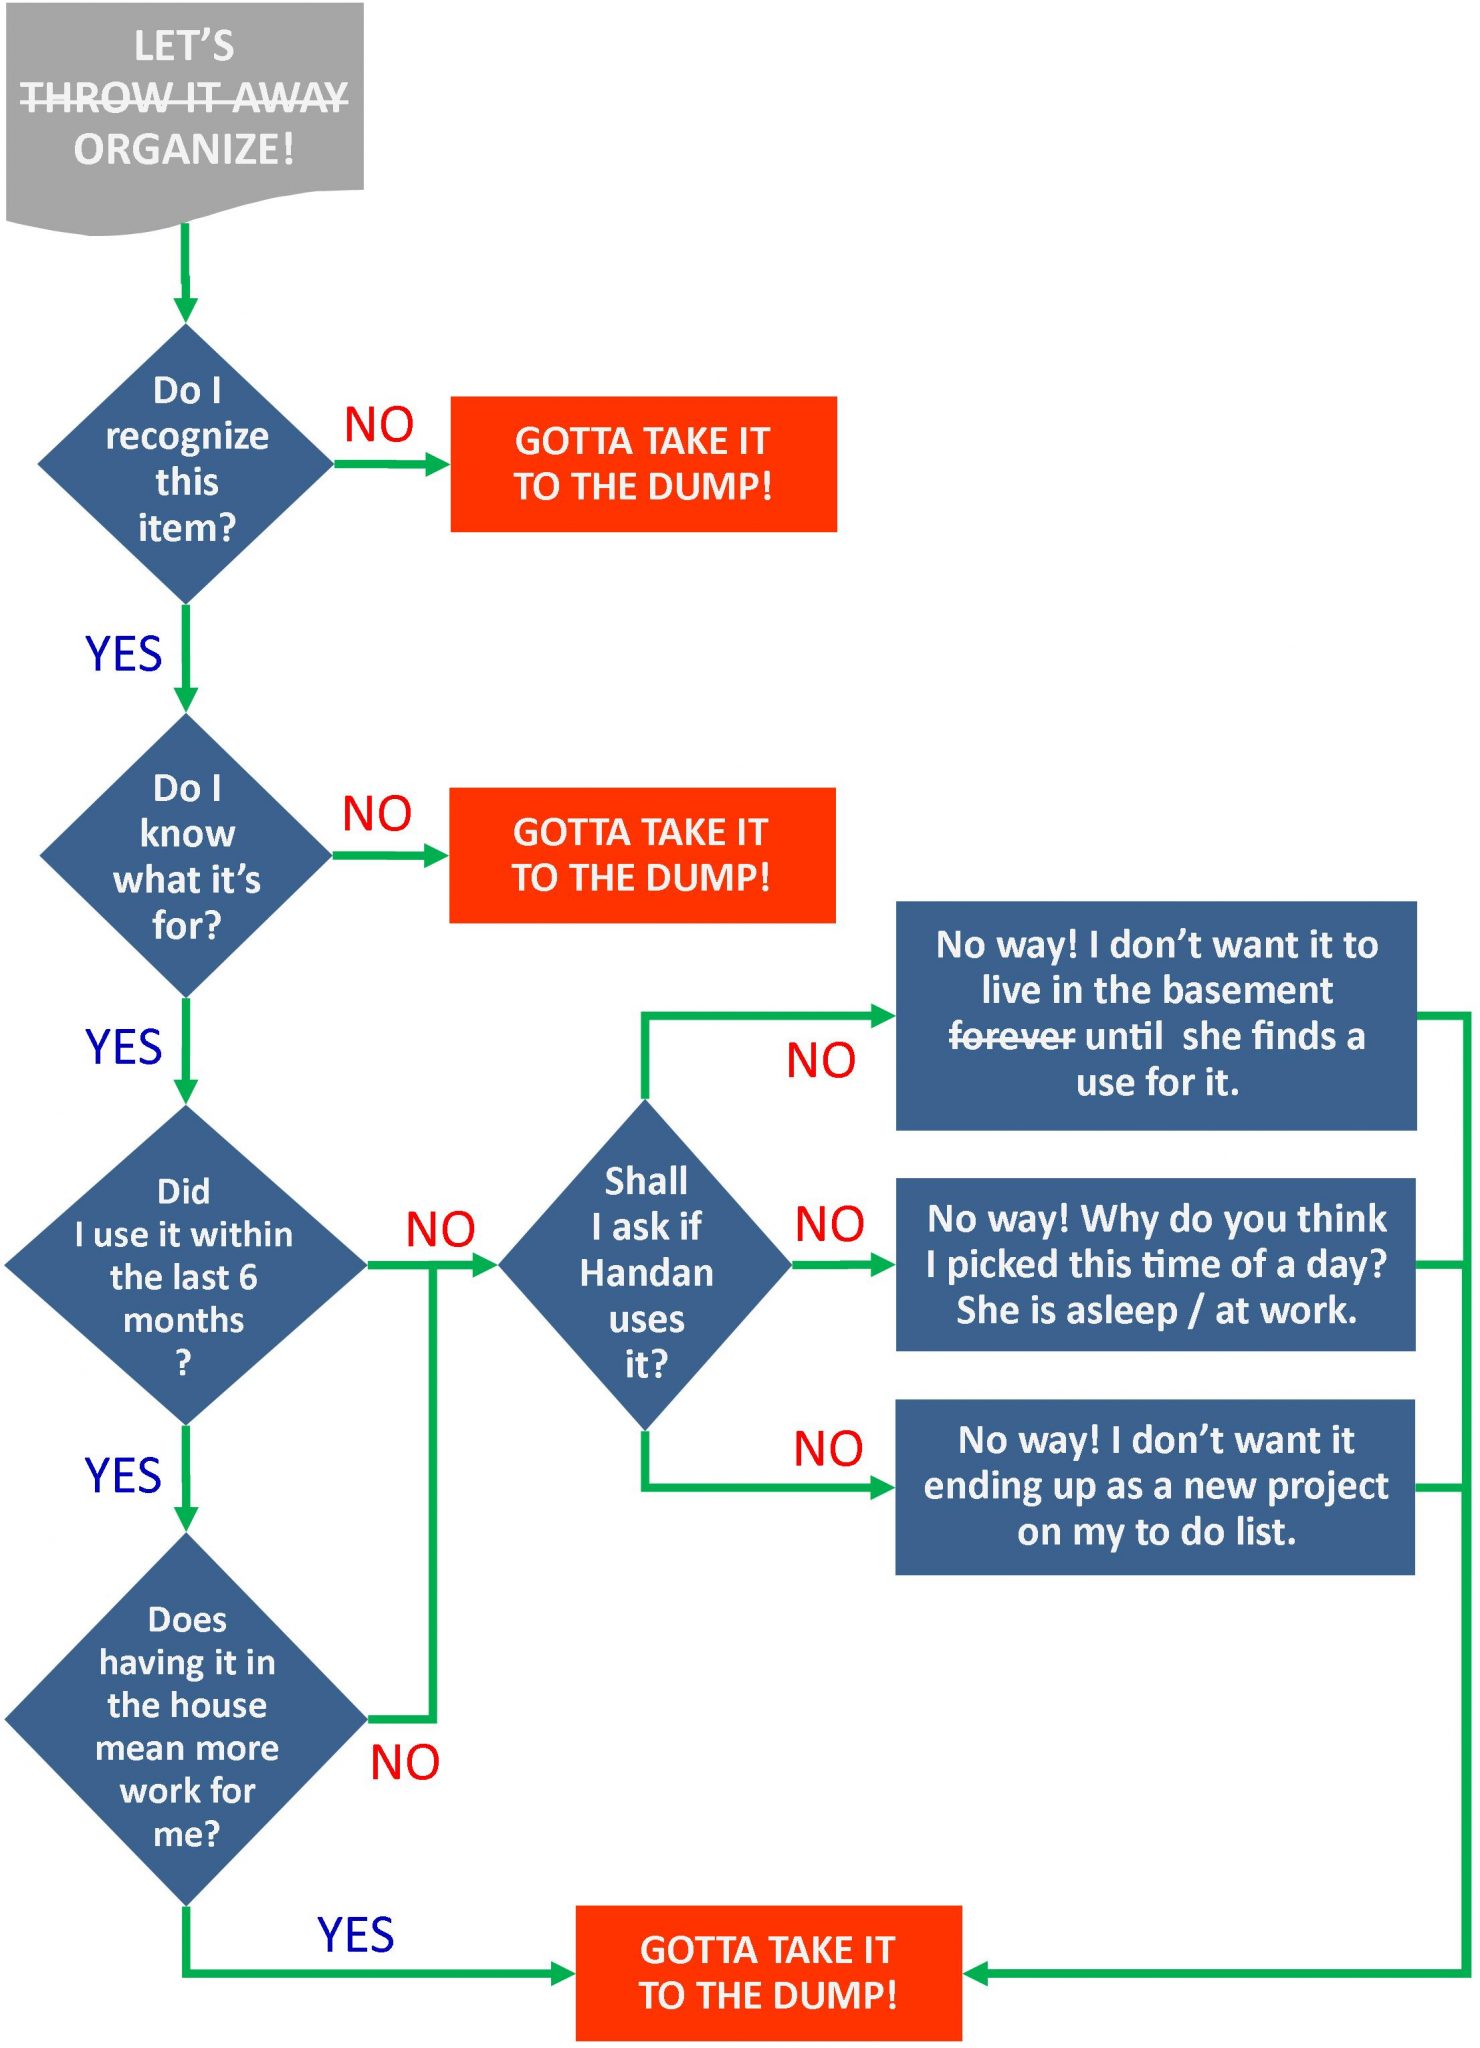
Yes, Greg wanted to organize…LOLOL. When he explained to me what he was doing I couldn’t stop laughing, because it sounded like me saying “I’ll be there in 5” 😀
Joke aside, if I didn’t act in time help him, most of what you see could have ended up at dump, because as far as Greg’s organizational skills go:
Hence, the delay in this post. Anyway…
Let’s not keep you waiting any longer. Let’s get on with how I did this set of garden decor, shall we?
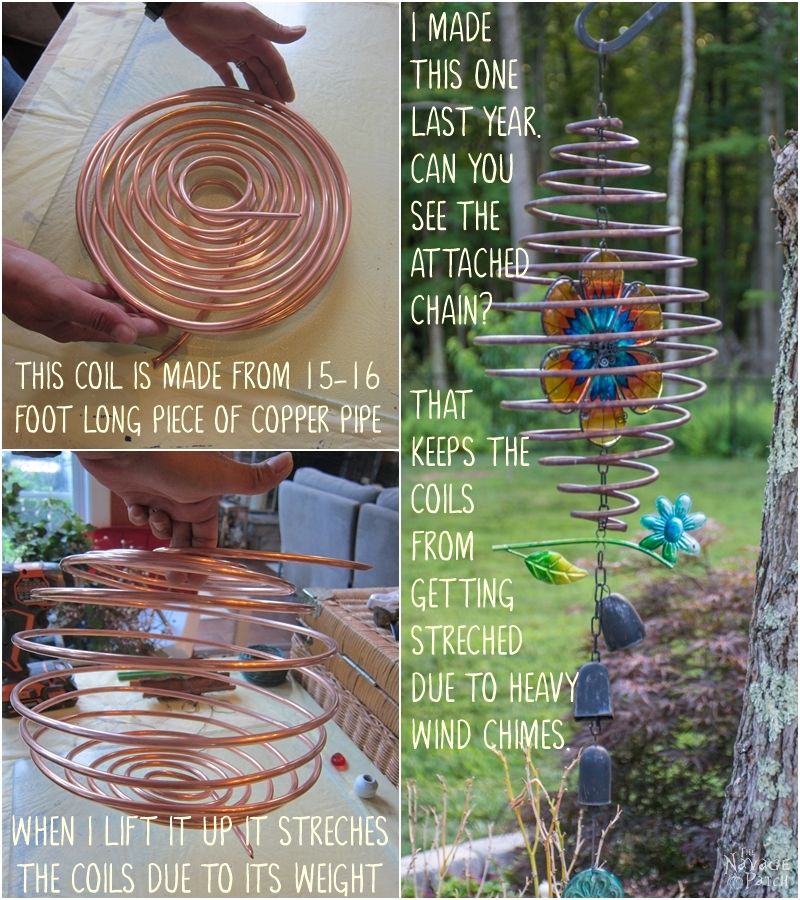
For the coiled copper garden decor I used soft refrigeration copper coil I bought at Home Depot. Refrigerator type copper pipes are soft enough to bend or work with yet strong enough to hold their shape unless you apply a big force. If you don’t have a Home Depot nearby, you can find them on Amazon.
I cut an 11 foot long section from the copper pipe. I marked my copper pipe at the middle of the entire length or 5 1/2 feet.
After marking the copper pipe, I started working from one end and bent it to make a small loop as shown in the picture below.

The important part here is to leave that little section of pipe at the beginning (like the one I left) as that part will be the place where you will be hanging your garden decor from. Also make sure that little section stays on the top, not under the loop that you are making.

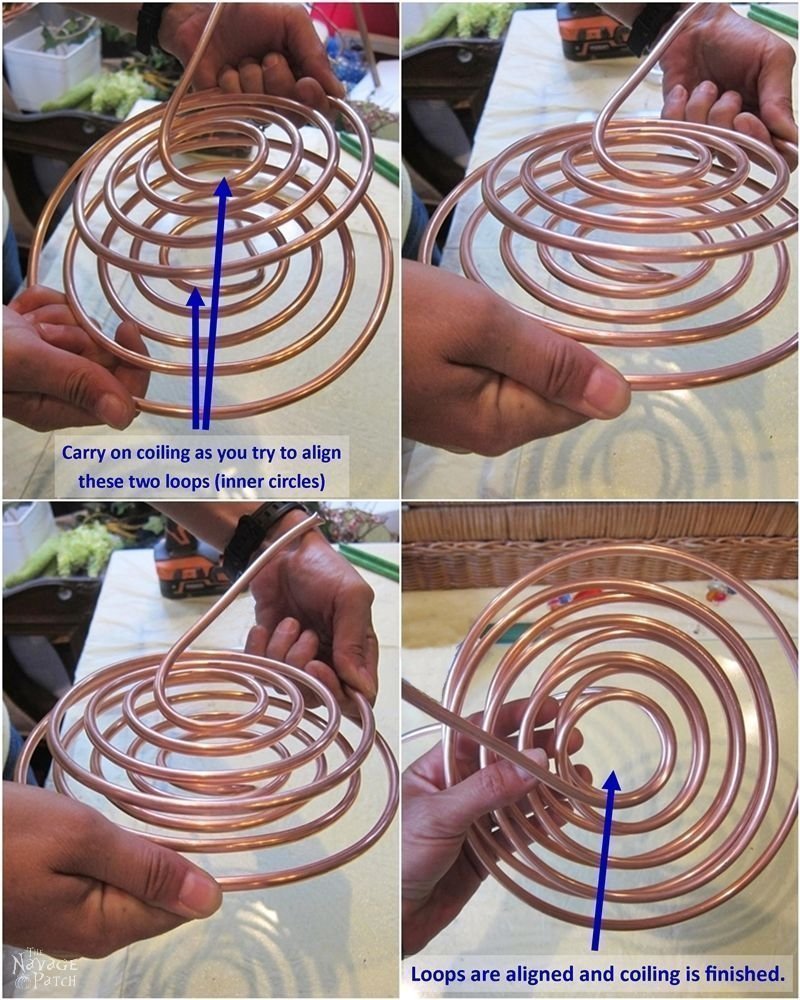
Next, I placed my fingers on the main pipe to use them as spacers, and I started to coil the copper pipe loop towards my fingers as shown in picture below. I carried on coiling until I reached my mark in the middle of the pipe…the mark at the 5 1/2 feet remember?
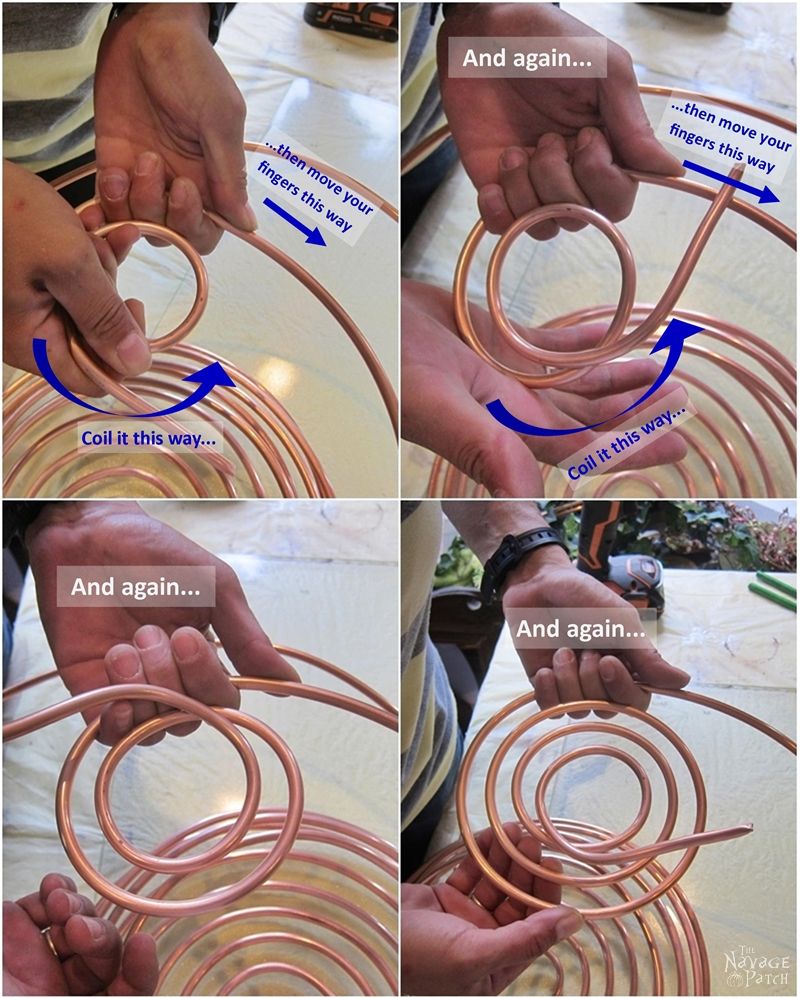
Once I reached the middle point, I started working with the other end of the pipe – the uncoiled part. I started coiling this second part just like I did with the first part. As I came close to the middle mark with my second coil, it started to look like what you see in the picture below.

At this point, I carried on coiling the second part (the top coil in above picture) while trying to align the loops / inner circles of both coils.
Once the loops were aligned and coiling was finished, it was time to give the 3 dimensional shape to my coiled pipe. To do so, I picked a piece of wood and stuck it in between the rings. Then, holding the wood still, I started turning my coiled pipe…
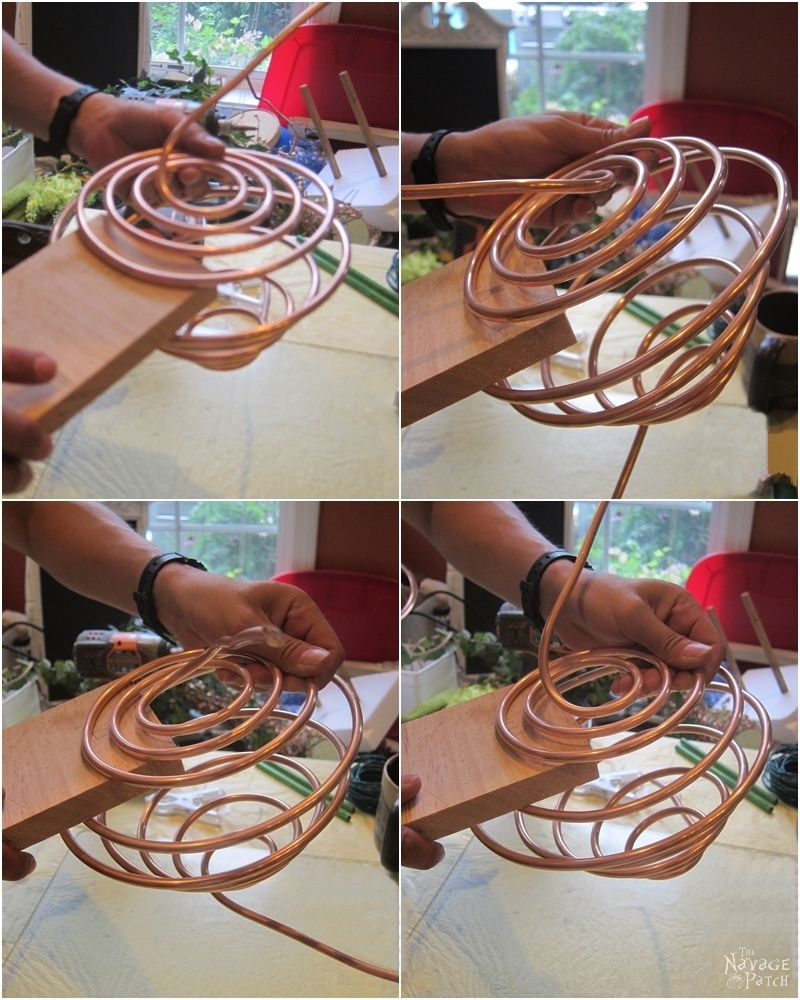
…until the coiled pipe took its 3 dimensional shape like the one in the picture below.
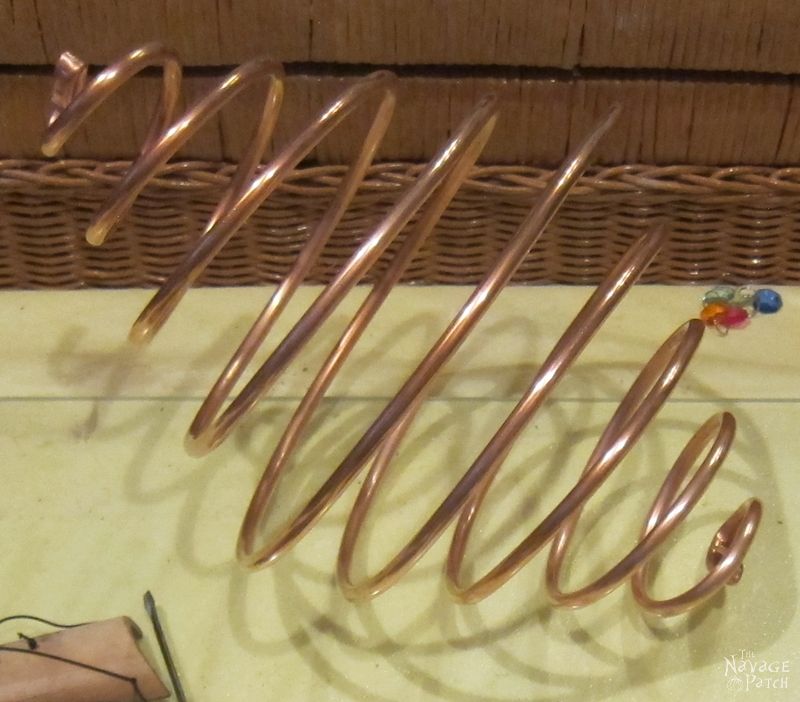
You might be wondering what happened to the end parts – the little pieces I left at the beginning of each coiling process. Well, I forgot to take pictures of it, but I cut them shorter and bent them in half.
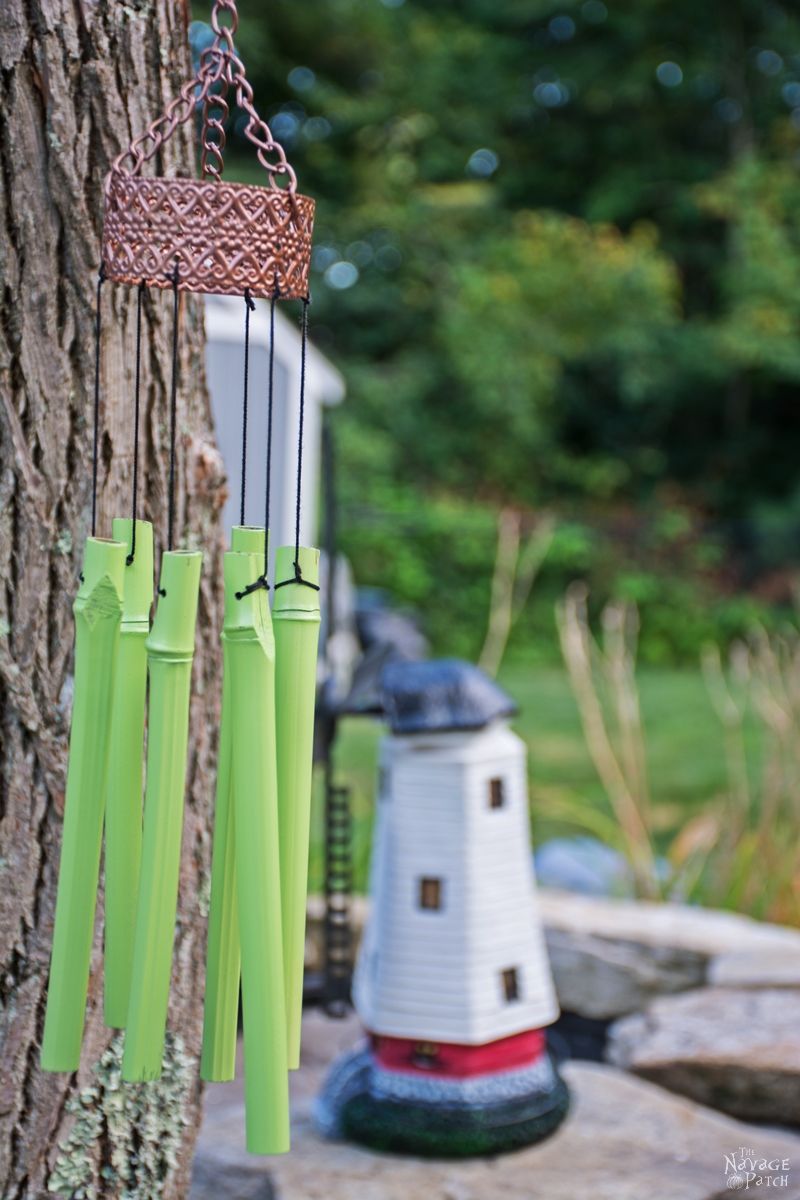
Once the coiled pipe was done, I started working on the wind chimes part of the project. For that, I used a bamboo wind chimes I bought from Dollar Store, a little piece of decorative metal strip, E6000 and some chain pieces. I bought my decorative metal strip at Hobby Lobby, but if you don’t have a Hobby Lobby nearby, you can find similar decorative metal strips on Amazon.
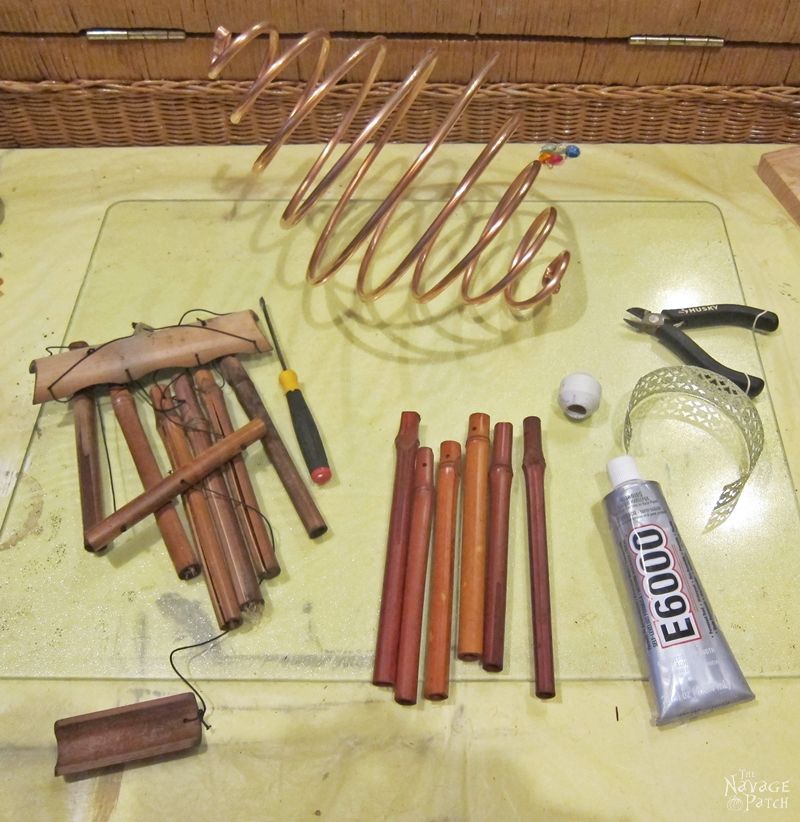
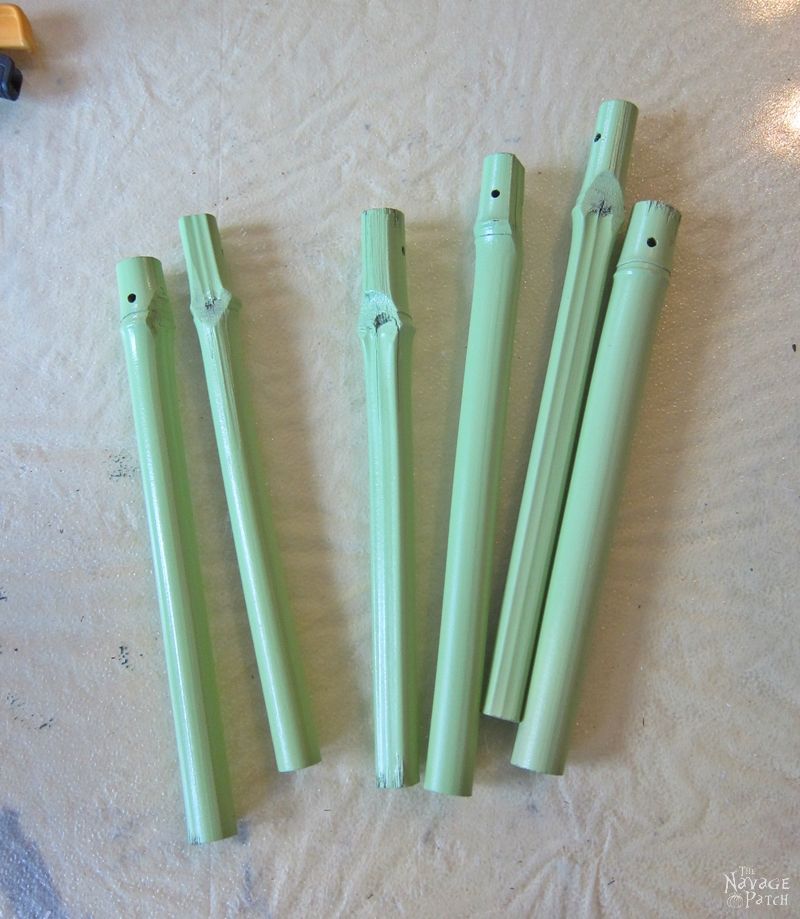
First, I took apart the Dollar Store wind chimes to separate the bamboo chimes (the stick parts). Then, I spray painted them with Rust Oleum’s Green Apple color…
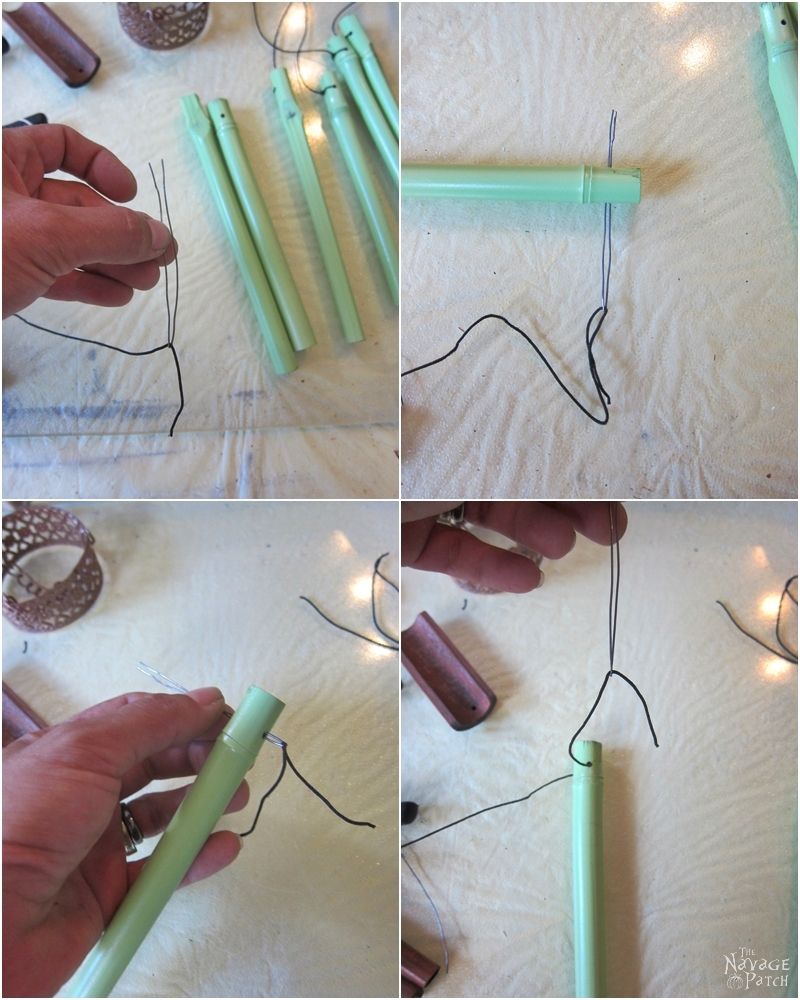
…and with the help of a little piece of wire, I put their strings back on to ready them for hanging.
Next, using E6000 and my mini clamps, I glued the decorative metal strip to make a small circle.
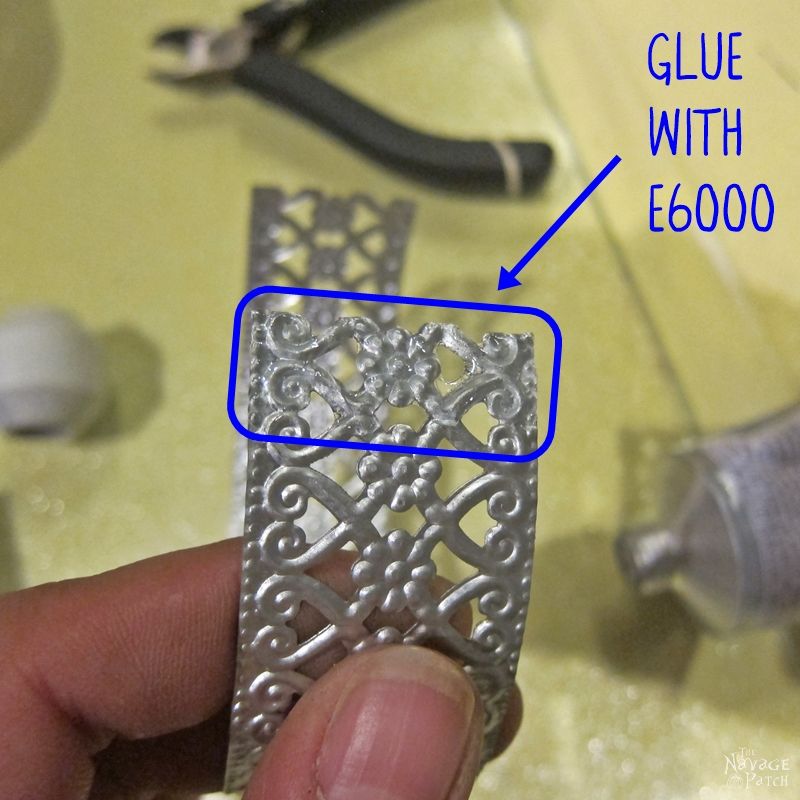
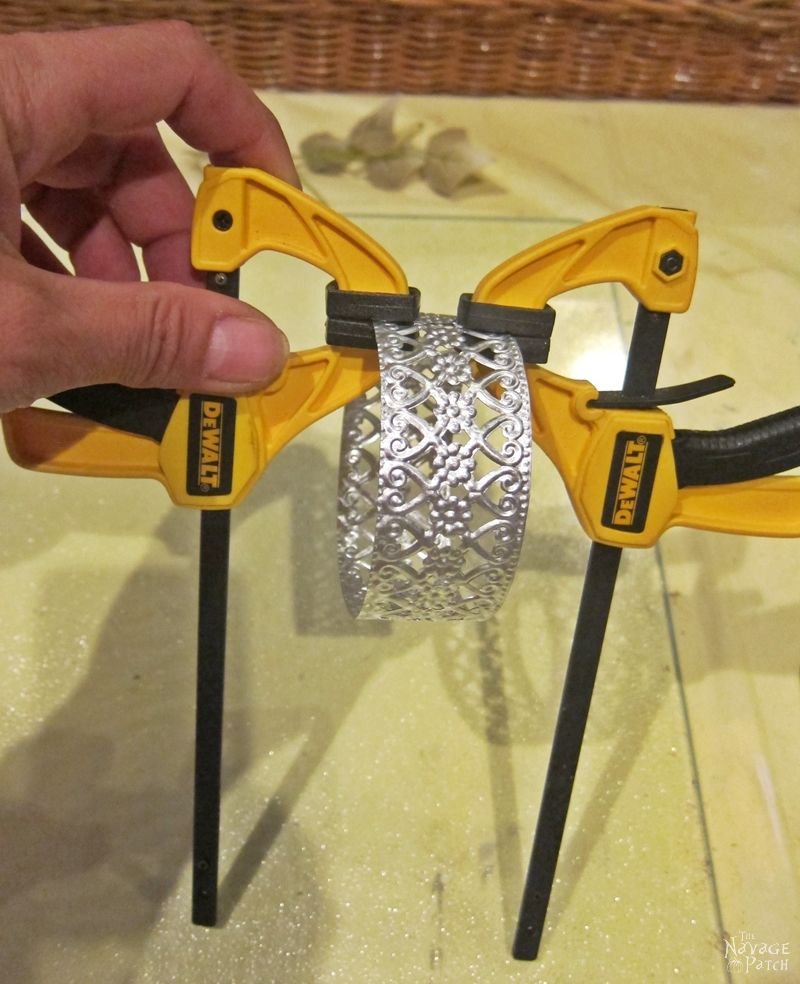
Aren’t those clamps the cutest things ever? And I have to say, they are so very handy, too! In case you are wondering, I found these little cuties at Homedepot. Amazon also sells the same type of clamps – quick grip clamps. Anyway… back to the wind chimes.
I attached some chains to the circle I made from the decorative metal strip…
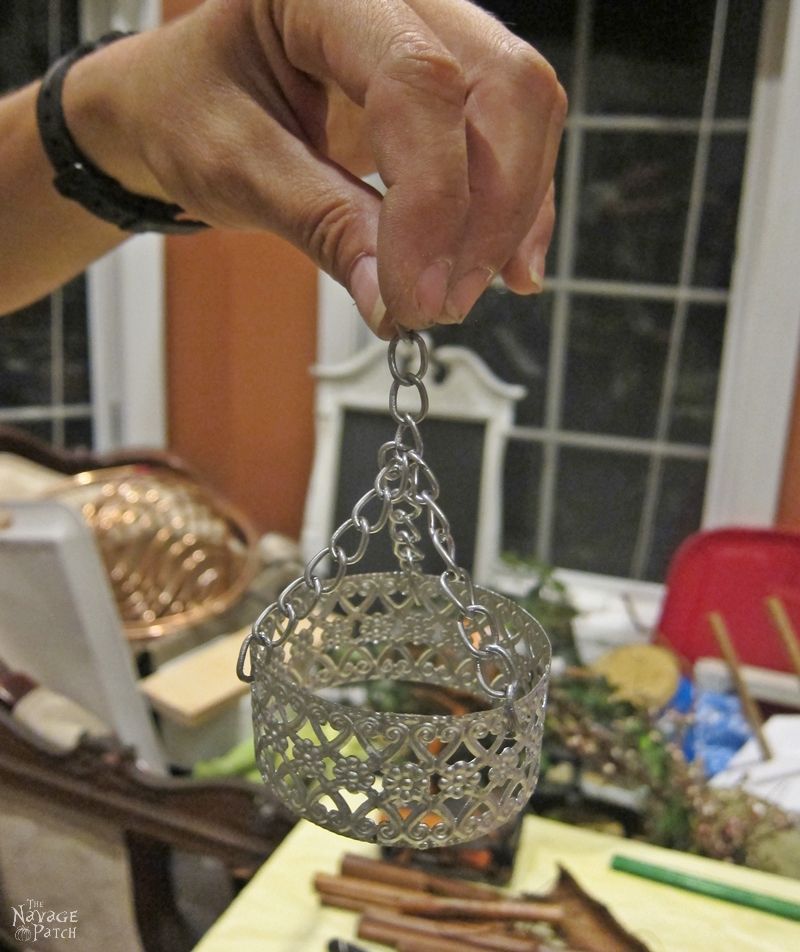
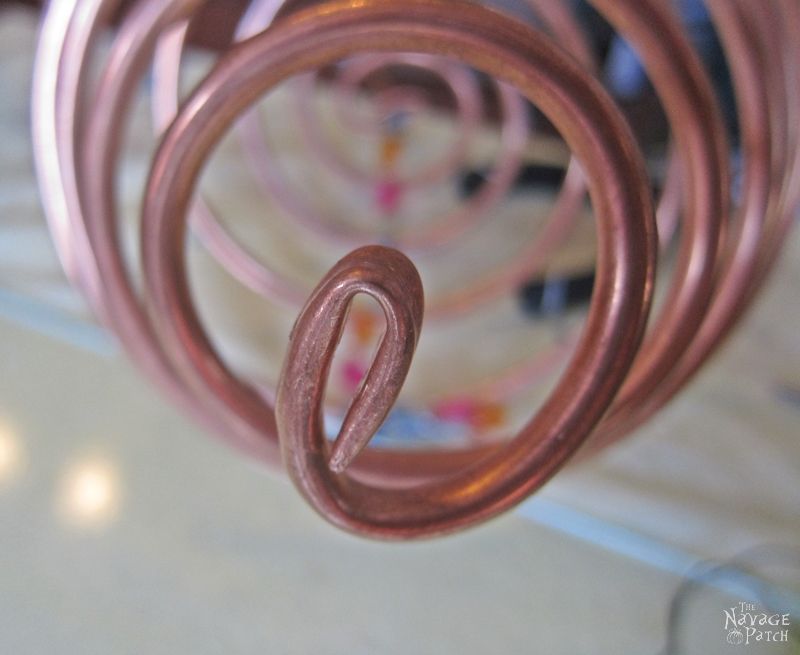
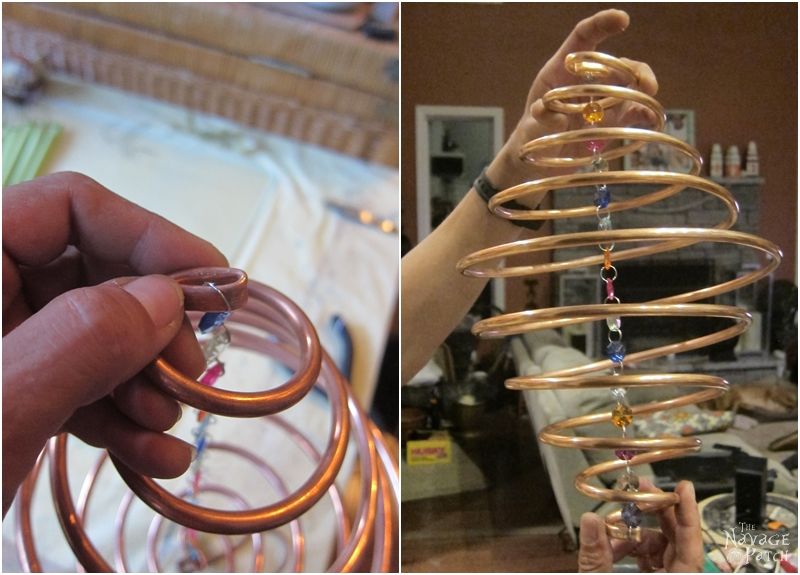
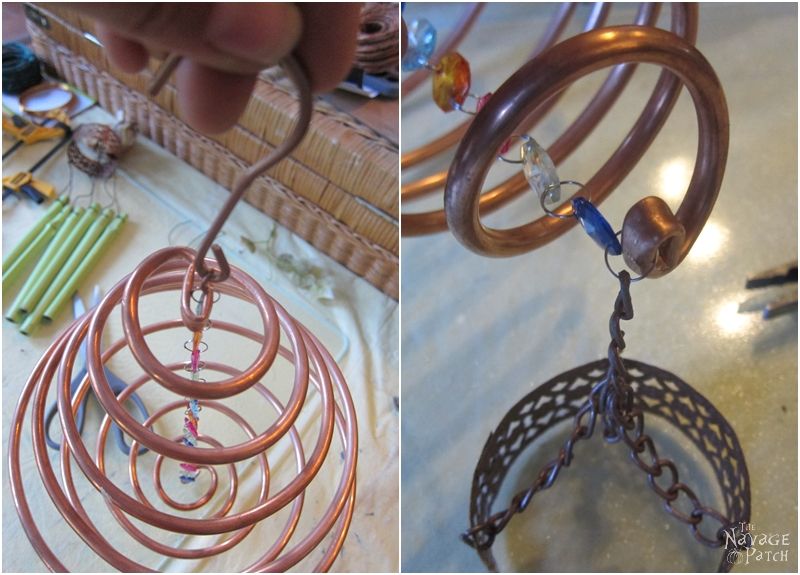
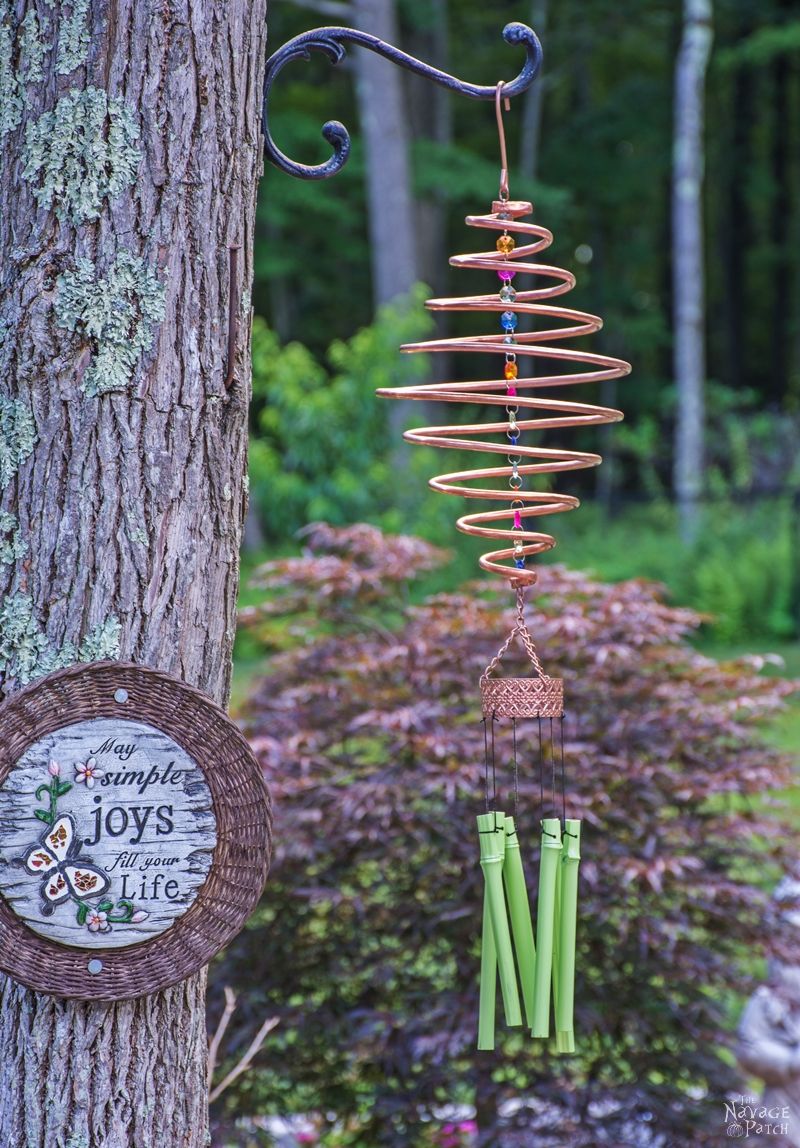
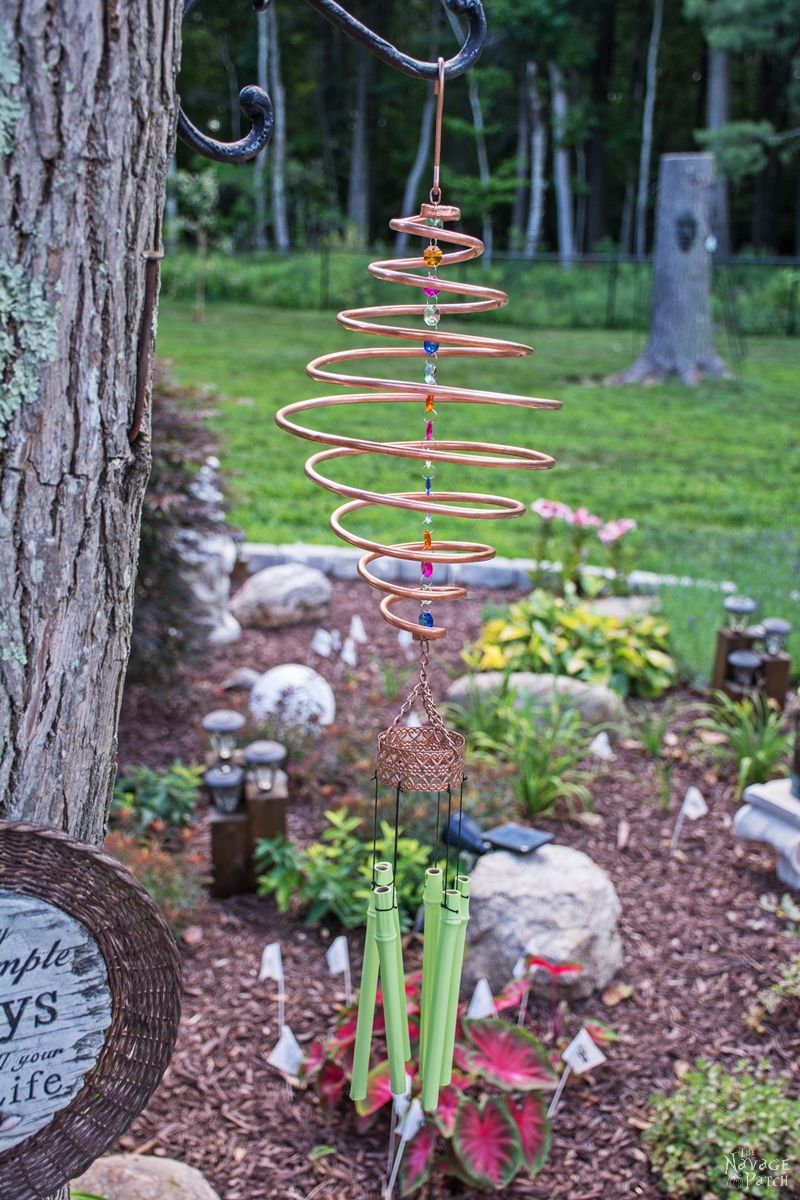
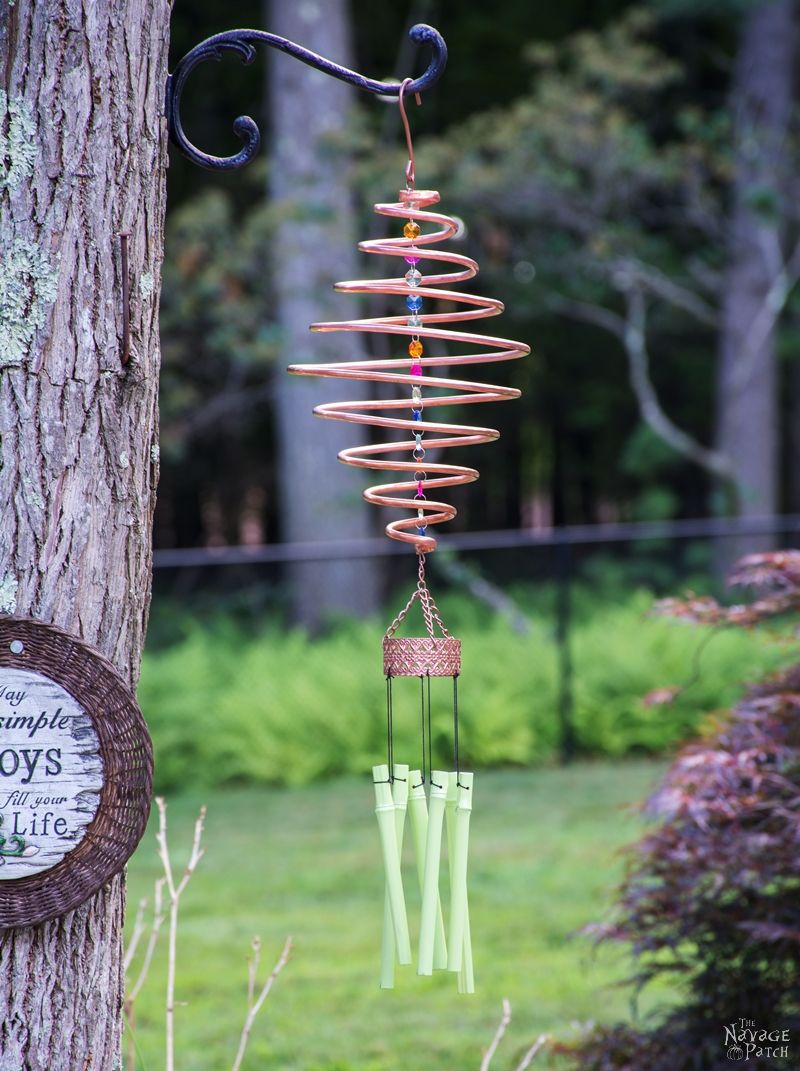
…and spray painted the whole thing with Rust Oleum’s Hammered Copper color. While I was waiting for the paint to dry, I prepared a string of beads and attached them to the coiled copper, as shown in the picture below.
Next, I added a hook on top of the coiled copper, and I added the chime hanger to the bottom.
As the final step, I hung the bamboo chimes to the chime hanger, and that was the end of the project.
As this post is a little long, it may seem like the project was also a long and hard one. But I promise you it is not.
So what do you think? Not bad, right?
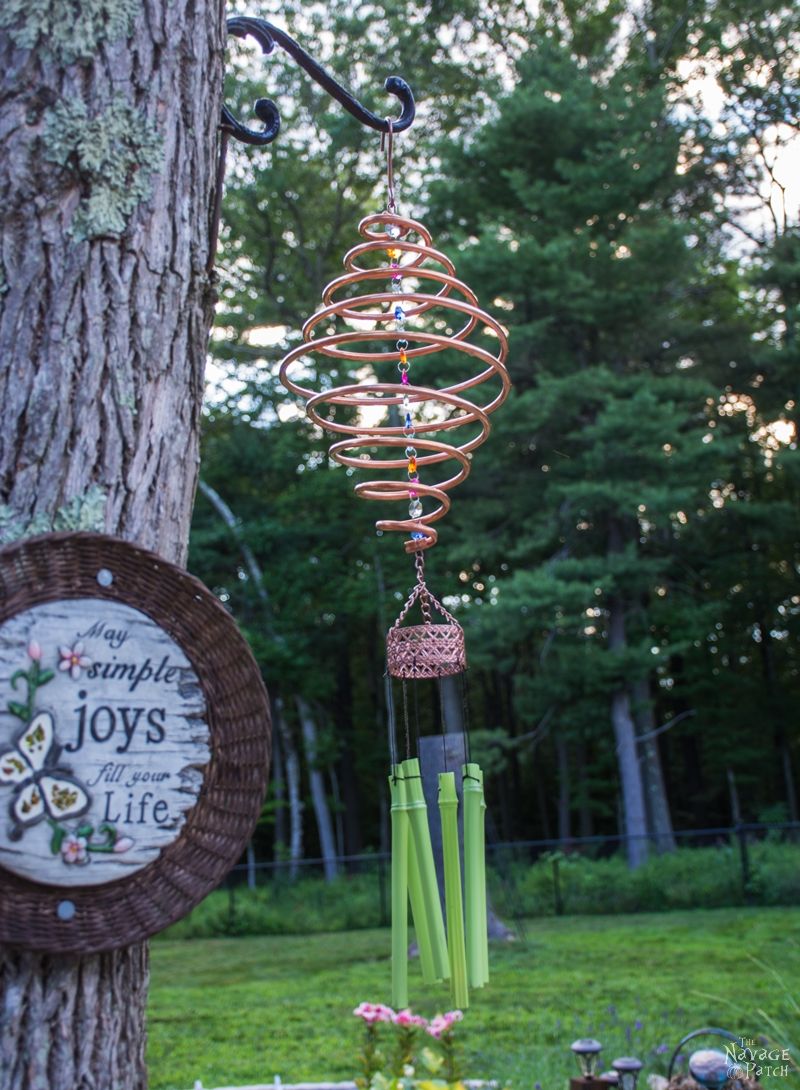
Before we go into more beauty shots, I want to explain a couple of things about the coiled copper part. I used an 11 foot long piece of copper, and I could have gone up to 13 feet but no more than that. This is because the longer the copper pipe is, the heavier your coiled copper will become, and so the coiled shape will start sagging. In other words, the gaps between each ring will become bigger due to the increased weight.
I attached the string of beads for the same reason. The string keeps the coiled pipe in shape. If I ever wanted to hang a heavier wind chimes, the string will keep the coils from stretching out under the heavier weight. See the picture below as an example.
Now back to the beauty shots!

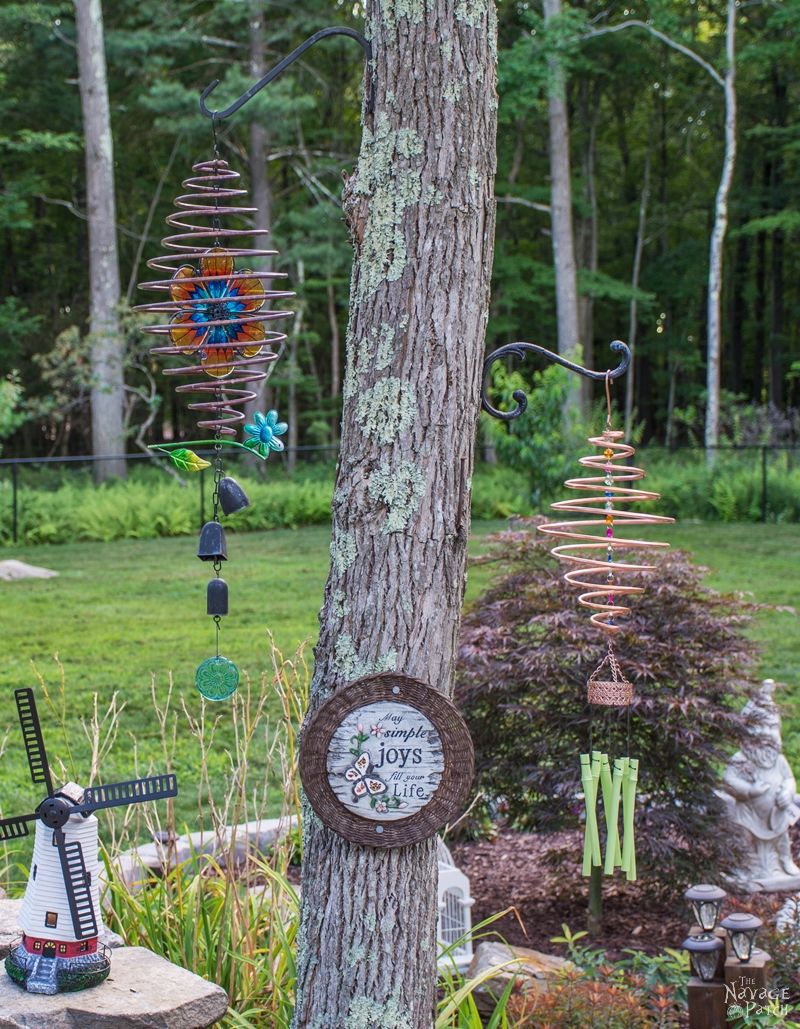
If you like garden decor, then you should check out our other garden projects, such as these waterdrop solar lights. Not only are they very easy to make, but they are also a show-stopper. Click here or on the picture below to see how I made them.

Handan, xo
We love it when you share our posts on Facebook and Pinterest!
Gorgeous chimes, great tutorial and may the reorganization go exceptionally well! ;)))) Lots of fun stuff!!
Thank you so much, Christina! We finished the shed organization (with minimum loss :D) and it looks really great now. Greg is also happy that he could take some of the stuff to Put & Take as that gave him the sense of “Now the shed is organized!”. LOL. Hopefully he will soon post about it so you can see how nice and tidy it looks 🙂
Very creative and so pretty great idea!!
Thank you so much, Sandra! I will be writing an old window post soon, and I want to give you a heads-up that I will be putting a link to your old window project in that post 😉
Wow, thanks so much Handan, that is so sweet of you have a great weekend!! :))
Ha! Now I see why and where I had some issues with mine. I love these and plan to make a couple more. Love the patina on these as they age as well as the new copper look when first made. Thanks for the tutorial!
You are so very welcome, Kat! Once again I am sorry it took me this long to prepare this post but at least I know it is helpful to you now 🙂
I love it! It turned out really pretty. I like how you added the beads in the center for a little bit of sparkle. I’ve been wanting some wind chimes but didn’t want to spend the money on them, I never thought of buying some at dollar store and taking apart and making my own. That is a great idea! I even have some of this copper tubing from my bead making. Now all I need is the wind chime, I have everything else.
If my hubby ever gets the idea of organizing our shed I will be right there with him, keeping him from taking my collection of thrifty junk for crafting to the dump. He’s banded me from getting more till I use up what I already have.
(-;
Thank you so much, Linda! 🙂
Your wind chime is gorgeous, Handan, but I really love your organizing flow chart for Greg. I’m still chuckling over it. Enjoy your weekend….organizing?
Thank you, Susan 🙂
What a clever idea! You two always come up with the coolest projects. Pinning to share and bookmark. Have a creative weekend 🙂
Thank you, Marie! 🙂
You are both so funny, I really enjoy reading your posts!! I cracked up when reading Greg organization skills, I am sure he and my hubby were close relatives in another life lol.
Your chime is adorable, I have to look for that kind of pipe around here because I’d love to try making something similar. Thanks for the inspiration!!
Thank you so much, Pili! I’m sure Greg and your hubby would be good friends! Good luck – I hope you are able to find similar pipe where you live! xo
This is so clever! I love the finished result. Pinned and sharing. Thank you for joining us at Family Joy Blog Link-Up Party. I hope you will join our next party starting today at noon EST.
Thank you so much, Cristina!
Love it! Added to my Pinterest queue.
Awesome! Thank you so much, Stephanie! 🙂
I LOVE THEM!!! Thank you for the step-by-step photos! Makes it so much easier. The copper in time will turn a beautiful green patina, right? I love that!
Thank you so much, Linda! Yes, after a time they start to look even better as they have patina 😉
I love windchimes and this one is beautiful! Love the spiral copper. I have some copper tubing in two different sizes I may try this if I have enough left of one, now that I have a tutorial to follow. Thanks so much for sharing! ?
I love those, they are so beautiful.
Thank you so much, Carol!
cool idea and they look pretty…..but do they actually chime? I’ve made a few bamboo and metal chimes and was looking for ideas for copper tubing.
What diameter tubing did you use? Also can you tell me what sizes the concentric circles of the spiral are. Did you fill the tubing with sand to prevent kinking the tubing. Thank you.
What a great post! But then, aren’t they all! I’m going to try this one…thanks!!!
Thank you, Sammi! 🙂