
How to Decorate A Narrow Stone Mantel for Christmas (in 5 minutes)
We’ll show you a simple trick to setting up your Christmas mantel decorations in 5 minutes, year after year! Works great on narrow stone mantels!
Setting up Christmas mantel decorations can be a time-consuming task, but it doesn’t have to be anymore! We used to have a hard time figuring out how to decorate our narrow stone mantel, but then we discovered one simple trick that not only sped up the decorating process (really, it only takes 5 minutes now!), but it also gave us more mantel space to work with! Curious? Then read on!
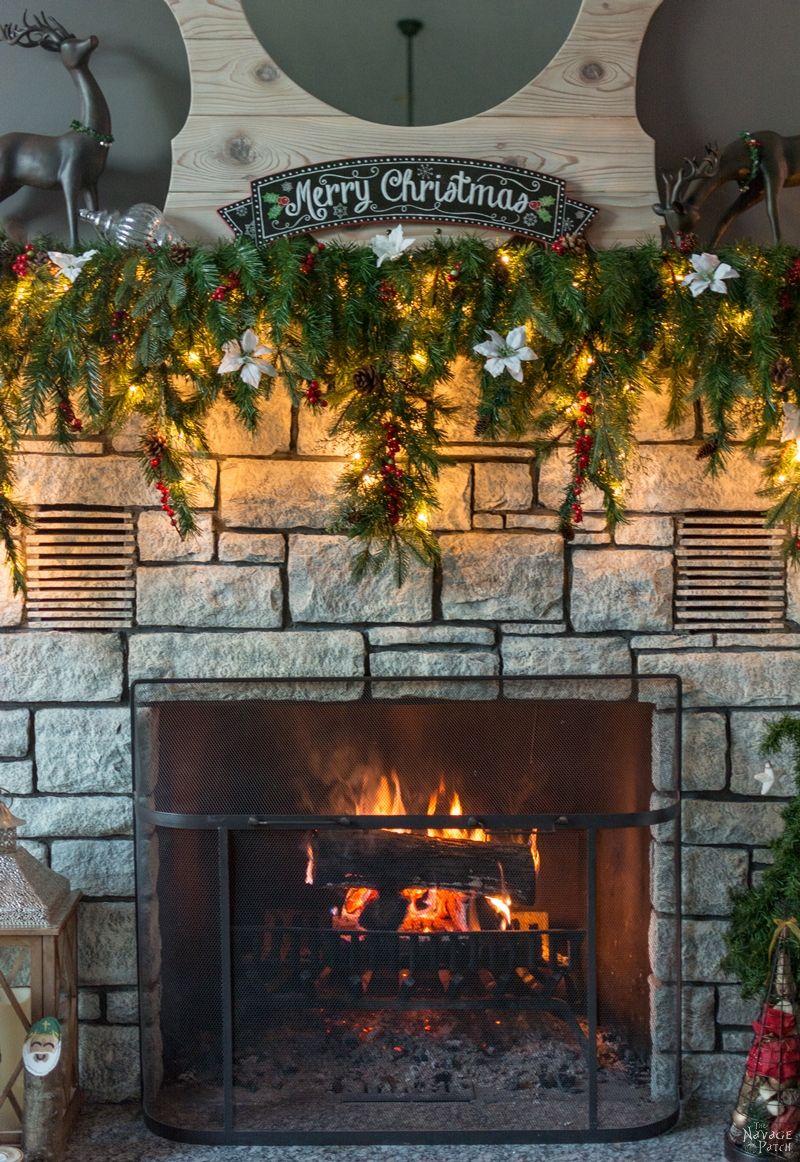
First, let me show you our Christmas mantel decorations from the last 2 years:
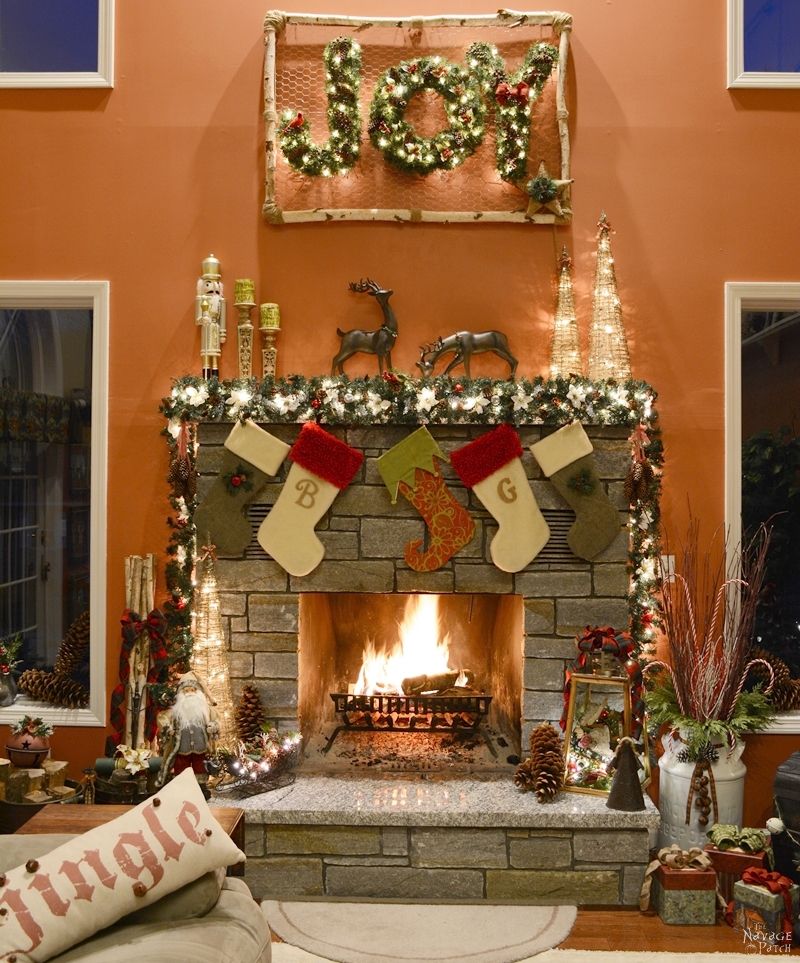
Yikes! Did we really live with that wall color for almost 3 years? Anyway…let’s focus on the mantel. It looks pretty good right? And here is last year’s mantel:

Now if I told you that it only took me 5 minutes to set up our Christmas mantel decorations what would you say?
“No way!” right?
Actually, sometimes it takes even less than 5 minutes – really, it all depends on how fast Greg can walk with a board in his hands hahaha :-D. Curious to know how? Let’s start with looking at our problematic mantel first, shall we?

Our mantel is pretty narrow – only 6.5 inches, and it is smooth granite. This is the worst combination for any seasonal decoration, because nothing stays on! I even tried using heavy duty 3M sticky wall hangers with our granite mantel, but those hangers are not sticky enough to keep any garland in place for more than a day. Besides, even if I manage to get my garland to stay, then I have no room to put anything else on that mantel. It is just way too narrow!
Now some may think “You have an oh-so-awesome and handsome and fun and talented husband, so why don’t you ask him to make a a wider wooden mantel for you?” Well…I asked him already, and the man said he would fix it! LOL.
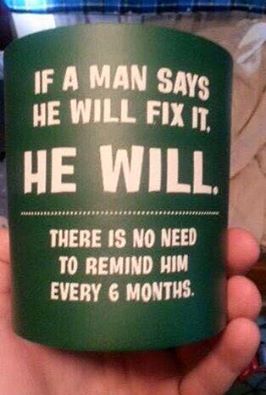
I think it was 4 years ago when I asked him that. And of course, I reminded him every 6 months after that. The latest news on the wooden wide mantel is that I will be getting it “soon.” Hurray! (Was it so obvious that I have my doubts about it? :-D)
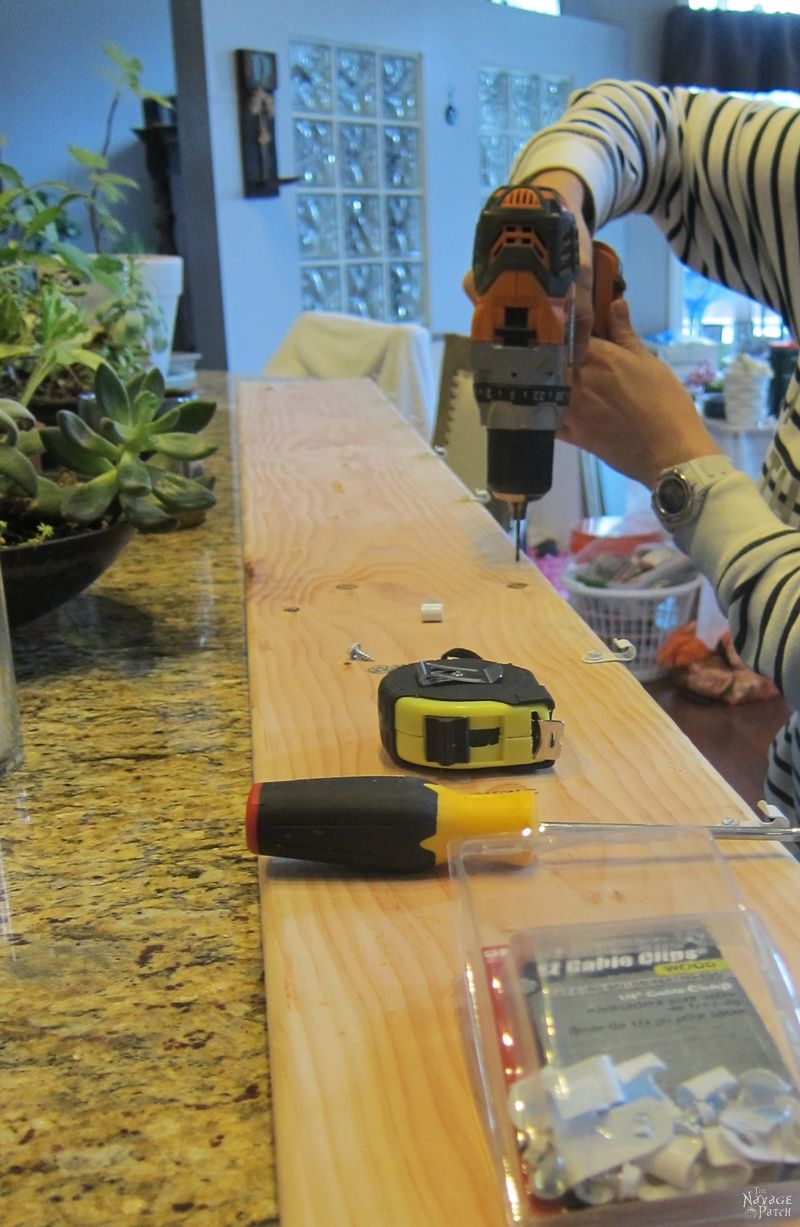
Anyhow…despite all that, here is how I managed to have my Christmas mantel decorations for the last 4 years: a 6 foot 2×8 pine board and some EZ cable clips from Home Depot, and that is all there is to it. 🙂
Depending on your mantel height, you may need to stain the board beforehand. Our mantel is pretty high, so a naked board is not visible to anyone in the living room. Also, depending on how big and bulky your garland is, you may need to use anything from 7 to 11 cable clips on a 6 foot pine board. As my new garland (in the picture below) is a little bigger and bulkier than my old one, I decided to use 11 cable clips with the 6 foot board. But with my old garland (in the pictures above), I only used 7 cable clips as that was more than enough to keep everything in place.

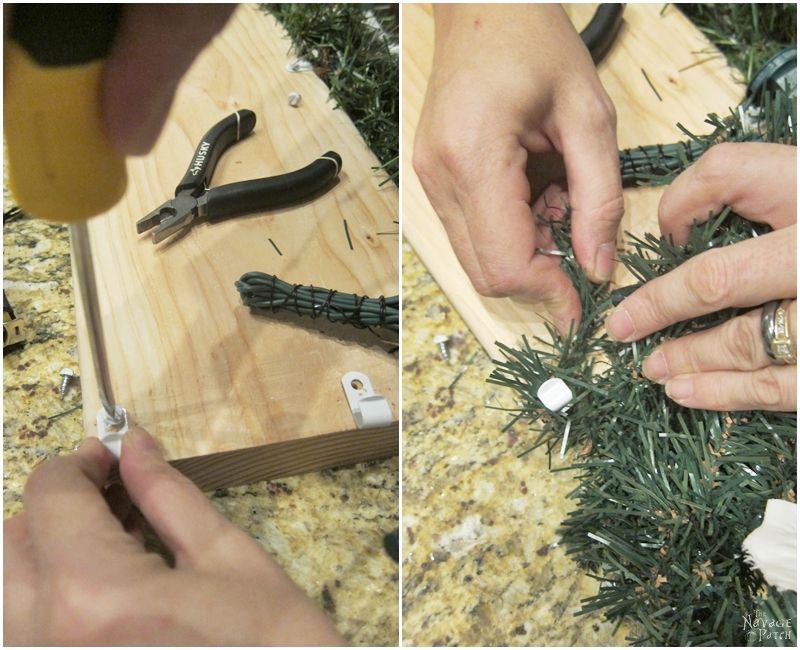
I marked the spots where the cable clips would be and drilled the pilot holes for the screws.
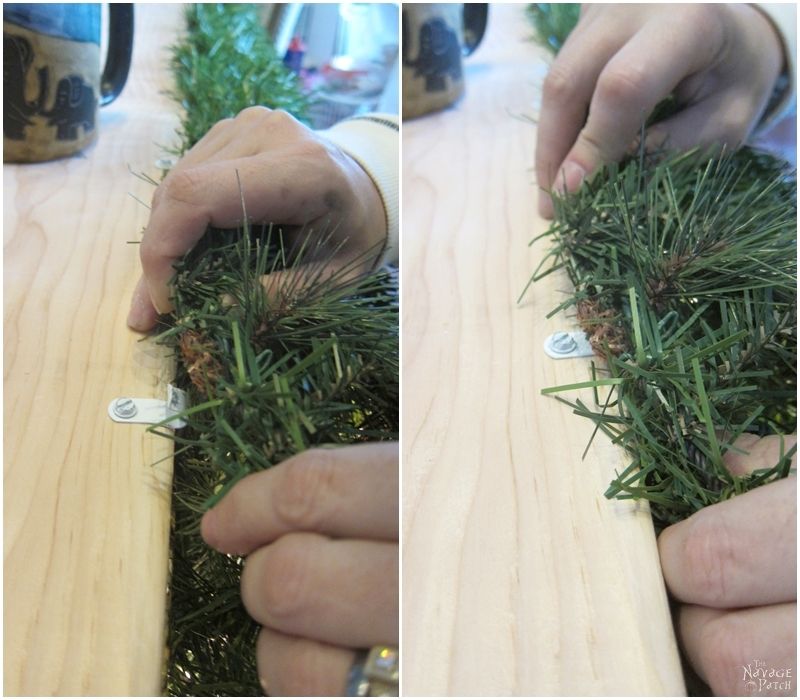
Then I screwed the cable clips onto the board.

Next, I hung my garland from those cable clips.
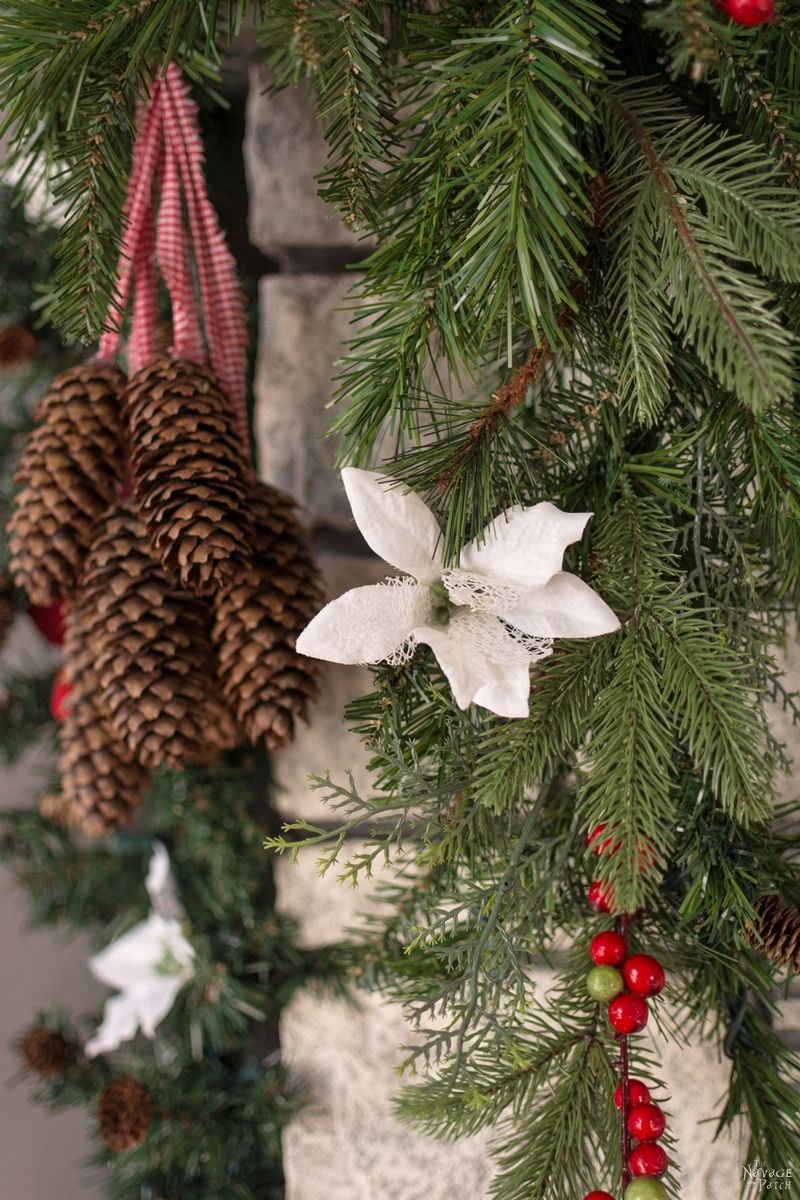
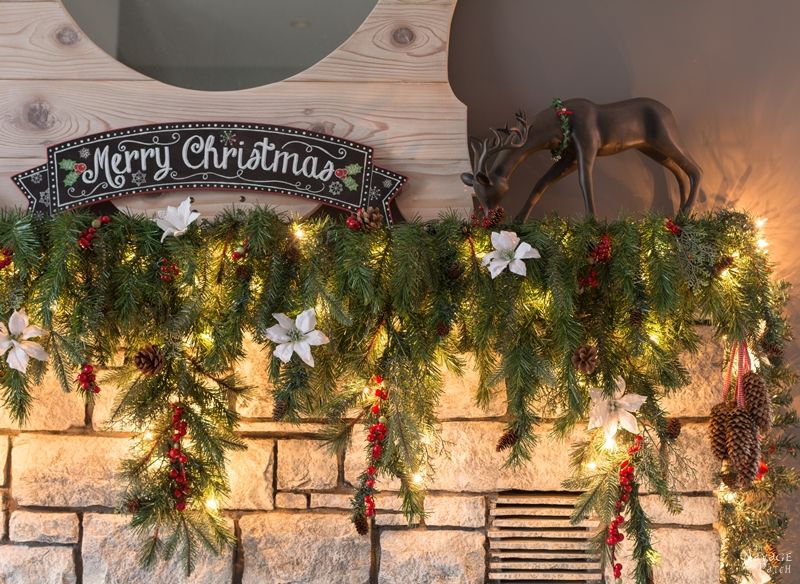
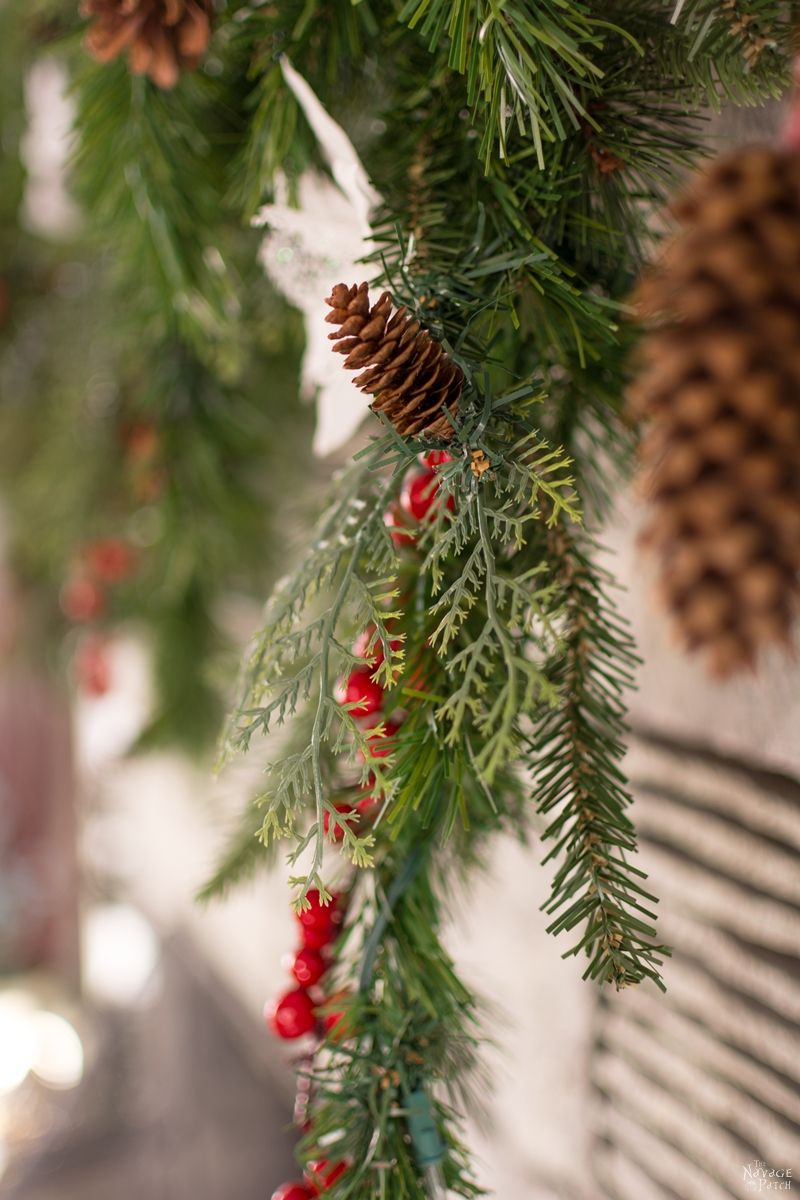
Then I started decorating our garland. As you may guess, this part is optional. I always like adding a bit of faux berries, pine cones and poinsettias to our garlands, as it makes it a bit more festive.

Once I was happy with the garland’s decorations, I moved on to the side parts of the board. The steps were exactly the same here: I screwed 2 cable clips on each side then hung a faux pine garland from those cable clips.
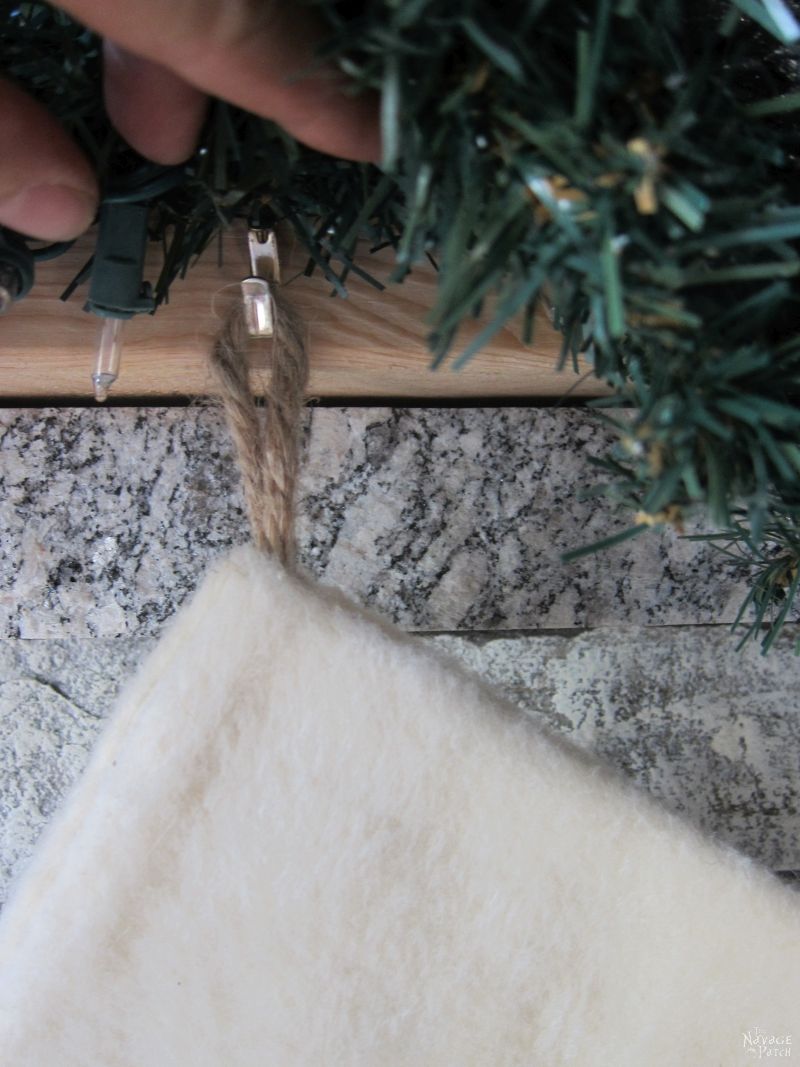
The next step is again optional: I nailed in 5 picture frame hangers on the front face of the pine board. These are for hanging Christmas Stockings as shown in the picture below.
As the final step, I asked Greg to help me carry our garland board, and we placed it right on top of our granite mantel.
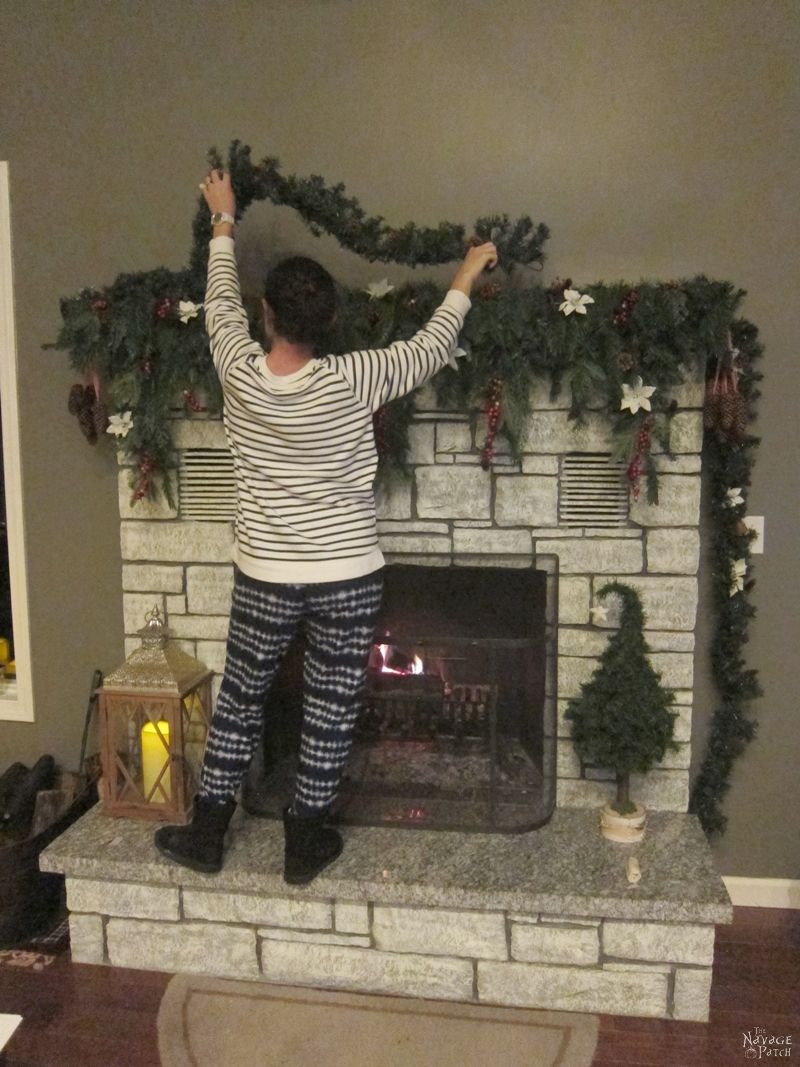
Once we placed the board on the mantel, he put the mirror back in its place, and I placed my other Christmas decorations on top of the pine board and voila!
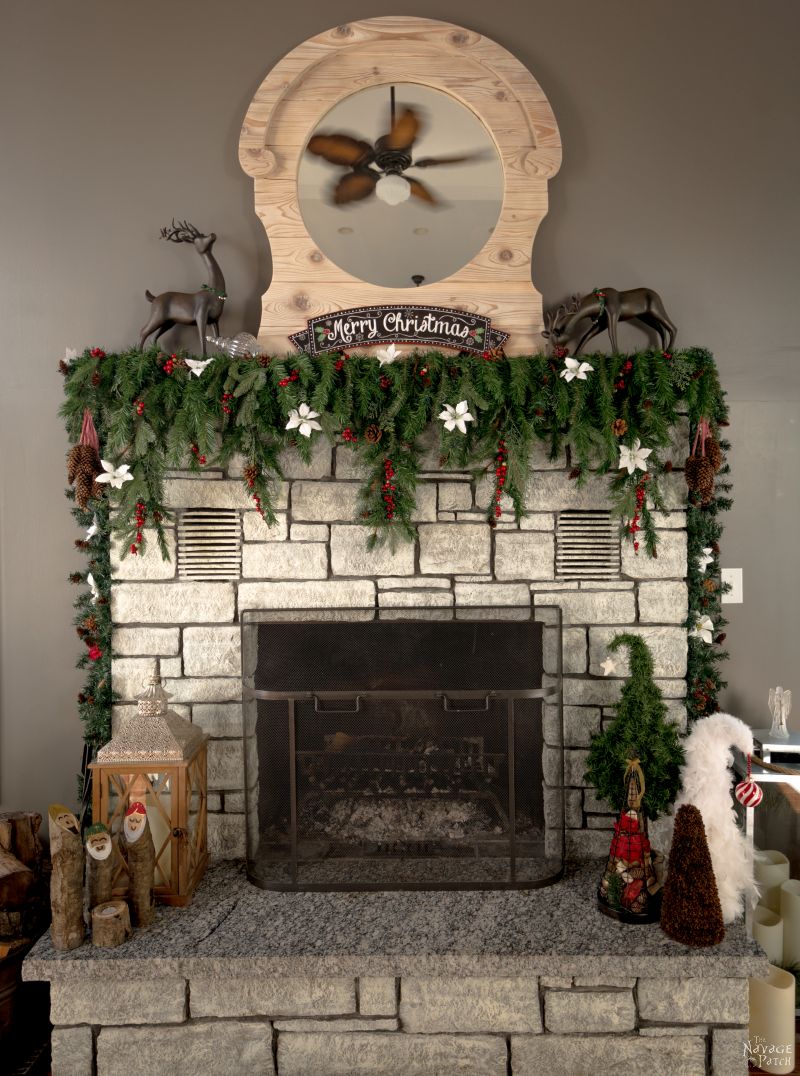
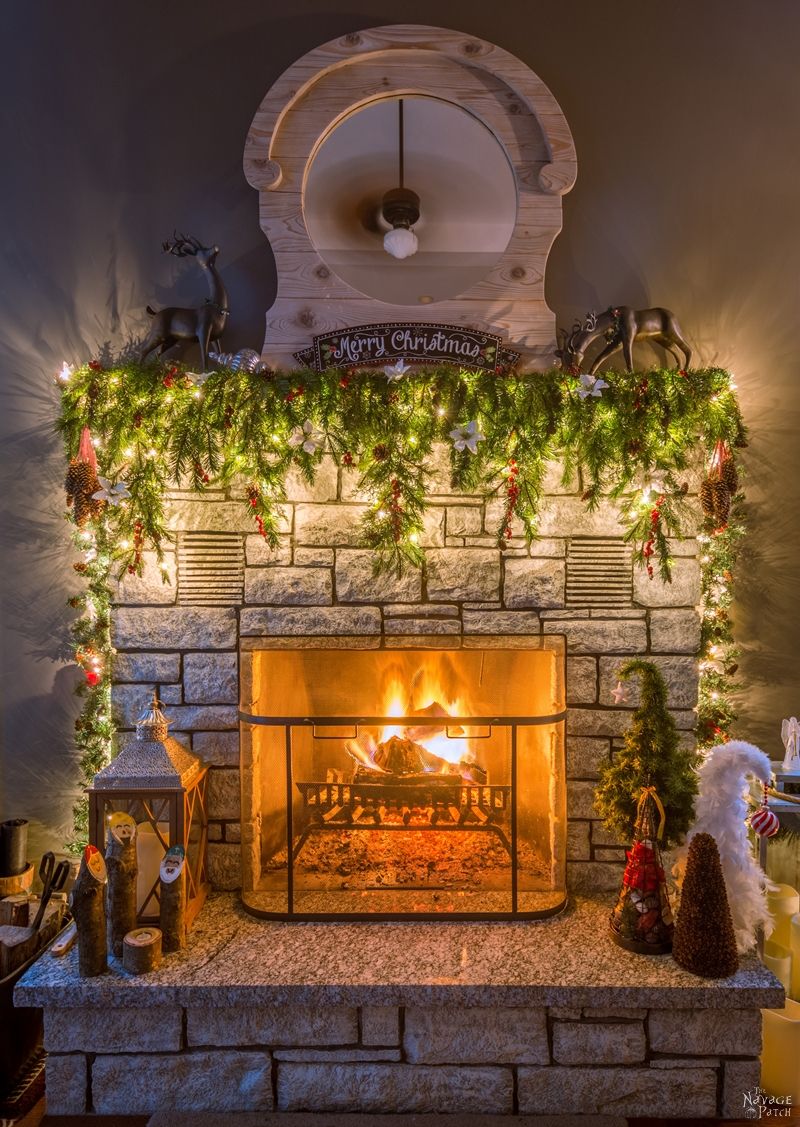
What do you think? It looks pretty good, right? And the best part is that our Christmas mantel decorations are now the easiest thing ever – only 5 minutes, year-after-year.

If you are wondering how we store this board, that is also very simple. I lay the side garlands on top of the board, and we store it on the top shelf in our basement storage area, letting the front garland hang down, so the shape stays as good as the first time I set it.
To be honest, after this post, Greg may finally turn our granite mantel to a wooden one, but still, I don’t think I will ever give up on our ready-made-Christmas-garland-board, as it saves me a whole lot of time and stress during the holidays 🙂
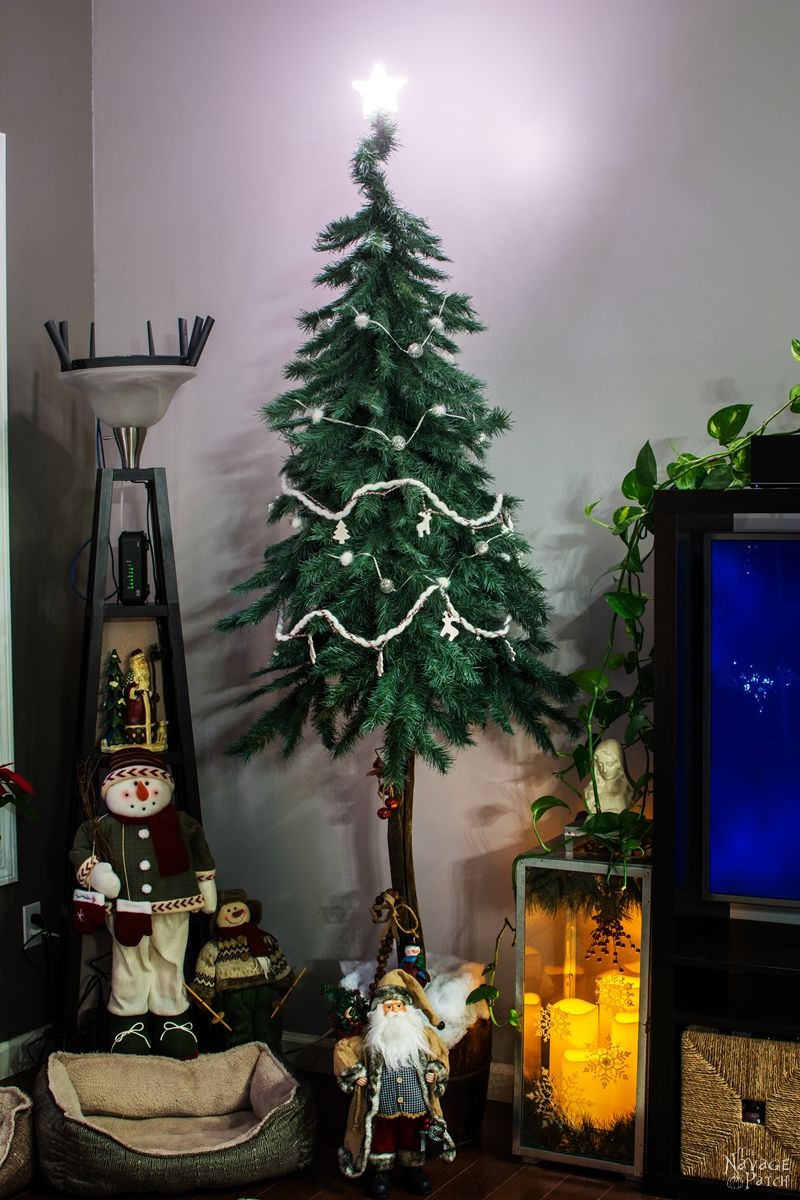
Talking about holiday stress and decorations, other than having this Christmas mantel, we are planning to skip our usual big Christmas decorations this year. And that includes having our usual big real Christmas tree. Luckily, I made the faux Alpine tree last year, and we’ll put the presents under it, but that’s about it.
Our plan for this year is to relax and enjoy the season with family and friends. Hence this year, our Christmas related posts will focus on a little bit of gift wrapping, some awesome new printables, and a little bit of easy and lovely DIY Christmas decor 😉
Handan, xo
We love it when you share our posts on Facebook and Pinterest!

Great idea but how do you store it after Christmas?
Thank you so much, Trudy! I mentioned that in the last part of the post, but here it is once again for you: I lay the side garlands on top of the board, and then we carry the board downstairs to our basement. We store it on the top shelf in our storage area, letting the front garland hang down, so its shape stays exactly the same.
You can also easily take one of side garlands off and store it standing up if you have a smaller storage area like a closet.
Very clever! If I had a fire place I’d give that a go! Looks beautiful!
Thank you so much, Barb! It definitely saves me a lot of time and hassle when getting our living room ready for Christmas 🙂
HI and thanks for the inspiration. Somehow I don’t get how the board stays in place on top of the mantel. Please help as I too have a shallow mantel! Thank you.
Hi Cindy,


The short answer is the board stays in place, because the board’s center of gravity is still on the mantel. The long answer is in the pictures below:
I used a 2×10 pine board (the real board size is 1.5 x 9.25) for this example. The red line is the mid-point of the pine board (in other words where the board’s center of gravity is), and the white line is the edge of our hearth, but for this example, let’s say it was the edge of your mantel.
When you place a naked board on your mantel, as long as the red line won’t pass the white line (as shown in Picture 2), it will stay in place due to the board’s own weight. Now in the same position, if you change the weight of the board by adding anything on the board past the white line, then your board will want to tip over. And that is what is happening in Picture 3.
In Picture 4, I accommodated for that extra weight by distancing the red line from the white line (I simply pushed the board back.) Hence the board stays on the mantel while carrying an extra weight on the front edge.
So as shown in these pictures, you can place a 2×8 board (the real size is 1.5 x 7.25) on a 6.25 inch or 6.5 inch wide mantel without any issues, as only about an inch of board will be sticking out. Or if you have a 7.5 inch mantel, you should be able put a 2×10 board (the real size 1.5 x 9.25) without any issues. Also keep in mind – the decoration you’ll be putting at the back of the white line (on the mantel side) will make your board stay in place easier and can accommodate even the stockings’ weight.
This all said, if you are still not sure that your pine board will carry your garland or not, then you can do this with a pressure treated pine board, because it is a heavier board. And the heavier the board you are using, the more load you can put on the front edge of the board, be it a heavy garland or full stockings.
I hope this info helps!
Thank you!! I appreciate the full answer. 🙂
Cindy
Beautiful and ingenious!
Thank you so much, Giselle! As they say necessity is the mother of invention, hahaha 😉
Oh Handan as usual you have created something stunningly beaitiful.It doesn’t matter that it looks almost the same ,Christmas is all about tradition, i hate the modern way of getting rid of everything and buying new every year to keep up with the latest “trend it is so wasteful in every way “.I still have some small decorations that were my grans unfortunately over the last 50 odd years fragile baubles have been broken , i also have a father chistmas and snowman my mum bought in the 60’s my favourite is a hanging musical bell my mum bought me for Christmas in 1964 .
Oh thank you so much, Catherine! Yes you are so right – as I had my previous garland-board I didn’t need anything new for the last 4 years, and our mantel looked always good for Christmas. If it weren’t for preparing this post (to help those who have a narrow or stone mantel like we have) I’d still be using our old garland-board.
Just because of this post, Greg told me that I should get a new garland and use that for the new board. And you know the rule of thumb: if your oh-so-awesome-and-great hubby tells you to go and buy something for yourself, you should never argue with him and do as he says 😀
for all of the lucky people with a fireplace this is great advice handan, and your mantel always looks spectacular, way better than i could do in 5 minutes, we just unload the tubs and shove stuff where ever it fits lol xx
Oh thank you so much, Chris! I never had a fireplace before this house. So until moving here, I didn’t even know what a mantel was, let alone how to decorate one. hahahaha…can you imagine our first Christmas? LOL. I can’t even describe how lost Greg and I were with everything falling apart. Aaaahhh fun days…but right after that first Christmas, little by little we started to figure things out and started to learn our house. With that, life got a bit better and also lazier I guess. So by the next Christmas, I realized I was about to go through the same decoration hassle, and I was like: “Elf this! I can only put myself through this hassle once more and no more!” hahahaha. So that was how I discovered the garland-board and now it is our favorite decoration in our house. LOL xx
Brilliant idea Handan and it looks soooooo Ah-mazing. I wish we had a mantle of some sorts here at home.
Thank you so much, Michelle! 🙂
Genius idea!! I have a deep mantel, but have trouble keeping things up without nailing them in. I think I will try this idea!! Also, LOVE the garland and have been looking for one like it. Finally found your link-THANK YOU!!
Thank you so much, Laurie! I am so glad you liked my quick mantel decoration solution 😉
Awesome idea! You guys have the most ingenious posts and I really love the ones where Greg writes the post.
QUESTION: I notice the stockings are marked with a “G” (for Greg?) and a “B” (for Handan???). Just curious ?
Hahaha – that makes two of us! His posts are the best!
As for the question: G for Greg and B for Barish (our son). The one in the middle (elf stocking) is mine. As it was different, I didn’t mark mine with H. The other two are for our dogs (Penny & Pepper.) Hopefully one of these days I will give the tutorial for our stockings. 😉
Awesome post! My mantle is as wide/deep as yours but made of wood so it’s easier to put things on it for Christmas HOWEVER, I love your garland & how it looks like it’s dripping off the mantel. Did it come like that? Or did you make it do that? Thanks!
Thank you so much, Victoria! The garland came like that – meaning that it was already in that cascading shape. I only decorated it by putting some berries, pine cones and poinsettias. because it came bare (just faux winter greenery.) I linked to the garland in the post, but here it is once again: http://fave.co/2jmTBig
It is a nice and very full (biiiiggg) garland, but if you consider getting one, try catching their sales so the price would be somewhat normal. I bought mine when they had a “25% off + free shipping”, so what I paid was totally worth the amount of garland you get 😉
Handan you are a genius! I love your posts!!! I always look forward to your funny and sweet posts. This is such a great idea and although I don’t have a skinny mantel, this is a very smart way to keep from damaging my mantel and make it quick to put up and take down the decorations each year. Have I mentioned that you’re a genius??? You amazing woman you. I hope you, Greg and your beautiful puppies have a beautiful holiday season!
Awwww – thank you so much for your lovely comment, Summer! You just put a huge smile on my face! I hope you and your family have an awesome holiday season too!!
Thank you so much Handan. I have been looking for a solution to hang garland on my narrow stone mantle for several years. You’ve made my holidays happier.
This genius idea just blew my mind. I am so so happy I found and joined your fabulous site. Thank you. Thank you. Thank you for this diy idea that after this Christmas, we will be stealing this idea.
Stay safe and healthy. Happy holidays
Thank you so much, Ivory! We always love to hear from you. Happy holidays to you and your family! 🙂