
DIY Built-in Media Console
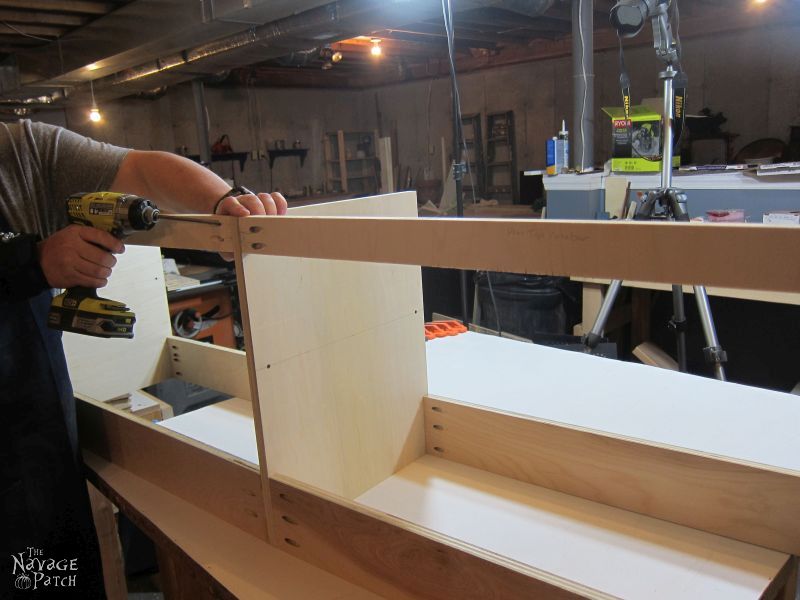
Once I cut and labelled all of the pieces, I drilled the pocket holes with my Kreg Jig. Handan bought the Kreg for me a couple of years ago, and it has become an indispensable part of my shop.


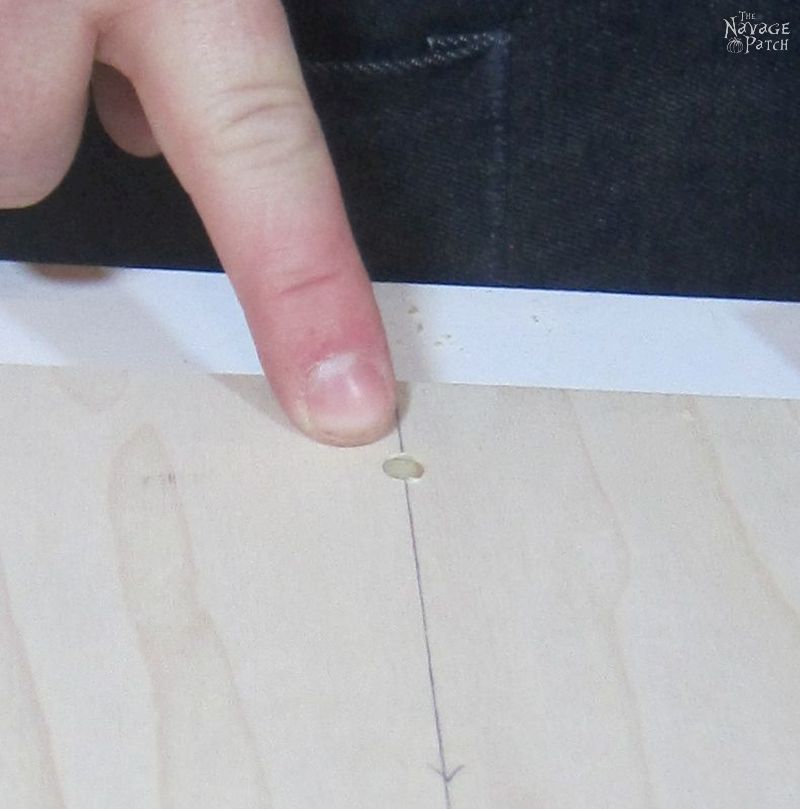
The cabinet space inside the console would be tall enough to accept the IKEA baskets we had stored in the unit we were getting rid of. But in case Handan wanted to reconfigure the space in the future and store smaller items in there, I used a handy little jig to drill holes for shelf pins.

The pieces were cut and the pocket holes and shelf pins were drilled. It was time to build. I wrapped my wrist with a gift that Handan gave me for Christmas.

It was much easier to have the screws so close at hand!


I will be updating this post in the next few days with step-by-step diagrams on how to build the console, so be sure to check back if you plan to build one of your own.
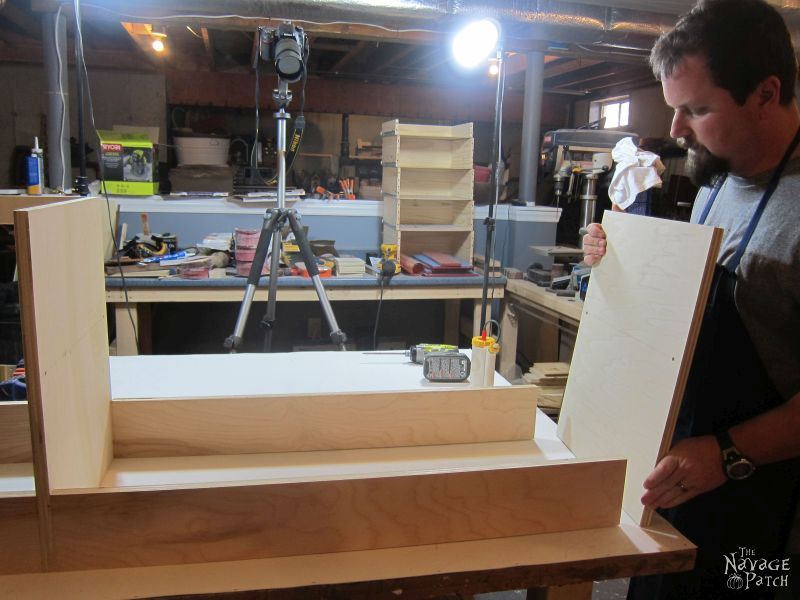
Piece by piece, Handan and I built up the console.


But something was on my mind.


Am I worried about rising interest rates?

Or perhaps I’m just dreaming about lunch.

With the carcass mostly built, I installed the bottom shelves.


Next, I built the face frame.


I attached the face frame to the console with brad nails, though you can also use a little wood glue along with brad nails for added strength.

Judging by my shocked expression, I must have worked out the meaning of life.
I’ve since forgotten.

The console carcass was now built, but not yet ready for painting. First I filled all the brad nail holes with spackle. I filled the end grain of the plywood with wood filler. If you leave the end grain exposed, it has a tendency to show through the paint. I filled any gaps in my joinery as well. When the filler was dry, I hand-sanded everything with 150 and 220 grit sandpaper until the whole unit was smooth and free of defects.
Click on ‘Next’ to continue.
omg i was so glad to see the patch in my email. it had been too long but greg your bloviating ( i had to look that word up ) filled my need ten fold lol, this project is awesome and gorgeous and makes me wish even harder that i lived next door so i could borrow all of your tools xx
that is a super impressive project!
Thank you, Mel!
voted xx
Thanks, Chris! I’ll let you know if my neighbors move out!
Great directions for a window seat if wanted! Well done. And yes, I voted.
Thank you so much, Derry! 🙂
Geez Greg, just when I think you’re an everyday man, you do something like this that makes everyone else feel woefully inadequate. I would never be able to do something like this, but your bloviating is entertaining, nonetheless. And I voted.
Hey, I’m everyday! Except on Saturday. And sometimes Tuesday. 😀
well this was a pretty intense post, but well done you guys! i love the latches, and that photo of you with your pipe, contemplating your first step, lol.
b
LOL, thank you! 🙂
Oh my goodness, I’m in awe! If I only possessed the talent in your little finger! The piece looks amazing by itself, and even more so combined with the Ikea pieces. Thanks so much for linking up with us at The Creative Circle Link Party! I can’t wait to share this, this week!
Thank you so much, Iris!
This is amazing! Nice work!
Aloha,
Charlee
Thank you, Charlee!
Awesome job guys! I love the little door latch thingies – I haven’t seen them like that before. And I too am a firm believer of using your finger to smooth caulk. Thanks for sharing! xx
Thanks, Kate! Yep, can’t beat the finger!
I love the look and the fact you have plenty of room. Very nice indeed. I am normally into the rustic look and country but this looks as if it could fit in the new age and old day age at the same time
come see us at http://shopannies.blogspot.com
Thank you, Annie! I agree, the style is timeless 🙂
Love the details of this tutorial!! Awesome job!
Thank you, Jen! 🙂
I really enjoyed reading every word here, you crack me up. You did an outstanding job! It looks fantastic.
Thank you so much! 🙂
Fantastic post, love your writing style, always gives me the giggles. Great project too! Wish you were my neighbor. Thanks for sharing! ?
Thank you, Naomi! 😀
Wow! This is amazing. I think everyone has their “never” moments but time and experience change “Nevers” to “Maybe’s” and our world becomes broader and more adventurous. Amazing work.
Thank you, Melissa!
Great job !!!!. The two you work together like pros. Not sure what you do for a living but you may want to consider going into comedy. This was a two for one. Great project idea that kept me laughing the whole way. Thanks for sharing.
Carolyn
Thank you so much, Carolyn! I love to make people laugh 🙂
Hey Greg I wanna build this but for some reason it won’t let me subscribe to get the plans
Hi Leticia, I’m sorry for this late reply. I looked in our database and see that you were able to subscribe. Were you able to find what you were looking for?