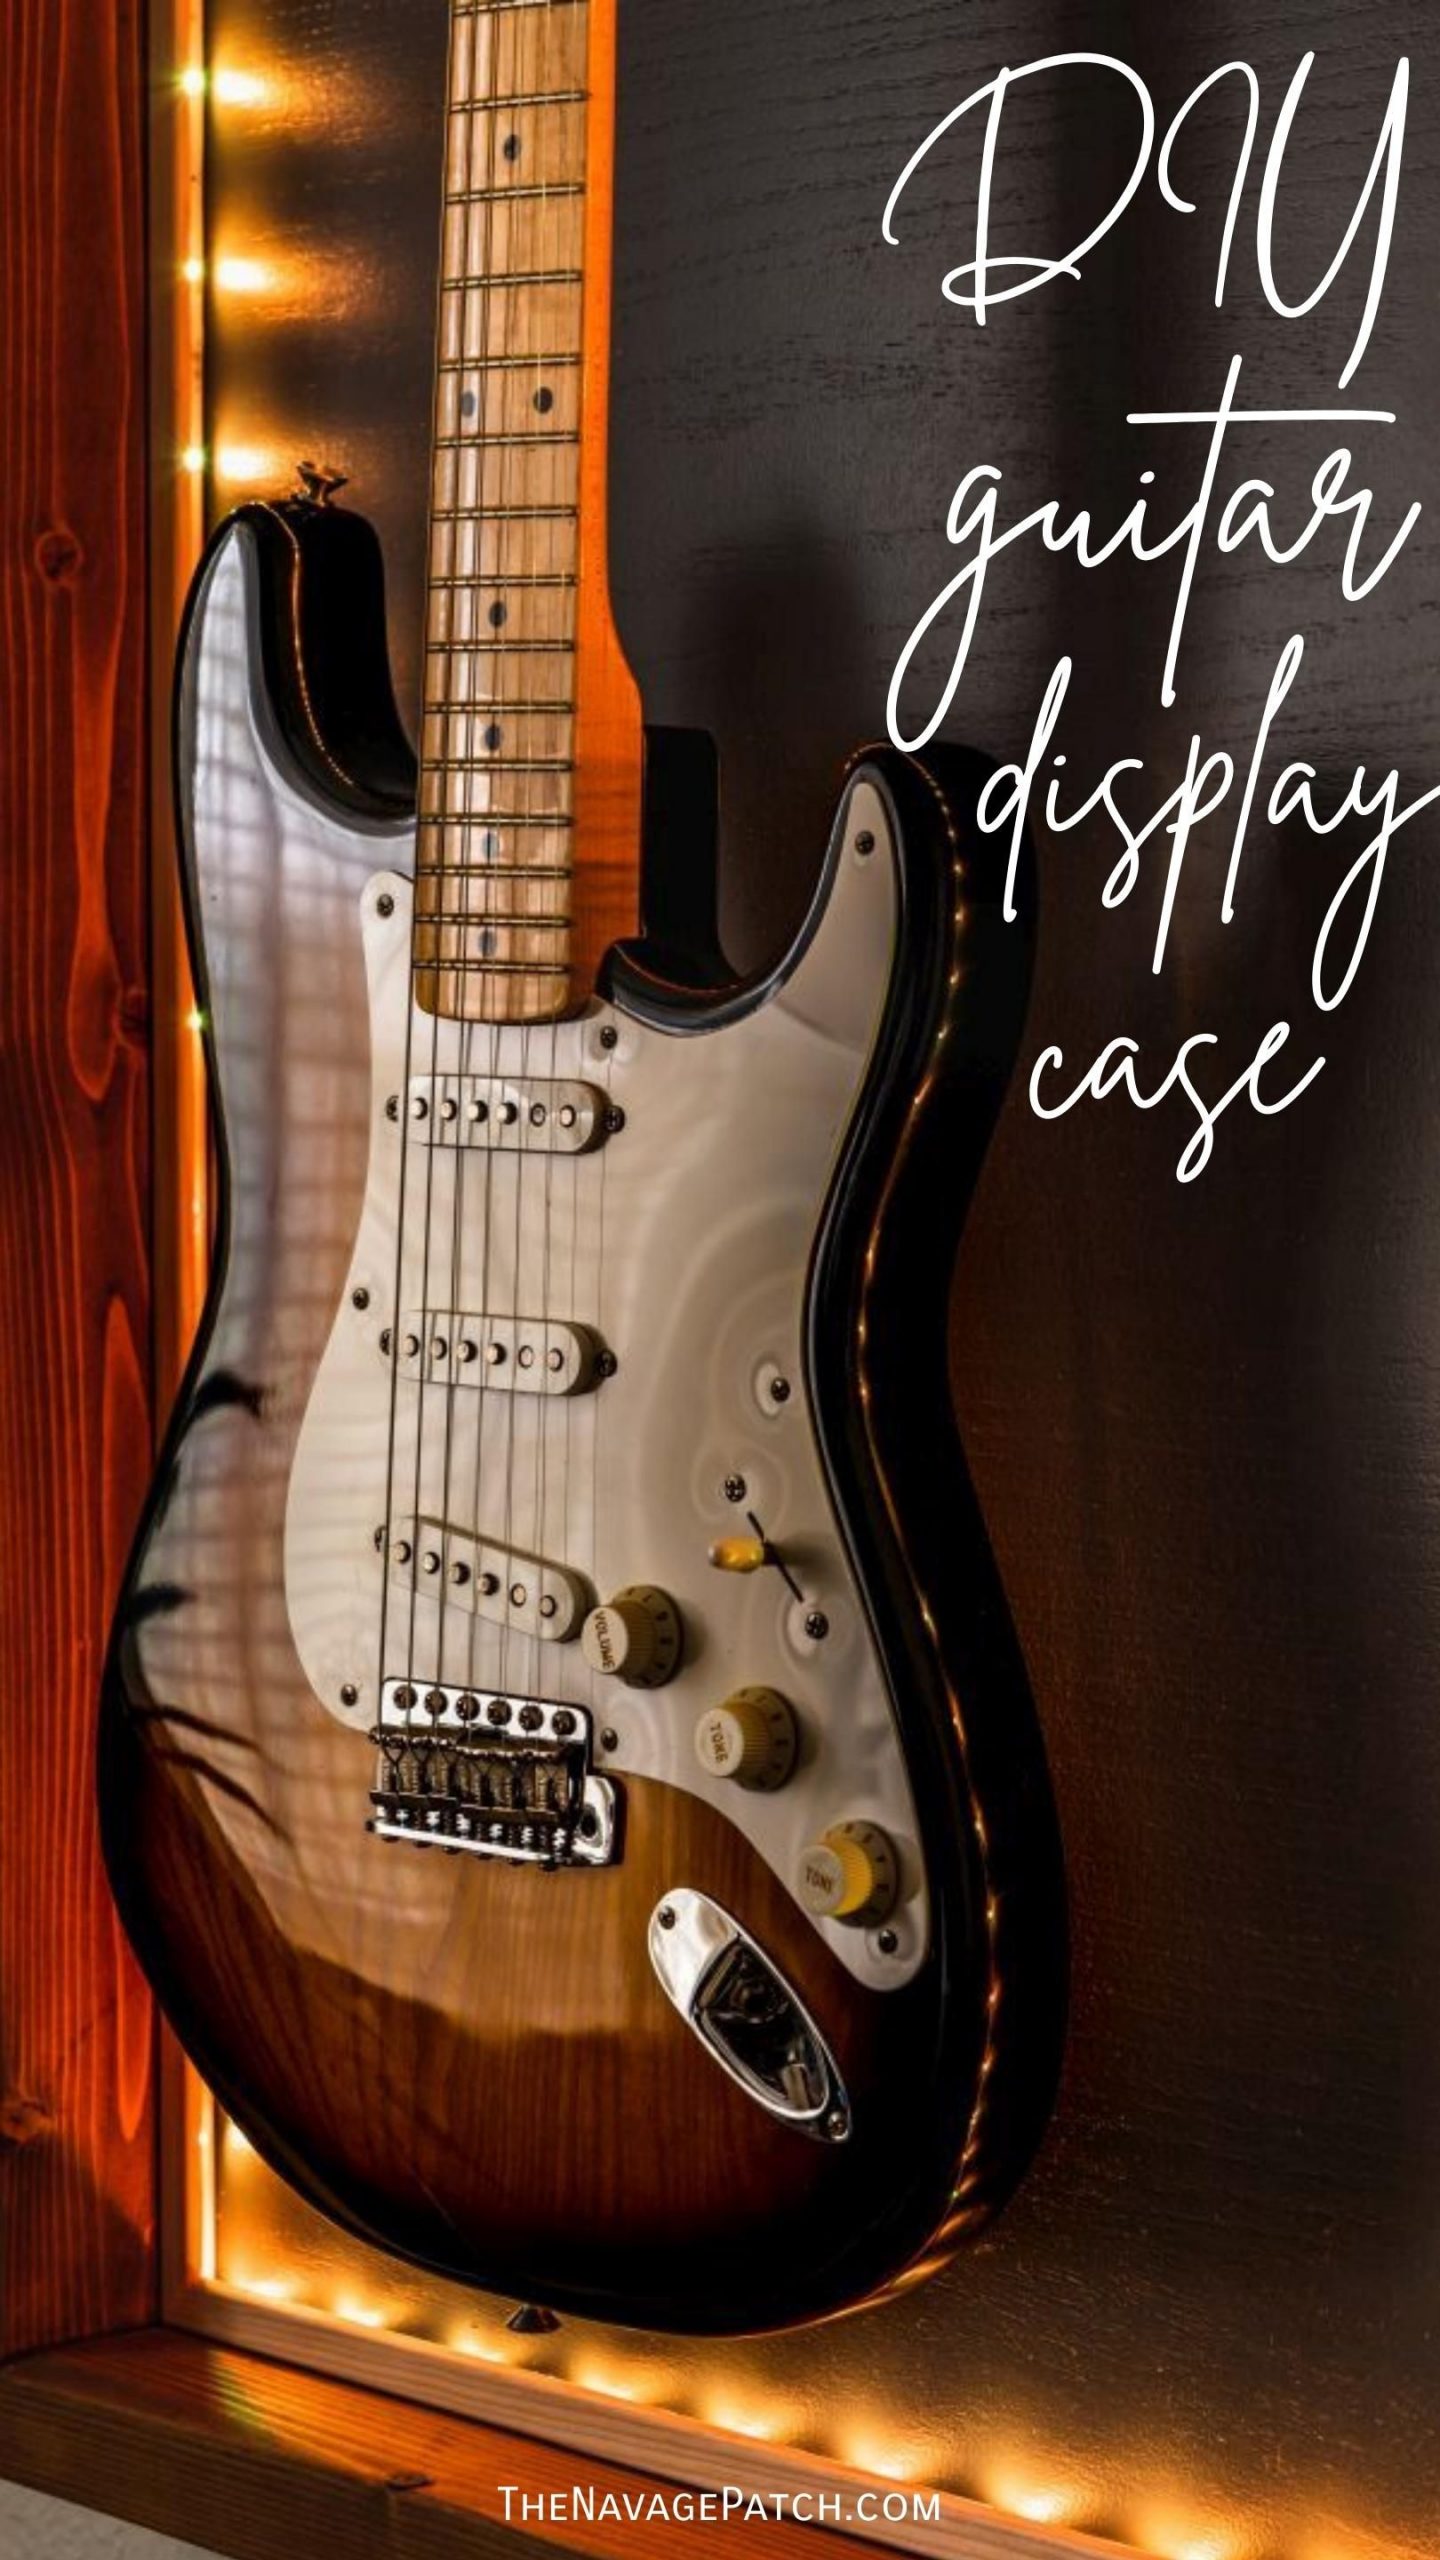
DIY Lighted Guitar Display Frame
Show off your ax with a DIY Lighted Guitar Display Frame! It’s a cheap and easy way to make your guitars the focal point of any wall!
When I was a younger version of myself, I played guitar in a rock and roll band. Throughout high school and college, my guitar was rarely far from my side. Music was the most important thing in my life – far more compelling than school, and a hell of a lot easier to master than flirting with girls.
There was a time in college when I thought about pursuing music as a career. I thought about trying to make it as a guitar man in a rock and roll band.
Where would I go?
LA?
Those were the days of Big Hair Metal. Can you imagine me in skin-tight spandex and a glorious mane of wavy brown hair? Maybe a codpiece thrown in for good measure?
(o_0)
Time passed, and I left the comfortable dreamspace of college and ventured into the Real World. Fortunately for me, you and everyone else with eyeballs and eardrums, the obligations of adulthood intruded upon the brittle dreams of my youth and shattered them into faded fragments of memory – forgone but not entirely forgotten.
Though I never plugged into an amplifier and played a wailing guitar solo to a cheering crowd again, I still kept a couple of guitars on hand that I reached out for from time to time, if only to remember those youthful days in dark and smoky places.
When we moved to the States in 2013, I thought it would be a perfect time to pass the torch to Baris. Handan and I went to a music shop, and we bought the boy a small-sized acoustic guitar. I taught him a couple of chords but soon realized that he’d be better served with a teacher who wasn’t also a family member.
He flourished.
I never would have thought he’d get as good as he did as quickly as he did. And he could do at age 9 what I’d never been able to do – play guitar and sing!
Starting him on guitar was one of my first proud-father moments.

But keeping him on that path required a little work, and that’s where these guitar display cases come in.
Baris is a kid of convenience. Thought of another way, he’s the pinnacle of efficiency. He loves fruit, for example, but if the fruit is hidden behind a refrigerator door, it will spoil in the produce drawer. But if that fruit is displayed in a bowl on the counter, his hand will reach out every time he passes by. There are no wasted movements with him, and if it means he goes without something he loves, well, that’s just the price of ultimate efficiency.
So to keep him on the path, we figured having his guitars within arm’s reach when he’s in his room will help him play guitar instead of video games every once in a while.
And do you know what? It has worked!
Let’s have a look at how I made these guitar display frames, and then I’ll show you the makeover!
DIY Guitar Display Frame Supplies List
Affiliate links are provided below. Full disclosure here.
- 1/4 inch plywood
- Scrap 3/4 inch plywood or other wood
- 2×4 lumber
- Guitar hanger
- Wood glue
- Brad nails
- French cleats
- Dark paint (we used Coffee Nook by Magnolia)
- Pre-stain wood conditioner
- Stain (we used Minwax Special Walnut)
- Poly of your choice
- Pine outside corner moulding
- Color changing LED light strips

How to Make a Guitar Display Case
Update 2022: I originally made these guitar display cases for Baris back in 2019 when we were living in Connecticut. We’ve given them a young man’s makeover for his Florida bedroom, and they look freaking amazing now!
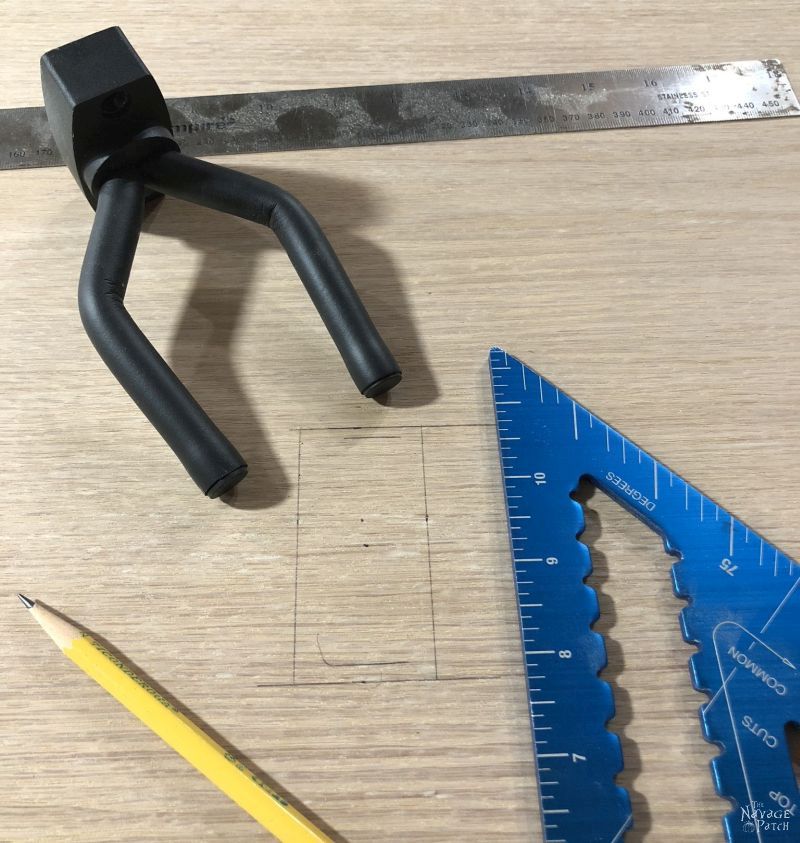
I first cut two identical pieces of 1/4 inch plywood that were longer and wider than either guitar. Handan and I just eyeballed it and settled on a size that we thought would look good with both guitars. We then centered each guitar on its piece of plywood. The guitars would hang from wall-mounted guitar hangers, and my next step was to mark their locations on the plywood.
I would later be gluing a mounting block to that rectangle, so I masked it off with blue painter’s tape and then handed the two pieces of plywood to Handan for painting. We wanted the backs to be the same color as Barish’s walls, so she painted them with Behr “Bit of Sugar.”
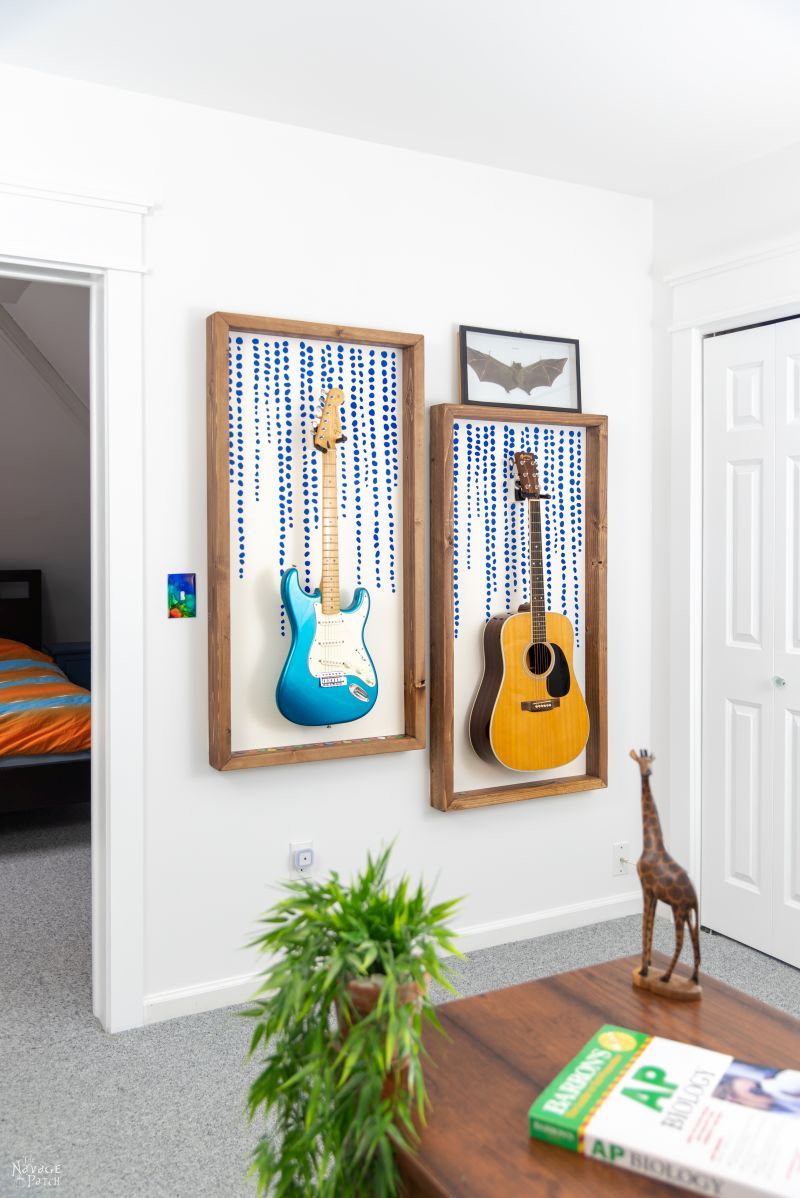
To bring color to the guitar display frames, we decided to use the same stencil we used for Barish’s accent wall. It would complement the accent wall and bring continuity to the room.
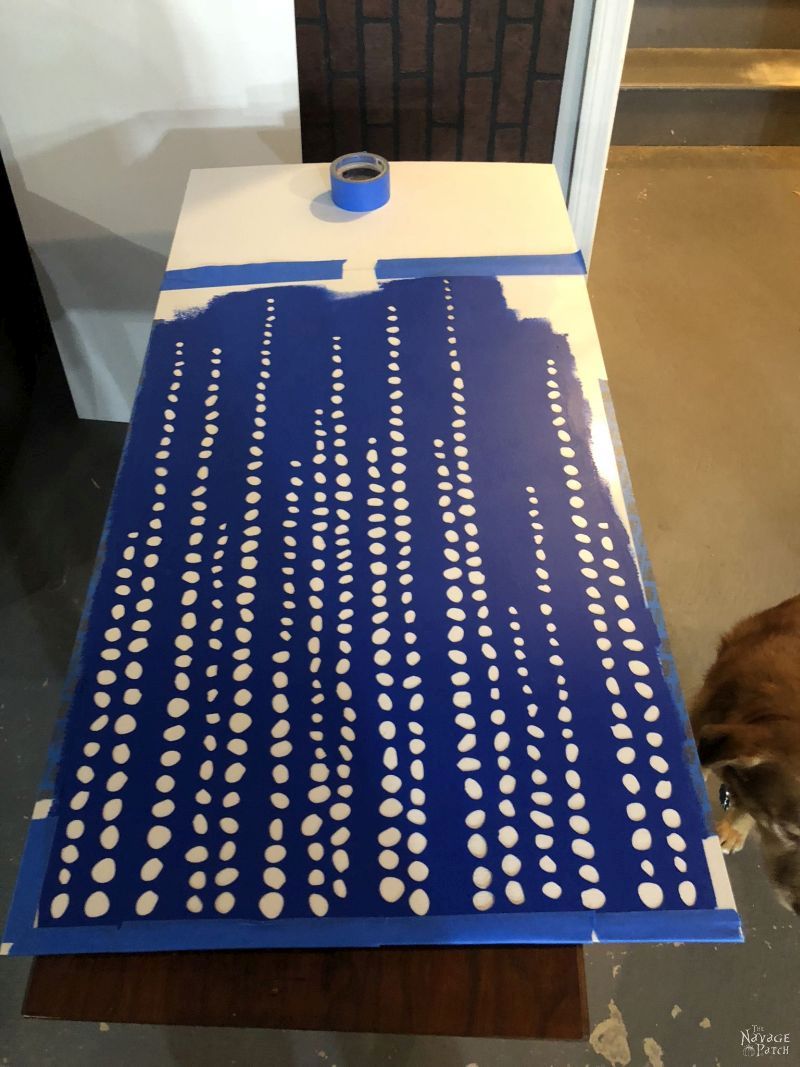
Handan used a small roller to apply paint to the stencil.
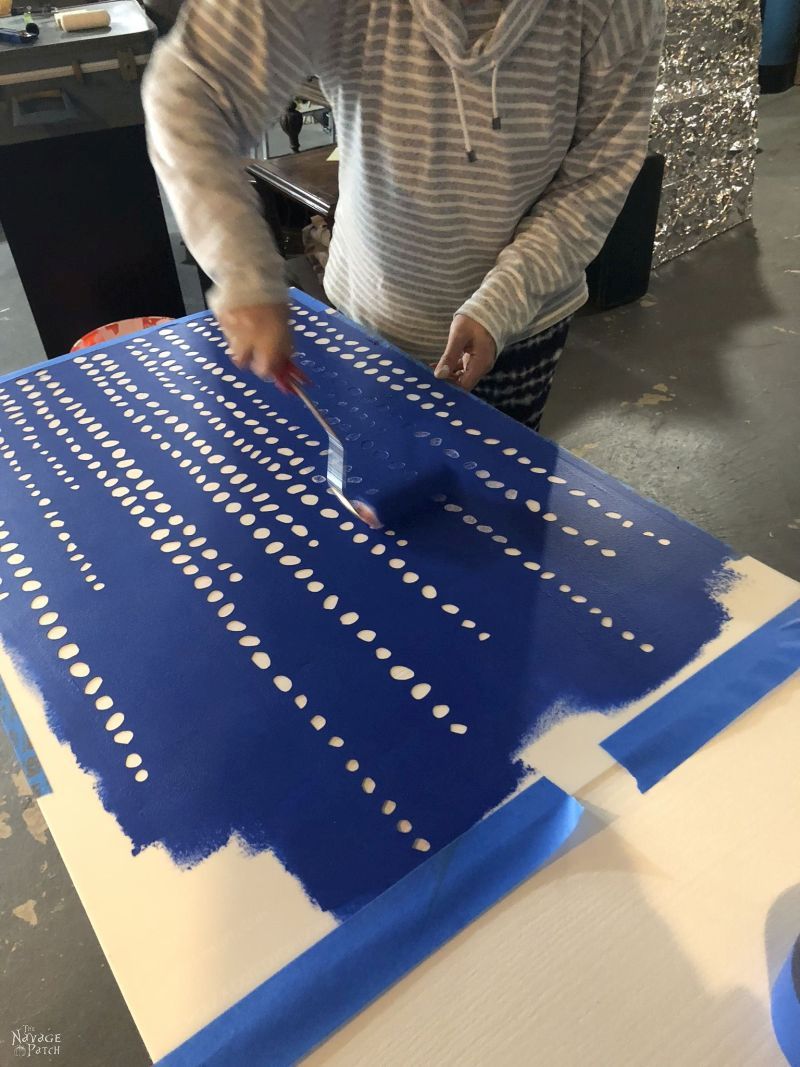
Once the stencil had dried, we peeled away the masking tape.
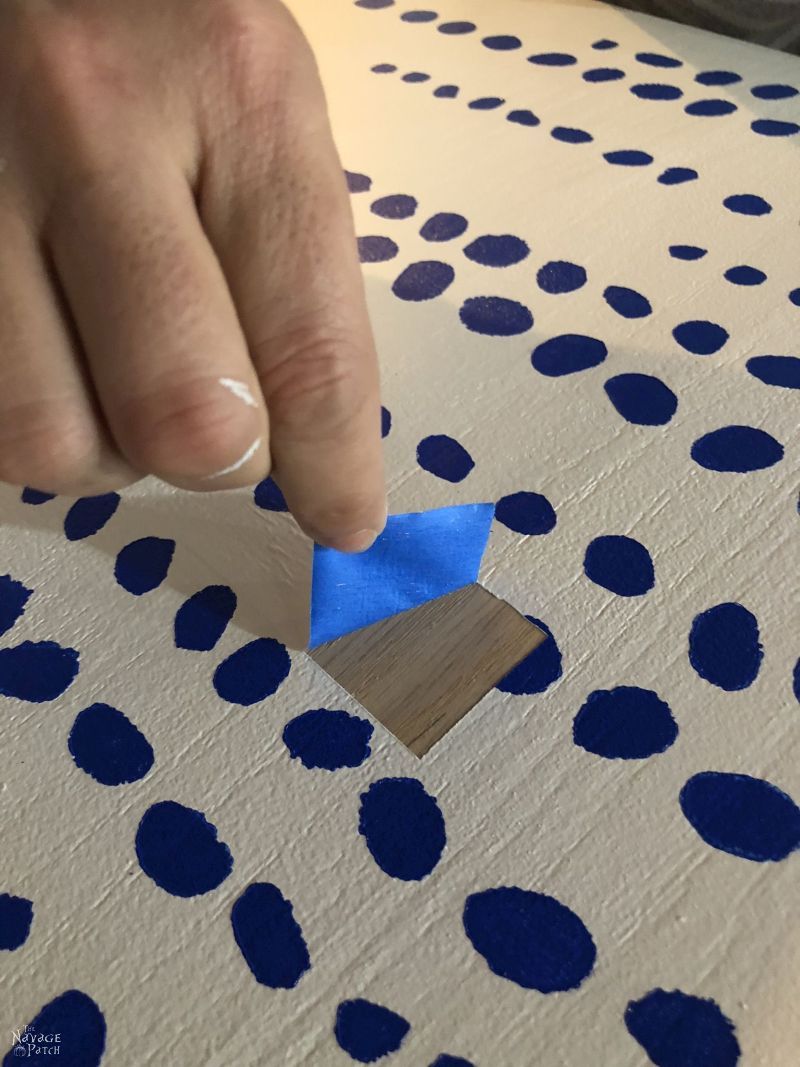
This was where I’d be installing the mounting block for the guitar hanger.
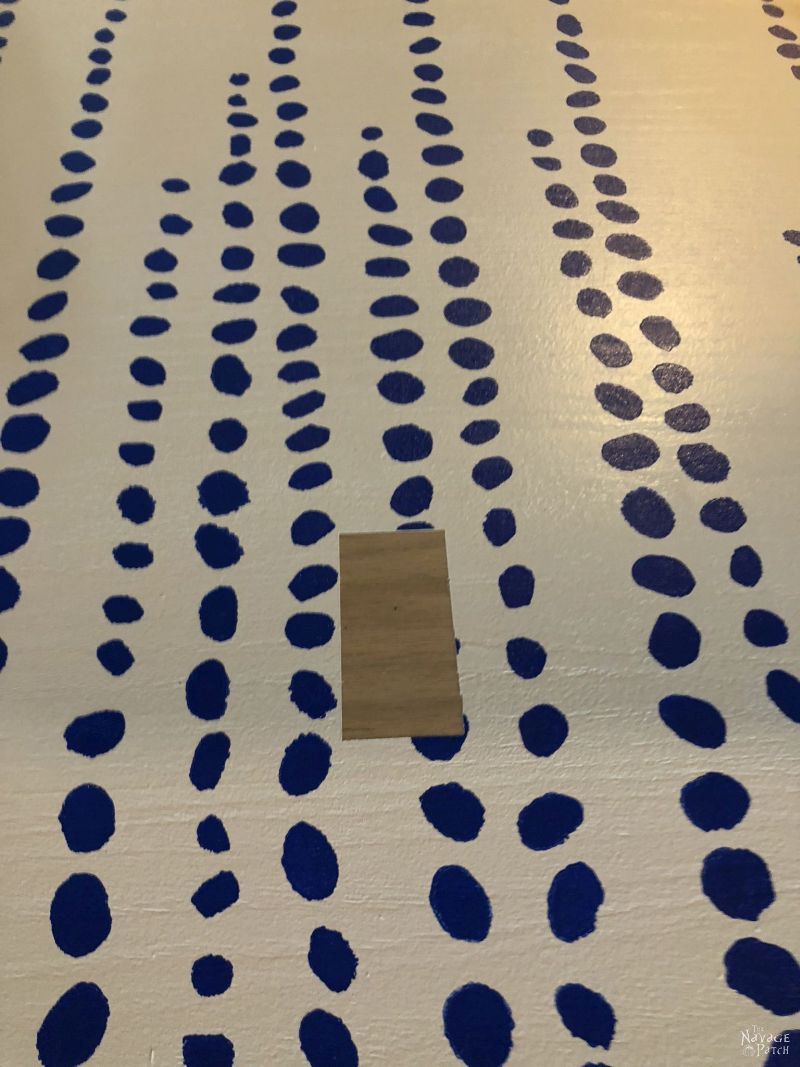
To make the mounting block more secure, I wanted to use screws in addition to the glue, so I drilled 4 pilot holes for the screws.
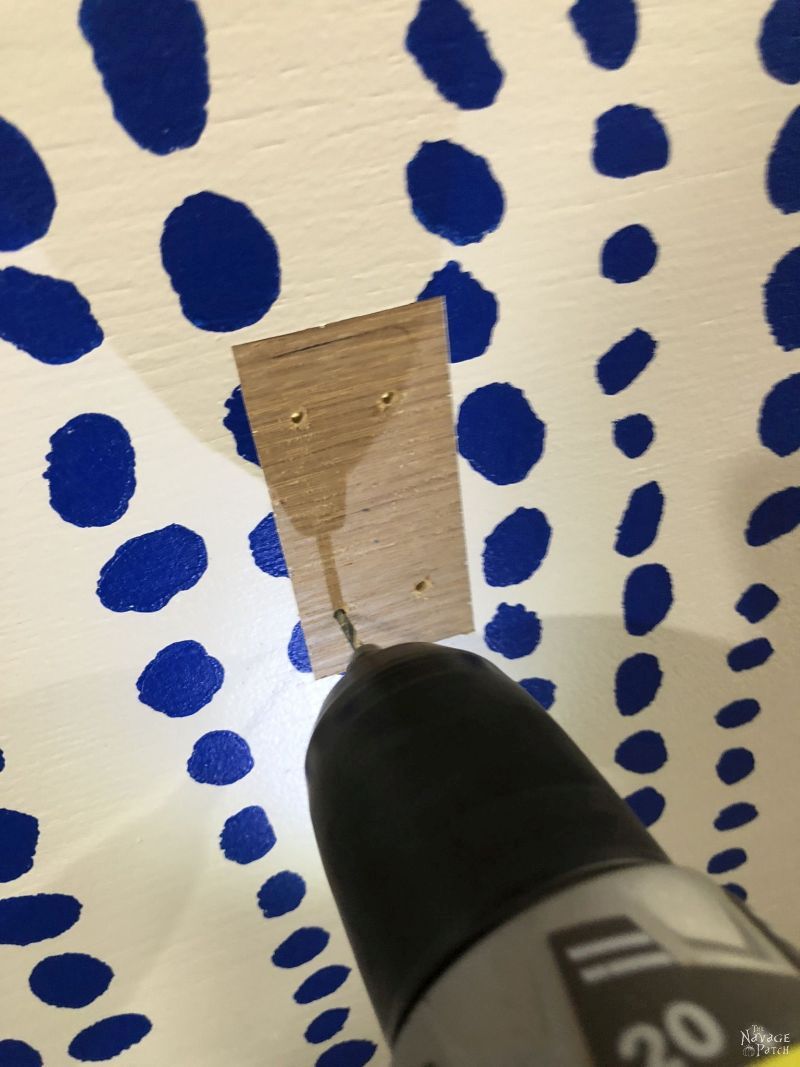
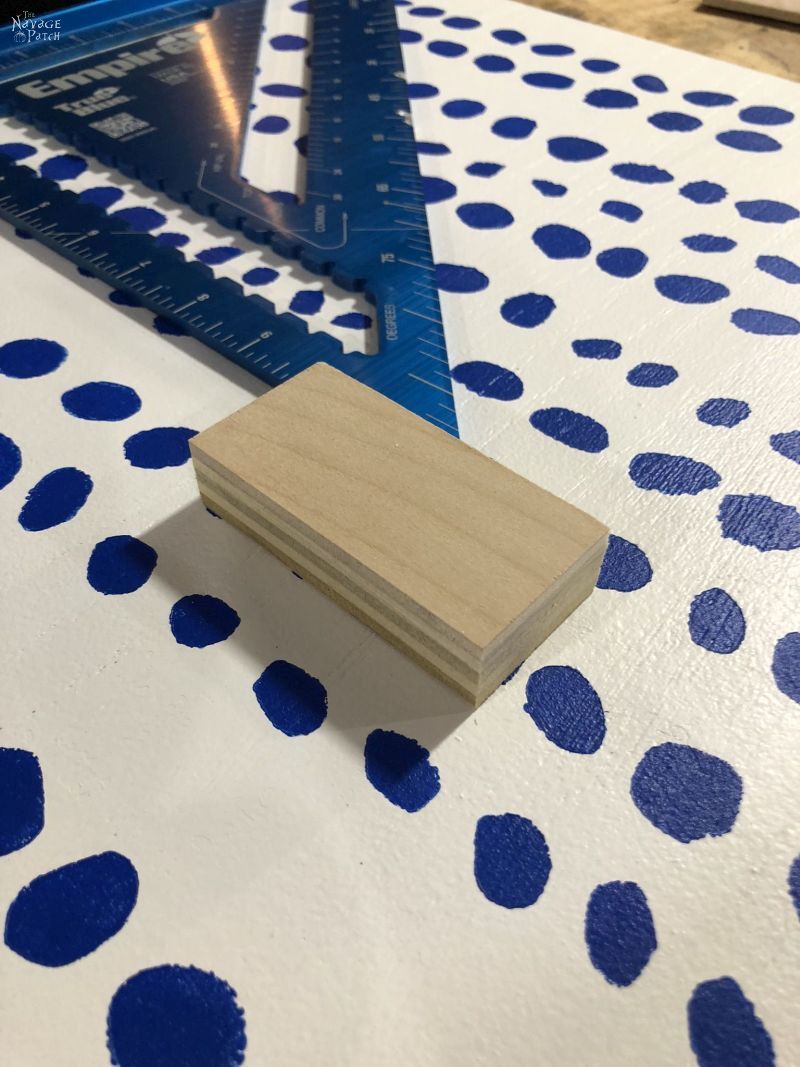
I cut two pieces of scrap 3/4 inch plywood to serve as mounting blocks. I put glue on one side and then lined the block up with the bare plywood.
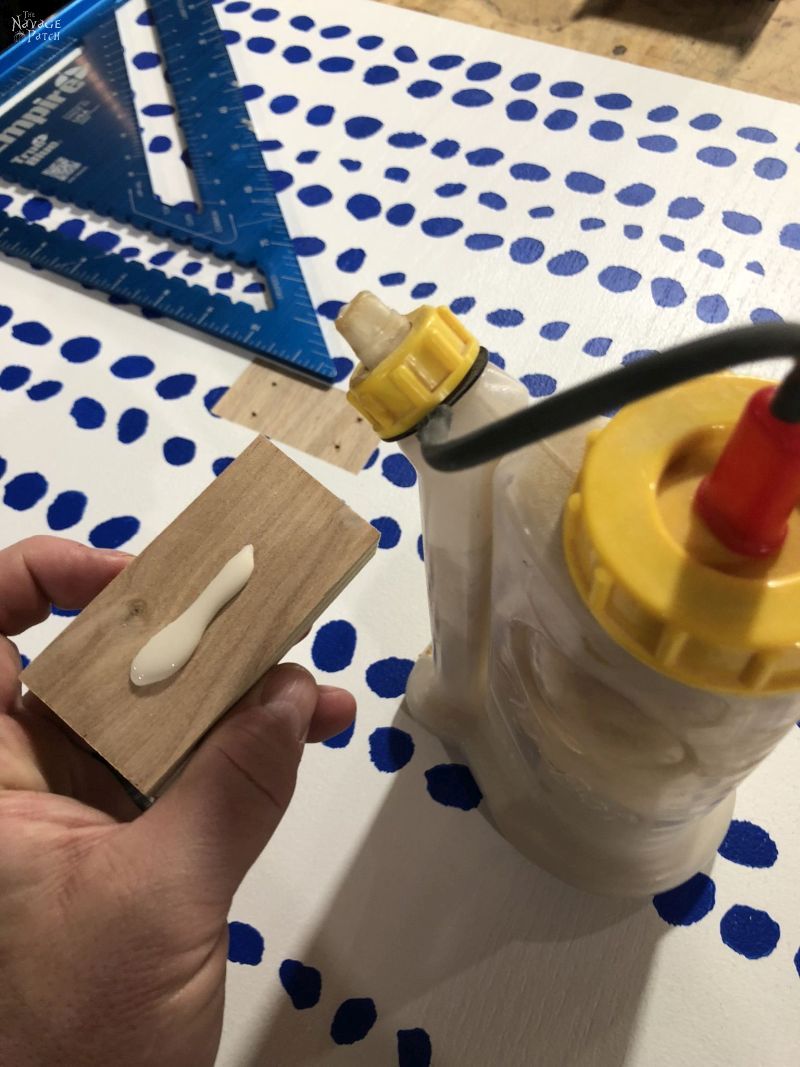
Once the glue had set, I carefully flipped the frame backing over and secured the block with 4 screws installed from the back.
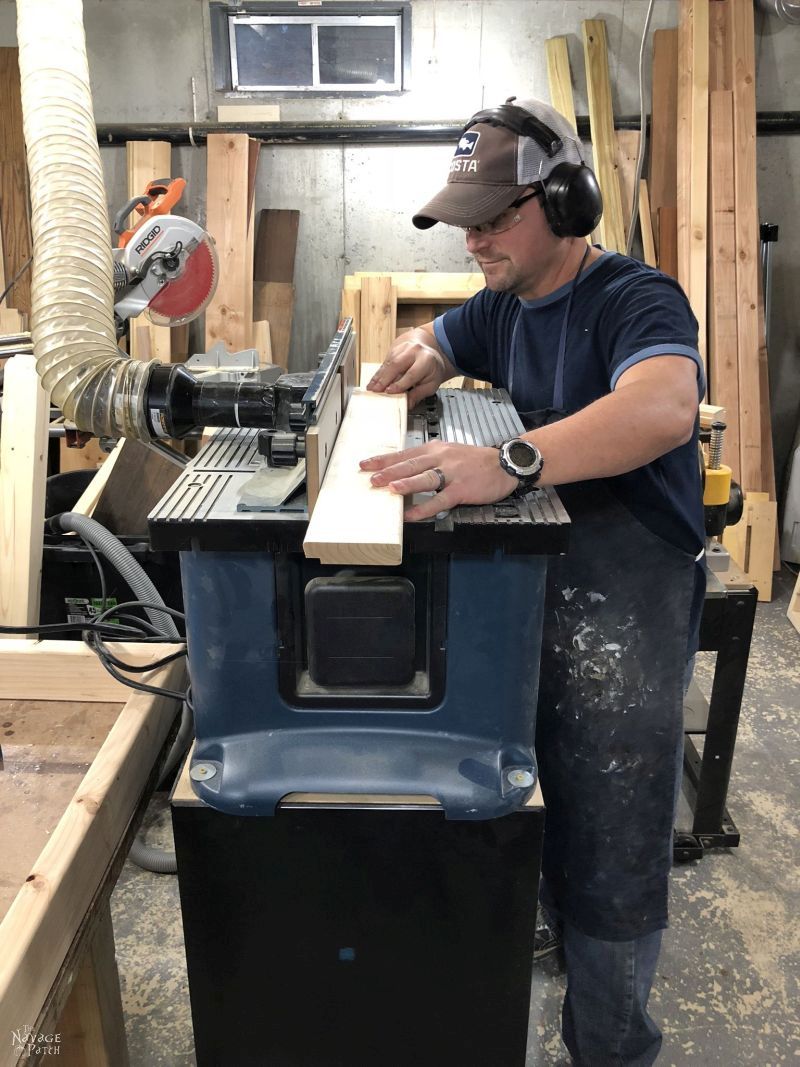
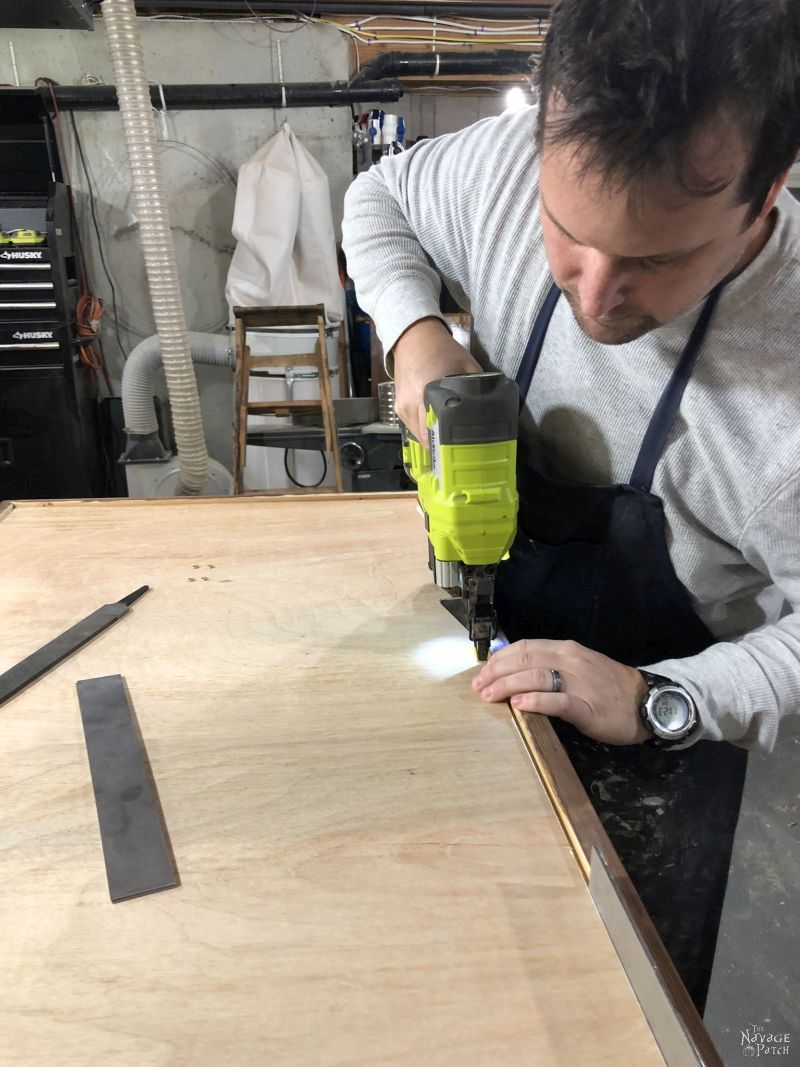
With the backings finished, I put them aside to start work on the frames. I used simple 2 x 4 lumber for the frames. They’d give a solid look to the guitar display frames.
Handan wanted to take some pictures of me cutting the wood to size. She got a little more than she bargained for. I hadn’t noticed that the dust collection hose had disconnected from the saw. Sawdust shot out the pipe towards her and then engulfed her in a chocking cloud.
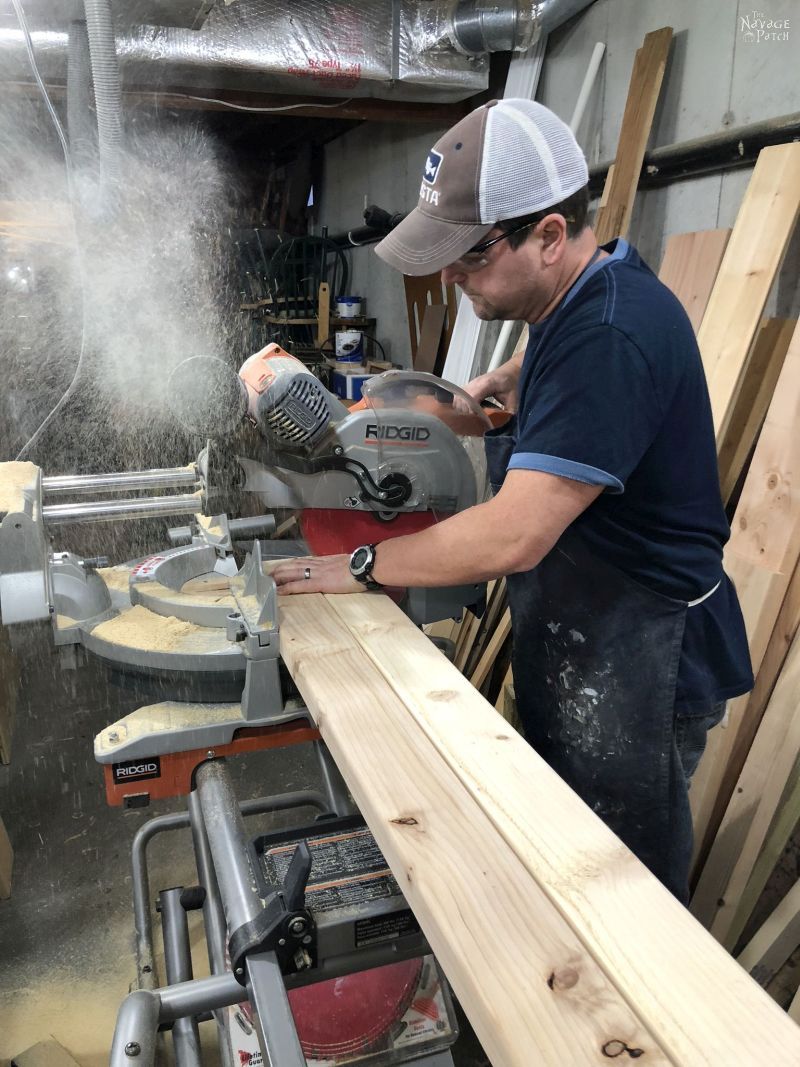
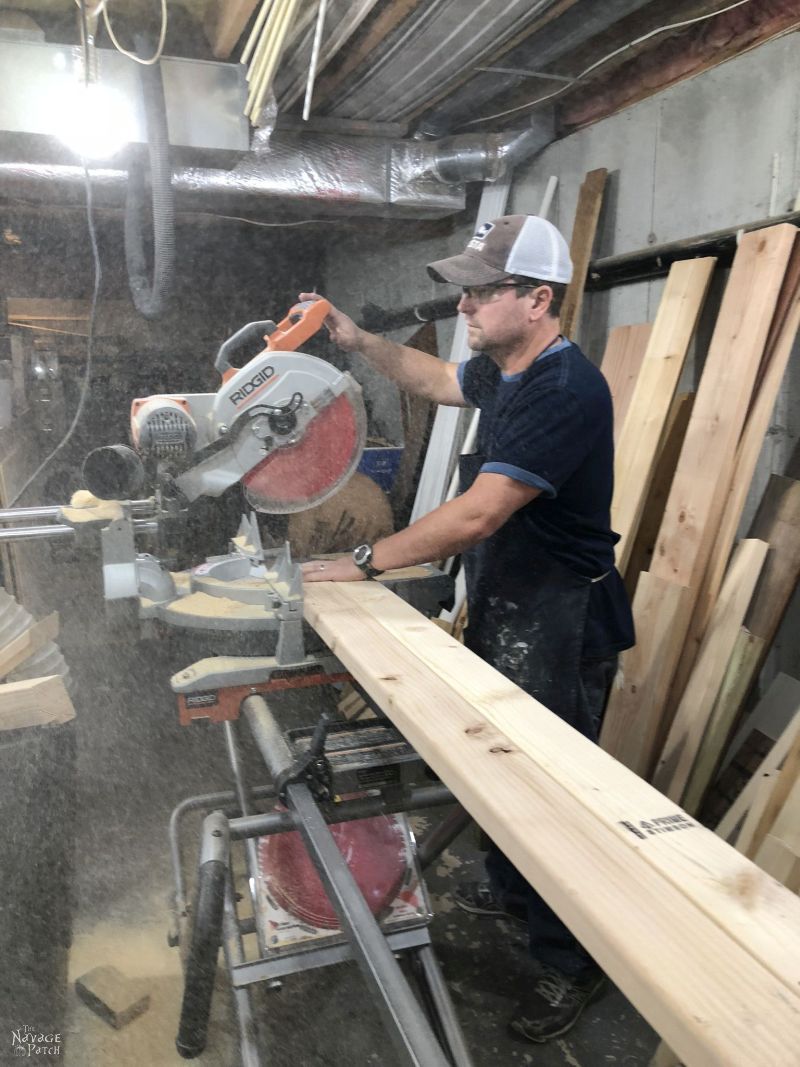
Oops. I wondered why she was running away, lol!
Things went more smoothly once I re-connected the dust collector!
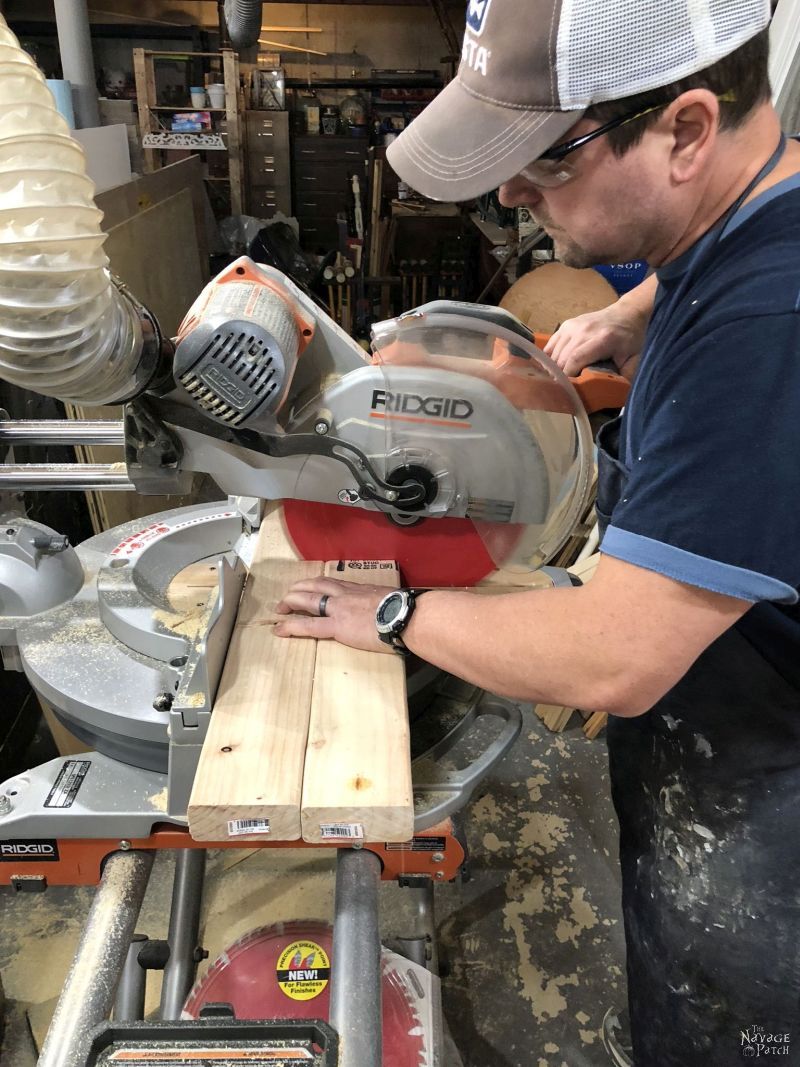
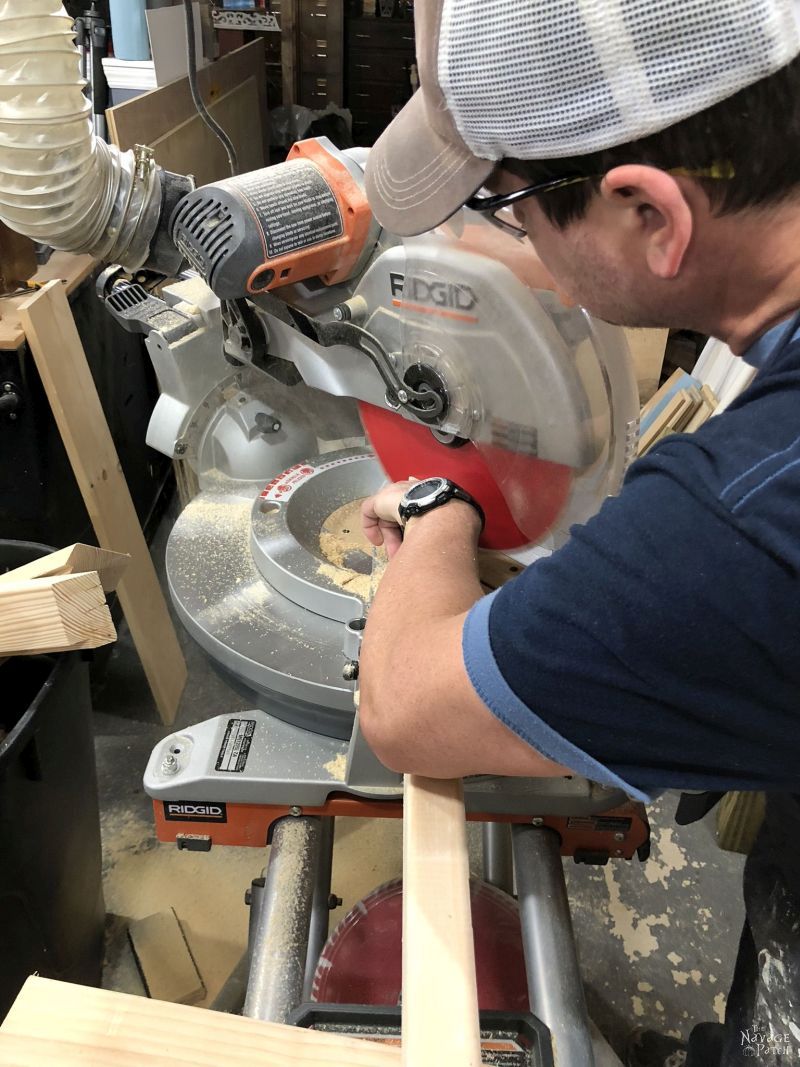
After cutting the lumber to size, I mitered the corners. I know it looks like I’m about to lop off my fingers, but I assure you they were safe! 🙂
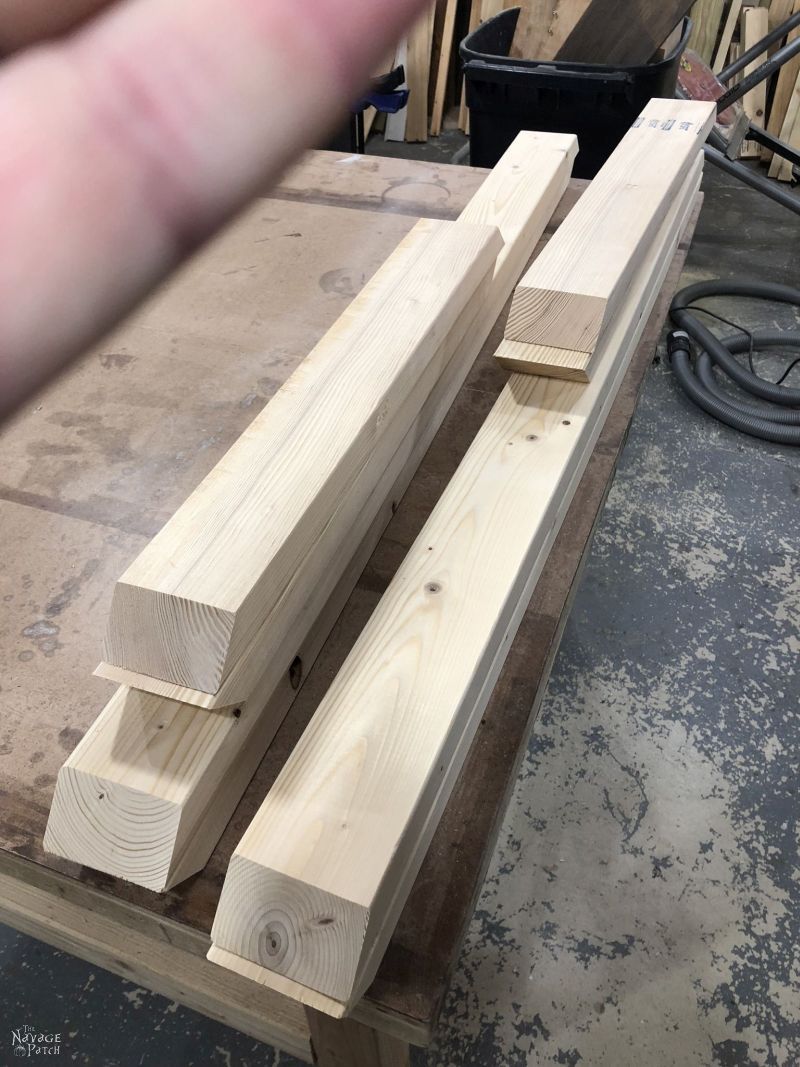
Here’s all the cut and mitered lumber. That finger in the picture is not a mistake. I was blocking out another project on the table that I hadn’t published yet. I wasn’t sure which I’d be posting first, so the finger was a precaution to keep the secret!
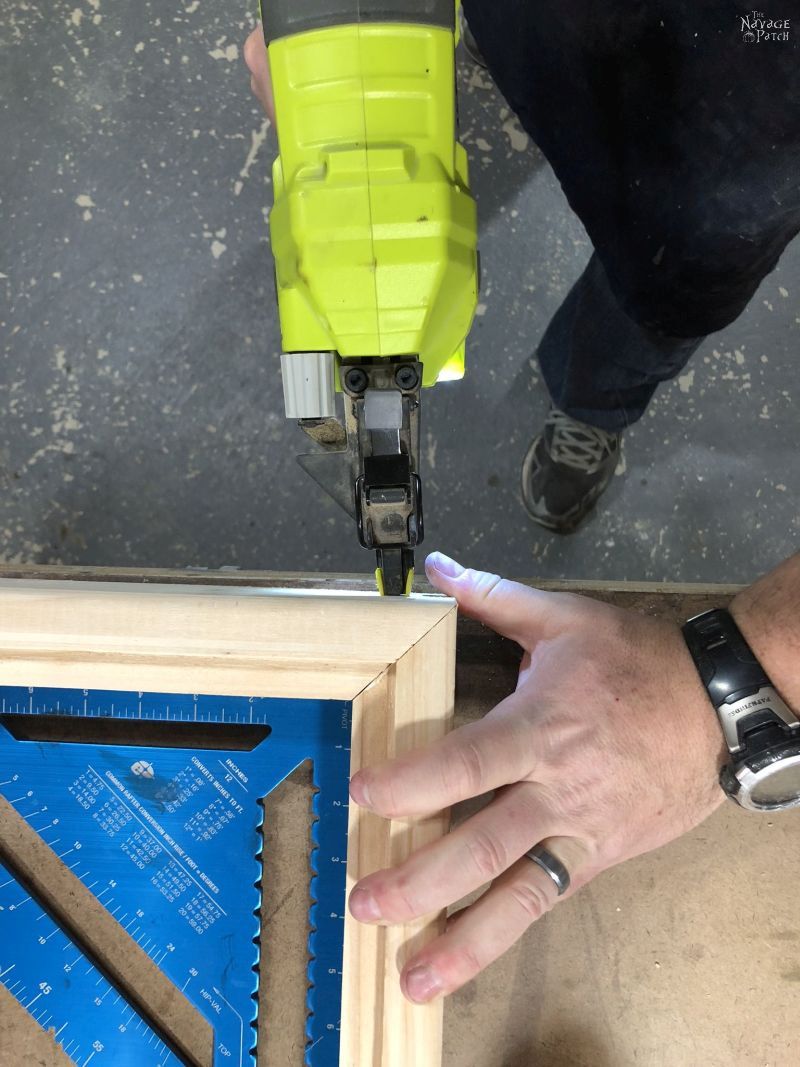
Before gluing and nailing the frame together, I routed a 1/2 inch recess into the inner back side of the boards. This is where the frame backing would be mounted.
Building the frame was straightforward – a little glue and some brad nails were all it took.
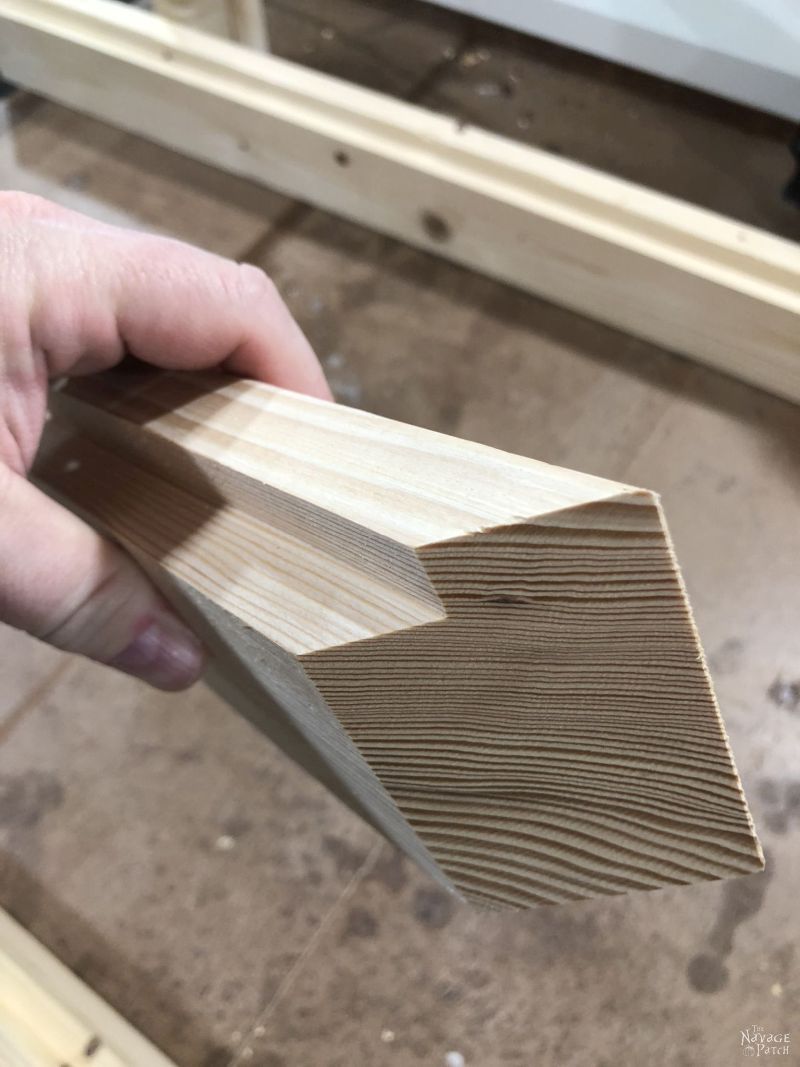
Except for that one stubborn corner…
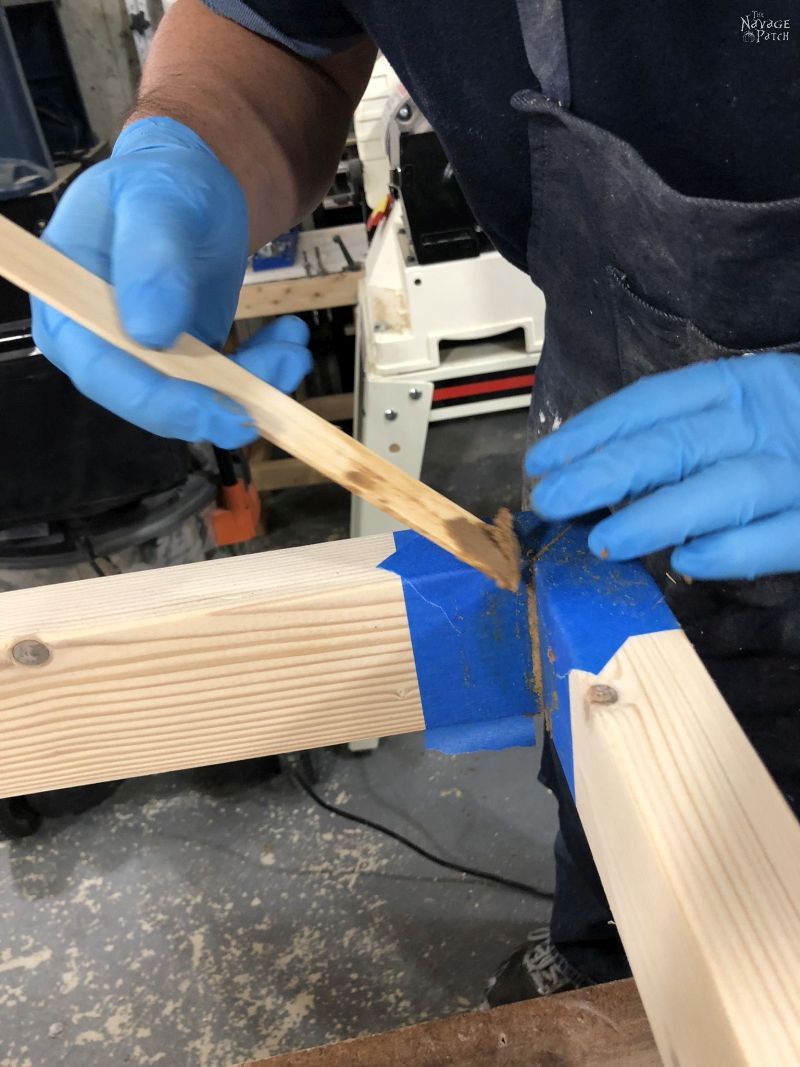
Home Depot lumber is rarely perfectly straight, so of course one stupid corner (actually two stupid corners – one on each frame) didn’t align perfectly. Now, I could have forced them into alignment and nailed them, but that would have warped the frame. The better solution was to accept the gap…and then fill it!
I masked off the gap…
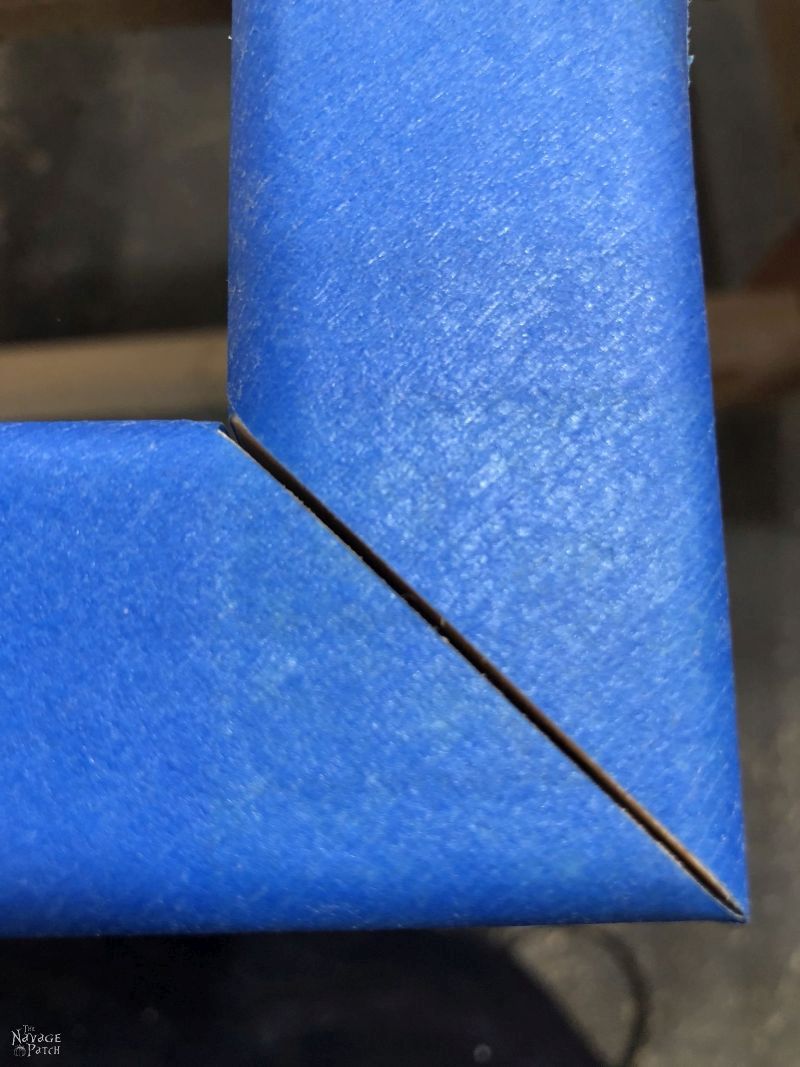
And then I mixed up a batch of my homemade stainable wood filler (my favorite wood filler is Bondo, but it is not suitable for a piece that will be stained). I gathered up some sawdust from the collection bag of one of my random orbit sanders and mixed it with shellac until I had a nice paste.
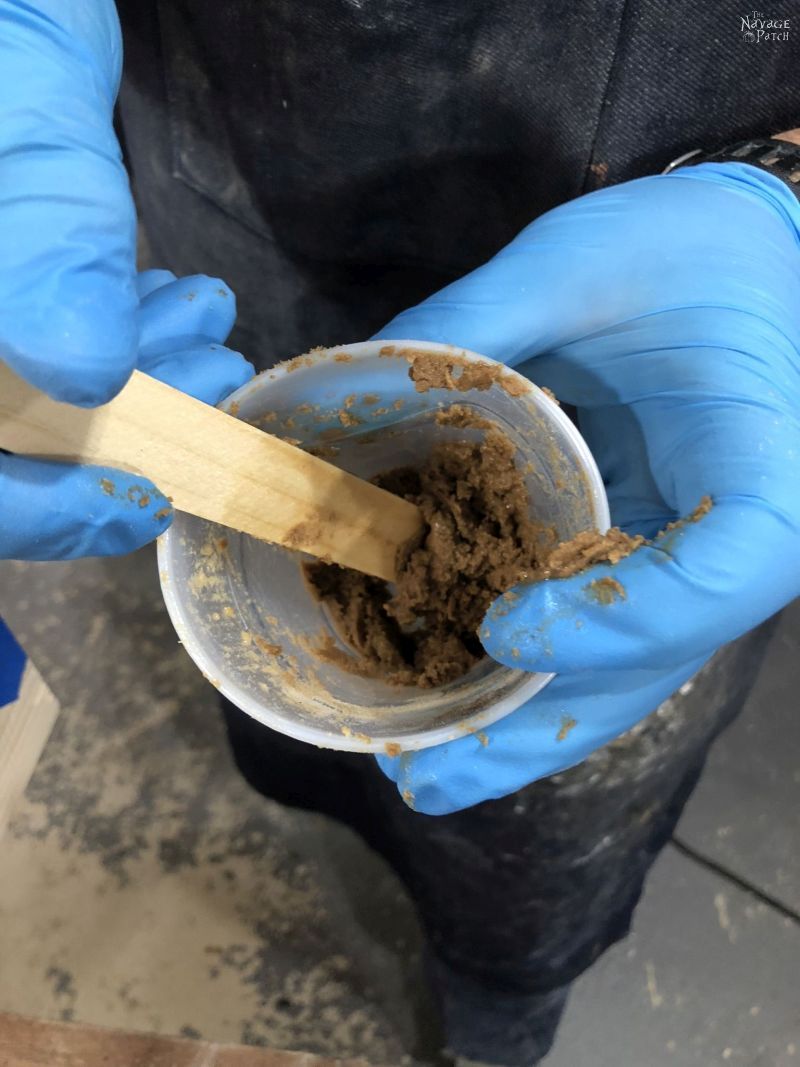
You can see more on the process of making the wood filler in my farmhouse dining table post.
I squished the wood filler into the gap…
..until I had it filled and level.
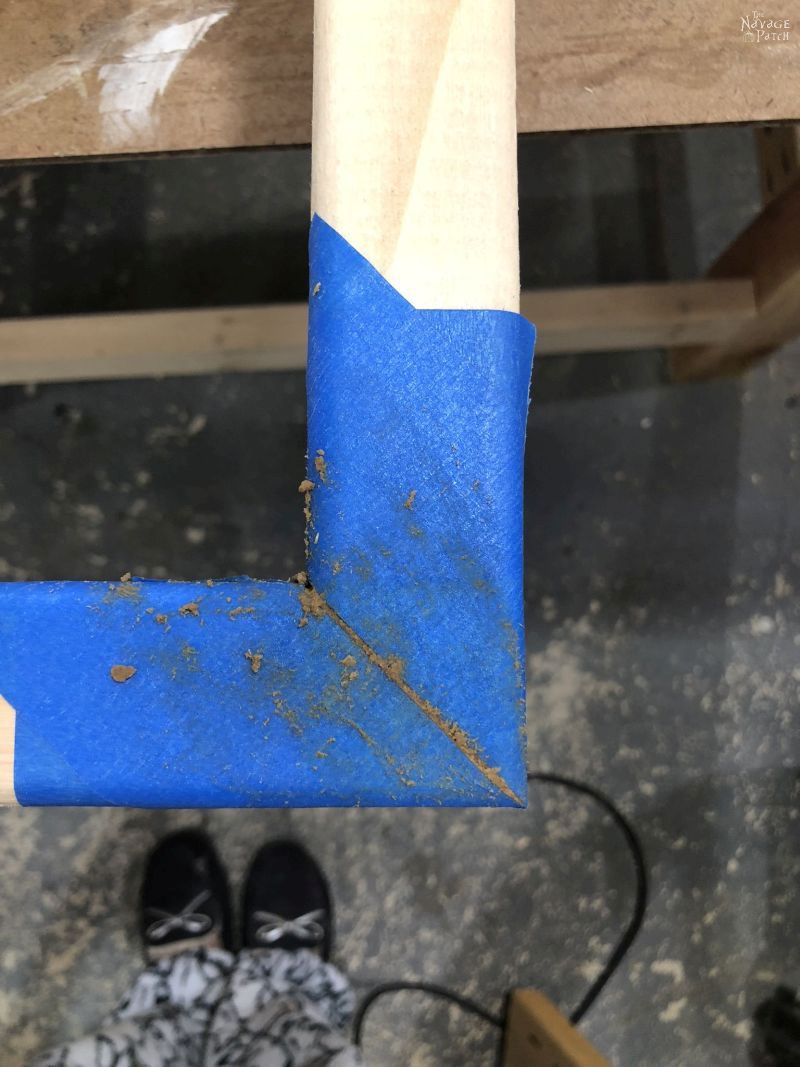
Before the wood filler dried, I peeled off the blue tape and then let it dry.
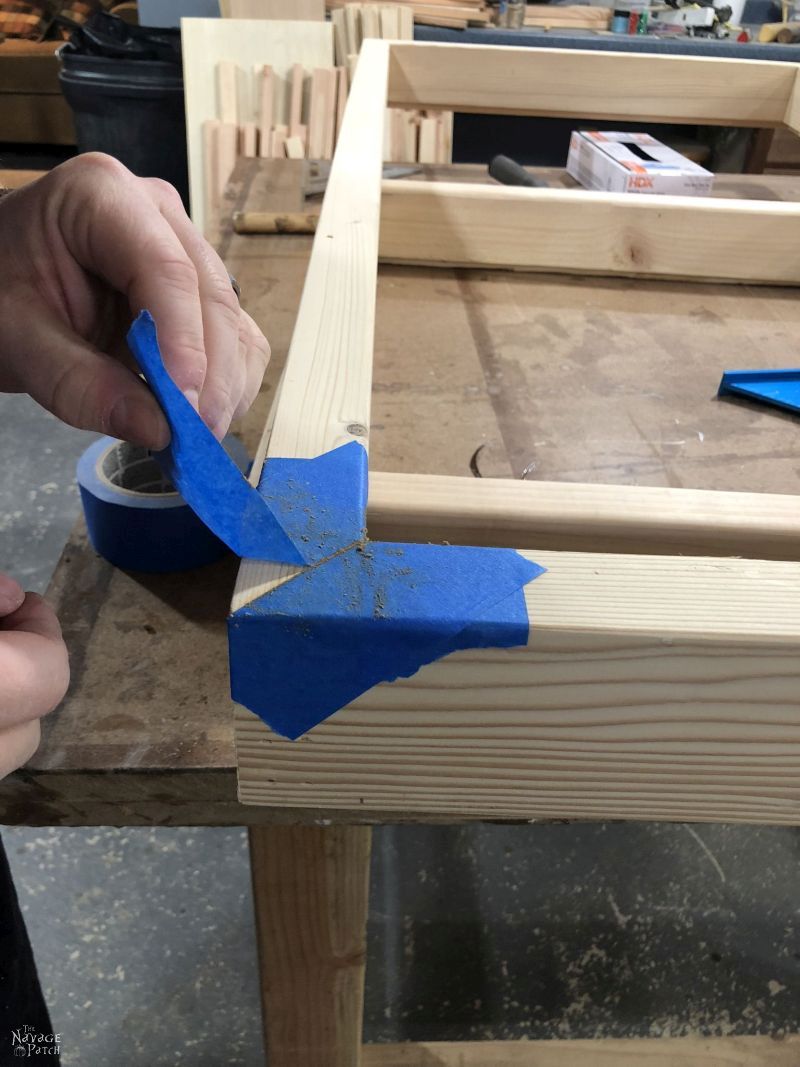
I then sanded the corners and the whole frame with 150 grit using a random orbit sander.

After cleaning off the sanding dust, I applied a coat of Varathane Pre-Stain Wood Conditioner, and then I stained the frames with Minwax Special Walnut.
When the stain had dried, I applied two coats of Greg’s Wonder Finish – an equal mix of satin spar urethane, boiled linseed oil and mineral spirits.

After the finish was dry, I turned the frames over and installed the backing boards with brad nails.
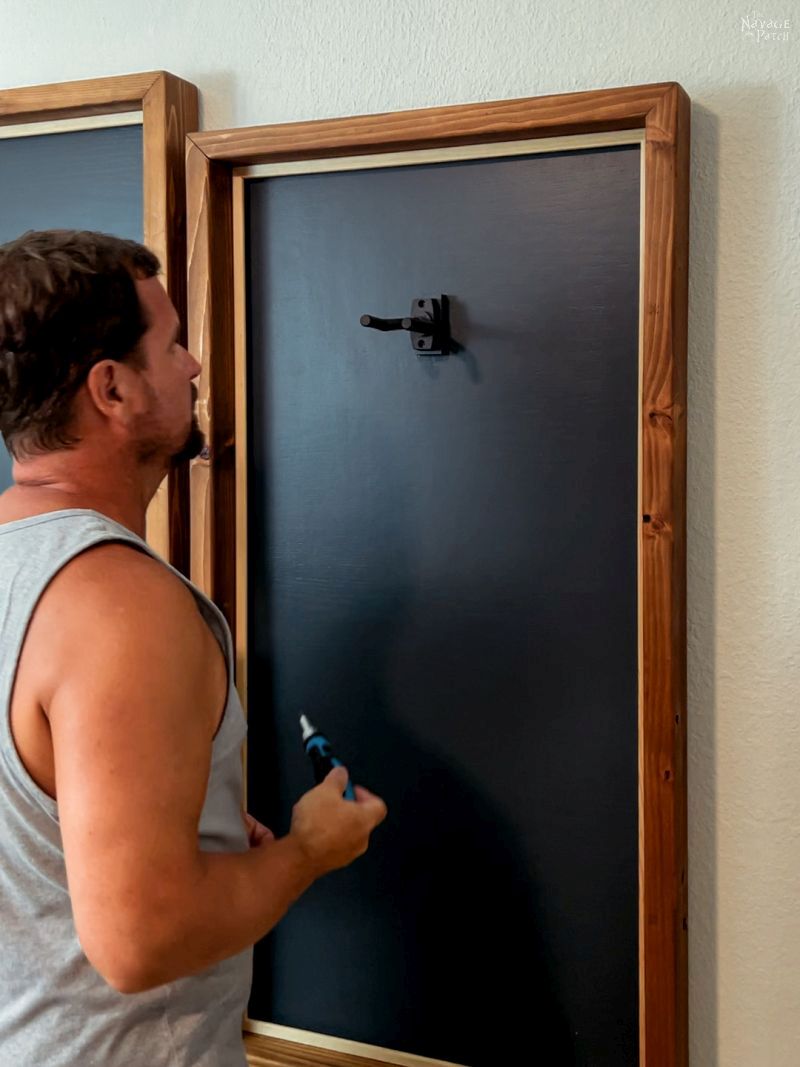
Handan and I flipped the DIY guitar display frames back so I could attach the guitar hangers.

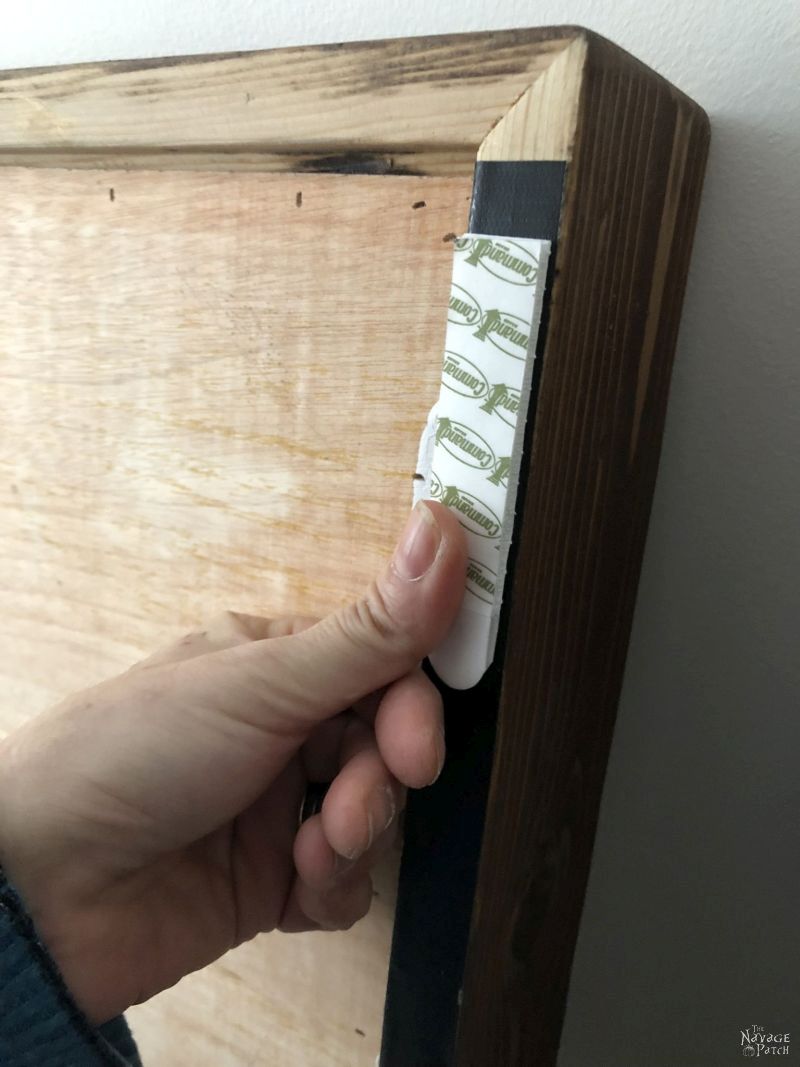
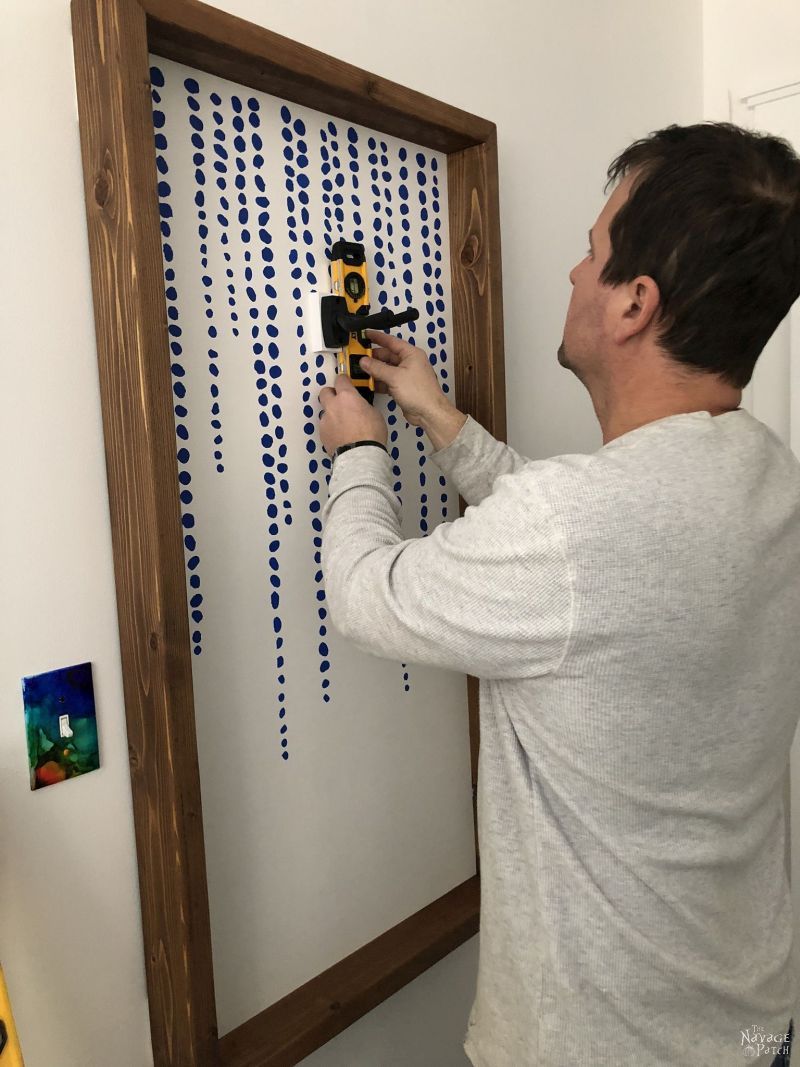
Our guitar display frames were done! We carried them upstairs to Barish’s room for installation. I drove three level screws into the wall on which each frame would hang. To keep them from getting bumped or jostled off the wall, we also installed Command Strips to the sides. The best way to stick Command Strips to wood is first to put a strip of heavy-duty duct tape on the wood. Duct tape is strong and sticky enough to stick to any wood, and the Command Strips stick much better to the tape than they do to wood.
I hung the guitar display frames with the help of a torpedo level.
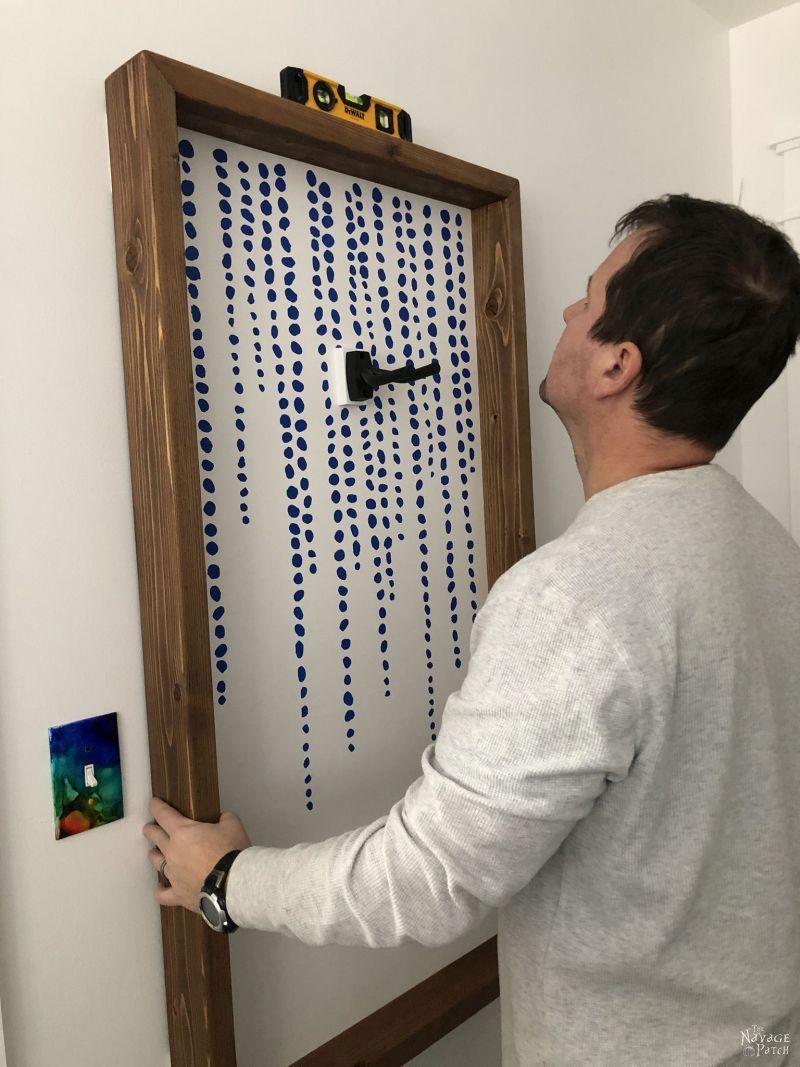
The moment of truth!
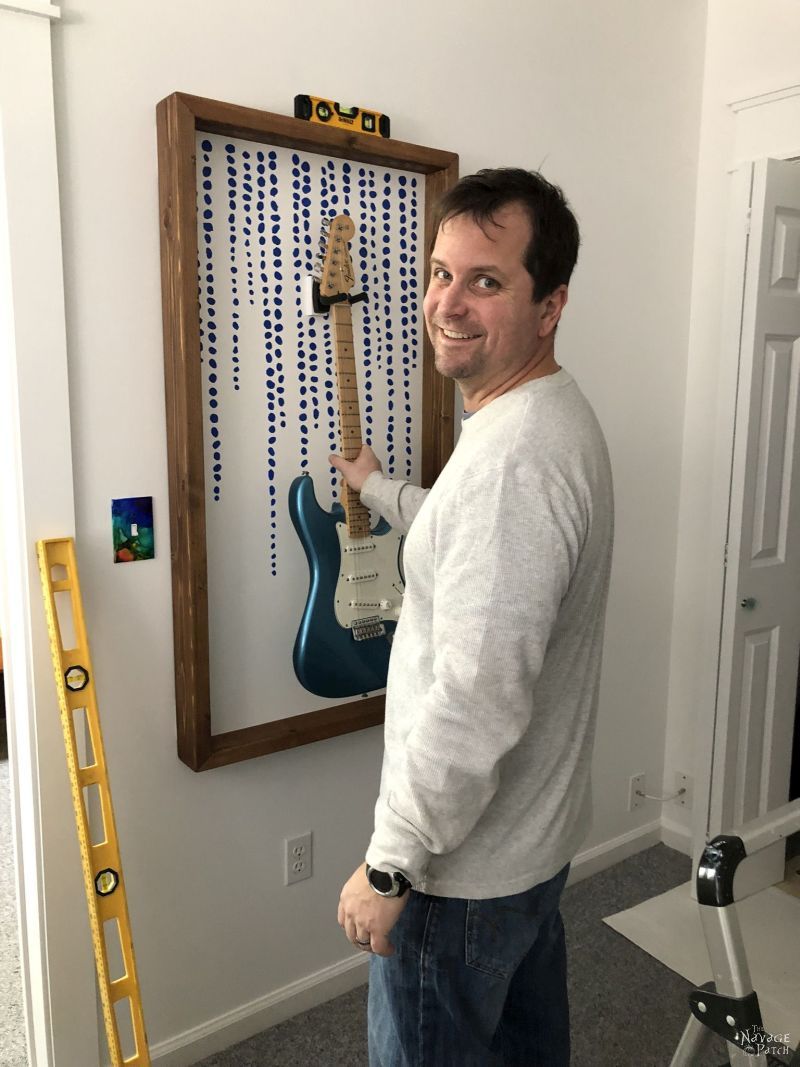
And it worked! The guitar stayed in the frame, and the frame stayed on the wall!
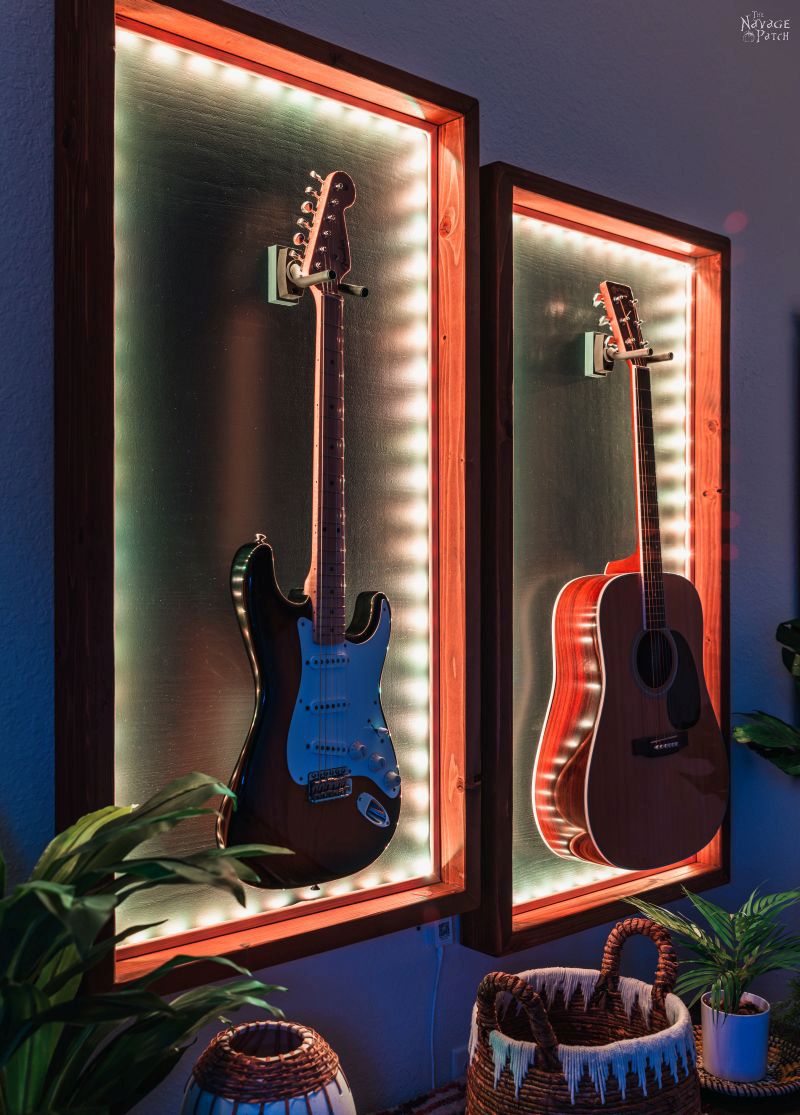
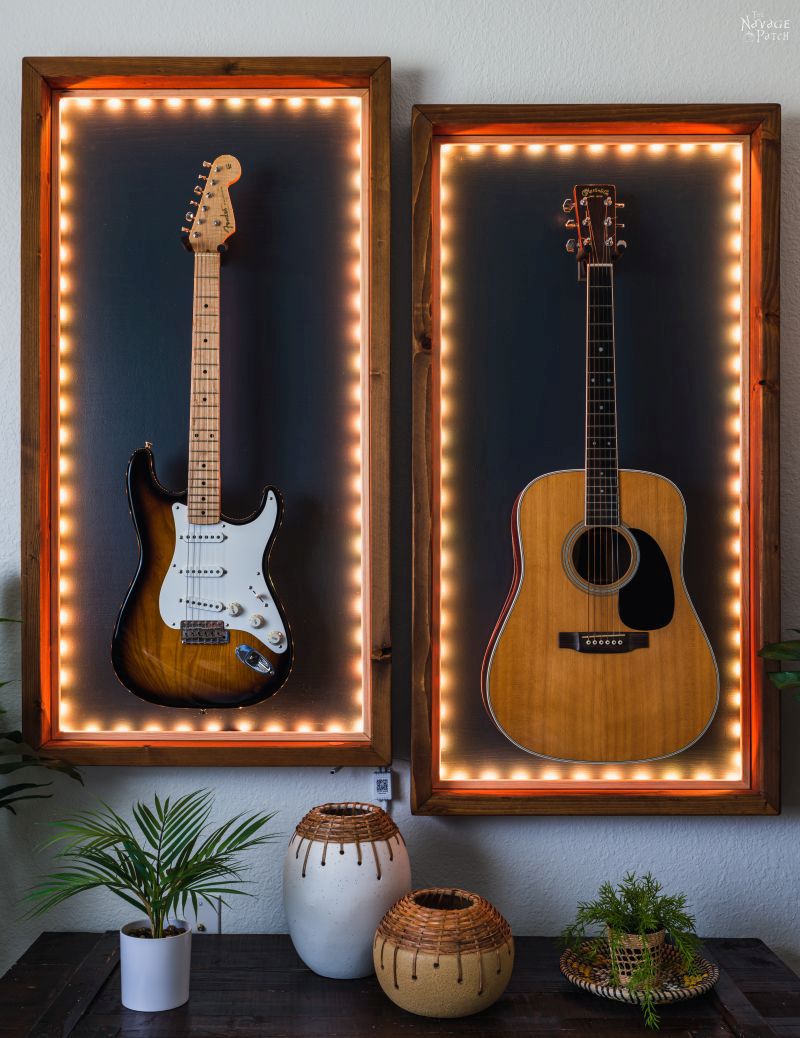
We hung the next frame, and Baris’s DIY Guitar Display Frames were installed and ready to rock!
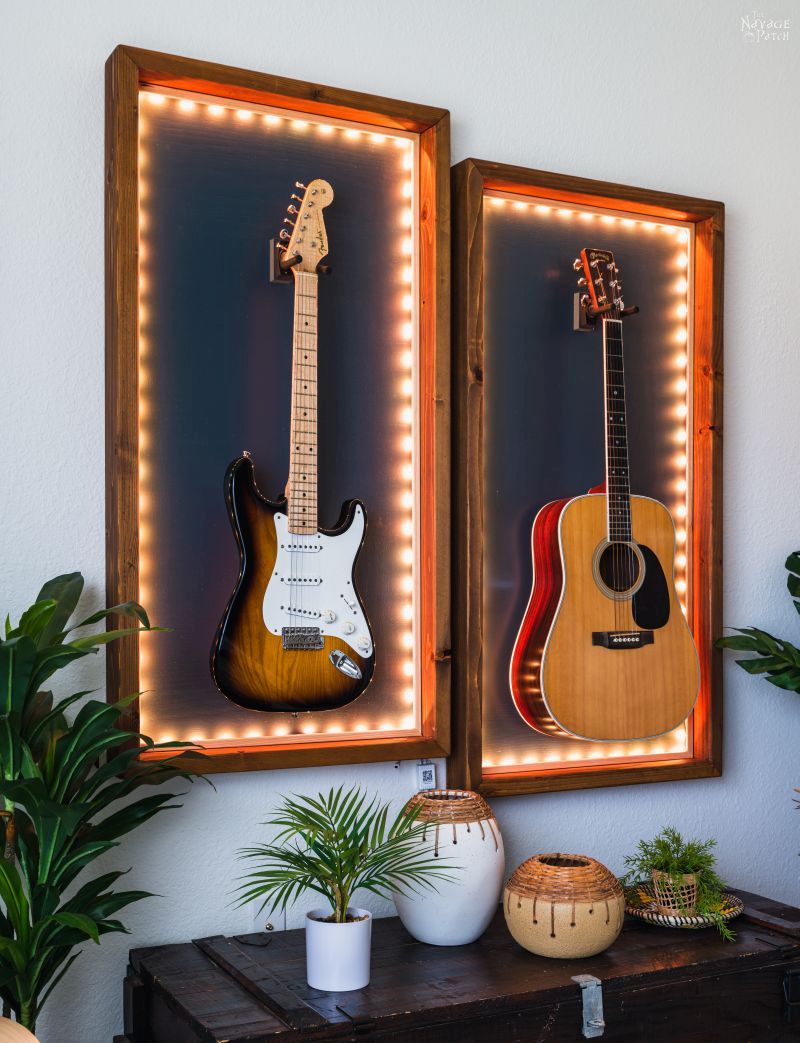
DIY Guitar Display Case Makeover
Okay, so that blue and white style got old pretty damn quick as Baris matured through high school. When we moved to Georgia before his senior year, we upgraded the hanging system to French cleats, and that helped a lot. But the blue stencil on white backing was a style best left in the past.
He’s a college man now, and we’re in Florida. The two have absolutely nothing to do with one another, but it all means that it was time to spice up those guitar display cases and make them something a young man would want in his room, apartment or house.
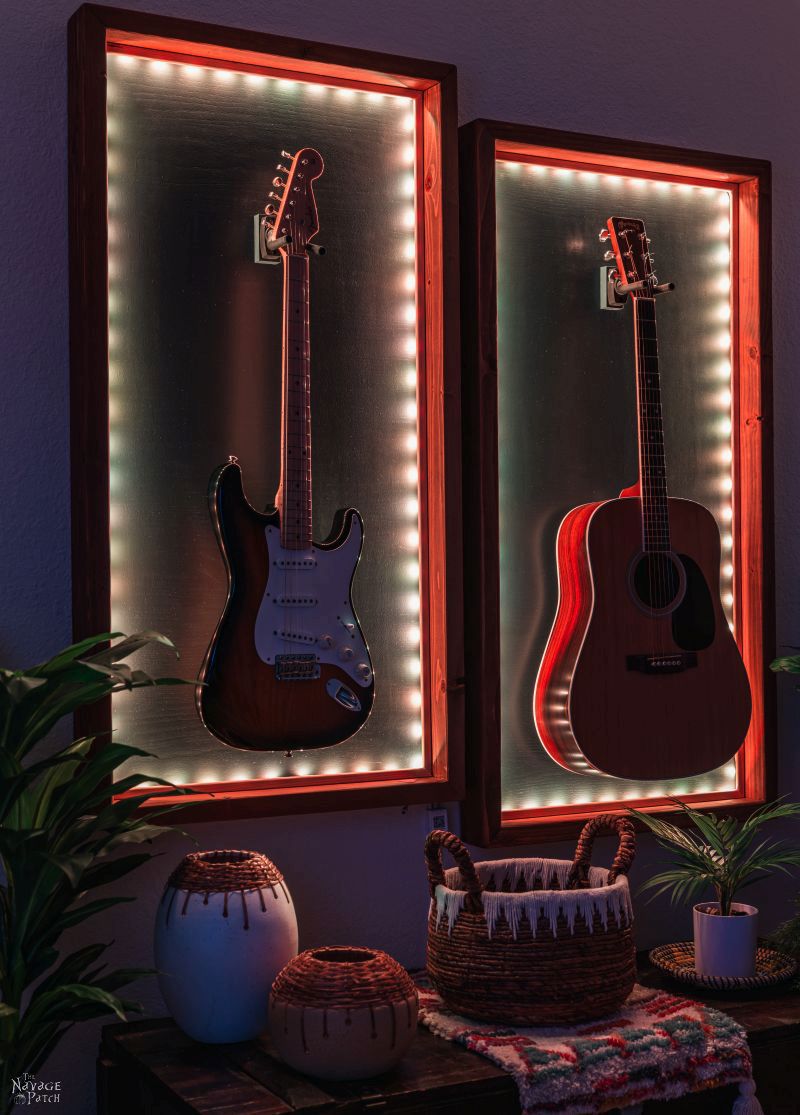
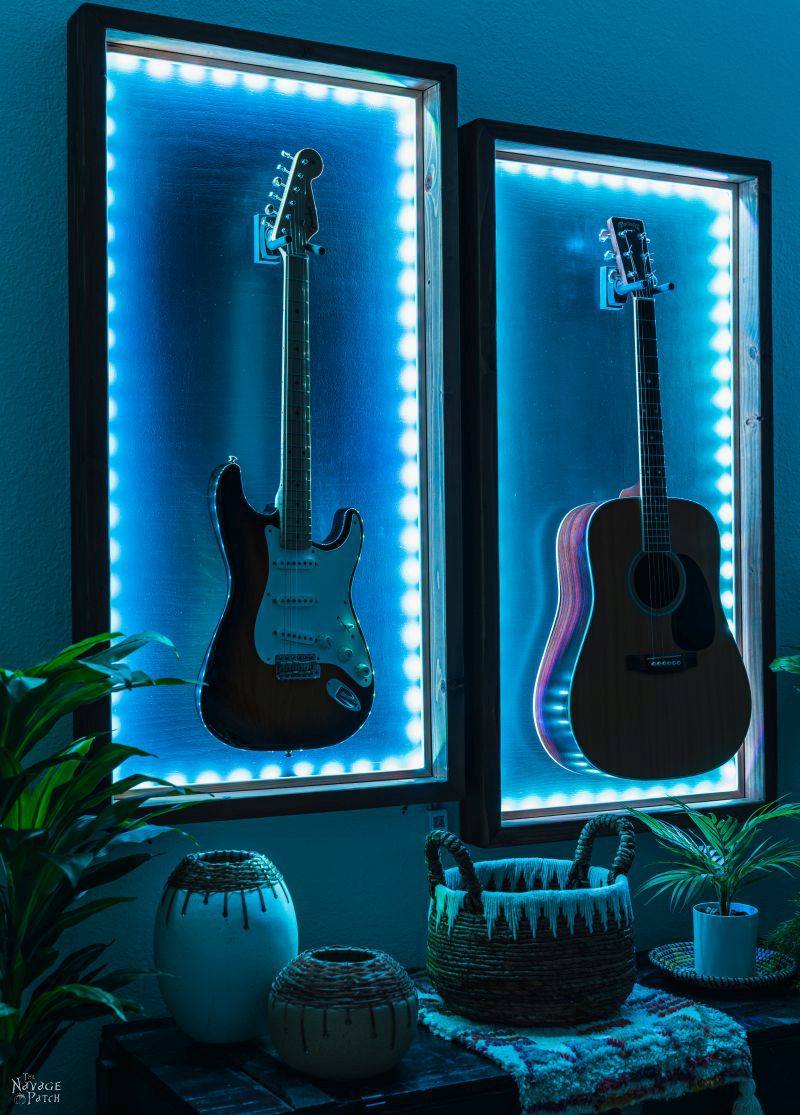
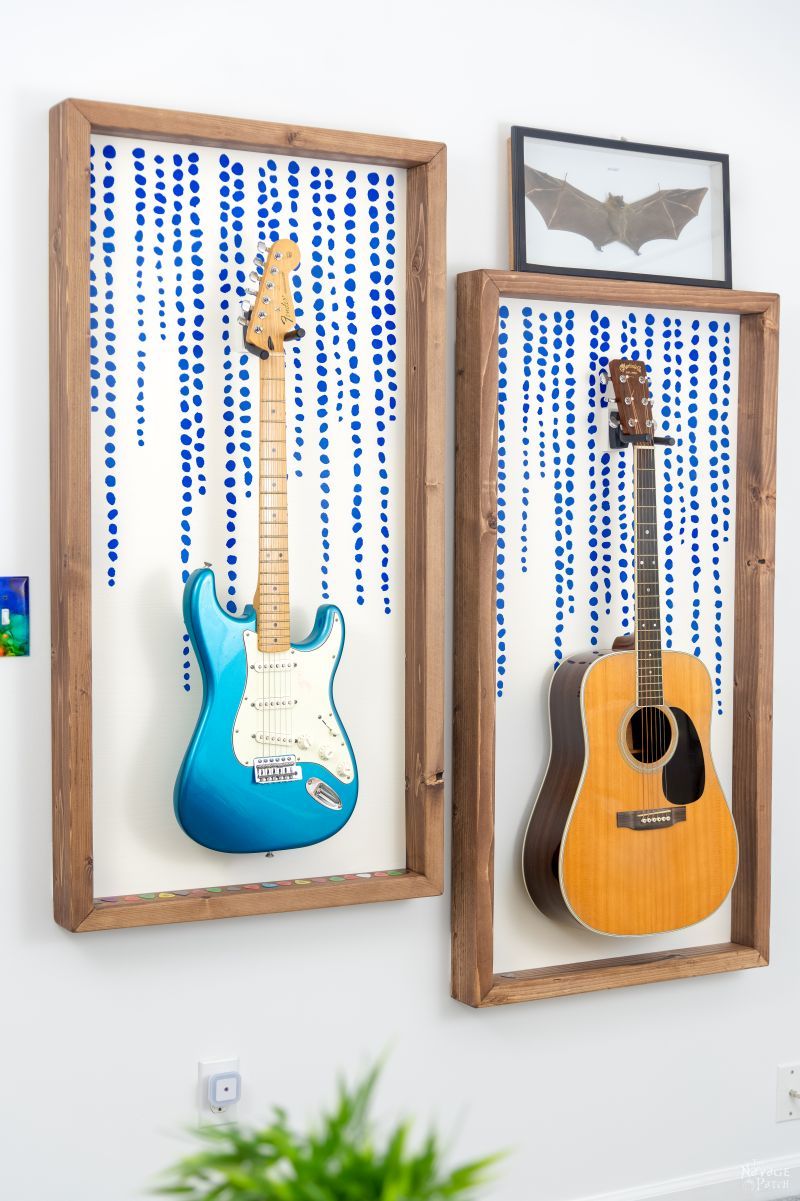
Fortunately, my babes and I had a few good ideas up our sleeves! Handan wanted me to paint the white and blue backing dark and then install LED strip lights – the color-changing kind with a remote control. My contribution, small as it is, was to hide the LED strip with moulding. Let’s get started, and I’ll show you what we did.
But first things first.
What your eyes have just seen above is the first photograph of Yours Truly wearing a tank top. It’s the first photograph of me wearing a tank top because it’s the first time I’ve ever worn a tank top! At least as a free-thinking adult. I may have worn one back in the 70s when they were all the rage and I was three feet tall. You’d have to ask my mom about that.
Anyway, the tank top was a compromise between my babes and me. Since summer enveloped the Florida panhandle like an oven-roasted wet blanket, I’ve basically sworn off wearing a shirt, especially outside. My body can handle the heat and humidity, but only if my upper half is au naturel. The problem is, my fat, glistening upper torso does not make for good blog post pictures. So instead of a long summer of arm and hand shots, Handan suggested I buy some tank tops. Welp, here you go. Enjoy the show.
Or should I say…Enjoy the Gun Show!!
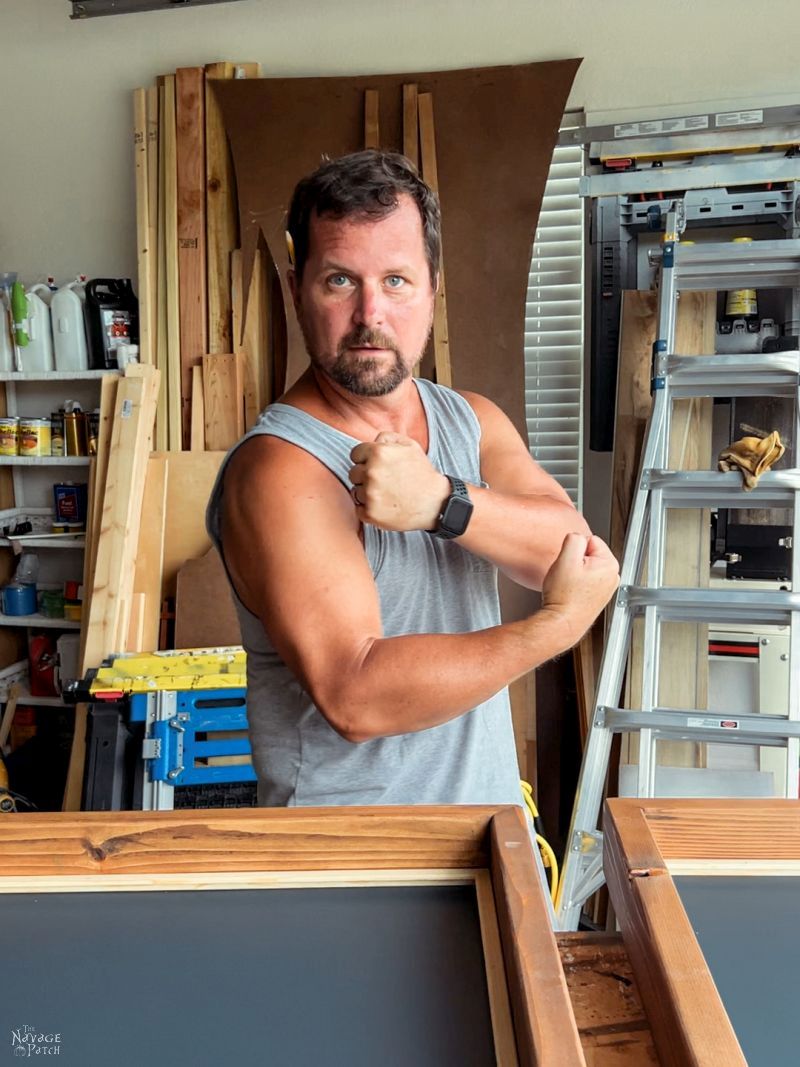
Who’s got tickets? Who’s got tickets to the Gun Show? [ppffttt…no body wants to go to a nerf gun show LOL – Handan]

Okay, now that I’ve got that out of my system, let’s carry on with our lighted guitar display case.
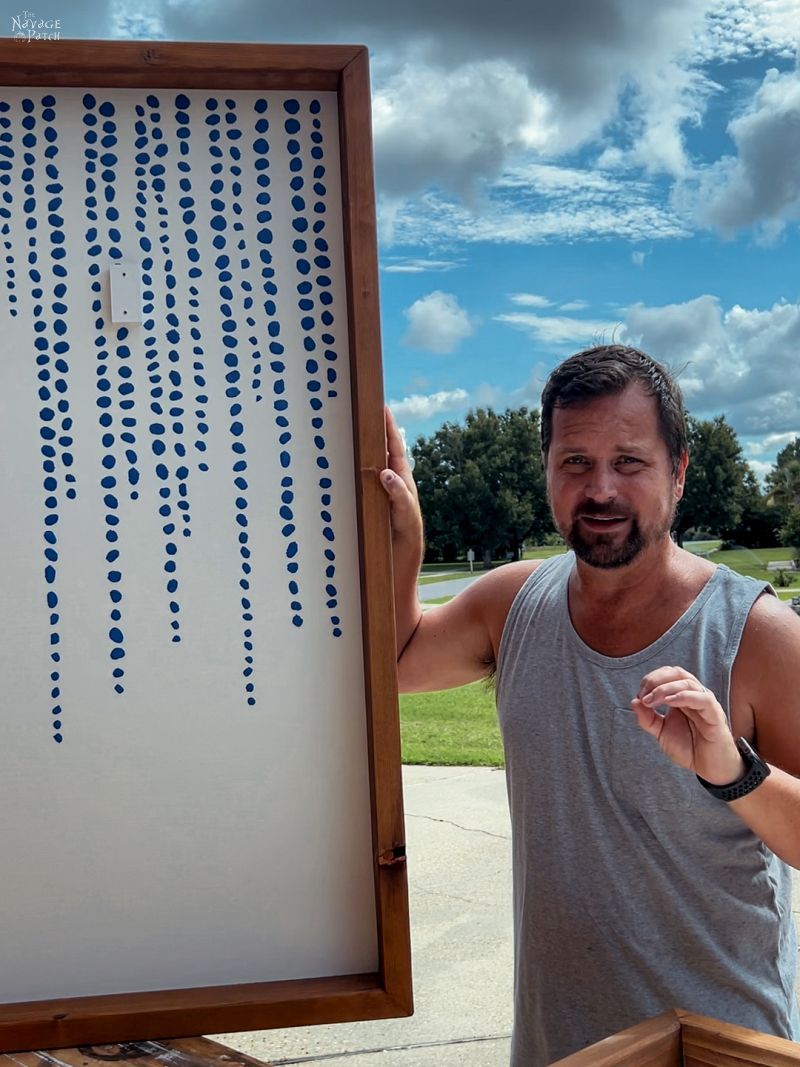
My first task was to sand down the blue stenciled blobs so they wouldn’t show through the new paint.
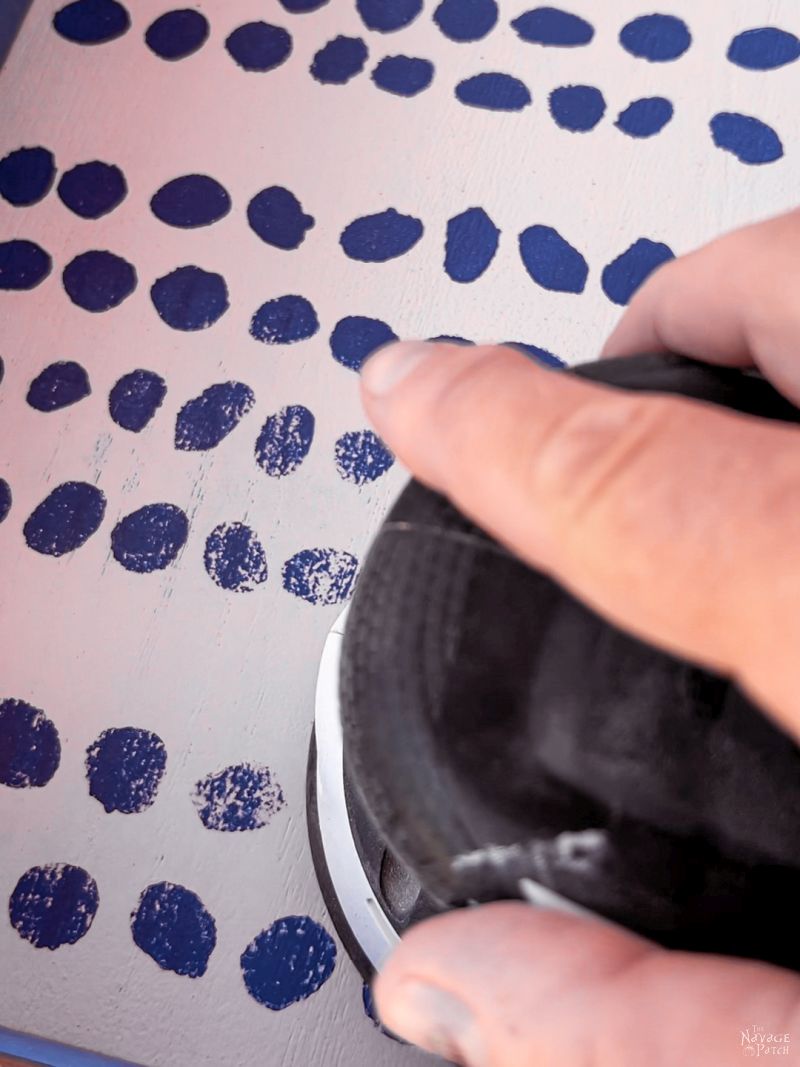
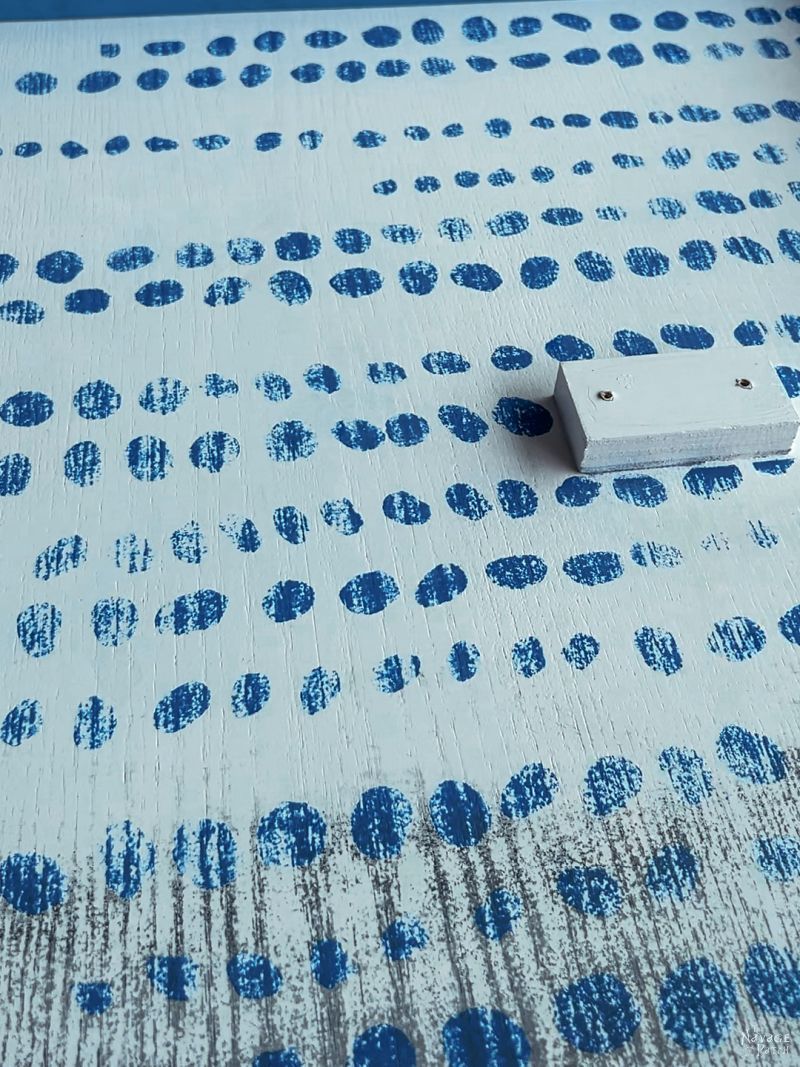
After vacuuming out the guitar display frames, I got my paint ready. Handan had bought some Kilz Magnolia paint because she fell in love with a color named Coffee Nook. Just another product from the Gaines Conglomerate.
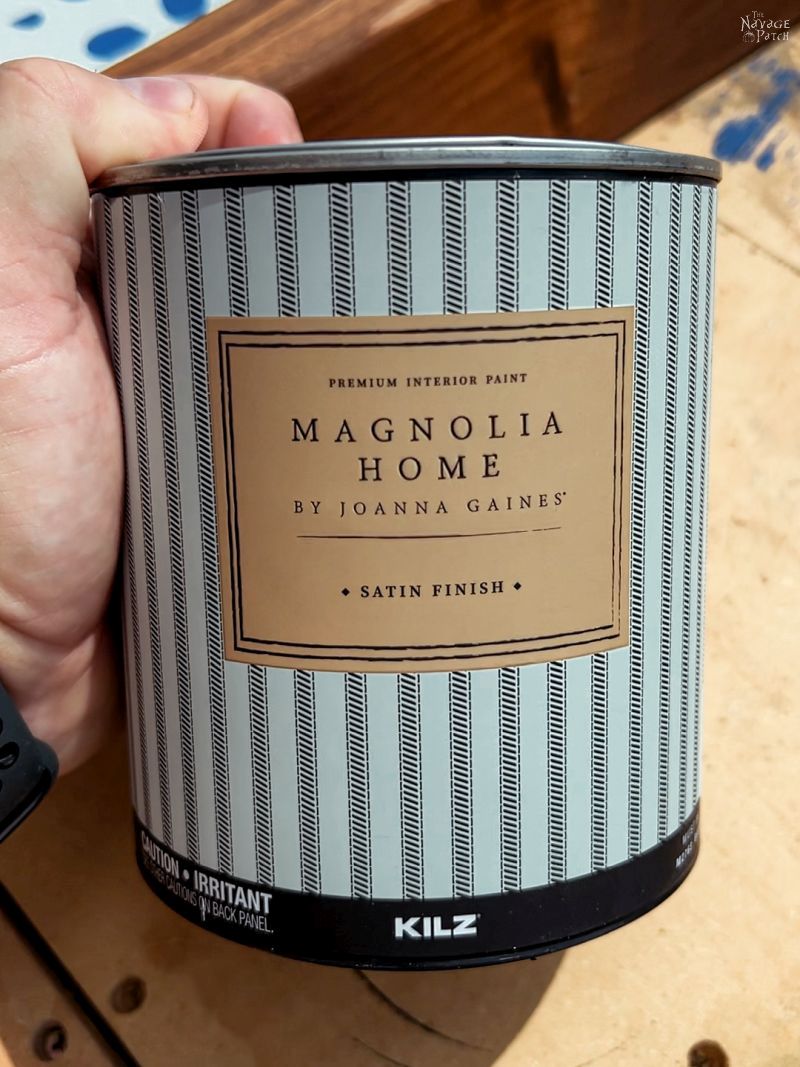
Based on the color tile and the blob on top of the paint can, I had this pegged as a dark, smoky gray – almost black.
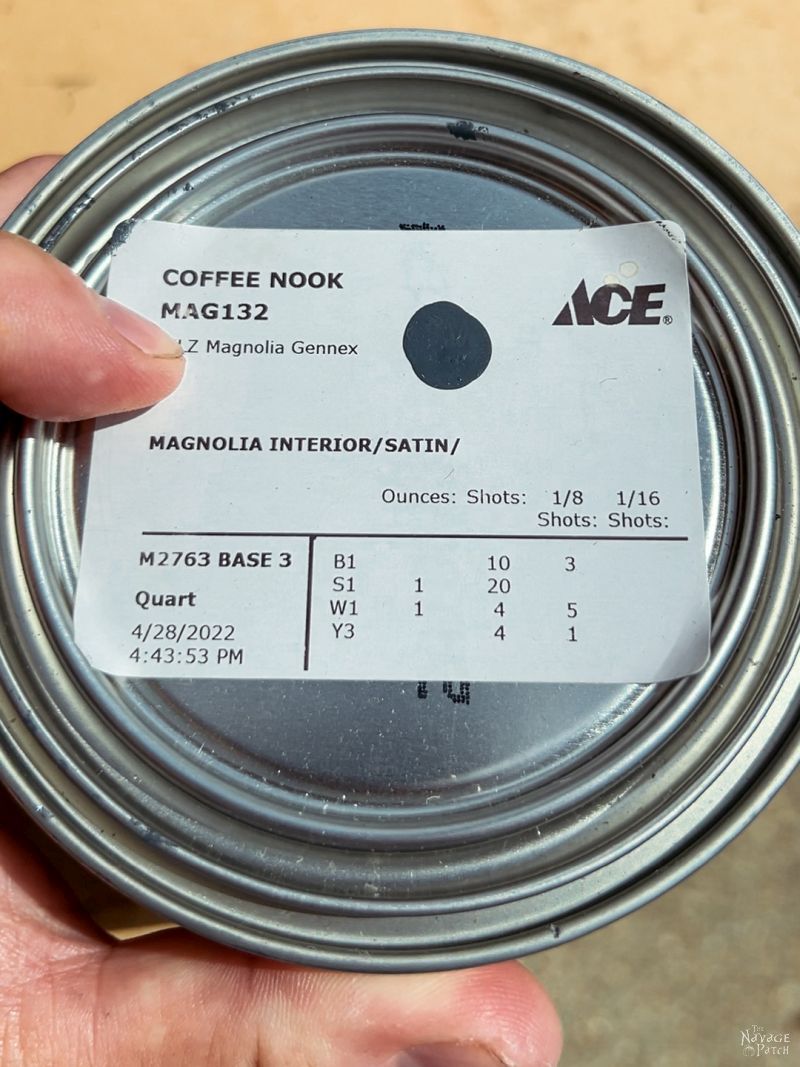
Boy was I wrong! Yeah. I know. Shocker.
This paint is a deep greenish, bluish gray, and that is why my babes is so enamored with it.

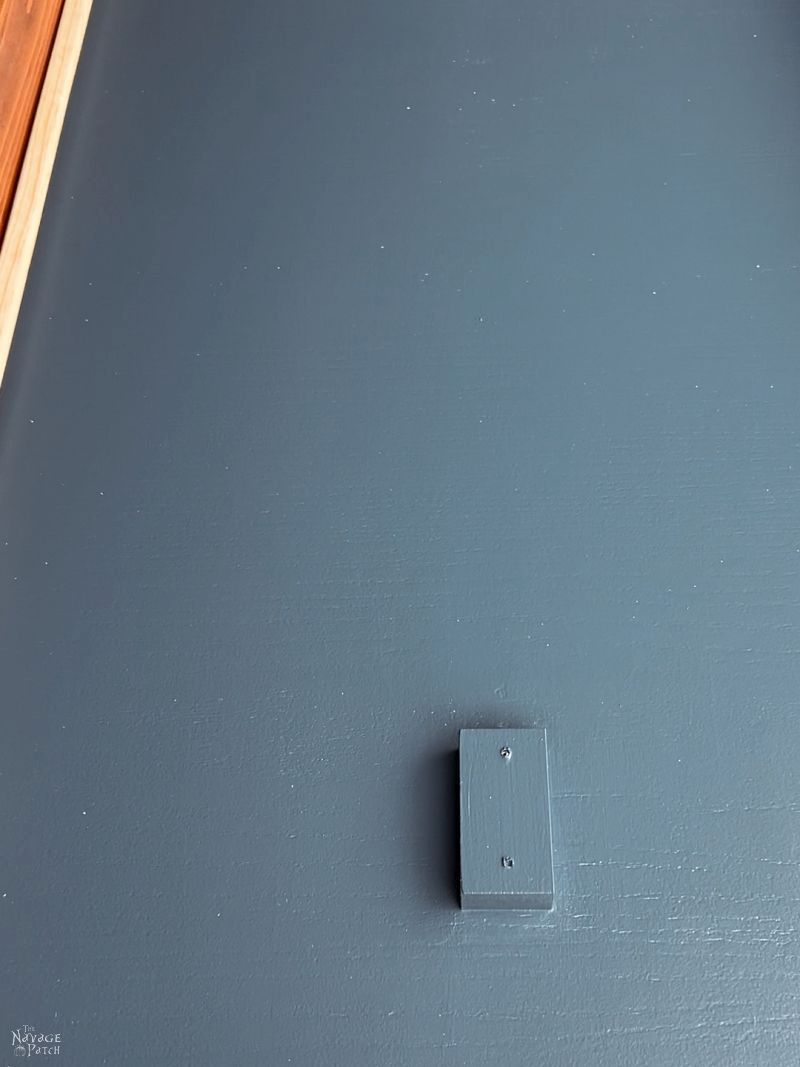
It may not look it from the picture above, but check out these guitar display frames after two coats! Definitely not the black I though it was. Of course, my babes swooned when she saw the newly-painted guitar display cases. That woman really loves her greenish blues!
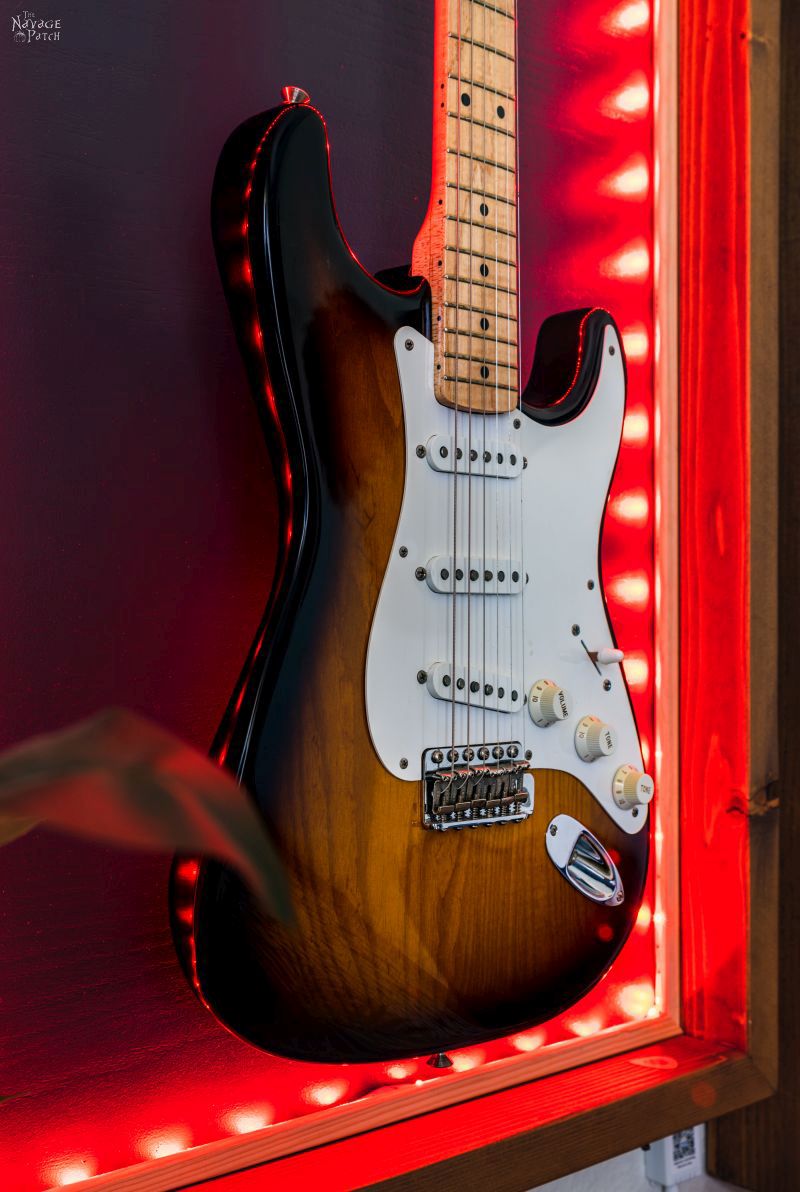
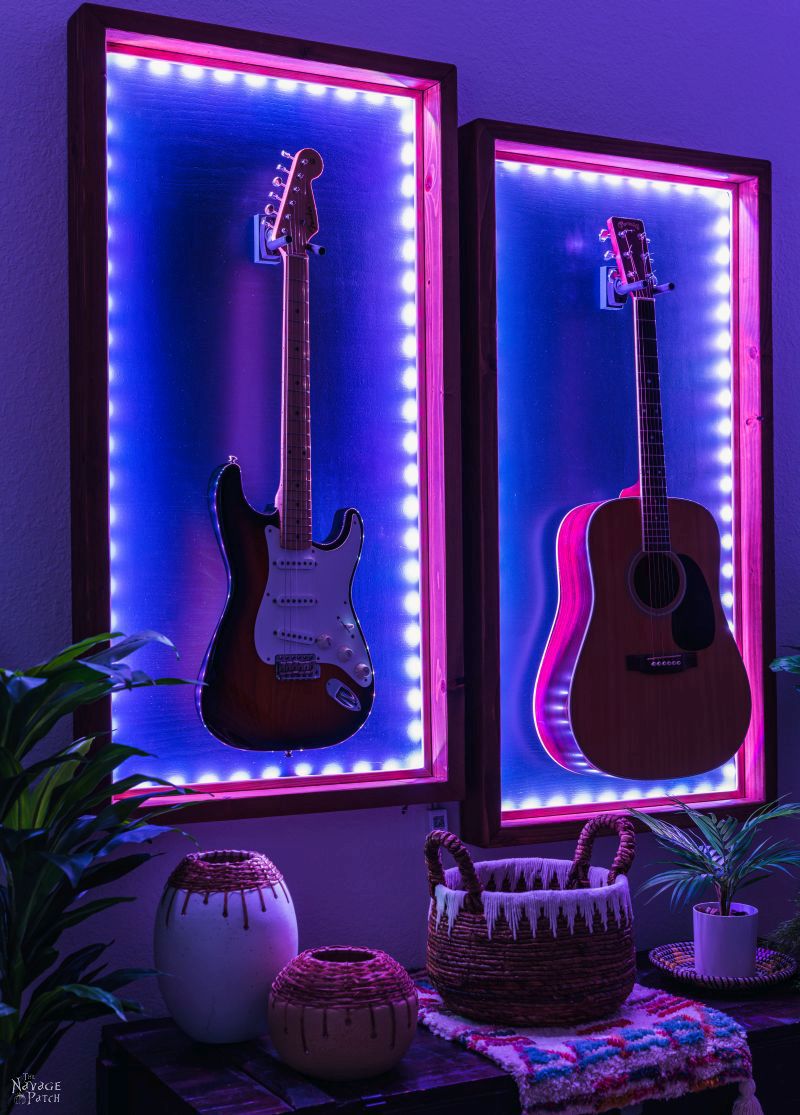
How To Install LED Lights to A Guitar Display Case
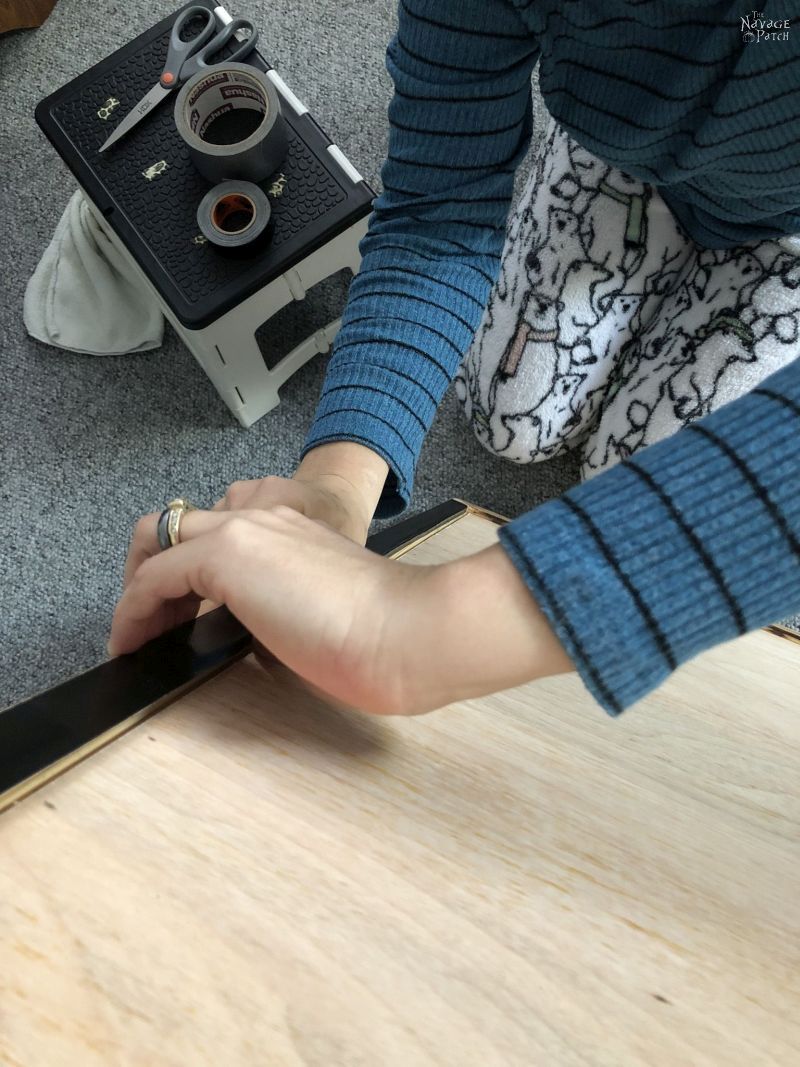
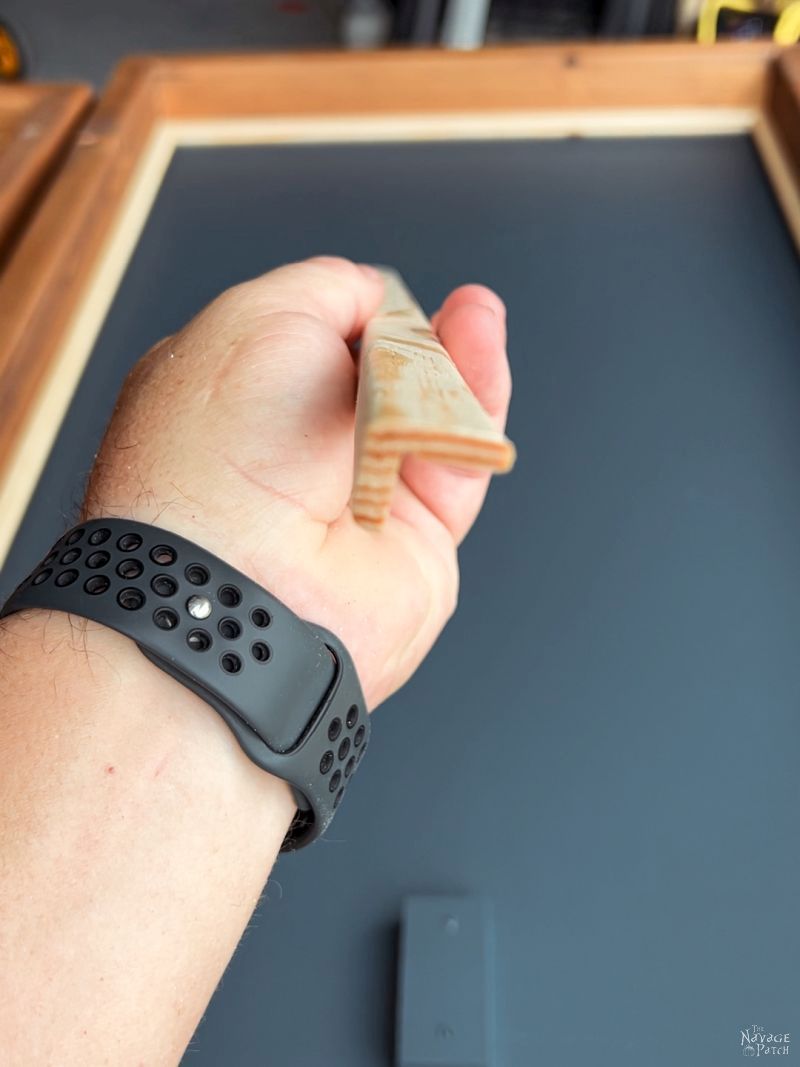
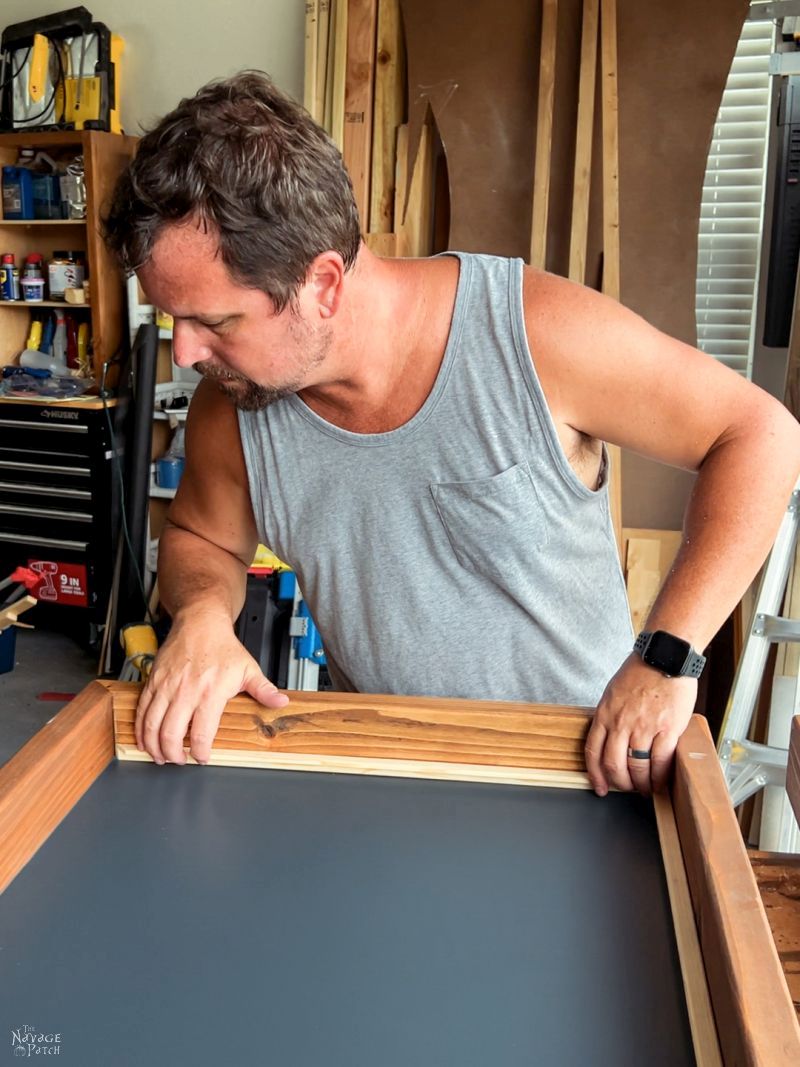
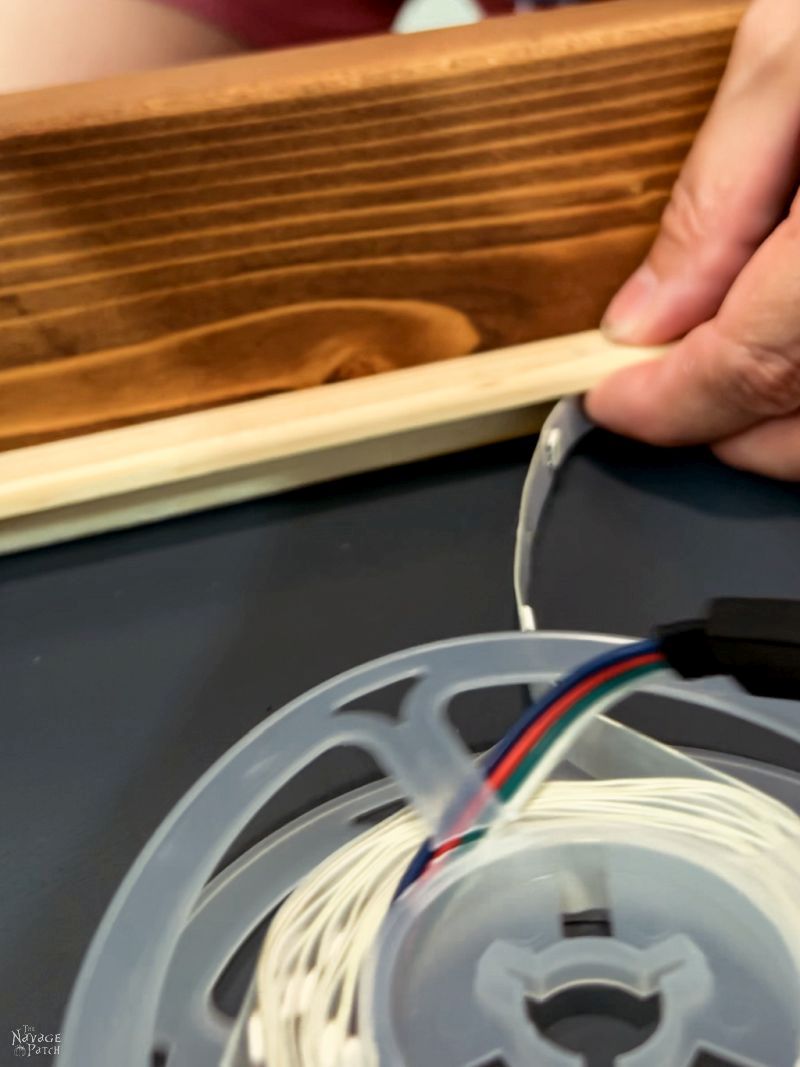
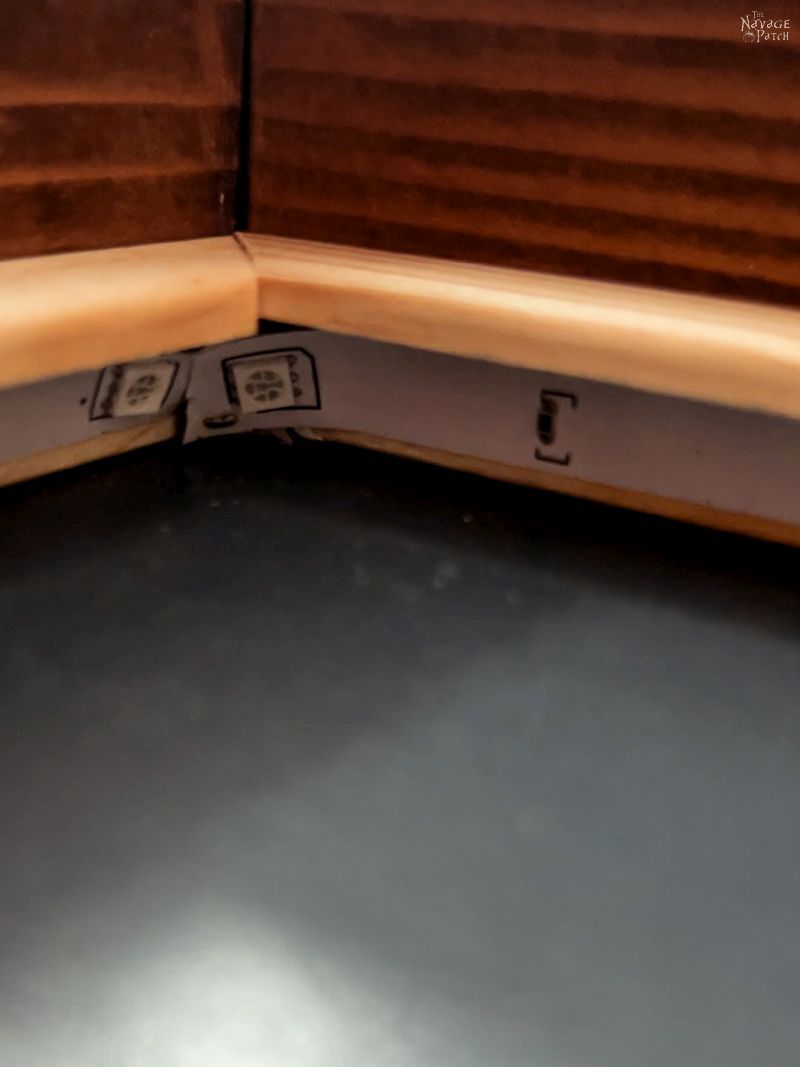
Okay, so the plan was to install some small trim moulding inside the frame to hide the LED light strips. We found some pine outside corner moulding at Home Depot that was perfect for the job. I would install it in the same orientation that it’s in in the photo below. The piece I’m holding in that orientation would go against the left side of frame. The LED light strip will be installed against the inner vertical surface.
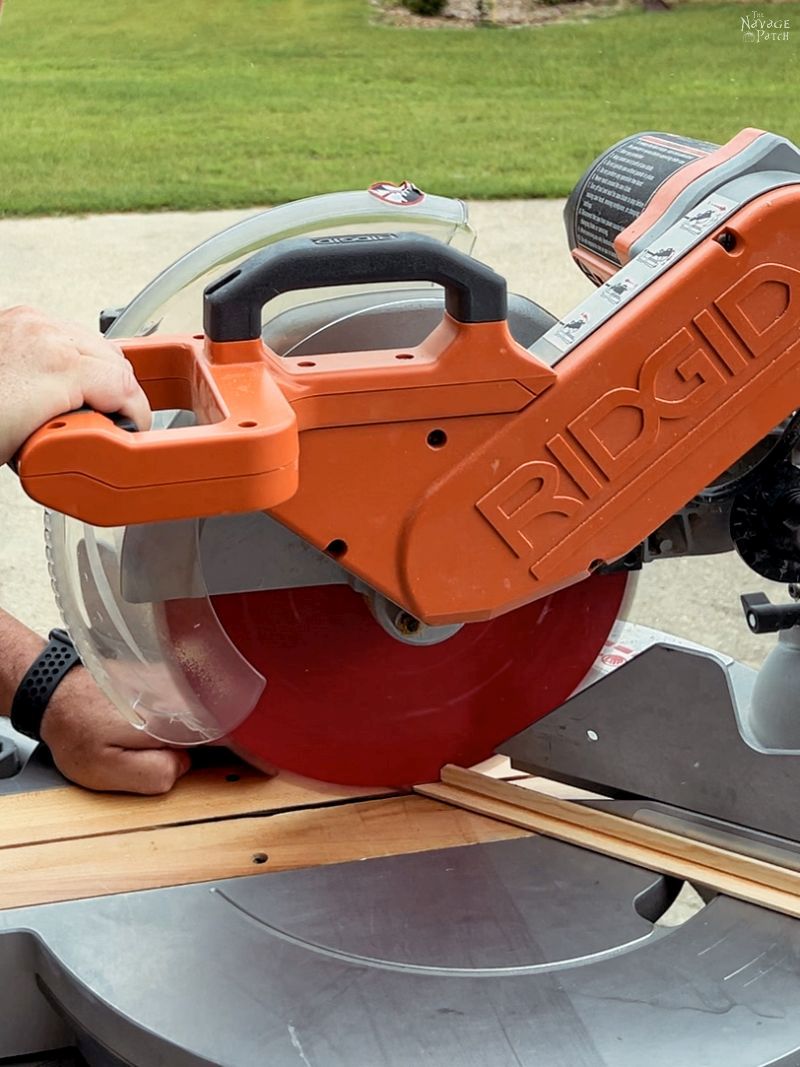
I mitered the corners so the moulding fit with the display frame’s mitered corners.
I dry-fit all the pieces into the frame before painting. The plan was to paint the moulding with Coffee Nook.
While I was cutting and fitting the pieces, Handan suggested that I stain the moulding instead of paint it. She thought it would be easier and probably look better, too.
I agreed.
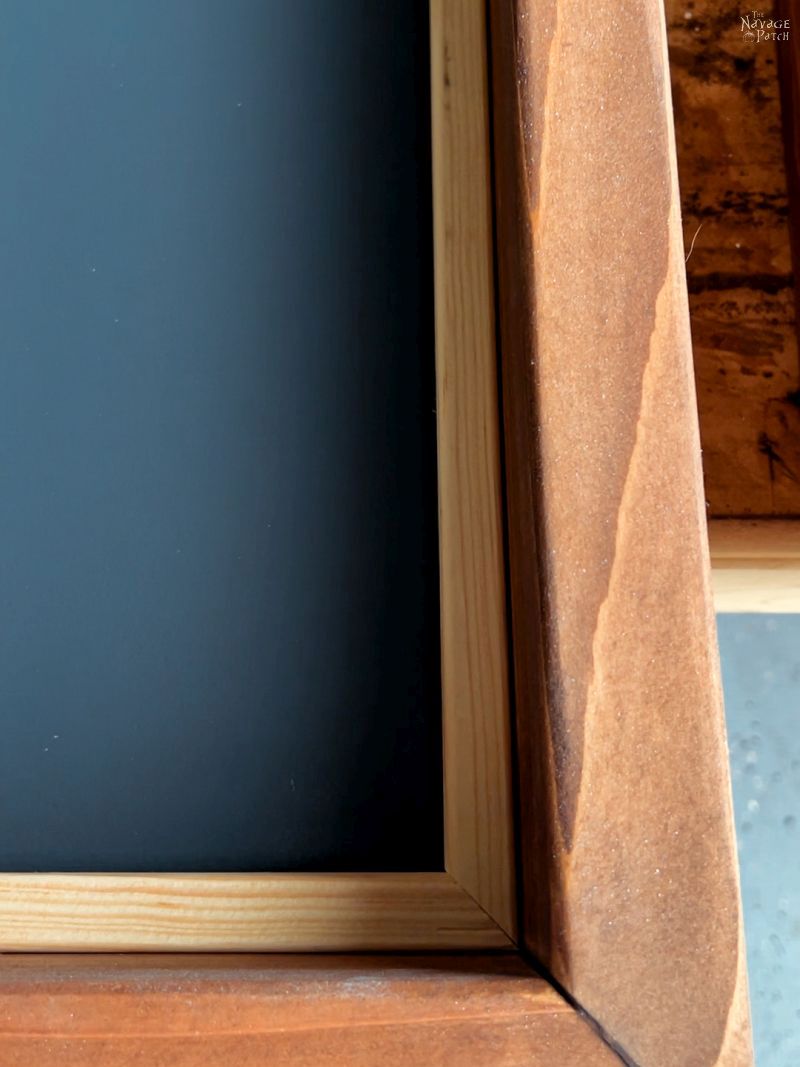
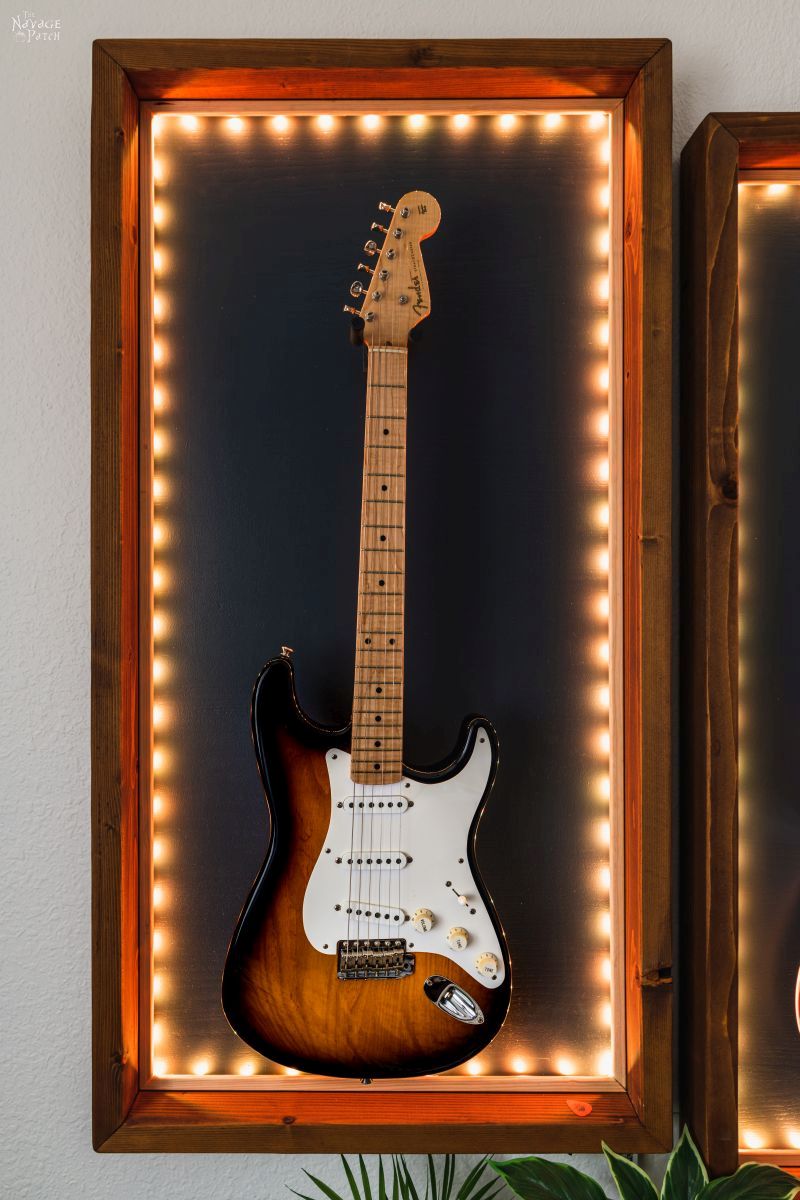
But when I finished dry-fitting the moulding, I noticed how well the natural pine color complemented the Coffee Nook, and how all three colors worked so well together. I told my babes about my discovery, but she wasn’t convinced. We called The Boy out for the tie-breaking vote, and he agreed that natural pine was the way to go.
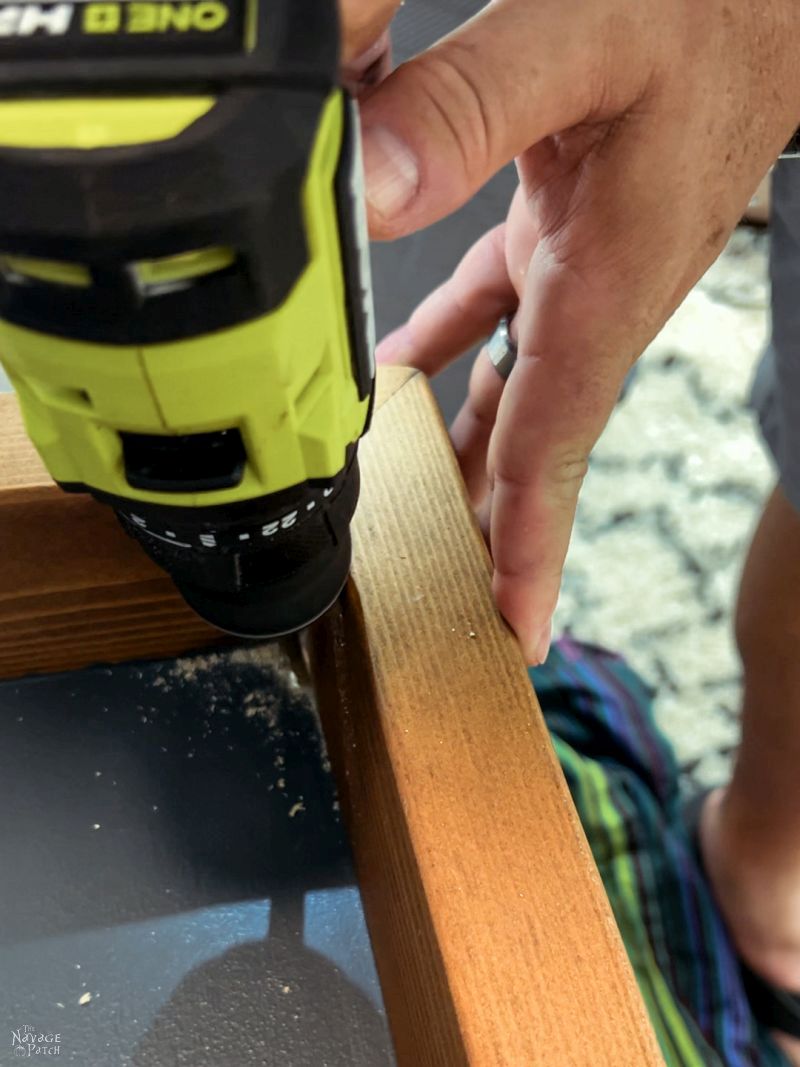
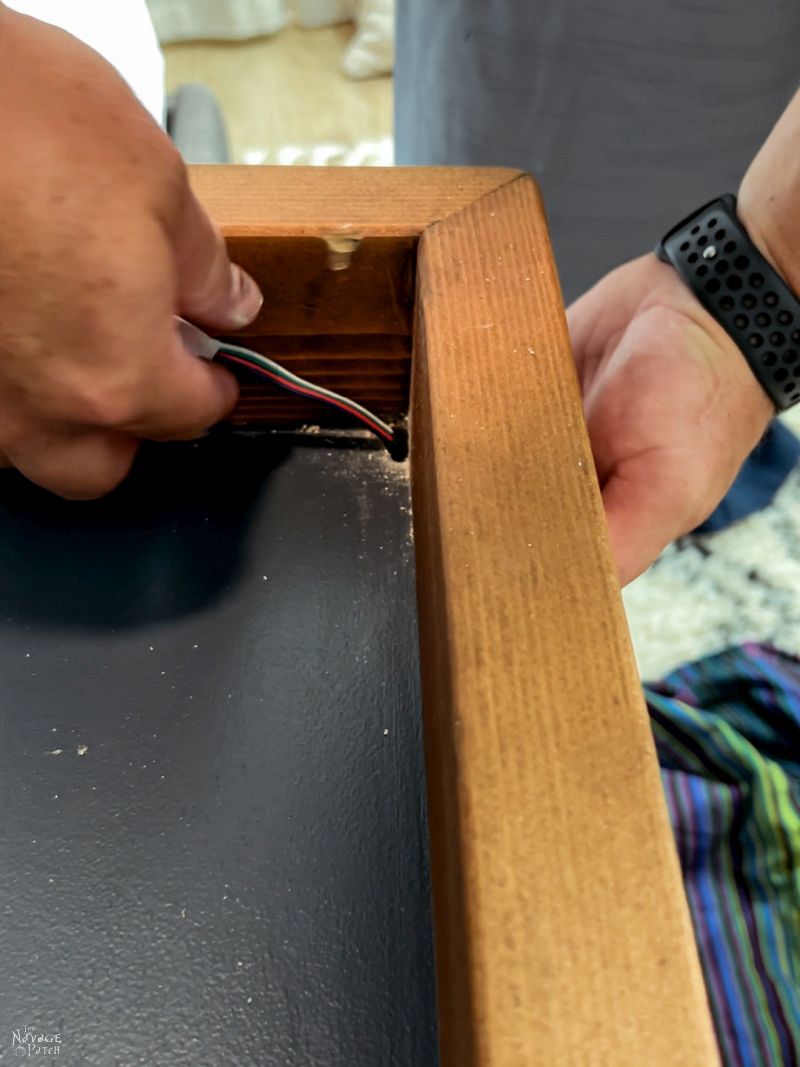
Back inside, I drilled a hole for the LED wire.
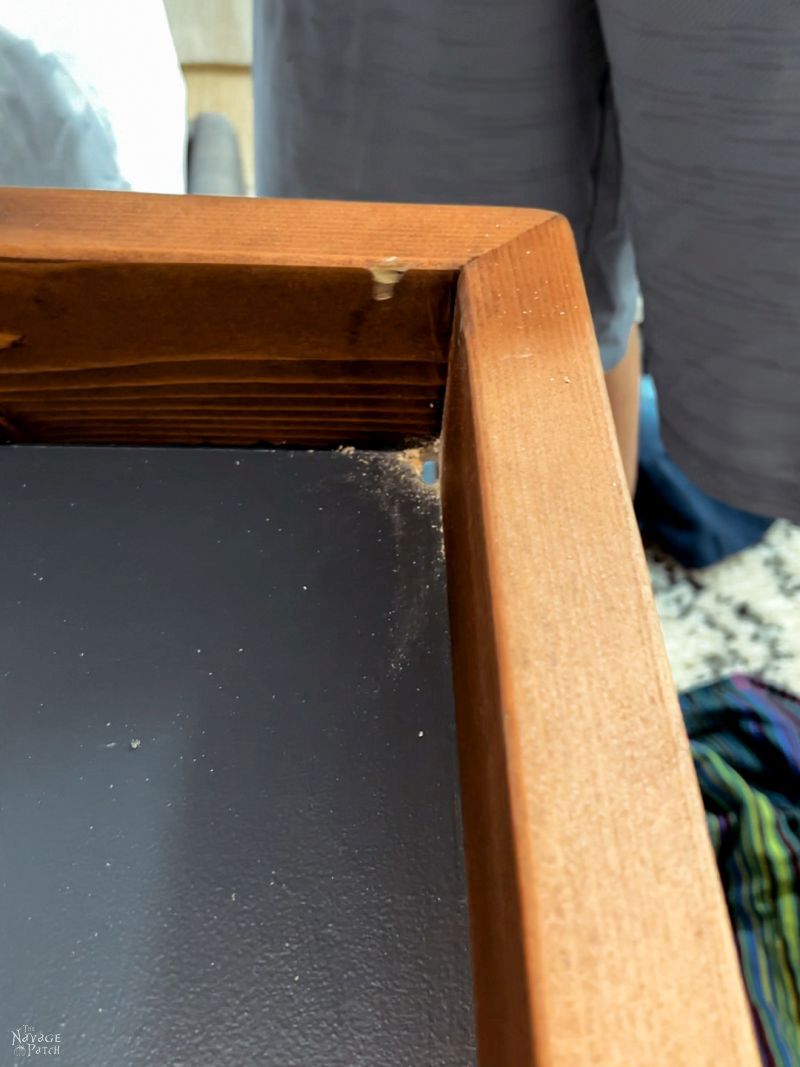
Yes, oops. I accidentally “sanded” the frame with the spinning drill chuck. Nothing a quick wipe of Special Walnut stain couldn’t fix!
I fed the wire through the hole.
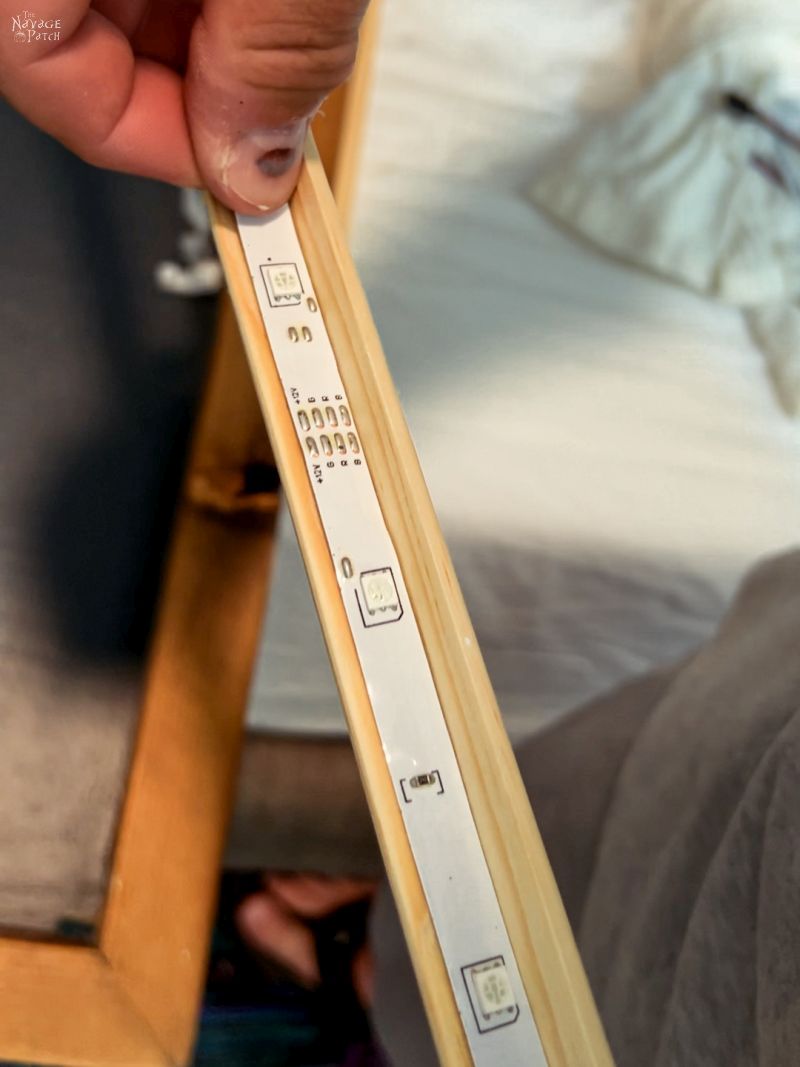
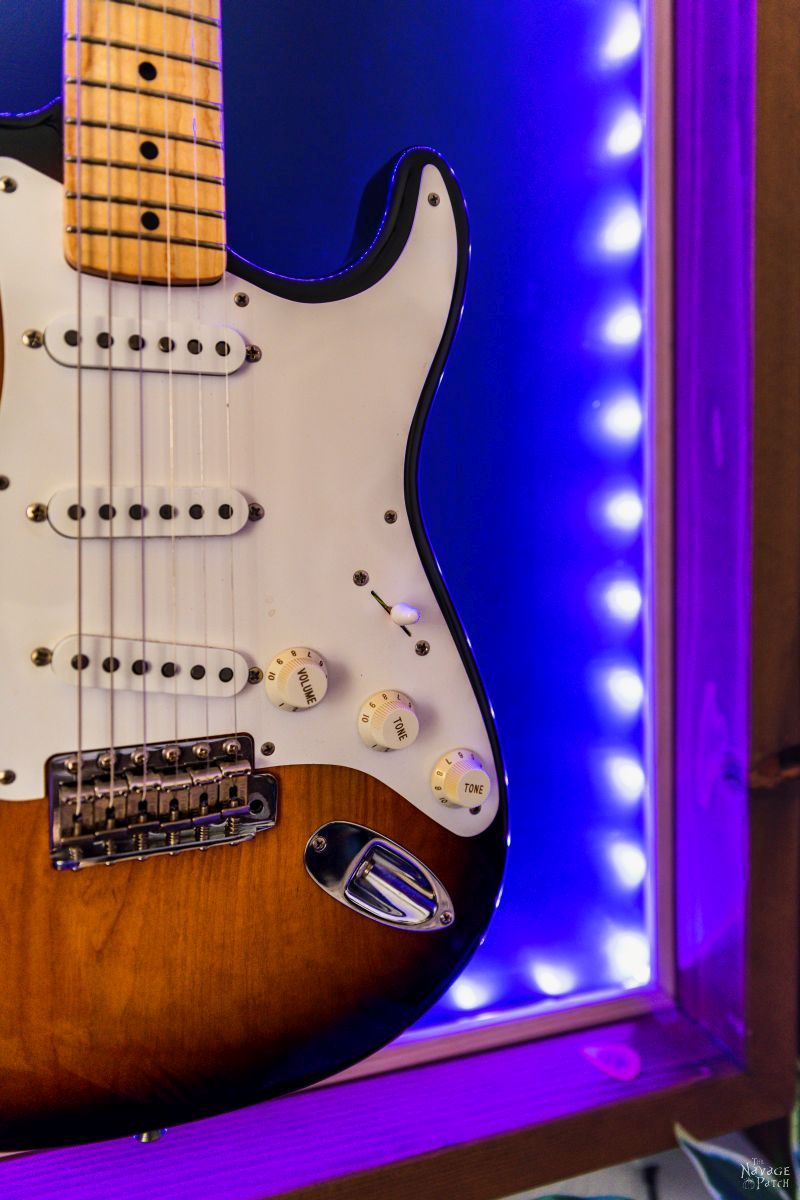
The LED light strip has an adhesive strip on one side.

I peeled the backing, and started to install it on the first piece of moulding. At this point, I had removed the moulding for LED installation.
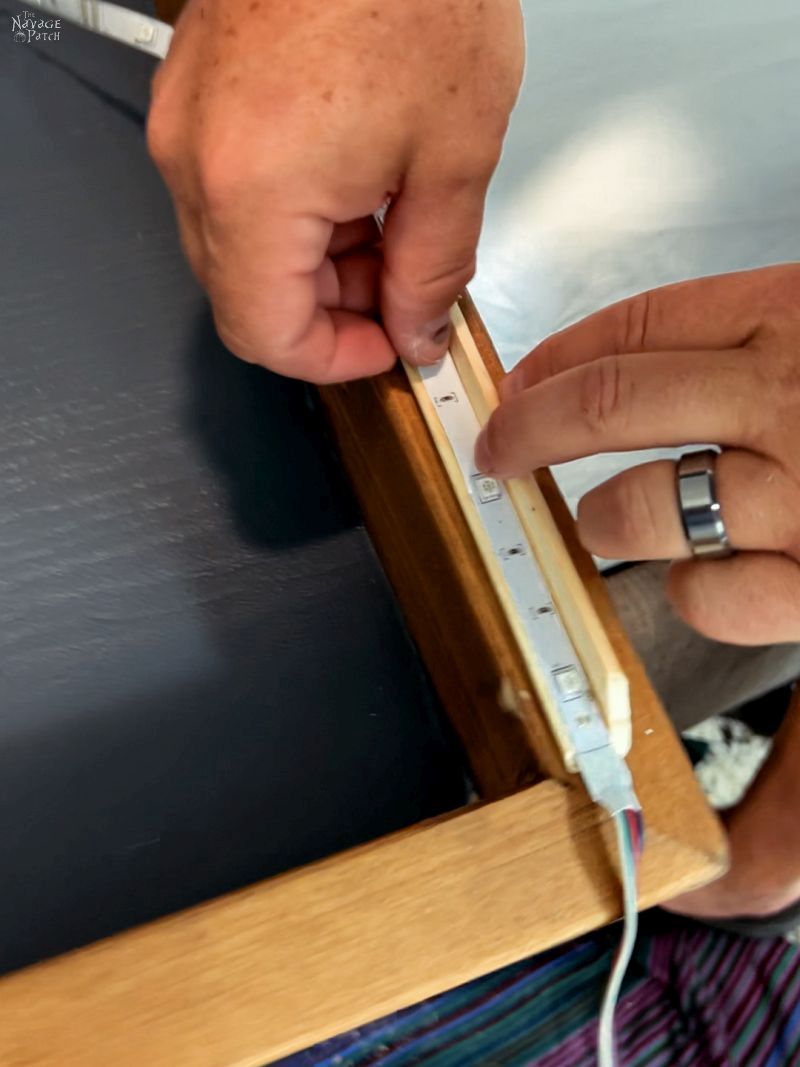
When I had applied the LED strip to the full length of the first moulding piece, I put it and the others back in their places. I had cut them so they fit snugly in place without the need for any adhesive or brad nails. In the future, I may secure the inner moulding frame, but for now, it is securely seated on its own.
After reinstalling the inner moulding frame, I carried on applying the LED light strip by removing the adhesive backing, then then pushing the strip under the moulding and into place. It was immediately apparent that my fingers were not as good for this job as Handan’s, so she took over.

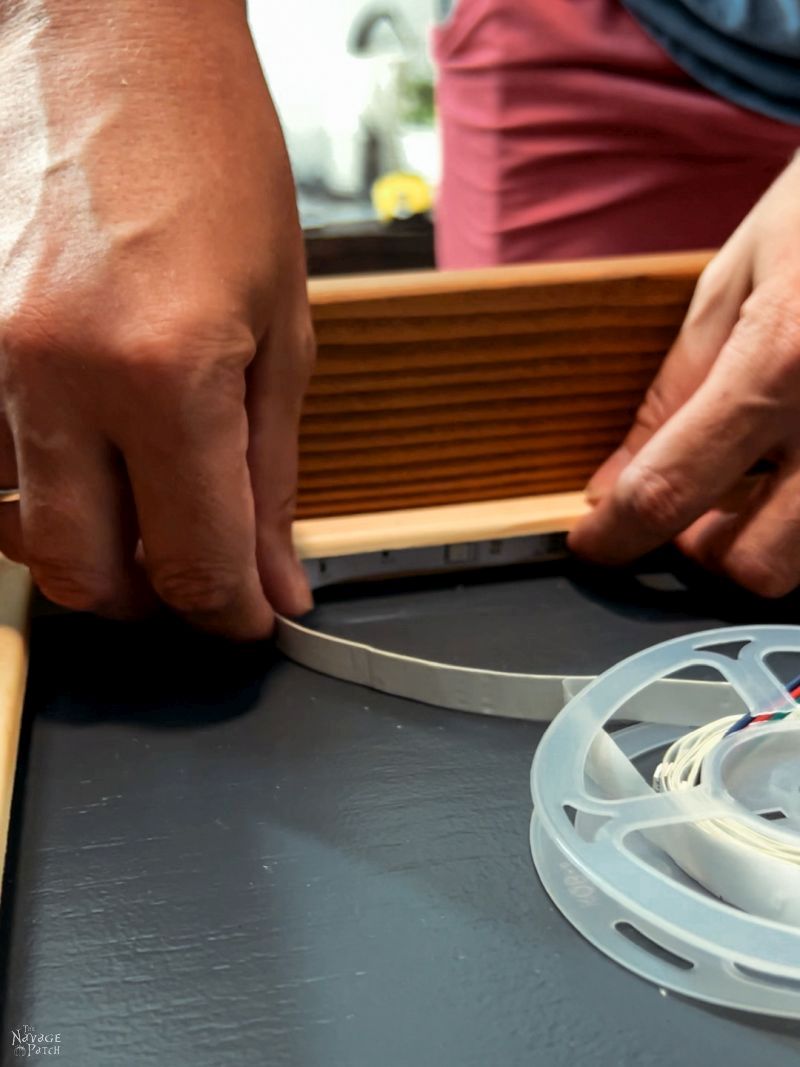
When she got to the end, I cut the LED strip with scissors, and she pressed the last bit into place.
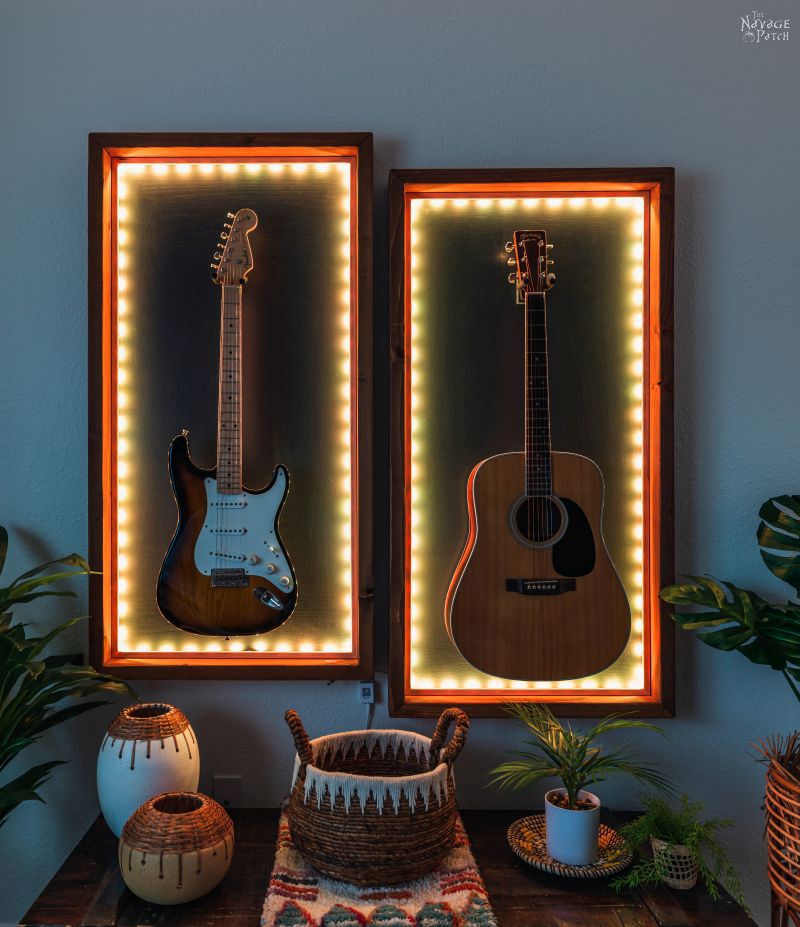
Next, I hung the guitar display cases on the wall (again with French cleats), and then I reinstalled the guitar hanger hardware.
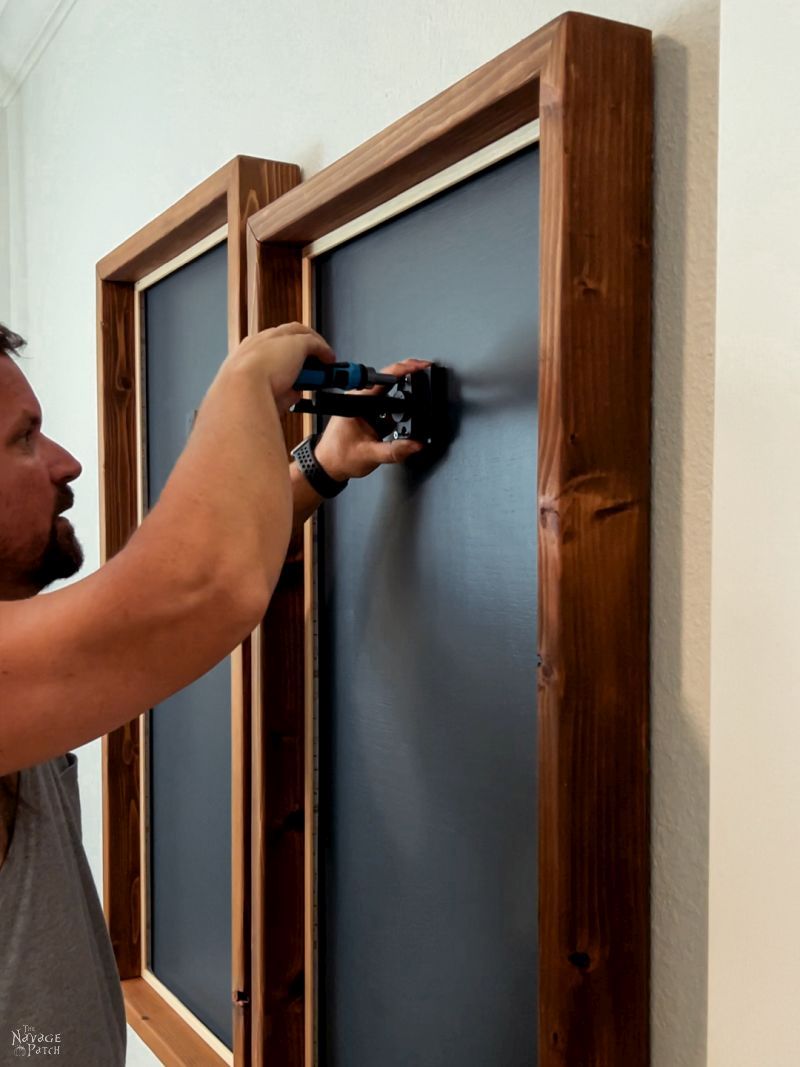
My arms guns and I appraised our work.
Handan plugged the LED strips into the remote-controlled, Bluetooth-capable controller and then plugged that into the wall.
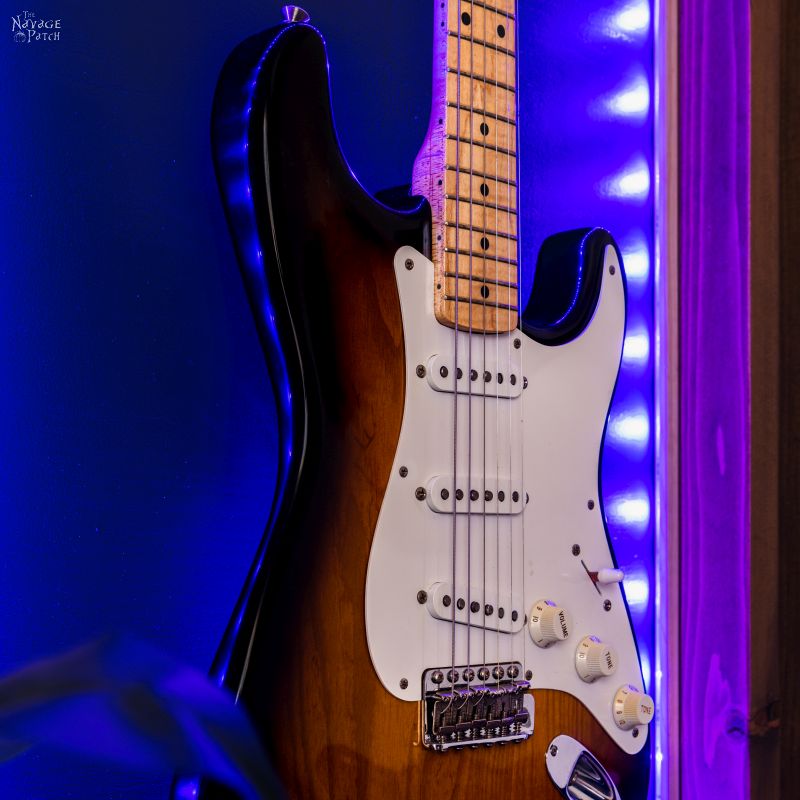
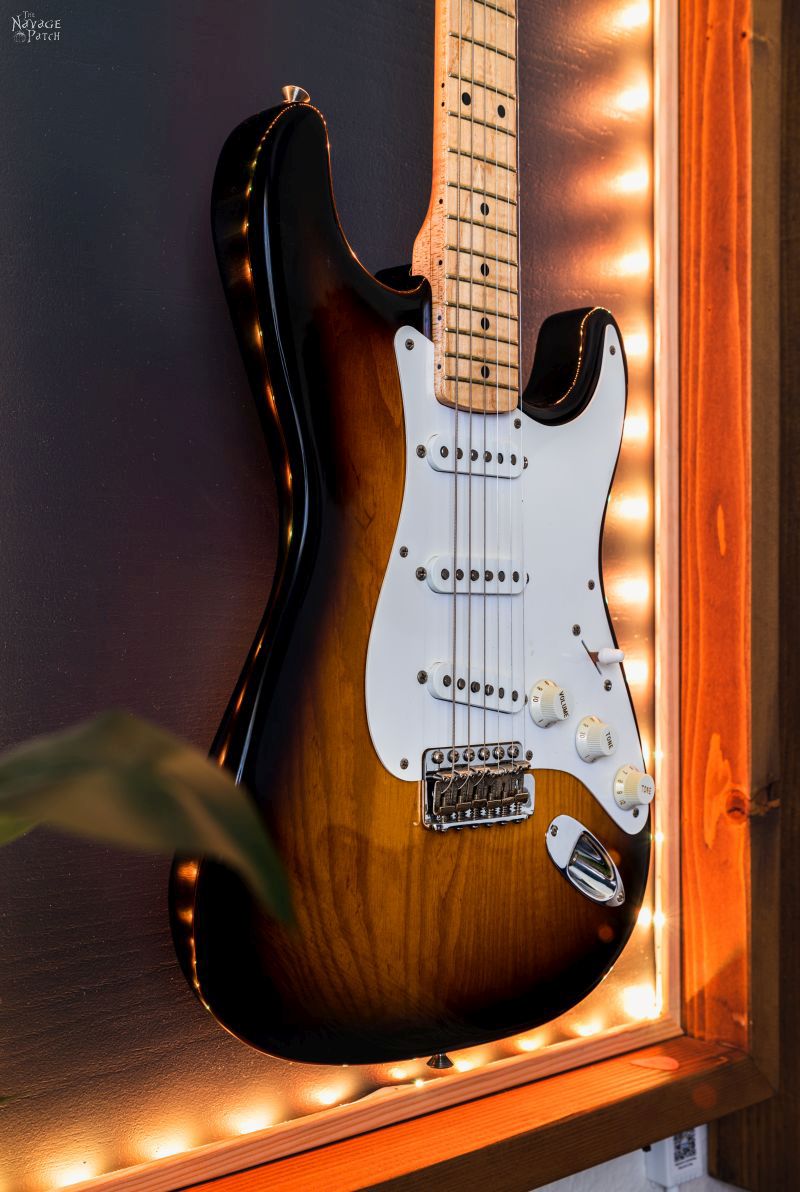
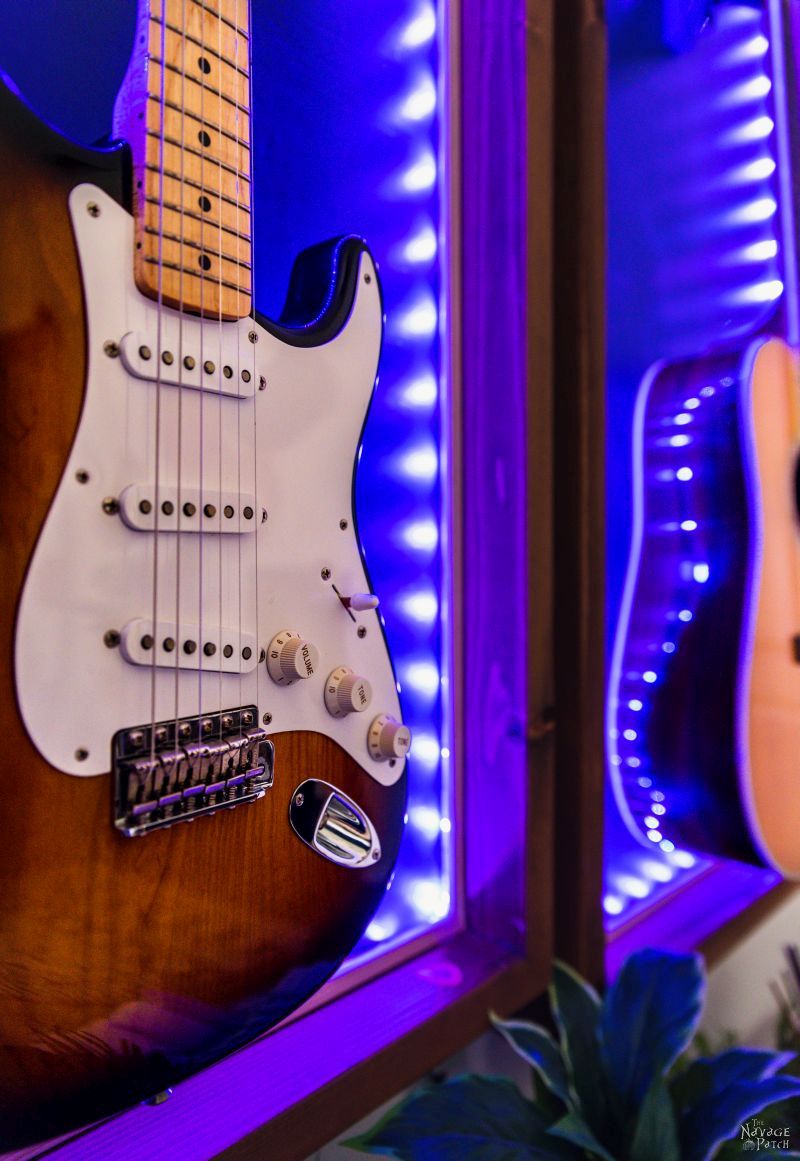
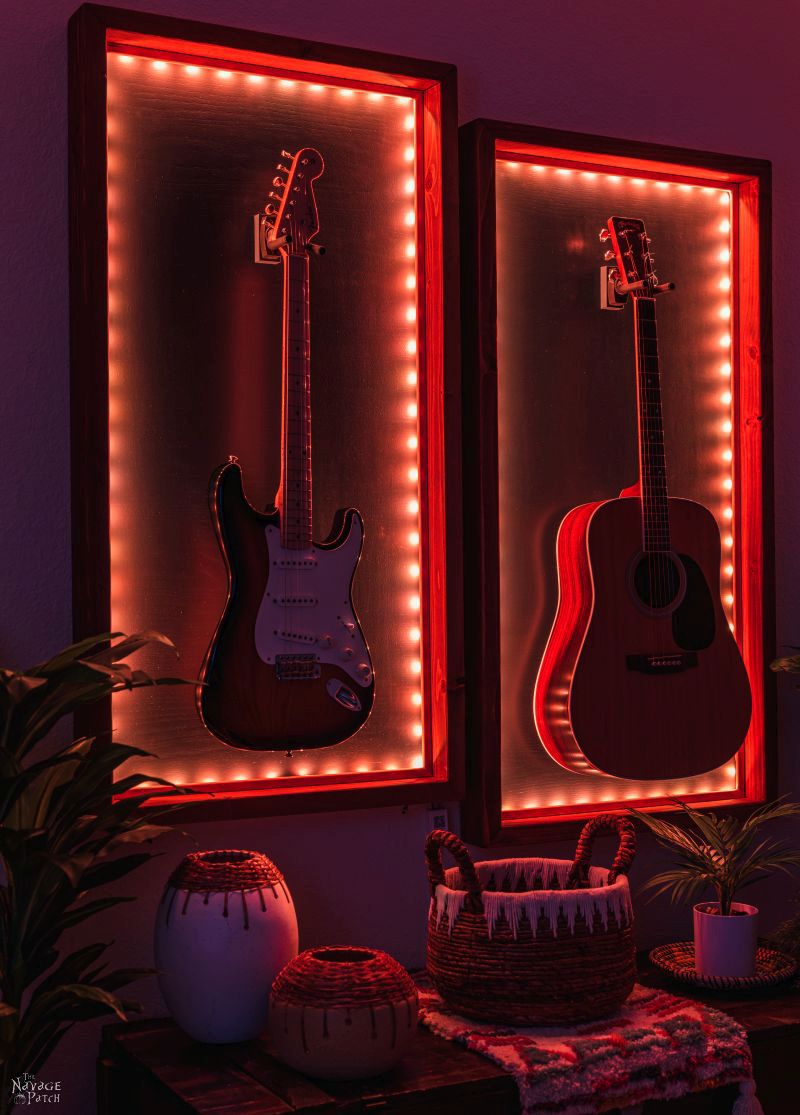
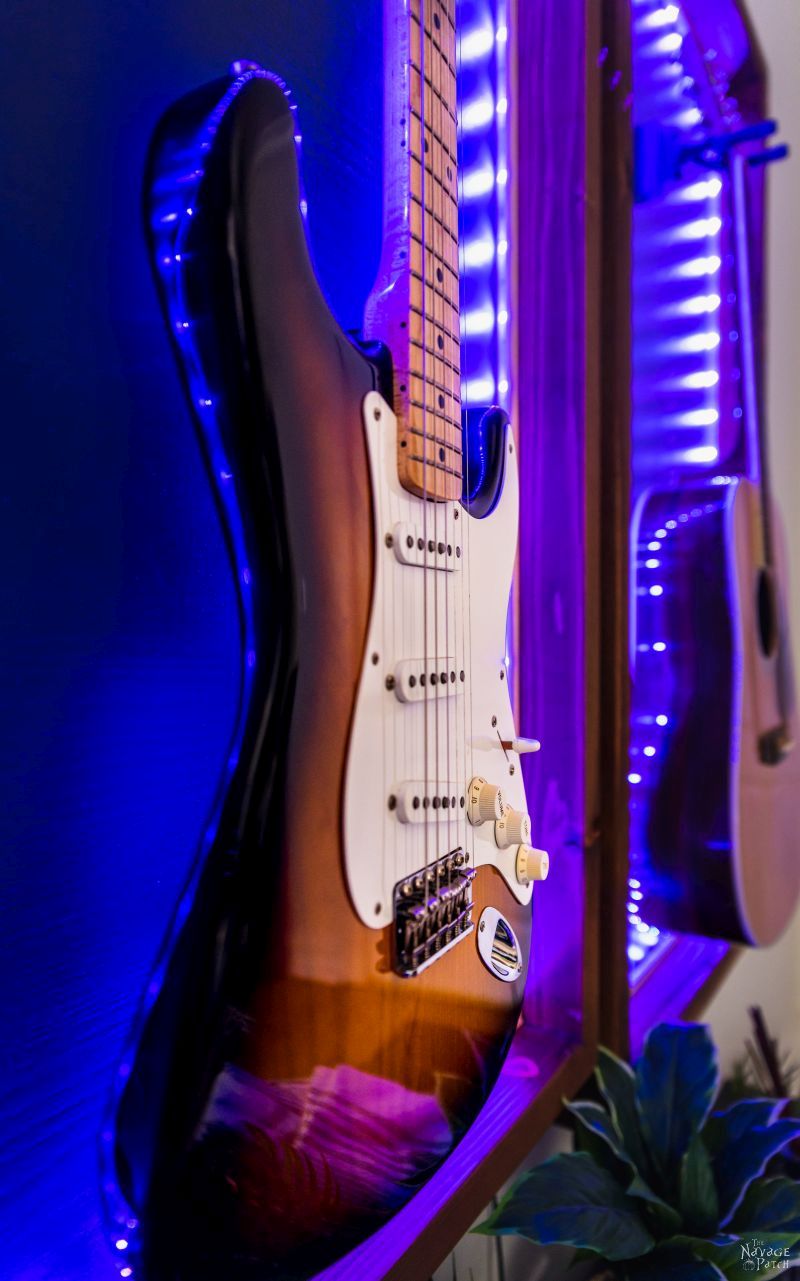
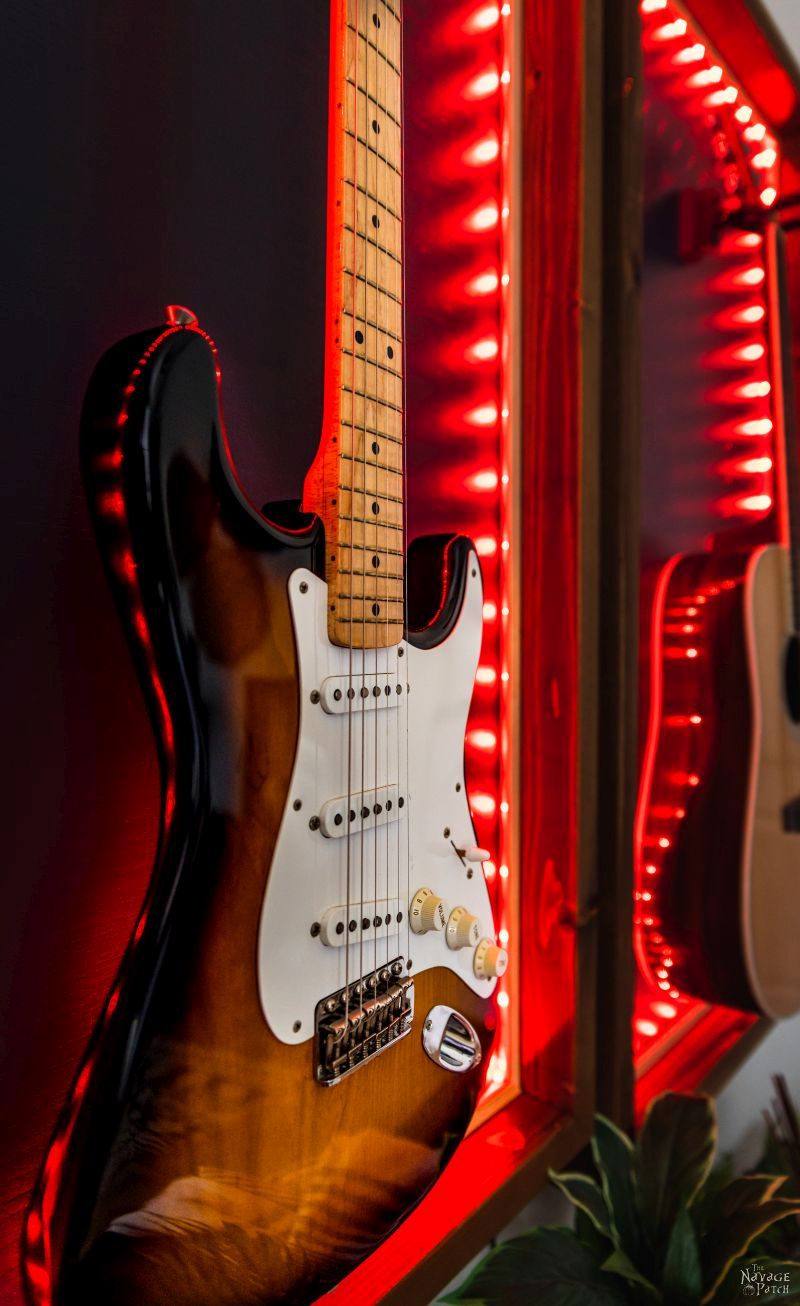
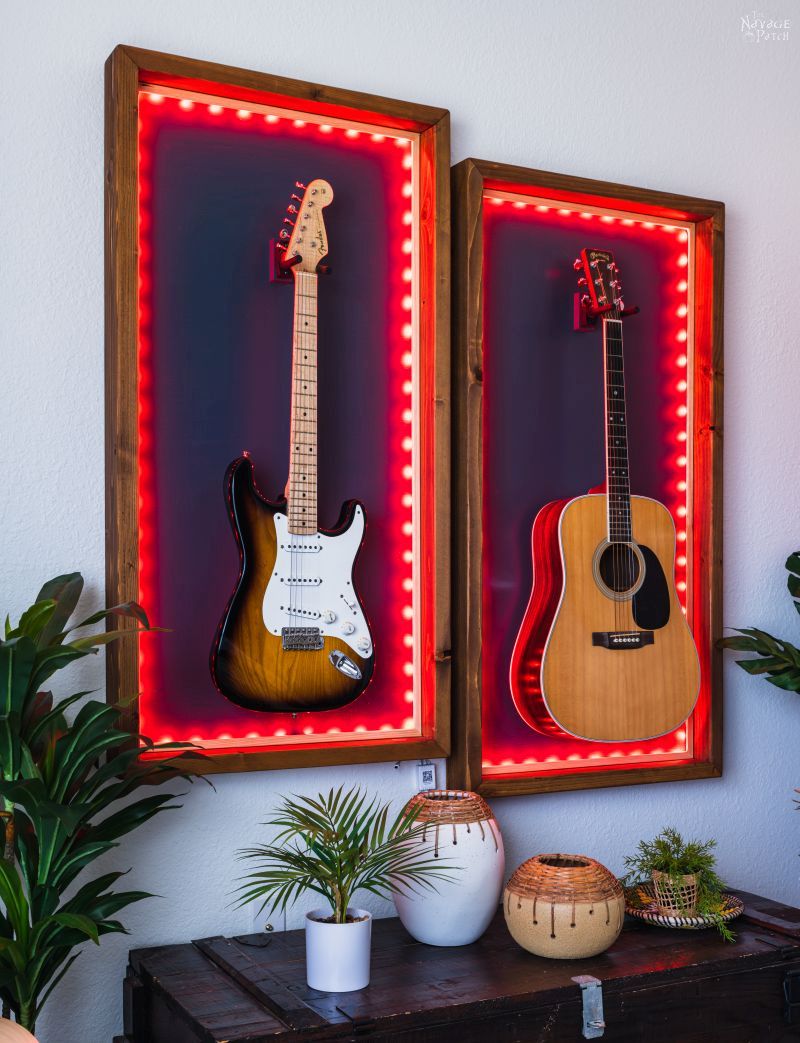
And wow! These LED strips are amazing, and what they did for Baris’s guitar display frames is nothing short of remarkable!
DIY Lighted Guitar Display Case Final Pictures
Share it on Pinterest & Facebook!

Who needs to know how to flirt when you play guitar?! Girls love musicians! If the guilt thing doesn’t work maybe the lure of groupies will! Lol! I like that you continued the stencil, the frames look great.
P.S. Handan, your pjs are adorable! I live in mine too! ?
I think that’s why guys learn how to play, LOL!
Hahahaha – thank you so much, Giselle! Oh I can’t live without my pjs! Put it this way: I have more pjs than jeans and shorts combined LOL.
Very Well Done. Looks soo Rad! Love the display of Plectrums. 🙂
I still have my 1st electric Guitar too. Love the Giraffe nice bit of Africa displayed there…
Cheers.
Shaun
Thanks, Shaun! Oh yeah, Africa in the house!
That is the ultimate! Well done display with step by step instructions! Make sure when you open the door that it doesn’t hit the guitar ?
Thank you, Francie! We made sure they are safe from any swinging doors! 🙂
Well done. The blue color of that electric guitar is so cool. I love that blue.
As for that sawdust cloud, my hubby did the same thing to me with the snow blower once when he didn’t realize I was standing nearby and the snow chute was facing towards me. Mini blizzard all around me as I clearing the back of my SUV. Fun times.
LOL, oh man, that could have hurt if the snow was heavy – those things are powerful! Yeah, we love that blue, too…especially Handan! She was there when we bought the guitar, and she heavily favored that particular one! 🙂
I always wished my parents had gotten me an instrument and lessons that was cool. …I learned the trumpet. Not cool. I’m also terrible at it so I didn’t even get anywhere close to the high lofty goals of a being a jazz musician. The one cool way you can play a trumpet.
Hopefully Barish will get to college and realise that girls really dig musicians and he will ring and ask if you’ve still got his old guitars. And they will still be hanging on these great displays, just waiting for him to pick them up over Christmas break!
Great looking, as always. Love the way you’ve used the same pattern from the wall on the backboard. It’s subtle so it’s not taking away from the instruments themselves but funky enough to stand out. Do kids still say that? Funky?
You are right about the trumpet – the only avenue to Cool Town runs right down Jazz Ave. My nephew plays, and he’s in a jazz band, so he gets a pass, lol! Yeah, someday, I’m hoping Barish will see that the guitar is a gateway to many great things. I’m also willing to teach him how to DJ – another magical art that I learned and went semi-pro with for a time in San Francisco. He seems to like electronic music, so we’ll see! 🙂
Oh man! These are awesome. I’m definitely adding this to my project list. I love the Command Strip idea for mounting too. Have you had success with them on textured walls? I can’t tell if your walls are smooth or textured in the picture. Thanks for sharing!
Thank you, Krissy! We’ve had success with those Command Strips on all of our walls. They are only mildly textured from the paint rollers we used (3/8 inch nap) when painting.
You know, you could have just said the finger was there as proof that you didn’t lop it off…we would have bought that! ?
Great project once again!
LOL, there’s a good idea! Handan has her pajama counter, and I can have my finger counter! 😀
Great project as usual! I love how you speak of your son (no “steps”). He’s a lucky young man. And also, I love Handan’s pj’s. If only I could come to work like that.
Thank you, Lori! Yep, he’s my straight-up “son!” 🙂 Now, about those pajamas – I’m sure Woodcraft wouldn’t mind if you strolled in one day wearing them, lol! 😀
With all of your cool tools, maybe you could make another guitar display frame for the guitar you make from scratch??! Wouldn’t that be a cool road to go down…and you would have enough guitars that each of you would have your own family band. Love the frames and the guitars look fabulous in there. Much better than my guitar looks hanging on the wall from the strap.
Oh, someday when I have free time, I may do that, Susan! That’s great that you play? Do you sing, too? What kind of music?
Very nice!
Thank you, Kelly!
You guys this is a wonderful way to get the guitar off the floor and make it shine on the wall. My son has a few that are hiding out. Maybe I can try this and surprise him!
Thank you so much, Mary! It’s a much better solution than having them strewn about the floor, lol! 🙂
Very cool! I am thinking of making something similar for arcade marquees for my husband but with the strips of lights behind a mat (shadow box style). Do you think those strips would be bright enough to light them up from behind the way yours are installed without being directly behind the marquees?
They might be, Anele – they are pretty bright. But not knowing what lights you had in mind to begin with, I can’t say for sure. We do love these lights though and will be using them elsewhere in the house!
I love the updated guitar display cases…the lights make it spectacular! Your son should be over the moon…
Oh, he is, Sherry! And we are too! 🙂
OMGOOOSH what an AMAZING way to display the Guitars!! I absolutely love the upgrade to the college man vibe with the LED lights!! I’m with Hayden….swooning over that color! It’s a gorgeous color! Great job as ALWAYS!! The sawdust wood filler is GENIUS!! Wow blown away and will definitely try it!
Oh btw… as a Southeastern NC born & raised beach gal…(30 mins from Myrtle Beach SC….does that help to lure you & Hayden to come do my remodeling you’ve been saying you were hoping right on it for a couple yrs…🤣🤣) the tank tops are a MUST! Dude when we (including Fl pan Handle) has heat waves with Heat Indexes staying 108-110°+++ daily with NO HUMIDITY RELIEF AT ALL…you’ll be even trying to rid yourself of the Tank!! 🤣😅 geez we can barely catch a breath when walking outside, then we bathe daily in sweat! Good Ole Summer! Hope y’all have a super wknd!!! Glistening Guns and all Y’all are rocking the DIY world!!! Keep up the great projects!!
Erica
PS: Hayden is rocking the PJ’s! Believe me there’s a LOT of us PJ wearing people since C19 hit! Lol It’s never going away either!! 😅
Thank you Erica! Oh, you’re so right about the heat and humidity down here! But I’m ok with it as long as I don’t need to wear too much clothing! I couldn’t imagine having to wear a business suit here in the summer! And yep, Handan rocks those PJs every chance she gets, lol!
Love this! It is a FANTASTIC upgrade from what it was!! So dramatic and expensive looking!! The guitars framed are great!!
Gotta say-the tank top is necessary in Florida! It is so dang hot!! We normally call them a “mank” man-tank!
The neighbors should not be exposed to a sweaty middle-aged torso!! The might ask you to move out of that swanky neighborhood!!🤣
LOL, they might call the police on me! :D:D
WOW! AWESOME! MAESTRO!
Thanks, Connie! 🙂
Great job! The tank top looks great too! I think you two are trying to make it so ‘the boy’ never goes back to college. The room is what dreams are made of.
Just wait for the reveal! Yep, he surely loves it! 🙂
Love – Love – LOVE! I w definitely want to make these, have to think of what I can display. Neither the hubs nor I play any instruments but I’ll come up with something. You guys have the best instructions, bar none! You make it seem like we are standing right there with you. And all the tips you give what no one else tells you. Thanks for all the time, effort and fun from all us DIY’ers!
Thank you so much, Nancy! Yes! You can display whatever you want in a frame like this – no need for guitars!
Amazing. Building something Very similar and love the idea of adding the lights. How do you get a single strand of led lights on both guitar frames without seeing the lights in between the frames? Cheers.
Each frame has it’s own strand of lights! The wiring from each frame connects to a single controller pack which you can see in the photos.
This is such a creative idea! I love how you’ve made it both aesthetic and budget-friendly. Can’t wait to try this for my guitars! Thanks for sharing the detailed steps!
Thanks for sharing this project, it looks amazing! I’m planning a similar project but considering some sort of textile fabric for the background. This guide will help a lot!
That will look great with fabric!