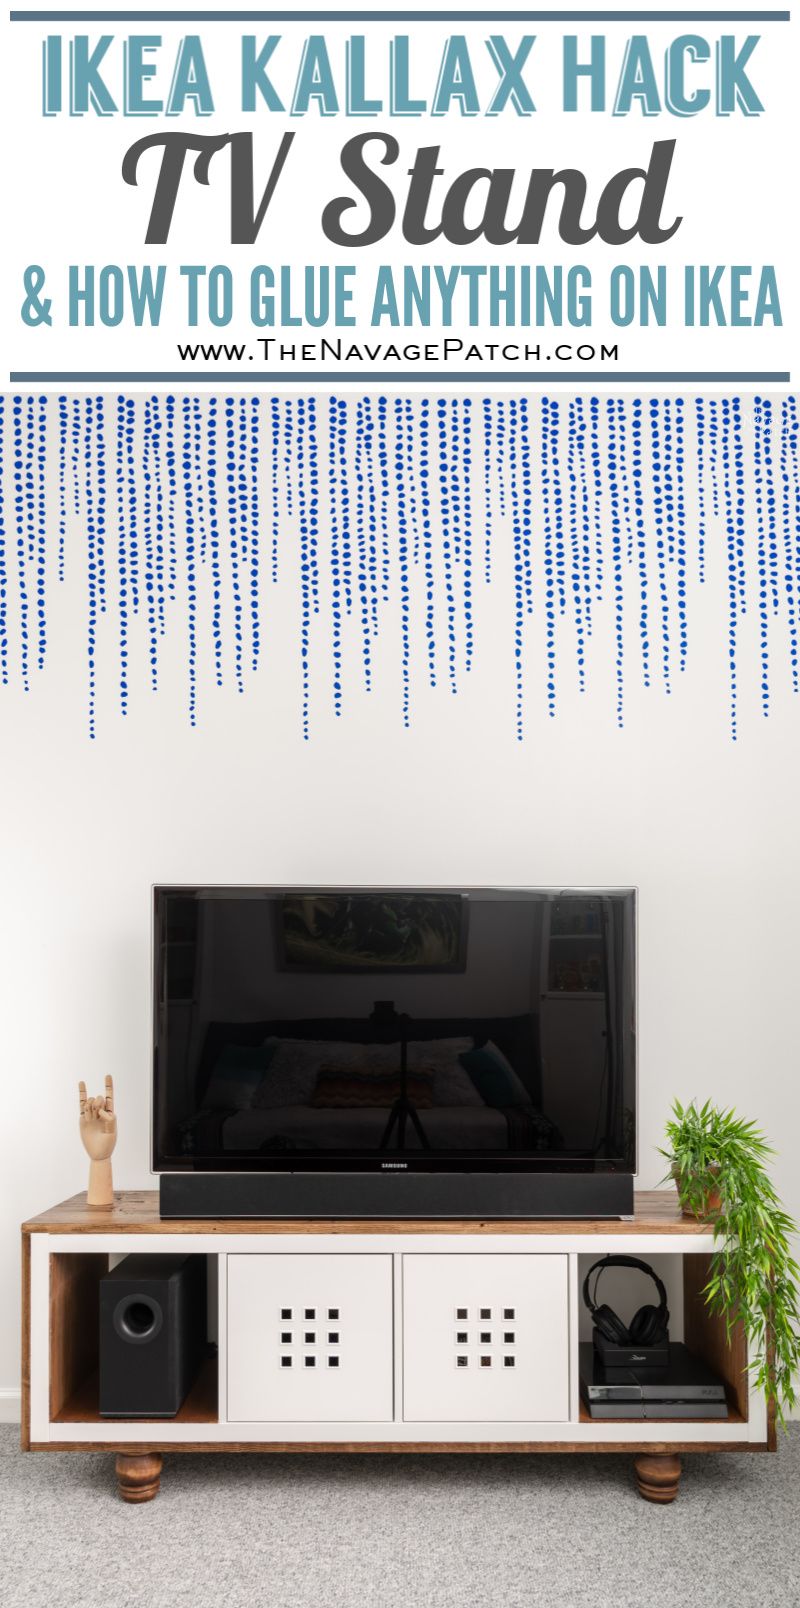
IKEA Kallax Hack TV Stand
This IKEA Kallax hack is a great way to add beauty to an otherwise plain piece of furniture. A Kallax TV stand is the perfect size for a big flat screen!
Nearly 3 1/2 years ago in one of the very first posts written for a young and uncertain Navage Patch, I penned the following words to sum up my feelings for the Swedish King of home decor:
When we moved into this house two years ago, before we learned how to craft and woodwork, before we figured out how to do-it-ourselves and find-it-for-cheap, we went on several IKEA sprees. Handan had been a big fan of the store, since they could be found in many countries and provided an easy solution to furnish apartments as an expat. On the other hand, I have been at odds with the Scandinavian behemoth since my first visit to the Emeryville, CA store in 2004. I detest the way they turn customers into maze-rats. Once entered, forever trapped! Shoppers are forced to wend through inescapable and endless warrens of gleaming, happy-colored crap. It is like traveling down the hallways of Hades, each step taking the hapless consumer farther from the world of the living and closer to some eternal damnation, where souls are forfeit for flat-faced furniture with unfathomable names. Bend your ear to the east; you’ll hear the kronor piling up around a delighted Swedish family and hear their laughter as they haul that money to the bank.
During one of these slogs through swamps of oak and frosted glass, we picked out a desk for me: a flat, black monolith, devoid of charm, beauty, and drawers. It was a perfect study in efficient minimalism. The absence of drawers or storage forced the user to adopt an ascetic work style. All material possessions (paper, files, pens, etc.) had to be shunned while at the desk, lest they spoil the clean, sterile form…
I held on to that bitter sentiment for years like a miser clutching a fistful of worn and tarnished pennies.
“Bah! IKEA! BAH, I say!” I doddered around mumbling and cursing the Swedish King anytime the name IKEA was mentioned.
Scrooge himself could not have been more derisive.
But then something changed.
It mustn’t have happened all at once, or I’d have realized it sooner.
When it came time for Barish’s teen bedroom makeover, Handan floated the idea of a few new pieces of furniture from IKEA, and a weird thing happened.
I didn’t immediately begin muttering and cursing and bah-ing!
What was happening to me?
And when it came time for us to drive to New Haven and enter the belly of the beast, I could find no negativity polluting my thoughts.
And as we strolled the aisles and miles – my wonderful wife and I – I found myself enjoying the experience.
But it was more than that. I saw the joy that Handan was experiencing.
She could enjoy herself because I wasn’t acting like a petulant ass.
And the more joy she felt, the more joy and more contentment I felt.
And just like that, IKEA made sense.
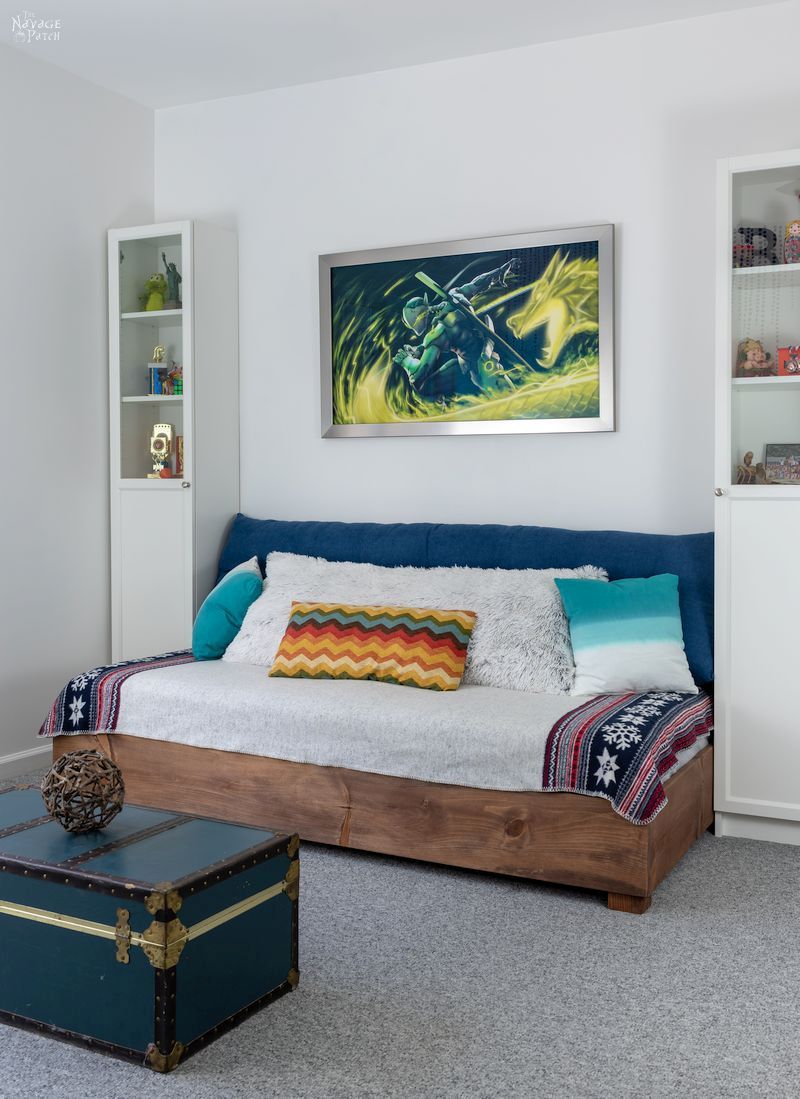
We bought a couple of Billy Bookcases on that trip. Barish helped build those, and they’re now flanking his new DIY daybed.
We also bought a white Kallax unit with the idea we’d hack it into a TV stand. With two IKEA builds already under his belt, Barish was feeling like a pro, so he insisted on building the Kallax alone.
We left him to it, and he delivered the goods.
I carried the Kallax to the basement to plan out the TV stand hack.

IKEA Kallax Hack – How to make a Kallax TV Stand
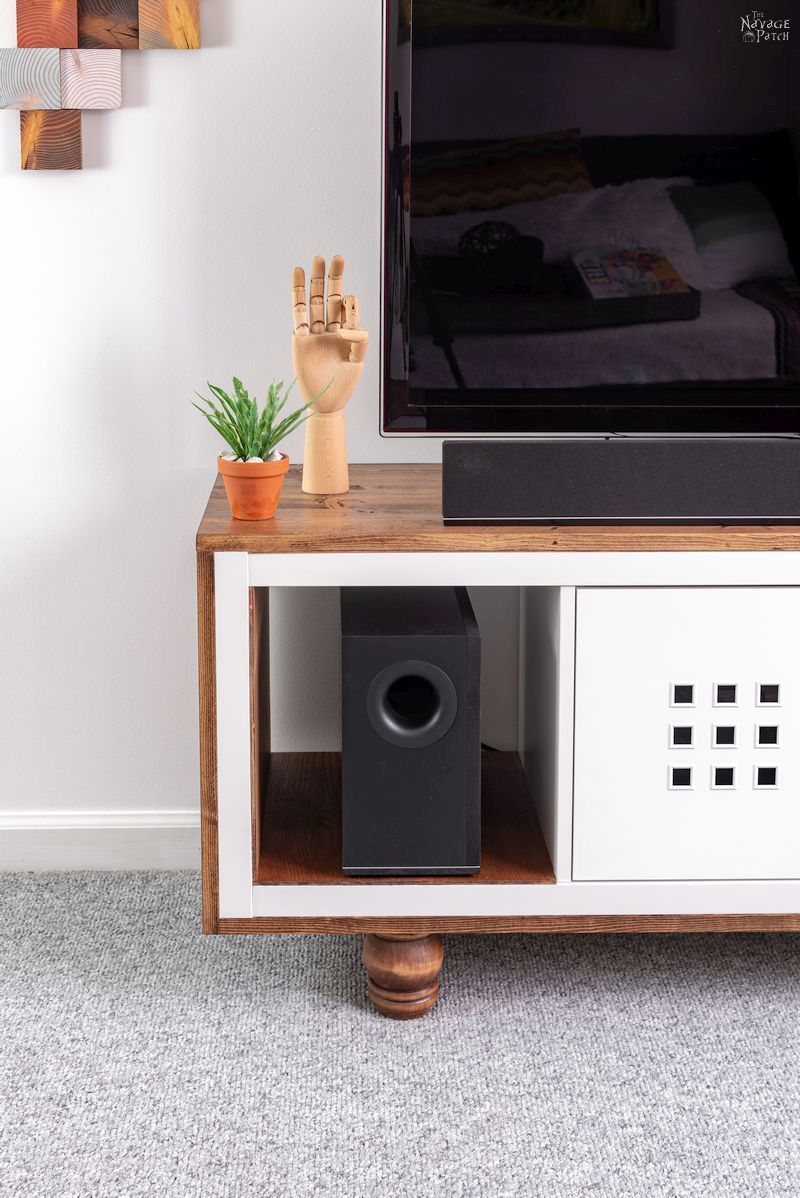
Handan’s idea was to cover the sides and the top with wood. She also wanted the outer two cubby bottoms and outer cubby sides to be covered with plywood. If we threw on some angled legs, this hack would be totally mid-century modern.
But that’s not what we wanted, so angled legs were out.
Instead, we’d go for bun feet to pull the whole look out of the 1960s.
- (5) 1 x 6 pine boards
- 1 sheet of 1/4 inch plywood
- 4 bun feet
- Loctite PL Max adhesive
- Clamps
- Kreg Jig (optional)
- Wood glue
- Brad Nailer (optional)
- Wood conditioner
- Stain
IKEA Kallax Hack TV Stand Cut List
- 1 x 6s –> rip boards to 5 1/8 inches wide and then cut (3) 59 3/8 inch pieces, (2) 57 7/8 inch pieces, and (6) 17 1/4 inch pieces.
- 1/4 inch plywood –>(2) 15 5/16 x 13 1/4 inch pieces for the cubby bottoms and (2) 15 3/8 x 13 1/8 inch pieces for the cubby sides.
After cutting all of my wood to size, I arranged the pieces for the sides to give the most interesting grain patterns to the left side – that’s the side that will be facing the open room. The right side will be facing the wall and rarely seen.

There’s going to be an important lesson coming up, but for now just understand that the board groups pictured above are exactly 15 3/8 inches wide. As soon as I cut them, I held them together and placed them on top of the Kallax (which was standing on its side as shown in the previous picture).
More on this in a bit.
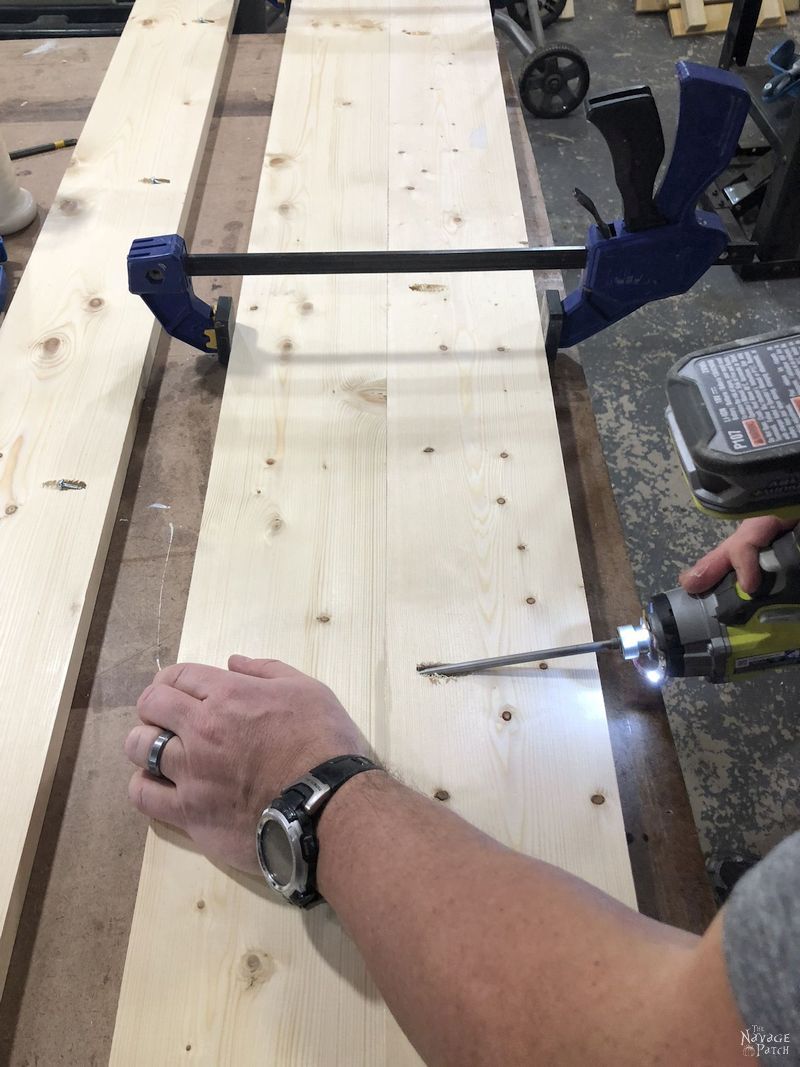
To join these boards, I used a combination of glue and pocket screws. You could get away with just glue, but since I had the Kreg Jig, I figured I’d use it.
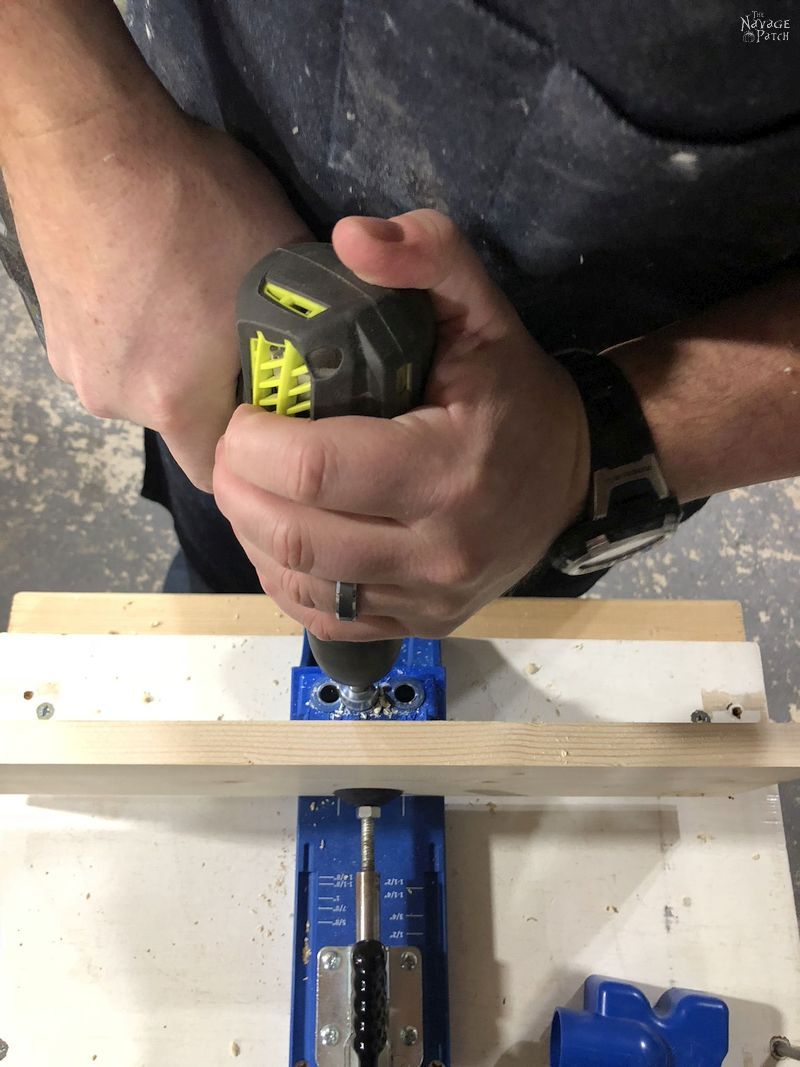

I put a bead of glue on the edges.

We all know the proper technique for getting excess glue off your finger, right?
When my finger was clean, I clamped the pieces together and secured them with pocket screws.

I repeated this for the other side group and then for the 3 long boards that would be the top.

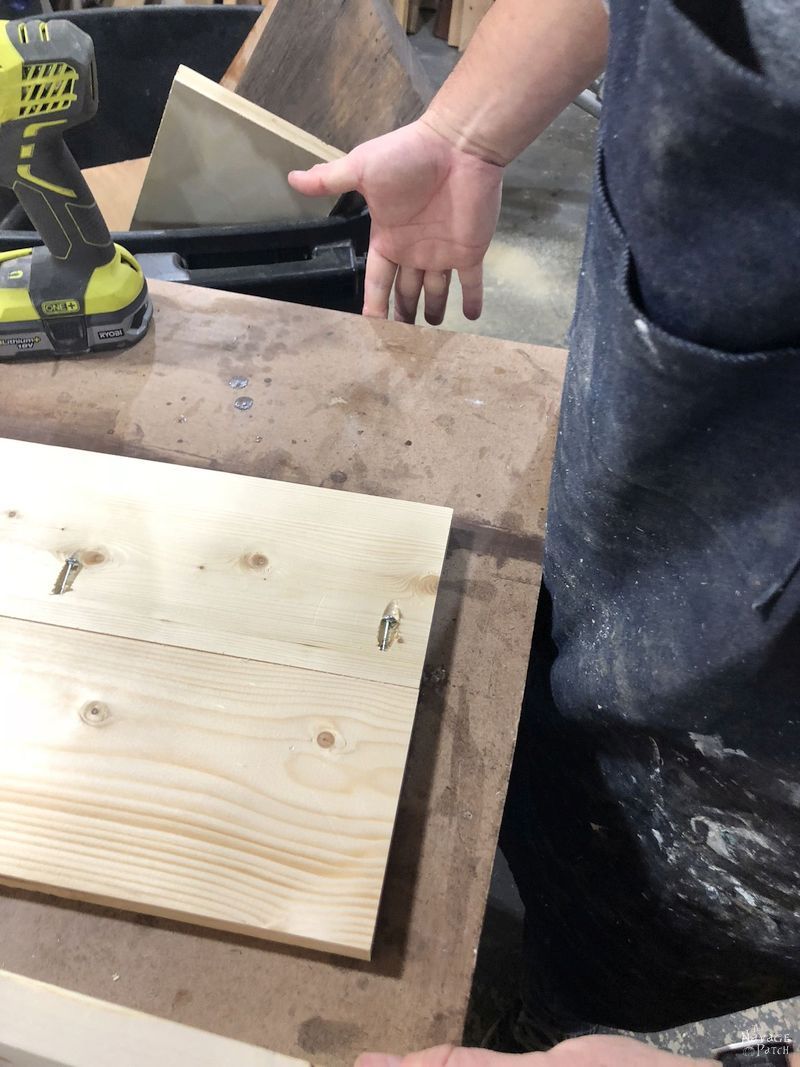
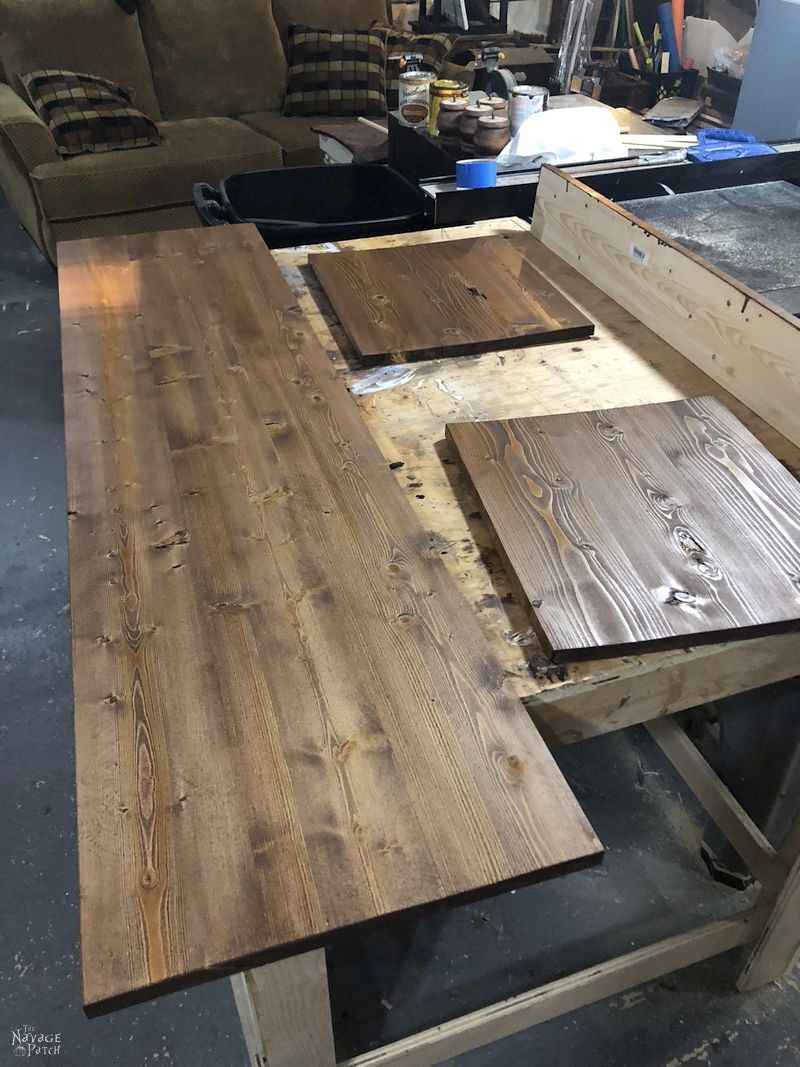
When the glue had dried, I sanded the 3 pieces and then applied wood conditioner.

Since I used Minwax Special Walnut for the DIY daybed, I also used it for this Kallax hack. You can see in the picture below that I stained the edge of one of the two boards that will be going underneath to serve as a base. I should have carried that stain back about an inch on the top of the board as I later learned when putting the whole thing together.
I set the sides and top aside and prepared to glue on the two base pieces underneath.
Most IKEA furniture (and certainly the Kallax line) is protected by some sort of magical finish that is so perfect that stain won’t even stick to it! A surface that smooth and non-porous is nearly impossible to glue, as there’s nothing for the glue to grab onto. Fortunately, the big brains over at Loctite have created a product that adheres anything to anything!

The only downside is that it requires a 24 hour cure time, so it does draw out the project a bit. But that’s a small price to pay for a bond that won’t break!
When using this adhesive on a non-porous surface like the Kallax, they recommend spritzing with water first.

After spritzing the Kallax with water, I put some PL Max on the board.

I placed the board on the bottom of the Kallax and carefully lined it up. Since the clamps have a tendency to shift the board around while tightening, I first shot 4 brad nails into each corner, just to hold the board in place while I tightened the clamps.


I left those boards to cure for 24 hours.
The next day, I removed the clamps and flipped the Kallax over. Since the side pieces of the Kallax are a tiny bit larger than the rest of the unit, I cut a very thin shim to run across the front of the top. If I didn’t put the shim, the top would show a gap underneath, especially near the sides.
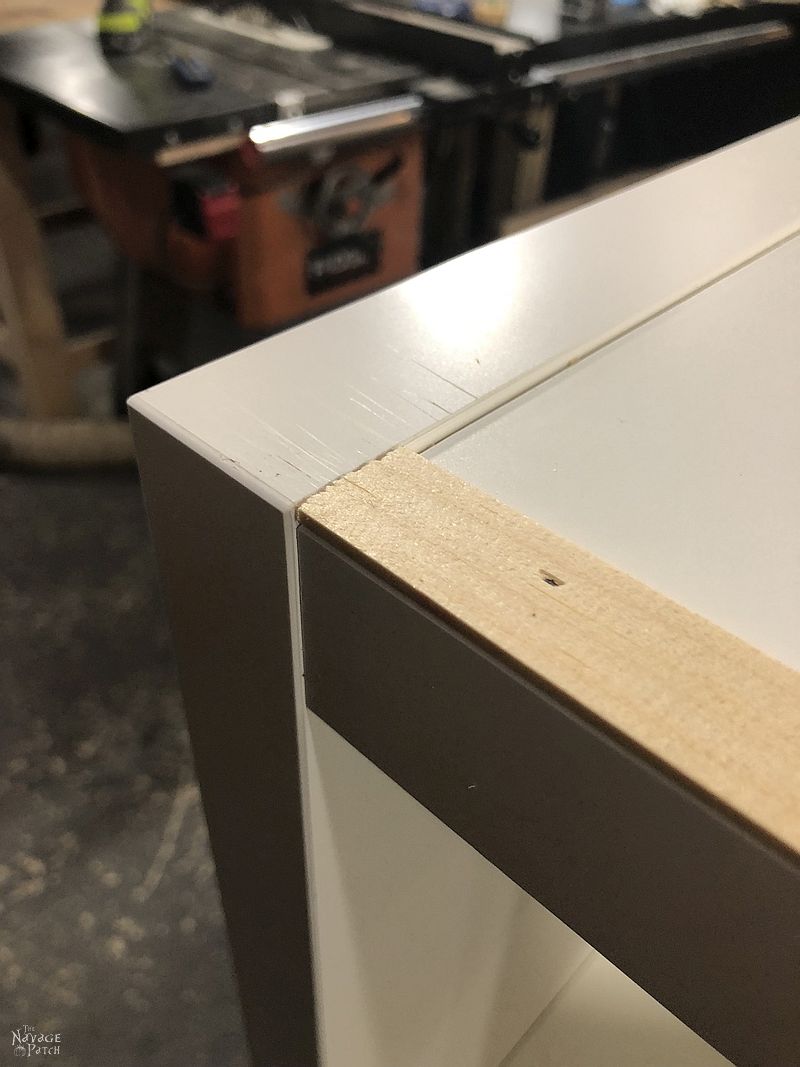
Okay, remember that important lesson I mentioned a while back? Well here it is. Can you guess what this is?

About a week had passed between the time I bought the boards and cut them and the time I was ready to glue them onto the Kallax.
So, remember how I said the sides and top were an exact perfect fit?
I didn’t account for two things:
- Home Depot lumber is always fresh and pretty full of moisture.
- It’s the middle of winter in Connecticut, and our home has an oil-fired furnace and forced-air heating. This means we have absurdly low humidity inside in the winter – about 20% relative humidity.
The combination of these two factors led to my two sides and top shrinking over 1/4 inch in a week!
I couldn’t believe it when I test fit the piece before gluing!
There was a huge gap on the side!
I was so pissed off, but I was the only one home, and I had no one to bitch to.
I considered running the whole Kallax through my table saw and just cutting off 1/4 inch from the back.
Seriously, who’d miss it?
When Handan came home, I showed her the problem and proposed my solution.
She reminded me that the Kallax was just a cheap, hollow OSB (oriented strand board) shell protected by a magic forcefield. Cutting off too much would expose the emptiness within.
I tried to explain to her about my emptiness within after making the mistake of not anticipating this hideous shrinkage!
In the end, we decided the best course of action would be to cut a thin piece of pine, glue it on and stain it.

Then with the stain…

Hehehehe, the perfect crime! No one would suspect a thing!
So with the project back on track, I got to the business of gluing the sides on the Kallax.

As before, I carefully lined up the sides and clamped them in place

The next day, I unclamped them and sanded the little extra that was sticking up.

Hey, you wanna see something creepy?
THIS GUY!

Yeesh! Why doesn’t Handan ever tell me I have a head like a watermelon or that I look like a deranged lunatic when she’s about to take my picture?
Okay, back to our Kallax hack. With the sides in place, it was time to install the top.
But first, a little stain on the shim, so it would match the top.

I spritzed the top with water.

Then I applied the Loctite. While totally awesome and grabby, this glue is also pretty nasty, so gloves are recommended. The fumes aren’t the healthiest in the world, so a respirator wouldn’t be out of the question if your work area is not ventilated.

I placed the top on the Kallax and lined it up with Handan’s help. You can see from the picture below that the top warped a bit. The sides were the same way. No big deal with clamps and Loctite PL Max! (It may sound like I’m shilling for Loctite, but I’m not – I’m just really impressed with it!)

We clamped it all around and left it for 24 hours.

Our next step was to attach the bun feet. I used a scrap piece to line up the widest part of the foot with the front plane of the Kallax. Then I pushed the foot down, so the screw made a dent in the soft pine. I measured the distance from the edge of the Kallax to the center of the indentation with my Kreg Multi-Mark.
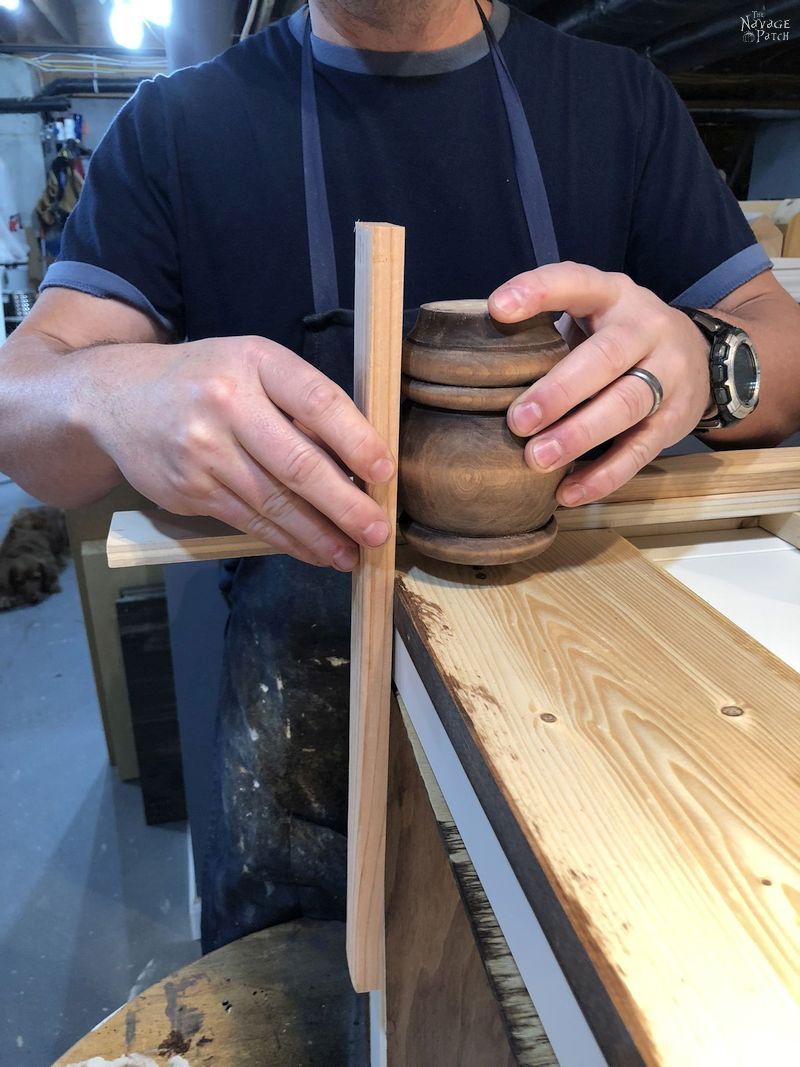
I then measured the middle of the cubby and marked the distance I had set with my Multi-Mark tool. This is where I would drill and install the bun foot. I did this for each foot.

I drilled a hole just smaller than the diameter of the bun foot’s screw.

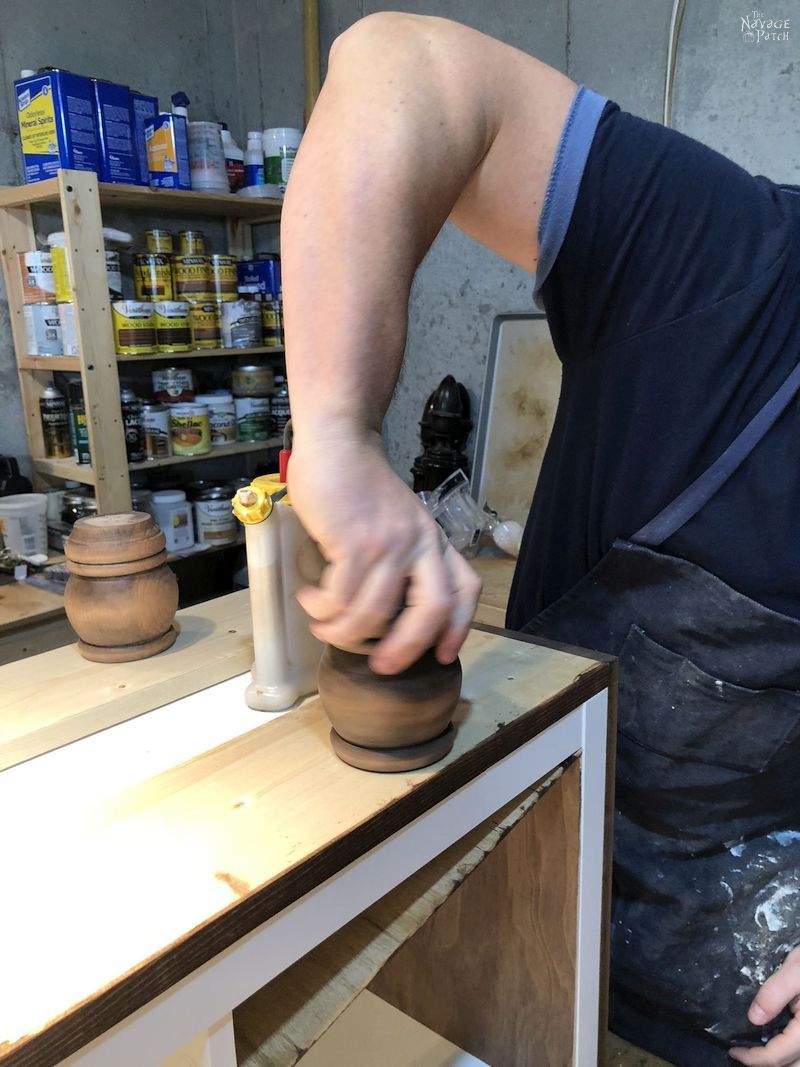
Then I applied some wood glue to the bun foot.

And I screwed it into the hole.
After securing all the feet, Handan and I flipped the Kallax TV stand back over so we could glue the inner panels in place.
Here’s why I know Loctite PL Max is the right glue for this job.
Figuring the dinky little cubby panels weren’t as important as the outer sides and top, I tried to cheap out and use Loctite’s all-purpose adhesive. After clamping them down and leaving the glue to dry for several hours, I came back to unclamp the bottoms so I could install the cubby side panels. The moment I released the pressure on the clamp, the plywood released from the Kallax. That all-purpose glue may as well have been pudding for all it held.
Lesson learned, I grabbed my trusty tube of PL Max and did the job the right way.


The next day, we installed the cubby sides.


When the cubby sides were cured, the last step was to apply a protective coat. I used my new favorite finish: Greg’s Wonder Finish.

Greg’s Wonder Finish is a mix of equal parts satin spar urethane, boiled linseed oil and mineral spirits. It’s a variation on a popular wiping varnish recipe I found online called Bob’s Miracle Finish.
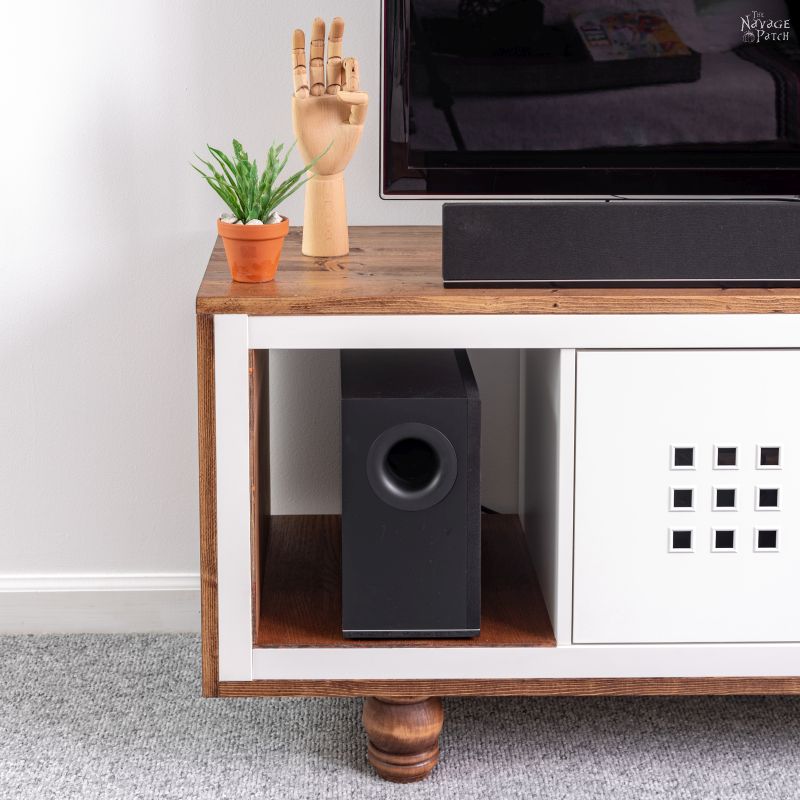
I wiped it on, let it sit for a minute and then wiped off the excess. Four coats, and my IKEA Kallax hack TV stand was ready for action!
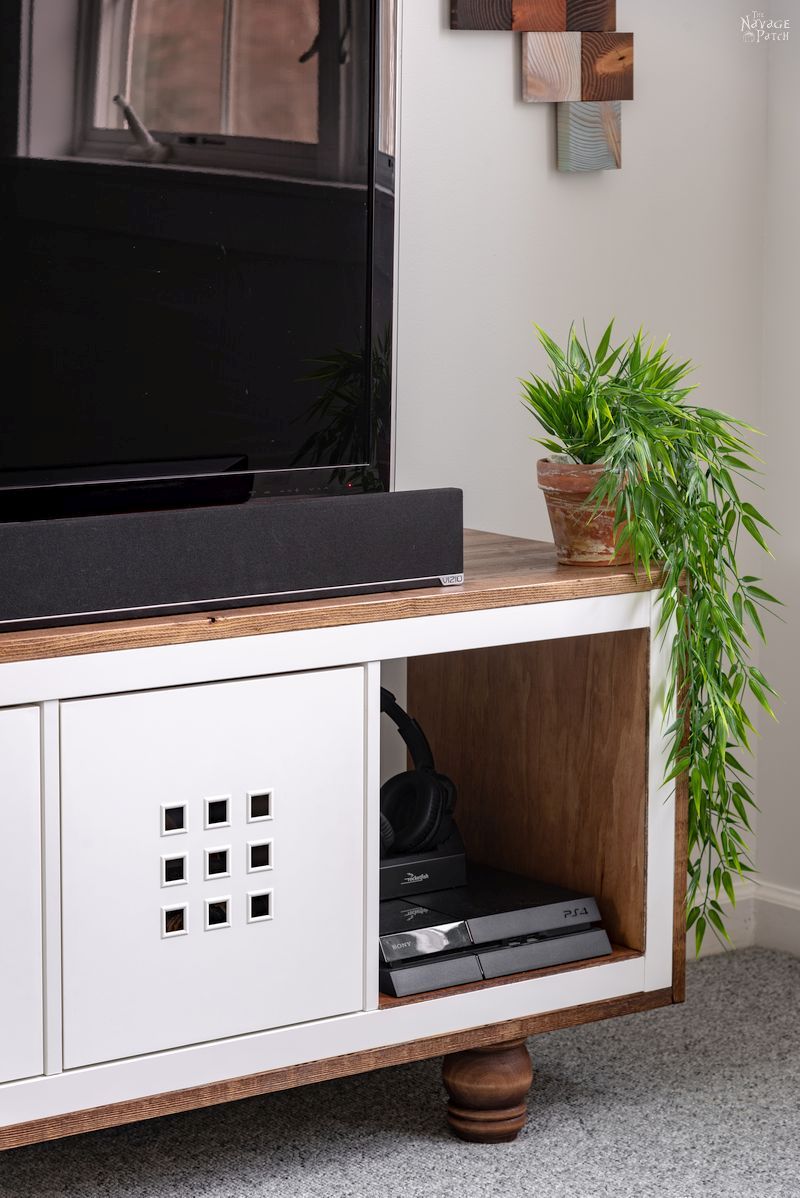
Handan and I carried it upstairs to Barish’s room, and then she started sorting all the wires and cables.
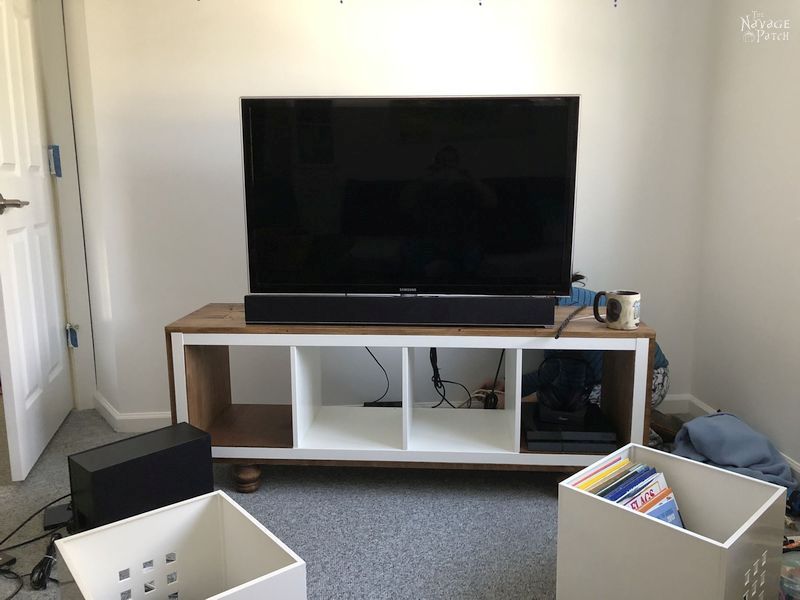
We had two white IKEA storage cubes that we wanted to put in the middle two cubbies. As an added bonus, the cubes would hide all the cables and wires.
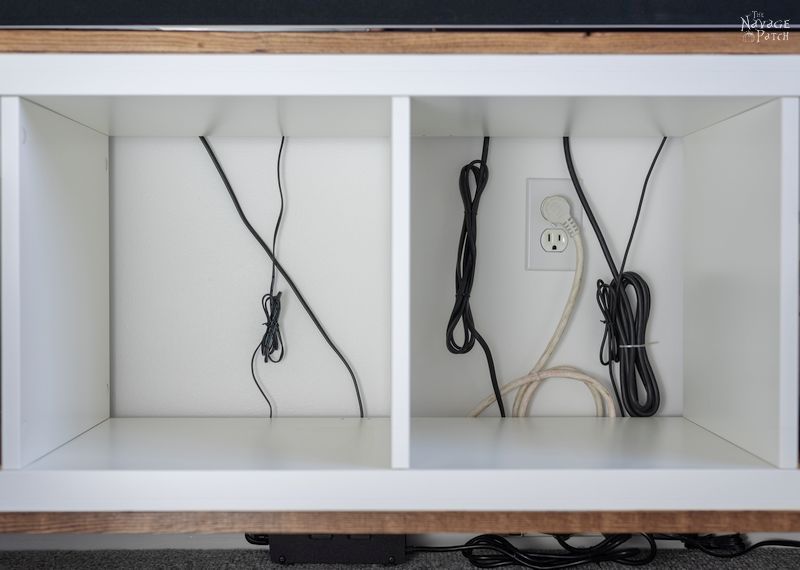
With the Kallax TV stand raised up on legs, we had room underneath for power strips. That big black box on the left is a 120V to 240V converter. We bought Barish’s TV when we lived in Vietnam, and it runs on 240 volts.

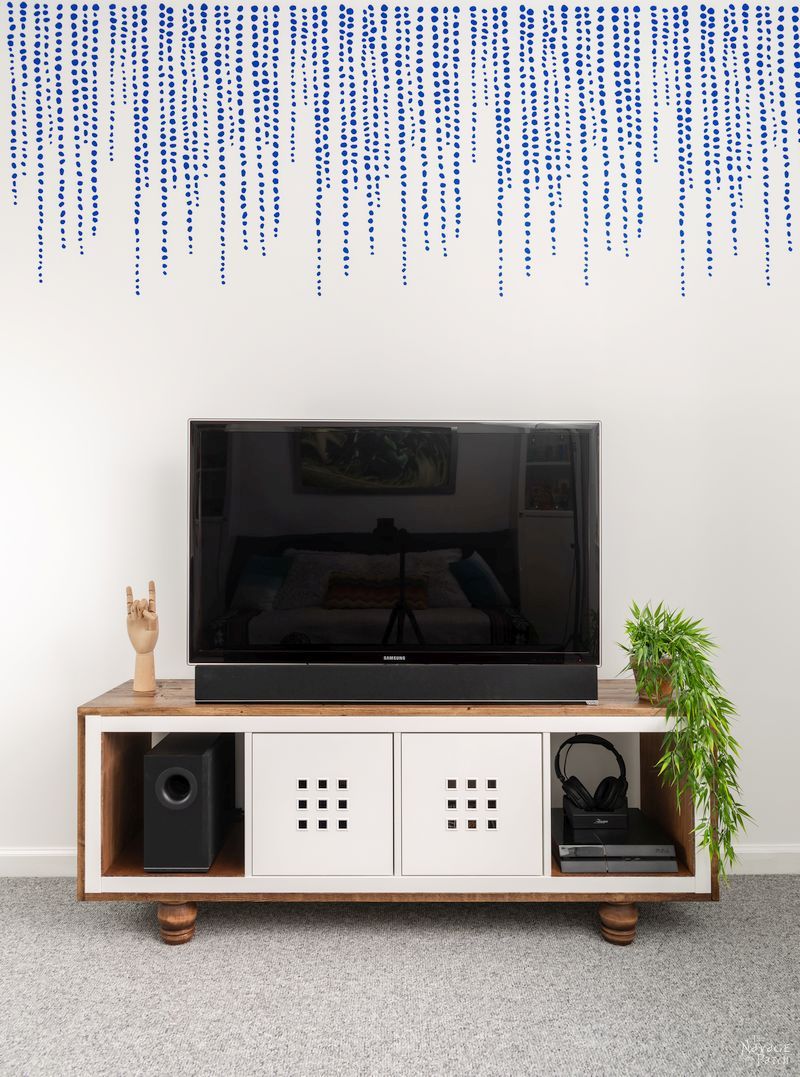
And here it is! Oh yeah, I’m sure you’re noticing the accent wall. I’ll be writing about that on Thursday!


Teen Bedroom Makeover Checklist (for The First Room)
Teen bedroom ideas and laying out the game planDIY alcohol ink switch plates- Paint the walls
Build 2 IKEA Billy bookcasesBuild a daybedHack IKEA Kallax into a TV stand- Create an accent wall
- Buy or DIY plugin sconces
- Make wooden wall art
- Build a small chess table
- Build 2 guitar display frames
- Buy a new desk
- Change the fan
- DIY fired alcohol ink art
- Hack IKEA Laptop Stand
- Buy throw pillows
- Add greenery: faux plants, air plants, DIY air plant holders
- Metal filing cabinet makeover
- DIY Craftsman style trim
- World map wall art
- Small closet makeover
- Barish’s first room reveal
Click here to see more teen bedroom makeover posts as we continue to cross items off our checklist!
We love it when you share our posts on Facebook and Pinterest!


You really outdid yourself on this one! This TV center turned out spectacular! Great idea, great job.
Thank you so much, Linda! 🙂
Wow, Barish’s room is really coming together. Can’t wait to see the full reveal.
Thank you, Laurie! We are really excited about it – so far everything is looking awesome! 🙂
Looks AMAZING. I love the white of the Kallax unit with the stained wood. It really adds something to the whole look rather than just the dark wood. The Kallax units are great for being just about anything you need them to be and I’ve seen a lot of hacks but this is definitely one of the best.
And
>>I tried to explain to her about my emptiness within after making the mistake of not anticipating this hideous shrinkage!
just had me laughing out loud. You and your way with words.
Thanks, Jay, LOL! 😀
Adding the stained wood really transformed the Ikea unit into a work of art! Great workmanship! It looks fabulous!
Hi Gail, thank you so much! The wood really complements the simple and clean look of the Kallax. 🙂