DIY Halloween Wreath (an Easy 10-Minute Craft)
This DIY Halloween wreath is so easy that even a man can do it! I’m a man, so I know what I’m talking about here. Take a break, ladies – your guy’s got it!
Embroidery hoops.
Has it come to this? Really?
I mean, seriously, what’s next?
Tea parties?
Crumpets?
Sewing circles?
When will this madness end??
Is this my fate?
Yes, ladies, I’m checking my manhood at the door and going Full Gertrude for this post, so grab your embroidery hoops, and let’s get crafting!
Today, I’m going to show you how to make the quickest and easiest DIY Halloween wreath ever. If I can make this thing in under 10 minutes (I’m not including the time it takes for the paint to dry, so don’t get sassy!), then you should be able to do it in 5!
DIY Halloween Wreath SUPPLIES LIST
Affiliate links are provided below. Full disclosure here.
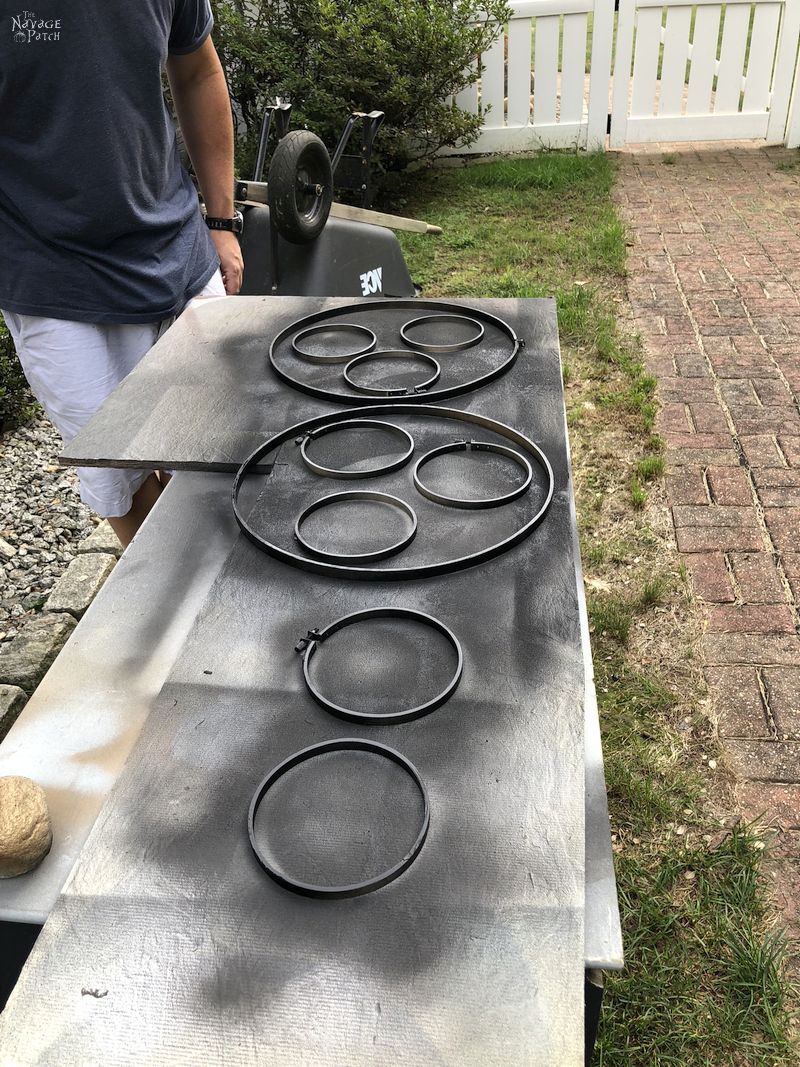
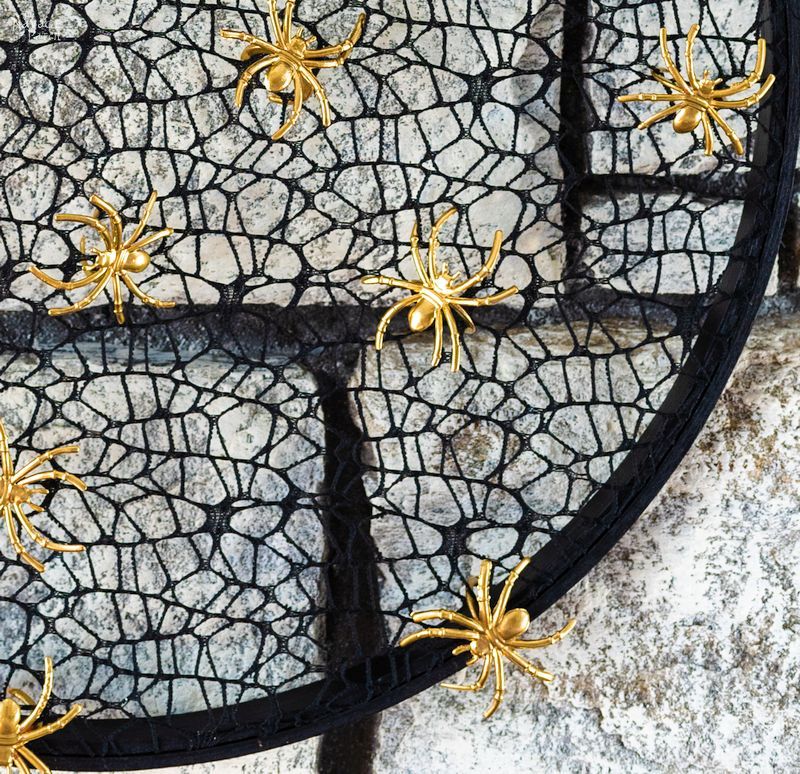
- Wooden embroidery hoops – I used four 5-inch hoops and one 14-inch.
- Black creepy cloth or black lacy fabric.
- Dollar Store spider rings – they come in a mixed pack of orange and black spiders.
- Gold or Copper spray paint – or any other shiny metallic color. The choice is yours.
- Black spray paint
- A pair of scissors
- A small piece of black thread
I gathered my hoops, and Handan arranged them into a shape she claimed looked like a baby.

I thought it looked like a surprised Sumo wrestler.
Next, I took apart the hoops and put them on a flat surface for painting.
I informed the hoops that their wood-looking days were over, then I took aim and fired with the black spray paint.

I sprayed them with 3 light coats of flat black.
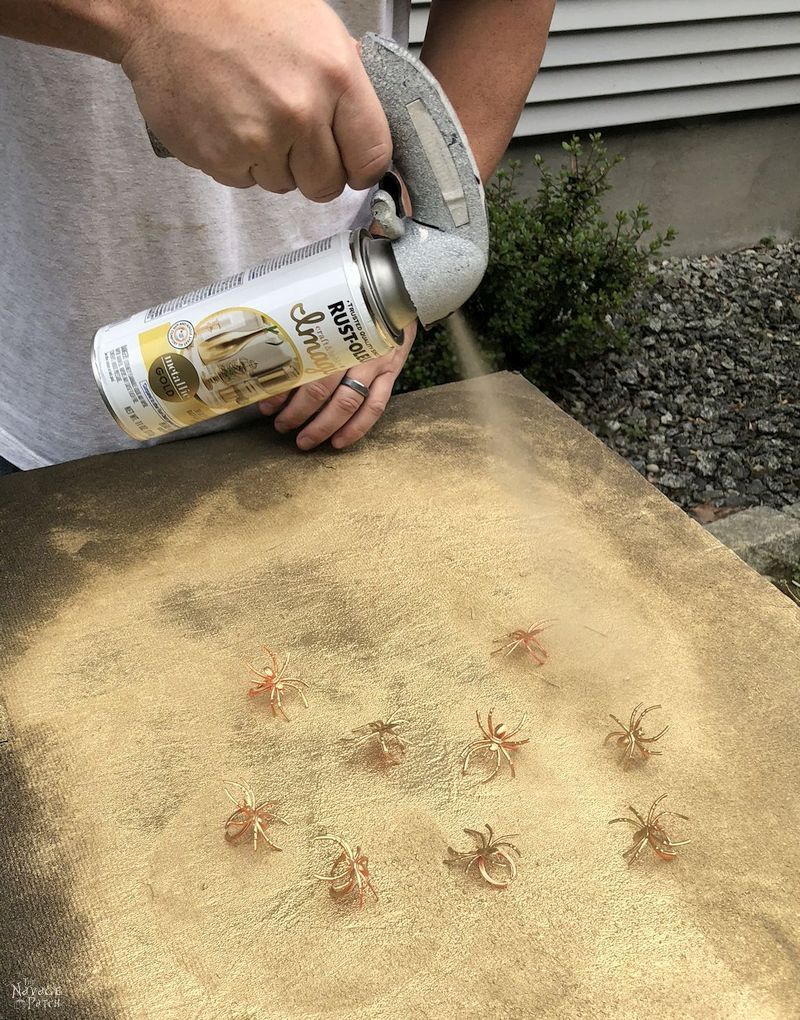
While the hoops dried, I sprayed 22 spiders to gold. I used Rustoleum’s new Imagine Craft and Hobby gold spray paint. Normally, I find the color gold to be hideous, unless it’s in the form of gold coins or bars sitting in my hand, but Rustoleum’s Imagine gold is awesome! Okay, here’s the thing though. You may have trouble finding this paint. It’s that new! Rustoleum was kind enough to send us a few cans for our holiday projects, but I can’t find it offered for sale anywhere online. I’m sure it will start popping up in the craft stores and on Amazon soon, so keep your eyes out for it, because it is a fantastic spray paint.
Once the hoops had dried, I laid my fabric over the inner ring. Handan had some spare cloth from a Halloween of yore lying around in her craft room, so I pilfered that for this project. I then laid the outer ring over the inner and pressed it into place.
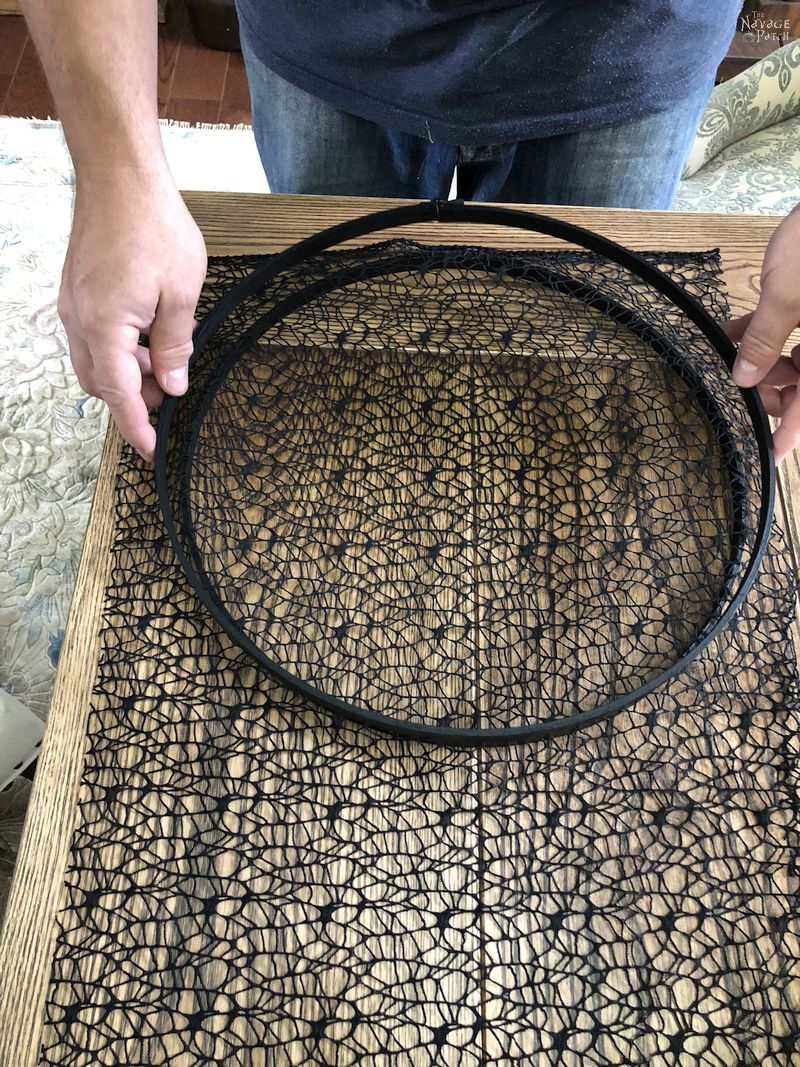

Working around the hoop, I pulled the cloth until it was tight.

Then I tightened the hoop to lock the cloth into place.

I trimmed away the excess cloth, leaving a few millimeters showing, just so it wouldn’t pull back through the ring.

Would you look at that? It’s almost done!

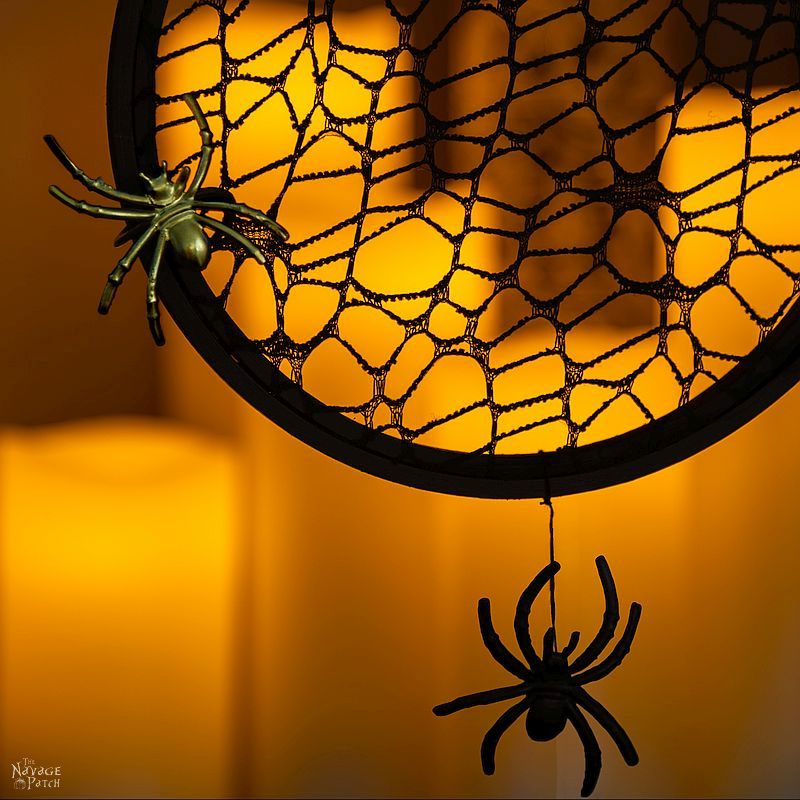
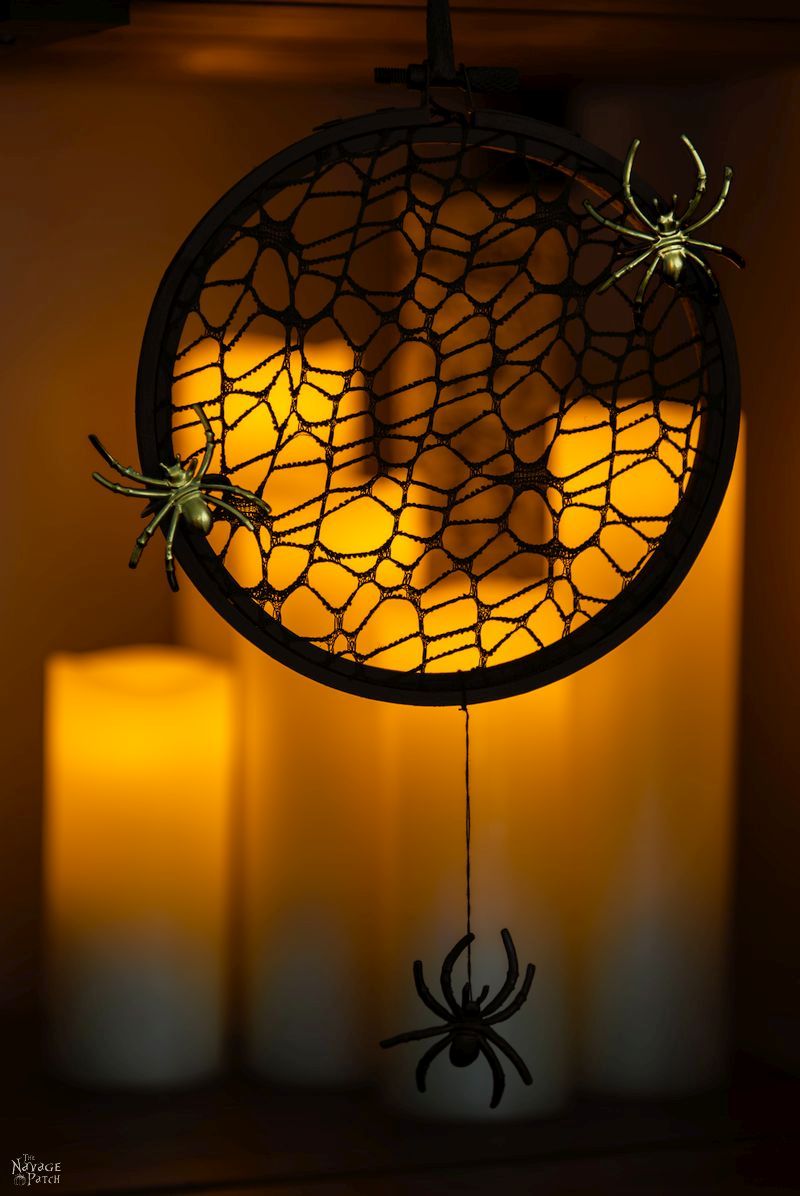
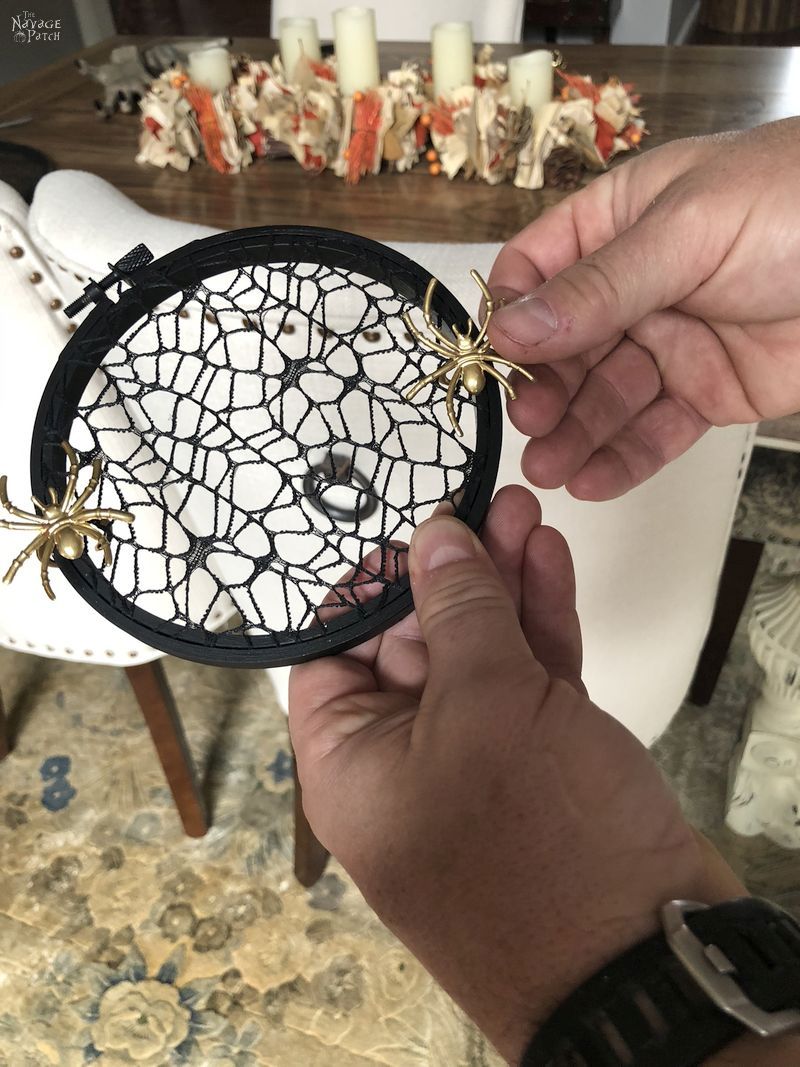
To the big wreath, I attached 14 gold spiders and set it aside to focus on the 4 small wreaths.
The gold spiders attached easily using their ring hoops.


Before attaching the black spiders, I had to cut the finger hoops from the spider rings so they’d look right when hanging.

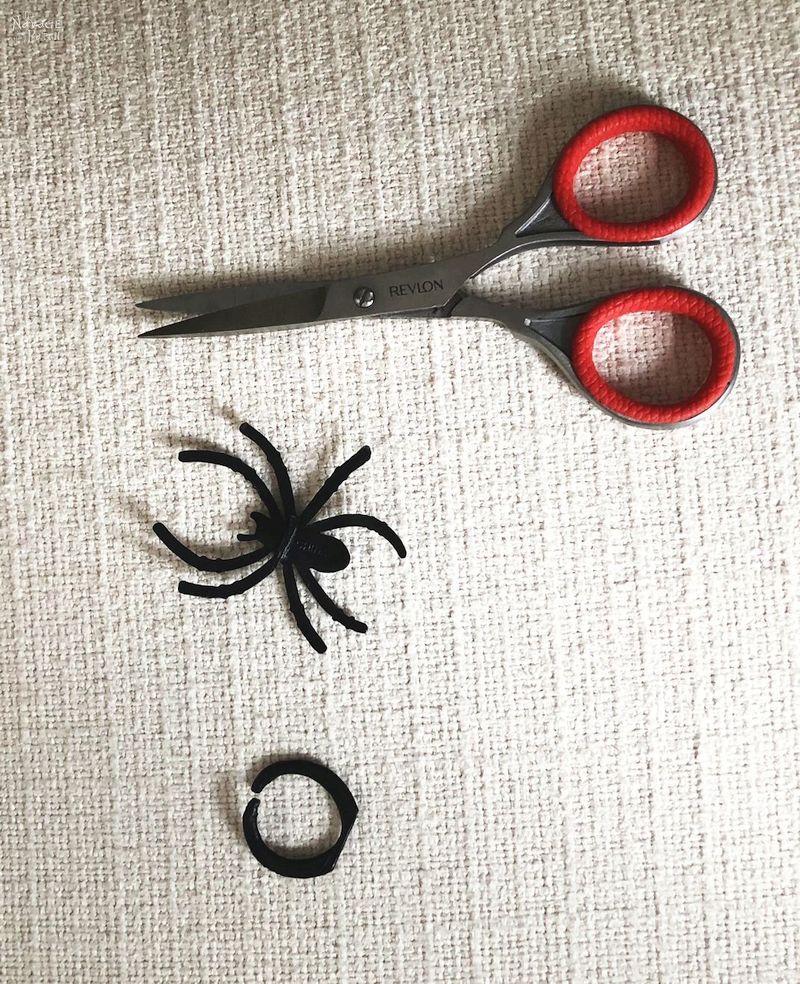
I tied a black thread around the spider. This is complicated stuff, madam – I hope you’re paying close attention!

And then I tied it to the bottom of the wreath and trimmed of the excess thread.


I hung the four small wreaths from the hoops on the backs of our dining chairs, but you can hang these wreaths anywhere.

And that’s it! The quickest and easiest wreath you’ll ever make! I’m a guy – trust me wreaths are not my cup of tea – but even I could make these things in almost no time!
Let’s have a look at how they turned out.


We love it when you share our posts on Facebook and Pinterest!


Maaan… o Maaann Greg.. That pic…. LOL LOL LOL!!!!!
Awesome Craft too…
Thanks, Shaun, lol!
Honestly, you have no shame!!! I laughed so hard at the picture! Which EXACT lacy fabric did you use? I like the spider web appearance. I can’t find it in the Amazon choices. Thanks for answering.
LOL, no shame at all! Handan updated the post with the fabric link, but I’ll also give it to you here: https://fave.co/2Rrk8Lh
ROFL! That picture was hilarious!!! The craft was great too, but I actually LOL’d at work! Good thing I happen to be alone today. 😀
Thank you, Susan! 🙂
This has got to be good for the soul. The wreath is amazing and will go into the H-Files (Halloween) but the portrait …….I can’t find words !!
Love you guys and all the wonderful diys .
Thank you so much, Wanda! 😀
Ohhh Lordy Lordy…LOVING your new look!!! I DID laugh out loud! ???
😀
I find myself looking just to get a laugh at your hilarious personality Greg. You guys are so much fun! Thanks for making this world happier and more creative place.Keep up the great work!
Thank you so much, Janise! We’ll keep doing what we do and hoping it makes you smile 🙂
Great project, great picture, great tutorial! As usual!
Thank you, Kathy! 🙂
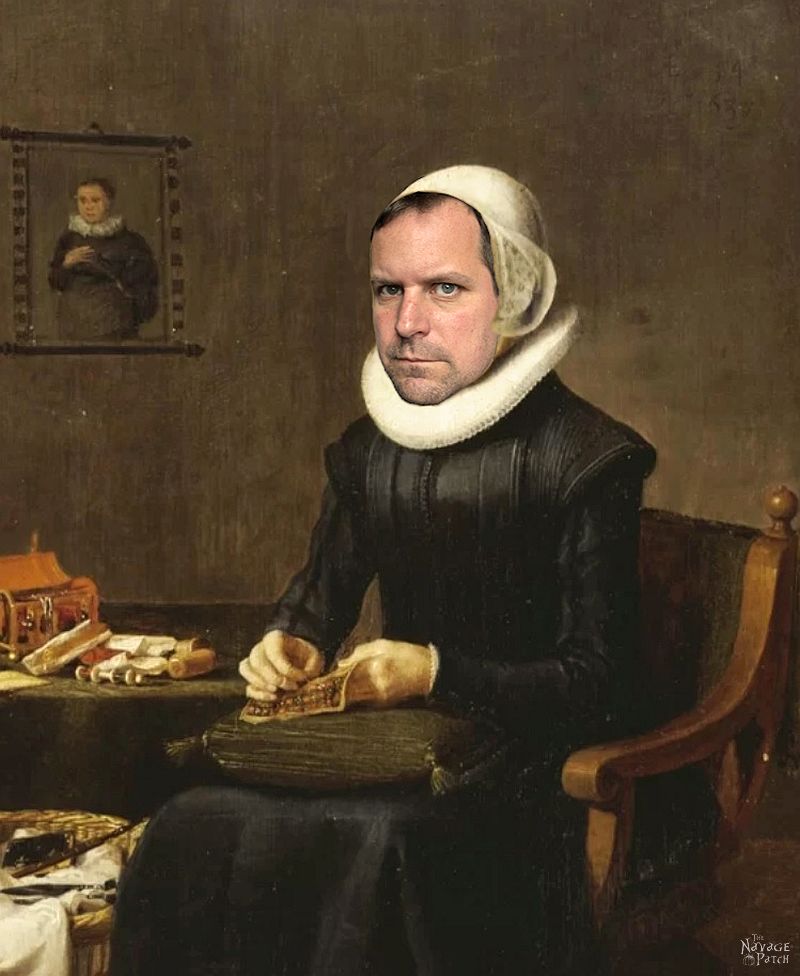
Just out of curiosity, where did you find that (17th century?) painting?
I found it by Googling “old lady embroidering” LOL!
HAHAHAHAHAHAHAHAHAHAHAHAHAHA That picture is the best thing ever!!!!!!!
😀
Amazing how it turned out! Perfect halloween crafts!
Thank you, Maria! 🙂
Lindo lindooooooooo maravilhoso . Estão de parabens. Gostaria de fazer igual qdo e se eu fizer coloco para voces rirem de mim .bj Elizete
Muito obrigado, Maria!