DIY Modern Sliding Barn Door
Learn how to build a DIY sliding barn door! This modern barn door is a straightforward DIY that will look great in any room!
Oh, c’mon, it was bound to happen sooner or later! We’re not immune to the fadwagon and the trend-train, you know. So it was only a matter of time before my babes settled her gaze upon some doorway or other and declared it time for me to build a DIY sliding barn door.
But full-tilt farmhouse isn’t our style. Sure, we dabble in it here and there. Overall, though, our style leans a little more classic, a little more boho, and perhaps a little more modern. I guess you could call it eclectic if you insist on slapping a label on it. And since this particular DIY sliding door was meant for our son’s young adult bedroom makeover, a farmhouse door was out of the question. His room makeover is shaping up to be something kind of Island Casual with modern and bohemian touches. However you want to label it, his room has a style, and the door I just made for it – let’s call it a modern sliding barn door – fits perfectly with that style.
So if you’ve been wanting a DIY sliding barn door but maybe not so much one that looks like it moseyed in from an actual barn, you’re in luck. I’m going to show you how to build a sliding barn door that looks like a work of art. And best of all? It’s really easy! There’s nothing hard about making this modern barn door. Let’s jump right in!
DIY Sliding Barn Door Materials LIST
Affiliate links are provided below. Full disclosure here.
- 3/4-inch birch plywood
- (1) 1 x 4 x 8 pine board
- (8) 1 x 2 x 8 pine boards
- 12-inch pine round
- Veneer edging
- Primer
- White paint
- Pre-stain wood conditioner
- Stain (we used Minwax Special Walnut)
- Construction Adhesive
- Sliding barn door hardware kit

Tools Needed to Build this modern barn door
Affiliate links are provided below. Full disclosure here.
- Circular saw
- Rip-cut circular saw guide (optional)
- Miter saw (hand-powered or electric)
- Random orbit sander
- 220-grit sanding discs
- Tape measure
- Brad nailer
- Clamps
- Iron or Cricut EasyPress Mini
- Paint sprayer (optional)
- Jigsaw

You may want to watch our short video below for an overview of this beautiful barn door before you read the detailed step-by-step tutorial.
Part 1 – How to Build a Sliding Barn Door
Step 1 – Measure your opening
Before anything else, you need to know how big you’re going to make your fancy new DIY sliding barn door. I made this one for our son’s bedroom closet, so it’s not as wide as others may be. Since his closet door has trim, and I wasn’t planning to remove it, I measured from the outside of the trim on one side to the outside of the trim on the other side. Now, you’re free to make your door as wide as you like, but most would recommend you make it 4-6 inches wider than your opening (including trim). This would make it 2-3 inches wider than your opening on each side. Since Baris’s closet door abuts the wall on one side and since it’s such a small space, we decided to go a little narrower with his barn door’s width. Instead of two inches of overlap on two sides, his door has one inch of overlap on one side. The other side butts up against the wall, so no overlap needed. As for the height, it is common to add an inch to the height of the opening. Again, if the trim is staying, measure to the top of the trim.
Our dimensions turned out to be 85 5/8 inches by 31 3/8 inches, though yours will almost certainly vary.
Step 2 – Cut the plywood
Halfway through this project, my babes bought me a tool I wish I had years ago. I’ve been struggling to cut plywood since we moved to Florida and I no longer have a big table saw with big infeed and outfeed tables. Those 4×8 sheets are just too big for my contractor table saw. But needs must, so with the help of our neighbor Grady and the tailgate of my pickup, Handan and I were able to cut the original sheet of plywood down to size.
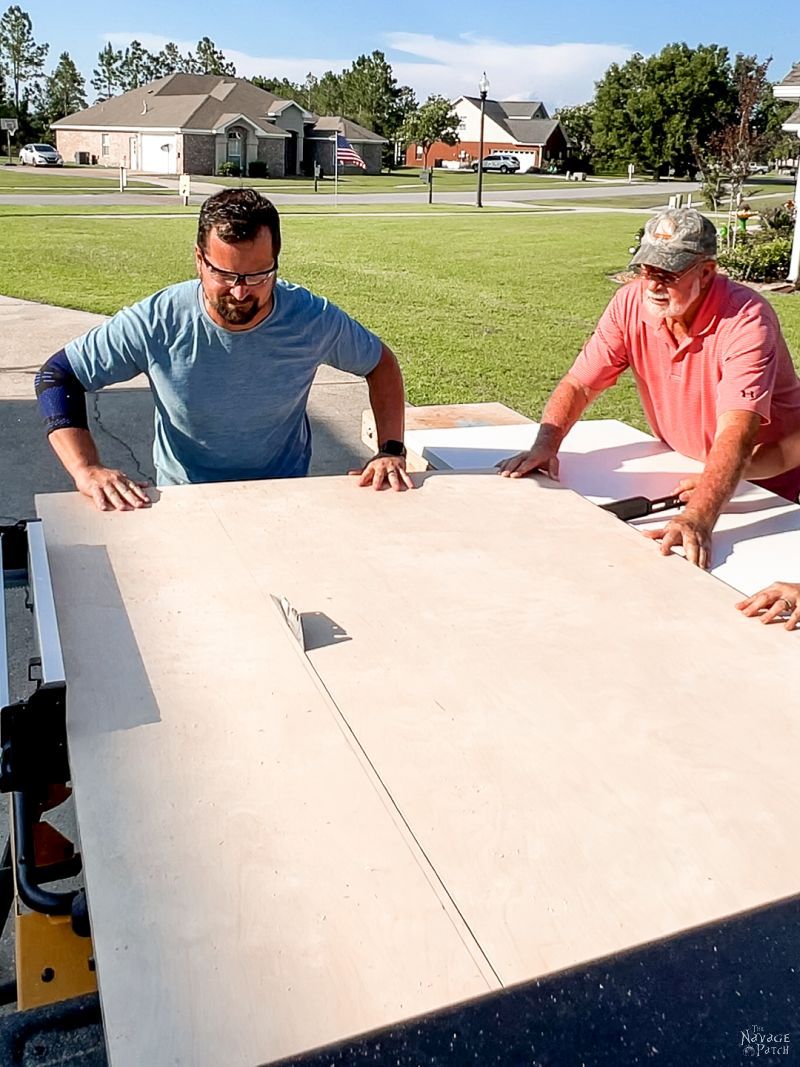
The tool she bought came in handy later in the project though – more on that in a bit!
Step 3 – Apply veneer edging
The plywood edge is just too unfinished for this project, so I covered those edges with veneer edging.

This is the easiest way to give a professional finished look to plywood. The white birch edging is an exact and perfect match for birch plywood.
I applied the veneer edging by first taping it in place with painter’s tape.
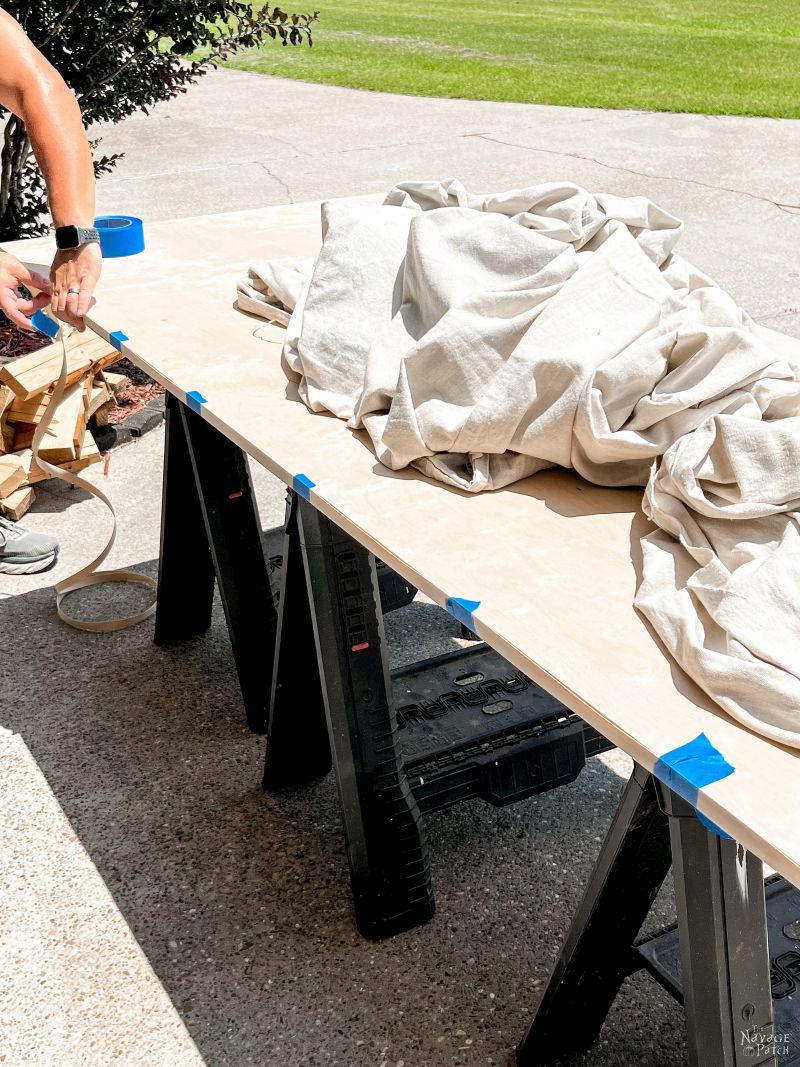
There’s heat-activated adhesive on one side, and it works like an iron-on decal. But if you happen to have a Cricut EasyPress Mini, it’s even easier!
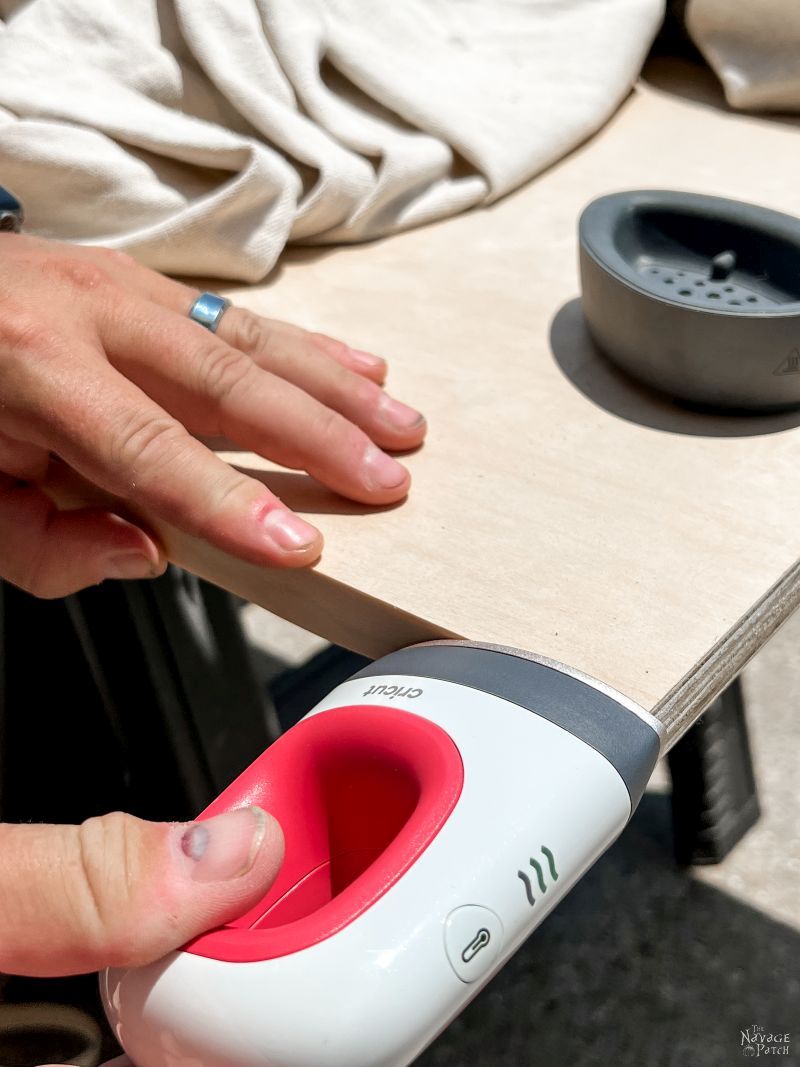
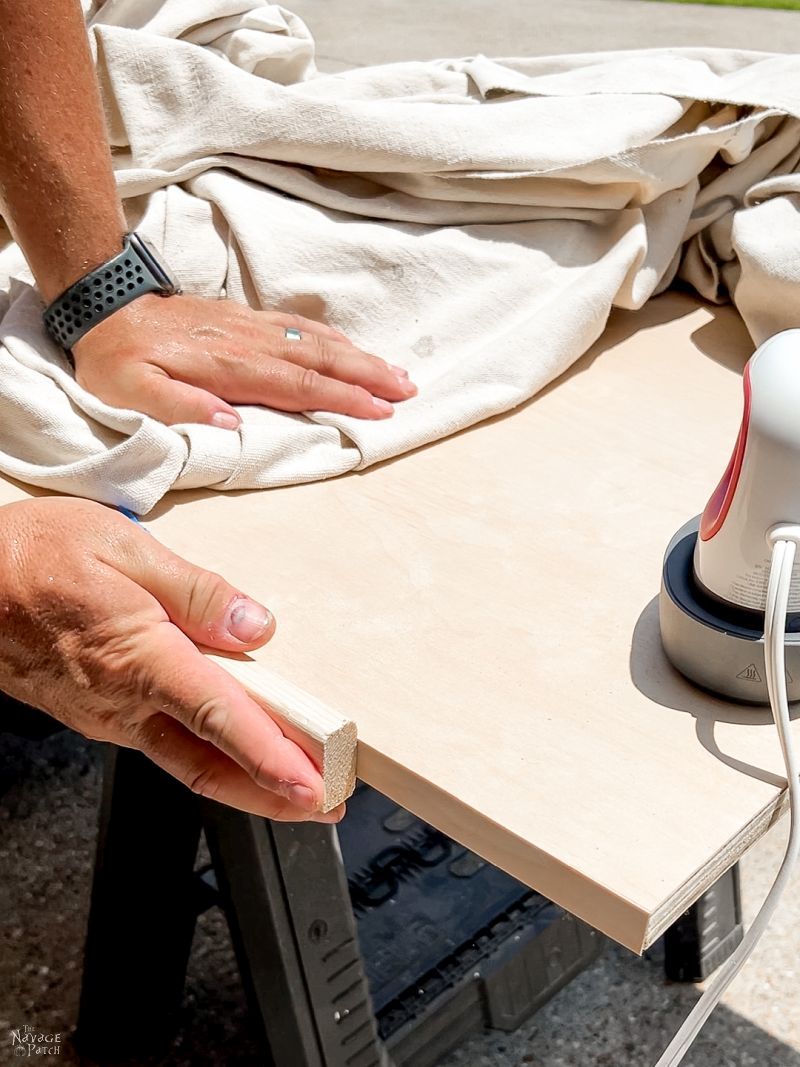
Before the adhesive cooled, I pressed it in place with a scrap piece of wood.
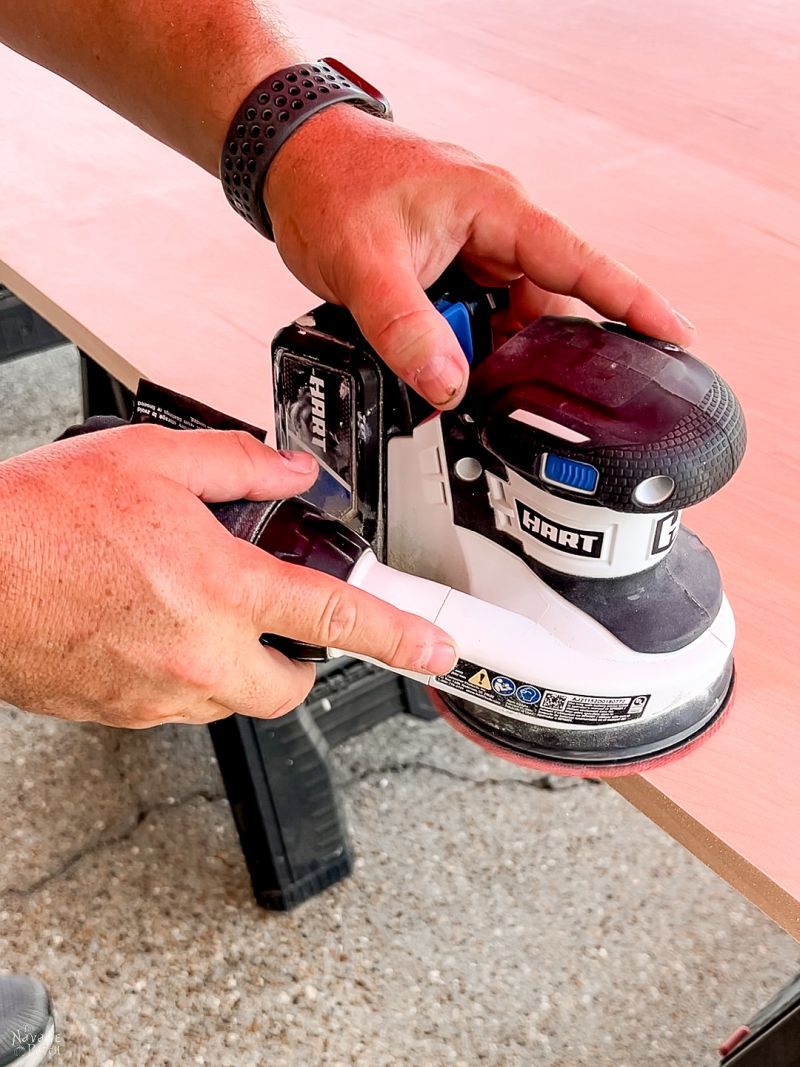
Once the adhesive had cooled, I carefully sanded the edges flush with the plywood with a 220 grit sanding disc.
Step 4 – Prime the plywood
I know, nobody likes to prime, but if you want the best results, you gotta do it! I used a paint sprayer for both the primer and the paint, and the results are much better and smoother than a foam roller.
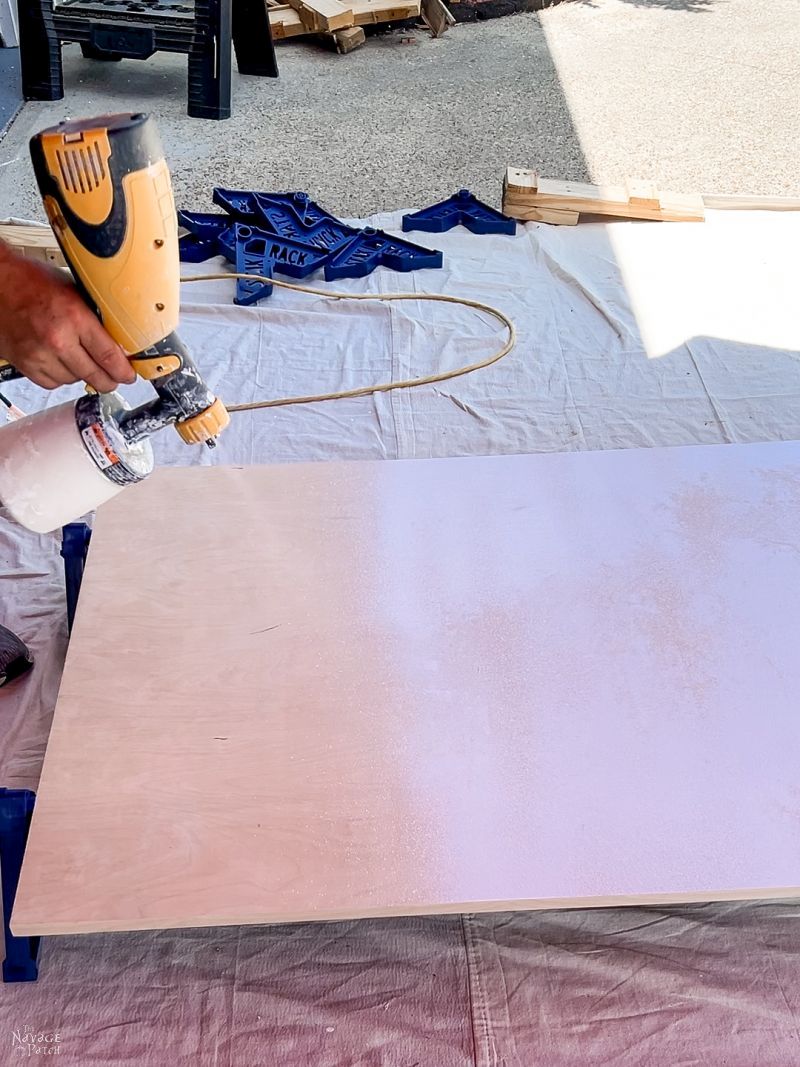
The photo below shows one coat of primer. I gave the plywood two light coats in total. Remember, light coats are always better than heavy ones. The photo above also shows an indispensable tool when painting plywood (or anything flat) that needs paint on both sides. I’ll talk more about it soon.
Step 5 – Sand
If you’re gonna do it the right way by priming, you gotta keep doing it the right way by sanding before you paint. Primer tends to be a little rough, and we’re going for a smooth finish. I sanded mine smooth with a random orbit sander and a 220 grit disc. Be sure to remove all dust with a damp rag or preferably a tack cloth before painting.
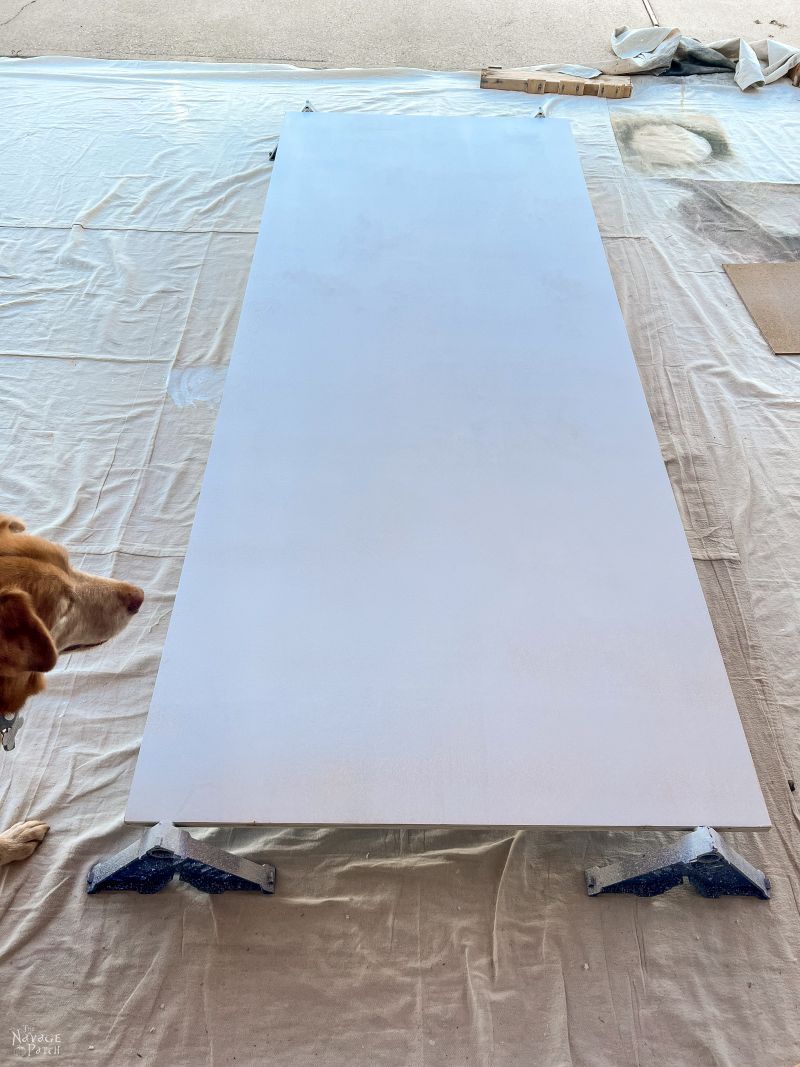
Step 6 – Paint your DIY sliding barn door
I used the same paint for the modern barn door that I did for Baris’s walls: Sherwin-Williams Bohemian Lace in eggshell. I applied the paint in 4 light coats using a paint sprayer.
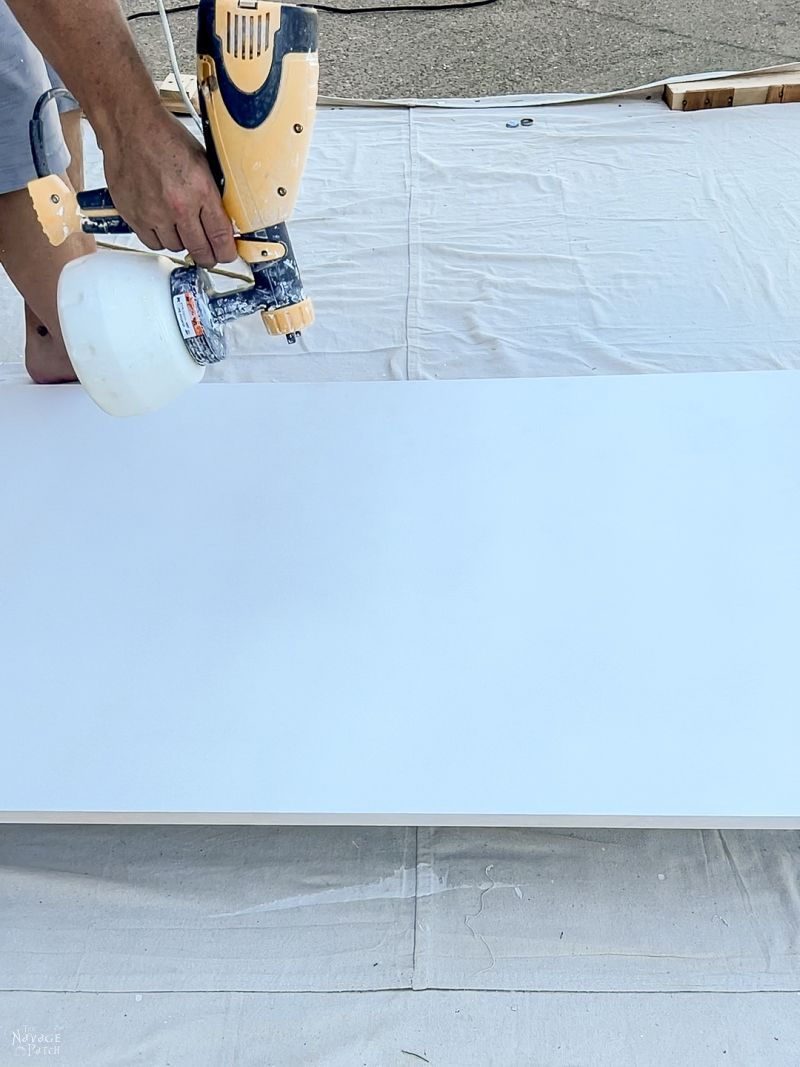
Latex paint does not sand well, and that’s another reason to make the primer as smooth as possible. With light, even coats of sprayed paint, you can get a beautifully smooth finish. Now, about that handy tool I mentioned a minute ago – the hardest part about painting two sides of plywood is waiting for one side to dry before you can paint the other side. Well, it was the hardest part, but not anymore! My babes got me an awesome product called Stack Rack, and they make painting plywood (or cabinet doors) a breeze.
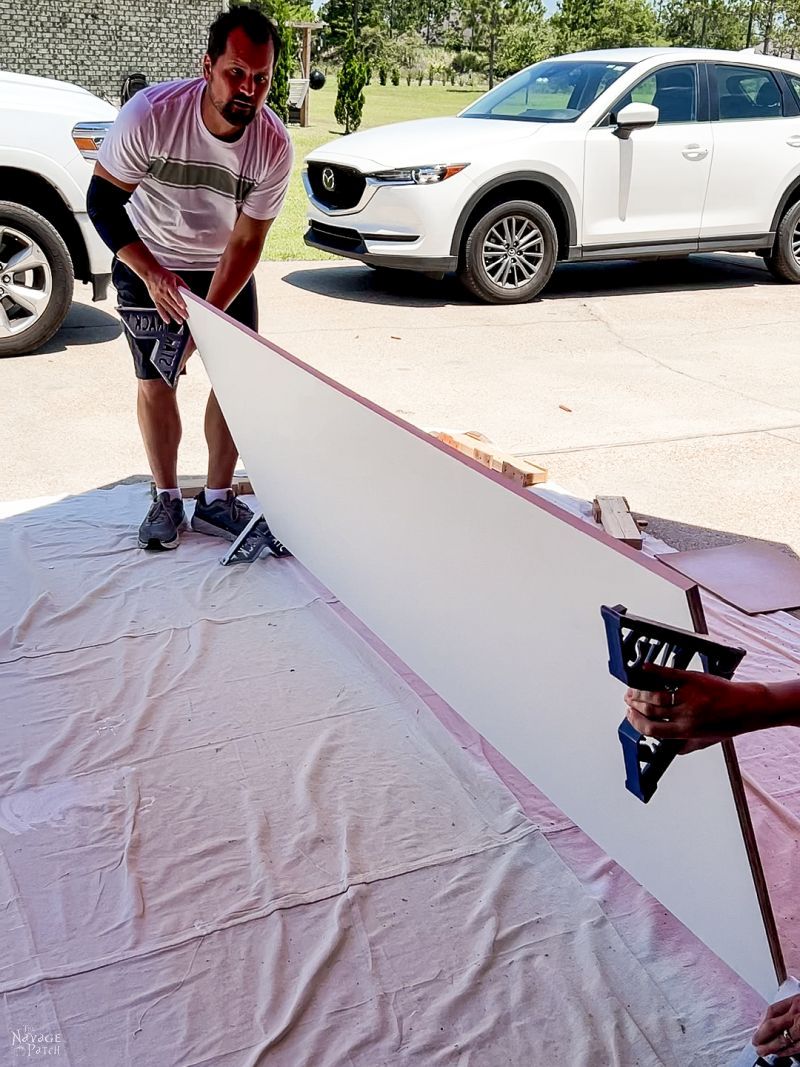
With Stack Rack, you can flip the piece of plywood without having to touch it, and it keeps it elevated off the ground. It works wonders for cabinet doors (which I’ll be doing soon). Best of all, you can stack the doors to dry (or plywood if you have more than one sheet) to save a ton of space!
When the sliding barn door had dried, Handan realized she had told me the wrong measurement for the width. Fortunately, the measurement she gave me originally was too big, so it was a simple matter to slice it down to size. It was simple, because at that point I had gotten the Kreg rip-cut circular saw guide that I didn’t have at the beginning of this project!

A little more veneer edging and another coat of paint, and I was back on track!
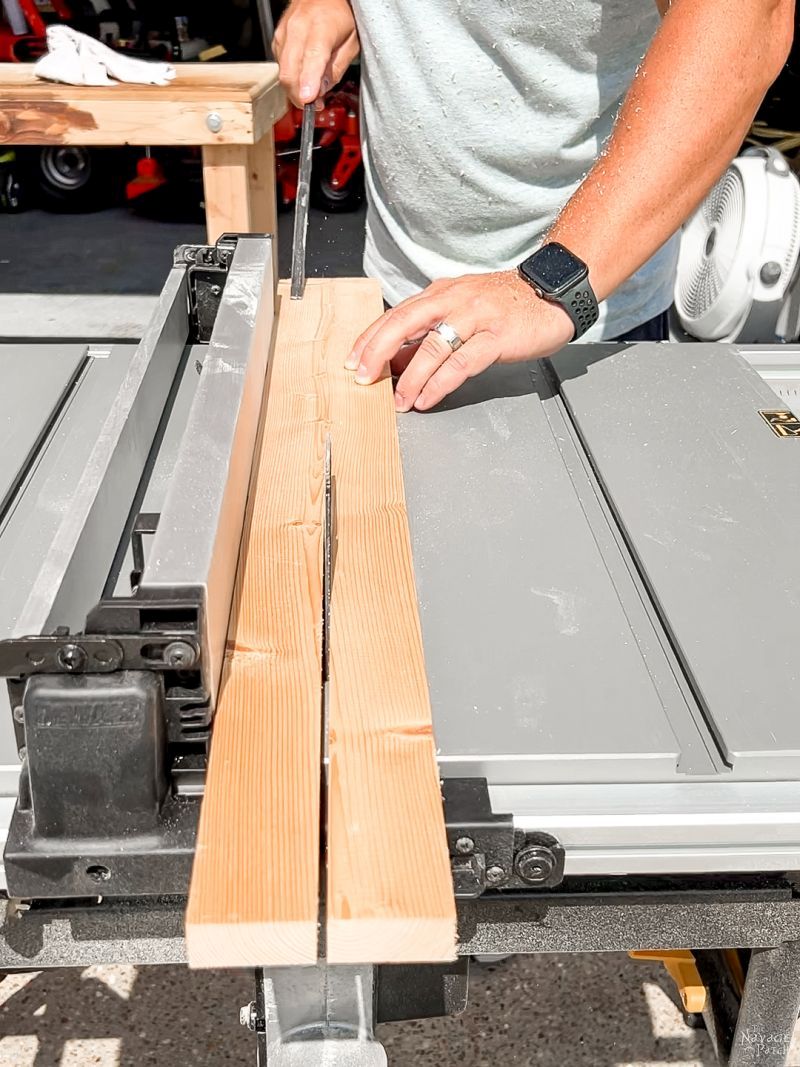
Step 7 – Cut the slats for the modern barn door
To save a little money, I bought a bunch of 1×4 pine boards and cut some of them in half lengthwise to make 1x2s. Since this step involves a table saw, you’re better off just buying 1x2s – they’re a lot cheaper than a table saw!
Cut list for slats (based on the dimensions of my door – yours will differ)
- (2) 31 3/8 inch pieces of 1×4
- (4) 18 1/2 inch pieces of 1×2
- (4) 23 1/2 inch pieces of 1×2
- (4) 29 inch pieces of 1×2
- (4) 34 inch pieces of 1×2
- (1) 78 5/8 piece of 1×2
If your door will be much wider than mine (and that is likely), you may want to add another row of slats. I will show you how I determined their lengths in one of the upcoming sections.
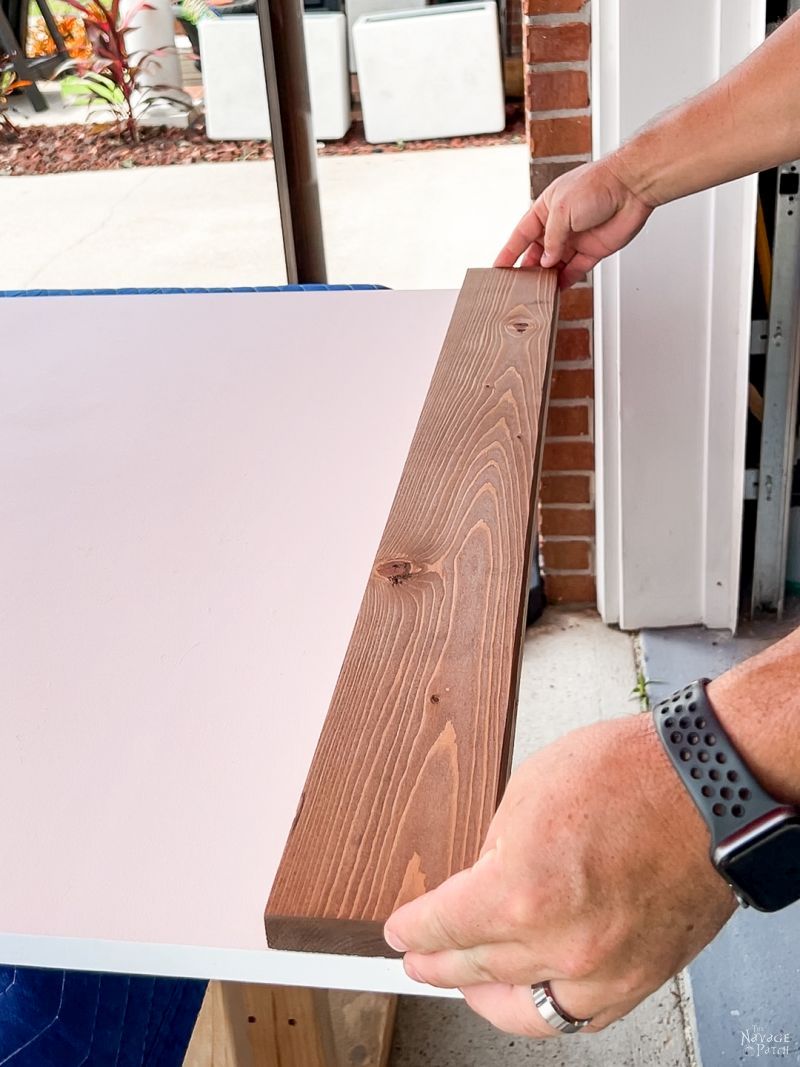
For our build, I found it easier to sand and stain the full 1x2s and then cut them to size, as needed. After cutting, I put a little stain on the cut end.
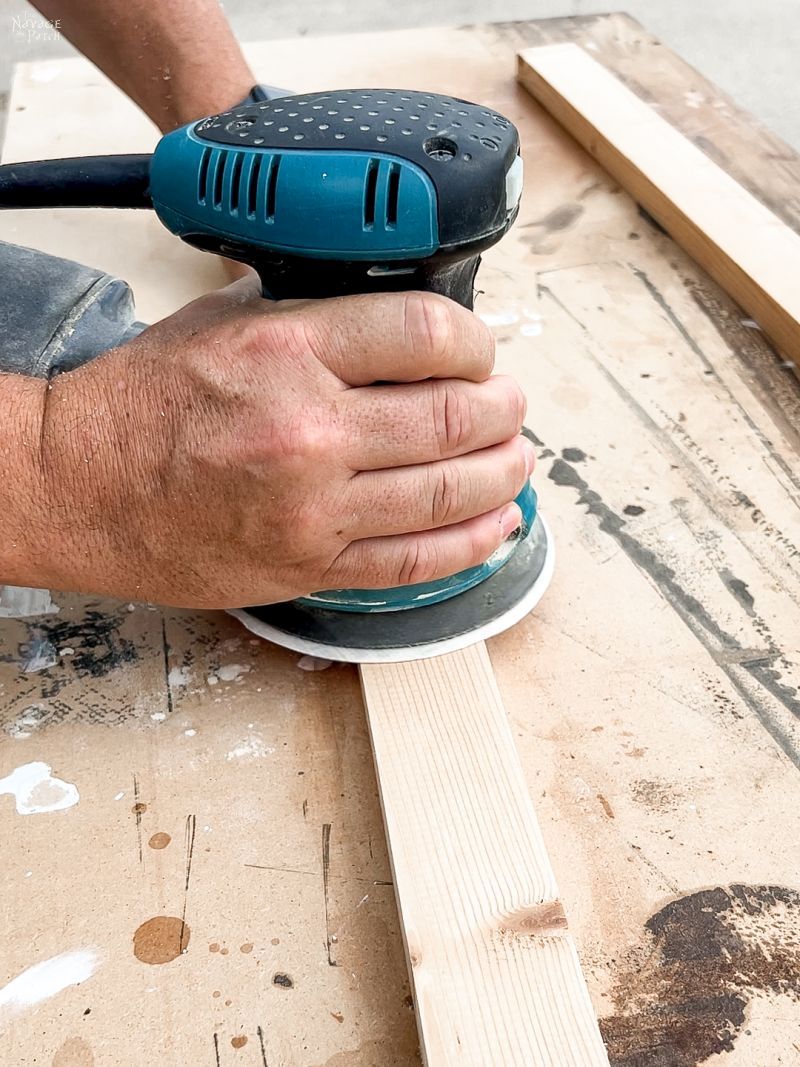
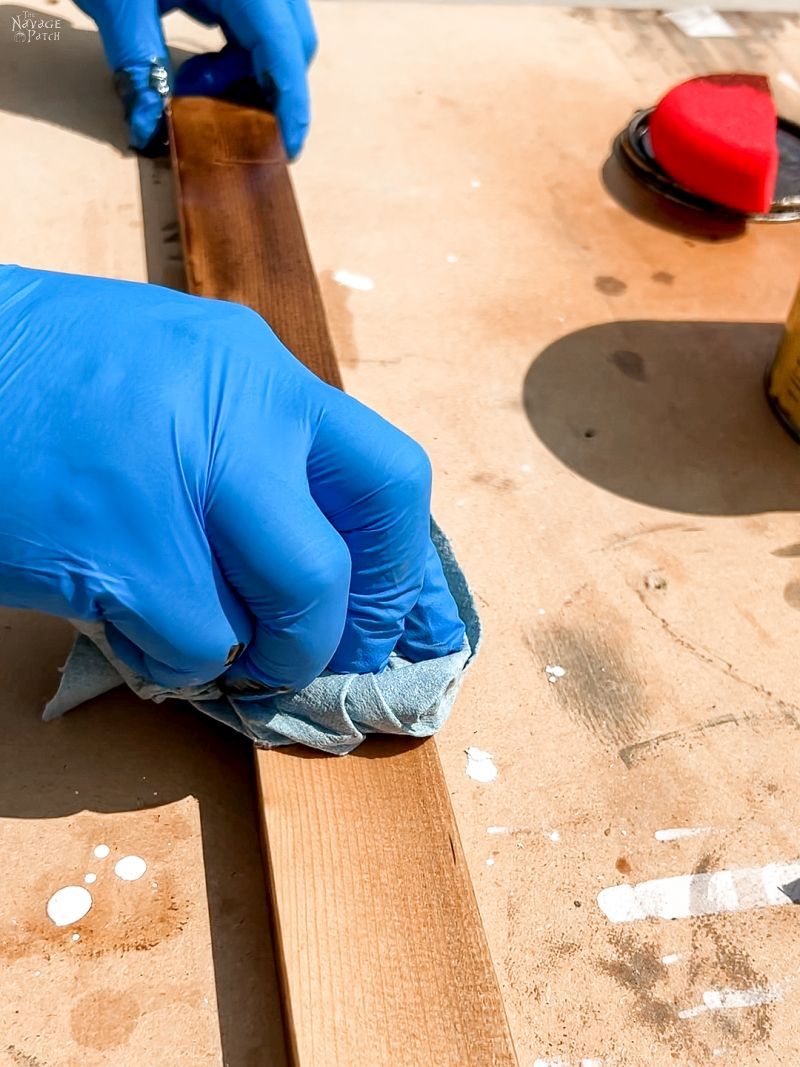
Step 8 – Sand & stain the slats
I gave each slat a quick sanding to remove any mill shine and to soften the edges just a bit.
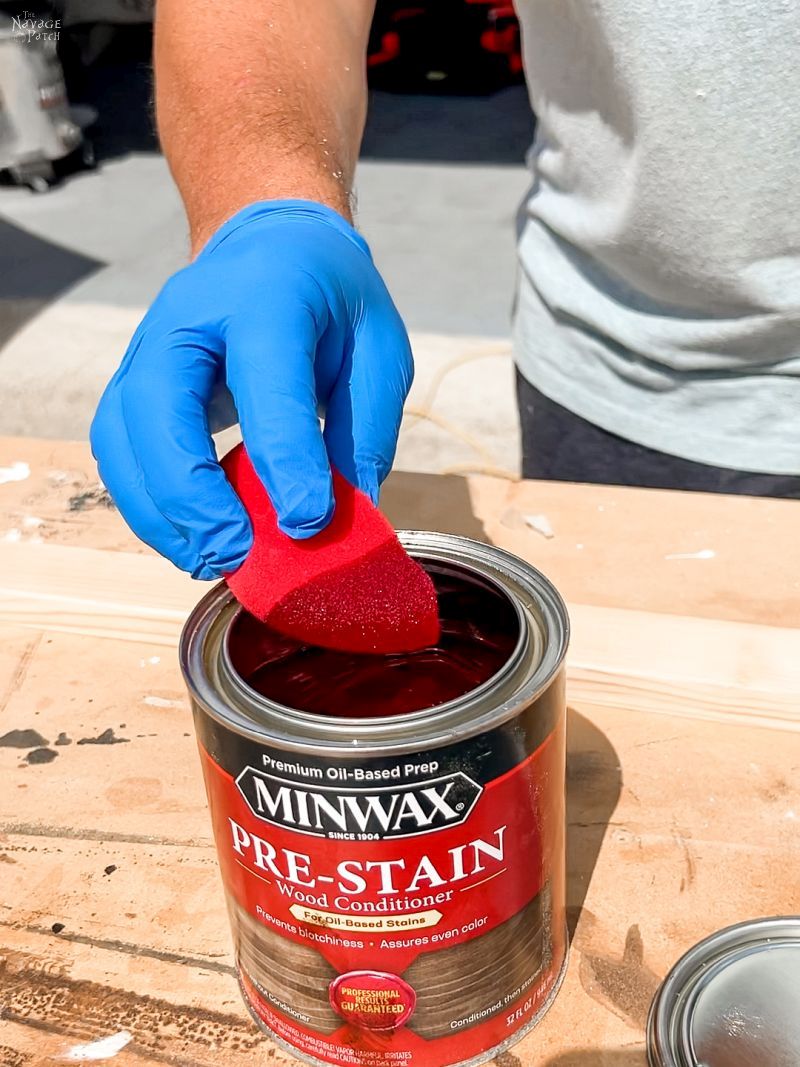
After wiping off the dust, I applied pre-stain conditioner. It’s a must-do before staining pine, otherwise you’ll end up with a blotchy mess.
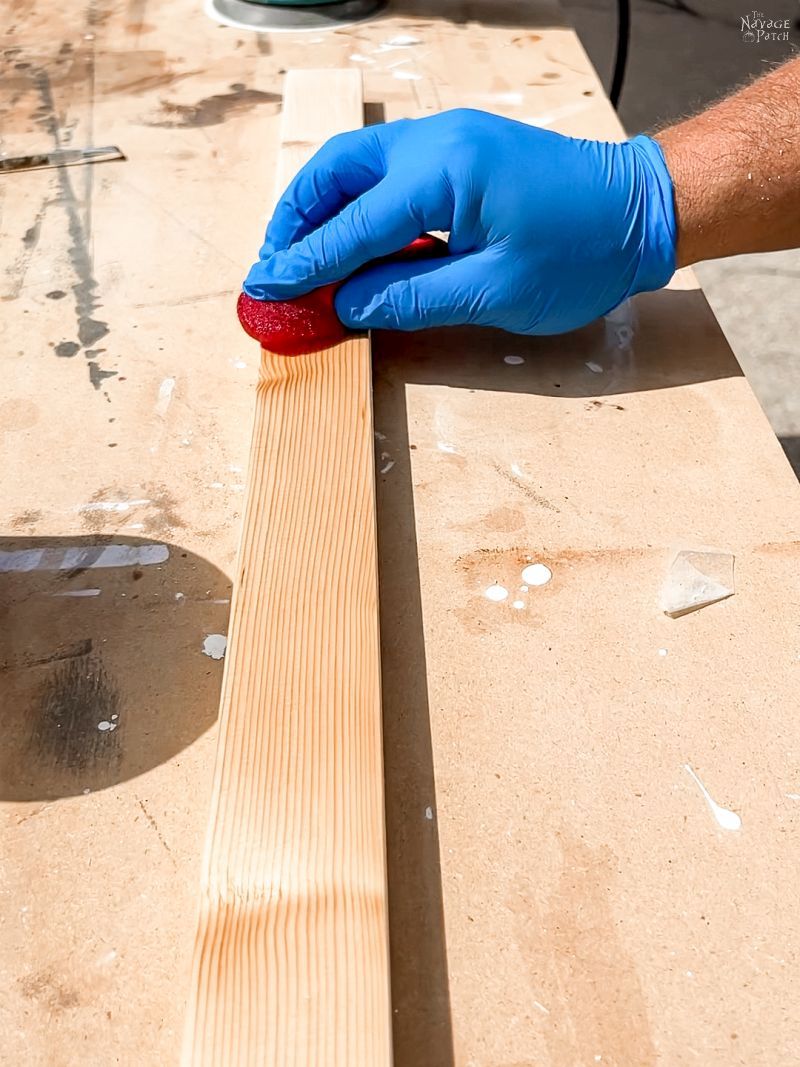
I followed the conditioner with Minwax Special Walnut stain.
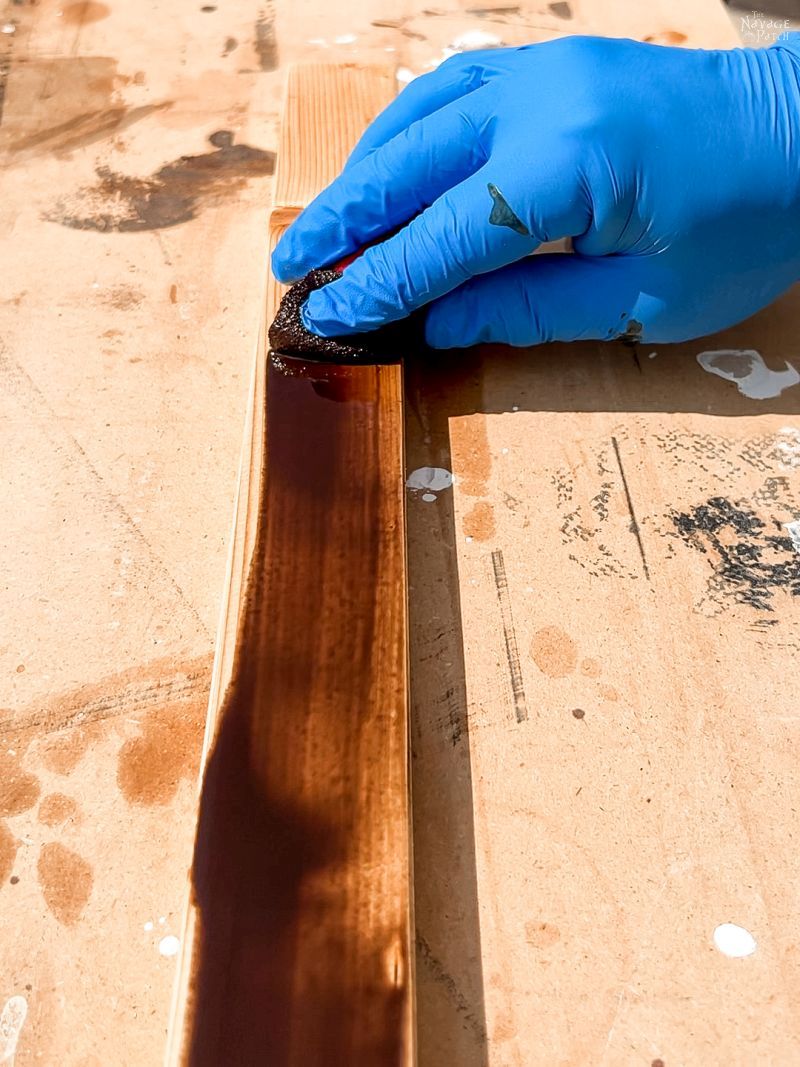
We wanted a light color, so I wiped it off immediately after applying it.
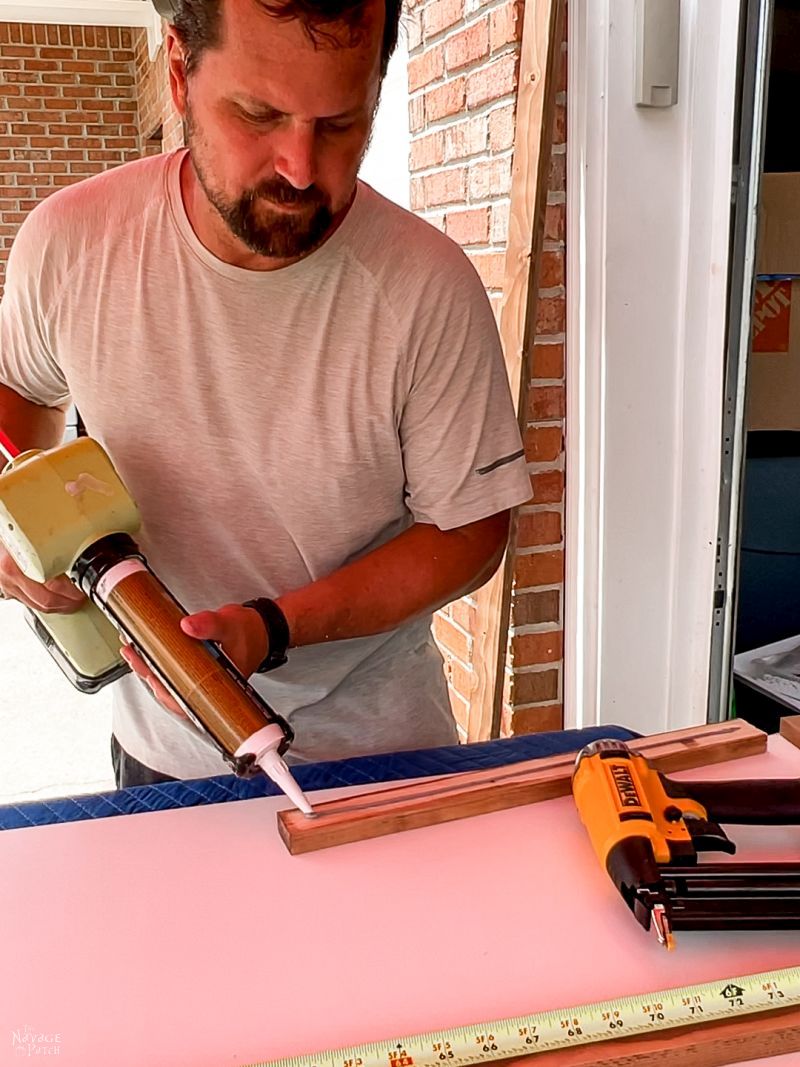
Step 9 – Attach the slats to the sliding barn door
Top and Bottom
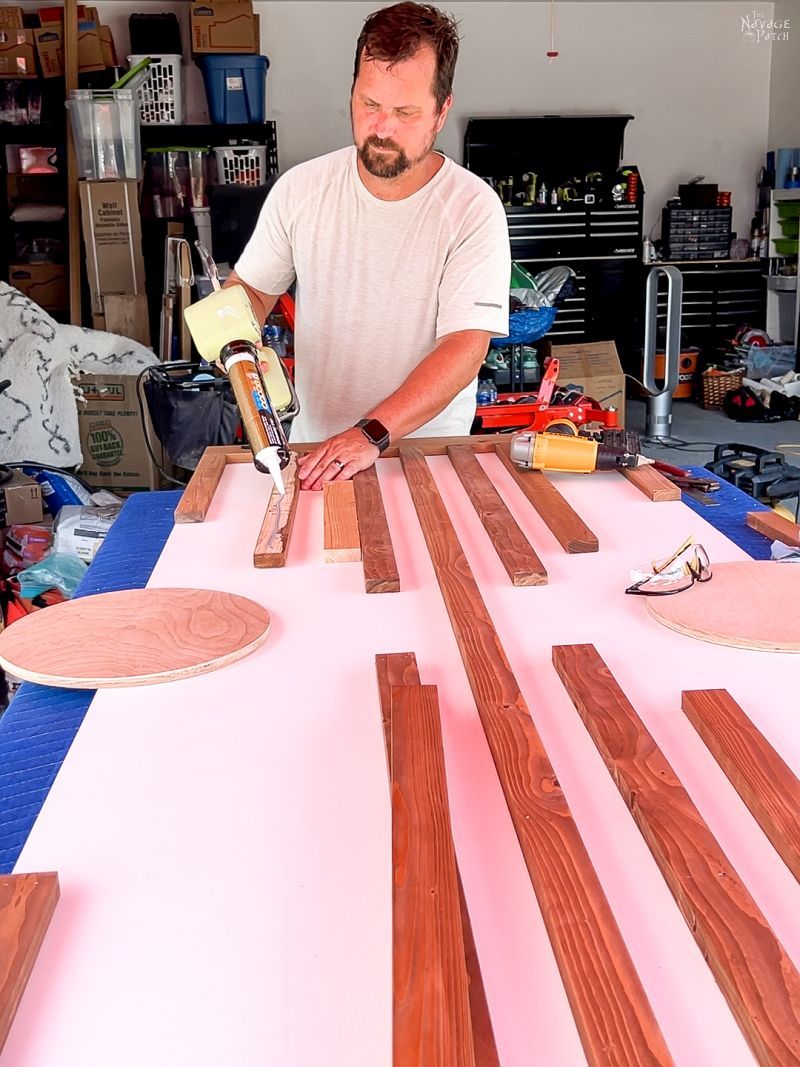
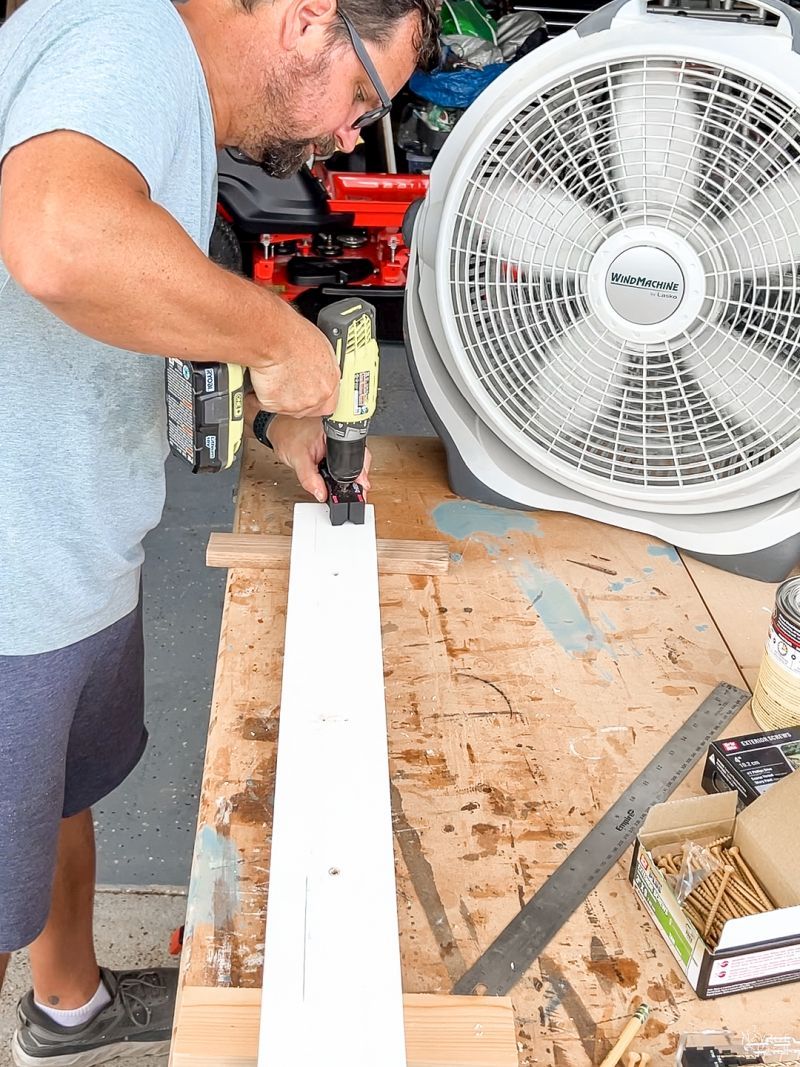
I started by attaching the 1×4 top and bottom pieces, first applying construction adhesive on back and then securing them with brad nails.


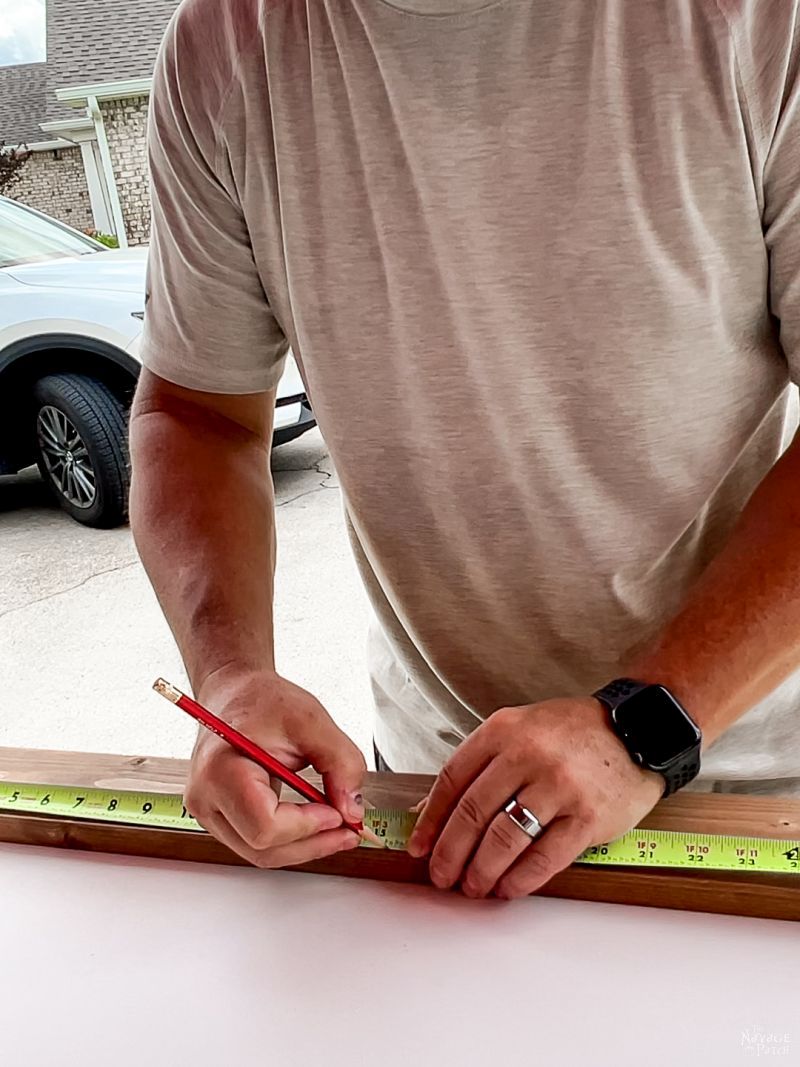
Center slat
Once the top and bottom pieces were attached, I measured and lightly marked their midpoints with a pencil.
Then I marked the midpoint of the width of the longest slat. I lined up the marks so that the long slat ran down the middle of the barn door.
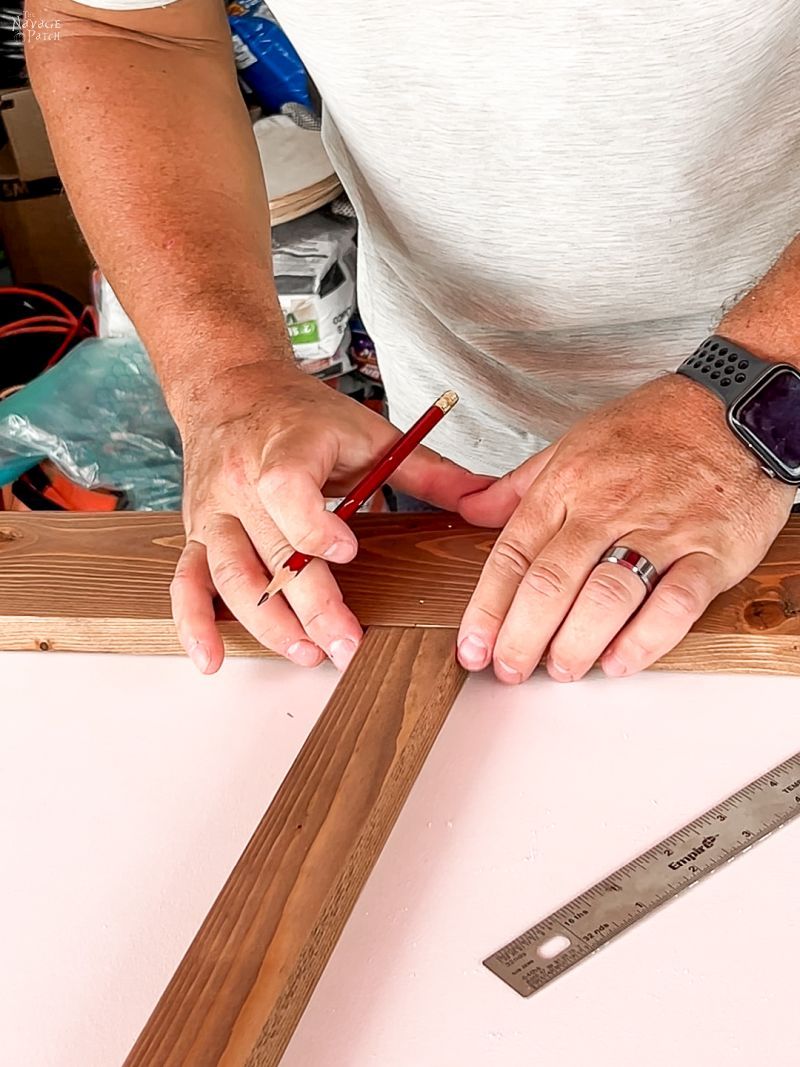
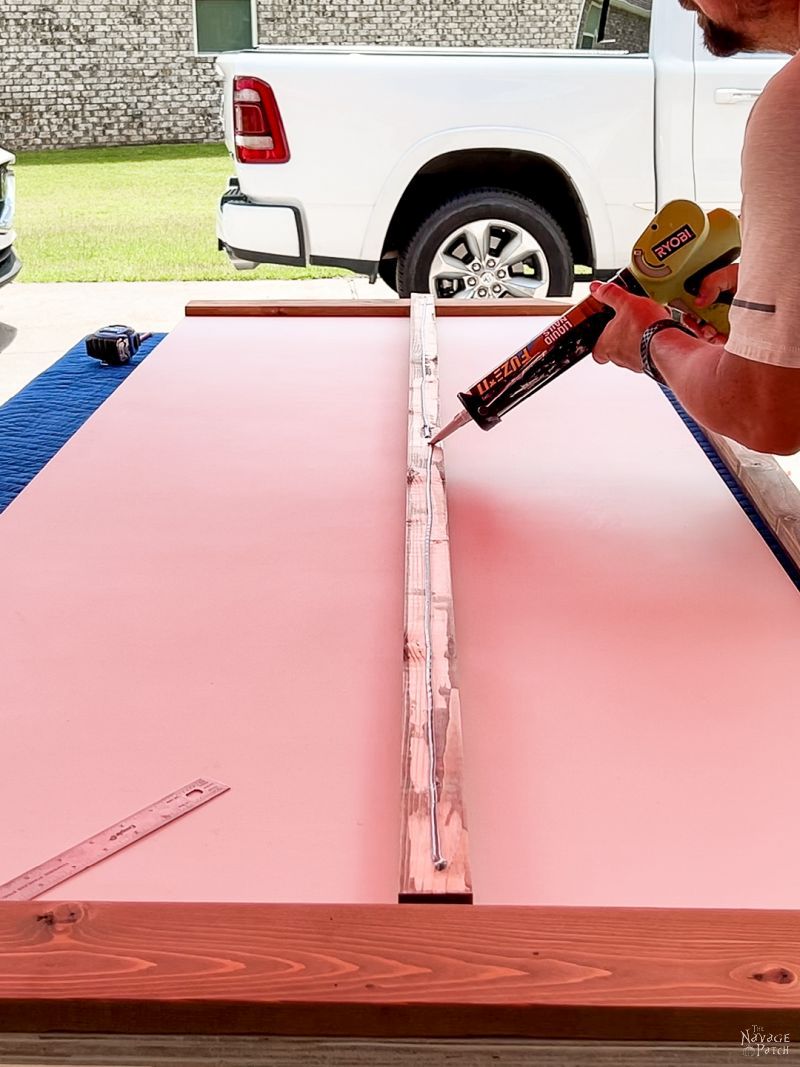
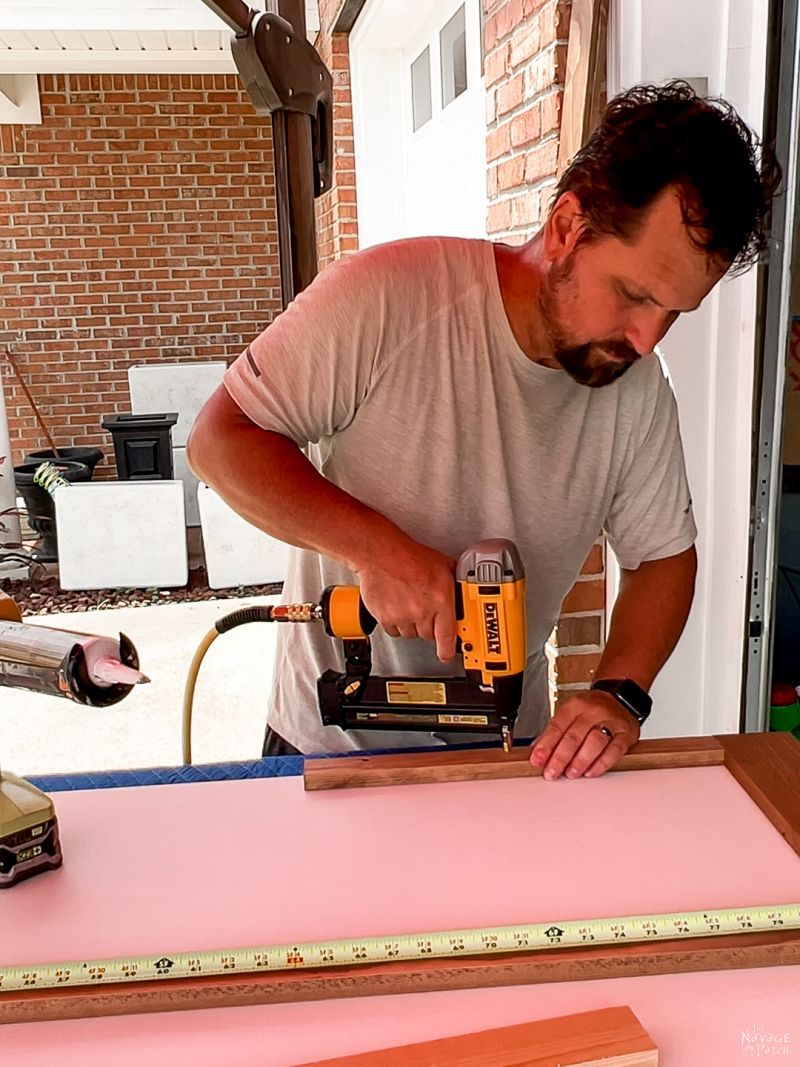
After measuring both sides to verify my marks were true and the slat was perfectly centered, I flipped it over and ran a bead of adhesive down its length.
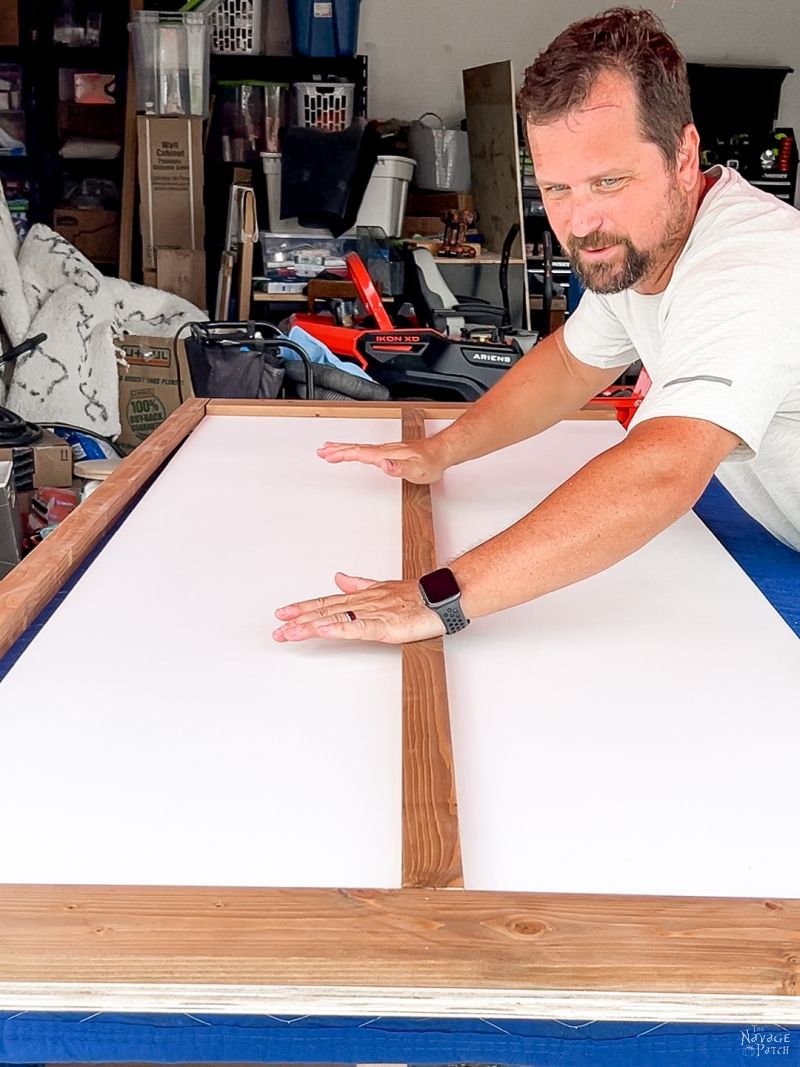
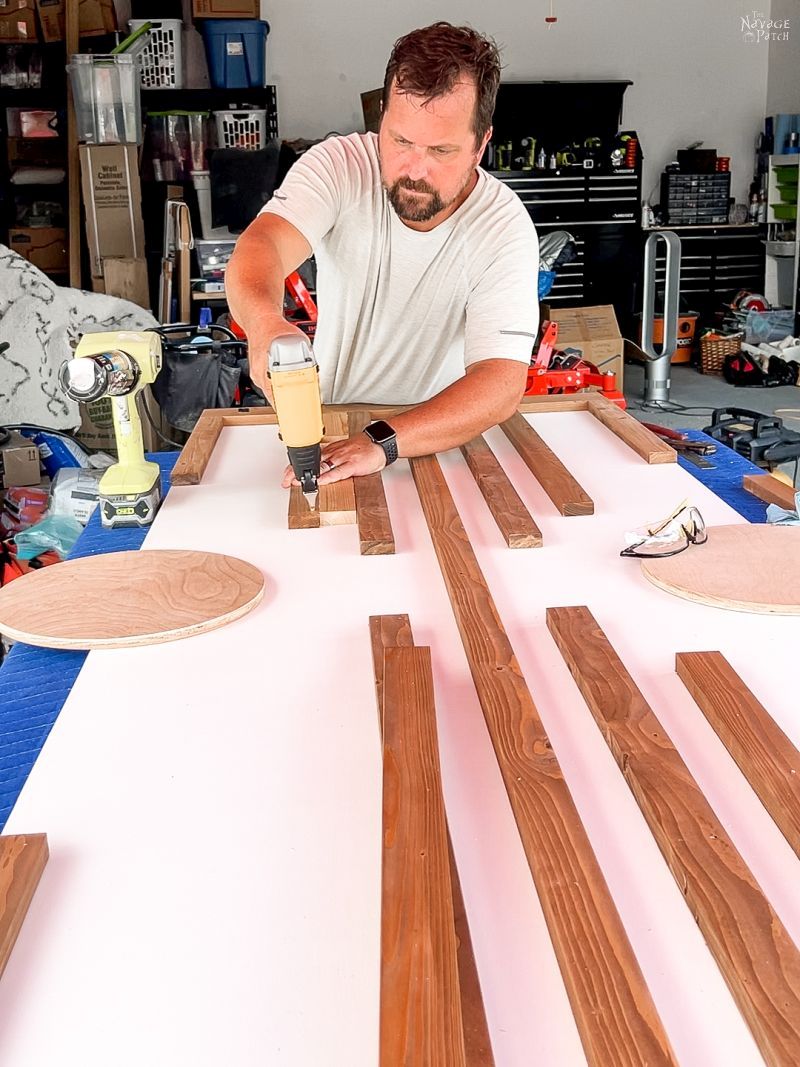
I flipped it back over, lined up the marks, pressed it in place and then hit it with brads.
Edge slats
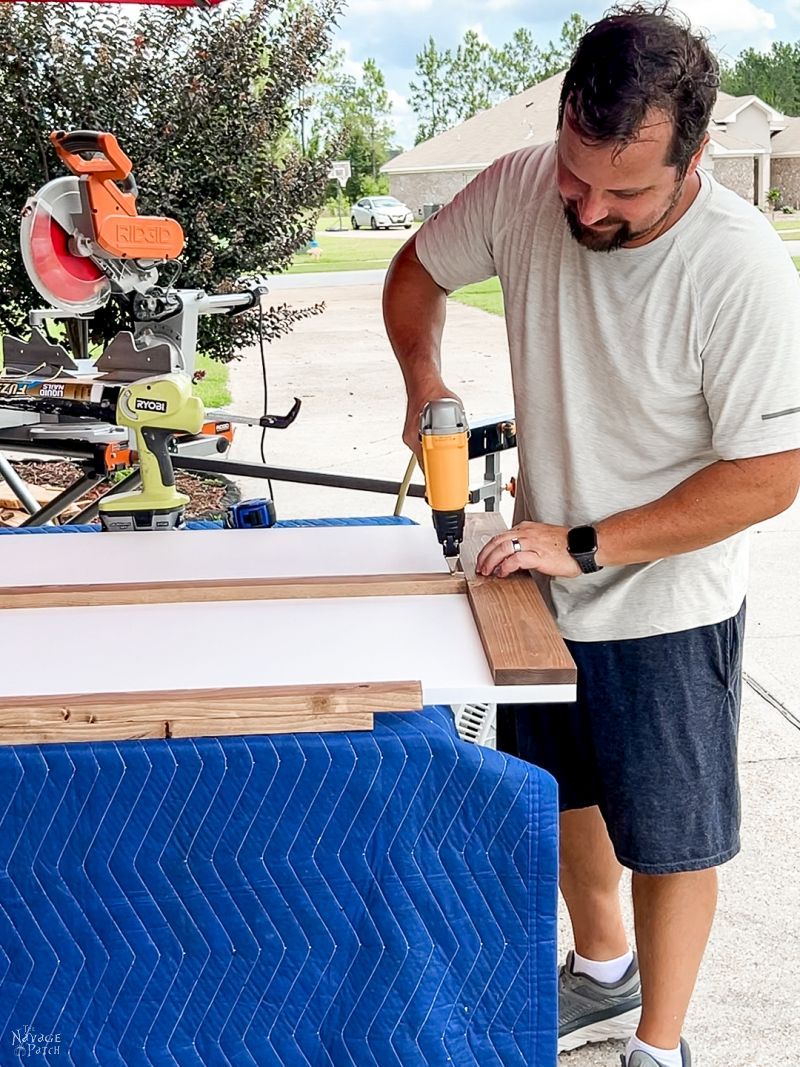
With the center slat installed, I moved back to the outer edge and installed the 4 shortest slats. We came up with their length somewhat arbitrarily after marking the middle of the center slat and choosing a slope we thought looked good. I glued and nailed the 4 short pieces of pine to the sliding barn door.
Make a spacer
You’ll have to do a little math to determine how much space to leave between each slat so that there’s equal spacing all around. For us, based on the width and number of our slats and the width of our barn door, our spacer needed to be about 1/32 less than 2 inches. In other words, 2 inches! I’m getting too old to split 16ths – that’s a young man’s game for a young man’s eyes.
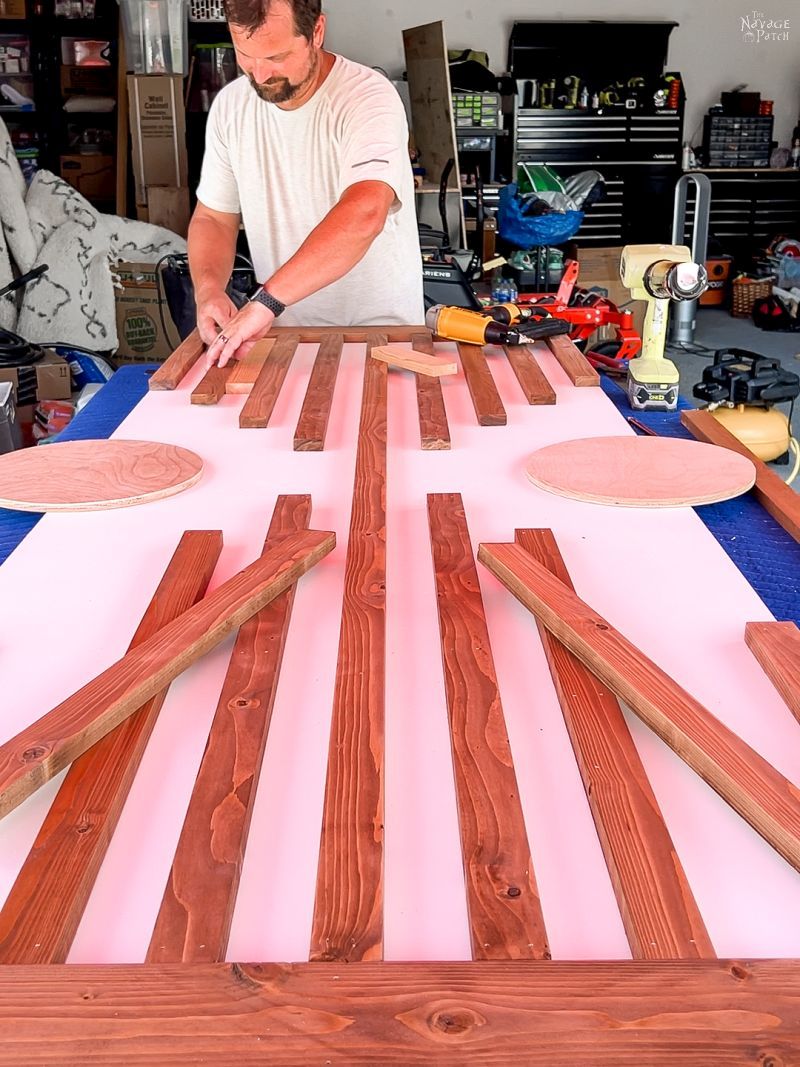
Install the rest of the slats to the modern barn door
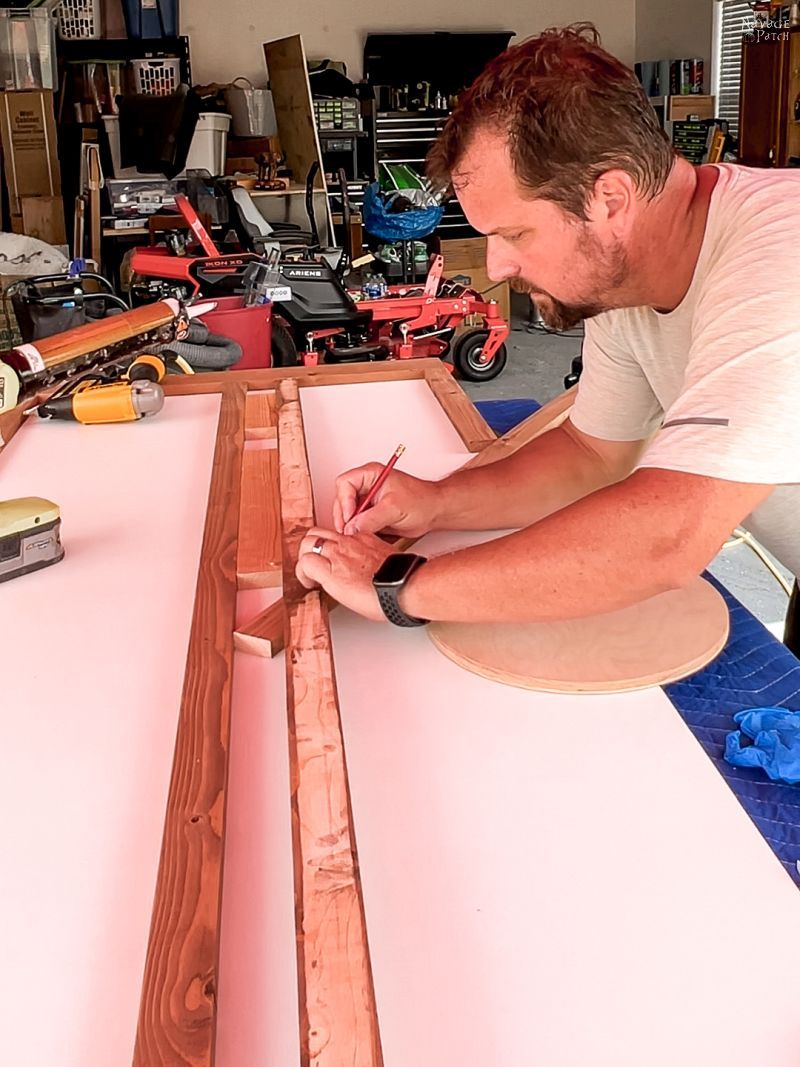
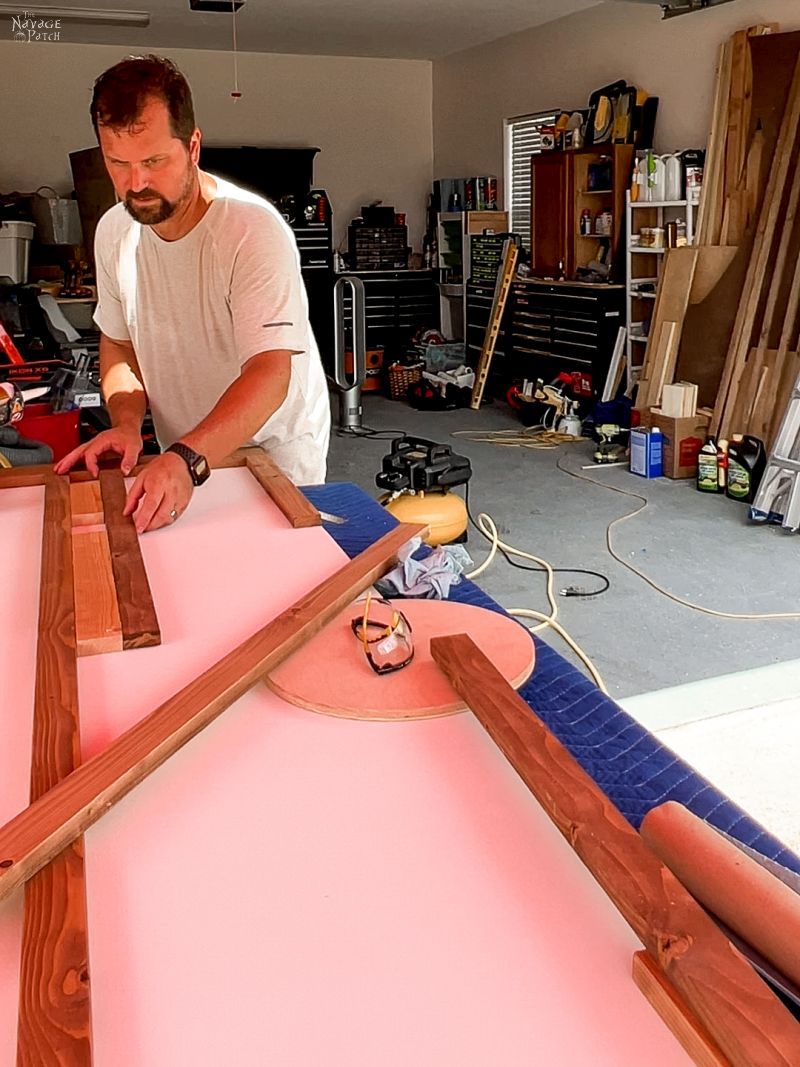
I placed the piece of round pine on the center edge for reference to help me determine the slope we wanted, and thus, the length of each slat.
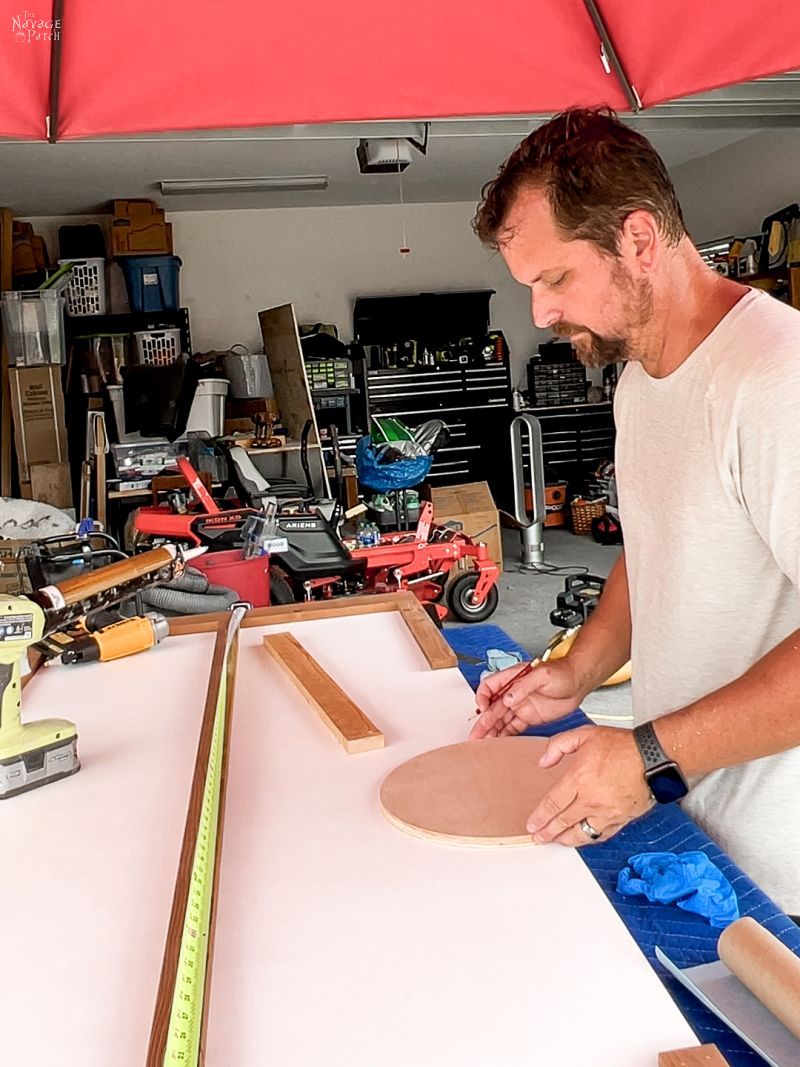
Next, I lined up a spare slat with the midpoint of the center slat and the corner of the short slat I’d already installed. This was the reference line for how long I’d make the rest of the slats.
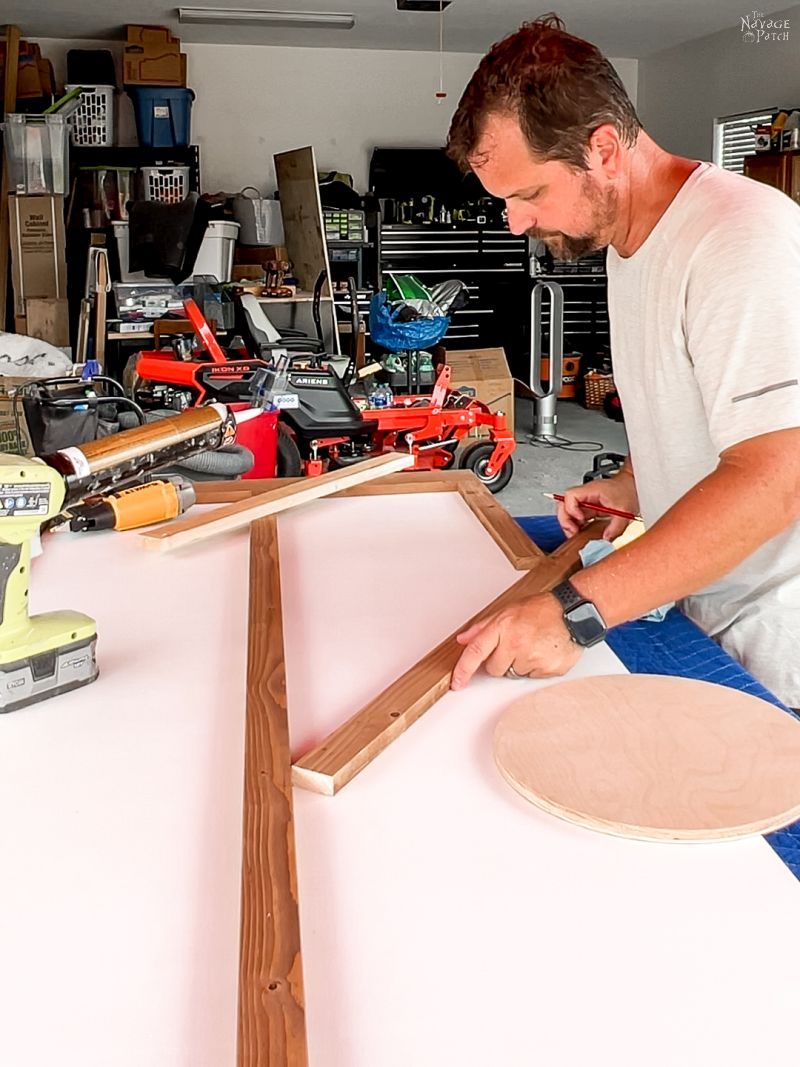
I laid a long 1×2 against the spacer and marked it where it met the reference board. The board is upside down, so I could mark the top and see it easier when cutting.
Again, all this measuring, marking and cutting can be done earlier in the project. But since we were teaching ourselves how to build a sliding barn door as we went along, we were cutting and installing on the spot.
From here on out, it was straight repetition: measure, mark, cut, stain, install.
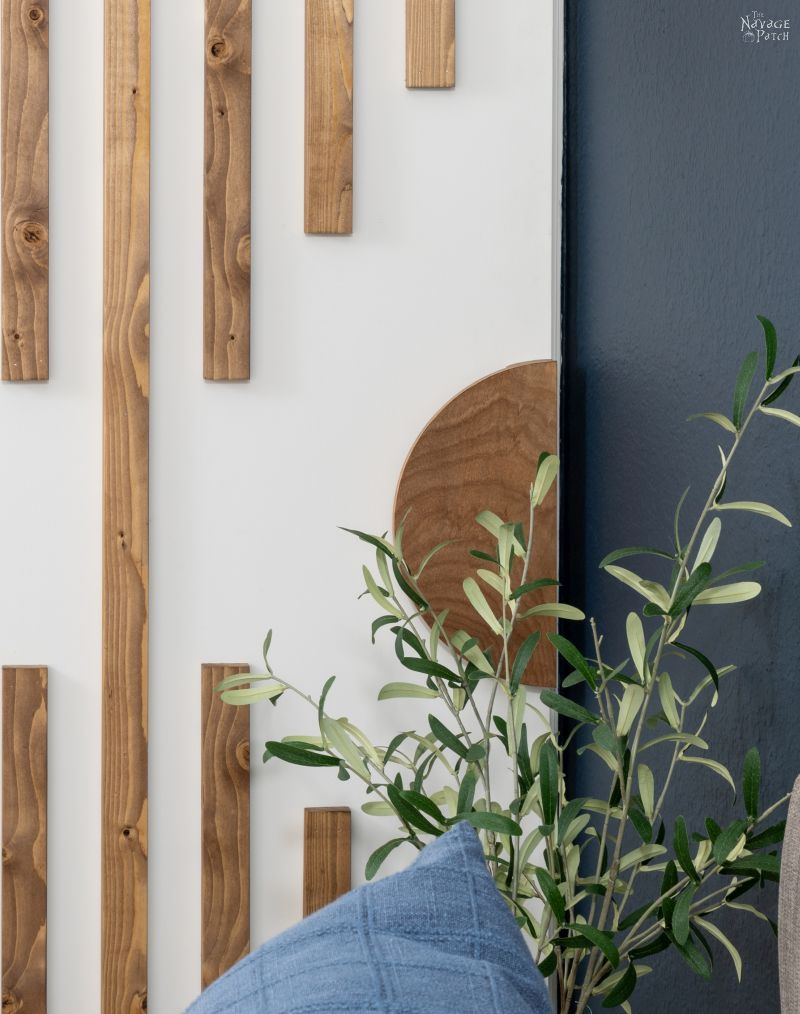
Step 10 – Make the door pulls
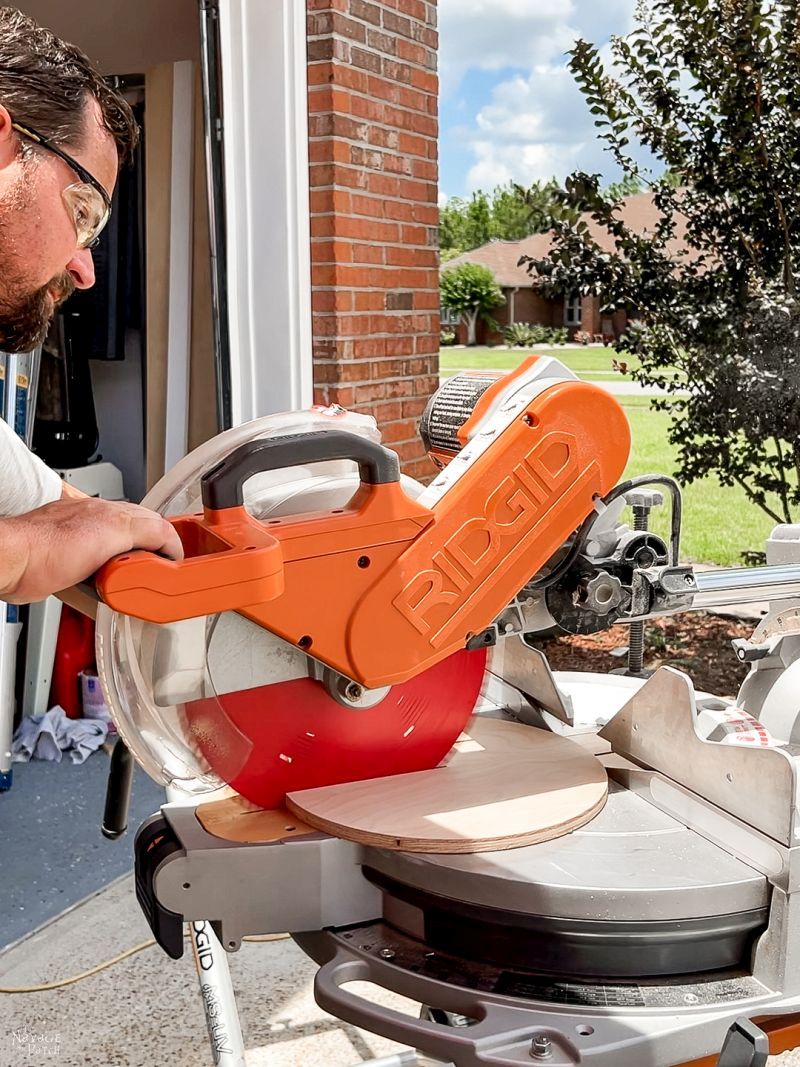
For the two door pulls – a pine semicircle on either side of the door – I first cut the 12-inch pine round in half.
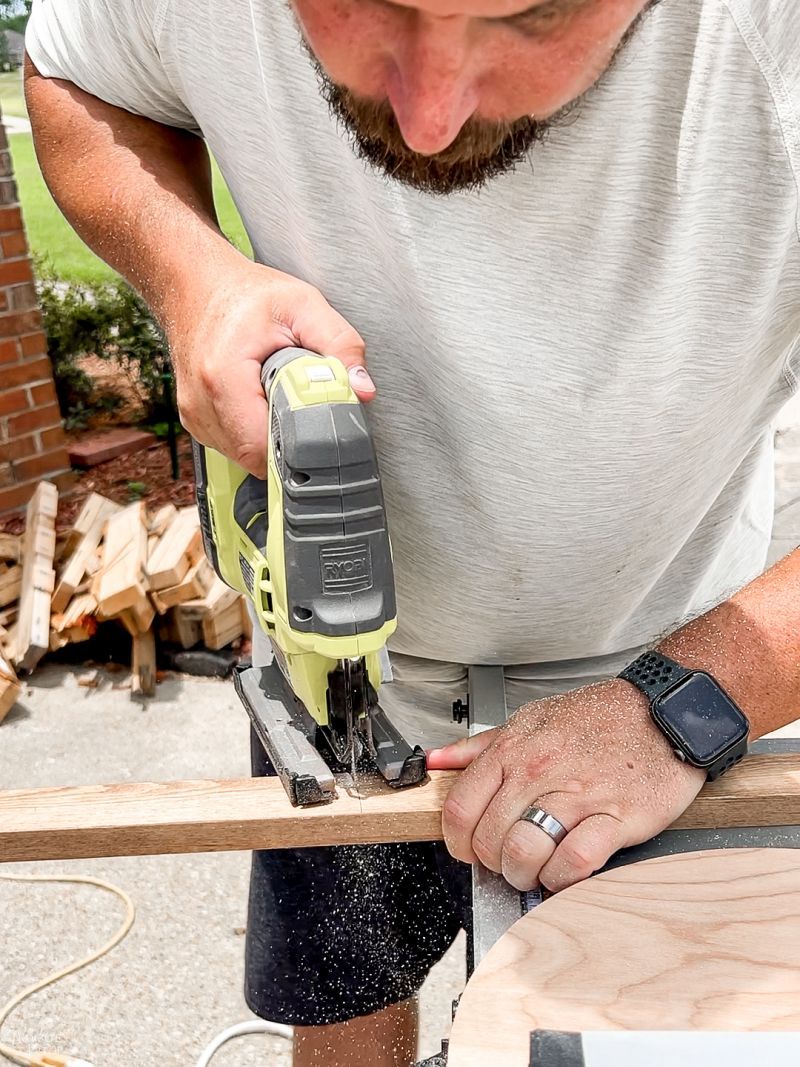
Then I used a spare slat as a spacer and traced the arc of the semicircle onto it. Next, I cut the arc with a jigsaw.
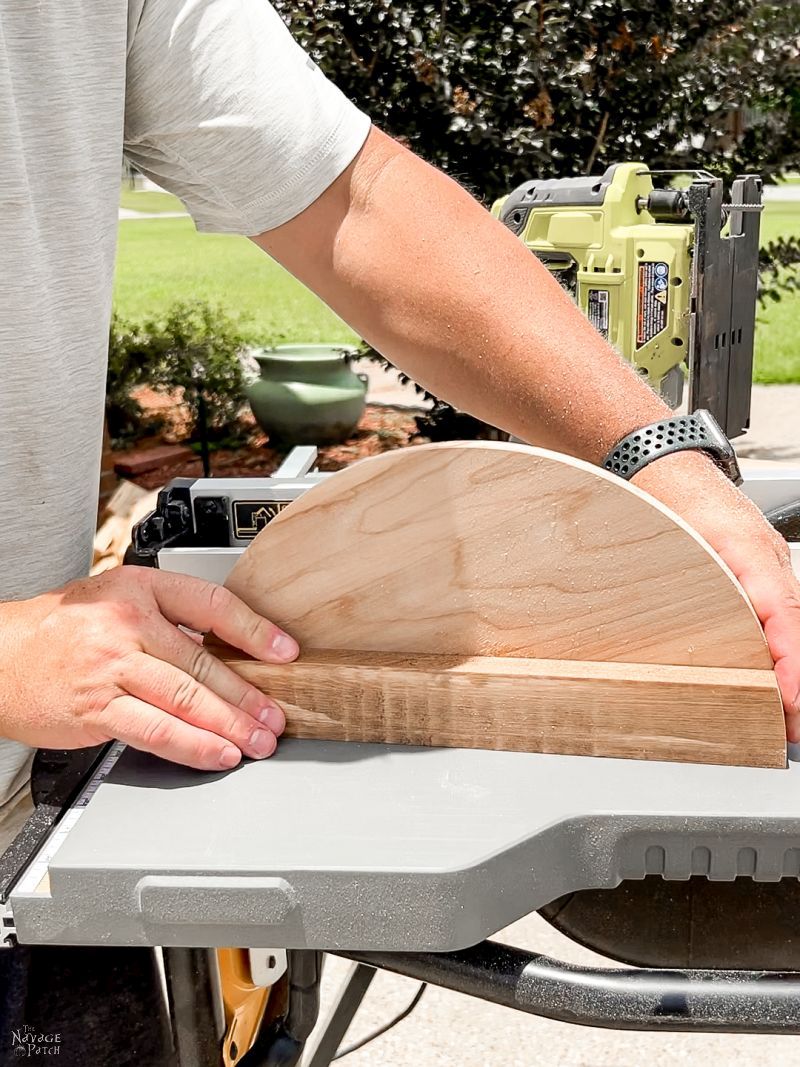
Before gluing the spacer to the door pull, I put veneer edging around the semicircle. It’s plywood and just looks better that way. After sanding and staining the components, I glued the spacers to the semicircle door pulls and secured them with brads shot from the spacer side, so they wouldn’t show on the face of the pulls.
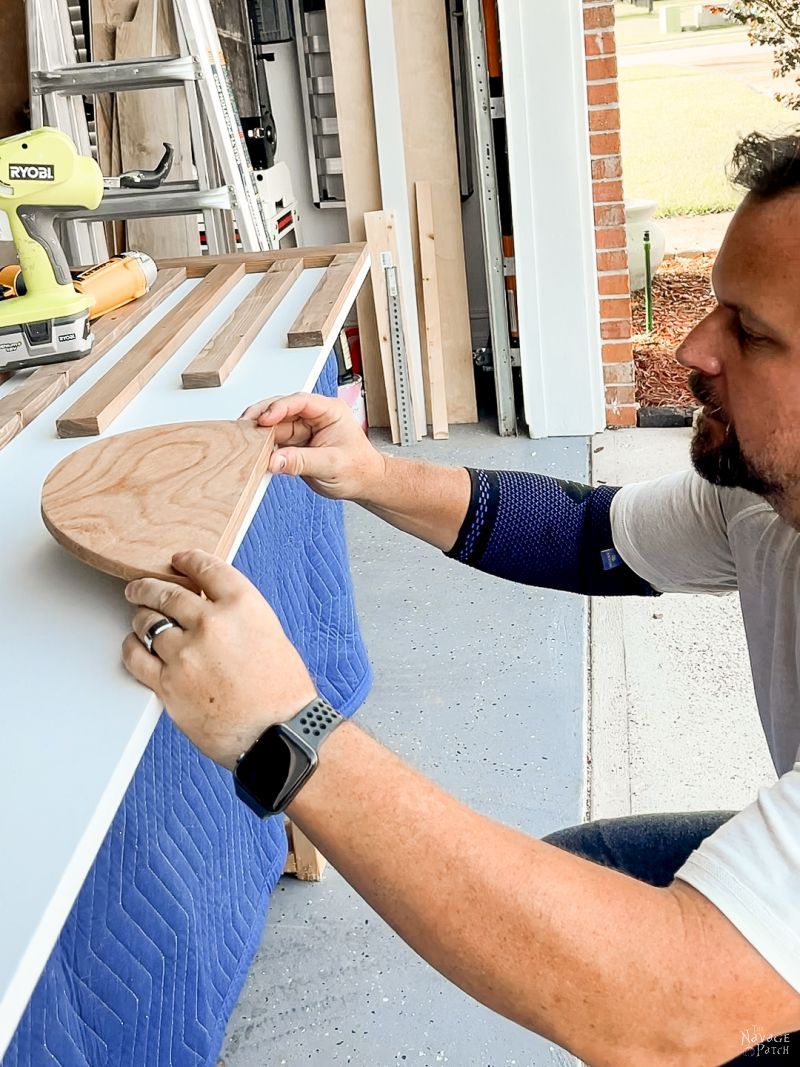
Step 11 – Install door pulls
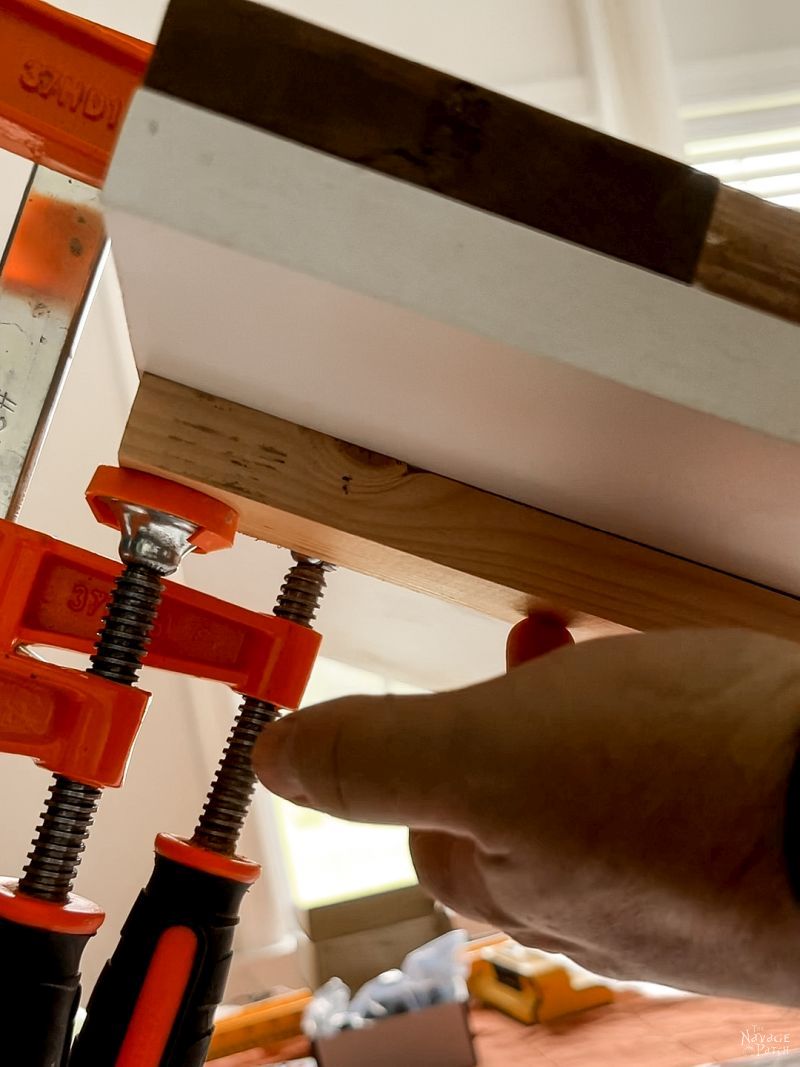
To install the pulls onto our new modern barn door, I applied construction adhesive to the back of the spacers.
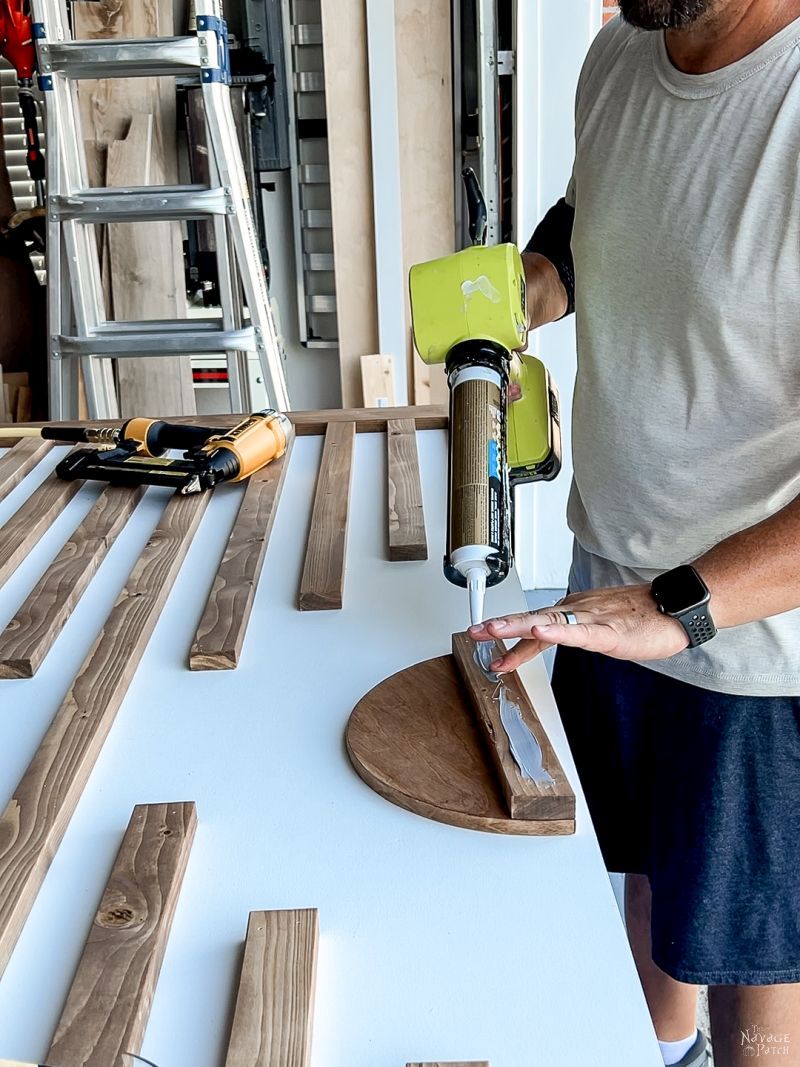
Then I centered the pulls on the edges of the door.
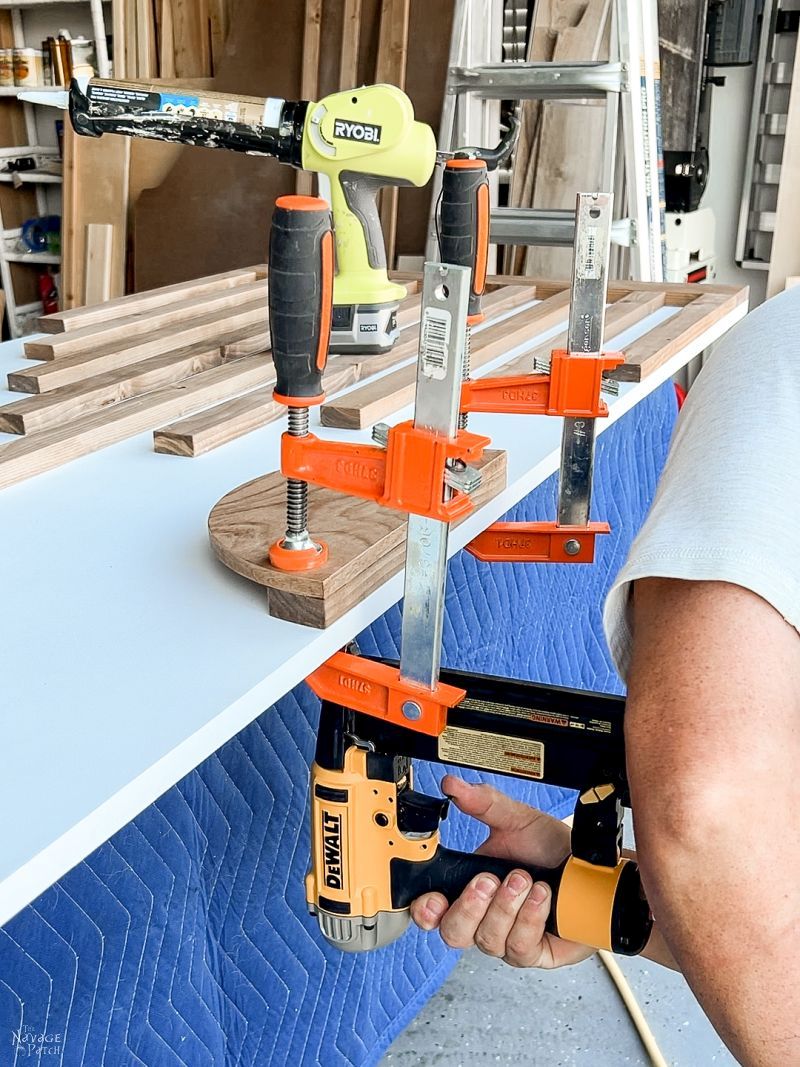
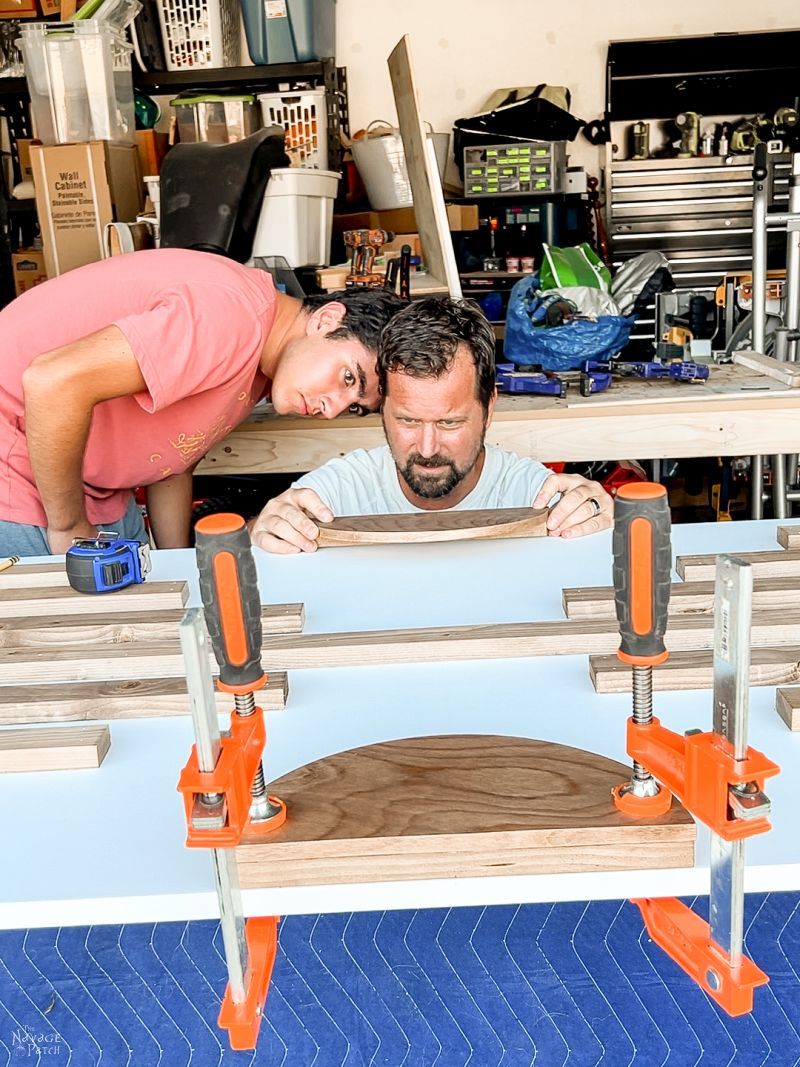
I secured each pull with two clamps and then shot some brads in from the backside of the door.
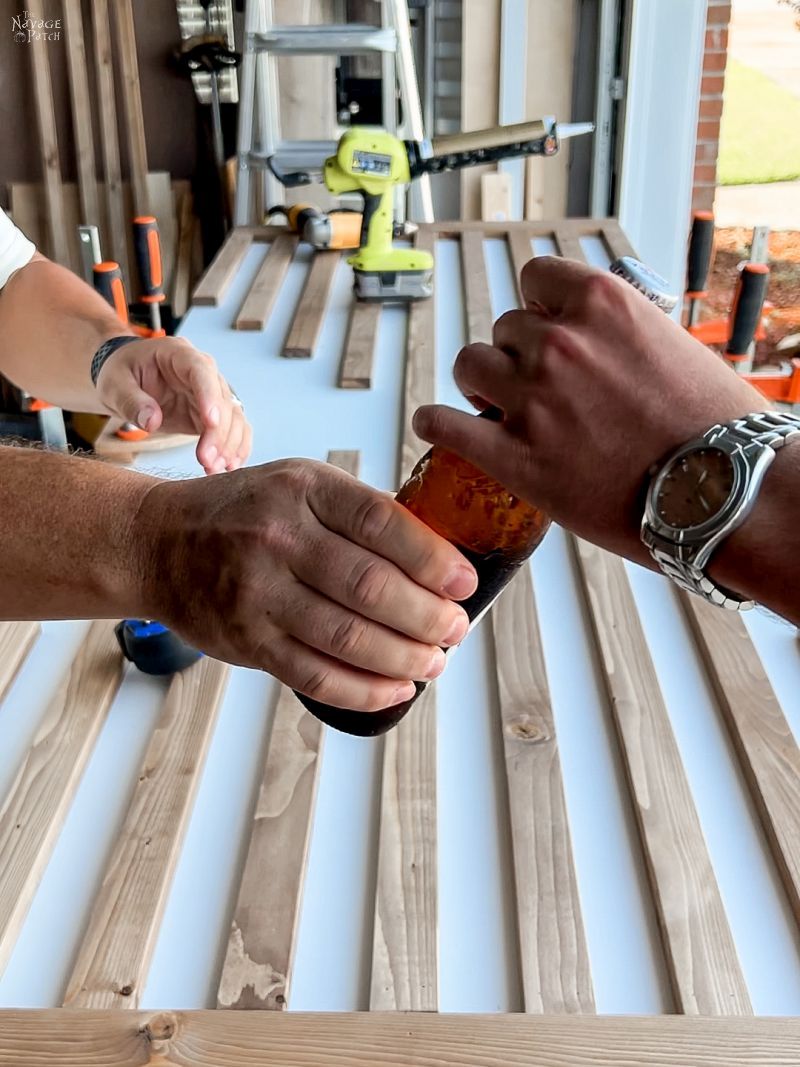
This rising AARP member is a tad retinally challenged, so I brought in some fresh eyeballs to help me find my mark.
The modern barn door build was done. Next up, installation. But first, a well-deserved cold beer on a ridiculously hot day!
We love to see our DIY projects out in the wild! If you try this DIY project and take a picture and post it on Instagram, be sure to tag us – thenavagepatch
PArt 2 – HOW to INSTALL A SLIDING Barn Door
Now you know how to build a sliding barn door. Your next job is to install it.
There are all sorts of DIY sliding barn door hardware kits out there. This is the one we chose. It has a 4.5 star rating on Amazon with more than 15,000 votes. Good enough for me!
Step 1 – Determine if you need to install a header board
You may or may not need to install a header board. We did because our studs weren’t spaced every 16 inches, so the pre-drilled track wouldn’t have anything solid to screw into. Also, since our modern barn door would be installed over the existing door trim, a header board was necessary to give it proper clearance.
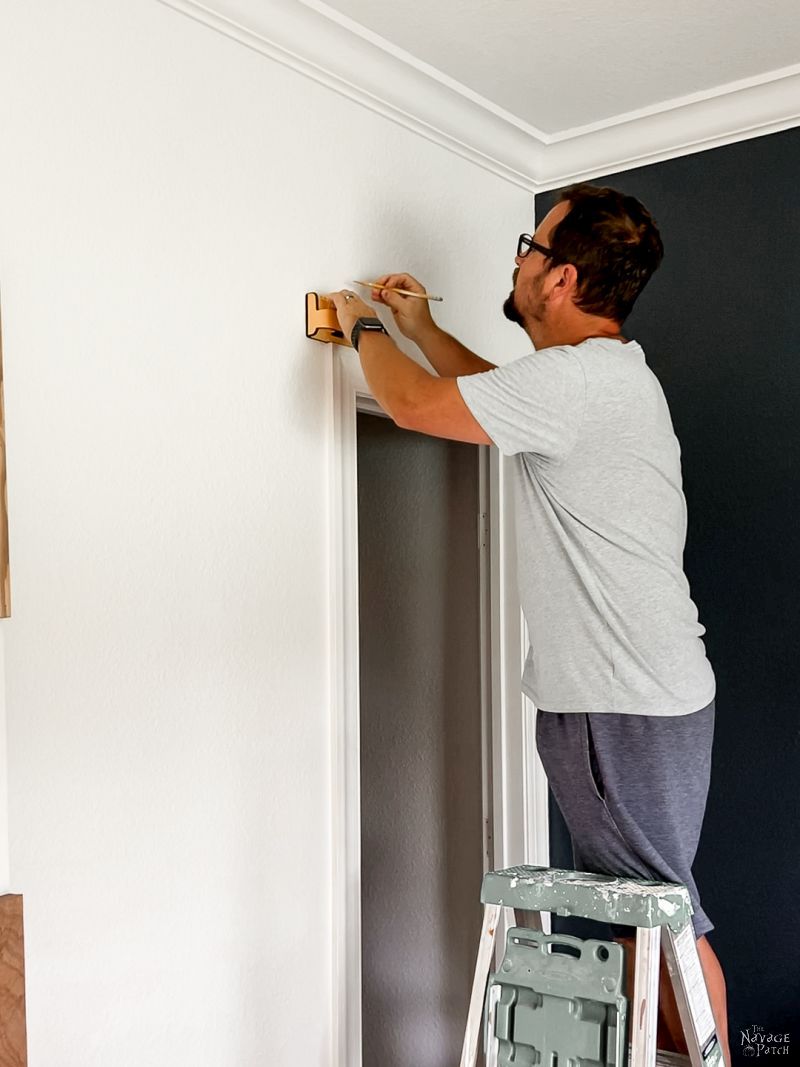
Step 2 – Mark the studs
I marked the studs over the closet door so I would know where to screw in the header board. After marking the studs on the wall, I held the header board up and translated the wall marks to it.
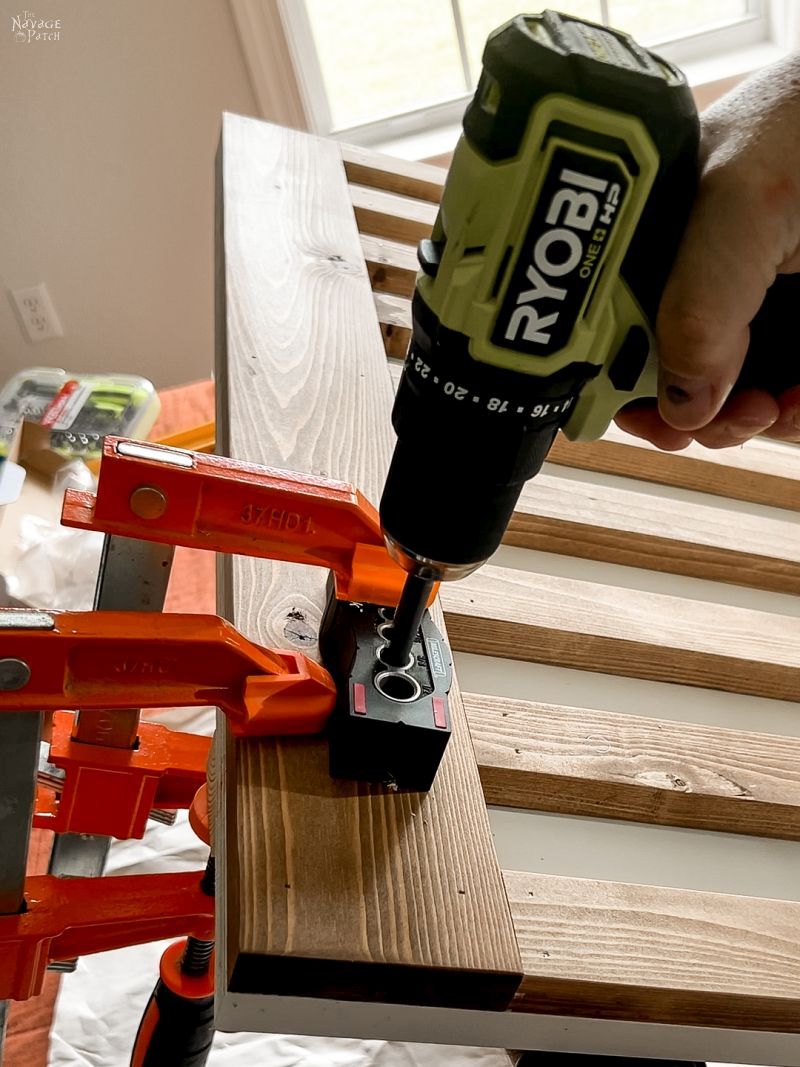
Step 3 – Pre-drill the necessary holes
I laid the track on the header board and marked where the 4 mounting holes would be. I then pre-drilled those with a 1/4 inch bit.
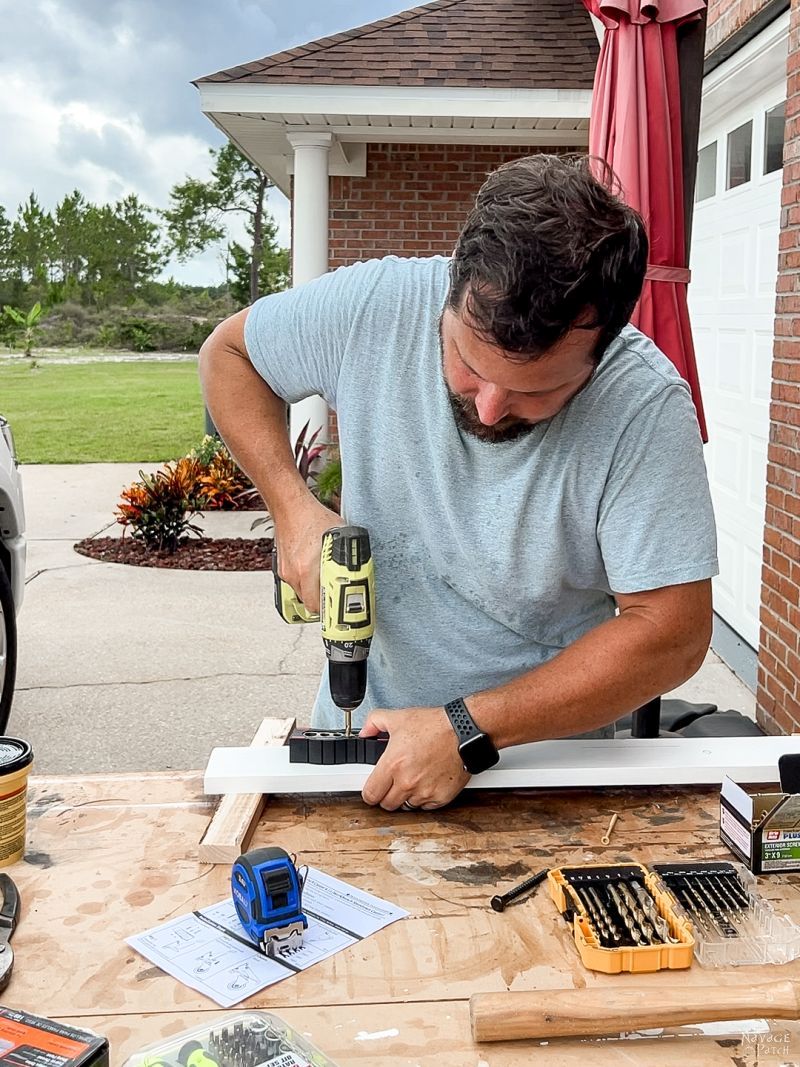
Next, I pre-drilled holes for the header board mounting screws.
To keep these screw holes straight, I used my Drill Block. It’s an inexpensive but super useful tool to have on hand.
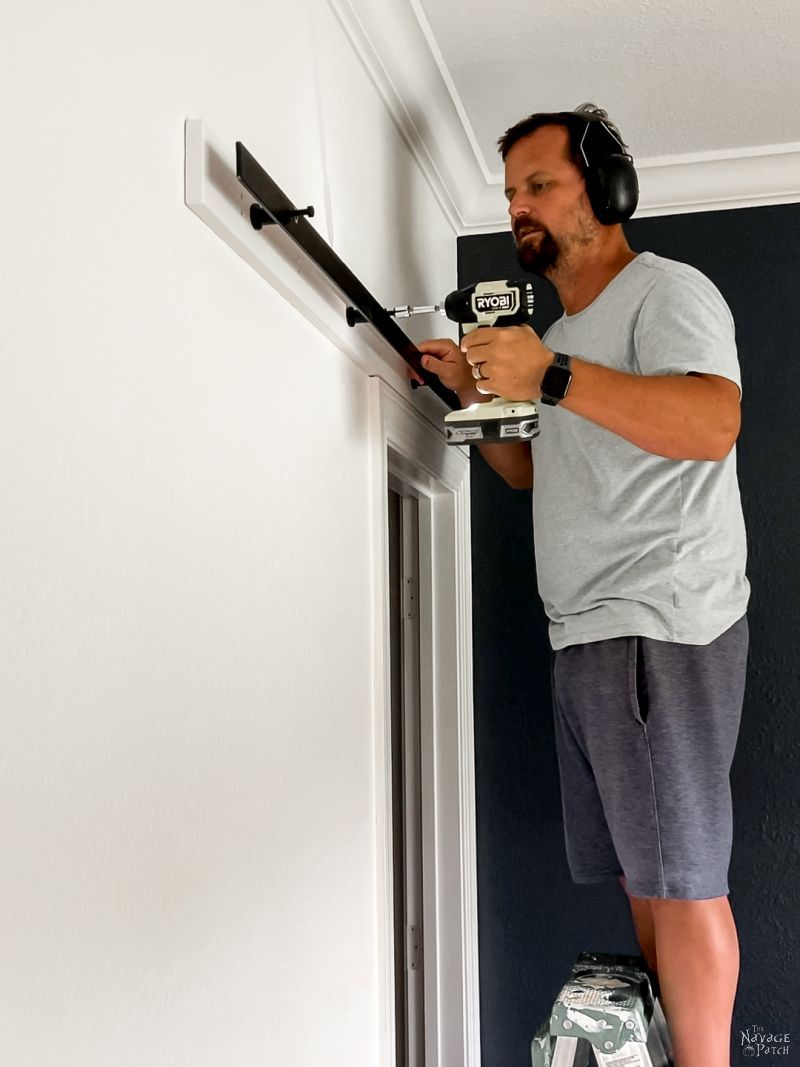
Step 4 – Install the header board and/or track
I installed the header board according to the specs given with the DIY sliding barn door hardware kit.

Next, I installed the track onto the header board.
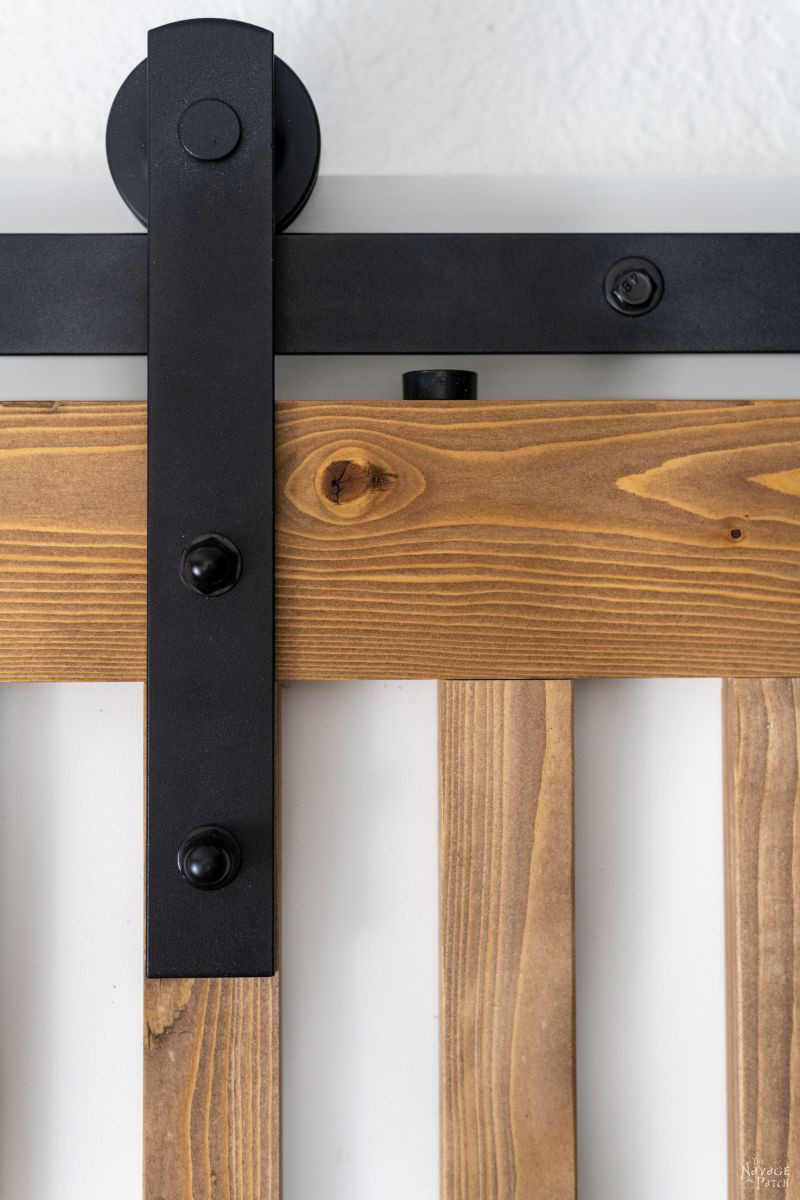
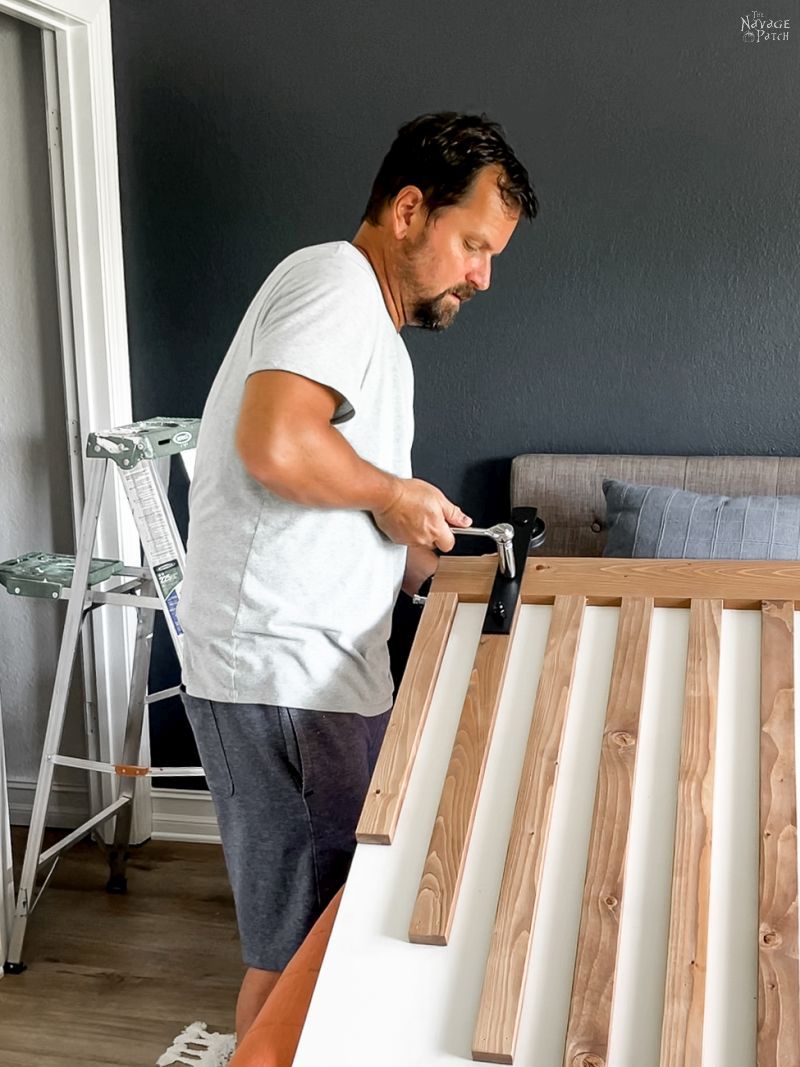
Step 5 – Bolt the wheels onto the sliding barn door
With the track installed, I marked the bolt holes on the wheel assembly.

I clamped the Drill Block onto the sliding barn door.
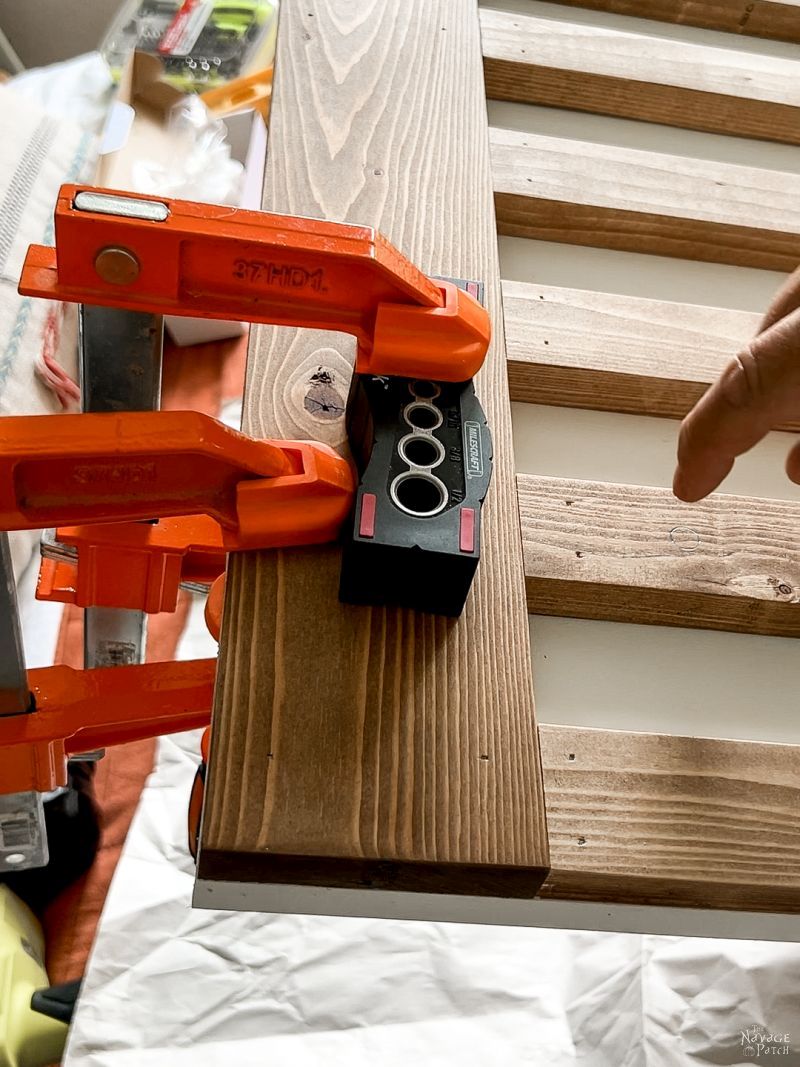
To save the drill bit from tearing out the back of the door, I clamped a piece of scrap wood where the bit would be exiting.
I drilled the bolt holes with a 3/8 inch bit.
Then I secured the wheels to the sliding barn door with two socket wrenches.
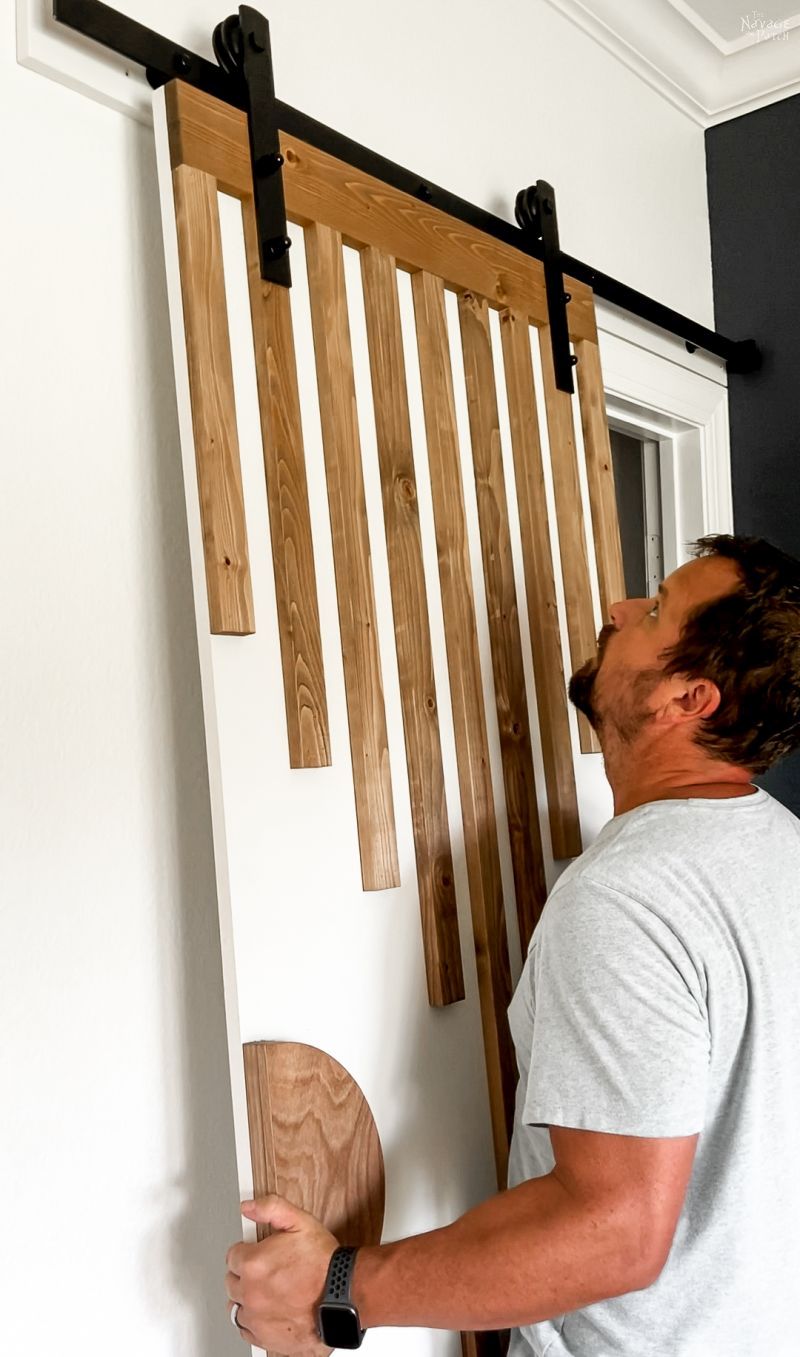
Step 6 – Hang the door
And finally, I hung our beautiful new modern barn door on its track.
One step I skipped in the installation process is the bottom track for stability. Since that requires drilling into the floor, I decided against it. I just installed the LVP in this room, and I have no intention of destroying it with screws. Since it’s a light-use door (it’ll mostly be open when Baris is staying with us and always closed when he’s away at school), we don’t mind that it sways a bit.
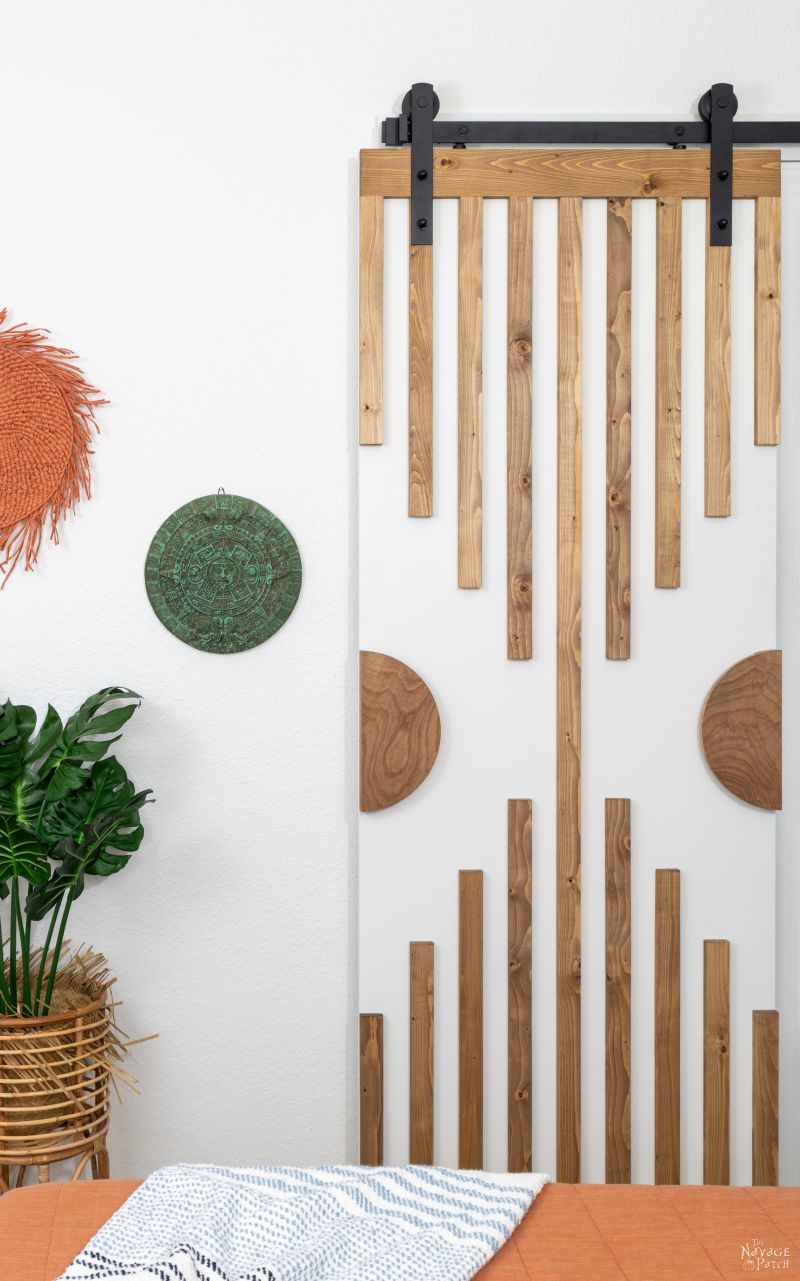
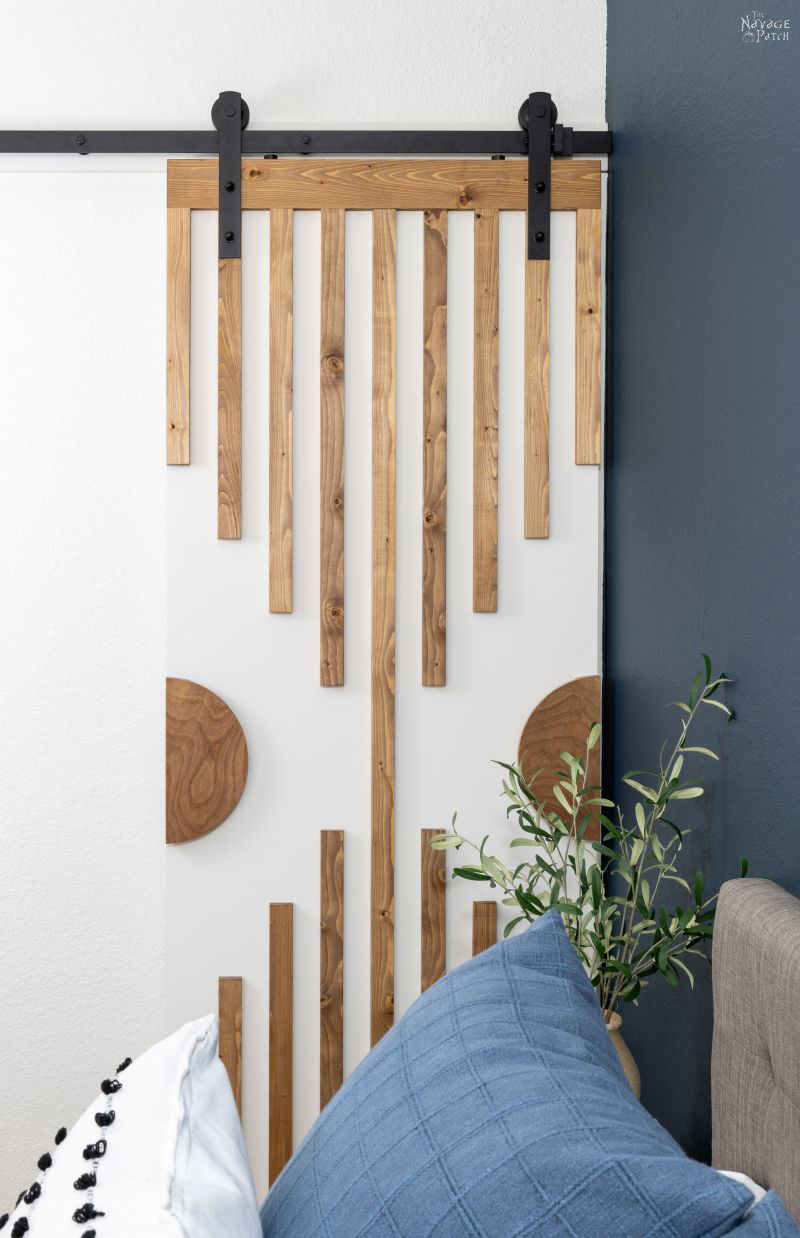
So that was a fun build, wasn’t it? Let’s have a peek at the finished product!


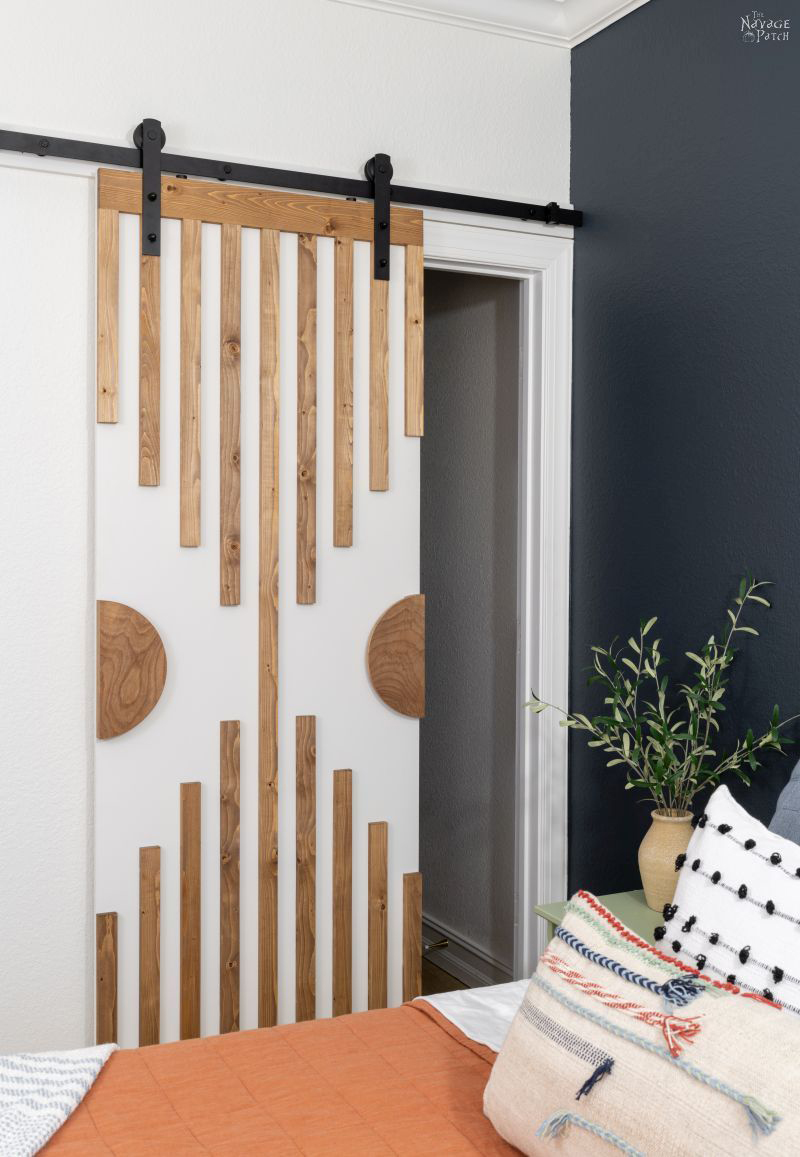


Wow, that is a modern barn door! I love it! Nice job. I love your posts, following all the updates you are doing to your home.
Thank you, Jill! It’s good to have you on the journey with us! 🙂
Wow! This would be my kind of style! I love everything about this door and wish you had paid me a visit here in Canada when we were putting in our four sliding barn doors! Good work, (as always), Greg! I wish I had your imagination. Your wife is one lucky girl!
Thank you so much, Colleen! I’m the lucky one here! 🙂
Wow! Nice job! Your son’s room is shaping up nicely. Always fun to read your posts — I learn something new each time. With all the fans I see in the background, the Florida sun must be brutal. It’s been really hot here too — but I’m sure your neck of the woods is much more steamy. Hang in there!
Thanks, Michael! Oh, yeah it’s pretty hot here, but weirdly, I’m getting used to it. It was 103 yesterday, but I would have sworn it was only 95! 🙂
I’ve just realized why I’ve always hated barn doors … because they look like they belong in a barn! Like you, my style is eclectic, but the “country” look is just seriously not my thing, so when I saw your Instagram post, I was fascinated. This is a gorgeous version of a very practical application. Kudos on another fantastic creation!
Thank you so much, Nancy! I knew there had to be others out there who weren’t gaga for all things farmhouse!
Lovely job Greg. Could this be done with an external door? We are building an outdoor hot tub room and a sliding door would save on room as it is not going to be that big (in the UK we don’t have the yard space you have in America ). Just a thought though. 🙂
It sure could! The inspiration for these door comes from actual barns. I’d not use plywood though if it’s going to be outside. Maybe something a little more weather-friendly.
Okay, not being catty or snarky, but I never understand why you’d call it a sliding barn door if it doesn’t look like a barn door. Isn’t it just a sliding door? Or do people call it that because of the hardware? Whatever you call it, it’s very nice and as usual you did a great job. Just not my style … I’ll take an actual barn door any time. But then I’m a westerner trapped in the east by an accident of birth. My cowboy boots and hat just wouldn’t be at home in a room with a door like that. But for your home, I think it’s fantastic!
It’s actually a great question, Ann, and it reveals a little something about the nature of blogging. You are right, of course. It should just be “sliding door.” But the more common term, especially among those searching on Google, is “sliding barn door” or even just “barn door.” These are called keywords, and they are the lifeblood of Google and the websites and bloggers that must keep the Google gods happy. This is why you’ll see so many references to sliding barn doors and modern barn doors etc in the post. I need to have those keywords in their so the google gods look upon my post favorably and hopefully show it high up in the search results when someone Googles those terms. Ah, the things we bloggers do for page views!
I just installed my first barn door as well. I also have LVP. My door is over the laundry area, so it’ll get some use. I have the same LVP conundrum and refuse to drill into it. I was thinking of command stripping the guide in place on the floor. Otherwise, I was going to check into wall mounted guides, but with the quarter round at the baseboard for the LVP, I don’t think that will work. Your door is gorgeous by the way.
You could try some extreme outdoor double-sided tape. But my worry with that stuff is it’s so sticky, it might rip the LVP out before letting go.
I think this is fantastic! The idea of the barn door can be far more versatile than I think people give it credit for, just like you’ve done with yours here, there’s a wide range of ways they can be styled. Love the wooden slats, love the door pulls, love the contrasting stain and paint. A great job!
Thanks, Jay! We’re very happy with how that door turned out. I’m sure Handan will want another somewhere else!
This is such a fantastic guide! I love the design ideas and the step-by-step instructions make it feel so doable. Can’t wait to try building my own sliding barn door! Thanks for sharing!