DIY Mudroom Organizer
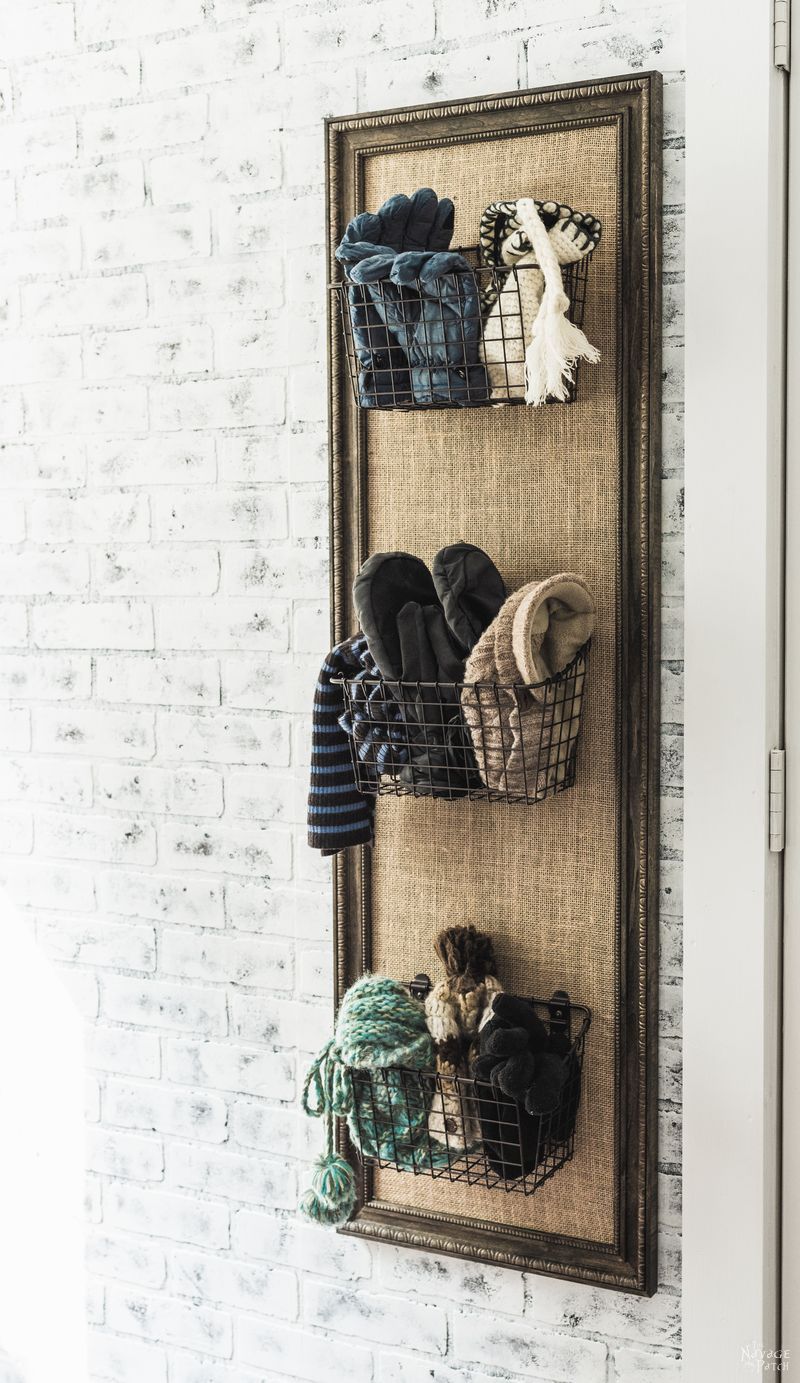
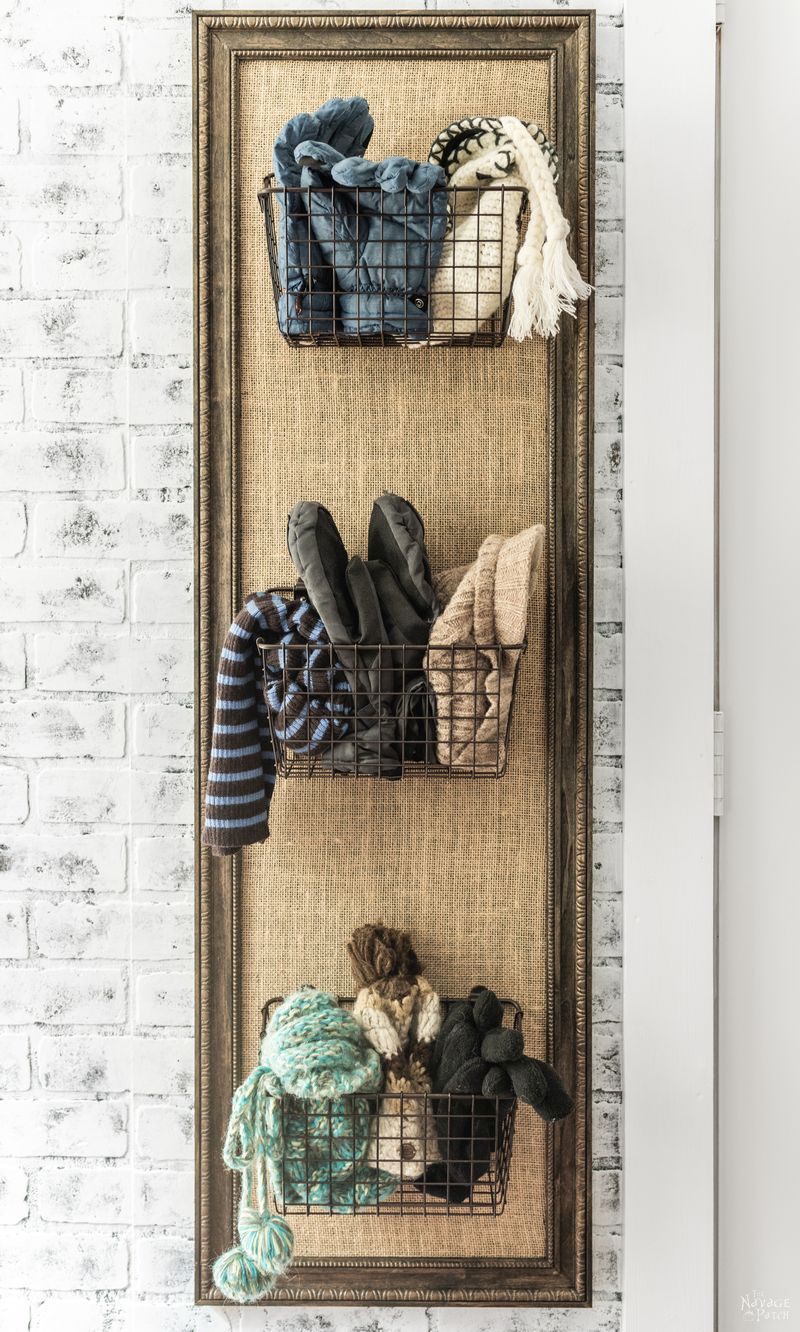
This DIY Mudroom Organizer is the perfect solution for untidy hats and gloves. It’s great for small spaces, and it’s renter-friendly, too!
It’s no secret that Handan loves frames.
She loves buying old frames at tag sales and from thrift stores. She loves finding ornate frames on Craigslist and scavenging them from the dump. Each frame has a story, and each takes up a piece of real estate in my basement.
We have frames within frames on top of frames next to frames.
They’ve started to come out of the wazoo, and that’s never a good place to find a frame!
So when she told me of her latest idea for a DIY mudroom organizer – essentially 3 wire baskets mounted to a framed burlap-covered board – I naturally assumed we’d pluck a frame from our vast underground reserve and go from there.
I naturally assumed wrong.
None of those frames would do. She wanted me to make one for the mudroom organizer.
It was an honor, really. She chose my *ahem* craftsmanship over all the masterful pieces in our basement. I felt pretty special.
Or it could be, you know, that we didn’t have the size she wanted.
Either way, we went to Home Depot to pick up a couple of pieces of trim so I could make my babes the best damn frame she’d ever seen!
She wanted the mudroom organizer to be about 49 inches tall and about 16 inches wide.
Before cutting the pieces to size, I first routed a recessed groove along the inner side of the trim. This is where the burlap-covered board would be seated.

Next, I cut two 49-inch pieces and two 16-inch pieces. I find it easier to cut my pieces to size before mitering.

Next I cut 45 degree miters on all ends.

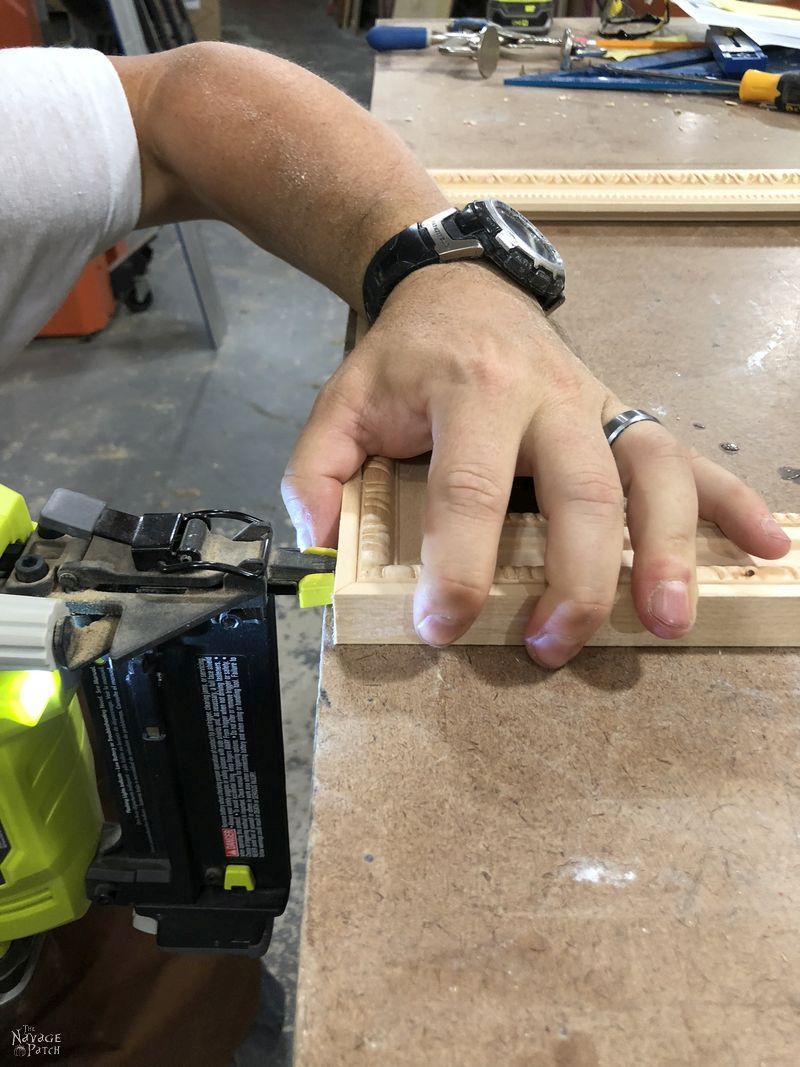
Now, for a rustic-looking piece like this, the easiest and quickest way to glue up the frame is with the help of a brad nailer. First I added a bit of wood glue to the mitered end…

I joined the two ends…

And then I fired in a couple of brad nails.


Building frames in this manner allows you to move the frame around while you’re assembling without worrying about the glued edges coming undone.
I aligned the final piece, drove in some brad nails, and the frame was finished. Total build time (not including cuts) was about 5 minutes.


Handan wanted the frame to be the same color as one I made for her about 4 years ago. That was back in the days when I was mixing stains like a mad chemist. I couldn’t be satisfied with what came out of the can. Oh, no. I had to be pouring and mixing and stirring…
Fortunately, I remember the exact mixture for that frame, as it was my go-to blend back then: 50/50 Minwax Jacobean and Minwax Ebony.


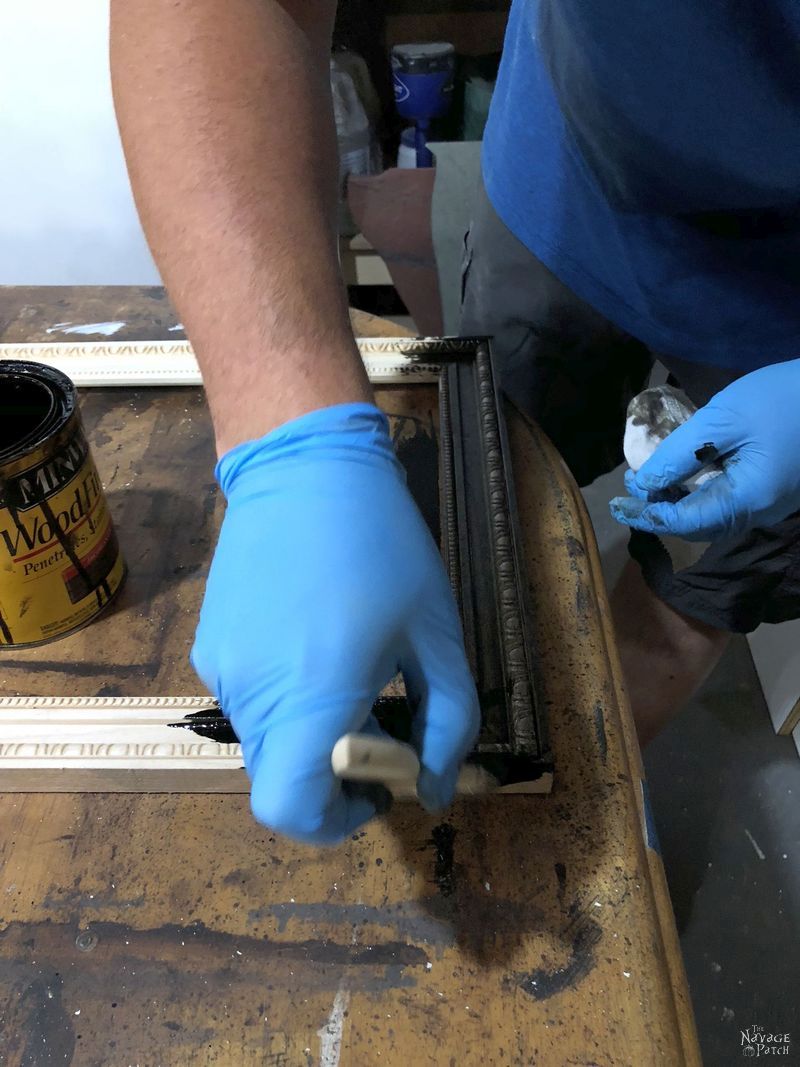
I started staining with a rag, but with all the little raised ornate bits on the frame, I switched over to a chip brush. Staining with a brush it much easier for projects like this.

Brush it on, and wipe it off.

I set the frame aside to dry and cut a piece of 1/4 inch plywood for the backing. Handan is always making fun of my RBF (Resting Bitch Face) when I’m working. What can I say? It’s been stated that those of us blessed with RBF have a stronger sense of self-awareness and a better ability to communicate than all the Guy Smileys and Grinning Glendas.

So even though I look pissed off, in my head I’m just singing a song and having a grand old time!
And look, here’s a huge smile to prove it!

We found that burlap looks better when covering a black background, so I took the plywood outside and gave it a good dose of black spray paint and RBF.
Yes, Handan made fun of my RBF out there, too. This is the least Resting Bitch Face-y of the 10 pictures she took while I painted. Poor me.

When the paint had dried, Handan wrapped the plywood with burlap and stapled it on the back. She did this literally right at my feet, but I didn’t take pictures as I was distracted by a dry martini in my hand and an old episode of Miami Vice on TV.
Here’s the result. Backside Bitchface.

Frontside Puckerface.

I secured the burlap-covered board in place with a Logan Point Driver. This is an indispensable tool for all sorts of frame-oriented DIYs.

The next step of our DIY mudroom organizer was to attach the baskets, a simple enough task with the provided screws.
And, of course you can tell that Handan attached the baskets, as there are no pictures of the process.
Mmmmm hmmmmm – you guessed it. Martini and Miami Vice. It’s a potent combination, folks.
Here’s the thing, though. The screws were meant to be driven into a wall, not into a 1/4 piece of plywood, so they were all sticking out of the back.

Don’t worry! Martini Man was on the case! (after a good night of sleep and some coffee, that is)
I first just snipped off the ends…

But that still left too much sticking out. If I scratched Handan’s beloved faux brick wall, she’d string me up by my big toes and flog me with a wet noodle. I took the extra precaution of grinding off the nubs with a Dremel.

Our mudroom organizer was now finished. All the remained was to hang it. Instead of the traditional nails-in-the-wall approach, Handan opted for a different technique. Since she is prone to changes of heart, and since she didn’t want her beautiful faux brick wall looking like Swiss cheese, she decided that we would use Command Strips to hang the organizer. They are easy to apply, easy to remove, and they can hold more than enough weight for the mudroom organizer.

This also got us thinking about a comment on our DIY Pipe Shelves post from Jana, who wrote:
Dang! So clever and so simple even THIS “stupid” could do it! Alas, I live in an apartment. Somehow don’t think my property management people would appreciate the simple beauty!
If you ever come up with things people can do in apartments that are non permanent, you would double your audience! Though I love to look and dream…..
Well, here’s the first in hopefully many more renter-friendly solutions that work equally well for the homeowner. Jana, this one’s for you!
Once I had applied 6 Command Picture and Frame Hanging Strips to the back, I used a level and stuck it on the wall.

Press hard!

Press harder!

More pressing!

And we’re done! Let’s have a gander…

Of course, in a few short months, it’s going to look more like this…


We love it when you share our posts on Facebook and Pinterest!


I do need a small mothering saw!!!
Husband going on out of state golfing guy thing, next month…….hummm and I do need ….baskets to put grandchildren ‘s coats and stuff in!!!! My daughter and son-in-law are moving in down the street in Nov.!
I can see……. I really need this…. and the saw!!!! I have a plan!!!
Carrie
Alright! Get the saw! Get the wood! Start sawing! Can’t wait to see your creation!
Greg, that is awesome! Good idea, Handan! Question: When it comes time to remove it, how are you going to get to the Command strips’ little pull-tab, to remove it gently, without pulling it from the wall, possibly damaging her precious faux-brick finish? (I’m not trying to be snarky, I truly want to know! – Good thing you can’t see MY RBF!!)
Ahhhh, I didn’t explain myself clearly in the post. These Command Strips are two-part VELCRO strips! The two pieces were already stuck together in the photos before I mounted it on the wall. To release the velcro, you just gently pull outwards. If you then want to remove the strip form the wall, you pull downwards on the tab, just like the regular Command Strip. The velcro command strips are awesome, Terra – you’ll love them!
OKAY!! Whew! That makes more sense!! I have used a LOT of Command strips, but not the Velcro. Good idea! (I really love the plastic knobs that look like “crystal”! I make a lot of bags, and was looking for some way to hang them in the closet, so they are accessible. My sister used the crystal knobs in her closet for jewelry, and they looked great there, too, but it gave me the idea for my bags! Command to the rescue, again!
Handan, we are kindred spirits! When we moved to Vermont, I had to bring my daughter for school while my husband stayed in Colorado to finish an acting gig. That left him and my sons to load the truck and clear the rest. I might have had a teeny (read ginormous) hoarding problem. One thing they were sure I wanted was my frames. Twelve boxes and some that wouldn’t fit in boxes. I didn’t even know I had that many!
Love the organizer and you have totally sold me on Command Strips!
Love the board/with baskets. Did not know Velcro came with commandstrips. Thank you for the beautiful decorating idea..your ideas are great.
Thank you, Shelley! 🙂
You are such a loving husband. I just love this project. I hung three baskets like this, but I did not put it on a frame like yours. I think I will be taking them down, and hanging them the same as your. I love this post. Thank you!
Thank you, Ivory! It’s easy to be a loving husband with a wife like Handan! 🙂