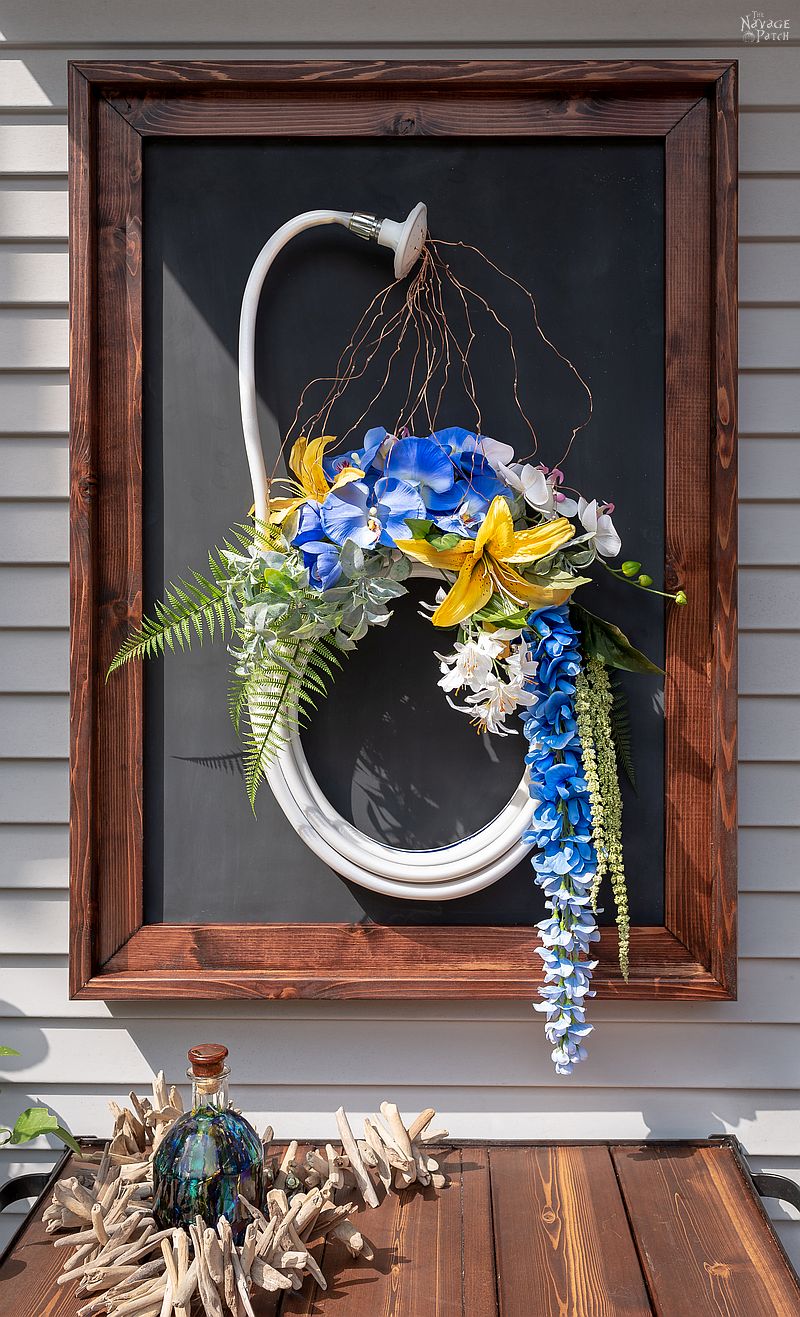
DIY Outdoor Magnetic Chalkboard
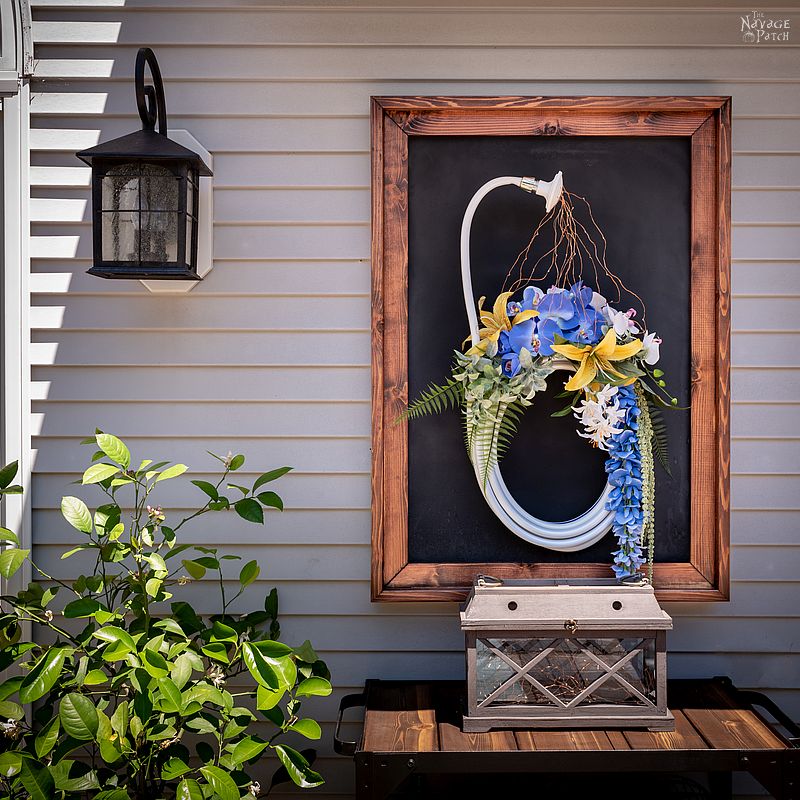
This DIY outdoor magnetic chalkboard is a great addition to any deck or patio. Hang it on your house and fill it with words or hang your favorite flowers!
Do you ever watch those nationally televised talent shows? You know, the ones with the panel of celebrity judges, one of whom is usually a cantankerous ass, and at least one is a total softy? I’ve never watched the shows as they aired, but the internet is awash in clips of the very best performances. And they are good. There is some serious talent floating around this small blue planet. But what I always think about when I see some scrawny 6-year-old belting out “Nessun Dorma” from the opera Turandot, or a woman who bootstrapped herself from the slums of Lagos to the world stage by virtue of her lithe undulations to traditional African music – performances that not only bring the house down but flood the aisle with tears – all I can think is man, I wouldn’t want to follow that act!
I mean, how do you think poor Jeremy Jenkins feels when he and his Jolly Juggling Gerbils have to follow this guy??
So it is with today’s post.
A couple of weeks ago, Handan published a post about this unbelievably beautiful thing that she created, and now I have to follow in her footsteps with a tutorial for the outdoor magnetic chalkboard that her unbelievably beautiful thing is mounted on!
This isn’t our first foray into magnetic chalk boards. Handan made her first way back in 2015 with this nifty little number, and it is still getting good use inside our house. But she’s been wanting an outdoor chalkboard mounted in a rustic frame to hang on the side of the house on our new deck – a place where she could write little chalky quotes or hang things with magnets, like the aforementioned totally awesome and incredibly gorgeous thing she made the other week. Do you get the feeling I’m trying to get you to click on the link for Handan’s previous project? Well, madam, I am! Such a beautiful thing, but hardly anyone read the post.
Poor Handan cried all night…..*sniff*
Nah, I’m just messing with you. We’ve got thicker skin than that. But seriously, go read that post or my next 5 posts will be about the finer points of watching paint dry.
Okay, let’s get on with the tutorial so you can get back to sedating your brain cells with quality talent show programs!
And you can just call me Jeremy Jenkins.

Outdoor Magnetic Chalkboard SUPPLIES LIST
Affiliate links are provided below. Full disclosure here.
- (1) 5/4 x 6 x 12ft cedar decking board (actual thickness is one inch) [2.54cm x 15cm x 366cm]
- (1) 3ft x 2ft piece of sheet metal [91.5cm x 61cm]
- (1) 3ft x 2ft piece of 1/4 inch mdf or plywood (optional – to stiffen chalkboard) [91.5cm x 61cm piece of .64 plywood]
- Router & 1/2 inch rabbeting bit [1.26cm rabbeting bit]
- Wood glue
- Brad nails & nailer
- Clamps
- (4) 4-inch flat corner braces [10cm corner braces]
- Drill
- Screws
- Stain
- Point driver

Since this is to be an outdoor chalkboard, I made the frame from cedar decking boards. The decking boards look great, and they’re not too expensive. Around here, the 12-foot board needed for this rustic frame runs about $17 at Lowe’s.
I first ripped the board into 3-inch [7.6cm] and 2-inch [5cm] strips. I then cut the 3-inch strip into two 41 1/4 inch [105cm] and two 29 1/4 inch [74.5cm] lengths. I cut the 2-inch strip into two 39 1/4 inch [99.7cm] and two 27 1/4 inch [69.2cm] lengths.
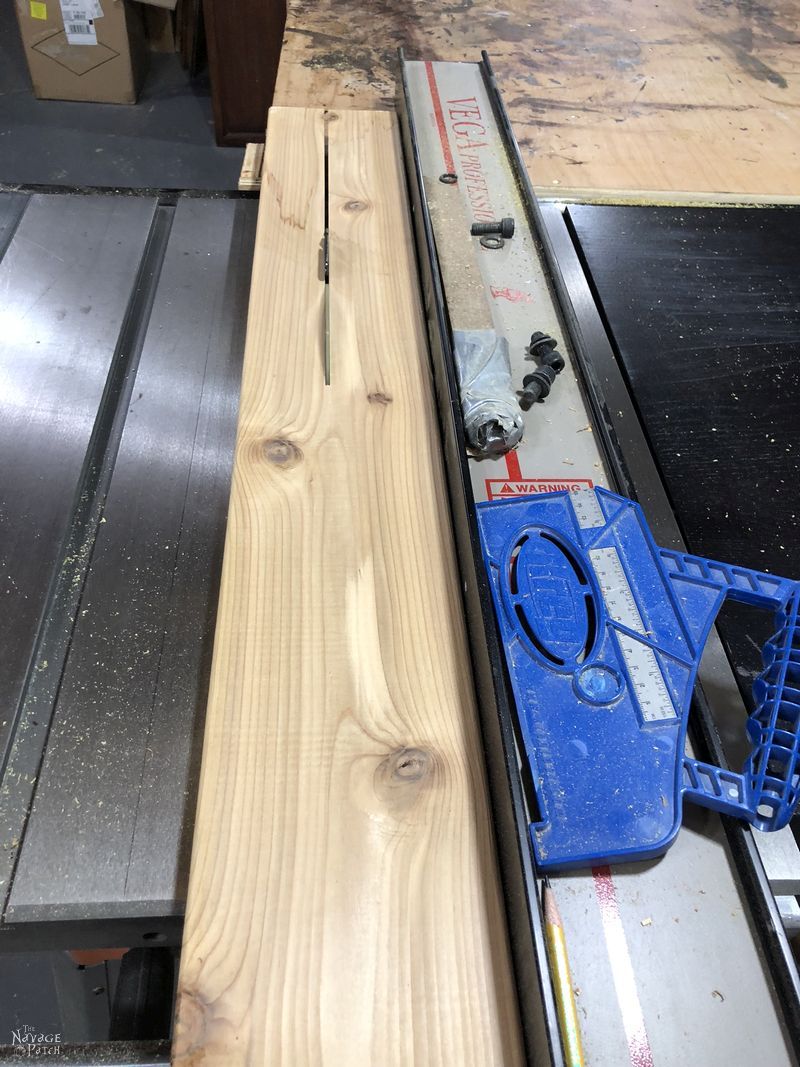
I then cut a 45 degree miter on all of the pieces. The 3-inch pieces were mitered so that when assembled, the frame would be 3 inches deep. This would be the outer frame.
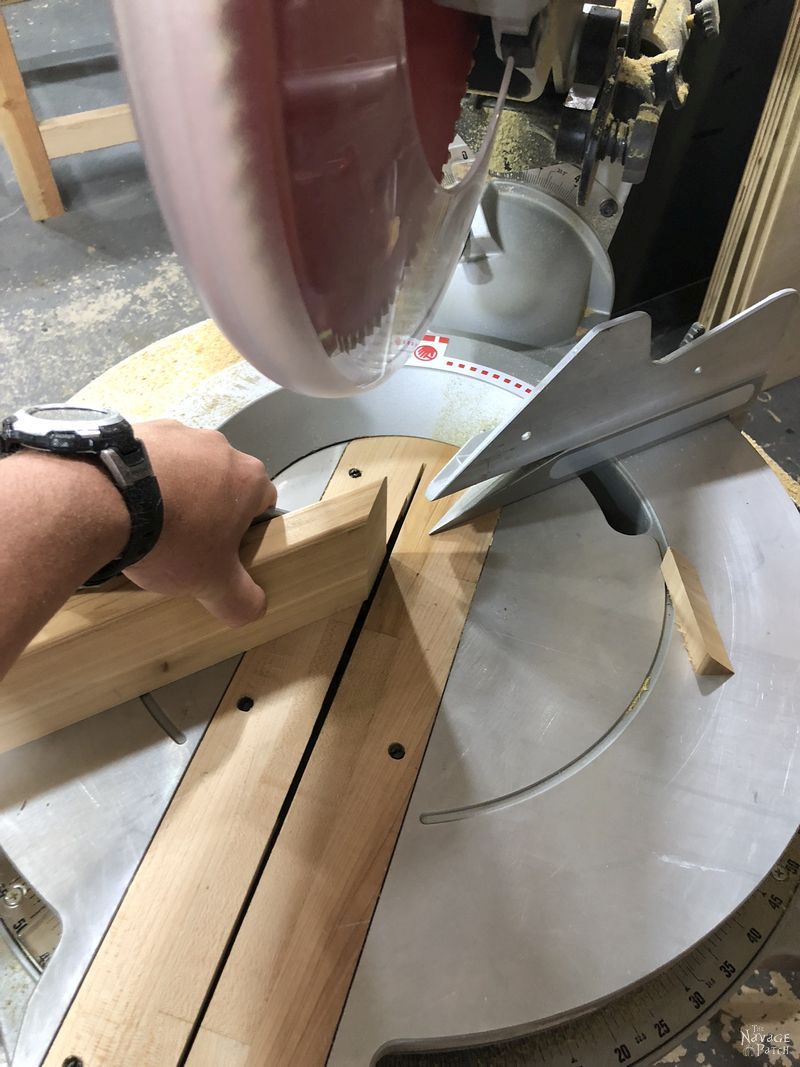
The 2-inch pieces were mitered so that when assembled, they would be wider rather than deeper. They would become the inner frame.

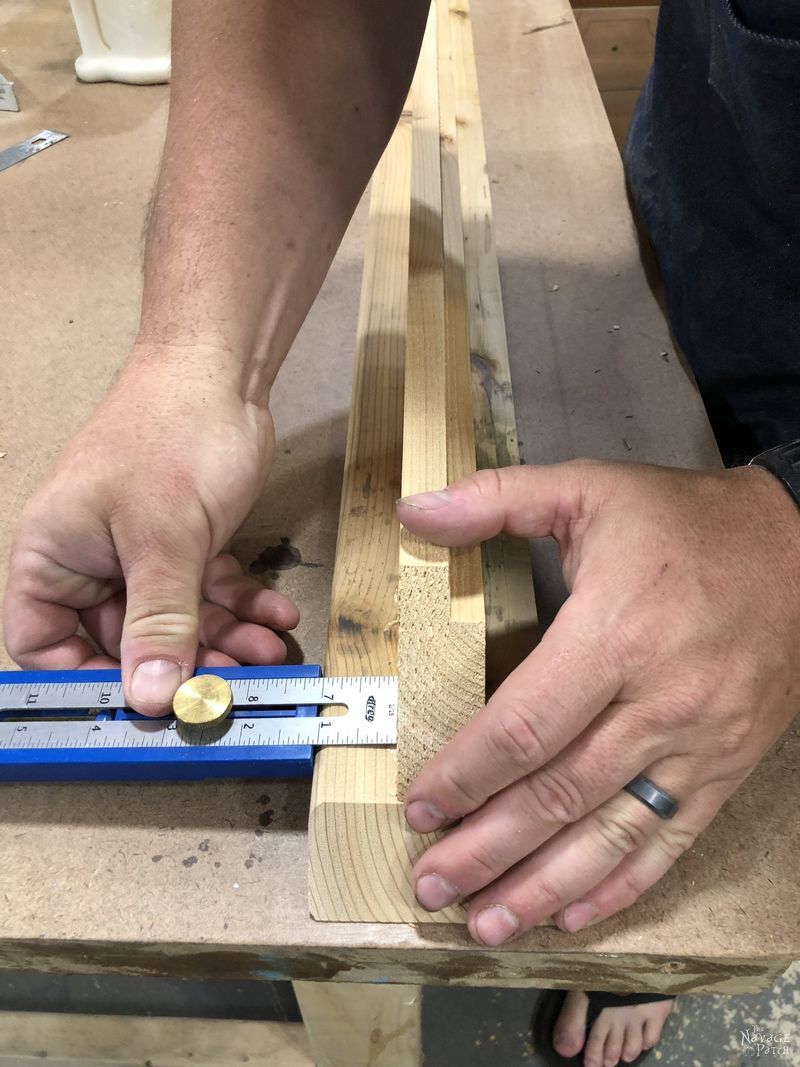
Before gluing up the frame, I routed the inner edges of the inner frame pieces with a 1/2 inch rabbeting bit. I made the groove 1/2 inch deep by 1/2 inch wide.


I wanted the inner frame to sit in the middle of the outer frame, so I set my Kreg Multi-Mark to 1 inch. I then ran a bead of glue down the outer edge of the inner frame.

I smoothed the bead with my finger…

And cleaned my finger in the traditional manner.

With the help of the Kreg Multi-Mark, I lined up the inner frame on top of the outer frame. I used my fingertips to feel that the edges were aligned.

I then check both sides with the Kreg, going back and forth until I was satisfied the inner frame was seated properly on the outer frame.
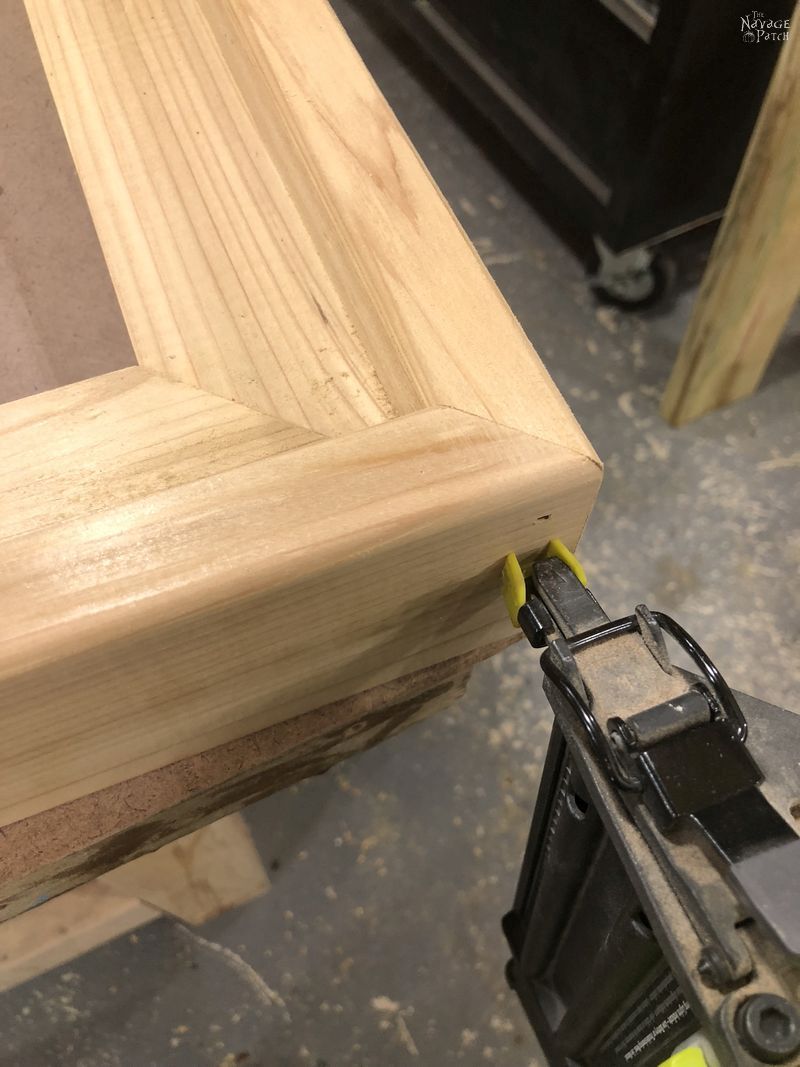
Next, I shot a couple of brad nails into the ends.

And then I clamped the two pieces in the middle.
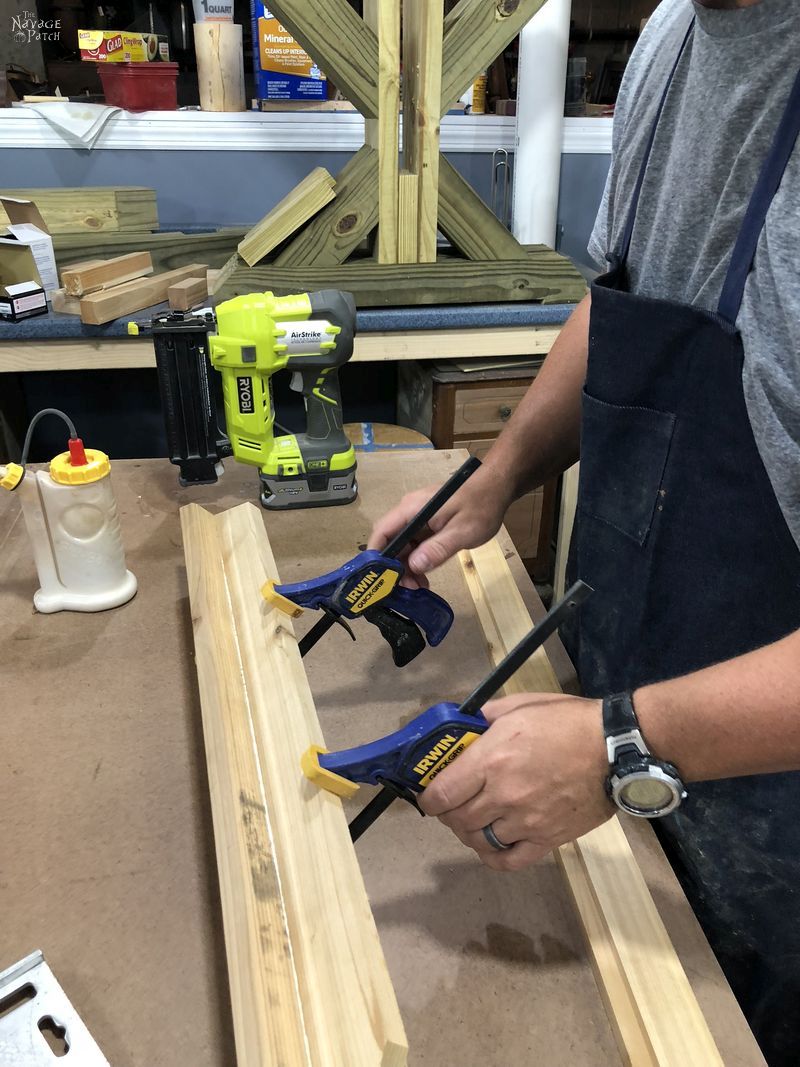
I repeated this process with all four sides of the frame, and then left the pieces to cure overnight.

The next day, I assembled the frame by applying glue to the ends and securing the corners with brad nails.
For added strength, I added corner braces to the back side of the frame. I had some straight braces on hand, so I used those, but I would recommend using “L” shaped braces, as they are specifically made for corners such as these.
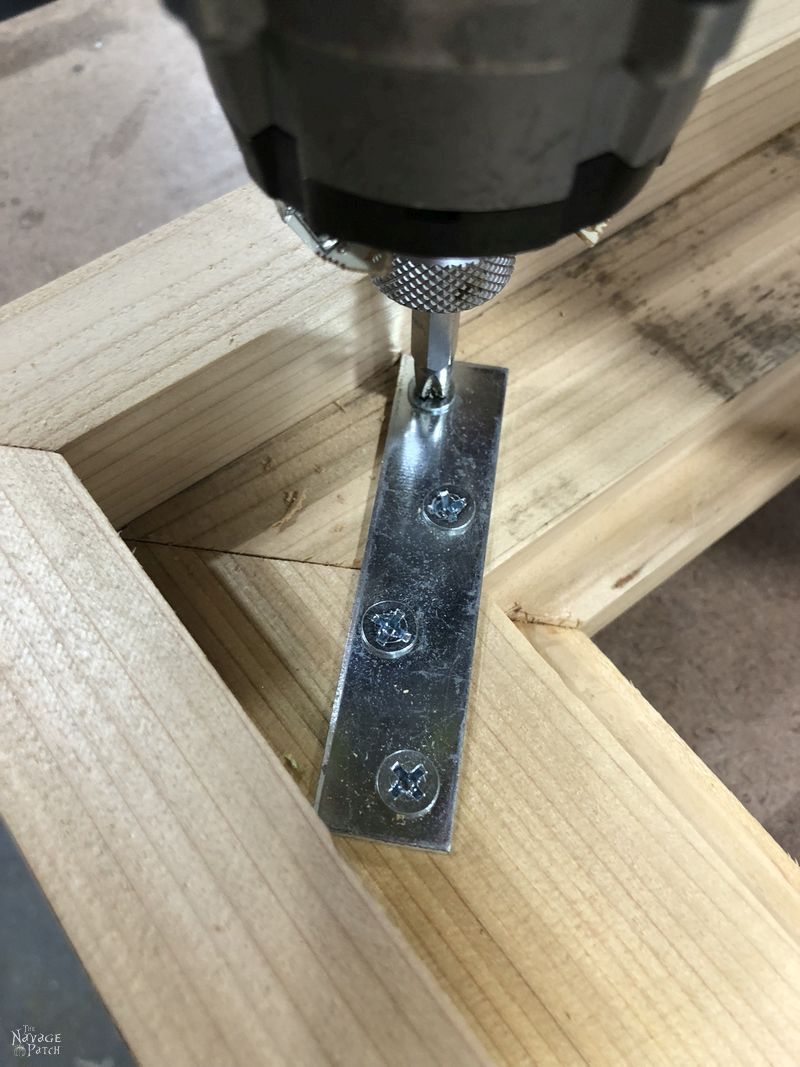
The frame was assembled and solid!

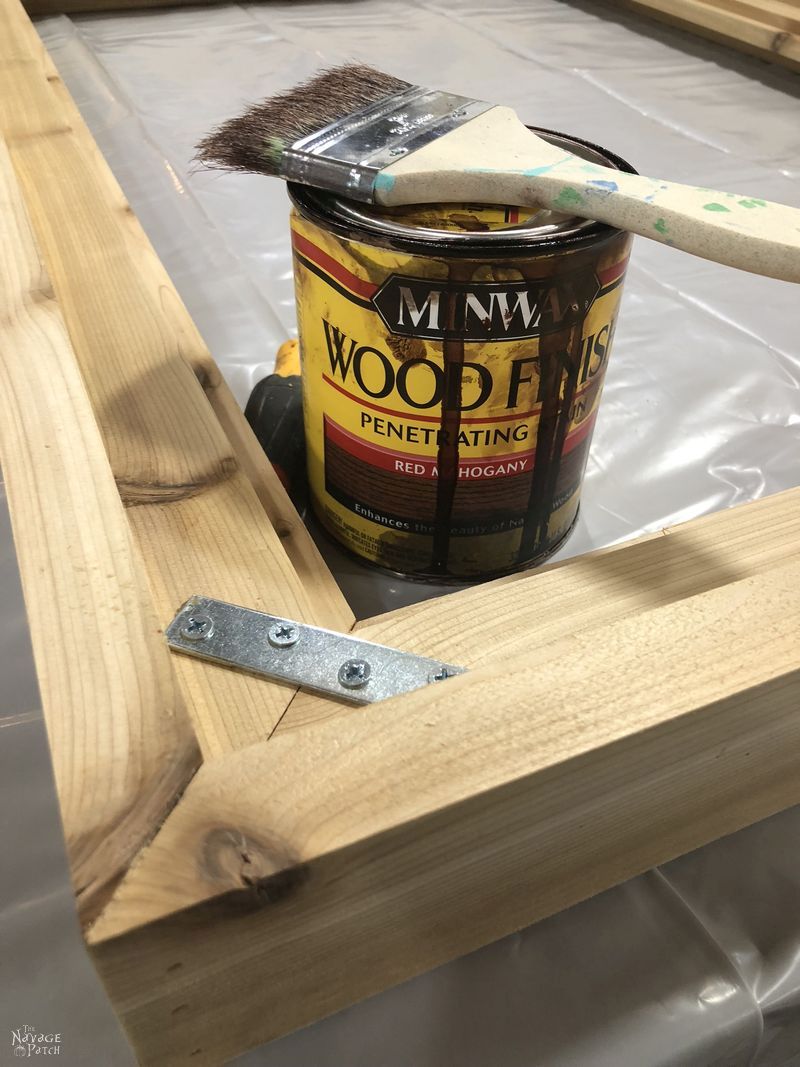
Next, I stained the rustic frame with Minwax Red Mahogany and let it dry overnight.
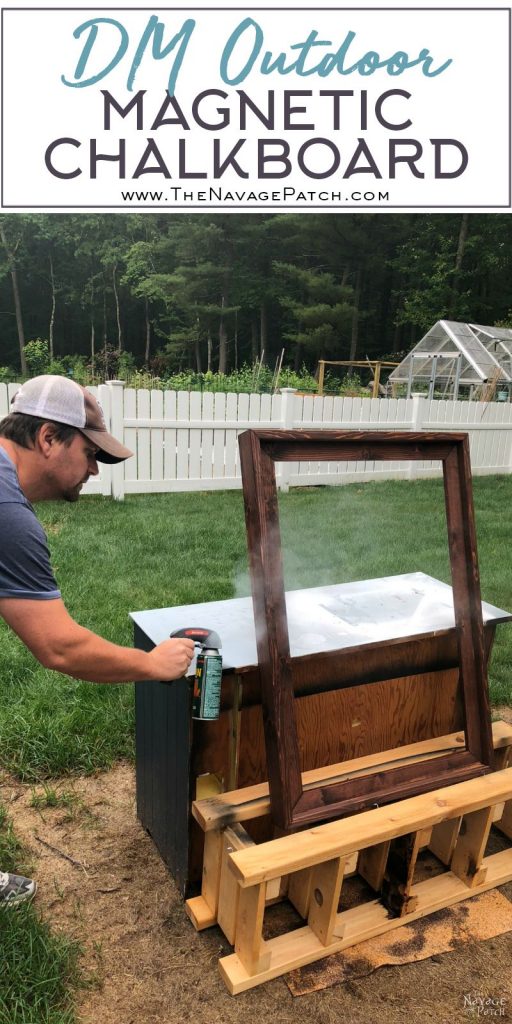
The next day, I took it outside and sprayed it with 3 coats of spar urethane.

Once the frame was completed, I turned my attention to the chalkboard. The 3ft x 2ft sheet metal I got from Home Depot would make a great magnetic chalkboard.
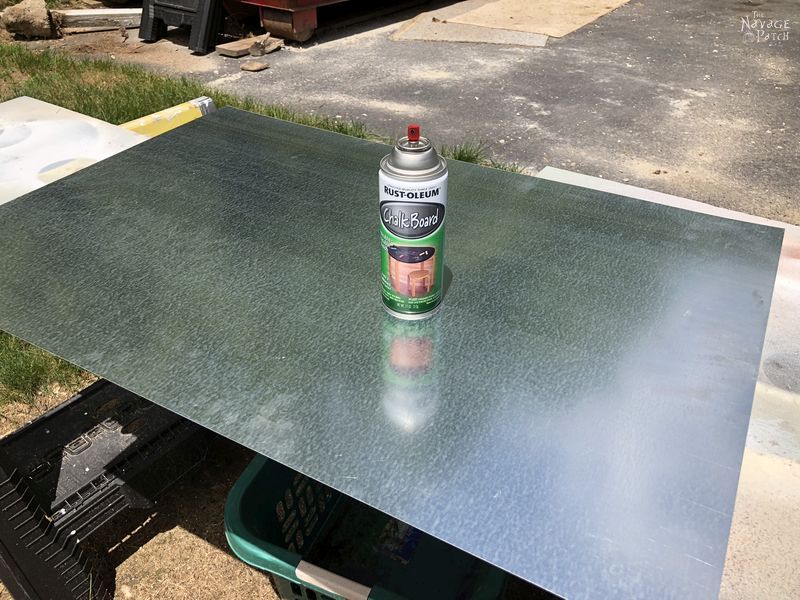
I gave it 3 coats of Rustoleum’s Chalk Board spray paint.

I let that dry for a day, and then I conditioned it a bit by rubbing on some chalk…
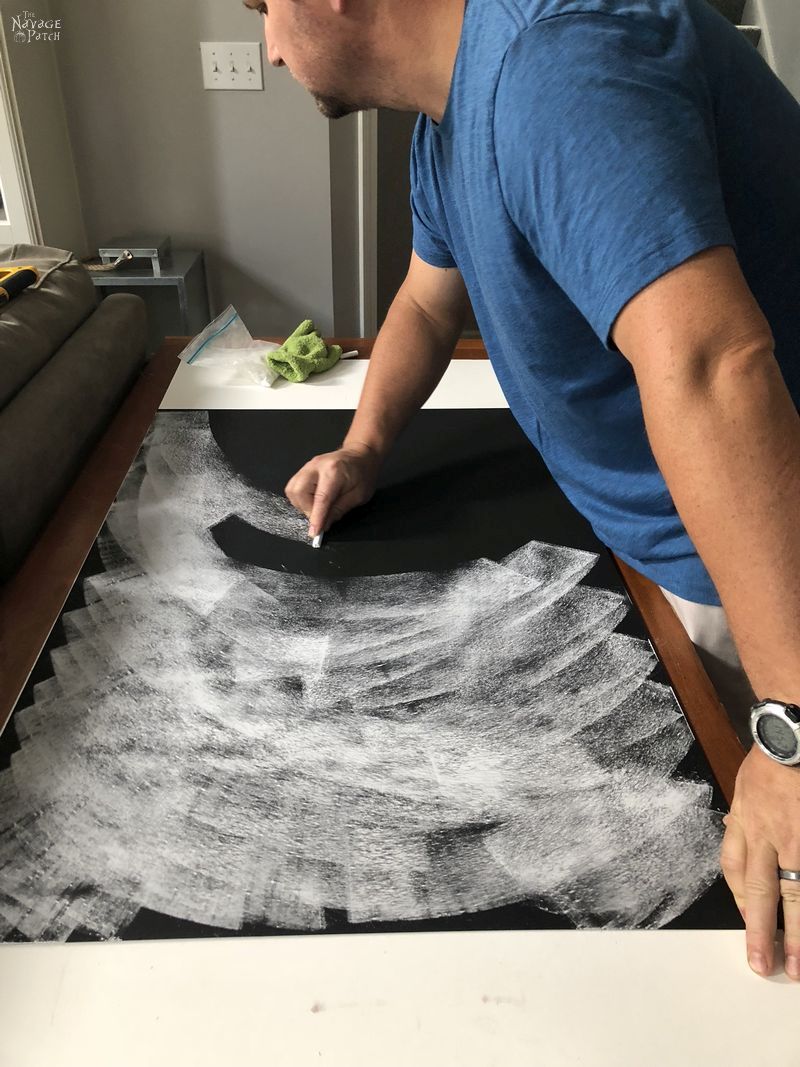
And then rubbing it in with one of Handan’s winter gloves. Bit of a tight fit.

Bend over. This won’t hurt a bit.


After I gave it a good green-glovin’, I wiped most of the chalk off with a rag.
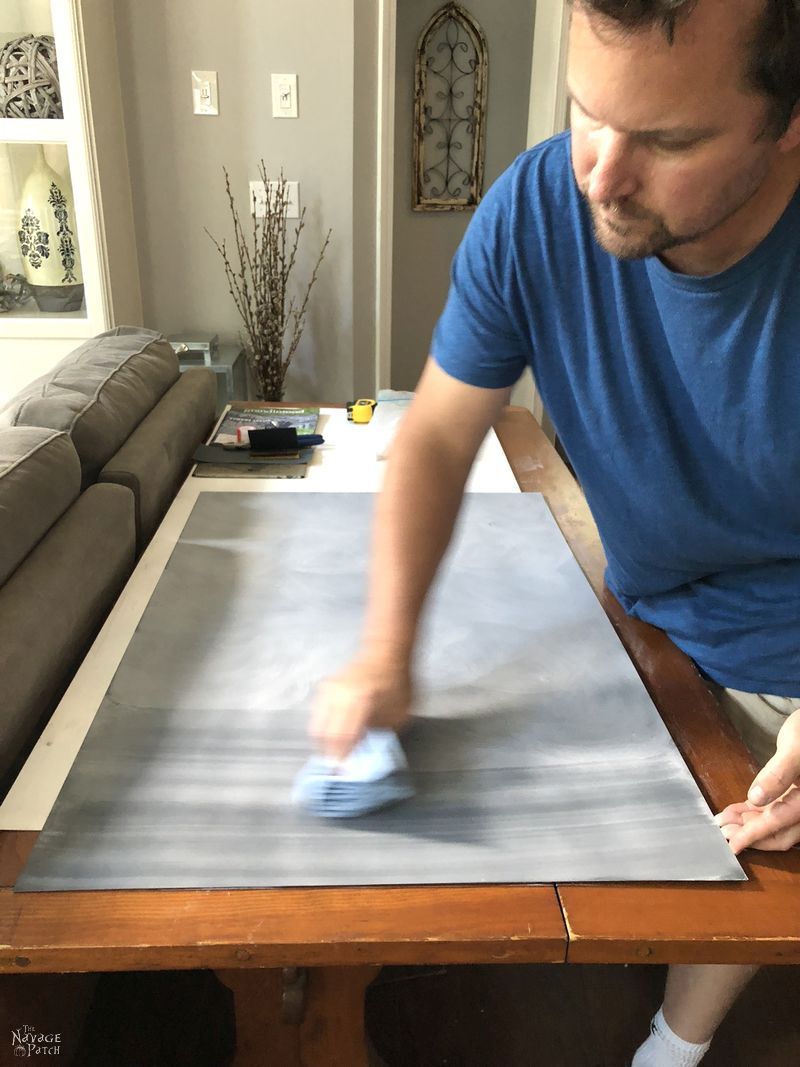
This chalk step isn’t necessary for an outdoor chalkboard like ours, especially if the board will be exposed to rain.
As a final step, I mounted the chalkboard into the frame with our Logan Dual Point Driver. I would suggest adding a support backing made from 1/4 inch plywood if you’re planning on doing a lot of writing and erasing on the board.
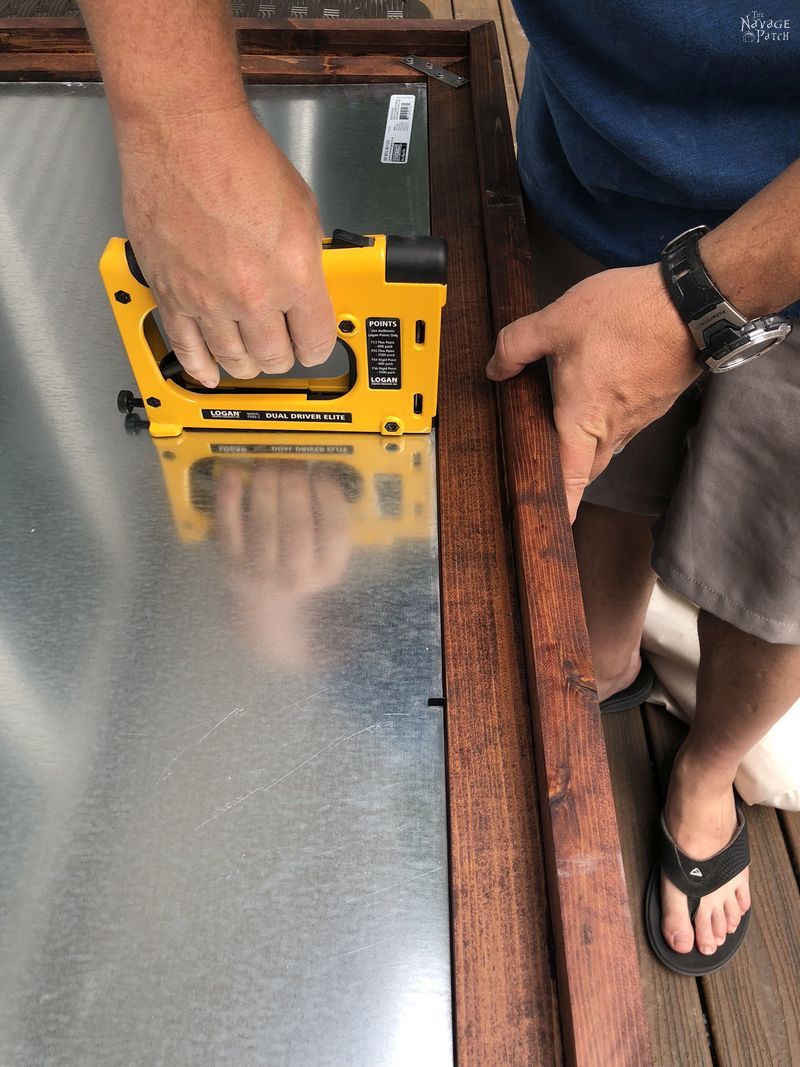
To mount the frame on our house, I drilled three 2 1/2 inch screws through the siding and into wooden sheathing beneath, leaving about an inch of the screw sticking out. The frame sits nicely on the three screws.
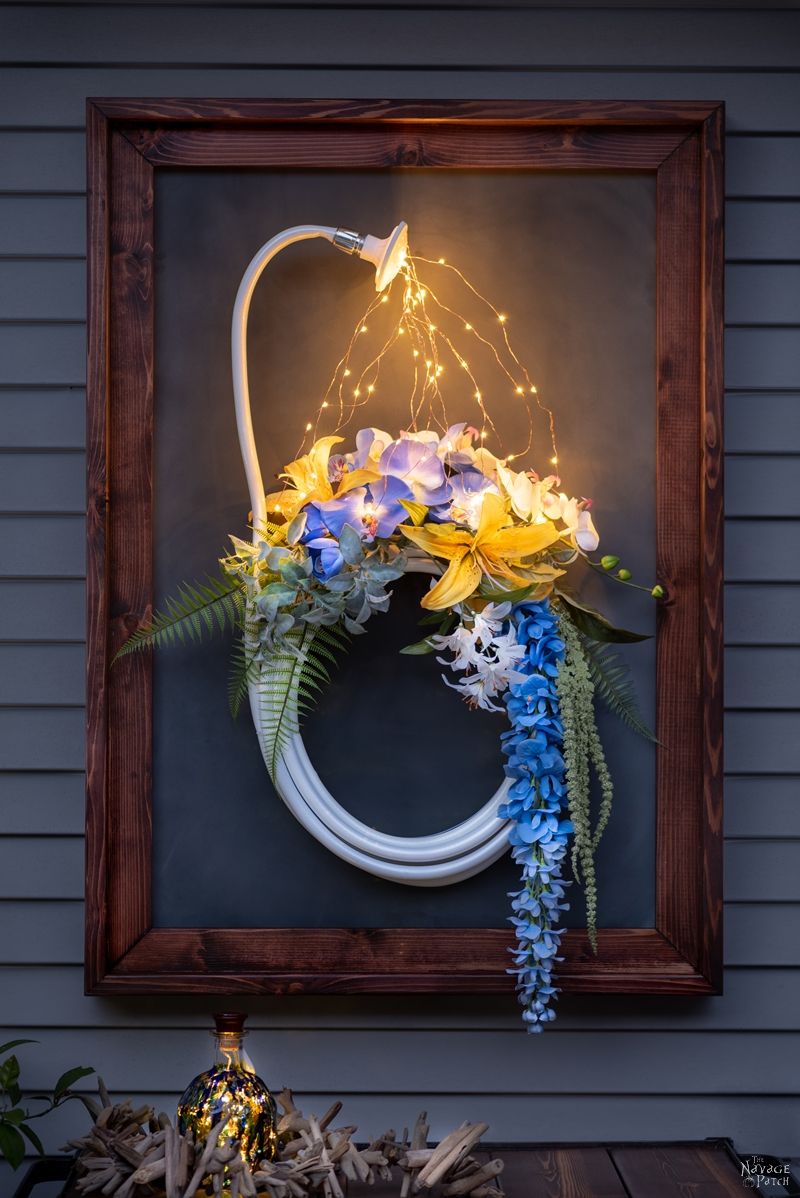
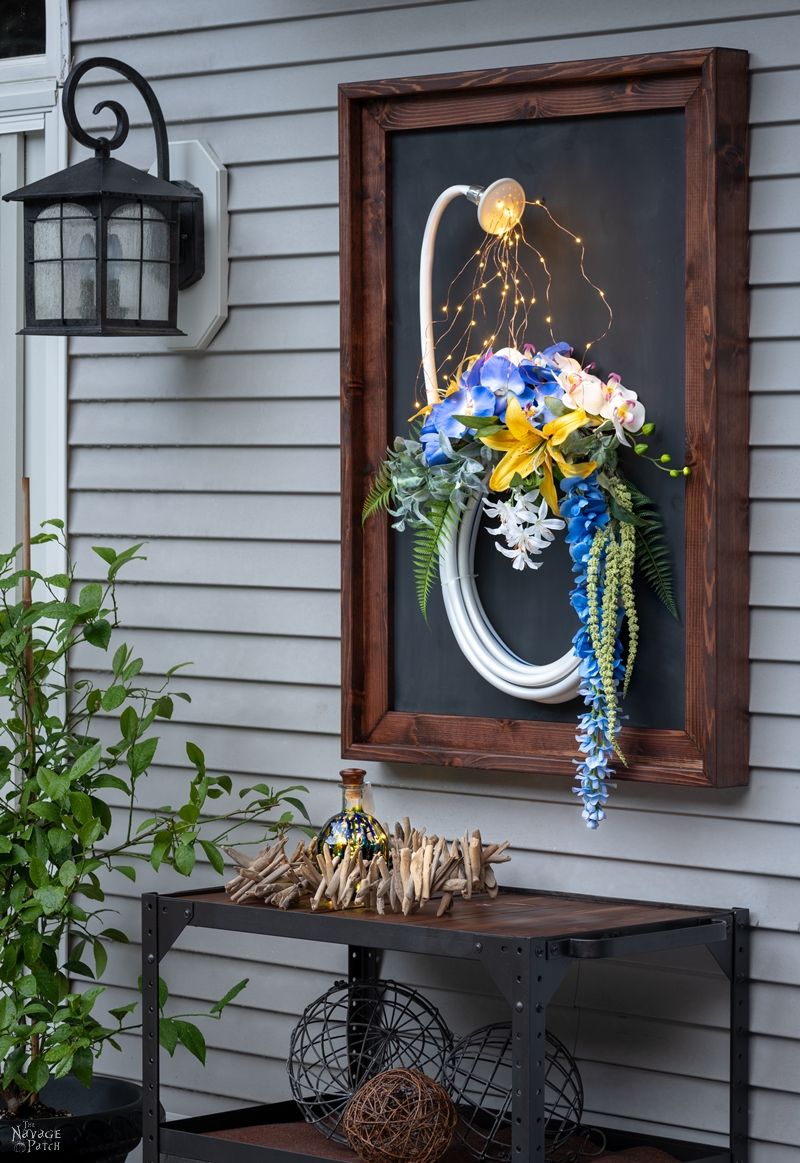
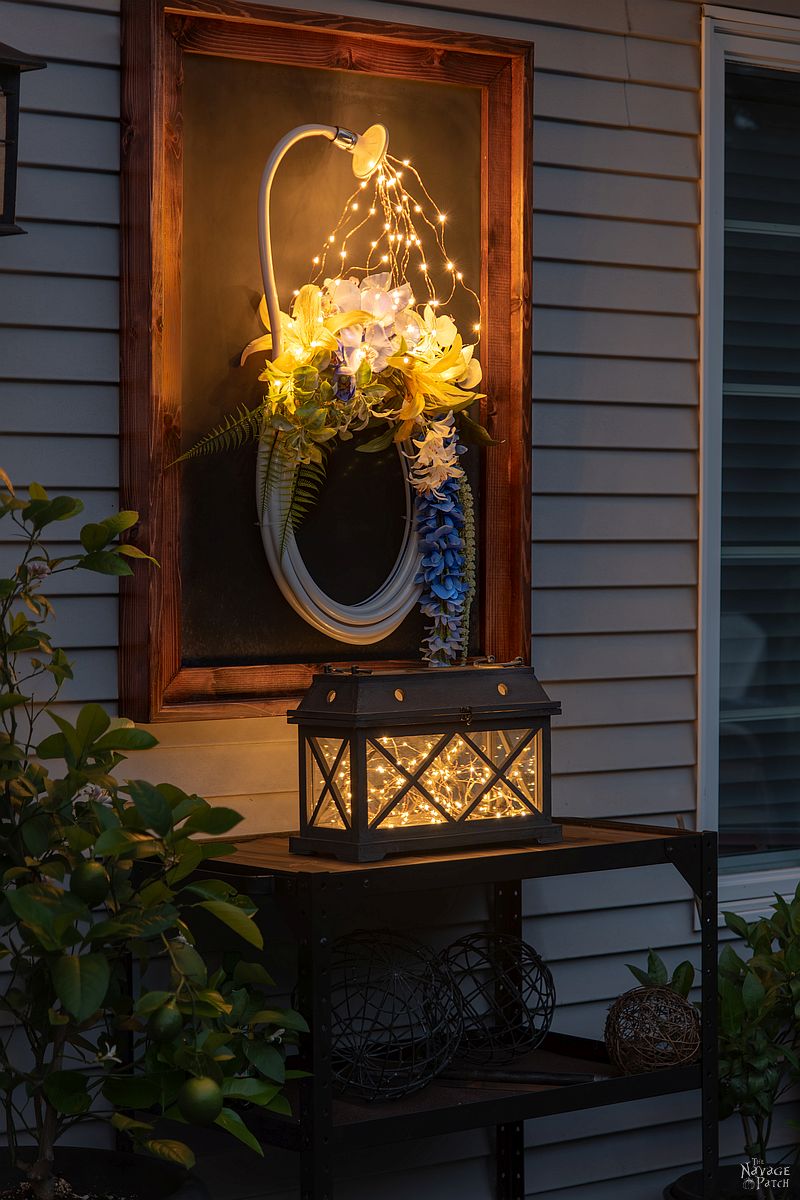
The frame is finished and hanging outside, and Handan has graced it with her awesome lighted garden hose wreath, which I’m sure you’ve read about by now, right madam? 🙂
We love it when you share our posts on Facebook and Pinterest!

Another great post and tutorial, Greg. Is her to do list ever ending? I think not. Just like mine. I enjoy your posts and have learned so much from them. Thank you! AND, I did see Handan’s beautiful creation before this post. Her visions and talents are awesome! You make quite the team!
Thank you so much, Audrey! Handan’s to-do list is an infinite loop.
Just for the record, I had already read Handan’s tutorial and I loved that garden hose light project. 🙂 This chalk/magnetic board is gorgeous!
Thank you, Claudine! 🙂
after the proctologist said to check out
Handan’s project, I went back and looked and I am sure I never got the post, your chalkboard turned out really nice xx
Thank you, Chris! I wonder why you never got that other email? Google is keeping us apart!
me, too! loved her hose-light fixture post and now this just adds more drama for the backdrop. cool, cool projects! … and thanks for sharing tutorials, too!!! you’re the duo of creativity!
Thank you, Dodie! 🙂
Say it slow, OMG, I love, love, love this , and can hardly wait for my husband to make one for us. This is to cute. Thank you!!!!!
Wow, thank you so much, Ivory! 😀
Very Cool Greg. Came out amazing.
Now, while you are sitting chilling on the Deck, Dry Martini in hand. Handan can write you a to-do list!!! Haaa Haaaaa!!!
Cheers.
Shaun
LOL, yeah, I don’t think the board is big enough for that, Shaun!!
Really nice! However, I can’t build stuff like you so I did pin Hadan’s Command center ? (and already have pinned the wreath) But you outshine everyone with your posts! So fun to read! Love y’all’s blog!
Aww, thank you, Susan! 🙂
Hi thank you for the pin just 1 thing living in South Africa lol dont know inch
Can you my be also put it in mm en cm
like you post
greetings from a cold South Africa
WIllem
Hi Willem, I will convert that post for you. Baie dankie, ek waardeur dit!
THANK YOU got it gaan dit probeer greetings to you family
Hi Greg, love that chalk board tutorial! And you alls sense of humor! Just one newbie question…. what is that gadget you’re using to spray paint? It doesn’t look like a typical spray painting gun, but looks like it would make using a spray can easier! What up? Thanks so much!!
Hi Judy, thank you so much! That handy little gadget can be found right here >>> https://amzn.to/2LPae33 <<< We have 3 or 4 of them, and they are all in constant use!
Hi ? can you tell me a little about the chalk step. I’m planning on doing two very large pieces of sheet metal to cover my walls instead of painting the walls. Any advice would be greatly appreciated 🙂
Hi Sabrina, if your sheet metal pieces are really big, it might be easier for you to use a can of chalkboard paint and a sponge roller. Give it 2 or 3 coats, then let it cure for a day or two before conditioning with chalk dust. By conditioning the board with chalk dust, you’ll prevent future writings and drawings from not erasing fully and leaving their image behind.
Thank you so much ?? so after I rub all the chalk on (condition) I just wipe it off with a damp cloth?
Use a dry cloth. If there still seems to be too much dust for your liking, switch to a new cloth and wipe again. Good luck!
Hi! What is the measurement of just the chalkboard area, excluding the frame? Thank you!
Hi Sandy, it’s 2ftx3ft