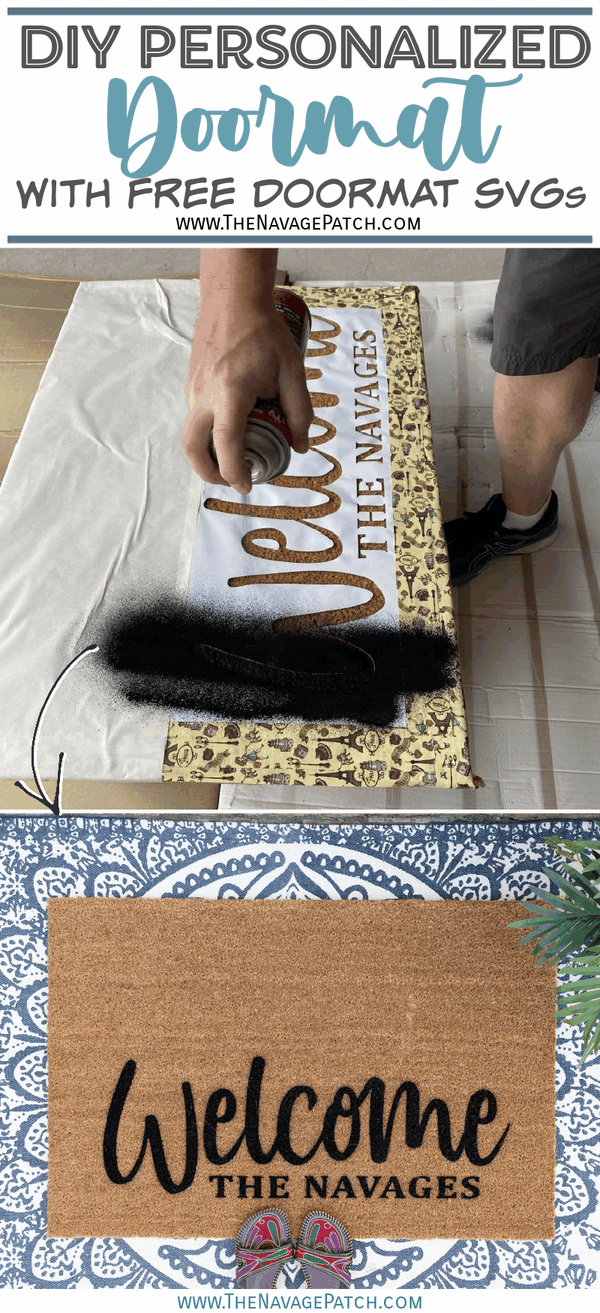
DIY Personalized Door Mat
This DIY personalized door mat makes a perfect entry to your home, and it’s a great way to spruce up your outdoor space on budget.
Alright look, I know how to spell, so don’t yap at me in the comments that it’s “doormat” and not “door mat,” okay?
It’s just that according to Big Brother Google, four times as many people search for “personalized door mat” than they do for “personalized doormat.”
Who knew?
So if the world wants to call it a door mat, who am I to tell them it’s actually “doormat?”
I’ve learned to pick my battles, madam, and I’m sure as heck not going to pick one with Google!
So, welcome to The Navage Patch! Allow me to roll out a personalized door mat for you!
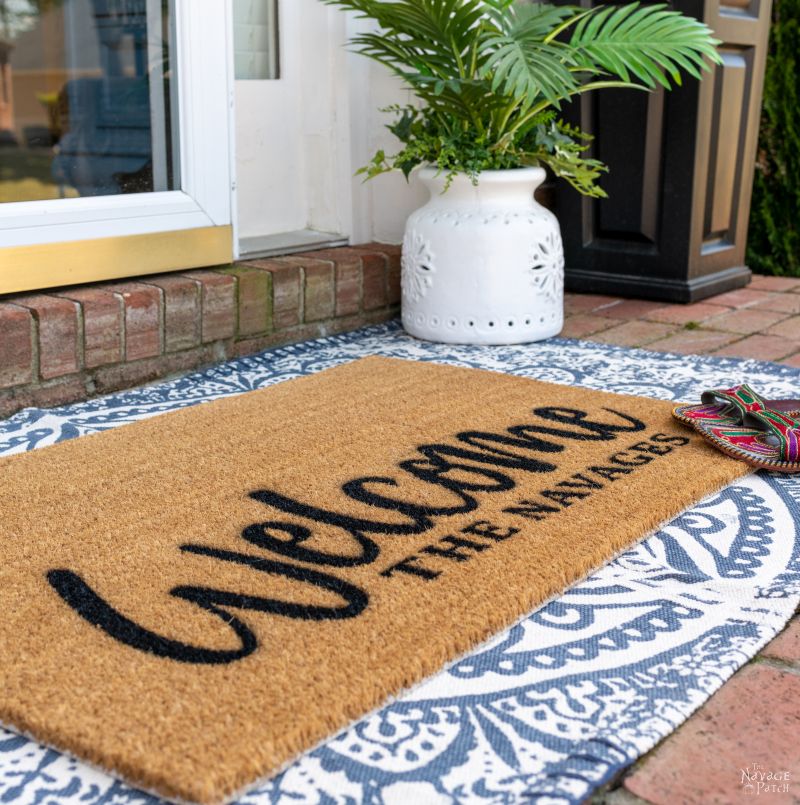
Anyway, Handan’s been wanting to spruce up our front door area with a personalized door mat since we moved in last year. Unlike our Fortress of Solitude in Connecticut where ravens and eagles outnumbered humans, here in Georgia, we’ve got neighbors a-plenty, and they’re all awesome and social. My babes wanted something a little more welcoming than a bland old foot-wipe, so we set out to make our own DIY personalized door mat with stencils. It’s a fun and easy project, and if you get your doormat (take that, Google!) at IKEA, it’s an inexpensive upgrade for your front door and entry.
DIY Personalized Door Mat
Before we get to the tutorial, we need to discuss a few things.
Let’s talk door mats…
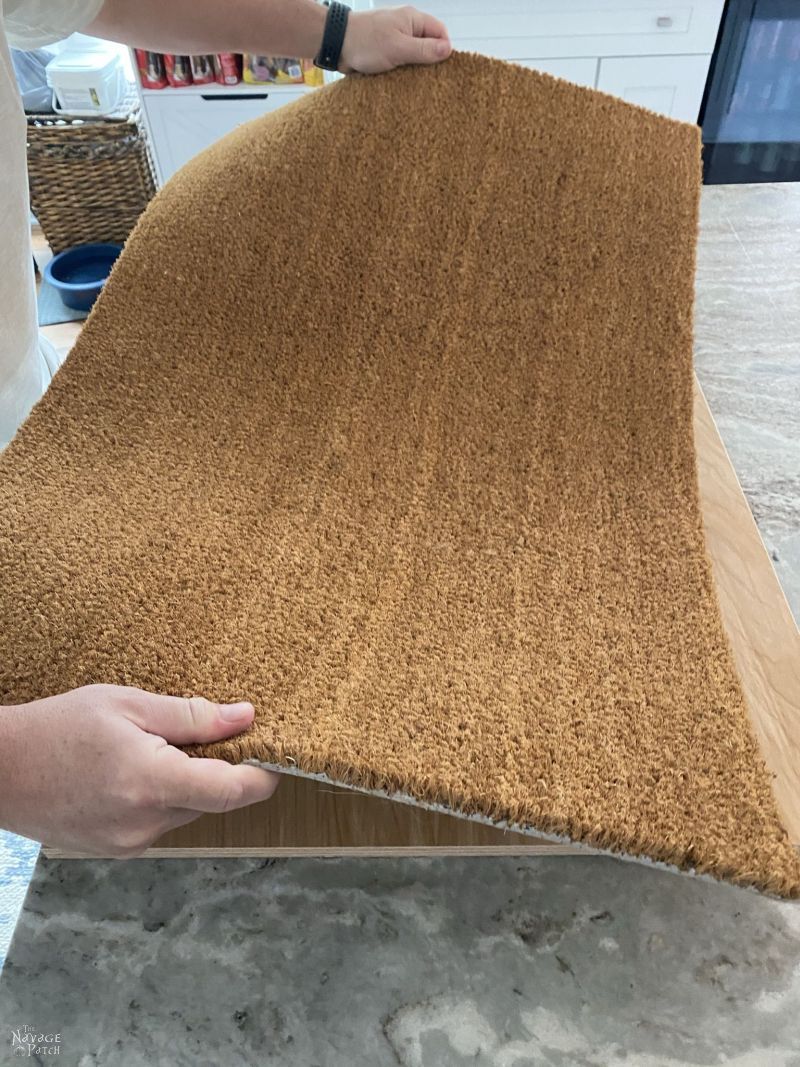
There are a lot of different door mats out there, but we like coconut fiber door mats the best. You may also know them as coir doormats. Coconut fiber is a strong natural fiber that is perfect for door mats – it is durable, it doesn’t absorb water, and the rough fibers are perfect for wiping crud from your shoes.
The best deal we’ve seen on a coir door mat is IKEA’s TRAMPA.
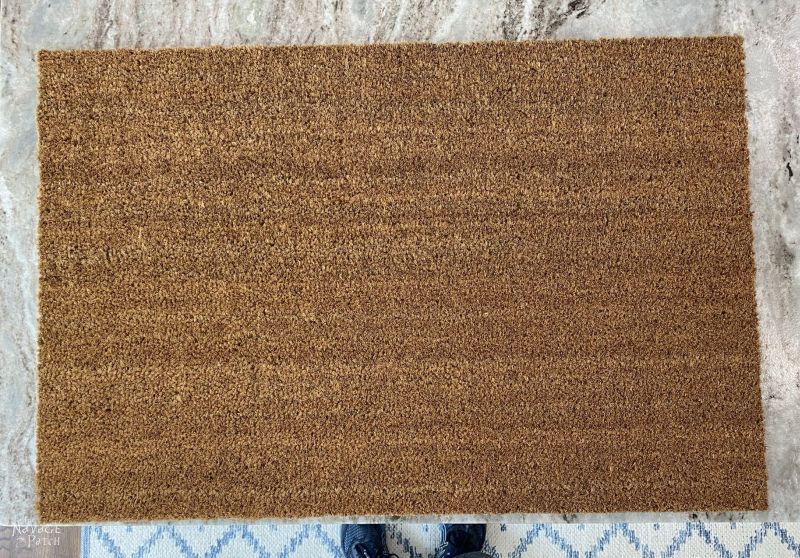
For $7.99, you get a full-sized coir mat at 1/2 to 1/3 the price of most other places. If you don’t live near an IKEA, and you don’t want to deal with ordering online from them, you can find coconut fiber door mats almost anywhere, from Amazon to Walmart.
About that paint…
We’re not using any. Yeah, that’s right, we’re stencilling without paint! We’re nuts like that!
Why?
Because we found something better! These personalized door mats are going to be outside in the sun, snow and rain, and they’ll be trampled on a daily basis, so we’re going to want something a little more robust than paint!
How about rubber?
Yep, rubber it is! What a wonderful world we live in where you can get sprayable rubber in a can!
Do I hear Cricuts?
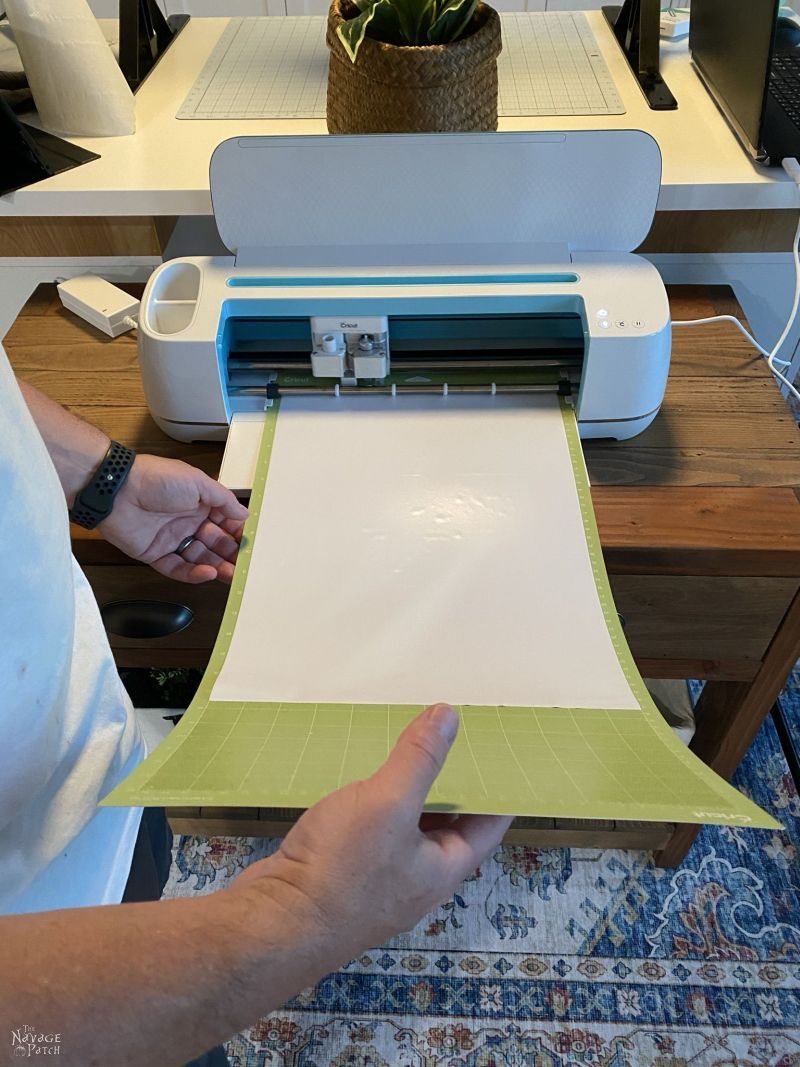
Yep, we used our Cricut to make these stencils, and if you want to make the same ones, you’ll need one, too. But we’re aware that a Cricut cutting machine is not in everyone’s budget, so don’t despair, because you can still make awesome personalized door mats using the technique we’ll be showing you with any stencil you can buy online (as long as it’s not too intricate). As much as we want to spread the good word about Cricut, we know the reality out there right now.
About the stencils…
We’re giving you six free stencil SVGs for your personalized door mat. If you’d like to add your name to the “Welcome” SVG, like we did, you can simply add it in Design Space.
Okay, enough of my blathering, let’s get to it!
SUPPLIES LIST
Affiliate links are provided below. Full disclosure here.
- Cricut Maker, Explore Air 2 or other smart cutting machine
- Cricut outdoor vinyl
- 24 inch StandardGrip Mat
- Free personalized door mat SVGs (available in TNP VIP Lounge)
- Weeding Tools
- Coconut fiber doormat (IKEA has the best price, but we’ve linked to Amazon in case you don’t have a store nearby)
- Vacuum cleaner
- Lint roller (optional)
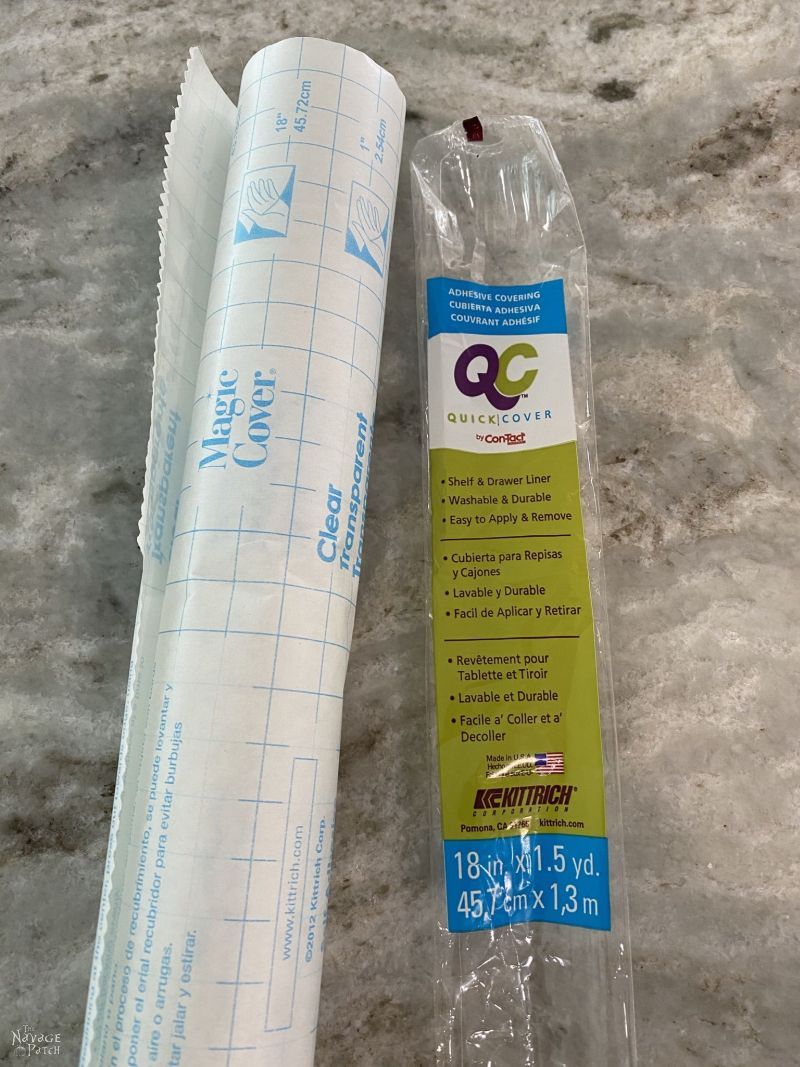
- Dollar Tree clear self-adhesive shelf liner (for using as a transfer tape)
- Dollar Tree duck tape (or similar)
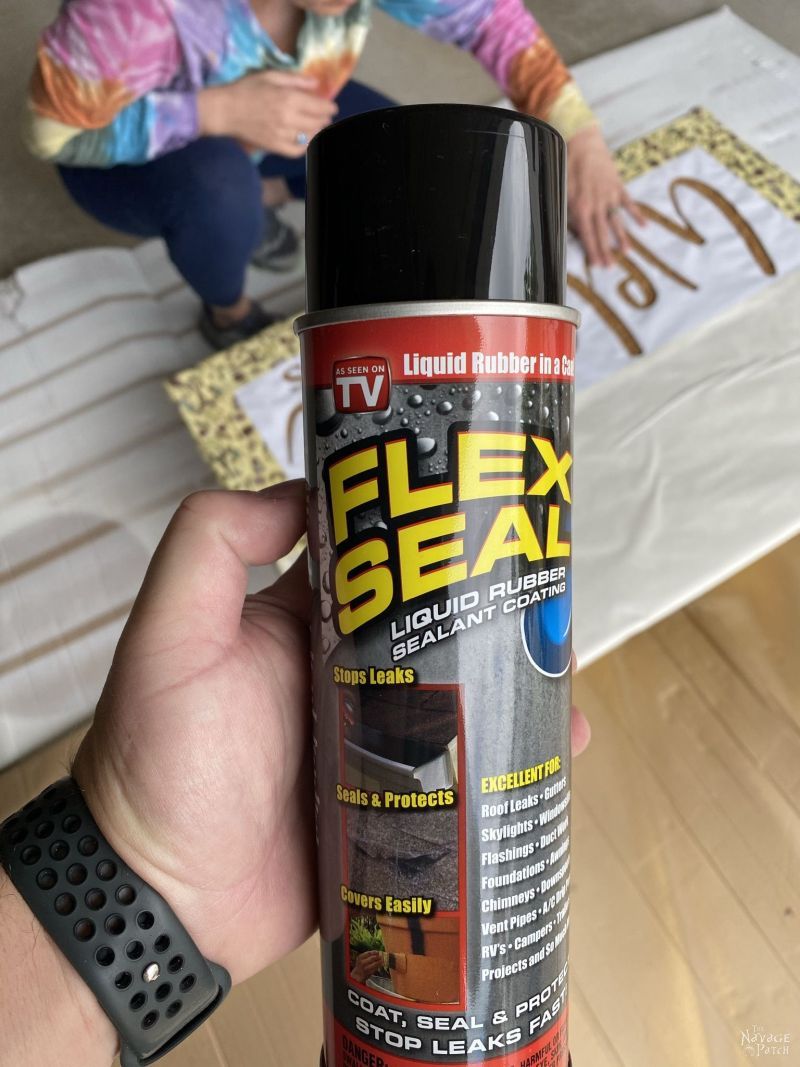
- Black Flex Seal Sprayable Liquid Rubber
- Clear matte sealant
This is a sponsored conversation written by me on behalf of Cricut. The opinions and text are all mine [unless they are mine! – Handan].
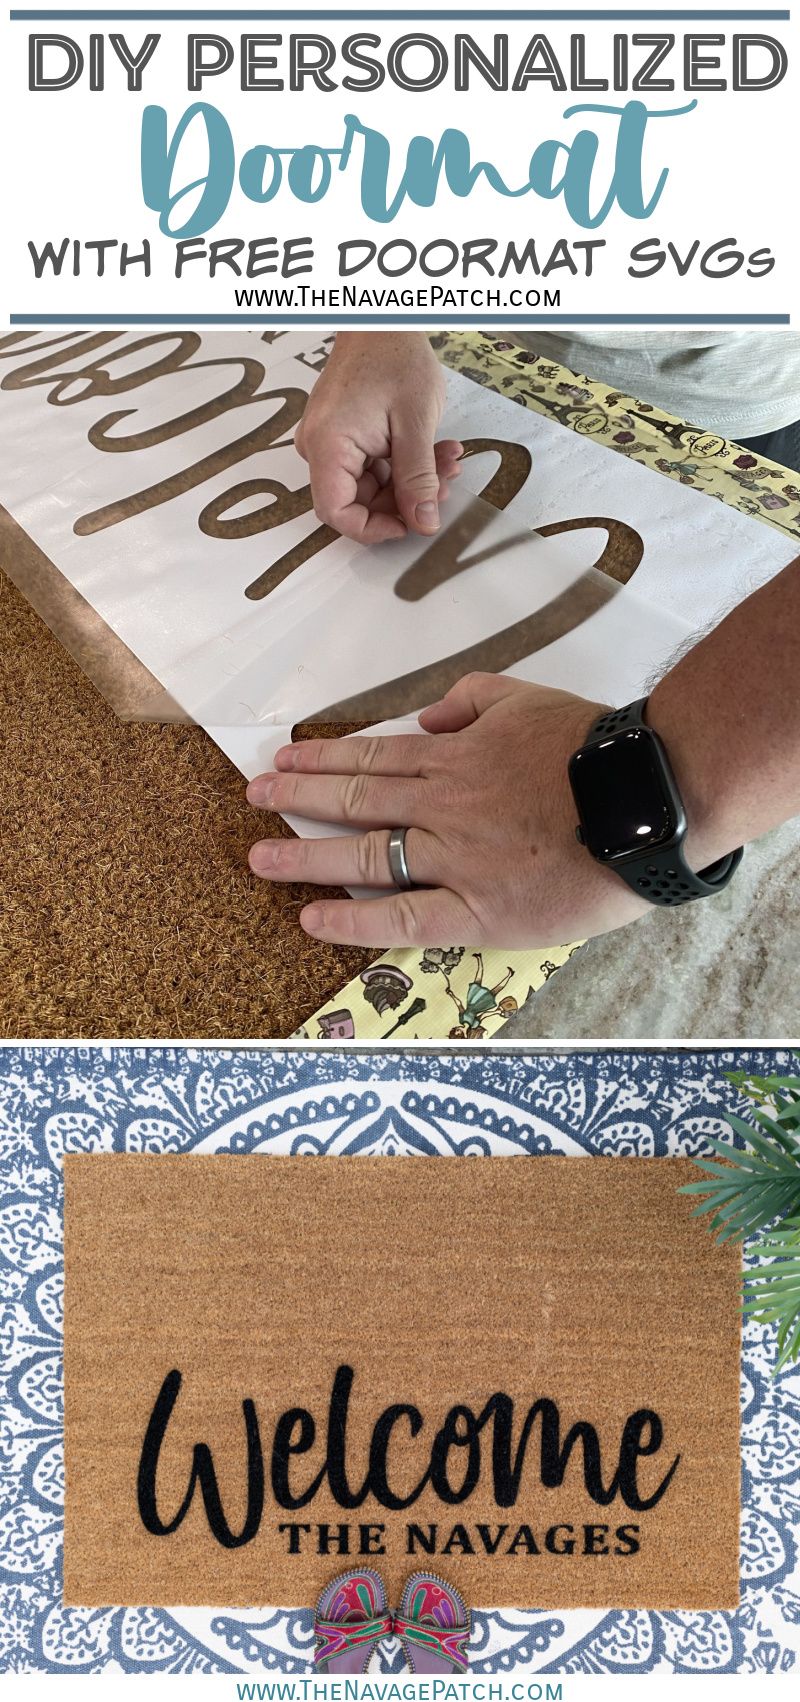
Personalized Door Mat 1 – Welcome
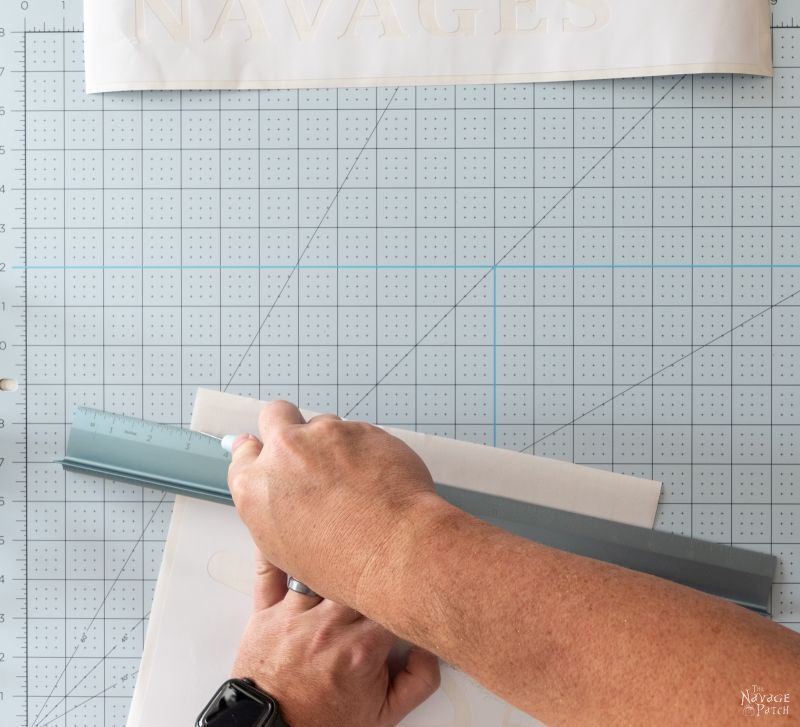
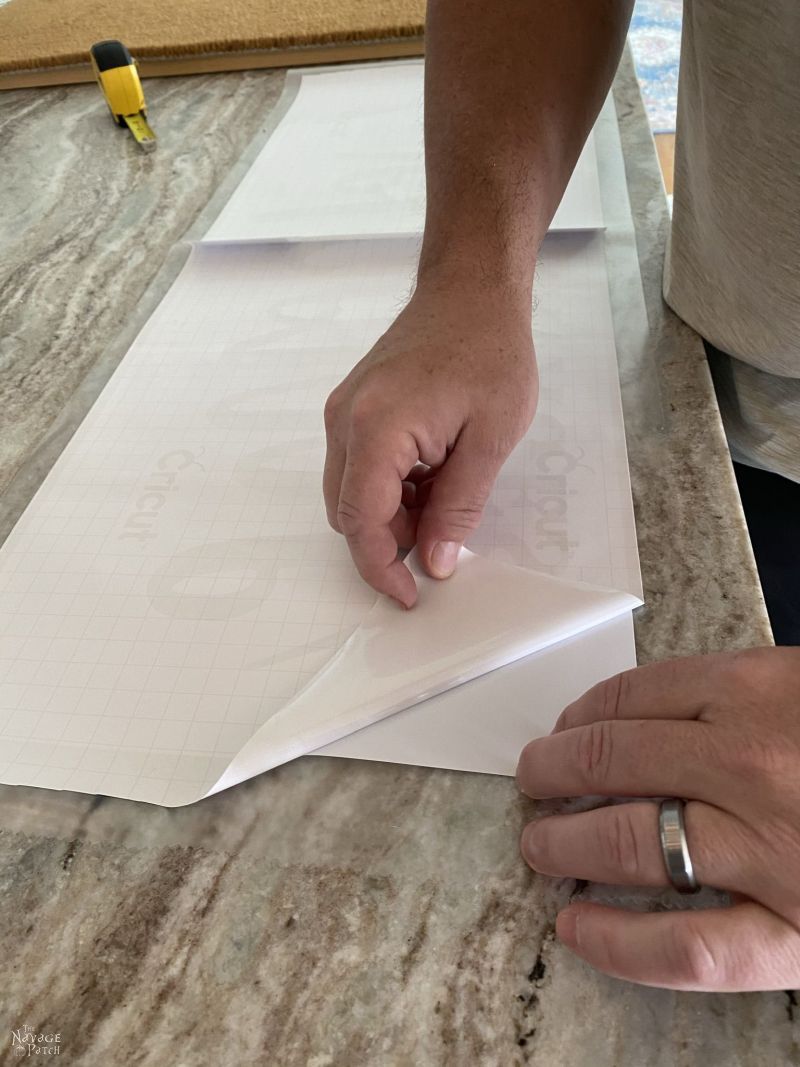
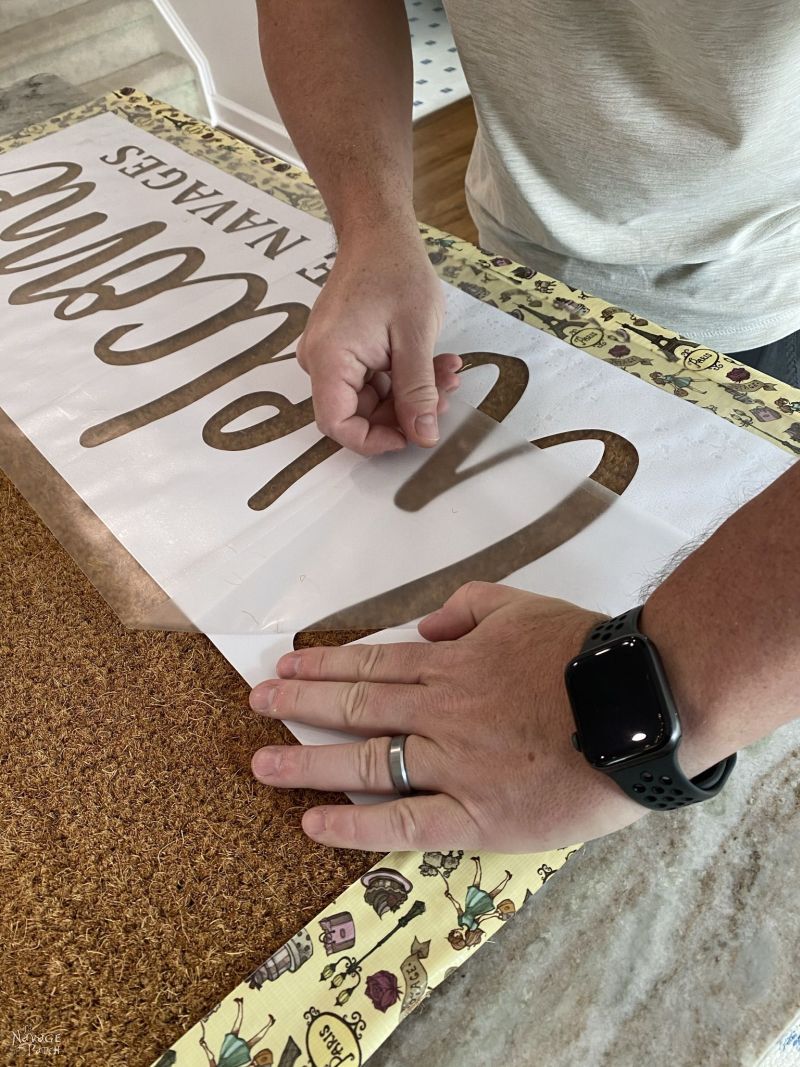
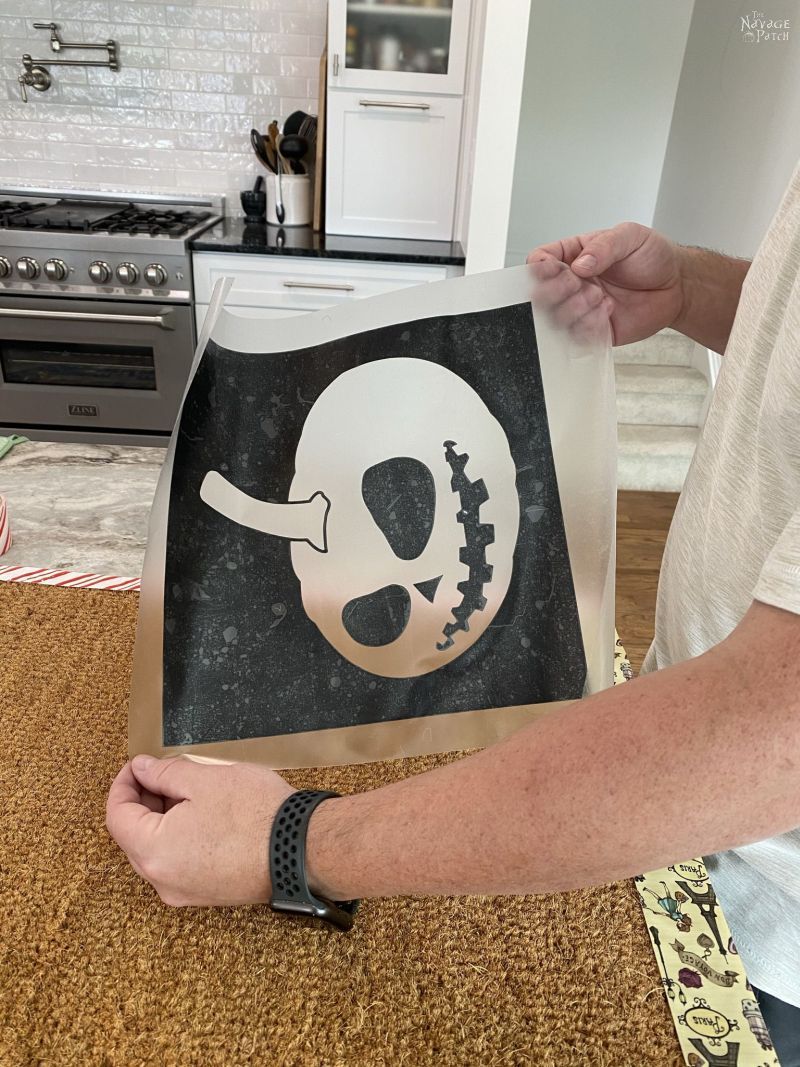
Step 1 – Cut, Weed, and Tape
The “Welcome” design needs to be made on two pieces of outdoor vinyl, each about 17 1/2 inches long. We tried making personalized door mats with both Cricut outdoor vinyl and Oramask stencil vinyl and found the outdoor vinyl to be the better option. Now lest you think I’m just shilling for Cricut, when it comes to transfer tape, we’re going to recommend against Cricut’s product. I may be a lot of things, but a mindless fanboy shill just ain’t one of them!
Peeling back the mat to release the stencil…
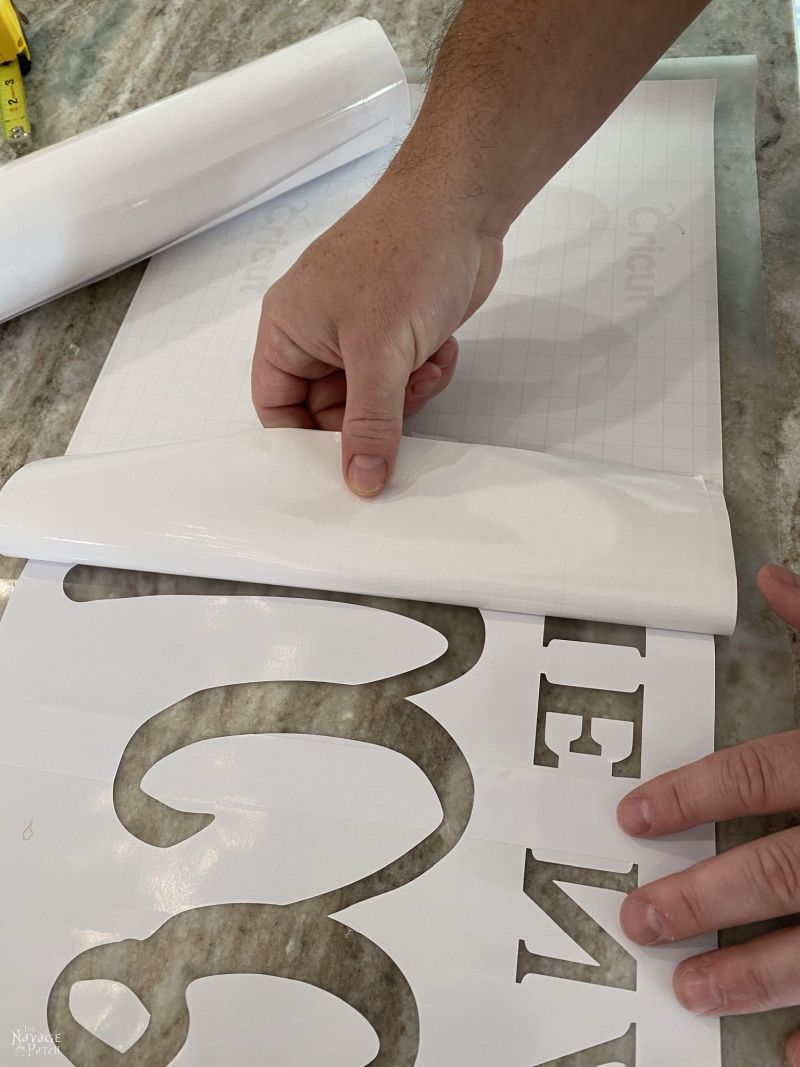
Weeding this design is a cinch. I just removed the outer border…
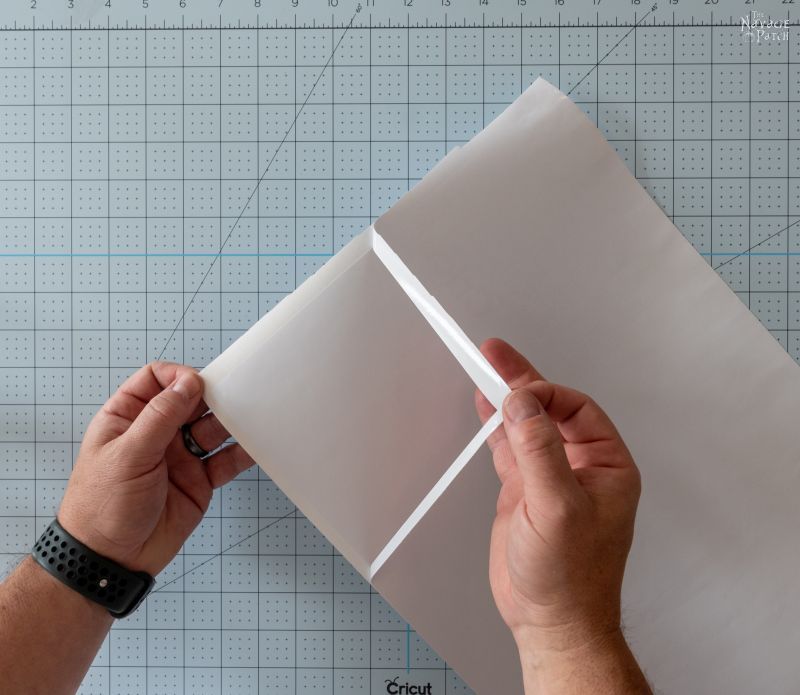
And then the big letters within.
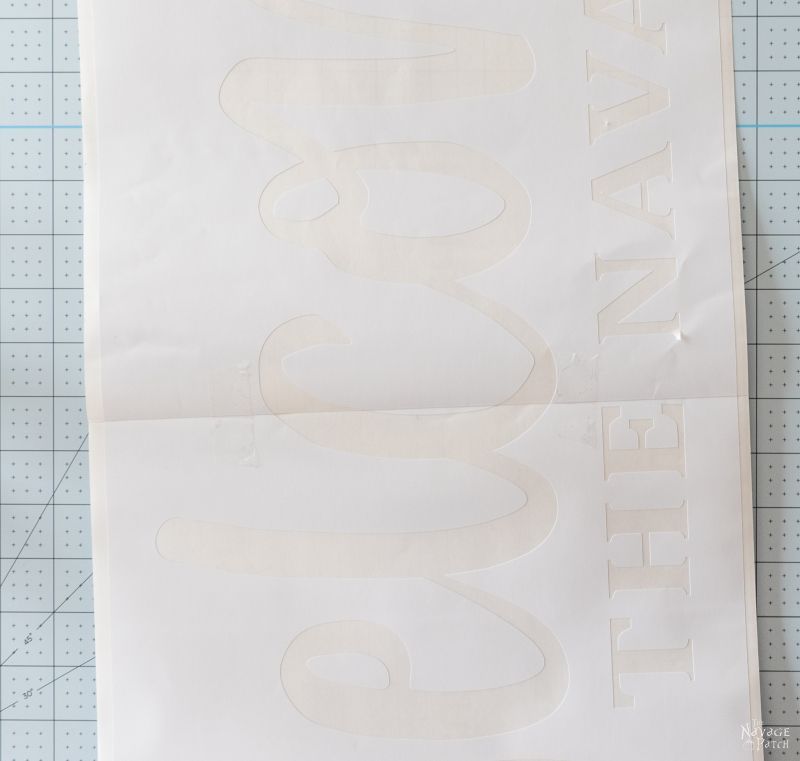
Here are the two halves, ready to be joined.
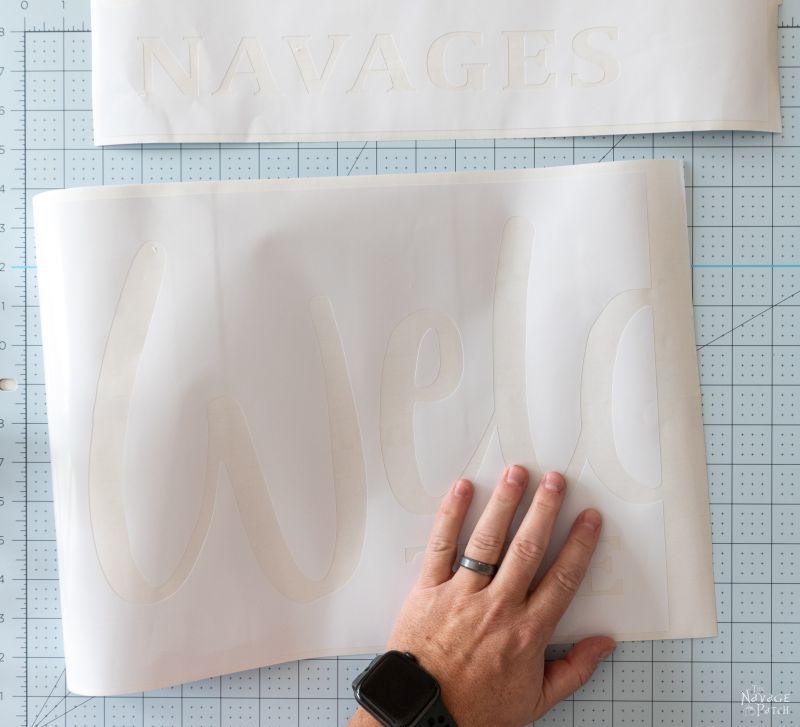
I first cut off some of the excess – the design overlaps a bit to make it easier to match up later.
Here you can see the little bit of overlap.
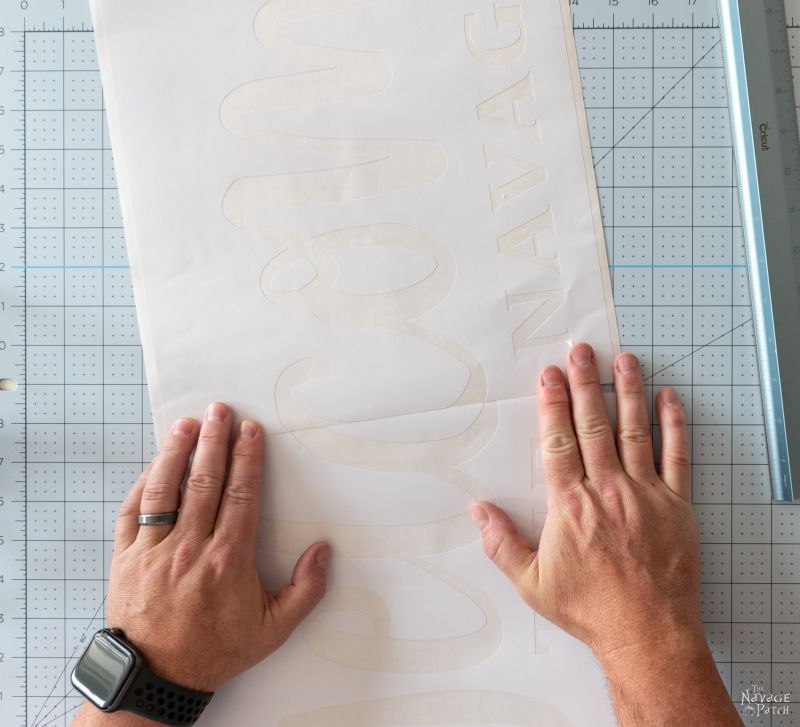
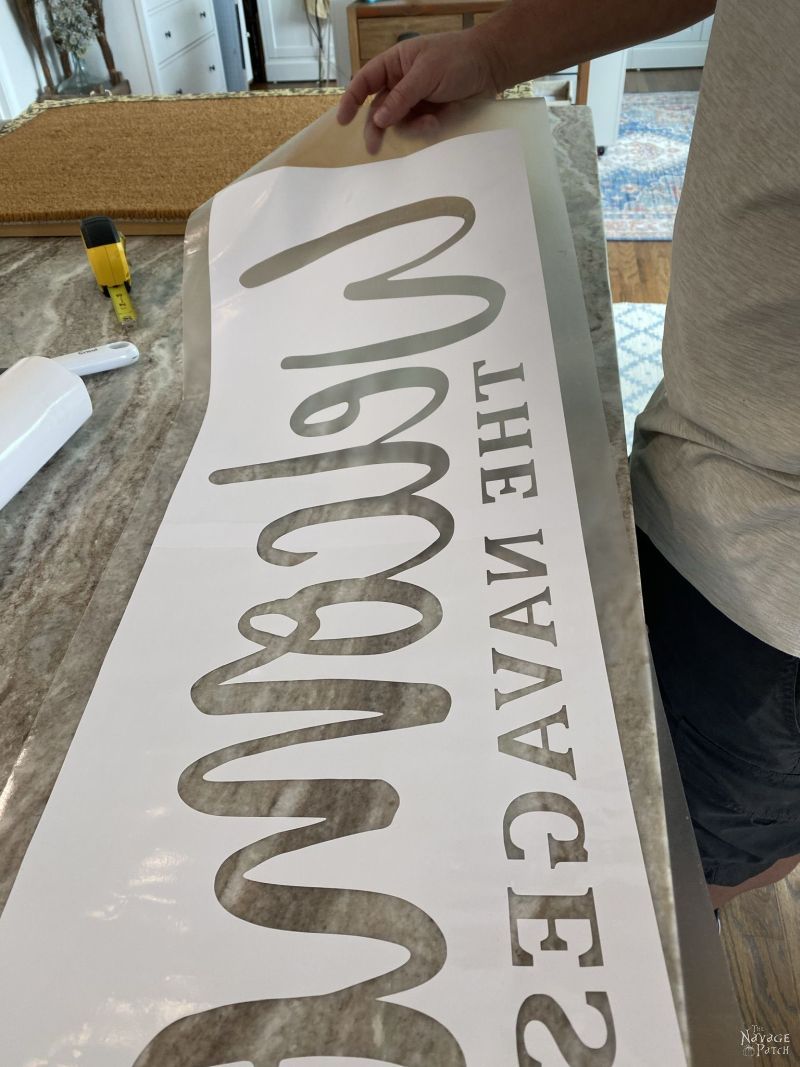
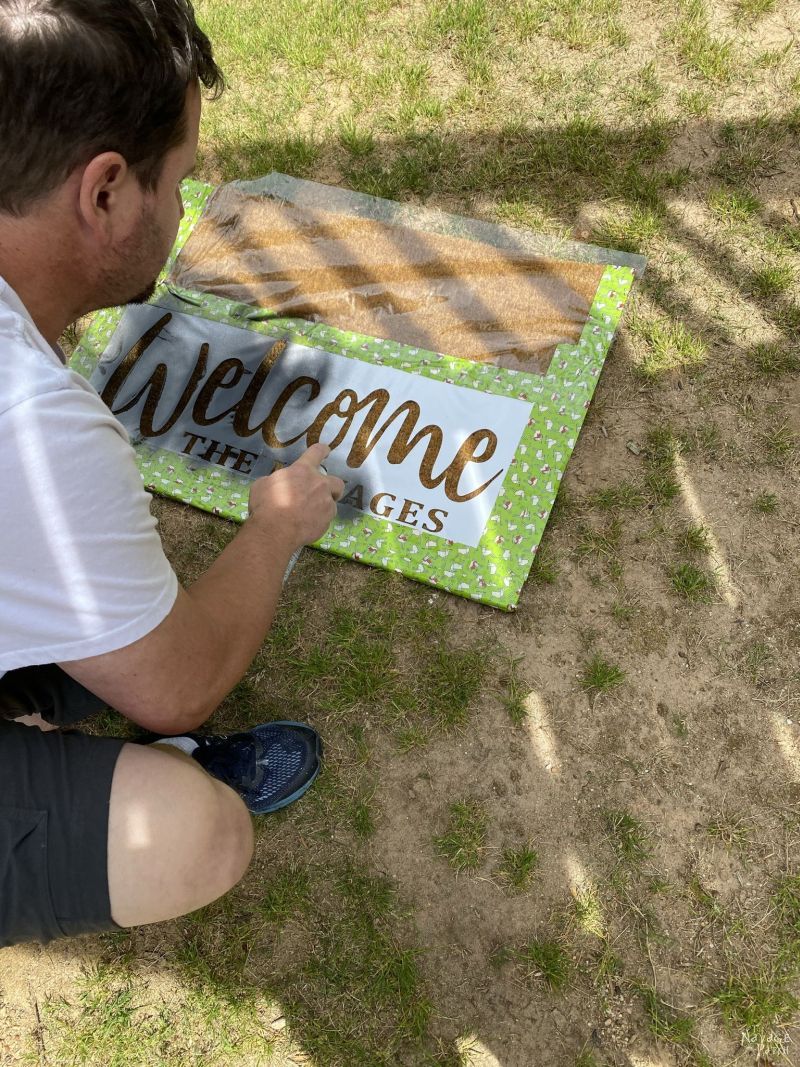
I lined up the design, paying careful attention to the top and bottom border, as well as the letter “C.”
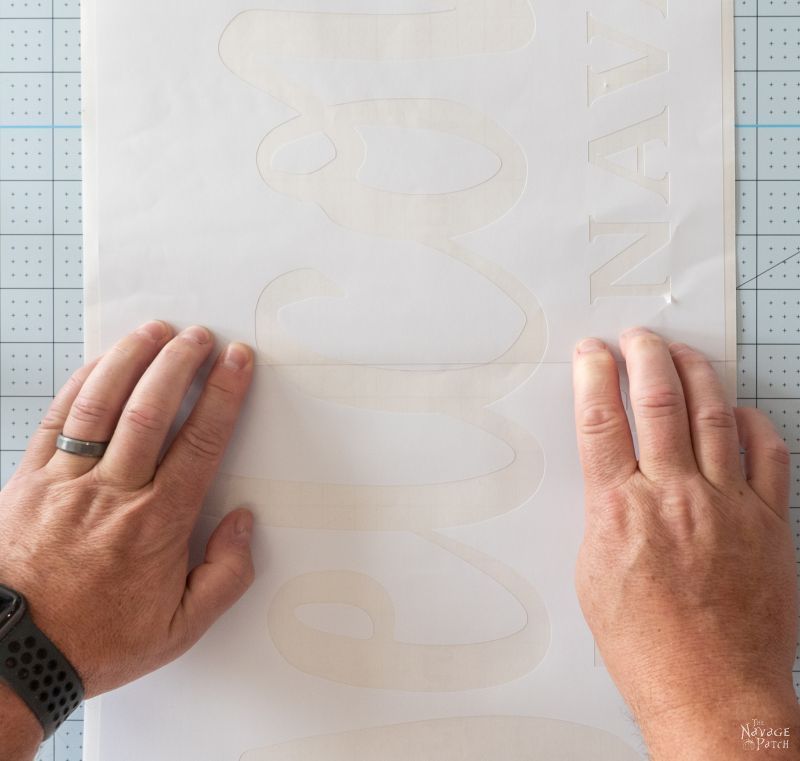
When I had it lined up perfectly, I asked my babes to slap on some scotch tape to hold it all together.
Step 2 – Prepare the door mat
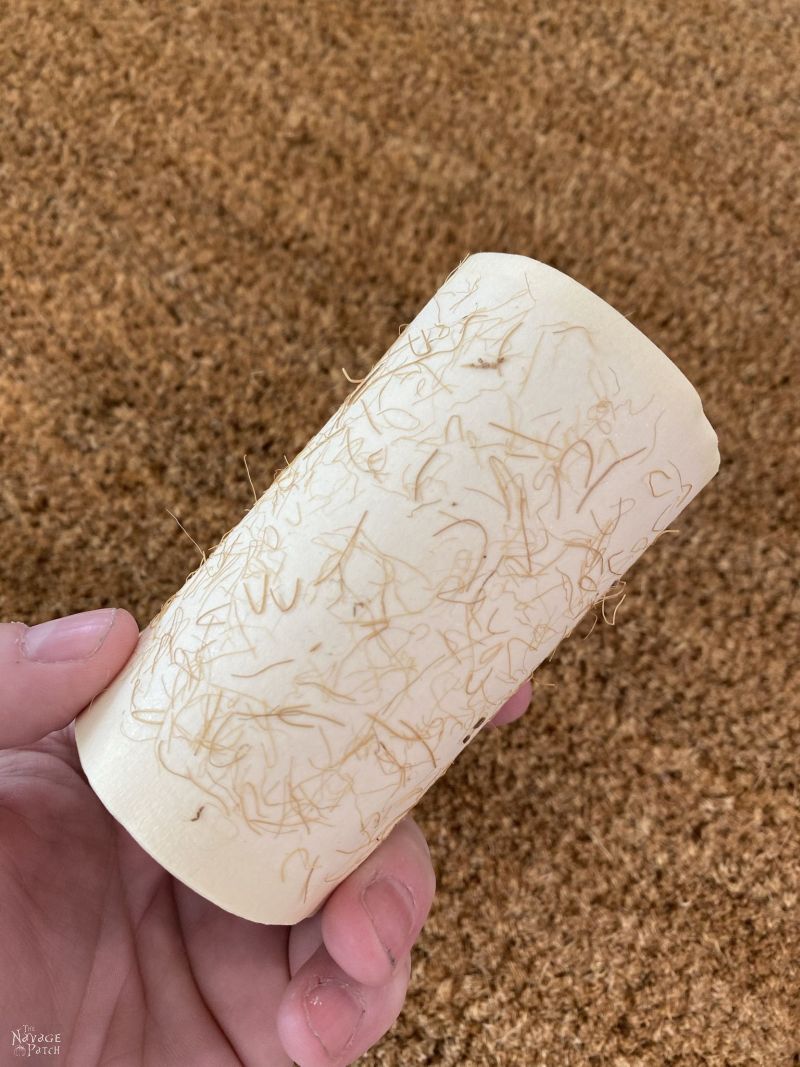
Coir mats usually have a whole bunch of loose coconut hair on them. The easiest way to remove it is with a vacuum.
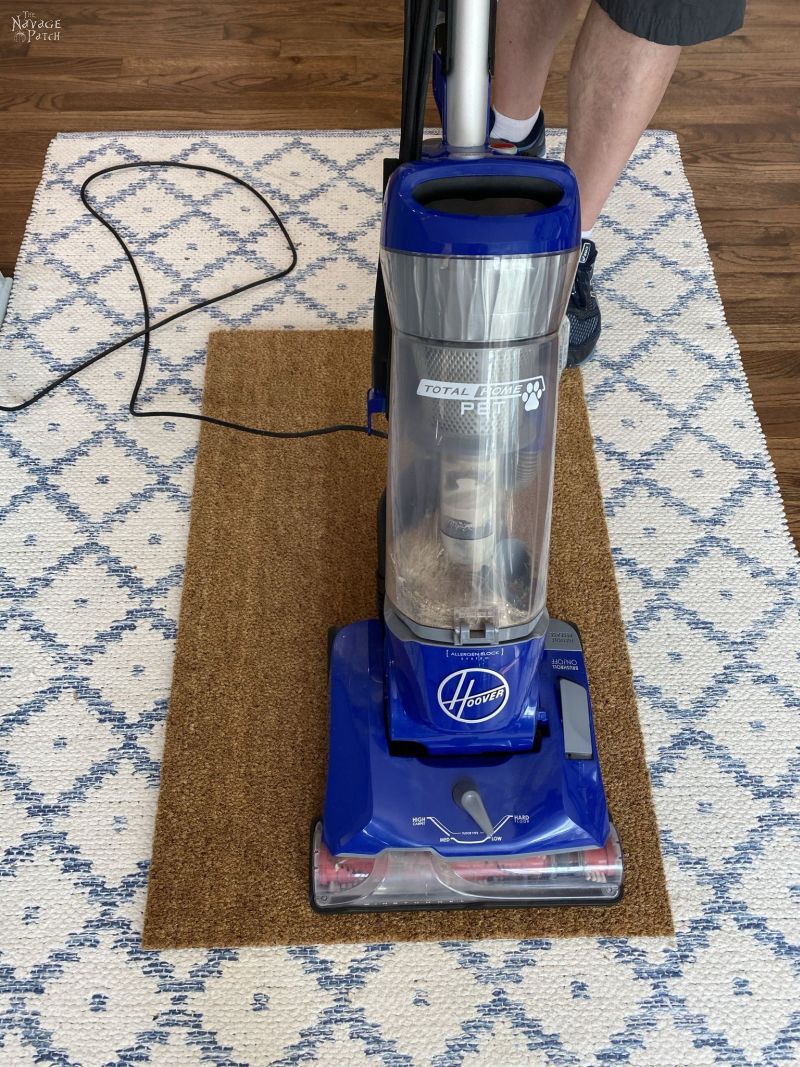
If you have a lint roller on hand, you can also make a few passes with it.
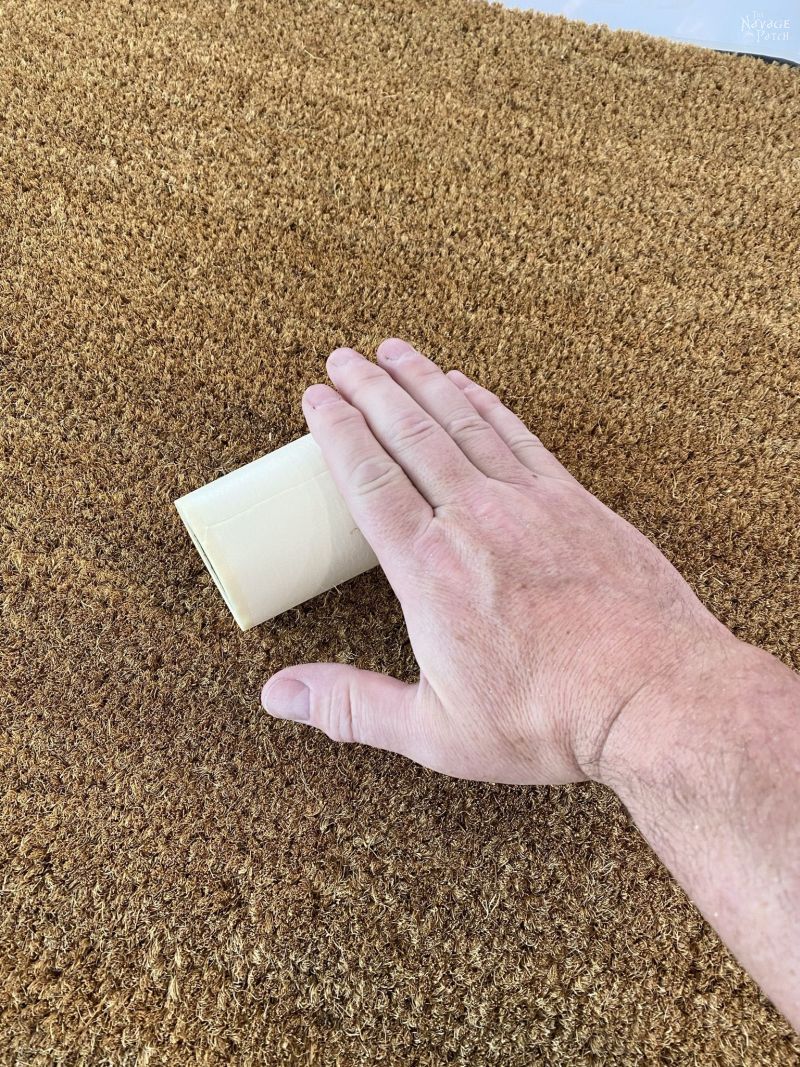
You could probably do this forever and each time come away with stray fibers. Don’t get too hung up on it. A simple vacuuming should be sufficient.
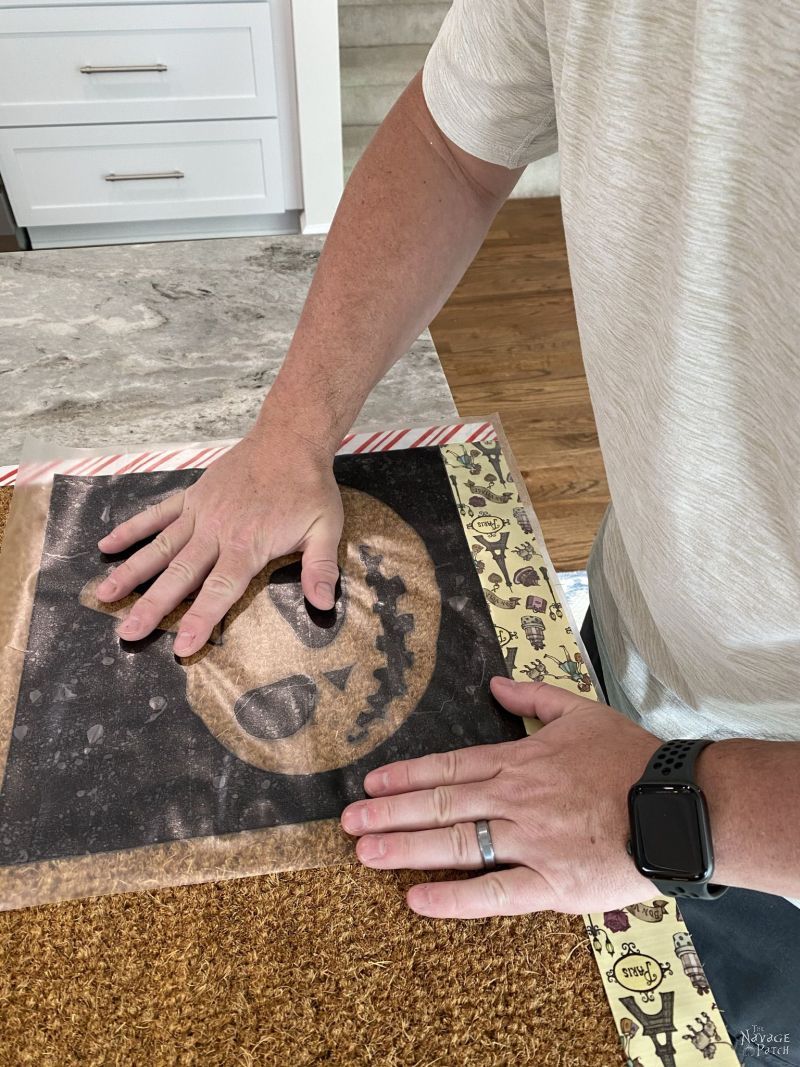
To transport the mat outside for painting without disturbing the stencil, I highly recommend placing it on a piece of scrap plywood, or even on or two pieces of foam board (you can get it at Dollar Tree). The stencil does not stick very well to the coconut fibers, so you want to disturb it as little as possible after applying it.
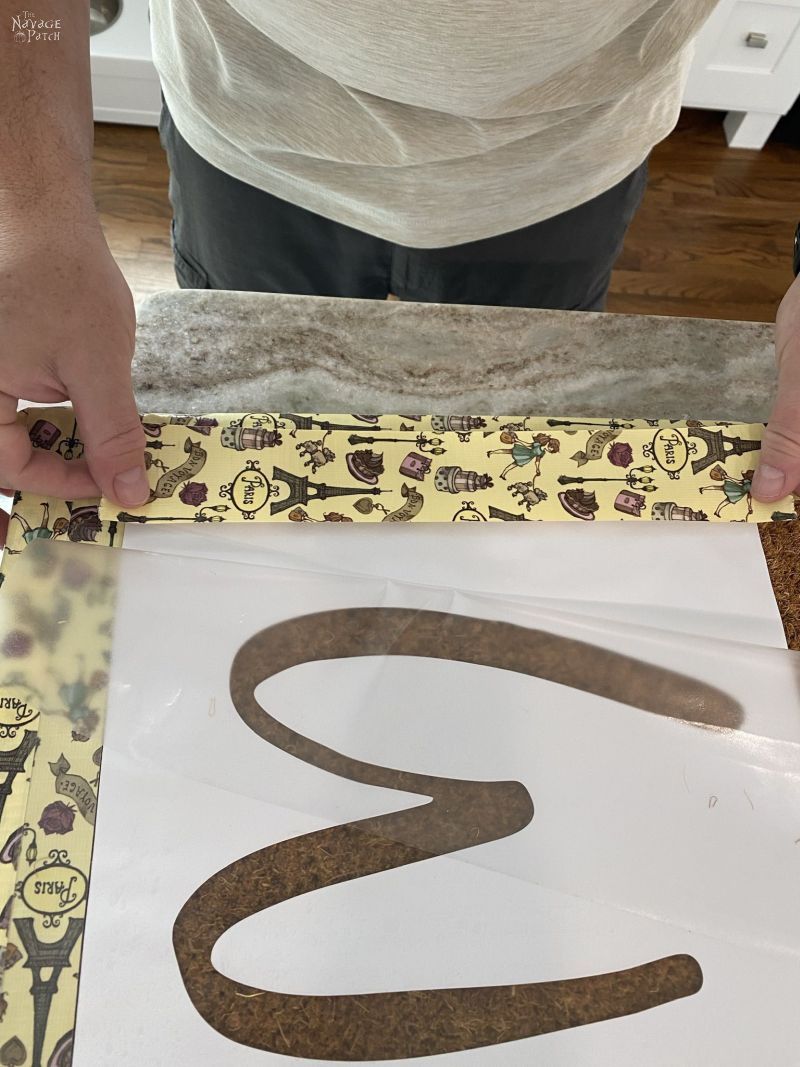
To make placement of the stencil easier, I ran some Dollar Tree duck tape (yes, they call this kind “duck” tape, not “duct” tape) along the bottom edge. For the tape on the sides, I measured in 1.75 inches from each side and placed the edge of the duck tape there. The mat is 35.25 inches wide and the stencil is 31.75 inches wide. 35.25 – 31.75 = 3.5. Divide that by two, and you get 1.75 inches of space on each side.
Once I had my tape frame in place, I turned my attention to the stencil.
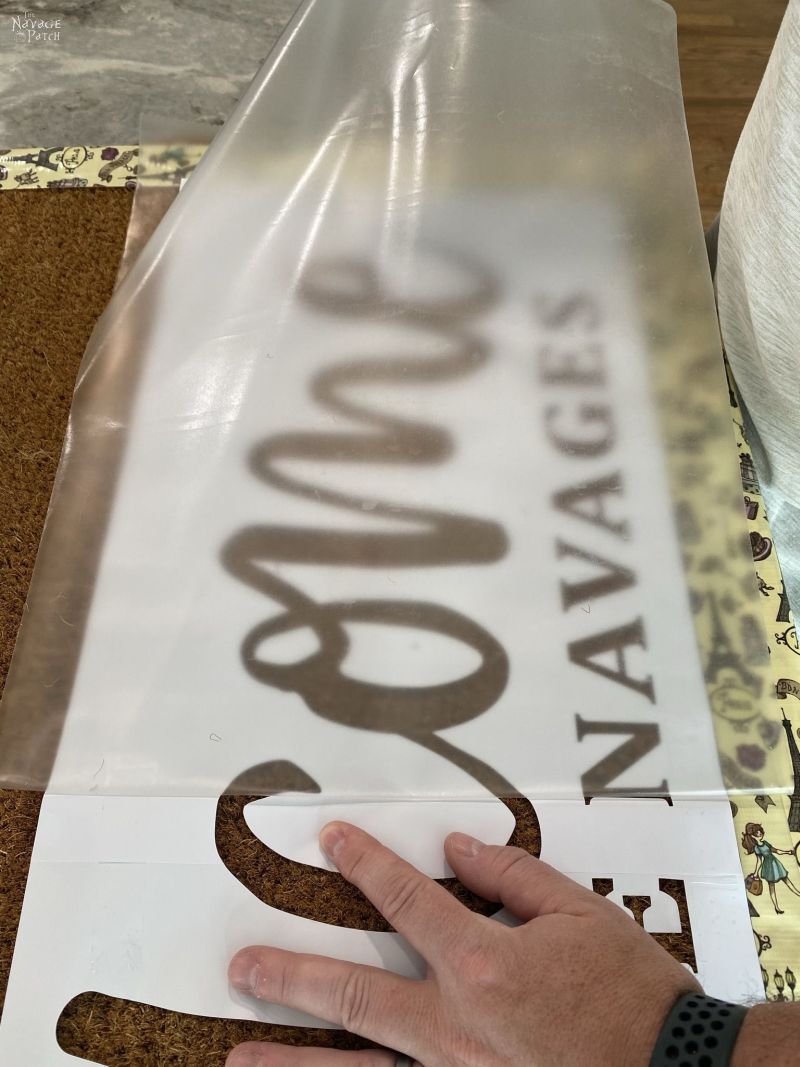
Step 3 – Transfer the stencil
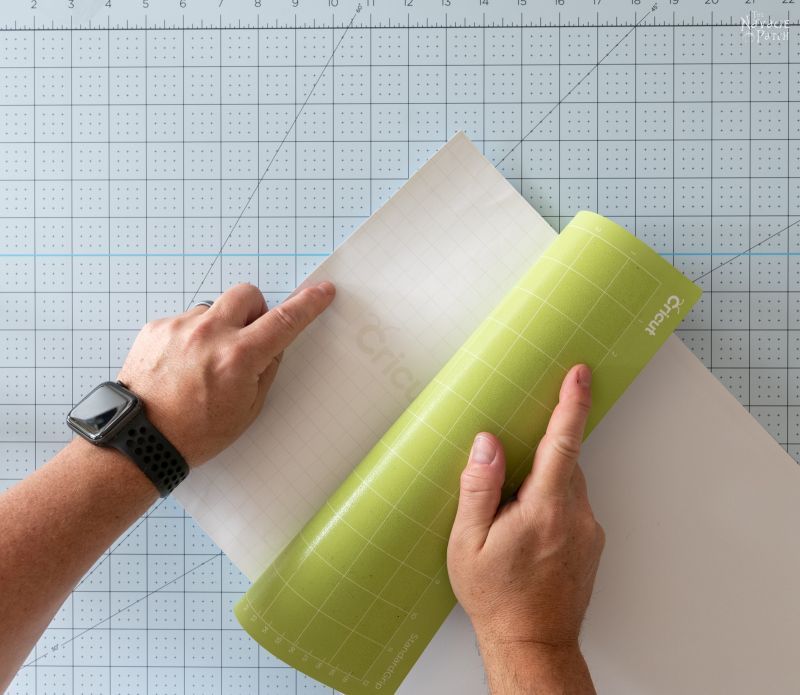
We tried two different transfer tapes for our personalized door mats – Cricut transfer tape (regular grip) and ConTact shelf liner from Dollar Tree. Normally you’d think Cricut would win this competition hands down. It’s Cricut vs Dollar Store fer cryin’ out loud!
But you’d be wrong. Sometimes a product can be too well designed for a particular purpose, and Cricut’s transfer tape is just too strong (even the regular grip) when trying to place a stencil onto a coconut fiber door mat.
Dollar Tree shelf liner on the other hand?
Goldilocks.
Not too sticky. Not too…not sticky. Just perfect!
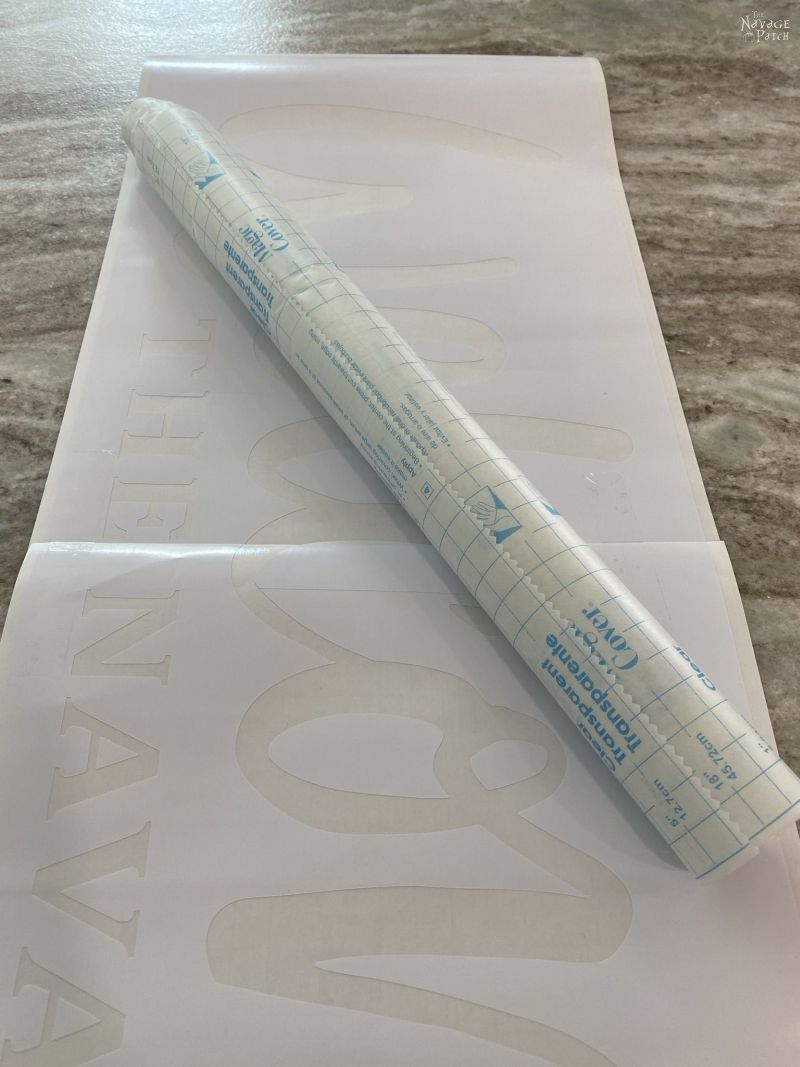
I laid the Goldilocks shelf liner on my outdoor vinyl stencil.
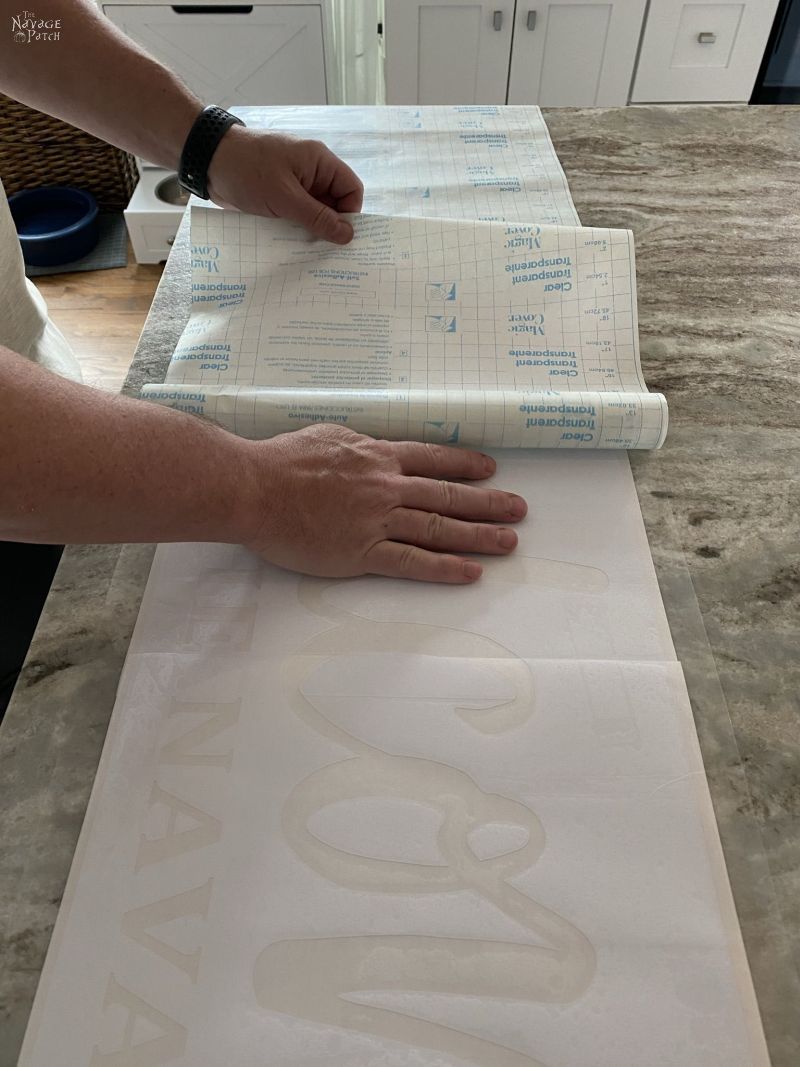
Even though the shelf liner has far less grip, transferring the stencil was no problem.
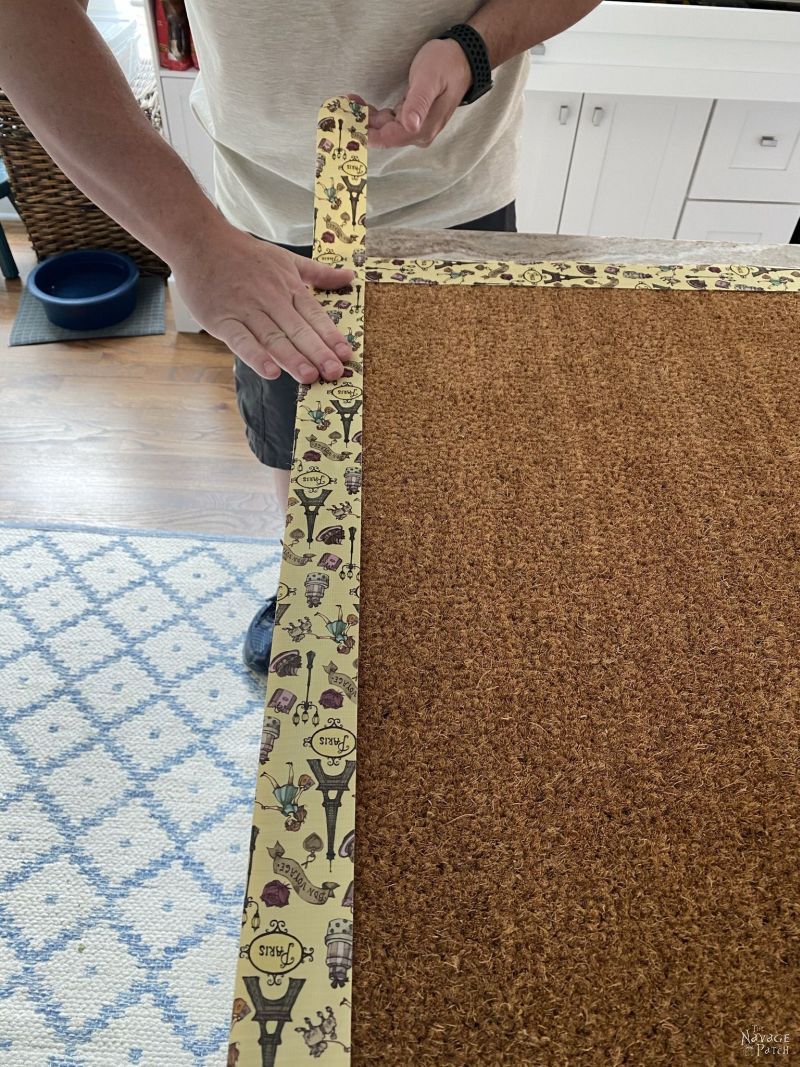
Transferred and ready to go!
I lined up the white edges of the stencil with my duck tape border.
And then I peeled off the shelf liner. I’ll talk about it more later, but this was sooooo much easier than when we used Cricut’s transfer tape. As I said before, the stencil will not stick well to the coir mat, so you want that transfer sheet to come off easy!
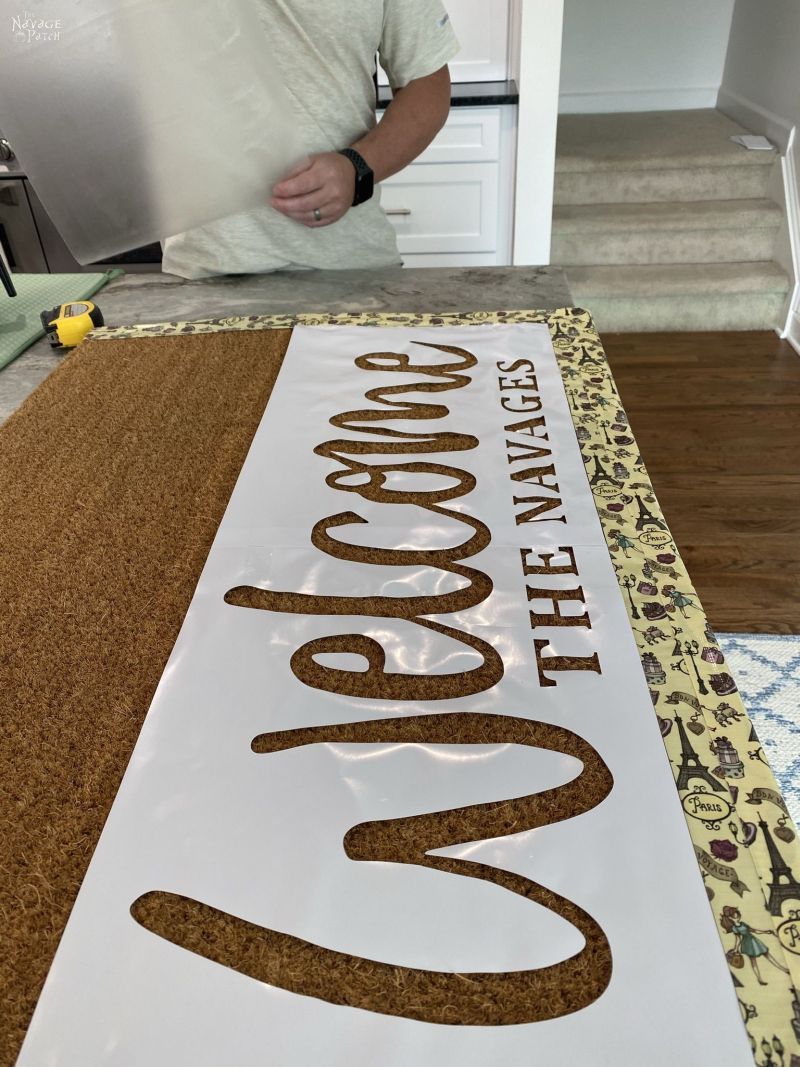
To make it even easier, once I had an edge transferred, I locked it in place with some duck tape.
When we used the other transfer tape, it took full effort from both Handan and me. With the Dollar Tree shelf liner, I could do it easily myself.
Here is the stencil, transferred onto the mat. I used some generic bulk transfer tape to mask off the rest of the mat.
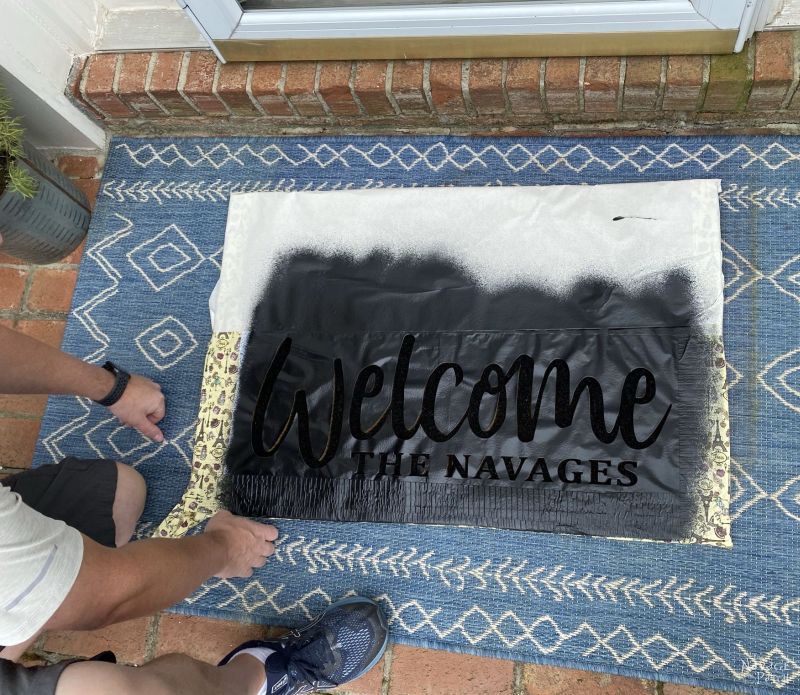
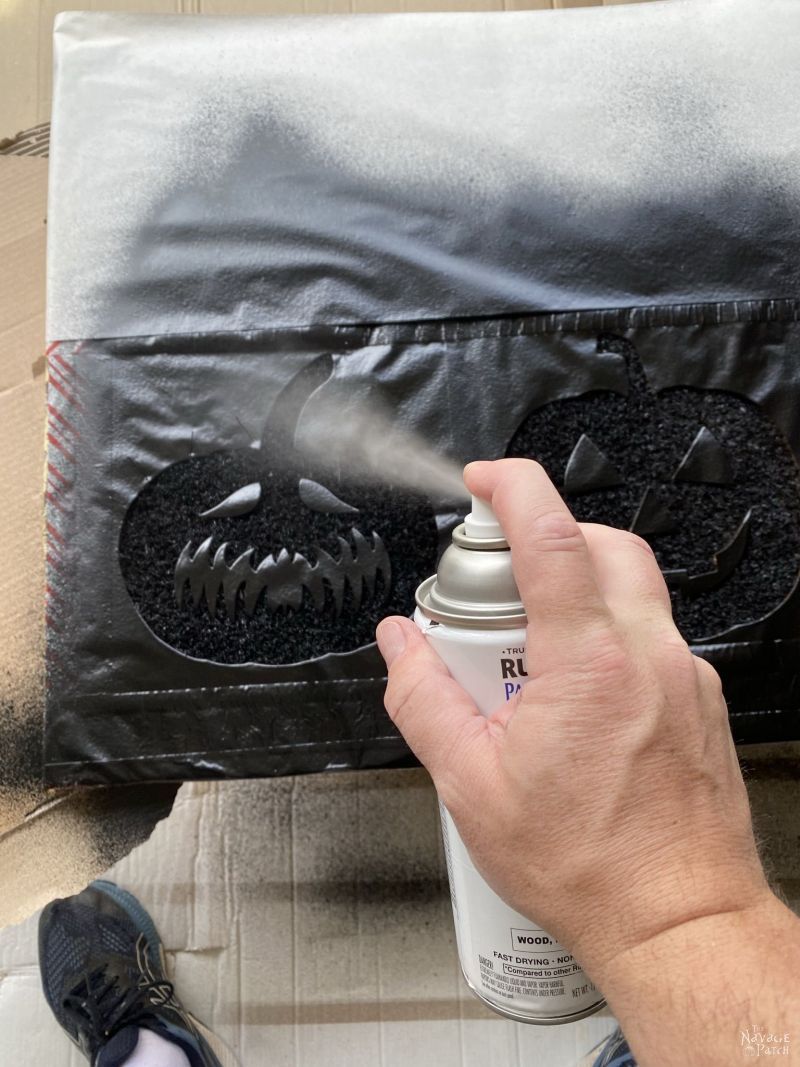
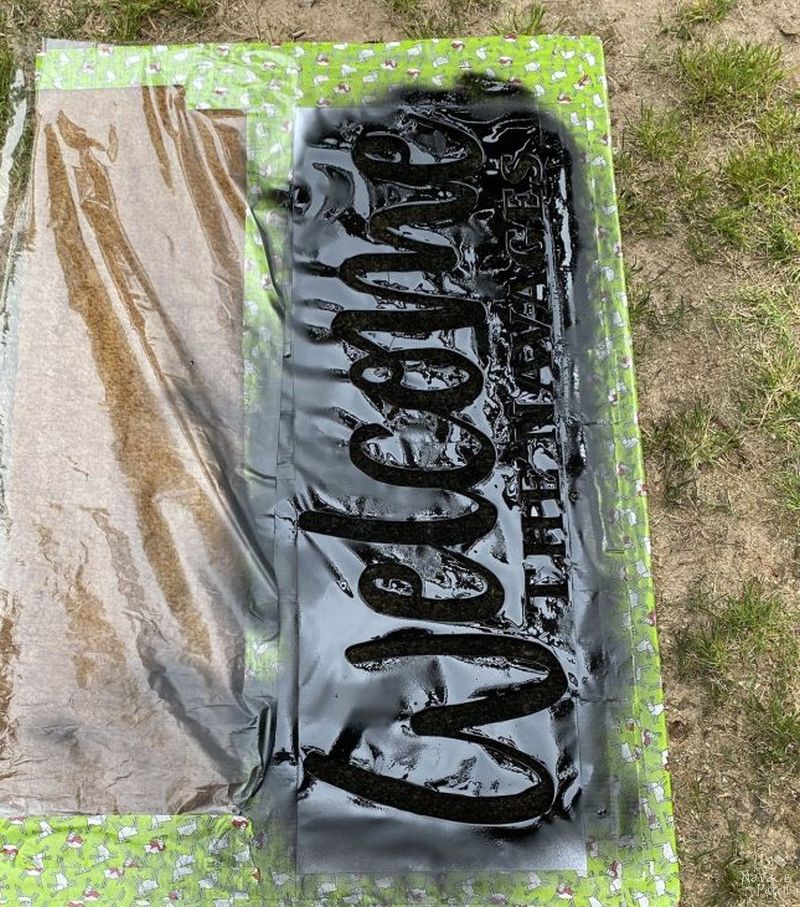
Step 4 – Spraying the mat
We carried it to the garage (rain was threatening) and set it on a box on some cardboard.
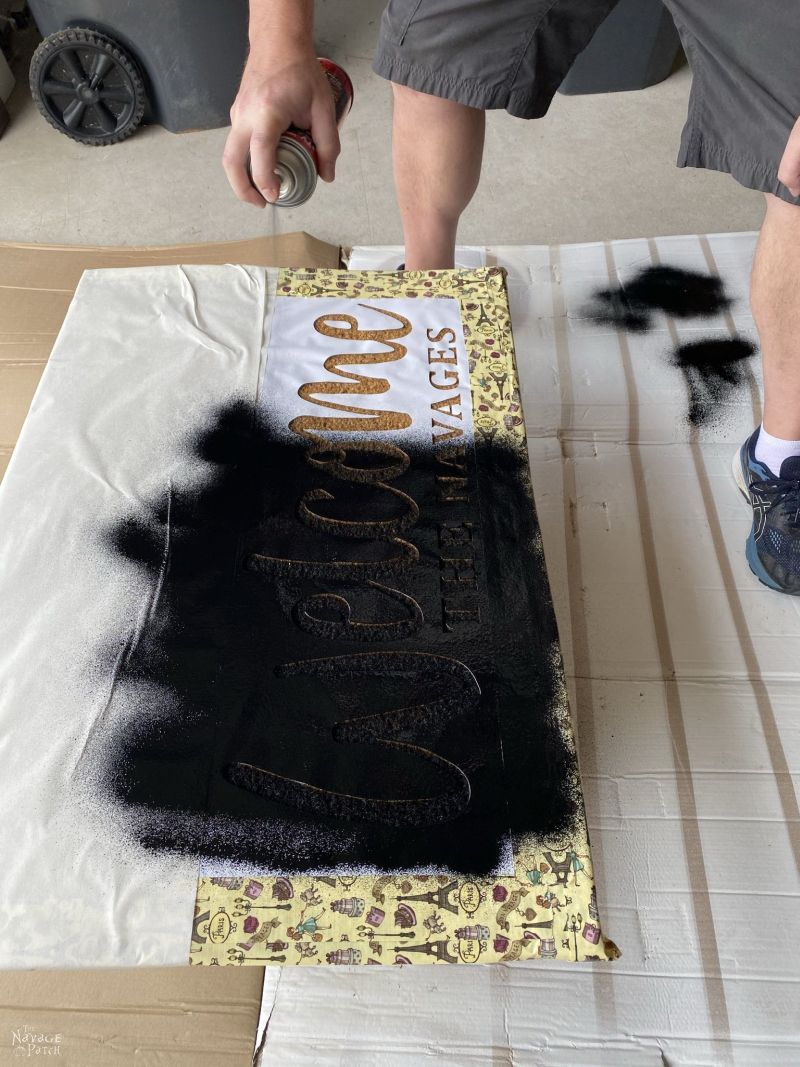
I started in with the Flex Seal, making sure to spray straight down, so the spray wouldn’t sneak in under the stencil.
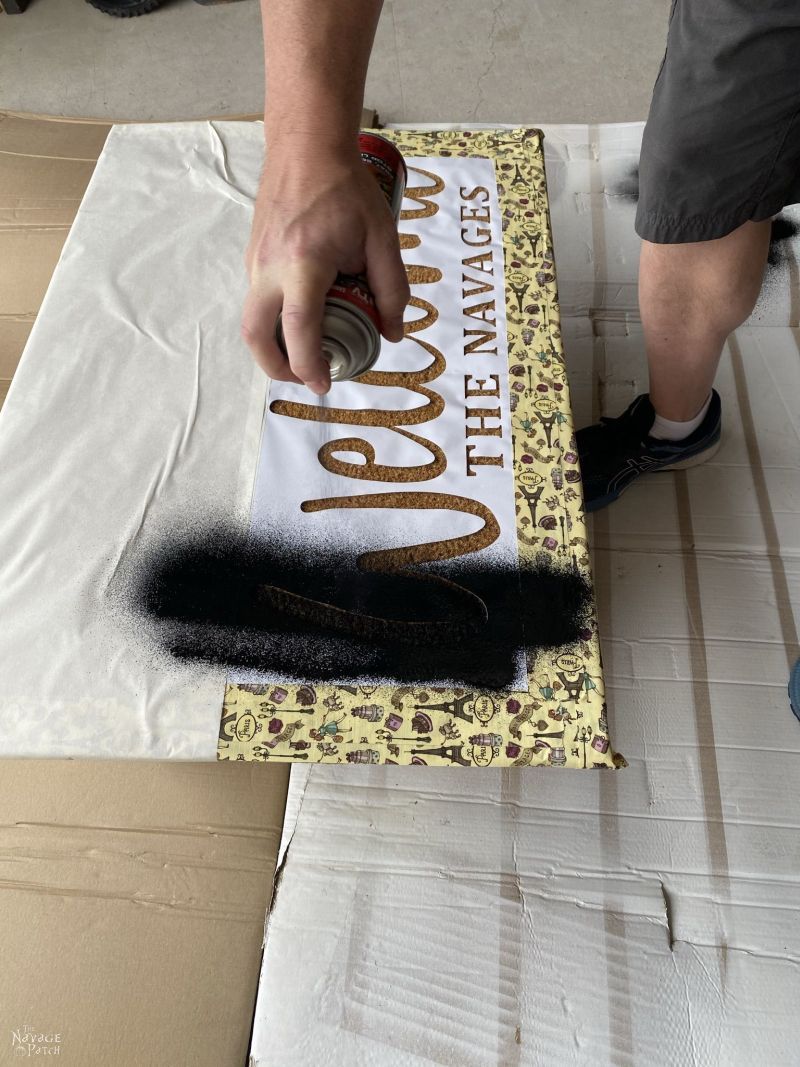
I started each pass either above or below the stencil since Flex Seal has a tendency to spit out globs of liquid rubber each time the nozzle is first depressed.
Here’s a little video of how I sprayed.
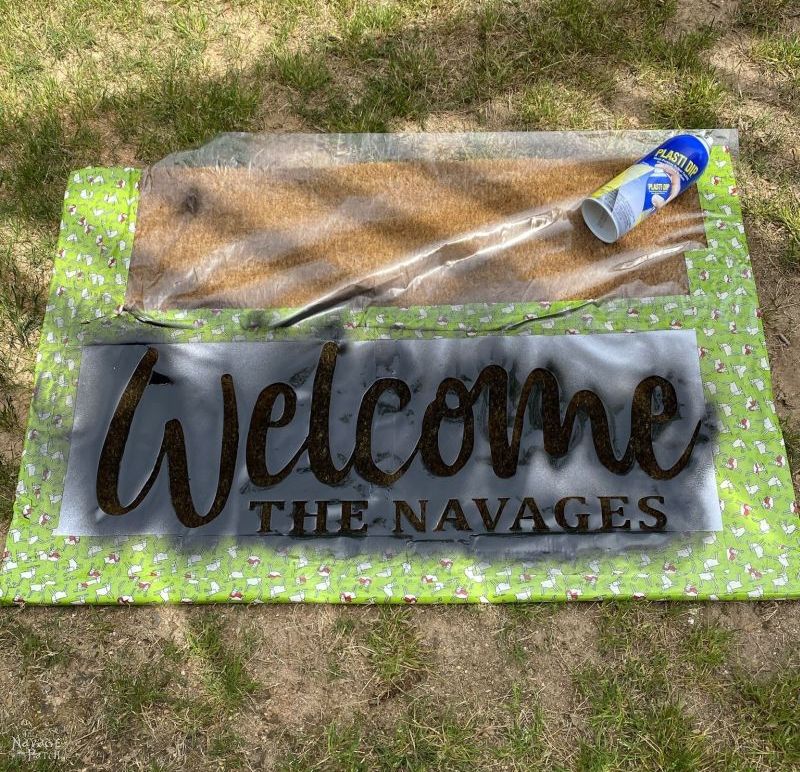
You only need to apply one good coat of Flex Seal – just make sure you spray enough to completely cover the fibers and get a nice, deep black color. The problem with two coats is that the stencil will start to curl a little bit once the first coat has dried, and you risk getting a blurry image from spray-under.
Later in the post, we’ll show you a failed attempt using Plasti Dip spray applied in two coats. Yeesh, not recommended!
Step 5 – Seal the doormat
Okay, so Flex Seal is rubber – it’s not like it really needs much protection from the rain. But sunlight is another thing, so a sealant with UV protection is a good choice to keep your personalized mat looking good for a longer time. Sun, feet, ice, dirt and rain will eventually destroy anything, but we can at least delay its eventual demise with a UV sealant.
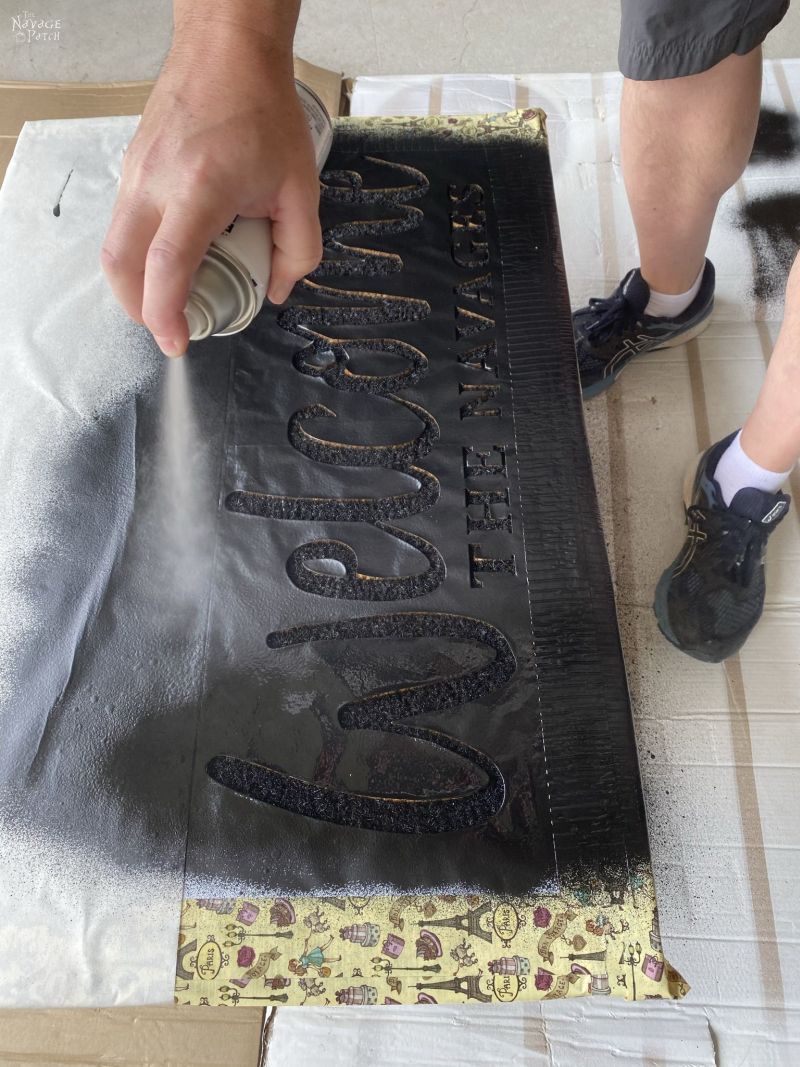
I chose Rustoleum’s matte sealant.
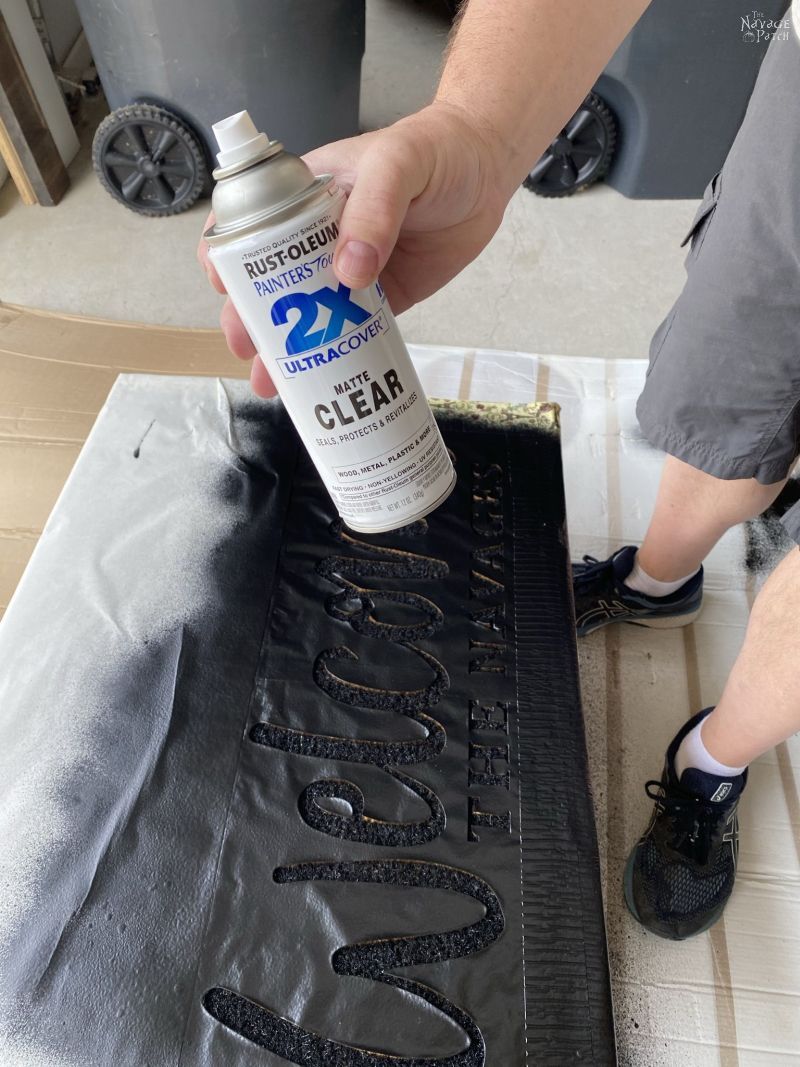
The more coats, the better protection. Three or four thin coats should be good enough. Just don’t glop it on!
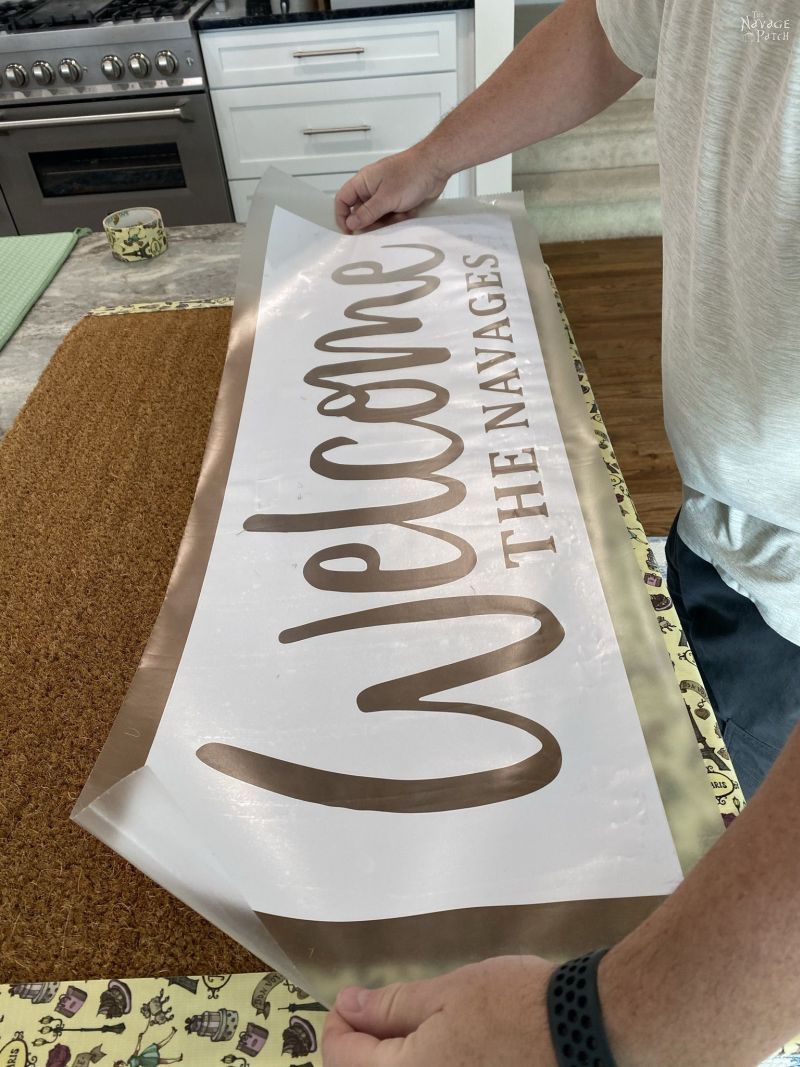
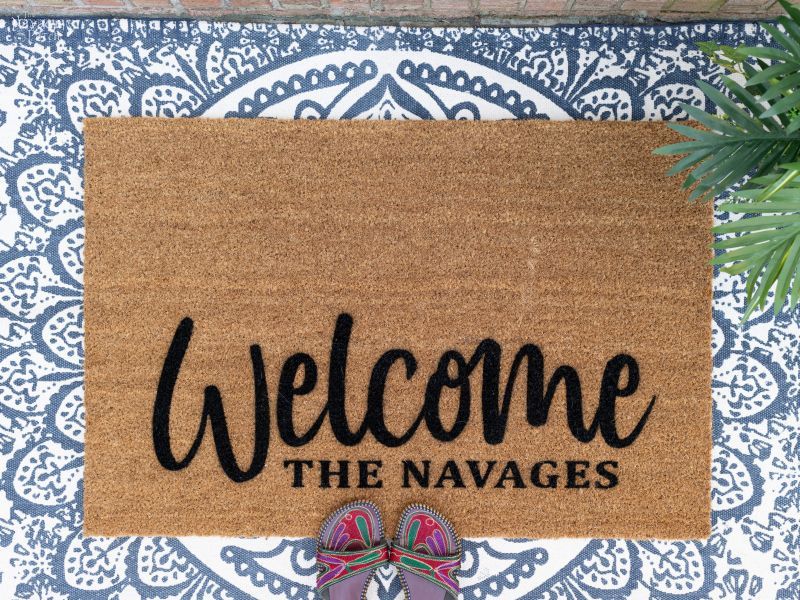
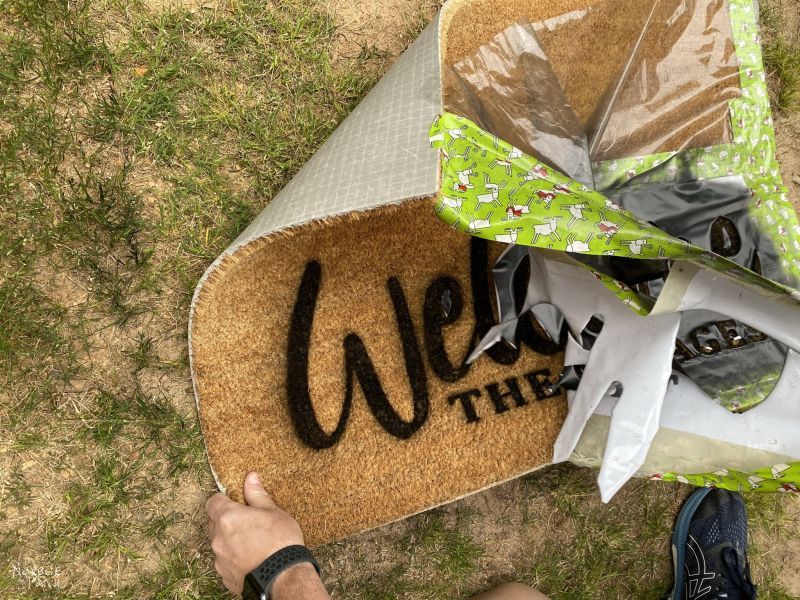
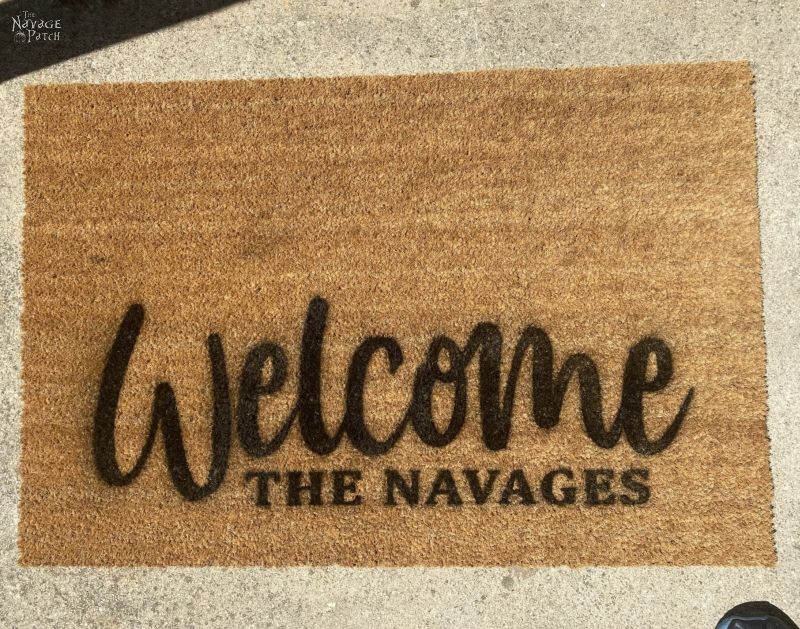
Step 6 – Peel & Reveal
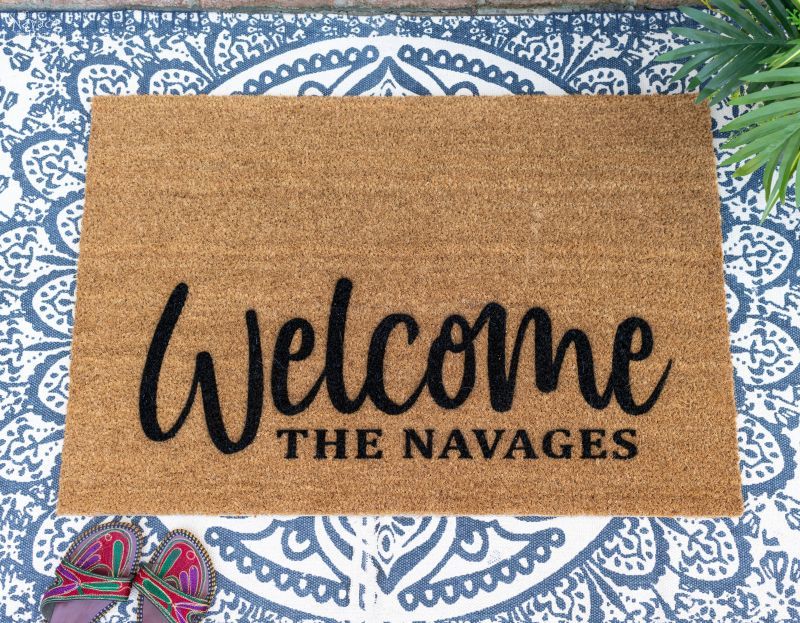
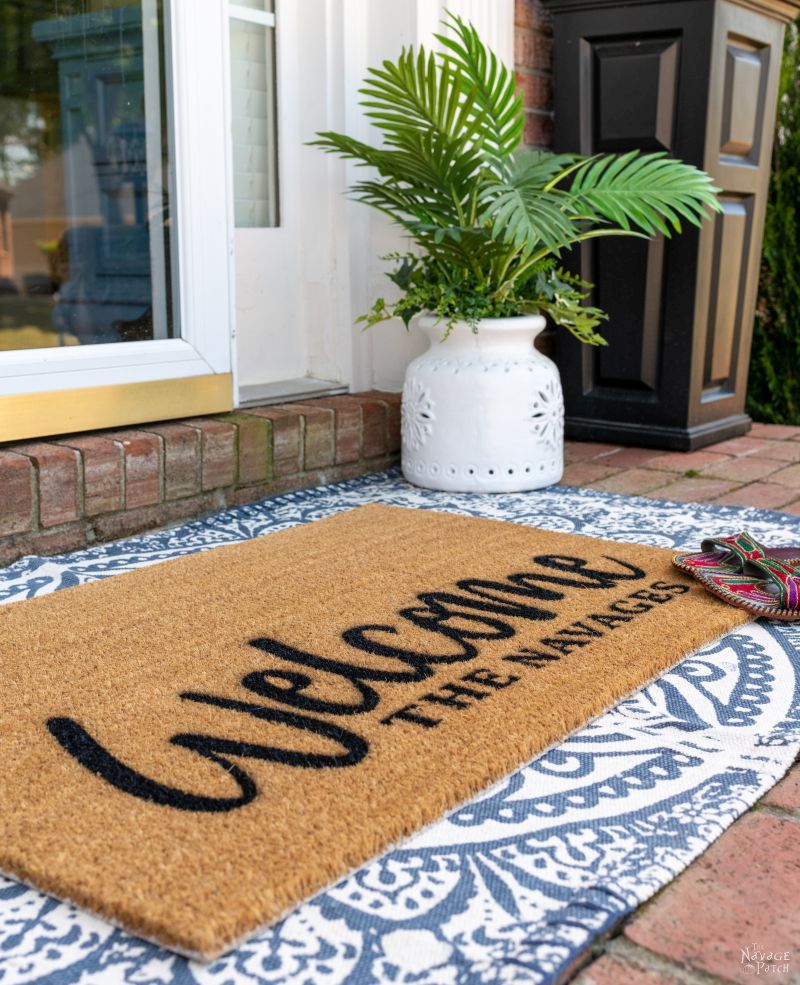
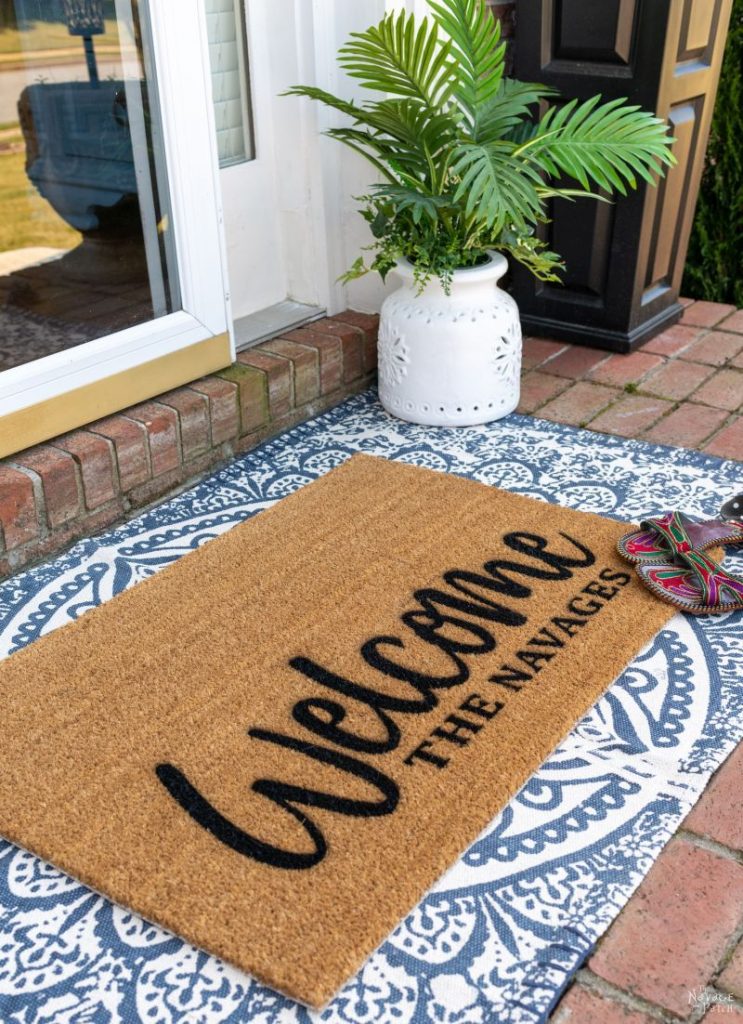
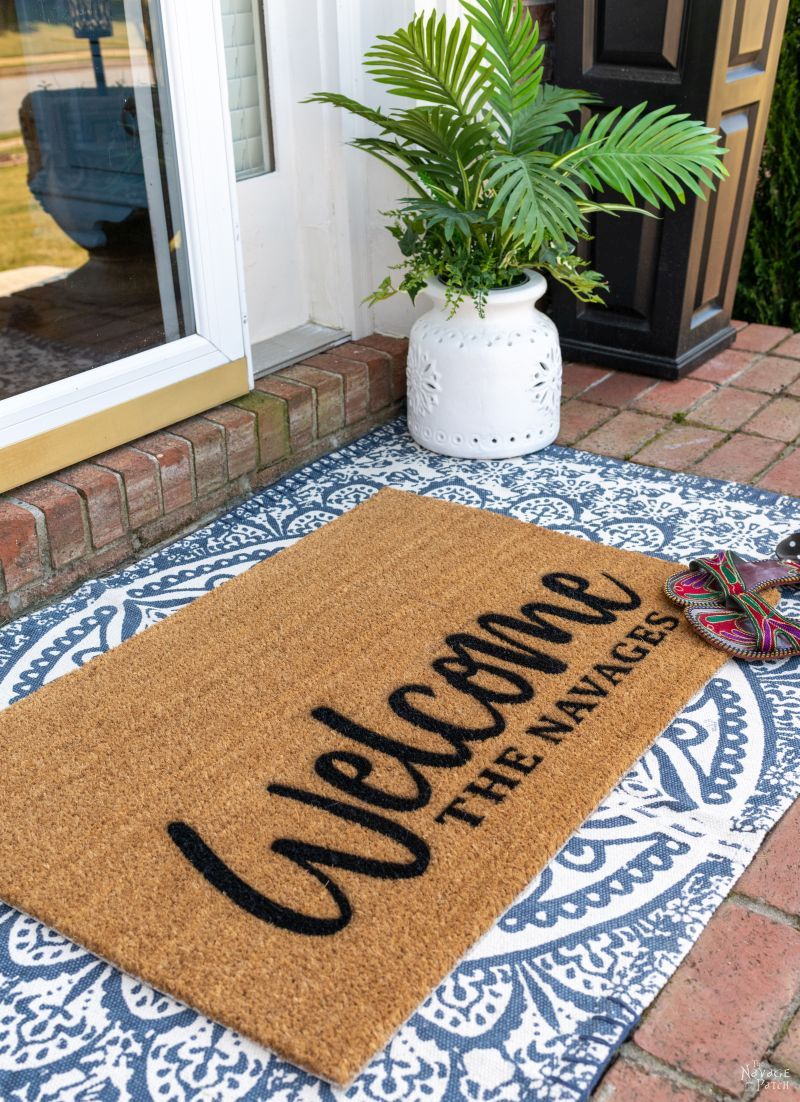
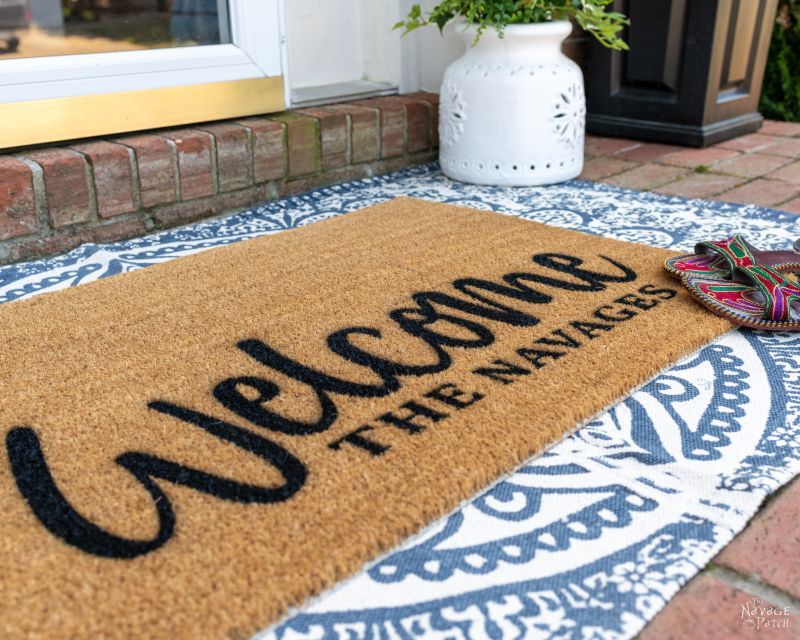
Here are a few pics of our beautiful personalized door mat! The lettering is so crisp and bold!
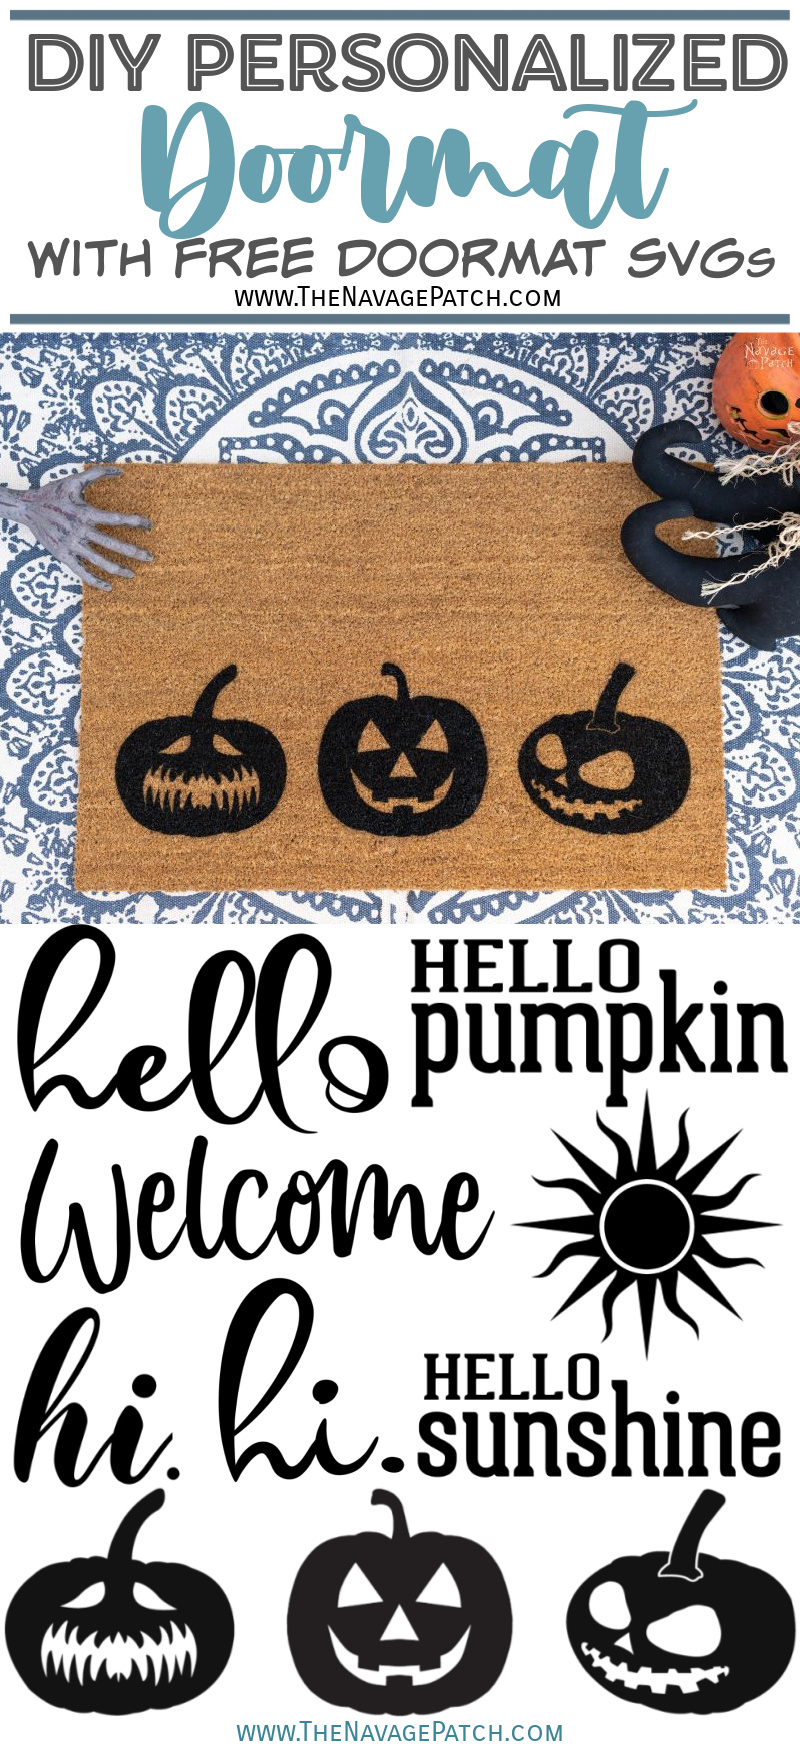
Personalized Door Mat 2 – Three Pumpkins
Since it’s never too late to start Halloween projects, we wanted to include an SVG for a Halloween/Fall doormat.
I cut each pumpkin head separately. The only reason for the black and white stencils is that we ran out of outdoor white vinyl, and I had to switch to black.
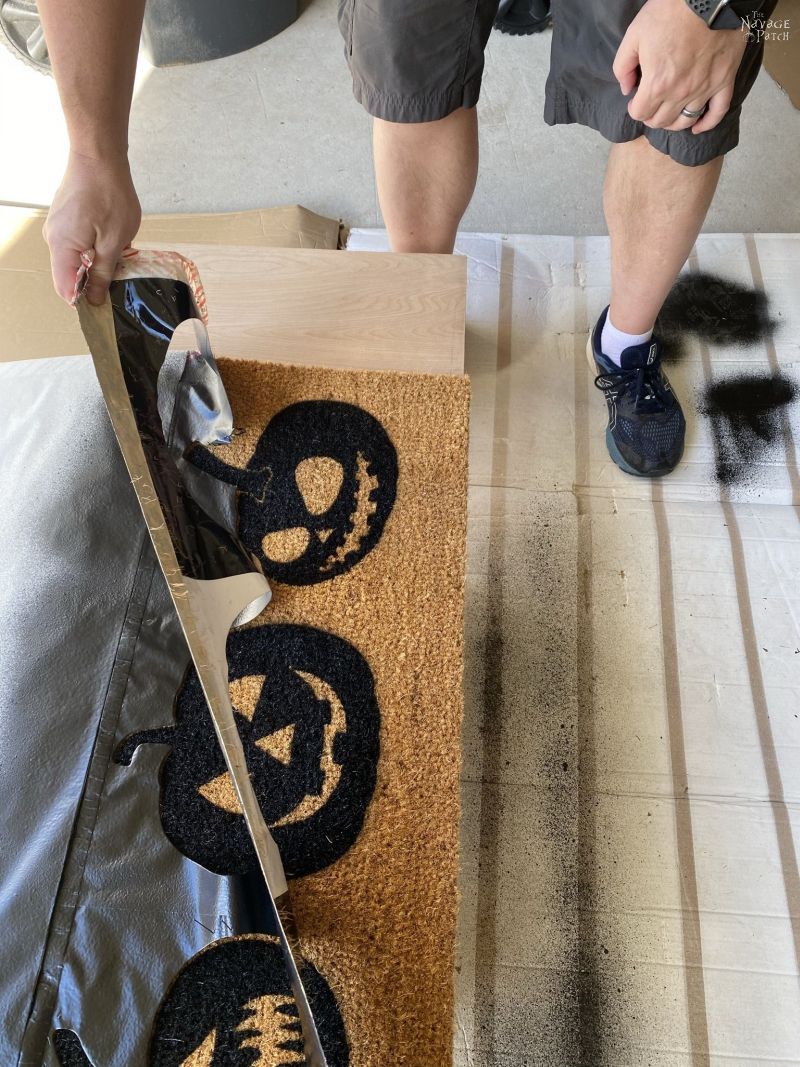
I did my measurements, added my duck tape and placed the stencils.
It was easier to line up the outer pumpkins first…
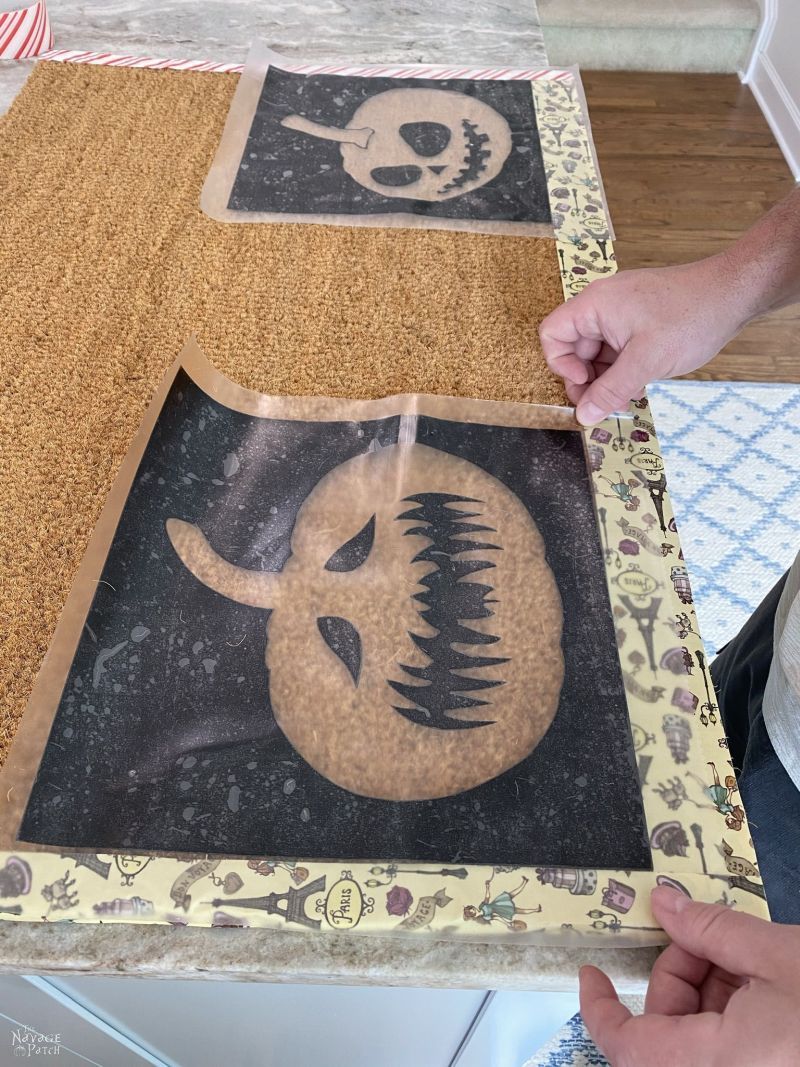
…And then add the middle one in.
Here’s a video of the full Flex Seal spray.
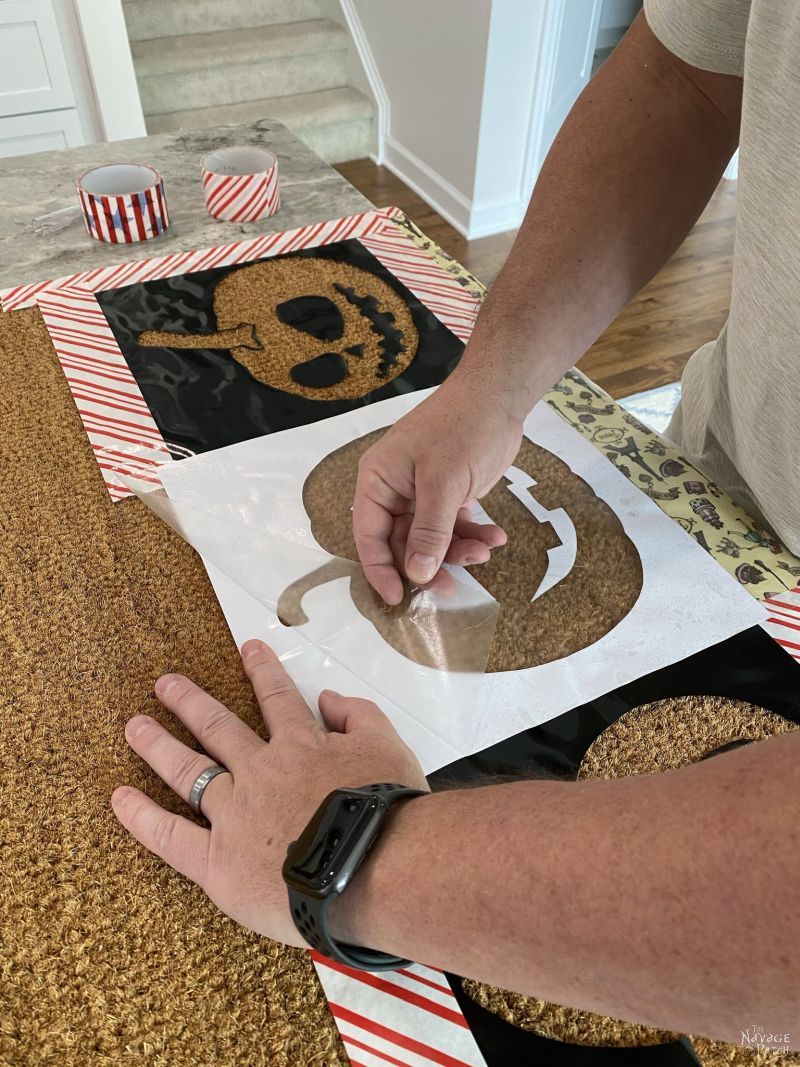
After a few hours, I sealed the pumpkins, just like I did before. Several light coats are better than one heavy coat (unlike with the Flex Seal).
So far so good!
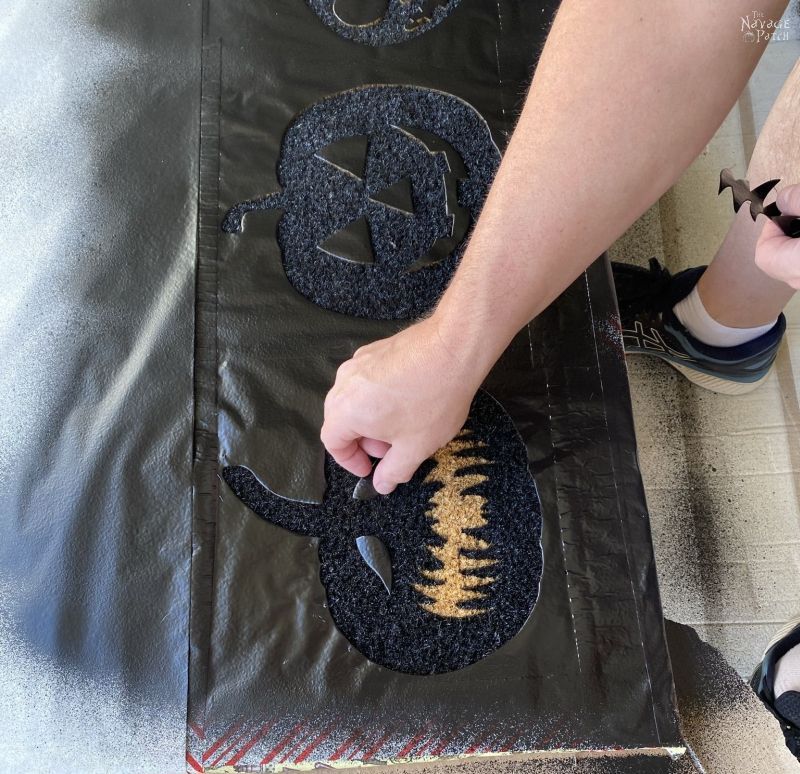
Even before removing all the masking, these guys look awesome!
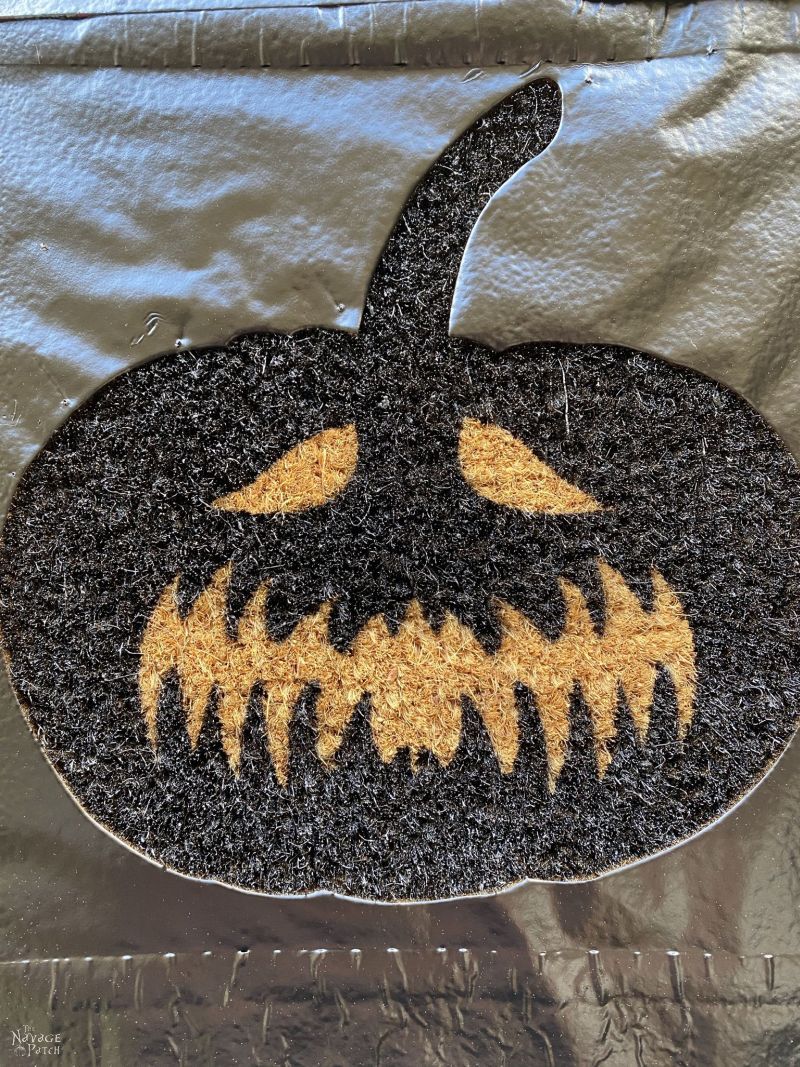
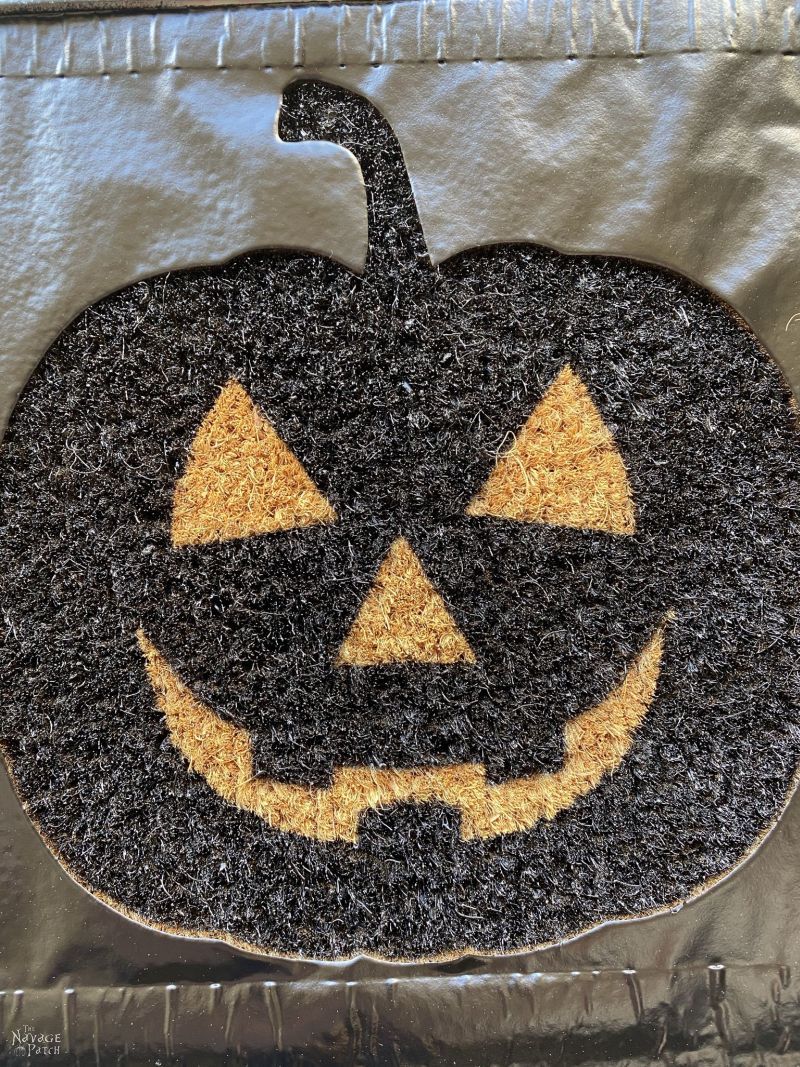
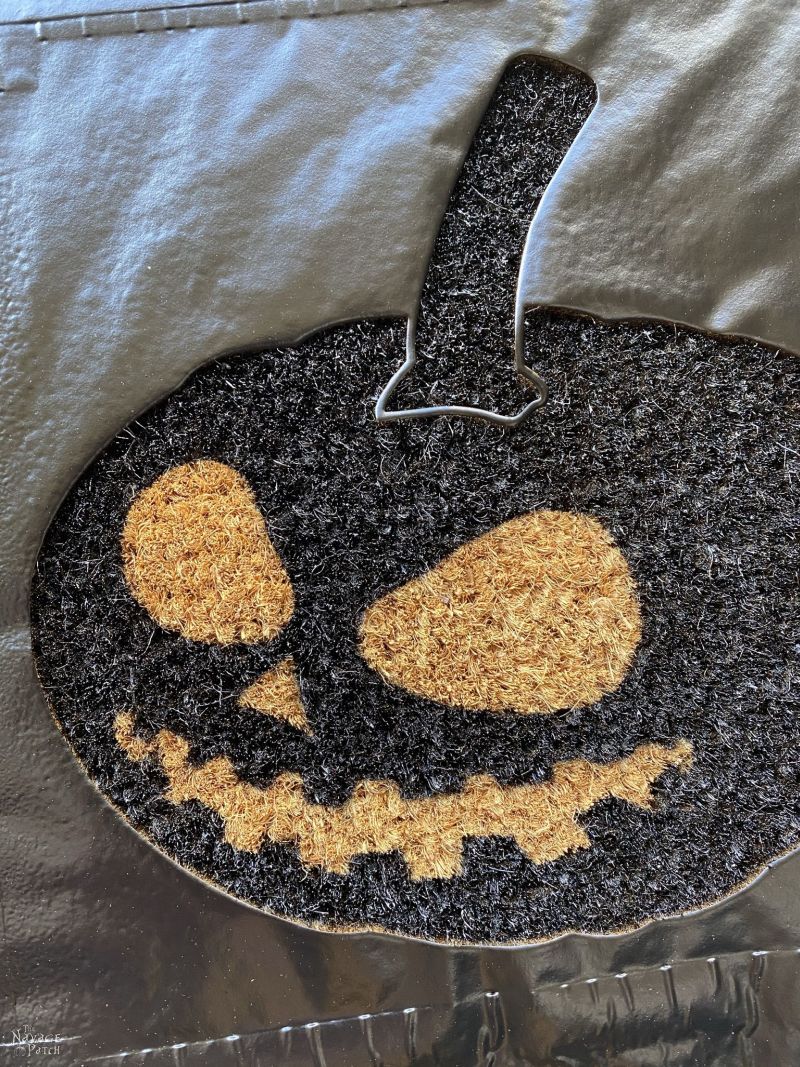
And the reveal!
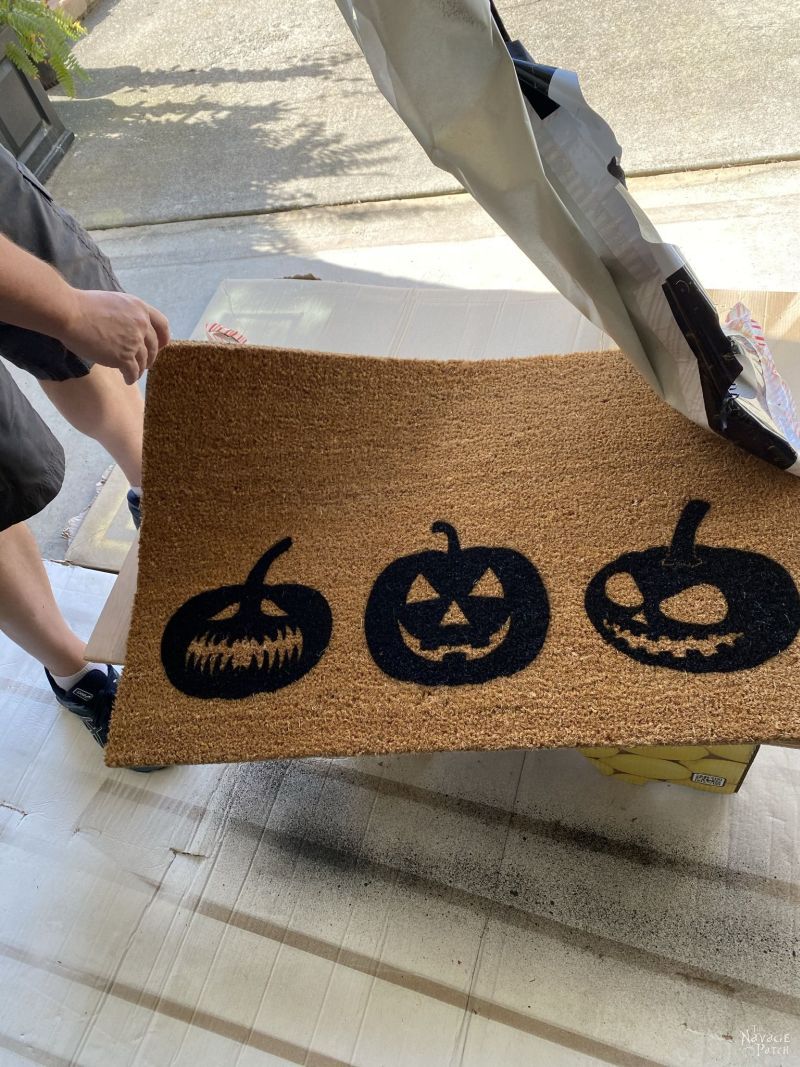
Here are a few pics before we put this one away until fall.

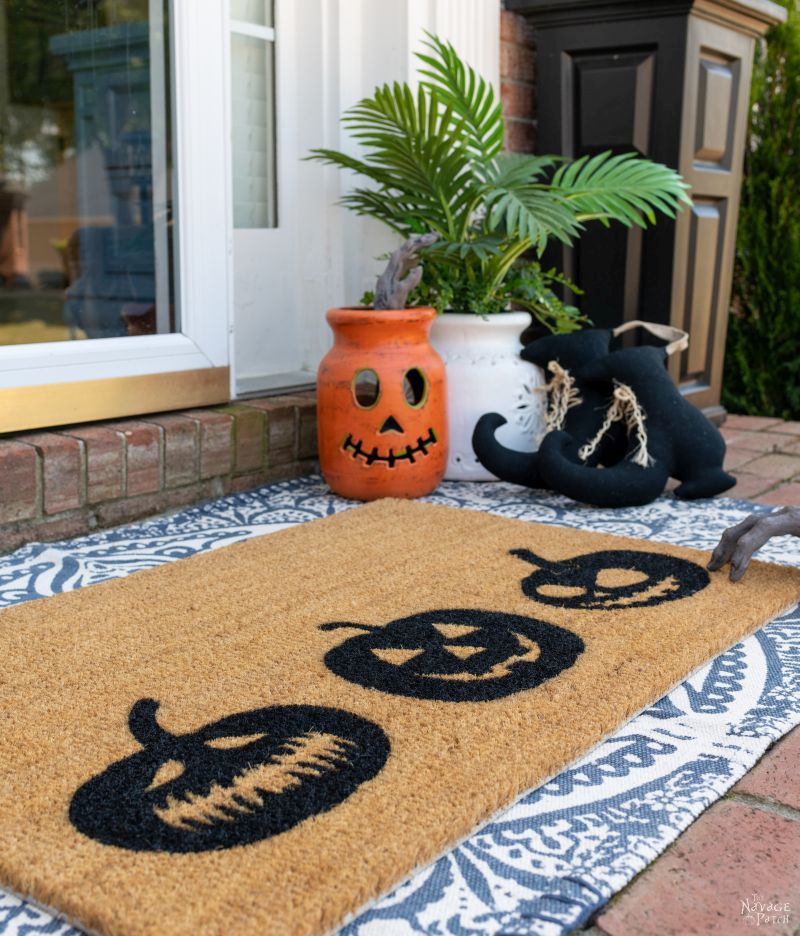
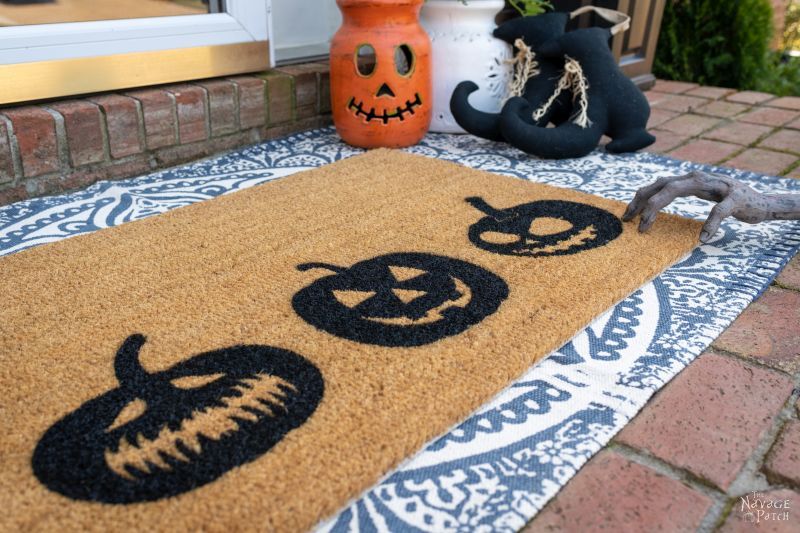
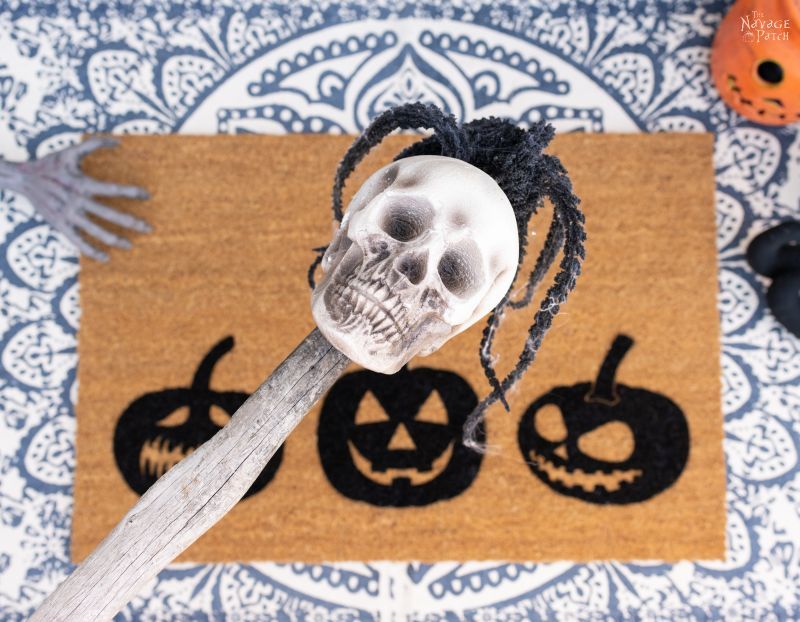
This pumpkin head doormat will be laid back down in October!
We love to see our printables out in the wild! If you display our free printables in your home or use our free SVGs in your projects, and take a picture and post it on Instagram, be sure to tag us – thenavagepatch
Personalized Door Mat 3 – The Failure
Everybody loves a good failure, so we’ll show you ours.
We decided to try making a doormat with Plasti Dip spray. It’s another spray-rubber-in-a-can deal, but it’s nothing like Flex Seal!
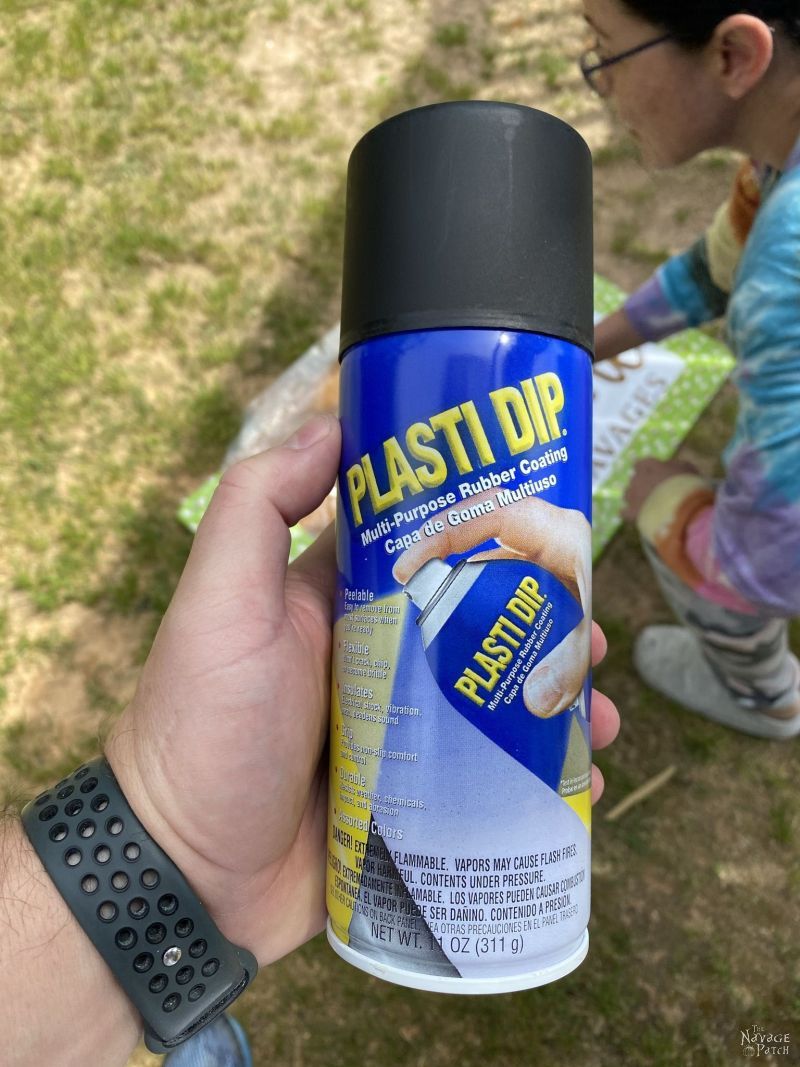
First of all, this is the mat for which we tried using Cricut’s transfer tape. As I mentioned earlier, it was just too grippy for the mat, and it made the transfer from tape to mat a long and painful one. Then came spraying.
I’m not sure what I was expecting, but certainly my expectations involved a lot more “black” than I actually got. This Plasti Dip was weak sauce.
After one coat, the fibers were barely black. I left it to dry so I could spray a second coat. This was a mistake.
When I came back, much of the stencil had curled upward when the Plasti Dip dried.
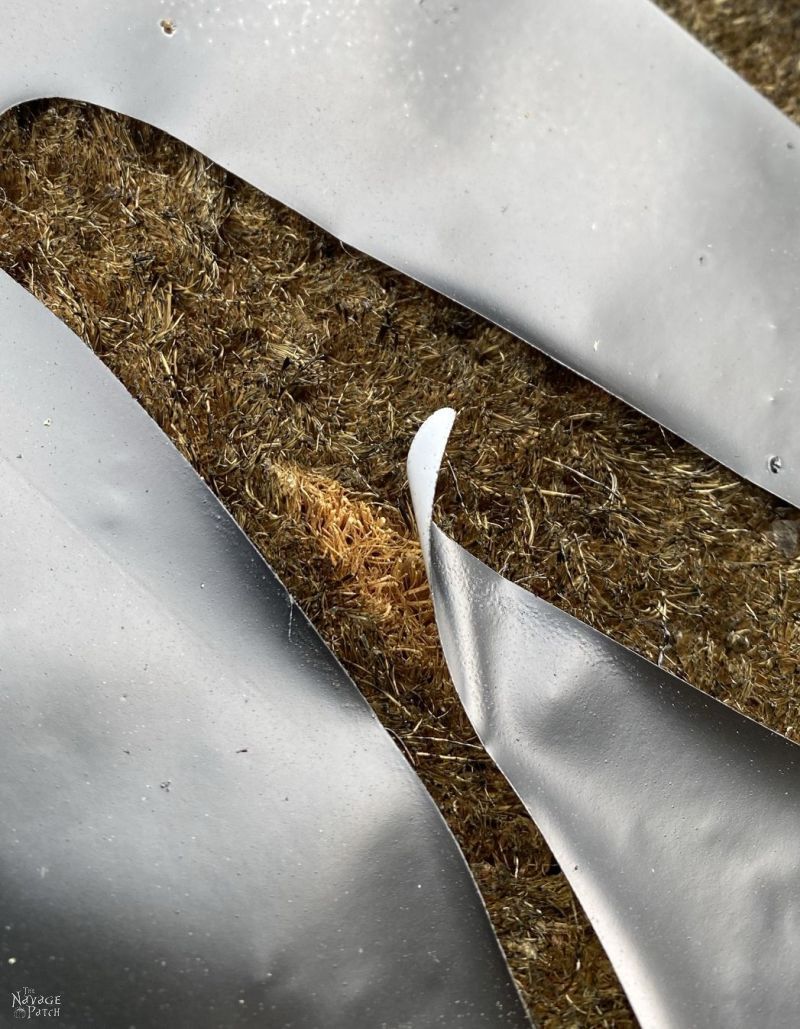
To avert a total failure before even finishing the project, I figured I could pin down the errant flaps of stencil.
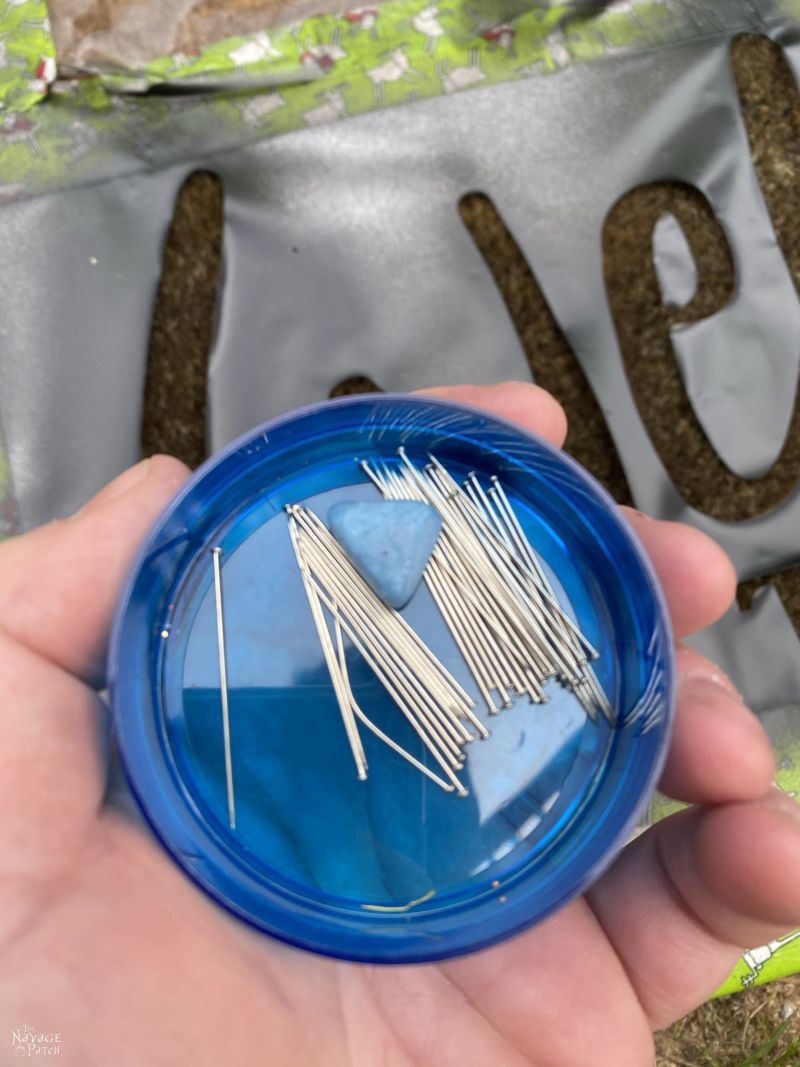
It took a lot of pins.
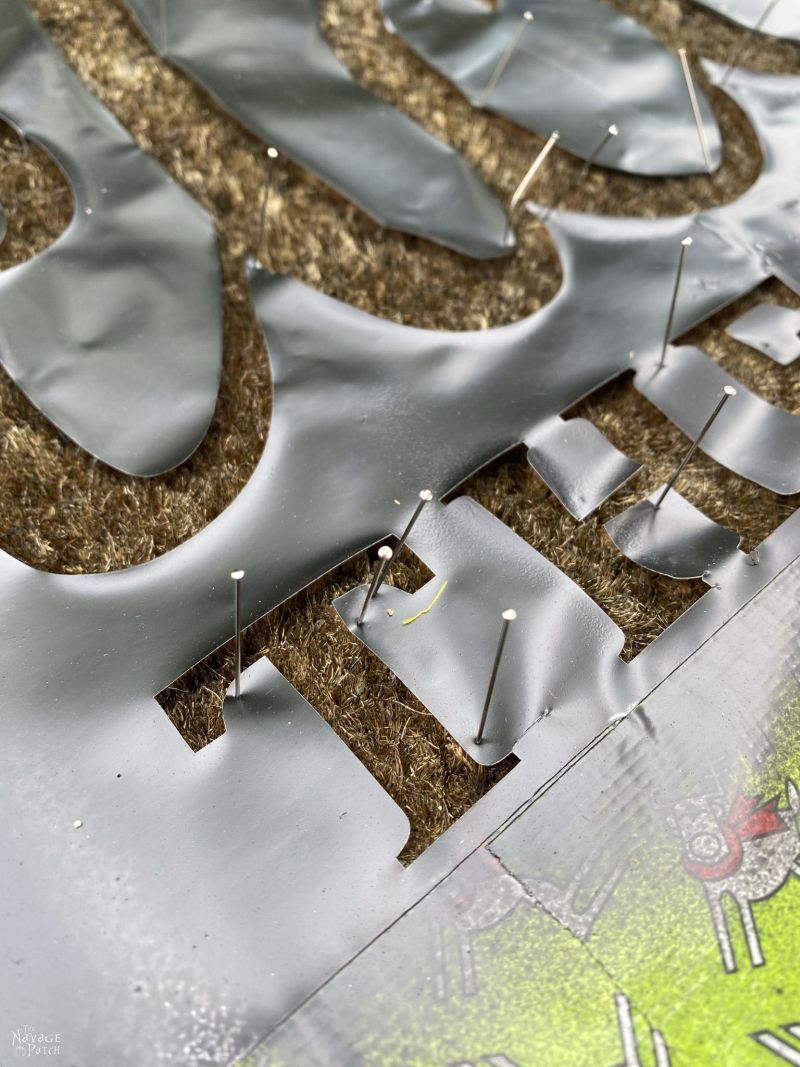
I sprayed a second coat on a wing and a prayer.

The reveal confirmed my fears and suspicions.
It’s not the worst thing on planet Earth, but it’s certainly not good enough for our front door. The black is not sufficiently black, and the letters are hazy and indistinct from spray-under. All in all, I don’t recommend Plasti Dip when making personalized door mats.
Handan and I hope you enjoyed our tutorial and our little videos. This was a really fun project once we figured out the right combination of materials (Cricut outdoor vinyl, Dollar Tree shelf liner, and Flex Seal). We will absolutely be making more personalized door mats in the future!
FREE Personalized Door Mat SVG Files
We created today’s FREE personalized door mat SVG designs as PNG and SVG files which are resizable and compatible with Cricut and all other cutting machines.
Now go ahead and click on the button below to download today’s freebies – they are all in the “SVGs – Stencils” and “Home Decor” section of TNP VIP Lounge.
take me to your
amazing freebies library
If you’re not a Navage Patch VIP, you won’t be able to access our Freebies Library. But that can be easily fixed! Subscribe for free on the form below and become a Navage Patch VIP. Once you subscribe, a password will be sent to you in our Welcome email, and that will give you access to TNP VIP Lounge [Freebies Library].
Share it on Pinterest & Facebook!

Love it. This would make a wonderful gift for a new home or a welcome for a new neighbor.
Thank you!
So happy you like it, Trish! 🙂
You Both come up with the best stuff!!! I love this idea!! Flex Seal, who would of thought to use that! SMHIW
Thank you so much, Olga! 🙂
I just love reading your posts! I not only love the projects but love your humor! Thank you!!
Thank you, Stephanie – that makes me so happy to hear! 🙂
Are you for rent??!! lol lol
Everything has a price, Linda, lol! 🙂
I enjoy your posts a LOT! I really like your welcome mat–which font did you use for your name?
Hi Sherry, I used “Cambria Bold” font. It comes with Windows, so if you have a Windows computer, then you should have it. The font size is 200 pt, but I compressed the height to 80%. In other words I compressed the height 20%.
Let us know how yours turns out!
Love this! I go through a lot of door mats because I get tried of design or they succumb to the elements. I could have a mat for every day of the week if I wanted. Cant wait to make a door mat. BTW, I spied your tall, black planters on the porch. Did you make those? If so is there a tutorial.
Thank you, Stacye! Nope, we bought those planters a few years ago from Home Depot. You can find them here.
I love the rug underneath, do you leave that out as well? I like the look! And, where did you get it?
We do have alternating rugs we keep under the doormat. We bought that one a few years back at TJ Maxx, so I’m not sure you’d be able to find it again!
Genius! And thank you for sharing! I bought a coir mat with wording I loved from Hobby Lobby, but less than a year later the letters were faded almost beyond recognition. So disappointing! Looking forward to trying your method instead.
You’re welcome, Sarah! If yours gets a lot of sunshine, be sure to put a lot of UV protectant on there!
And here in Australia Greg, it is ‘personalised’. You can’t please everyone.
Suzanne (Australia)
I just hope Google is smart enough to understand regional spelling variations! 🙂
Do you have any idea about how many mats can be made from one can of Flex Seal if I made the “Welcome” and put a name on it? Thanks
Hi Wendy, you can definitely make two and probably three with one can of Flex Seal.
Thanks so much! I can’t wait to try one!
Hello,
I have tried making coir doormats but with paint. I found this method to be easier, however I did have a concern about keeping the little loose pieces into place. I have always had this issue. How do they stay in place and not move while spraying?
Thanks!
Hi Sharon, I use pins to hold the smaller pieces down. As long as you spray directly downwards and not at an angle, you should be good!
Super awesome idea! Thanks so much for sharing!!
How long do you expect the rubber will last? I’m concerned about long term durability for my current project, but this project looks like it could be the solution!
Thanks again for this and any tips!
Hi Carrie, it really depends on weather, foot traffic and direct sunlight. All 3 will wear out the rubber (and the mat, for that matter), so it’s hard to say exactly how long they’ll last, as everyone’s environment is different. But I check out painted mats in stores whenever I’m out, and it seems like they’re using a similar type of process as we are.
Is there a way to successfully do this with a reusable stencil?
I’ve used press n seal in place of transfer tape too. It works great!!
Good idea!
So cute!! It looks amazing!
How much total do you think you spent on this?