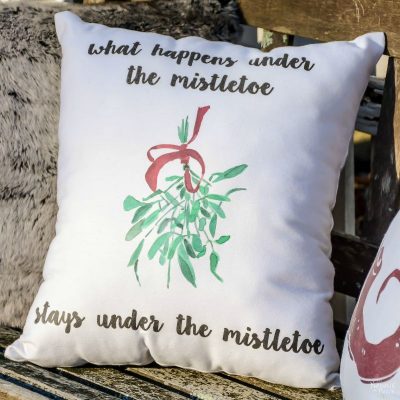
Painting Stair Risers – How to Get Clean Lines
Painting stair risers with clean lines is a cinch with this one little trick. I learned it the hard way, so you don’t have to!
In hindsight, I should have known.
I mean, it’s not like it was my first time around wood, right?
It should have been as obvious as the nose on my face.
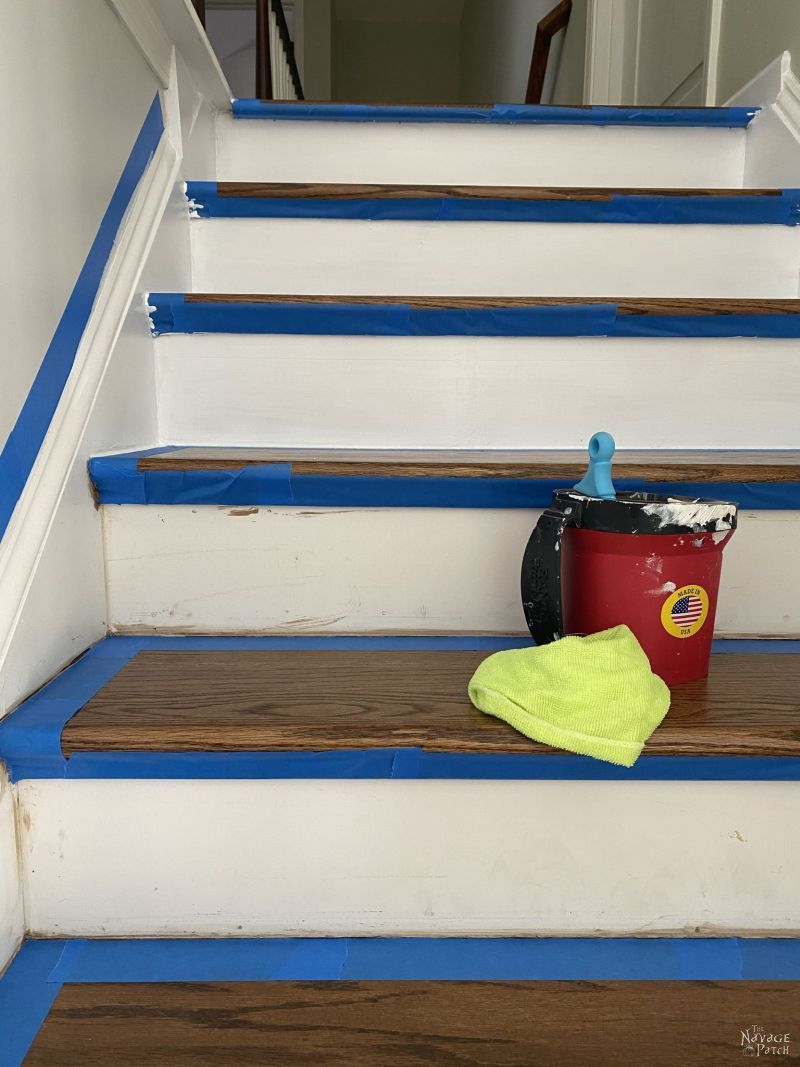
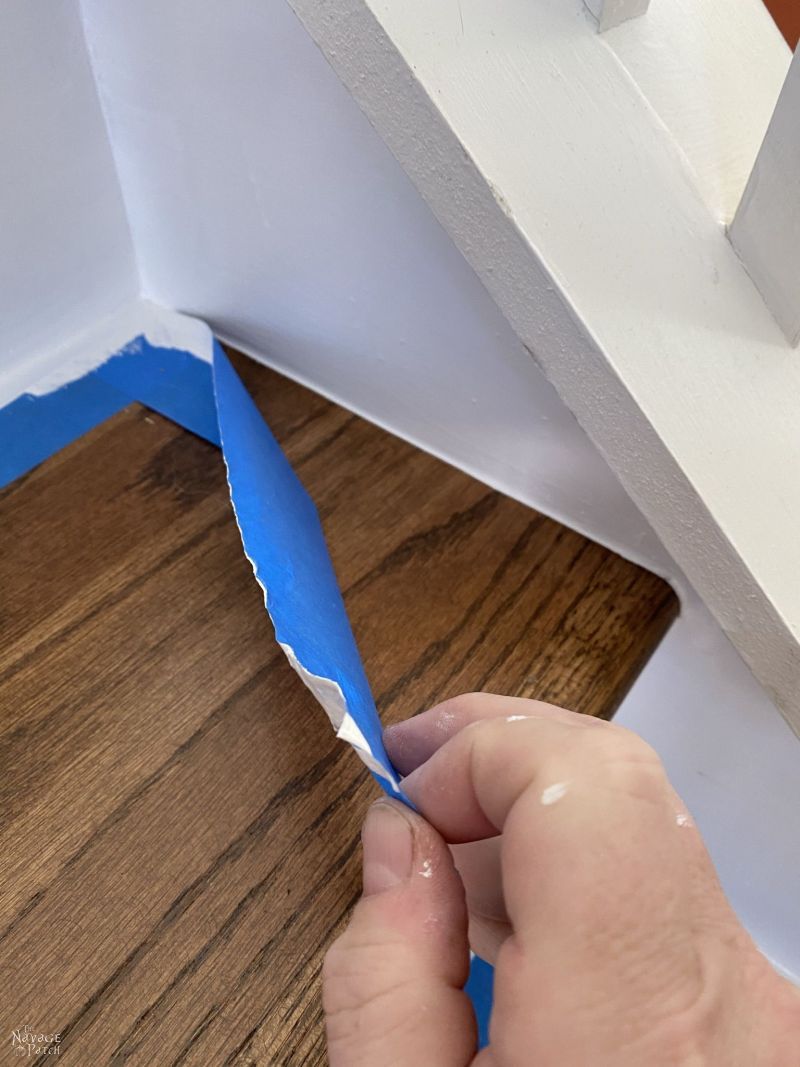
But the notion never crossed the threshold of my walnut brain, so I painted our stair risers as if they were no different than a common wall – I just taped off the stairs and slapped on the paint. I shouldn’t have been surprised to see that so much paint had leaked under the tape and gotten all over the oak stair treads. It was only then that the properties of wood came rushing back into the half-pint of oatmeal lodged between my ears, and I realized my error.
Wood has a grain to it, and that grain is not smooth. I tried taping it with painter’s tape, but there was no way the tape would get into every little nook and cranny, so the paint was doomed to seep under.
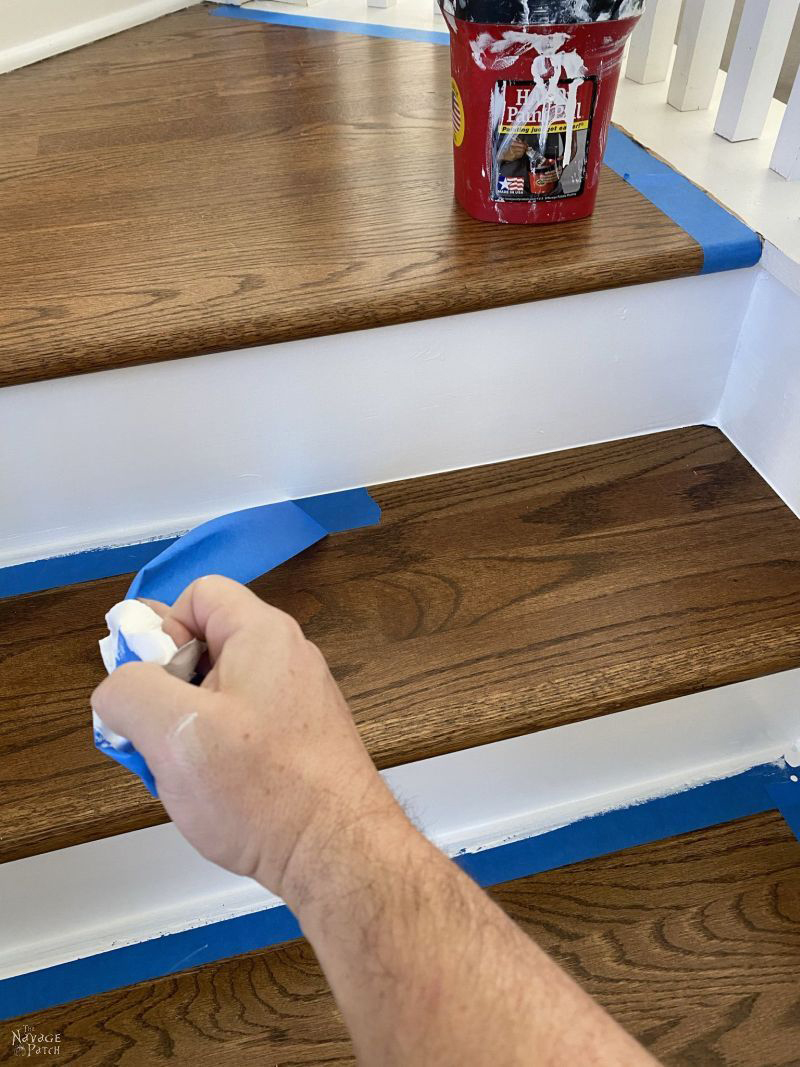
So, the thing is, I never meant to write this post, because I never intended for the stair riser painting to be anything more than a simple tape ‘n’ paint. And when I discovered all that white paint that had seeped onto my beautiful stairs, my only thought was to grab a scraper and start scraping before my babes found out and called me a dummkopf. It never occurred to me to take pictures of the mess, because I was never planning to write about it!
Well, naturally, she found out, because it took an entire afternoon of scraping to get all the damn paint from the stairs, and there’s no way I could ever avoid the kommandant for that long!
And the problem then was that the stairs still looked awful!
Okay, let’s start at the beginning.
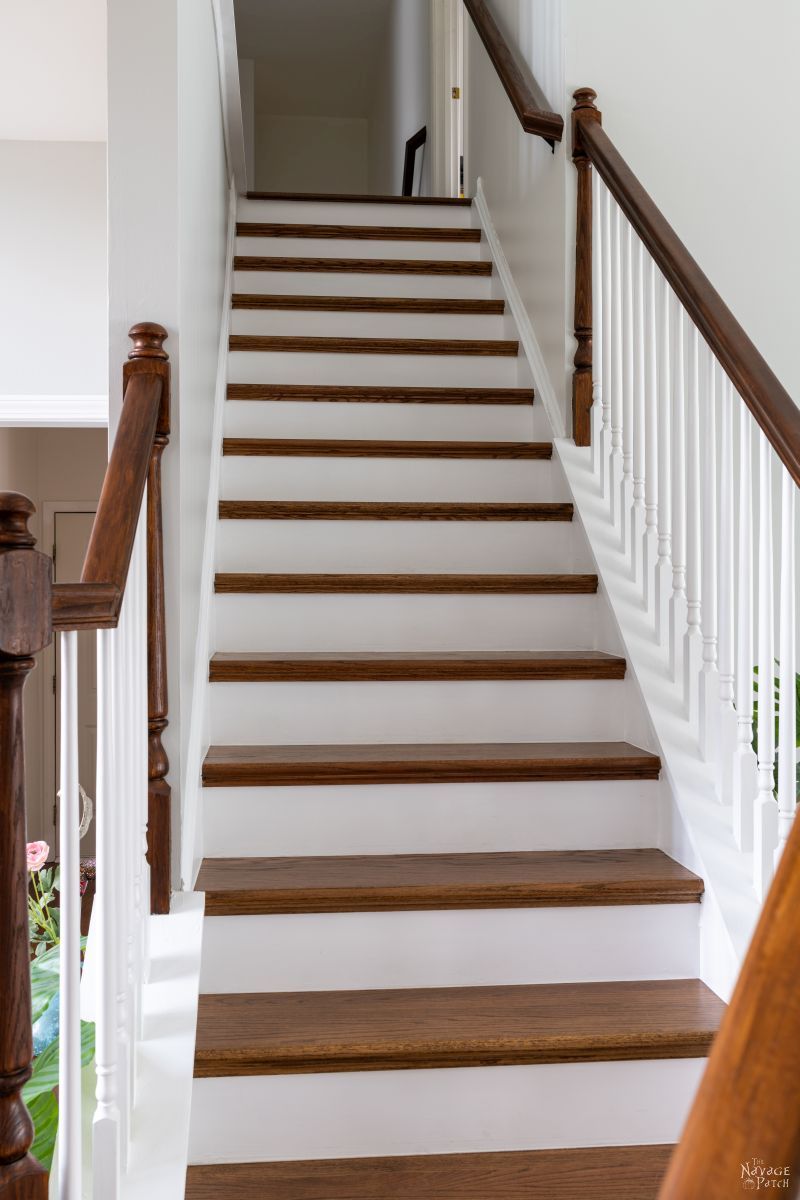
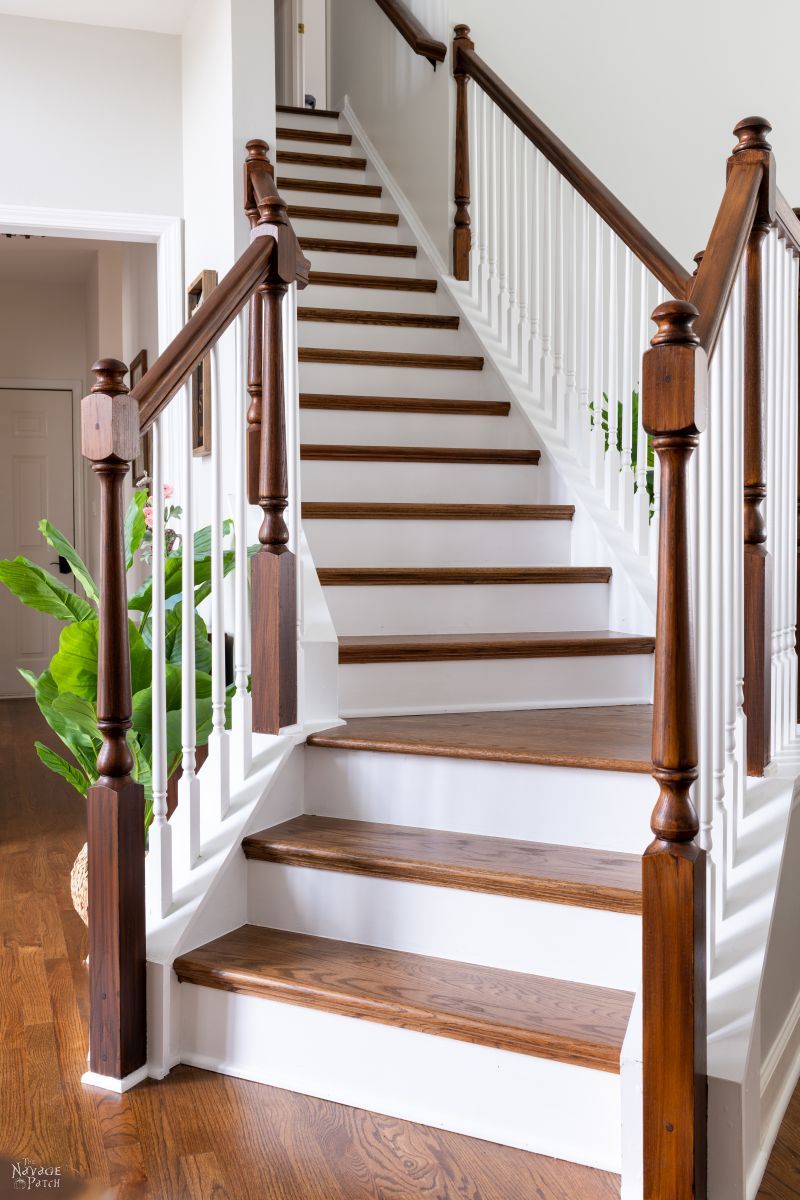
Here’s what we were left with after we had wood floors and wood stairs installed last year:
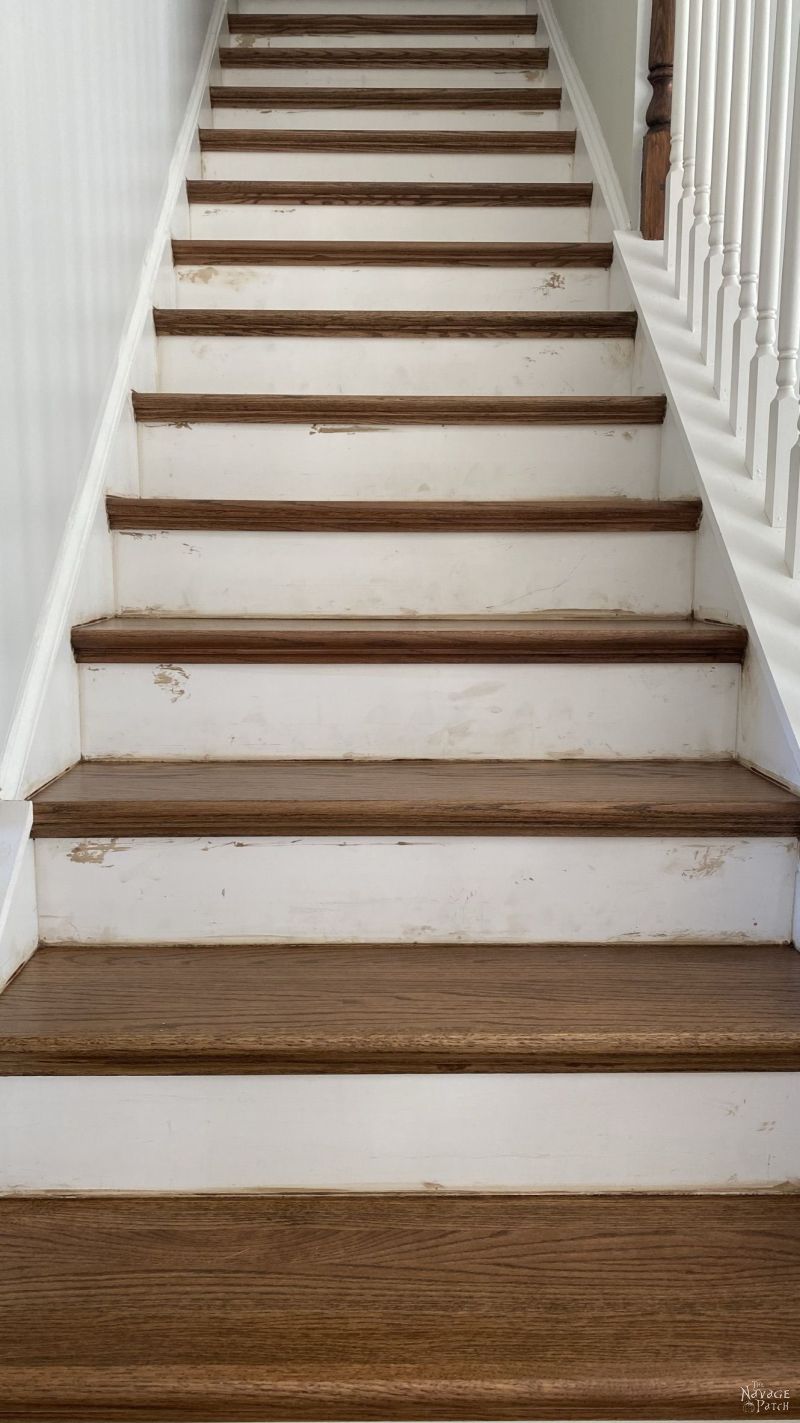
Not very pretty, and that’s putting it kindly. But the flooring guys were hired to install floors. Painting afterwards was not part of their scope of work. That job fell to me (and boy, did I take my sweet old time with this project, but that’s another story). Now, those oak stairs butt up against the wood risers, but it’s not a perfect fit, not when you really look close.

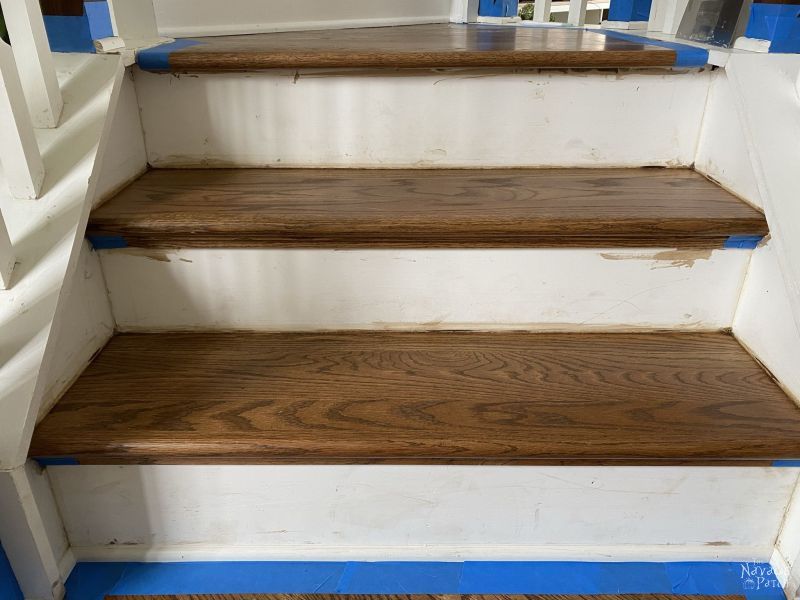
So even if I had a perfect tape seal, it wouldn’t have looked good. But I didn’t know that, so I blithely taped and painted and thought all was well with the world. Painting these stair risers was just going to be one small part of our Staircase Makeover, which I’ll be sharing with you soon. That’s why I only took this one picture.
A day after that picture was taken, I peeled off the tape and discovered my dopey error. There was a small blessing in that I’d only painted this one run of stairs, not the three steps after the landing.
I thought about the problem for a while and determined that some caulk would fix it right up. Of course, caulk would only work because the risers are white. Any other color, and I’d still be sunk. I re-taped the top section of stairs, leaving just a small area exposed, applied a thin bead of caulk and wiped it near flat with my finger. After peeling the tape, I saw that it had fixed the problem. The stairs looked great!
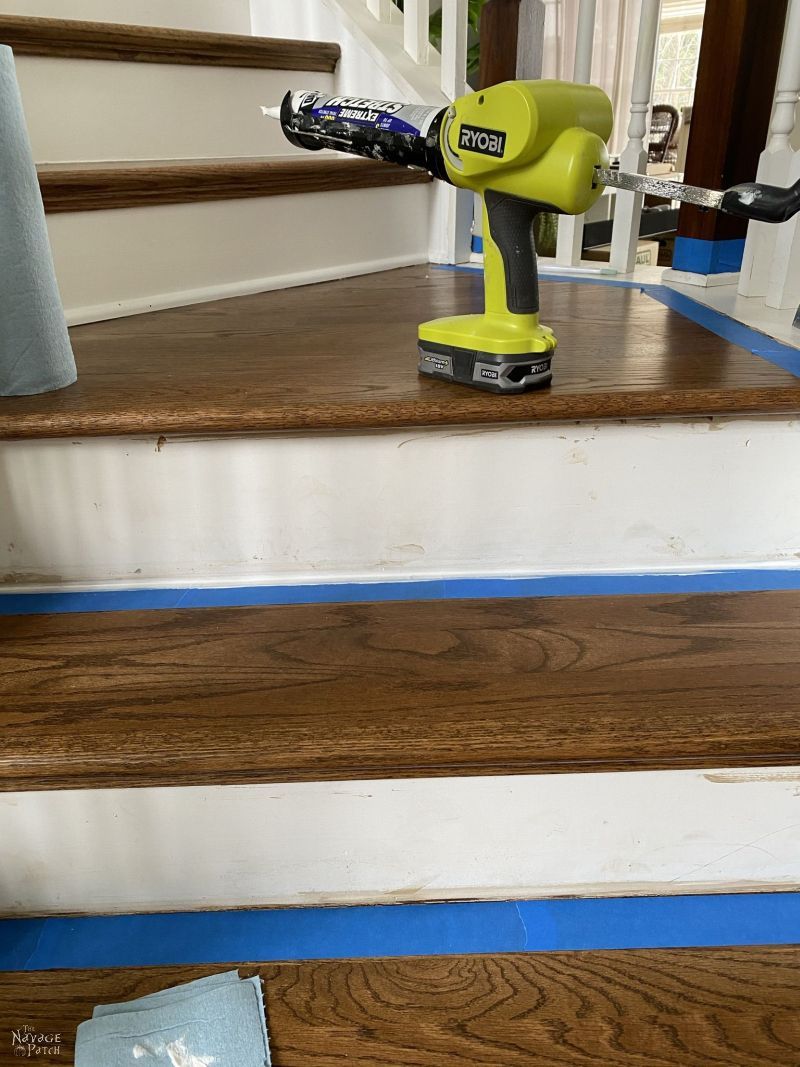
But taping twice was a drag, not to mention the horrors of all that scraping. I thought about the three landing stairs I hadn’t painted yet. Instead of taping, painting, scraping, taping and caulking, I wondered if I could use the caulk first and have it act like a paint-lock.
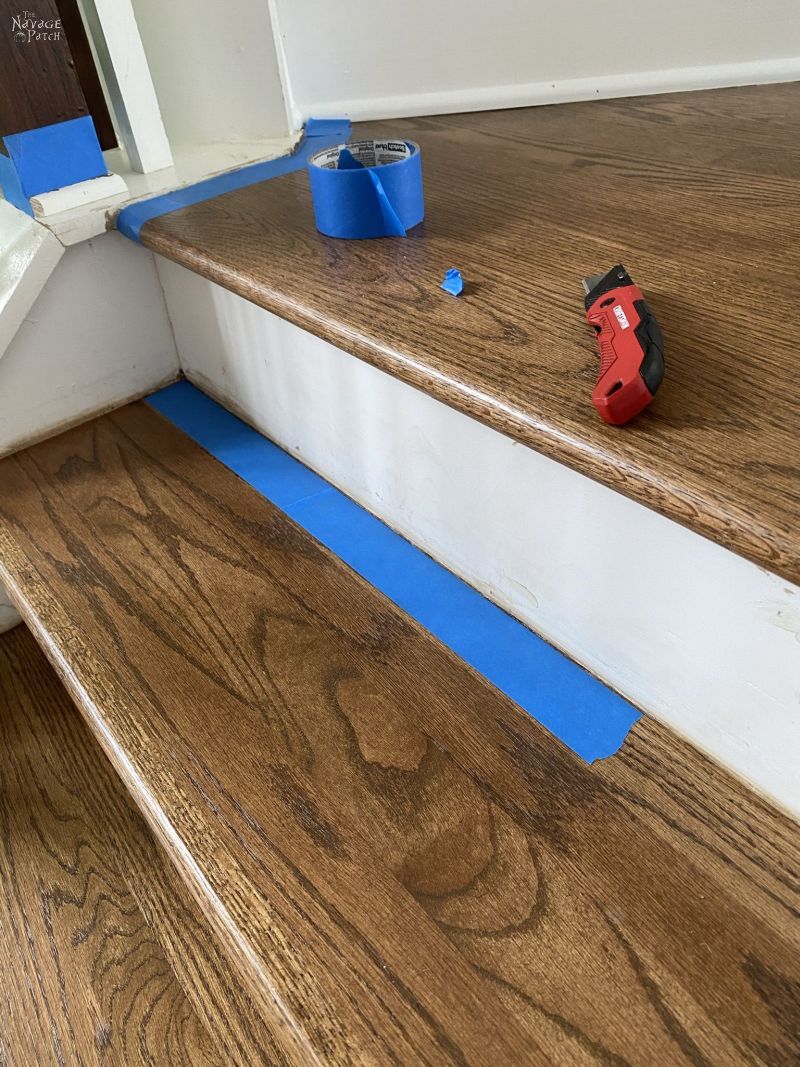
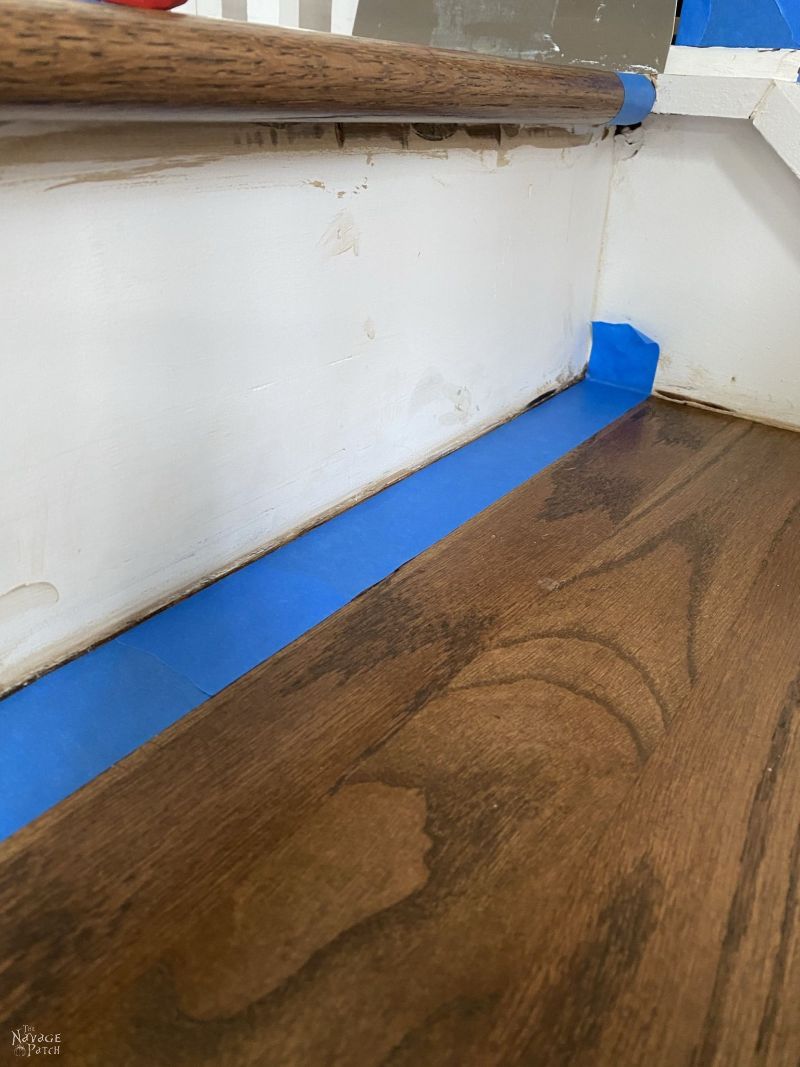
The idea had promise, so I went to the landing to try it out. Here’s how the looked.
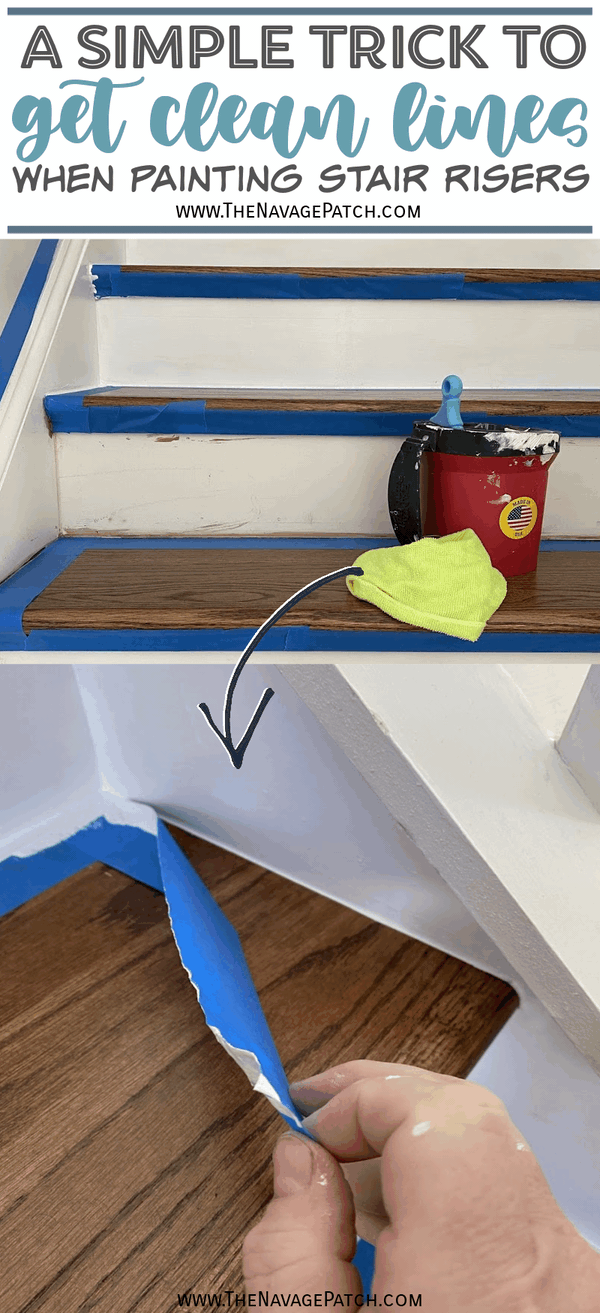
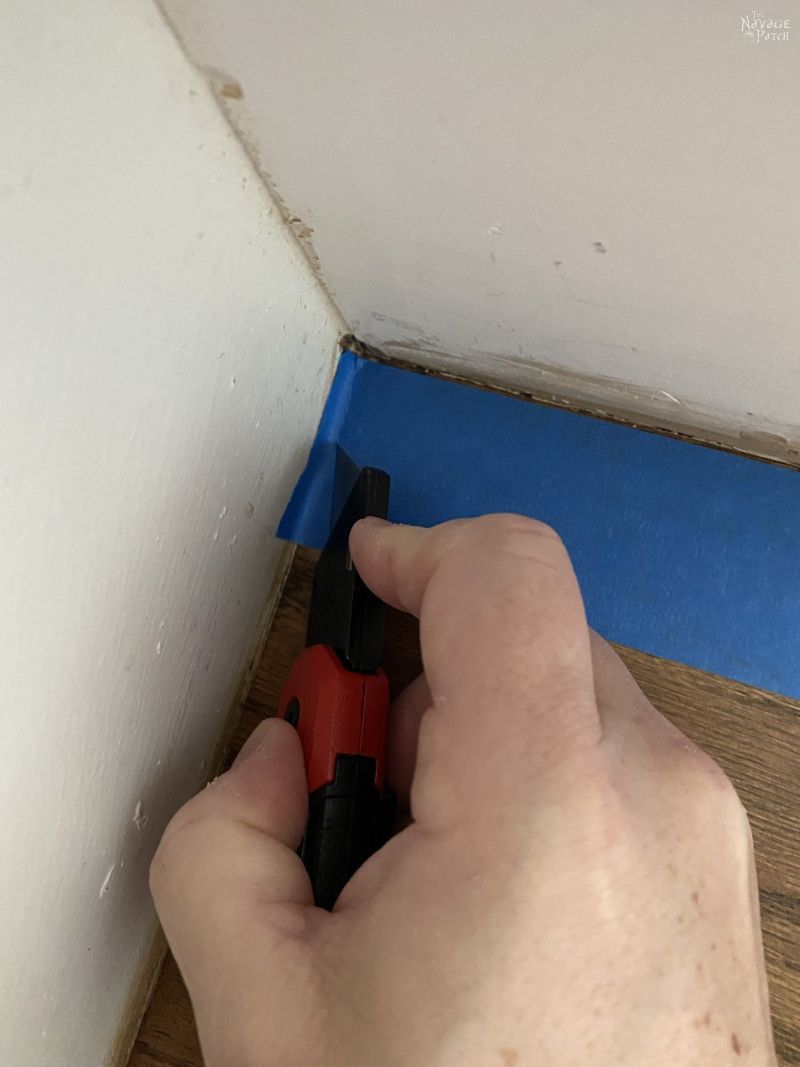
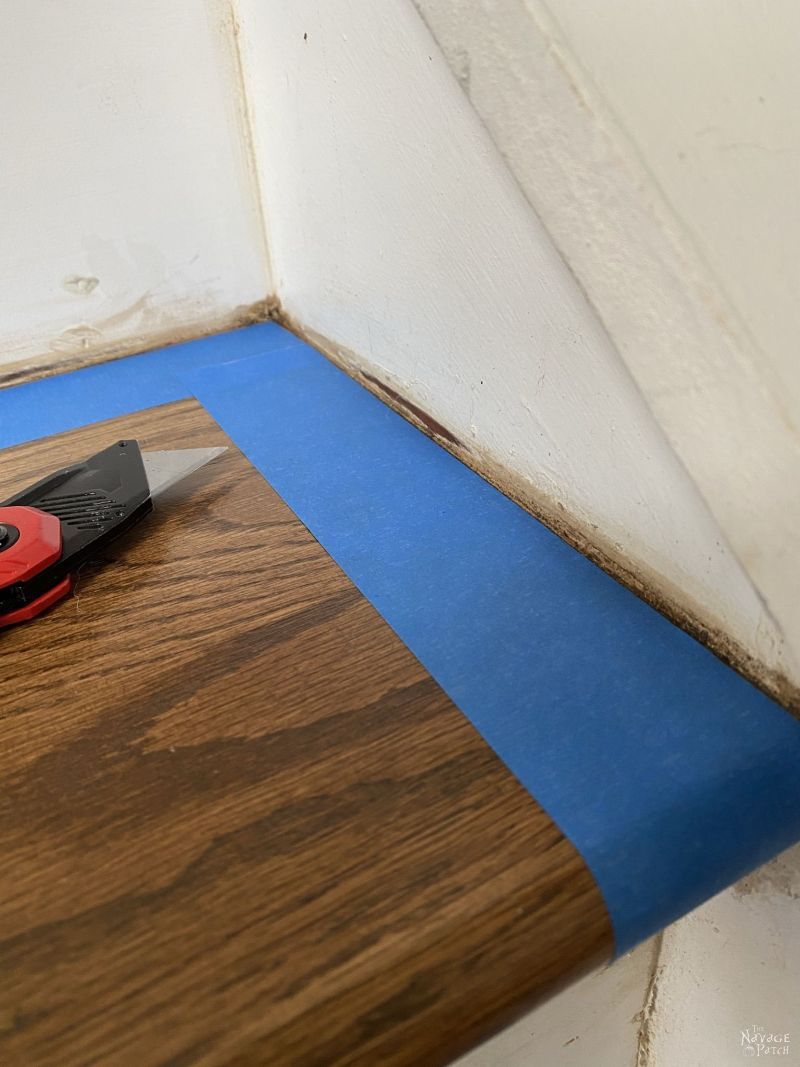
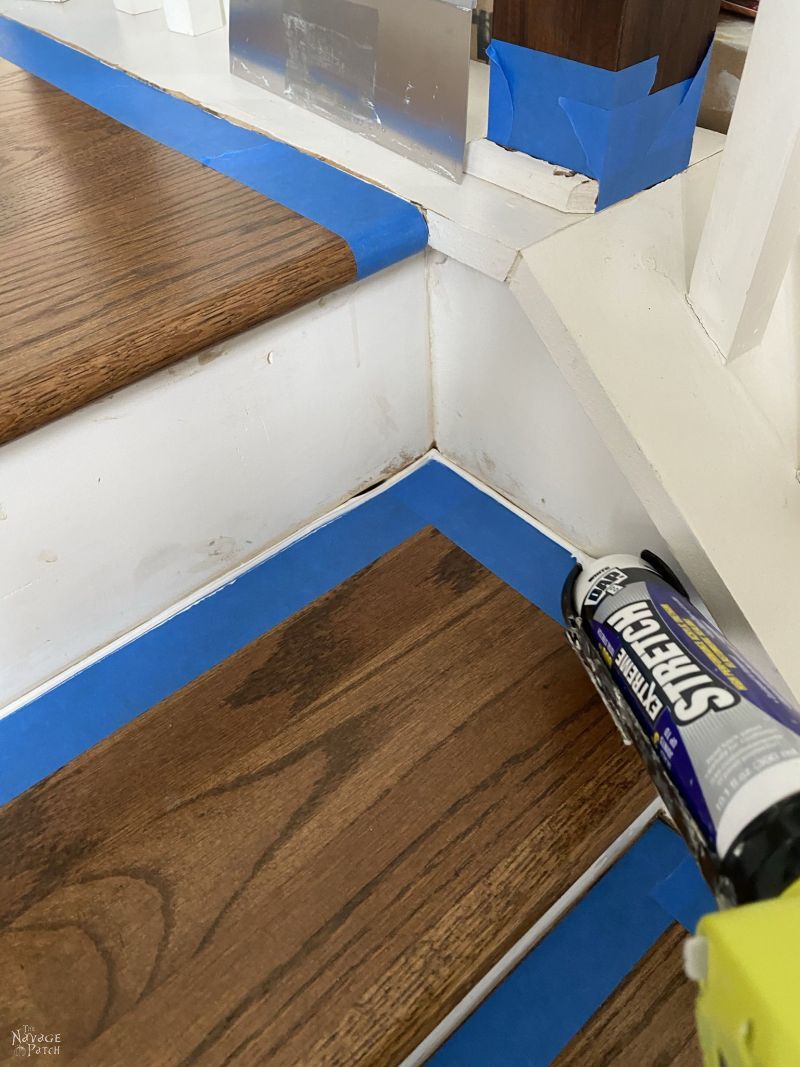
In order for the caulk to give a clean line, I needed to leave a very small gap in front of the riser. This gap would be covered with caulk, and it would had the ugly seam between the stair and riser. I started with a piece of blue tape.
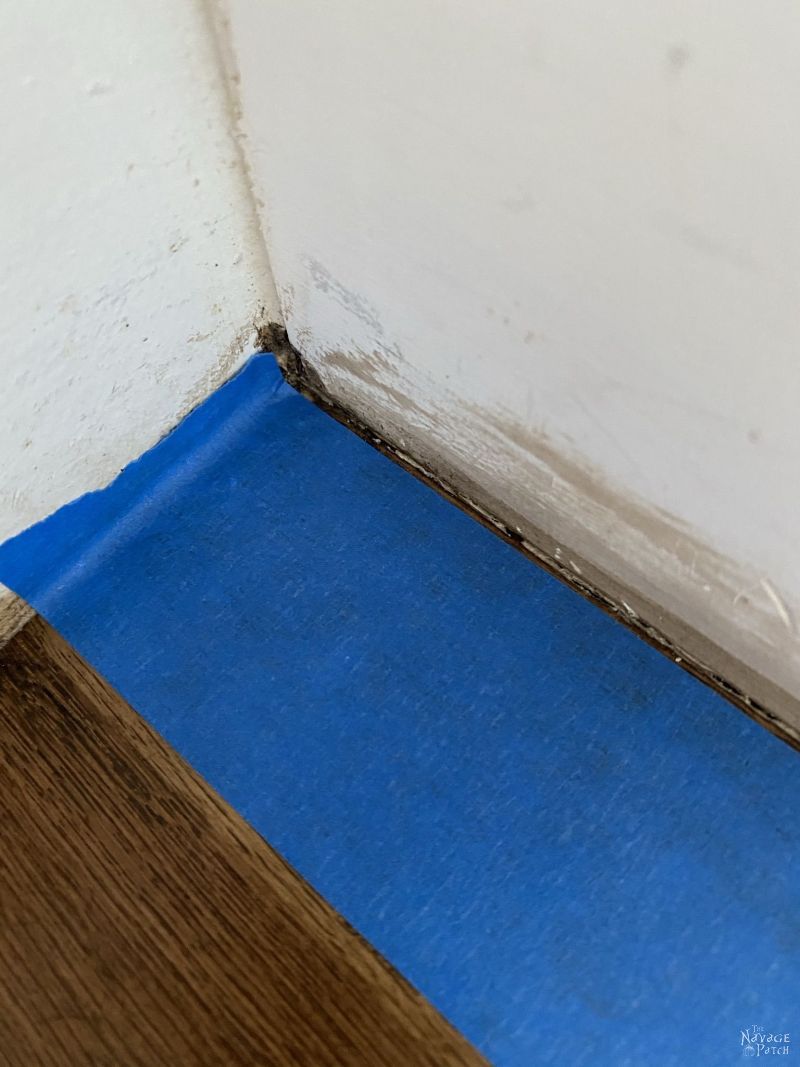
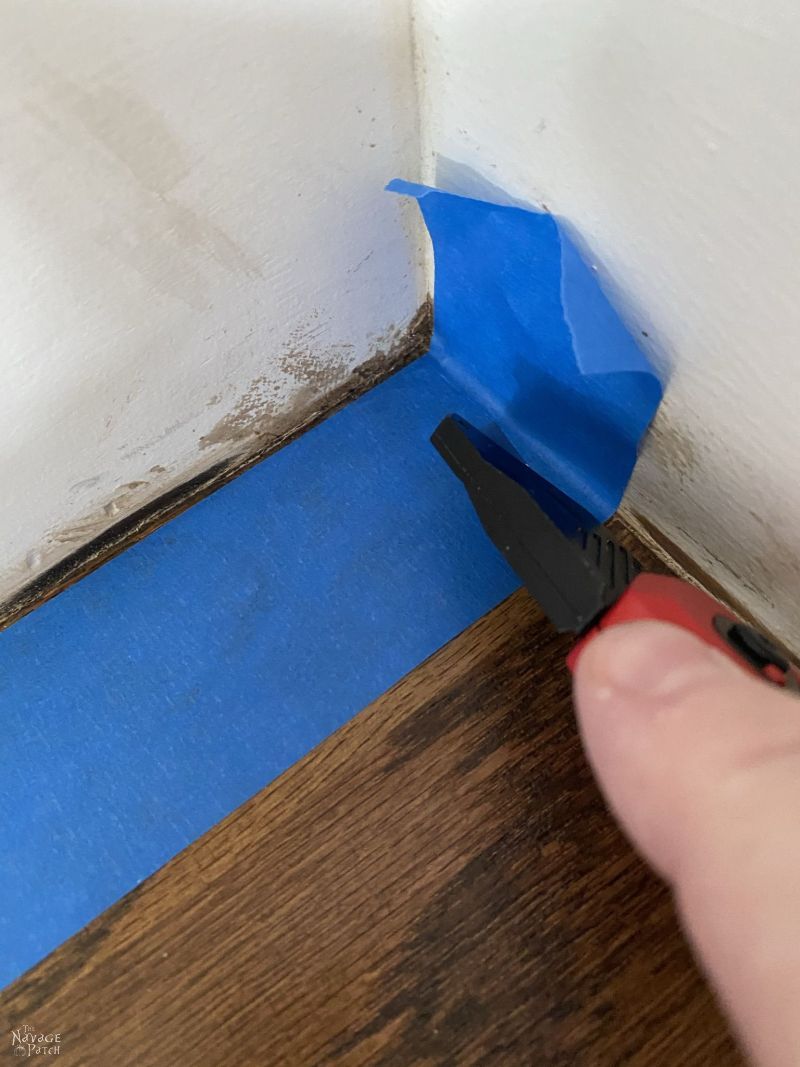
I then used a utility knife (with a brand new blade – very important) to cut off the excess, being careful to cut in a straight line and to leave a small gap as I did along the riser.
This next pic is from the next stair down, but it illustrates the point.
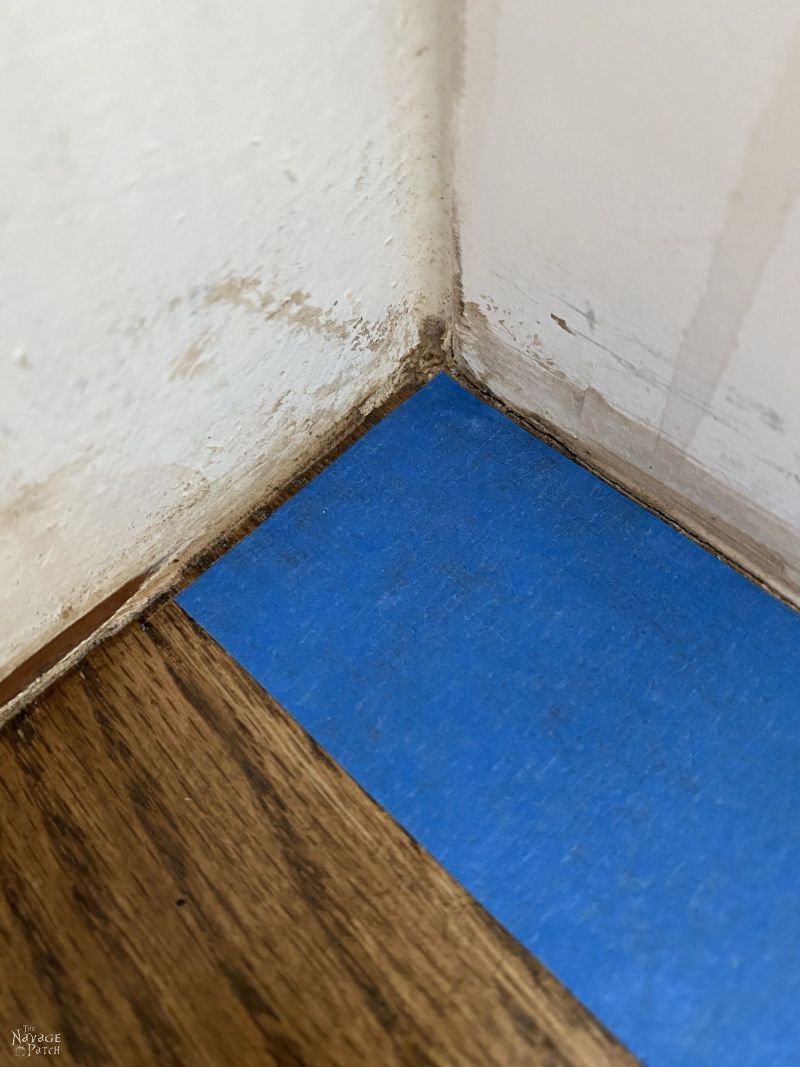
I worked with lengths of tape about 12-18 inches long. Any longer, and it was hard to keep a consistent gap. I was very careful to exactly match up each new piece with the one already laid.
When I reached the end, I repeated the process with the utility knife.
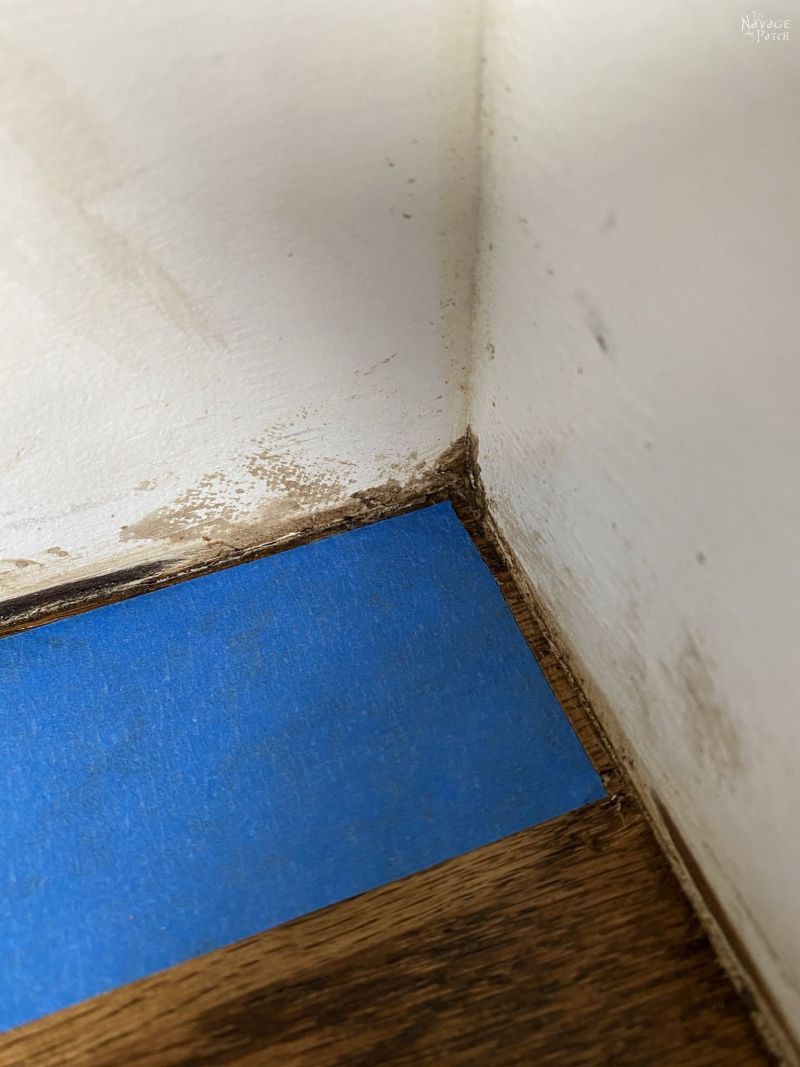
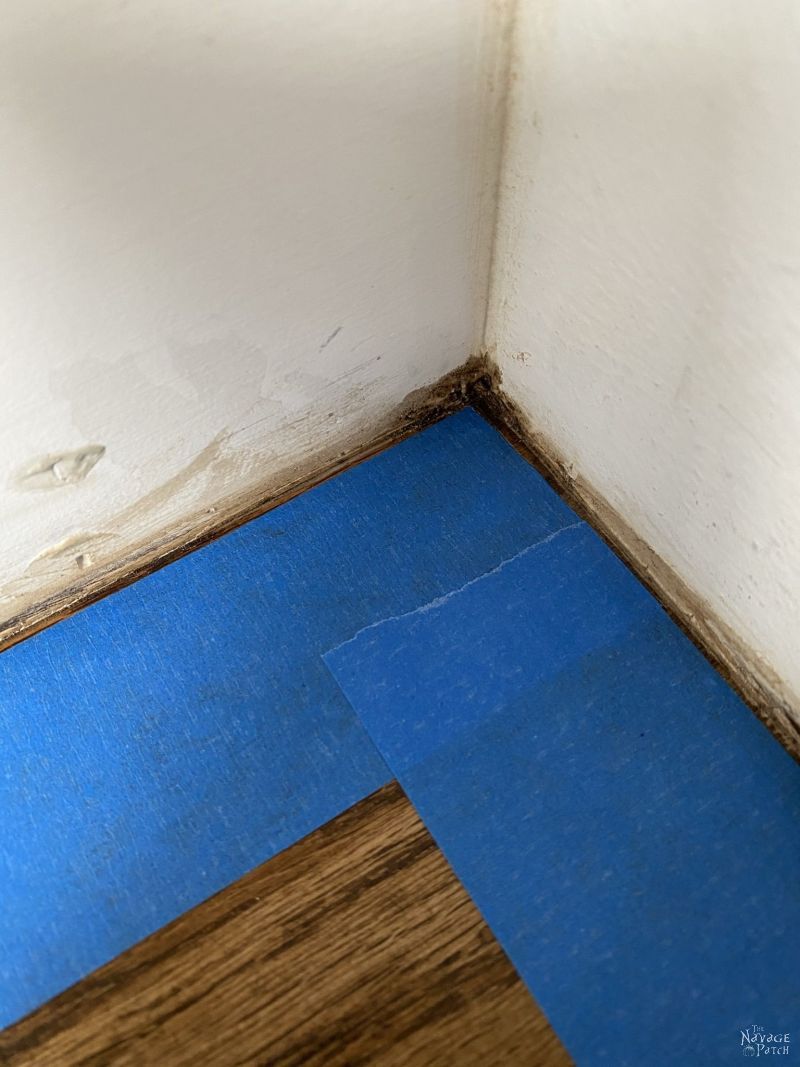
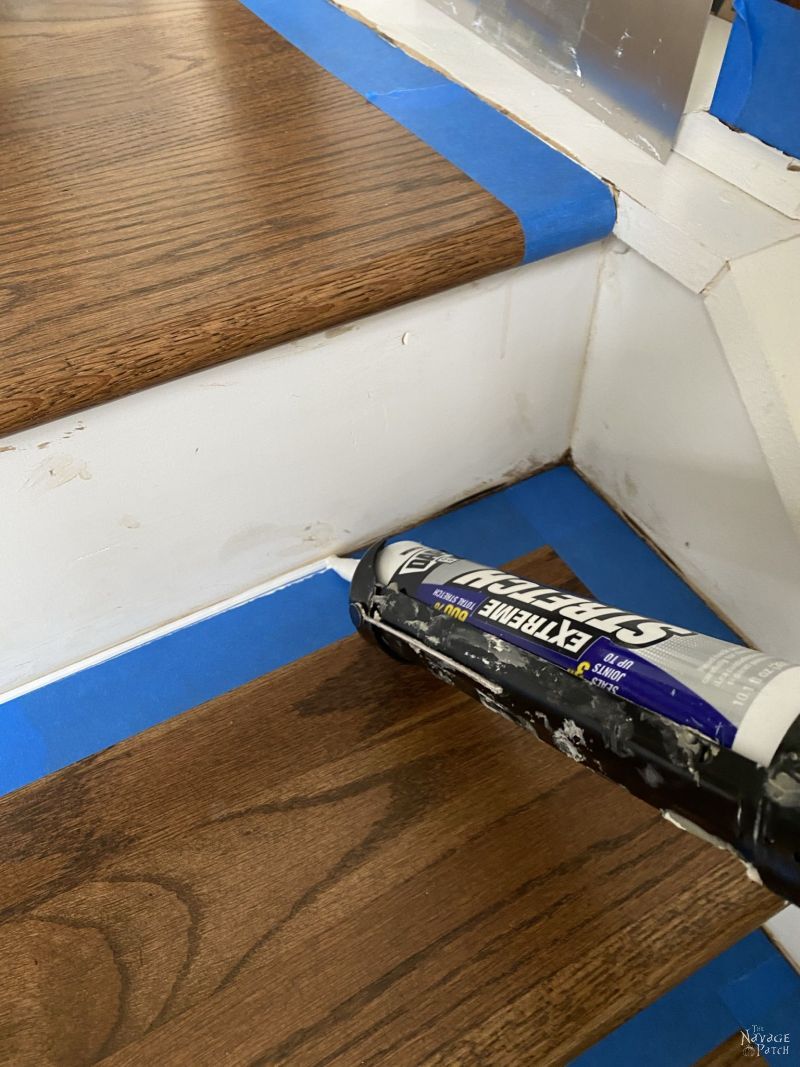
Next, I taped the sides of the trades, being careful to follow the line already established.
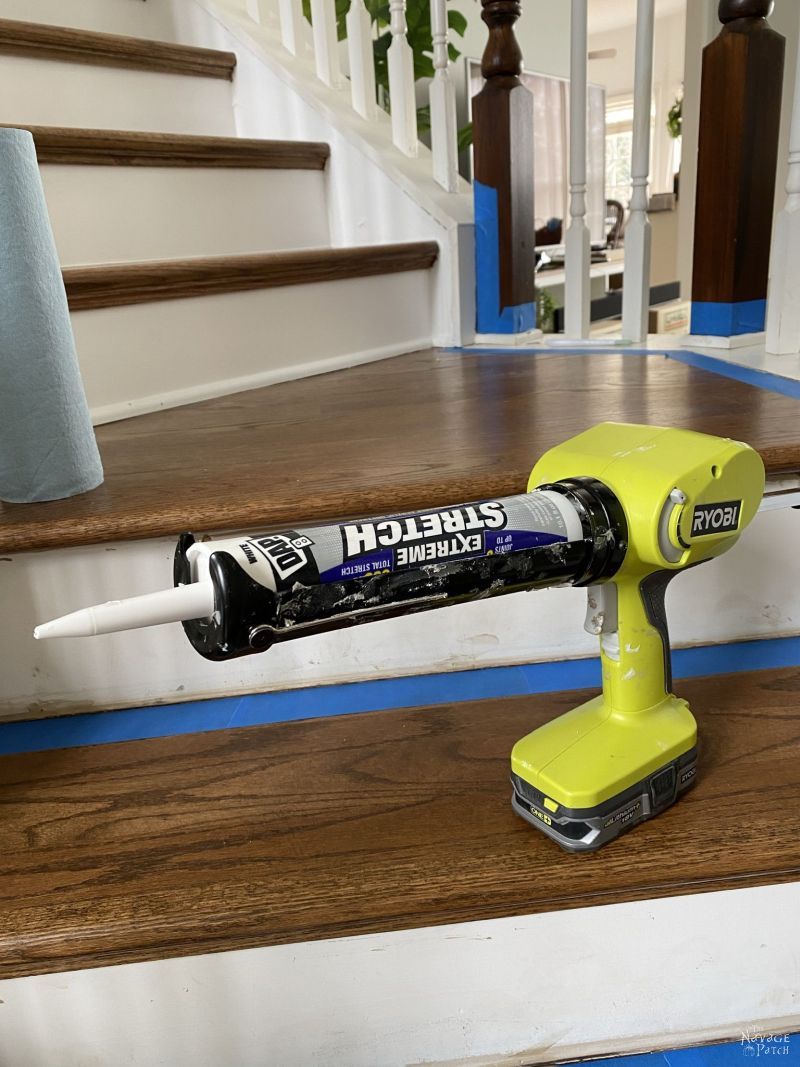
I prefer DAP Extreme Stretch caulk – it’s a little messier to work with than regular trim caulk, but it holds up much better, especially in areas prone to seasonal expansion and shrinkage.
Since I wasn’t filling a crack, and my goal was for the caulk just to lock a clean line and hid the stair/riser joint, I applied a thin bead of caulk.
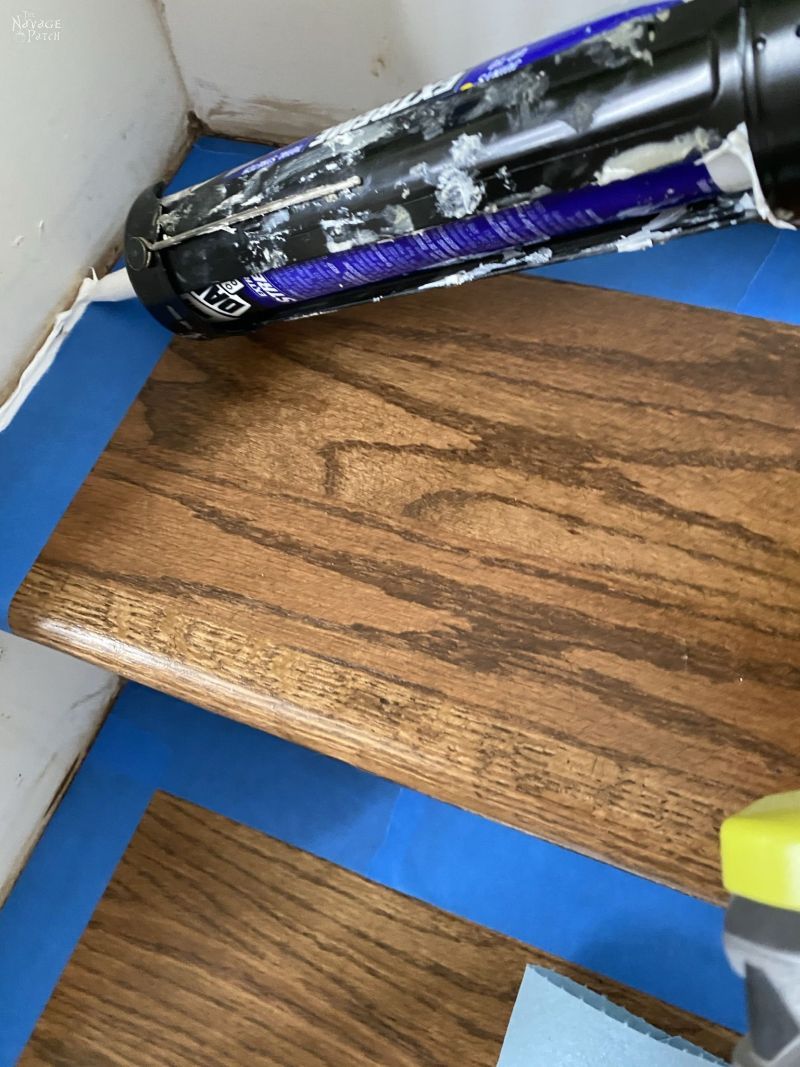
There isn’t a tool on Earth better than your finger for smoothing caulk. Don’t ever waste your money on those silly caulking tools.
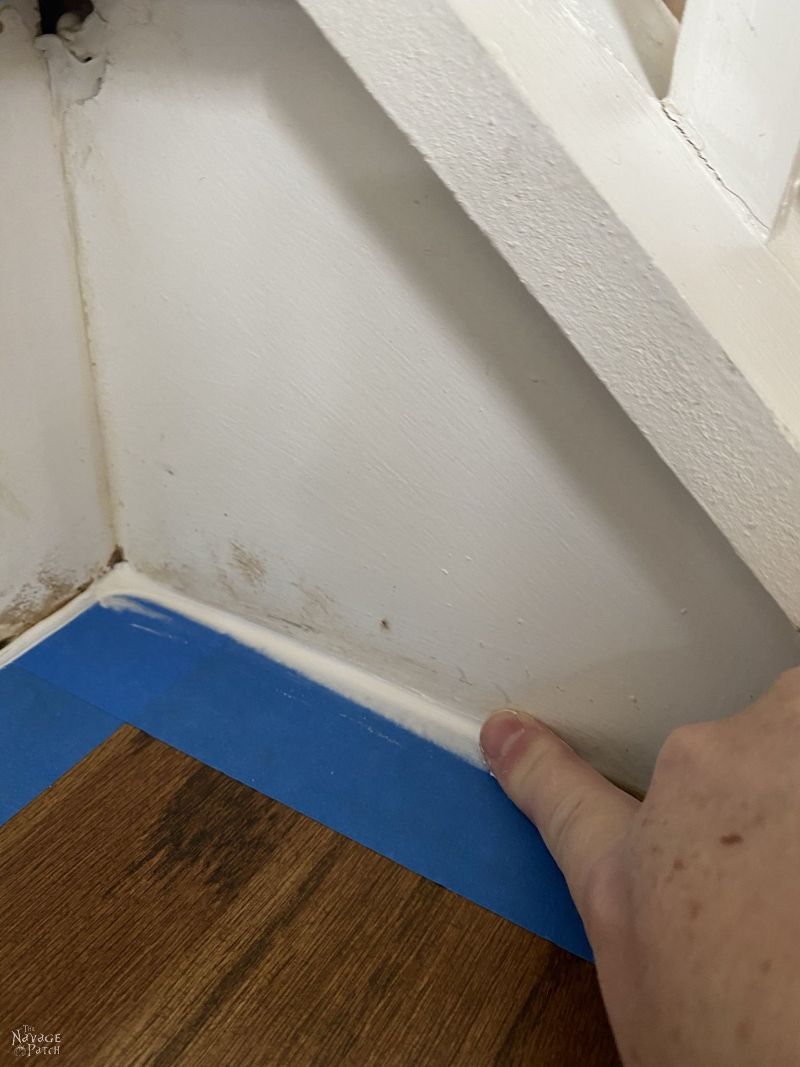
As I didn’t want a bulky caulk line, I pressed down pretty hard and removed a lot of caulk with my finger. I just needed a small amount on there. I made sure the caulk tapered to nothing on the upper side, so I didn’t end up with a visible caulk edge on the riser, and I made sure to do the same where the caulk met the tape. If there’s too much caulk on the stair where it meets the tape, you risk pulling the caulk off when you remove the tape after painting.
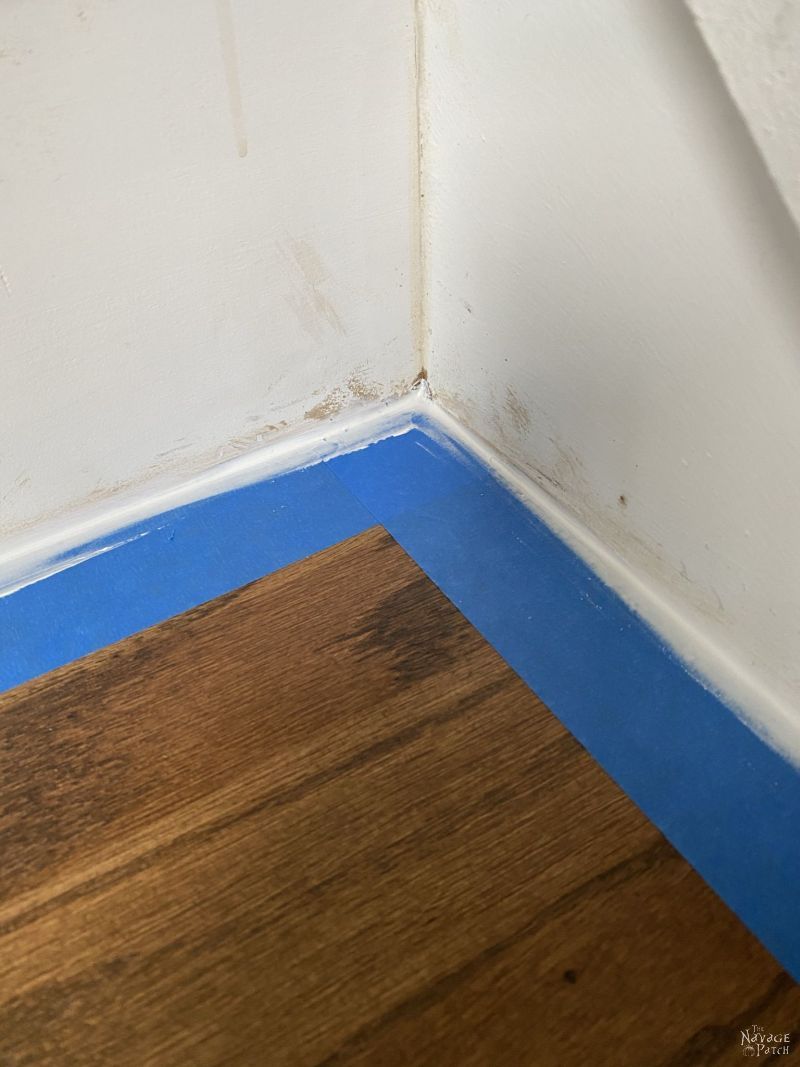
I allowed to caulk to set for a bit before painting. Since I was painting with a brush, if I had started in right away, the brush would have wiped away the caulk.
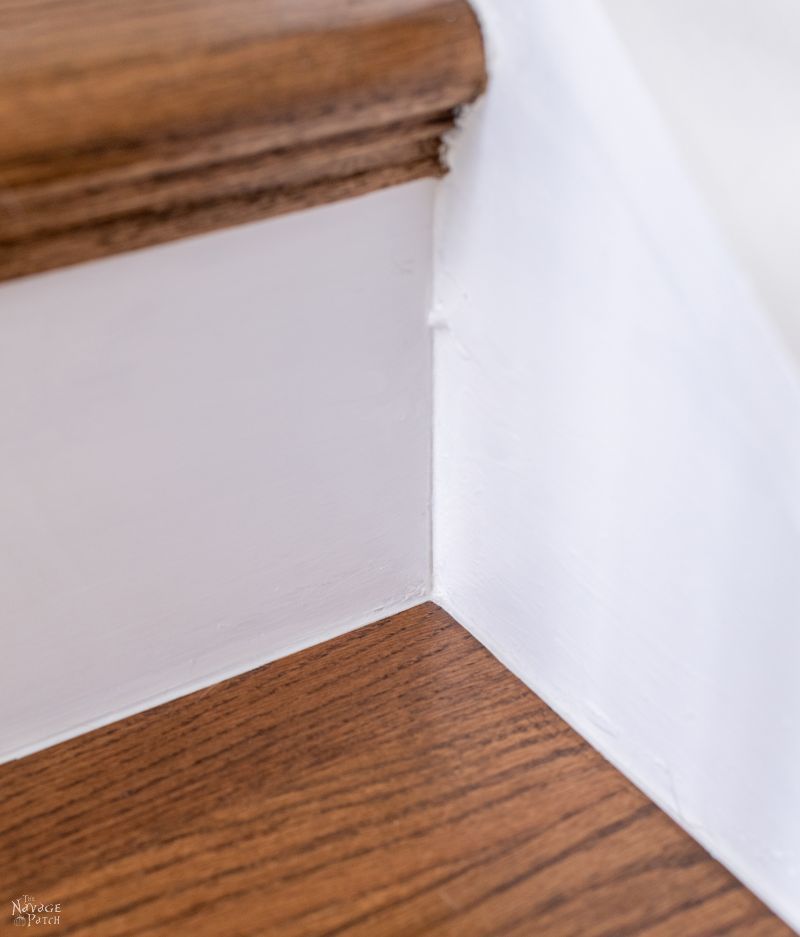
After a few coats of paint, I peeled back the tape to see how it worked.
It was perfect! A couple of the corners had a little buildup, but I was able to easily cut it off with the utility knife.
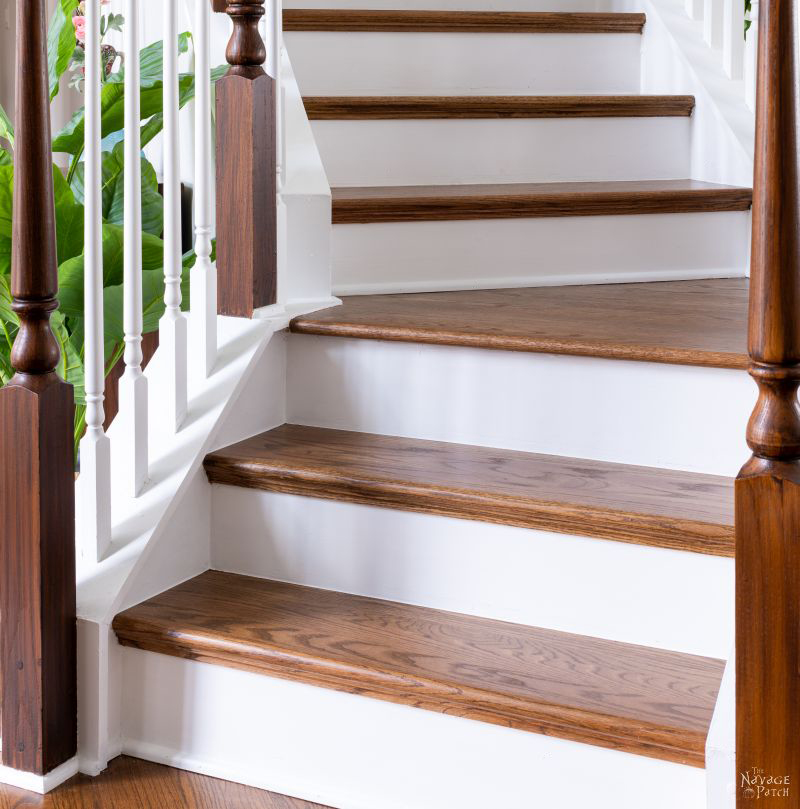
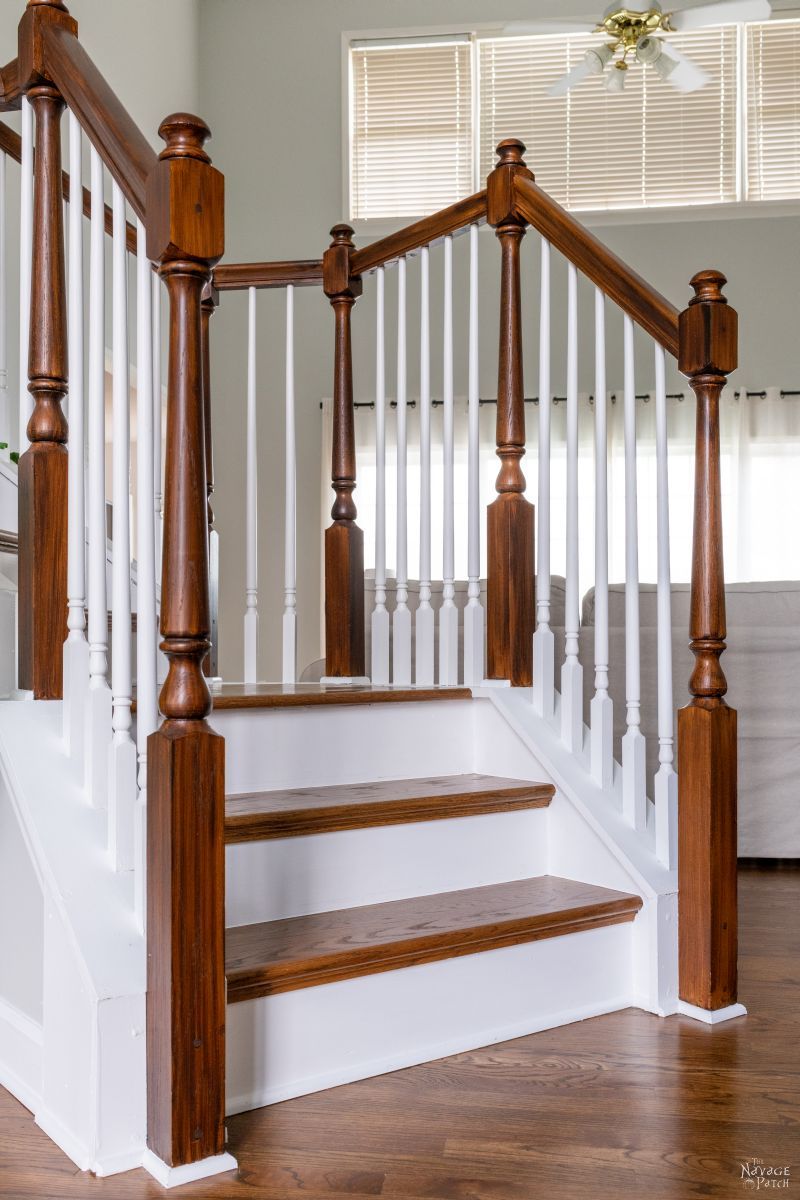
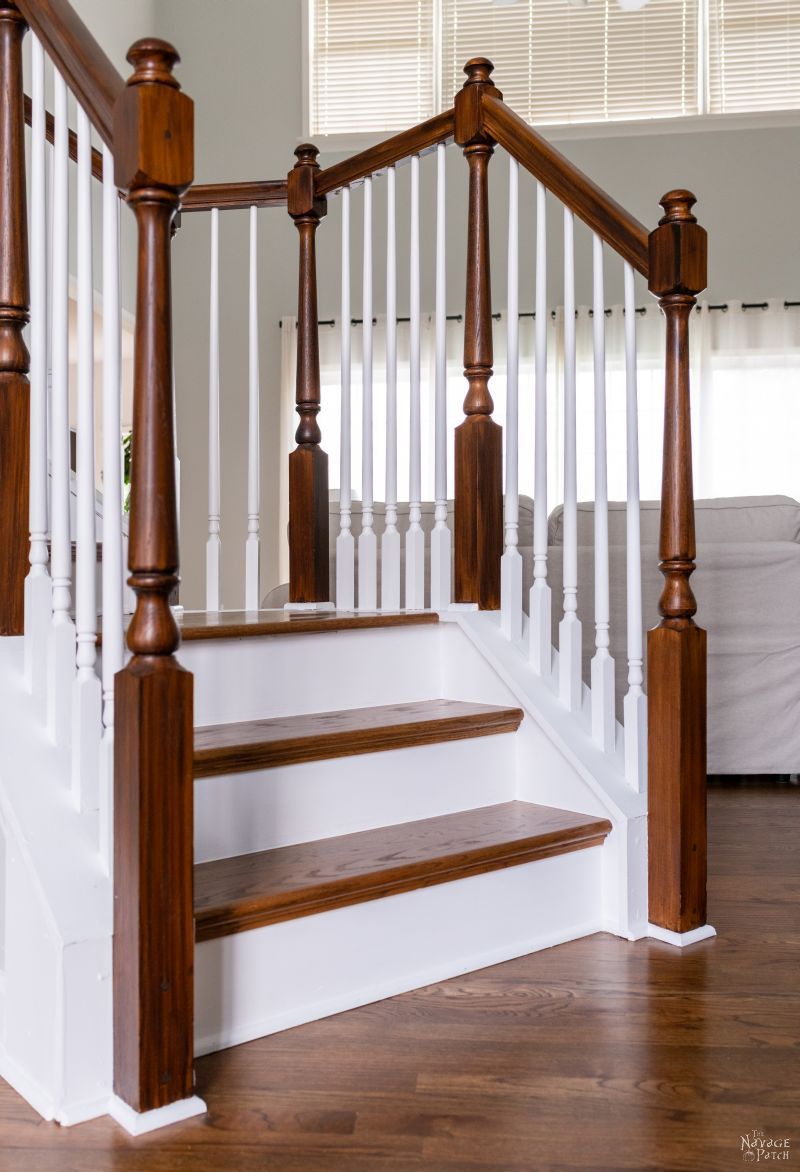
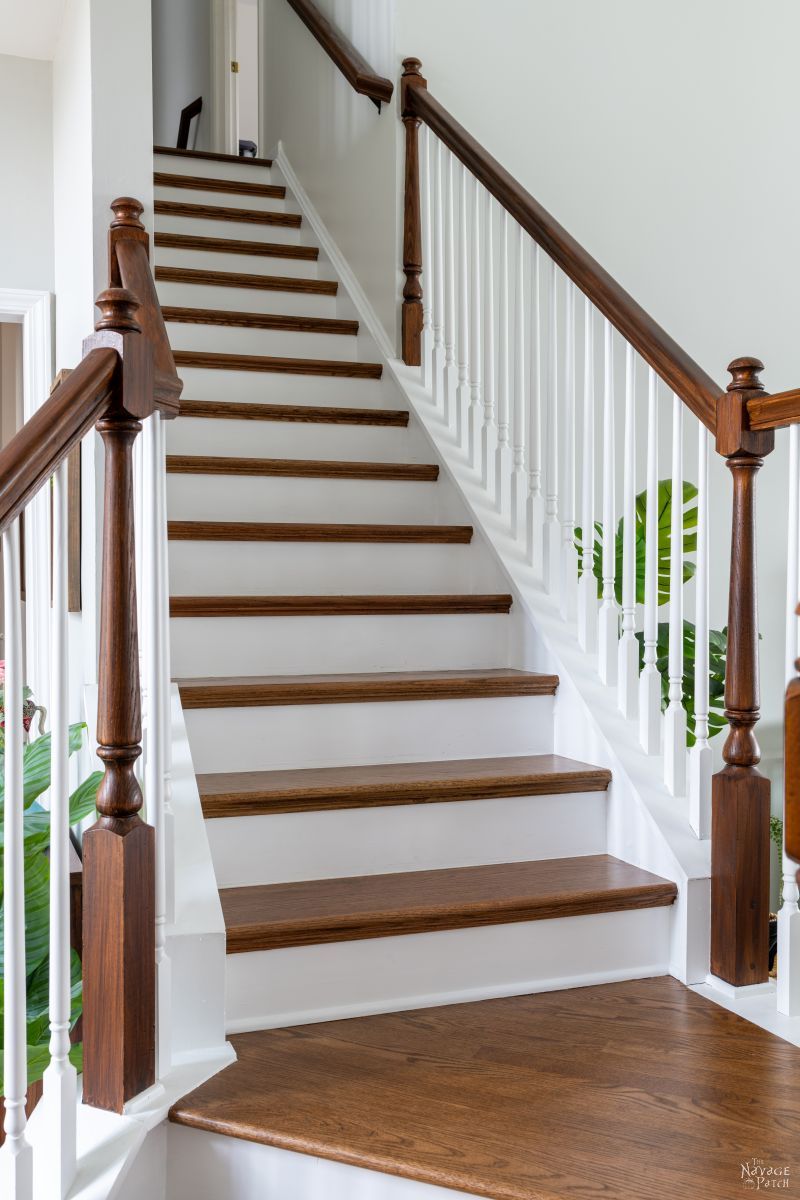
And here’s the finished product!
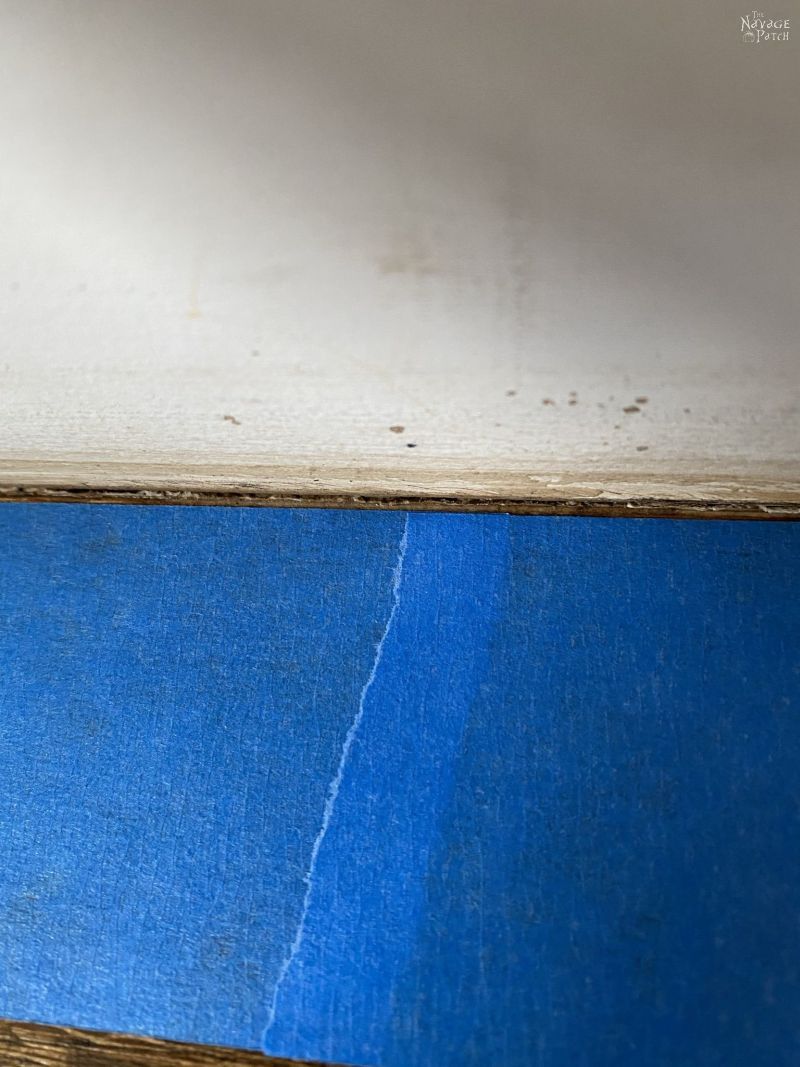
To compare the two techniques, here’s a closeup of tape, paint, scrape, tape, caulk:
And here’s a closeup of tape, caulk, paint:
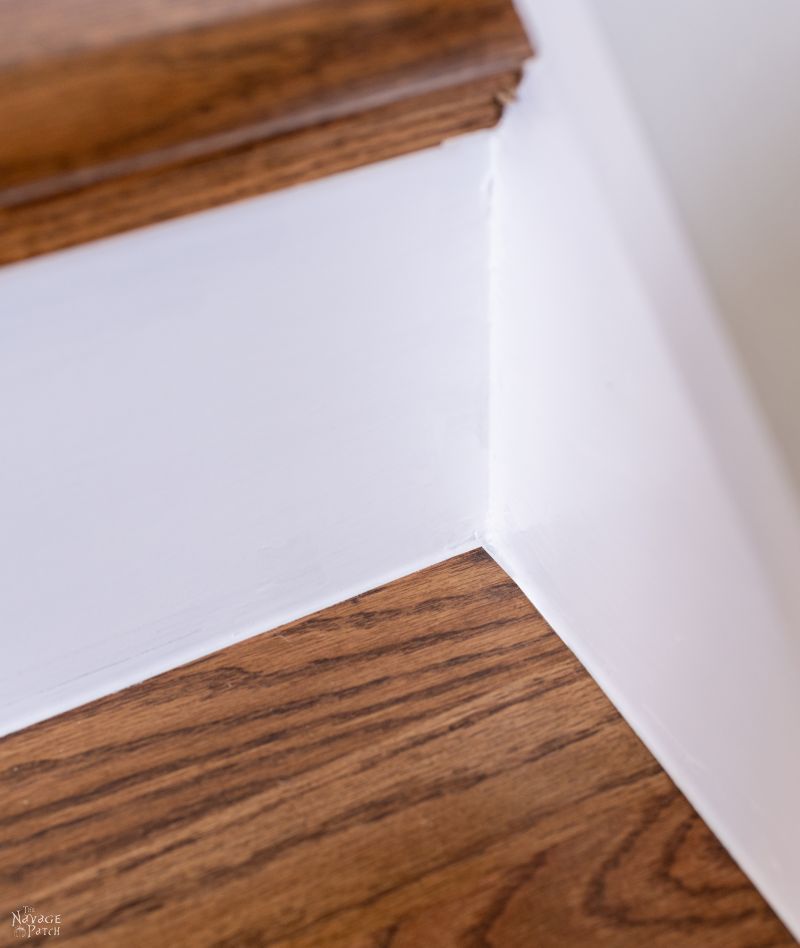
Same result, but one is a heck of a lot easier!
Stay tuned for the full Staircase Makeover and all that went into it.
We love it when you share our posts on Facebook and Pinterest!


Fantastic job! Thanks for the detailed explanation!
Thank you, Mary! 🙂
It looks crisp and beautiful!
Thank you, Tina – the difference is incredible! 🙂
I wish I had read this tip before I painted my risers 8 years ago. Good to know for next time.
There’s always a “next time” with DIY lol! 🙂
Nice job – thanks. I did it the hard way on two sets of antique stairs – I KNOW how much work this is to get it perfect.
Thanks, Ki! Yeah, not fun! 🙂
Is that your drill that is hooked up to the caulk? How do you do that?
It’s a battery operated caulking gun. They are amazing, it makes caulking SOO much easier! You’ll never use one of the regular caulking guns again. I am horrible at caulking, but can actually get by with our battery operated gun and get quite a bit done now that we have one.
Couldn’t have said it better, Nassra! 🙂
Thank you so very much for this, because I have tiny hands that are just getting more tired as I get older, and I LOATHE those caulking guns…Like, A LOT. I usually pay a lot more than I should for the tubes, simply because I cannot handle the caulk guns. Not only did I learn how to do this chore that I glaring at me with beady eyes, but I have a much better idea how to get it done…thank you, thank you, thank you!
You’re so very welcome, Cherie! That caulking gun is the best!
Nope! It’s the Ryobi caulk gun!
It looks awesome! You did such a great job. You should be proud of your accomplishment.
Thank you, Deborah, I am! 🙂
I appreciate the full details that you provide in your posts. Paying attention to the small things makes all the difference in the look of the final project. Your kommandant has trained you well!
That, she has, Kim, lol! 😀
You did an amazing job. I had the same problem once when I tried to paint a wall next to my wood cabinets in the kitchen. I wish I had known your method back then. Thanks for posting it.
Thank you so much, Barbara! May it come in handy next time! 🙂
Looks great!! Thanks for posting this!!
Thank you and you’re welcome, Anne!
What kind of paint did you use on the risers? Regular old paint or something fancy? We are about to repaint our stair risers as we have difficulty keeping them clean with the paint that is there now. Please let me know what you used! Thanks
Hi Laura, I used Sherwin Williams Infinity ultra pure white in satin finish (from Lowe’s) – it’s what I use around the house for trim. However, I would recommend something a little tougher to help keep them clean – at least a semi-gloss. The glossier the finish, the easier they will be to clean. And yes, the quality of the paint matters. For such a high-traffic area, I’d get the best paint you can fit in your budget. Besides scuffing (which you can’t avoid), you don’t want the paint on your risers to chip off or peel. Good luck to you guys!
Just a heads up – I bought some SW paint from Lowe’s. When it ran out, I went to the SW store for a second can. According to the store, the paint in Lowe’s is not the same as the paint in the store and they said the store paint it a better quality. Not sure if it is true, but I would not be surprised. Thought you might like to know!
(P.S. CT misses you. It is all of 79 and low humidity here today. Bet it is not like that down south!)
No, it’s true. Lowe’s isn’t SW, they’ve just partnered with them and HGTV for their colors. SW and BM are way more expensive than Lowe’s and HD. You get what you pay for (usually), but we find the Lowe’s paint to be good enough. CT may miss us, Laura, but I’m sorry to say we don’t miss it back, lol! We love it down here, and I wouldn’t dream of trading our winters for the cold Northeast! 🙂
I can think of other areas where this will work as well. Thanks so much for posting this. It’s tips like this that really help the rest of us.
Happy to help, Mo! All this knowledge was learned the hard way, lol! 🙂
Wow! Love the caulk gun, never seen one of those before. I always buy stacks of the little caulk tubes when I need to do caulking because I hate using the metal caulk gun!
I know! It’s a real life-saver when you’ve got a lot of caulking to do. A must-have for the DIYer!
Hi! The stairs look AMAZING. I am a first time home-owner and tried my hand at painting the risers on my stairs, similarly let paint under the painters tape and now I need to scrape it off like you did. What did you use to scrape that didn’t destroy the finish on the wooden tread? Thanks!
That’s the million dollar question, Andrew! The best way is to use the edge of a metal putty knife – the kind with a 1-inch-wide blade. Wrap that blade with a damp microfiber cloth (single layer) and using either the flat blade edge or a corner (depending on the paint drip you’re after), scrape with the wood grain. It may take some time, but eventually, you’ll get paint out. You’ll wear through the cloth from time to time, so just reposition it so you have that layer of cloth between the knife and the wood. This is also the technique I use when painting baseboard over a wood floor. The quicker you get the paint bleeds, the easier they are to remove. Good luck!
This technique worked perfect on my 100+ year old staircase. Thank you!
So happy to hear it – thank you for sharing!
Thank you for your post! This is super helpful! I just finished my stair treads and I’m getting ready to caulk and paint the risers but I can’t decide if I should tape up before I caulk and paint or after I’m done caulking. I’m afraid the tape won’t come off once I caulk. Did you have any trouble getting the tape off after caulking?
Nope, I peeled it off before it fully cured, and it came off with no issues!
really great tutorial including the mistakes which are the best learning tool :0
thanks so much!!
You’re very welcome! 🙂
I find when I caulk on top of tape, if there is any excess caulk the tape will peel it away and job turn trash. The best and easiest in my opinion is to apply whatever is beneath the tape on top of the tape so if something does seap it will be what’s underneath so in your case you would apply varnish on top of tape and that forms a block for the white paint to seap through.
Incredibly helpful! Thanks for the great advice. Saved me a ton of headaches.
So happy to hear it JD!
Thank YOU!! I’m in the middle of fixing the same initial mistake you made! Going out to buy the caulk!!!!!!
Oh good! So happy you found my solution Jean!