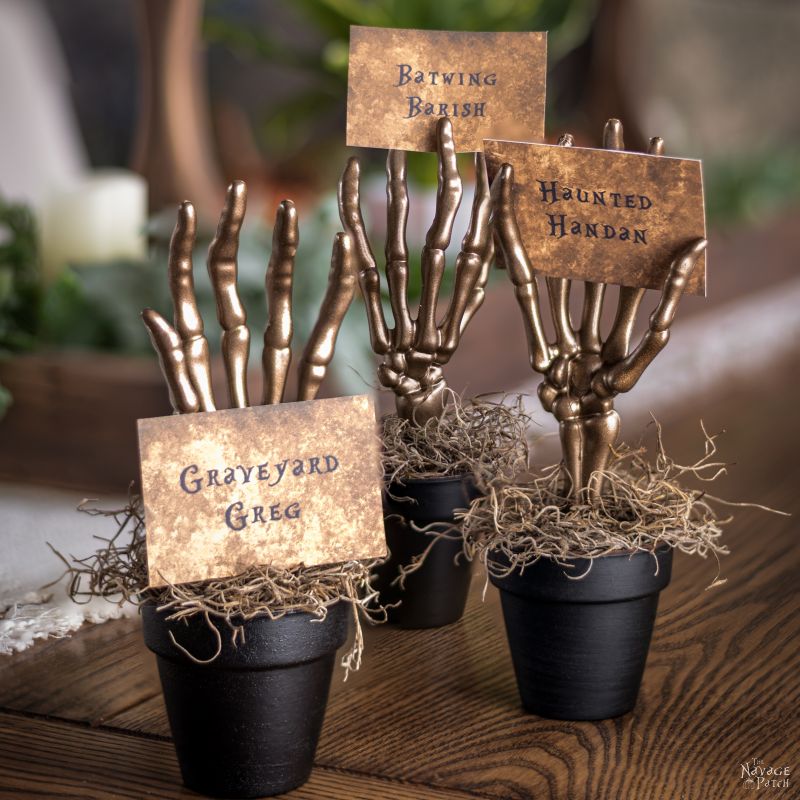
DIY Skeleton Place Card Holders & Free Printable Place Cards
These DIY skeleton place card holders are perfect for Halloween entertaining, but they also look right at home in a spooky display!
It starts in August, you know.
That’s when one of our many local Dollar Tree stores brings in its first load of Halloween goodies fresh off the slow boat from China.
August!
Most Americans are busy swimming and grilling and beachcombing.
Nobody’s in the mood for Halloween in August.
August!
Kids aren’t thinking about Halloween candy in August – they’re outside running around playgrounds or inside running around virtual battlefields.
Nobody wants Halloween in August.

Well…
That’s not entirely true…
There is this one person I know…
Her name is My Babes, and when the first cheap plastic skull hits the shelves in the Manchester Dollar Tree, she’s right there with her little green shopping cart and a huge smile on her face.
August!
You see, nobody wants Halloween in August—except Handan!
She waits all year for the spider webs and the glowing skulls and the plastic rats and all those bony skeleton arms that look like they’re all waving a big Hello!
And look, I guess I can’t blame her. She’s got a knack for coming up with awesome Halloween projects with dollar store stuff. Remember Skully & Ratface?
So there we were on a sweltering August afternoon a short while ago in the Manchester Dollar Tree. Mind you, it’s the Dollar Tree in the strip mall next to Party City and Joann—not the Dollar tree a couple miles away next to the Stop & Shop! No, that Dollar Tree may be bigger, but it doesn’t get on the Halloween train until September, and ain’t nobody got time fo’ dat!
Anyway, there we were while children in bathing suits ran around with ice cream cones and ice-cream-stained faces while their mothers huddled under oversized sun hats with oversized sunglasses gossiping about the latest hollywood scandals.
There we were while high summer bloomed around us, and the beaches surrendered their scorching sands to a thousand and one bare feet of all shapes, sizes and colors.
There we were, and there was my babes with two of the aforementioned bony skeleton arms in her hand.
I arched my brow.
She tossed the arms in the cart.
I tilted my head.
She grabbed more arms.
I began to speak.
She tossed more arms in the cart.
I thought better of it and closed my mouth.
Best to let this play out.
Best not to get involved.
Might get roped into doing something.
She turned back to the bones, and I slipped away from the cart and wandered off in search of, well, anything else, I suppose.
Some time later I reunited with my babes, and I saw that she had Halloween’d the cart up pretty good. Not a bad haul for the early season pickin’s.
I also saw that she had a few mini terra cotta planters thrown in the mix.
Hmmmmmmm.
Anyway, we left the store and walked back into summer. When we got home, Handan placed the bag of bones in a corner of the craft room, and of course, I promptly forgot all about it.
But Handan never forgets. You should know that by now! I should know that by now!
Recently, I was outside enjoying some of the fine, warm and entirely summer-like early-fall weather, when I heard my dearest wife yapping at me from the deck.
Well, at least she was yapping and not yammering.
Yammering is usually more serious, and I wasn’t in the mood for serious that day.
So I tuned my selective hearing to the Yapping Frequency and had a quick listen.
“…skeleton arms…” Okay, mmmmhmmmm…
“…terra cotta pots…” Yup, got it…
“…place card holder…” Okay, I could see where this was going. Seemed easy enough.
I turned off my WiFi (Wife Filter) so I could fully hear and understand.
DIY Skeleton Place Card Holders SUPPLIES LIST
Affiliate links are provided below. Full disclosure here.
- Skeleton arms – we used Dollar Store salad server skeleton arms
- Rust-Oleum Metallic Champagne Bronze spray paint
- Mini terra cotta pots
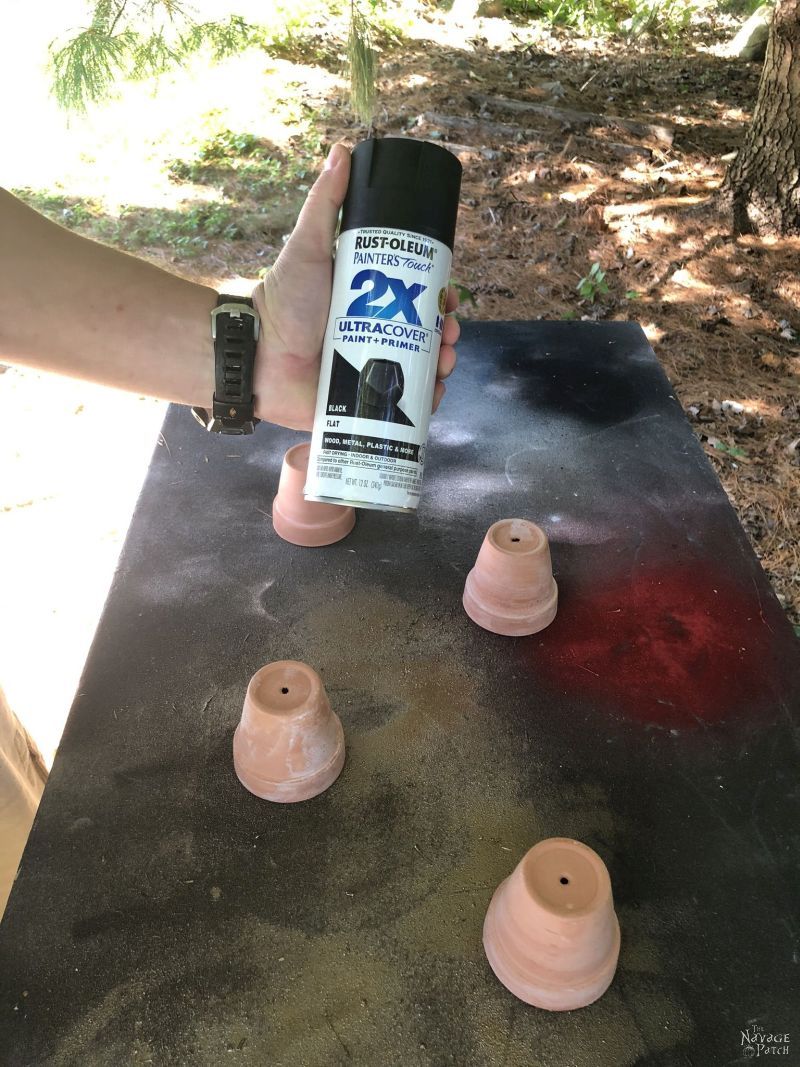
- Flat black spray paint
- Styrofoam cones
- Dried Spanish moss
- Glue gun
- Hand saw or hacksaw (garden loppers would also work)


DIY Skeleton Place Card Holders TUTORIAL
I didn’t need full skeleton arms for this project, so I pulled out my trusty bone saw and chopped them down to size. To give some variety to the final place card holders, I cut each arm to a slightly different length.

Next I sprayed the little hands with skeleton-approved Rust-Oleum Bone Spray.

Nothing sticks to old bones like Rust-Oleum!
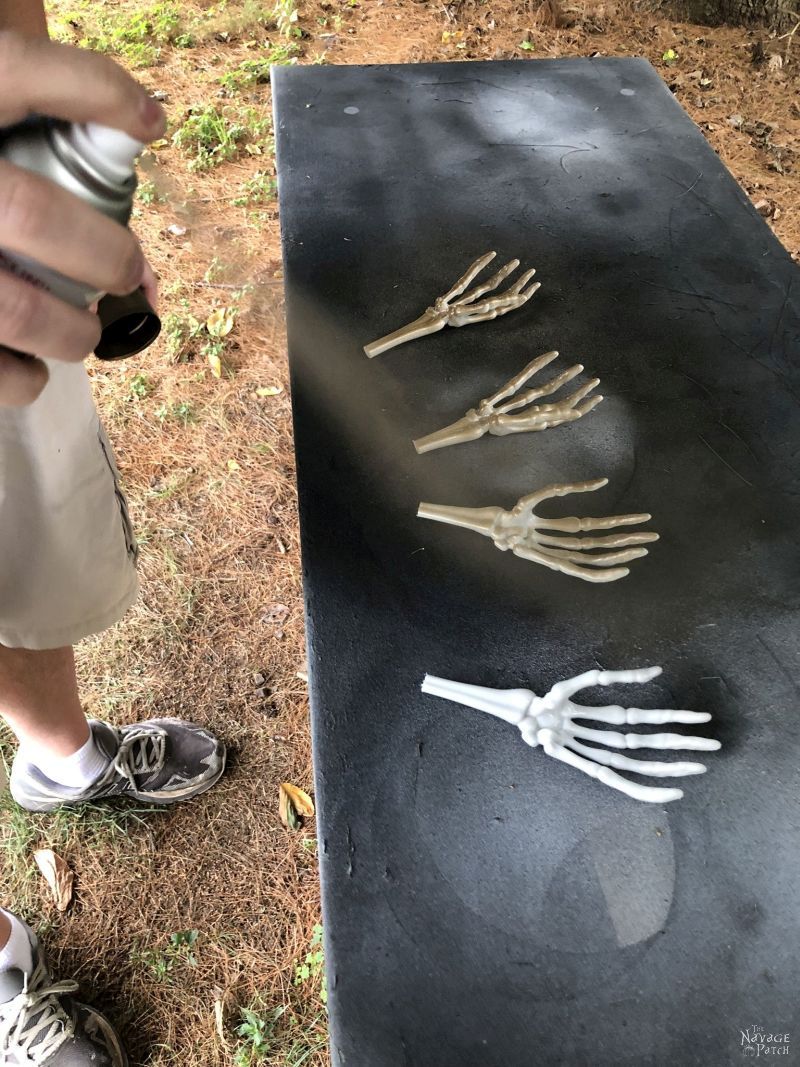
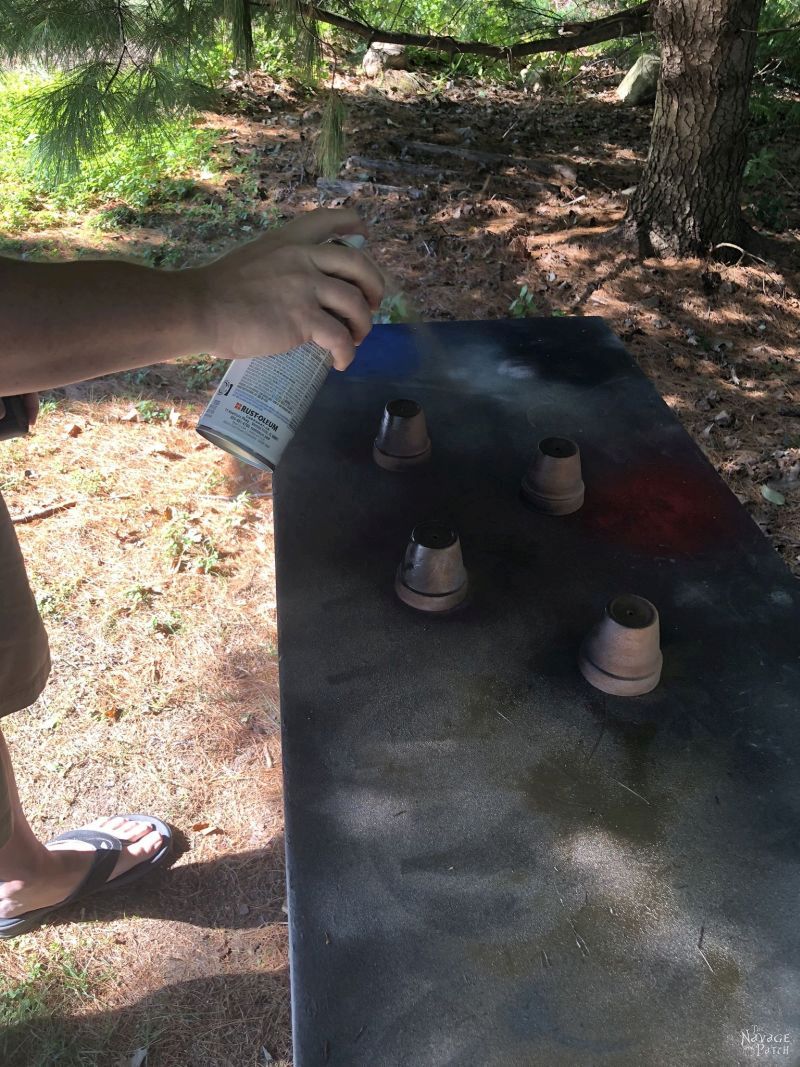
After I had bronzed my bones, I sprayed the terra cotta pots with flat black.

Moving back inside…
There sure are a lot of hands in the photo below.

Anyway, my first step was to cut a piece off the Styrofoam cone that would fit inside the terra cotta pot. If you don’t want to deal with finding Styrofoam cones, you could also use floral foam.


I cut the Styrofoam a little smaller than the pot. I didn’t want it to fill the pot completely, as I’d be needing some space for moss later on.

Here’s a dramatic shot of me inserting the cone into the pot. Tensions were high at this point. The whole project rested on this dangerous maneuver!
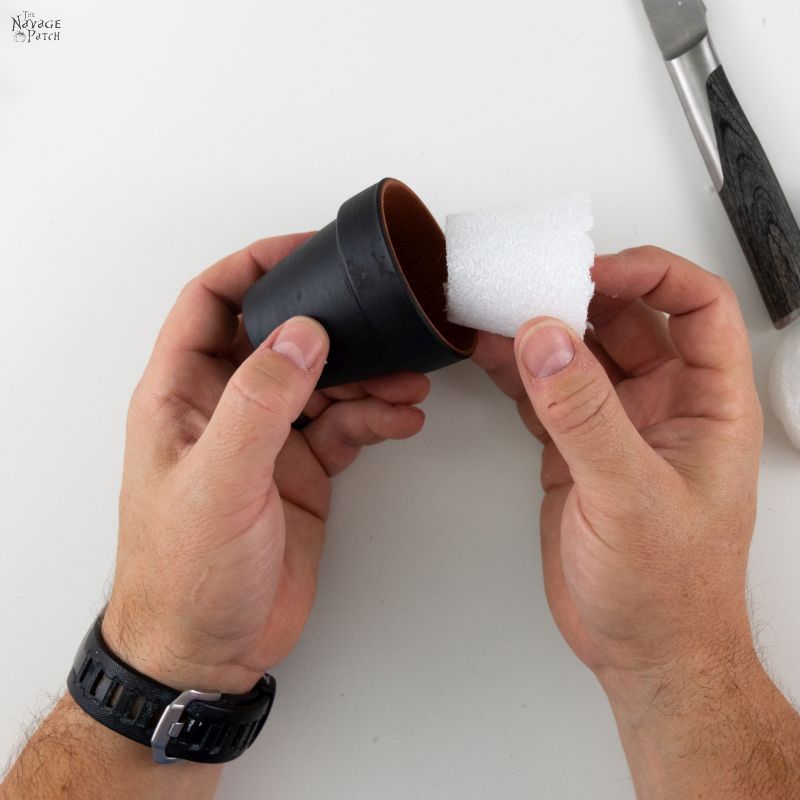
Phew! Success! That was a close one!

Satisfied that I had trimmed my cone to perfection, I pulled it back out, flipped it over and put some hot glue on bottom.

Then I stuck it back in the pot – this time for good! That Styrofoam wasn’t going anywhere!

Next I pulled a bit of Spanish moss from the enormous baggie of moss we have that never seems to end and never seems to get any smaller.
I think we may have moss elves that appear each night to top off our Spanish moss supply. Or maybe it’s just Handan that does it when I’m not looking.
But I think the real question here is what do they call Spanish moss in Spain?
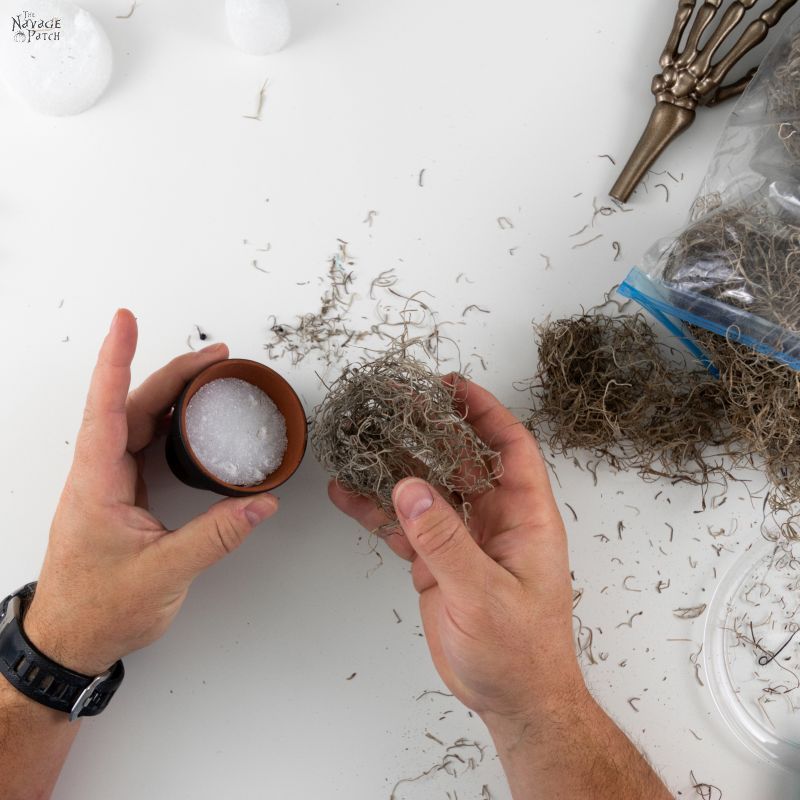
Satisfied that I had made a sufficient mess on the crafting table, I squeezed some hot glue into the pot.
Because, here’s the thing: Spanish moss doesn’t actually grow in Spain! It grows in America, among other places…

And then I stuck the Spanish moss in place.
So maybe they call it American moss?
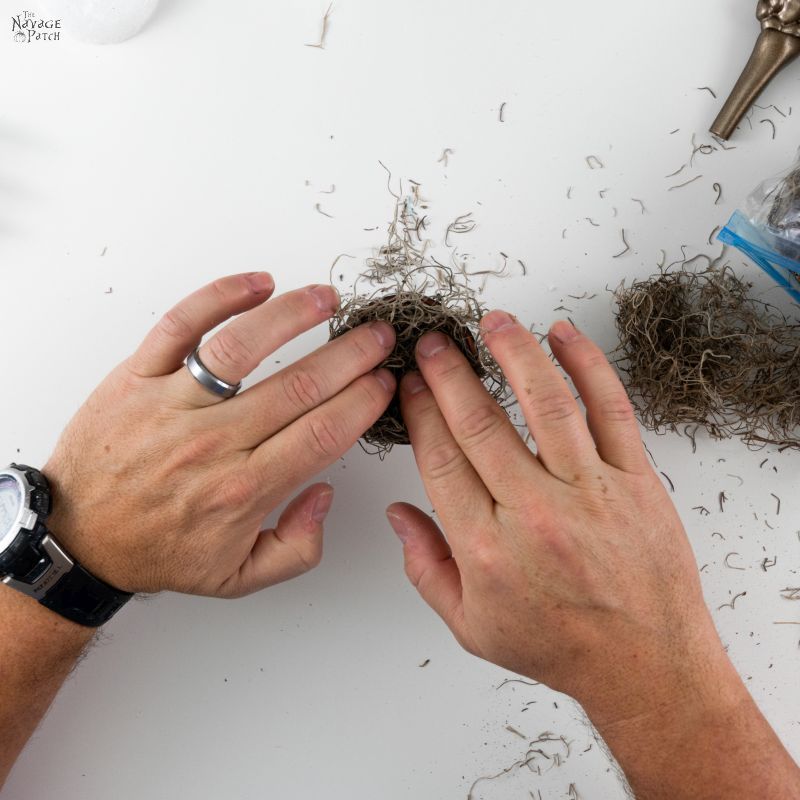
Next, I cleared a little space in the center.
If we have any Spaniards here—please let me know what you call Spanish moss in Spain!

And then I stuck the arm down into the Styrofoam.

All of my arms stuck firmly into the Styrofoam, but if you find yours are a little loose, you can always pull it out, squirt a little hot glue on the end and then jam it back in the hole.

And that’s it! Pretty easy, huh?


And who says you need to use these on the dining table? They also look great in a Halloween display!

Okay, so maybe you’re just not that into skeletons.
Maybe you’re more of a witch gal.
Well that’s great, because you can do this little craft with Barbie legs like Michelle and Shaun from A Crafty Mix did!
Just substitute a painted terra cotta pot if you can’t find a small cauldron and use the sign as a place card.

And hey, if hands (skeleton or otherwise) growing out of pots is your cup of tea, then you’ll love our potted Rosemary!

We love to see our DIY projects out in the wild! If you try this DIY project and take a picture and post it on Instagram, be sure to tag us – thenavagepatch
Free Printable Place Cards
As usual, here is some information on the printables: we designed these free printable place cards in two formats: PDF and JPG. As you know, PDF is not scalable, but the JPGs can be scaled up or down as necessary. If you need help with scaling these place cards, then make sure you check out Handan’s “How To Easily Resize Pictures” post.
Now it’s time to click on the button below to download today’s free printable place cards – they are all in the Halloween section of The VIP Patch.
take me to your
amazing freebies library
If you’re not a Navage Patch VIP, you won’t be able to access our Freebies Library. But that can be easily fixed! Subscribe for free on the form below and become a Navage Patch VIP. Once you subscribe, a password will be sent to you in our Welcome email, and that will give you access to The VIP Patch [Freebies Library].
Share it on Pinterest & Facebook!


Aw, these are cute!
Ah Halloween, the only time of year when it’s acceptable to cut up old bones and dig graves in the front yard without anyone questioning your motives.
I wish my house had more storage closets so I could have more Halloween decorations, but you know how those circa 1950s New England homes are, small and sparse closets and not enough place to stash da loot.
You know, it sounds like you’re a prime candidate for a she shed. I’m thinking that would solve some of your storage/display problems! Christmas is coming up – maybe you should put one on your list? 🙂
I would love a she-shed. But I want my last bathroom in my house gutted and remodeled first. Unless I win the lottery, then anything goes. LOL
My hubby is a handy, all-around Mr. Fixit, but building a she-shed is not on his list of skills. A carpenter he is not.
What kind of place cards did you use on yours? They don’t look like any in the free printables? I love the cloche idea! Will have to do this, but I LOVE your cards you used!
Hi Sheila, Greg wanted to take the photos before I could finish printing and cutting the place cards. Hence he had to use whatever he could find on his computer. When I get home tonight I’ll get that background from him and turn those also into place cards. By tomorrow morning you can find them in the same place with the Place Card 15 file name. 🙂
Just an idea….would LOVE for you to do a tutorial (challenge) on making a HUGE yard spider….I’m talking HUGE here, with legs out of PVC pipe that looks like a black widow with long spindly legs! 🙂
You never know what the future holds, Sheila! 🙂
I love these! Did you purchase an extra set to toss and serve salad with?
LOLOL! That’s a great idea, Tracey! 😀
Bwahahaha! Handan just told me they ARE salad servers. LOLOL! I had no idea. When she starts shopping, my eyes glaze over and I go into The Dollar Store Stupor. :D:D:D
?
Love it!
Thank you, Giselle! 🙂
Another brilliant idea from the Navage patch, love your place cards, brilliant names!
LOL, thank you, Catherine! 😀
I just love reading your blog!! So creative and funny! Your instructions are easy to follow, so many things that are posted on Pinterest leave out important details. Please keep doing what you do so well!!
Indra
Thank you so much, Indra! We have no plans to stop doing what we’re doing! 🙂
How I wish Halloween happened here! ? If just for the puns! Because as soon as I saw the list of required tools, I lost it at “hand saw” for a good minute and it wasn’t even a joke! These are very cool. Great project!
LOLOL! Unintentional, but hilarious! 😀
Wonderful: I love them!
Thanks, Kathy! 😁