
Potted Rosemary {Potted Hand Halloween Prop}
As we get closer to The Day, I become like a kid who keeps asking “Are we there yet? Are we there yet?” – hahaha. 😀 Well, you all know me – I enjoy doing this and that, but there is one time of the year where I really have great fun working on my projects. You know what I am talking about, don’t you? Of course you do! Halloween! Yeessss!!!! Today is the day I start posting about Halloween. And oh boy – do I have some lovely Halloween props for you this year! But before jumping into anything else, I want to show you my potted Rosemary (aka potted hand Halloween prop), as it is related to last year’s beloved project: Halloween Apothecary Jars.
Speaking of Apothecary Jars, I love it when you send me pictures of your jars, so please keep me posted on how your jar projects are going, ok? And also be on the lookout, as I will be sharing more jar labels with you this year. Yes – they will all be for new ingredients (hahaha – I knew you would love this news!) 😀
Ok, let’s get on with making our potted hand Halloween prop, shall we? For this project I used:
Potted Hand Halloween Prop SUPPLIES LIST
Affiliate links are provided below. Full disclosure here.
- A planter or urn – the older the planter is, the better your prop will look 😉
- Spanish moss
- A creepy hand- these are what I bought from Lakeside.com last year. But if they sell out, then click here to find the same hands on Amazon. Or you can try it with a mannequin hand 😉
- Hot glue
- Floral foam
- Wooden dowel – or a stick from your backyard can also do.
- Various plastic creepers – this is optional.
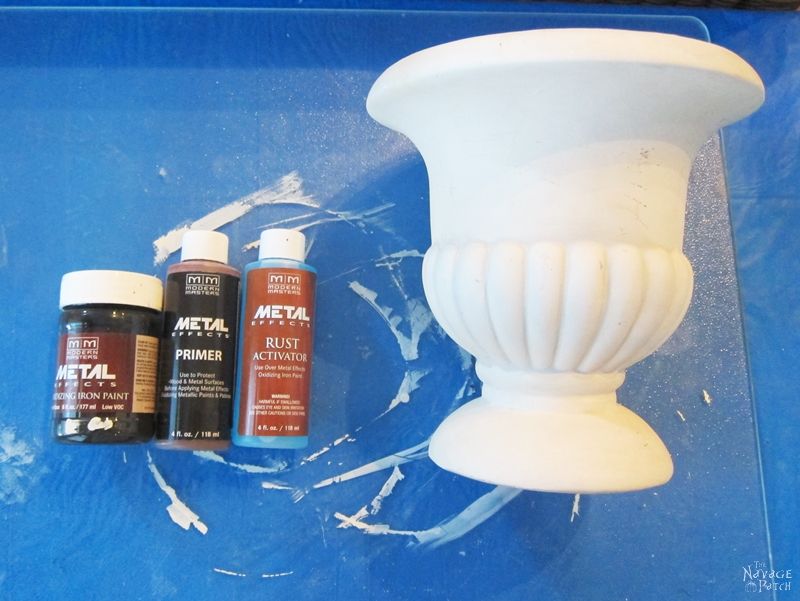
- Modern Masters iron paint and rust activator – this is also optional. I used it to make my urn look aged. If I had an already-aged planter or urn, I wouldn’t need it.
- Card stock paper and some thin natural twine. – or you can use a plant marker instead 😉
How to Make Potted Hand Halloween Prop
Once I gathered the supplies, I started my project by aging my urn. If you are wondering where I got my urn from, Mom (Greg’s mother) gave it to me. Apparently Mom bought these back in the day to make centerpieces for Margo’s wedding (Greg’s sister), and she had 4 which she never used. So she gave them all to me knowing that I will put them in good use. Hahahaha 😀 I know, right? From wedding centerpiece to potted Rosemary! LOL. What a wicked mind I have sometimes… But I am not to blame – you may remember Greg’s famous Facebook post from 2 Halloweens ago. Well, after I dealt with that nicely, he posted another one of his Halloween specials last year. LOL.
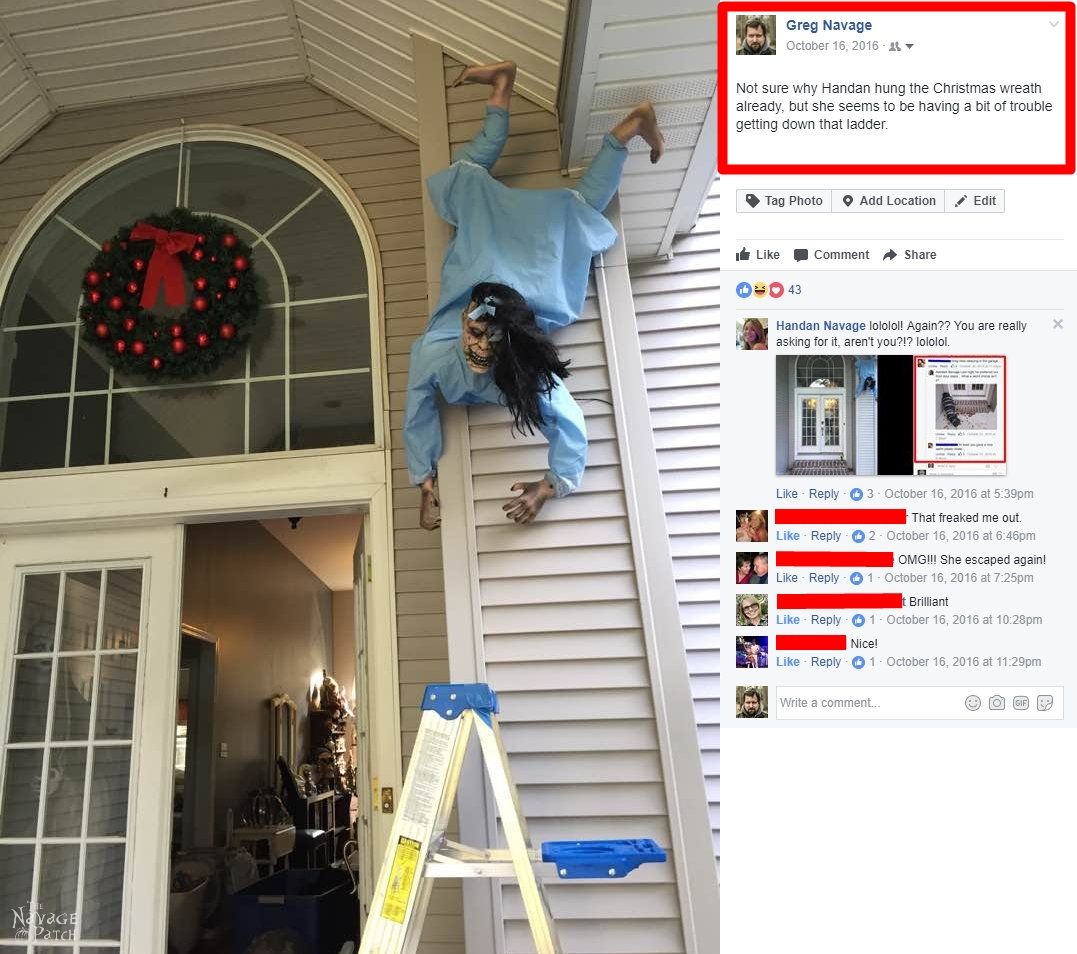
Now tell me: doesn’t this also need a response? Of course it does. My first plan was to make a potted Gregory as a response to that! 😉 But our local nursery told me that Gregory doesn’t do well in pots, but thrives in the wild [I was born to be wild, Baby! You can’t tame this beast! Now, where did I put my martini and crossword puzzles? -Greg], therefore I had to go with the Rosemary this time. He has no clue how lucky he is :-D… Anyway – back to the tutorial.
As I wanted my urn to look like an old rusty iron urn, I first painted it with 2 coats of Modern Masters iron paint. I let the paint dry for about an hour.

Once the paint dried, I put my plastic gloves on and poured some rust activator into a small spray bottle. Then I sprayed my urn all over and waited. Nothing happened.
Here is a hint: if with the first time spraying nothing happens, give it 5-10 minutes and spray it once again.
After 5 minutes, I gave it a second spray. That did the trick, as this urn started to rust right in front of my eyes. Although within 30 minutes it had a good amount of rust, I let it do its thing overnight.

Next day, I picked a flower foam from my stash and started shaping it so it would fit into my old rusty iron urn.

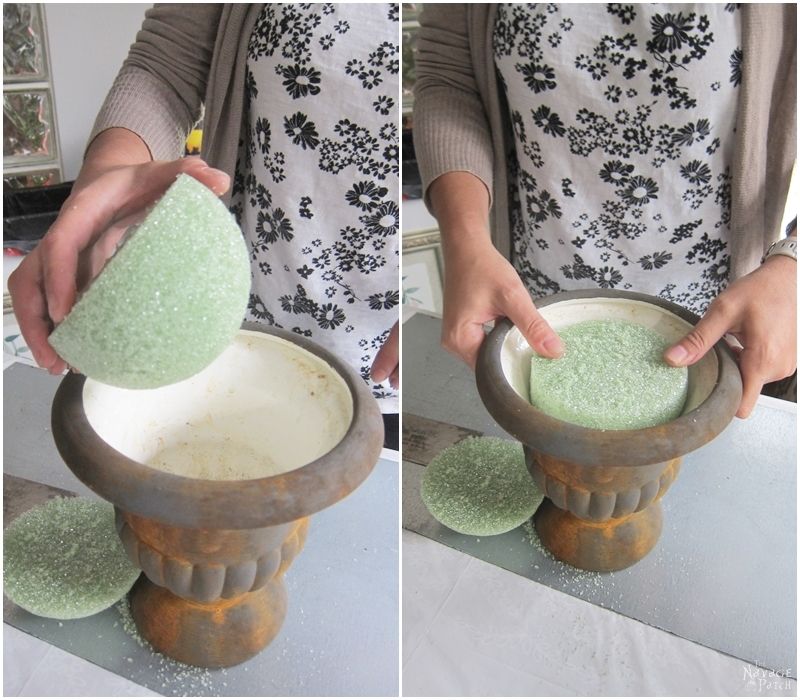
Once I was done with the foam placement, I picked some Spanish moss and hot glued it all over the top. While doing this, I tried to create random moss spills here and there. You see – any plant you grow from seed would disturb the soil on top (or moss in our case) as it grows, hence you would see some spills from the side of the urn.
Now I bet you are thinking that I care too much about the details. It is really not that, but more like… I don’t know…I guess Greg makes it easy to imagine how it would be if I grew him in that urn. hahaha 😀
We love to see our DIY Halloween decor out in the wild! If you make this Halloween DIY decor for your home, take a picture or video and post it on Instagram, be sure to tag us – thenavagepatch
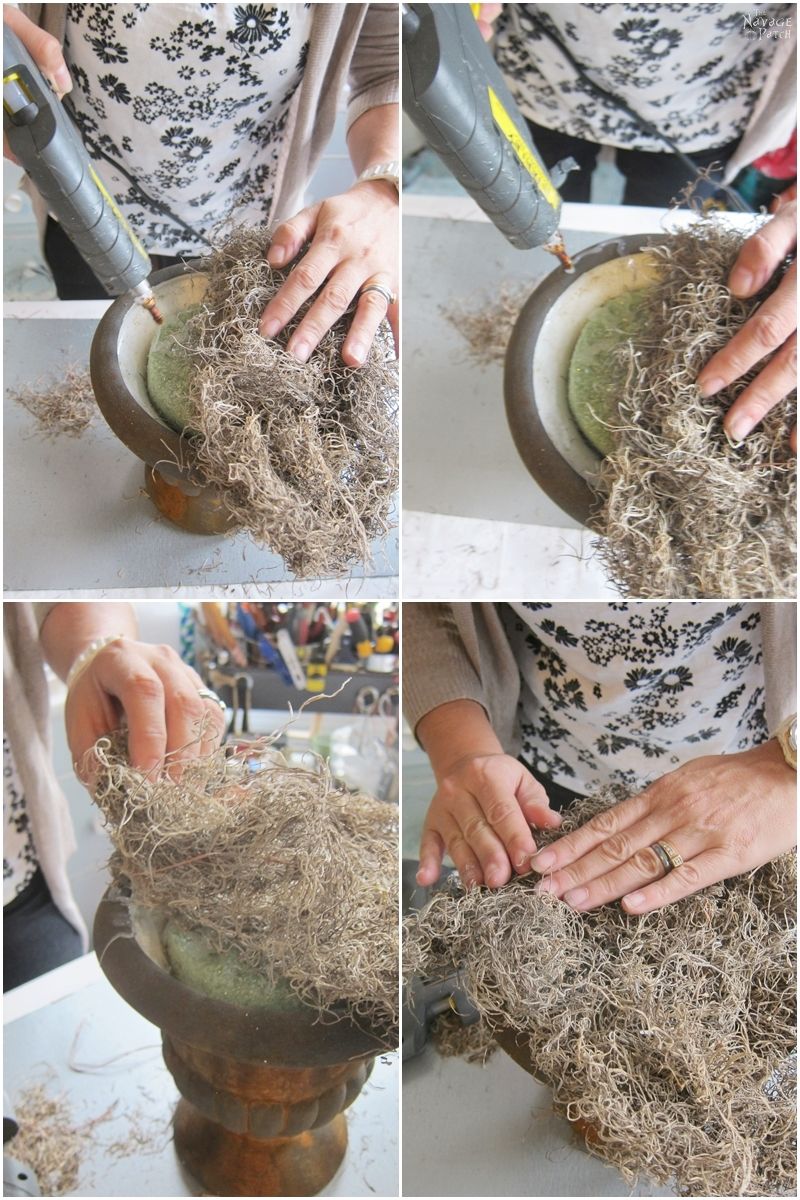
After I finished placing the moss, I hot glued a few Halloween creatures on it. When doing this, just glue a few – you don’t want your urn to look too crowded. Also, with some creatures, hot glue may not work, like the small rubber rats I had. With them you can use E6000 like I did. 😉

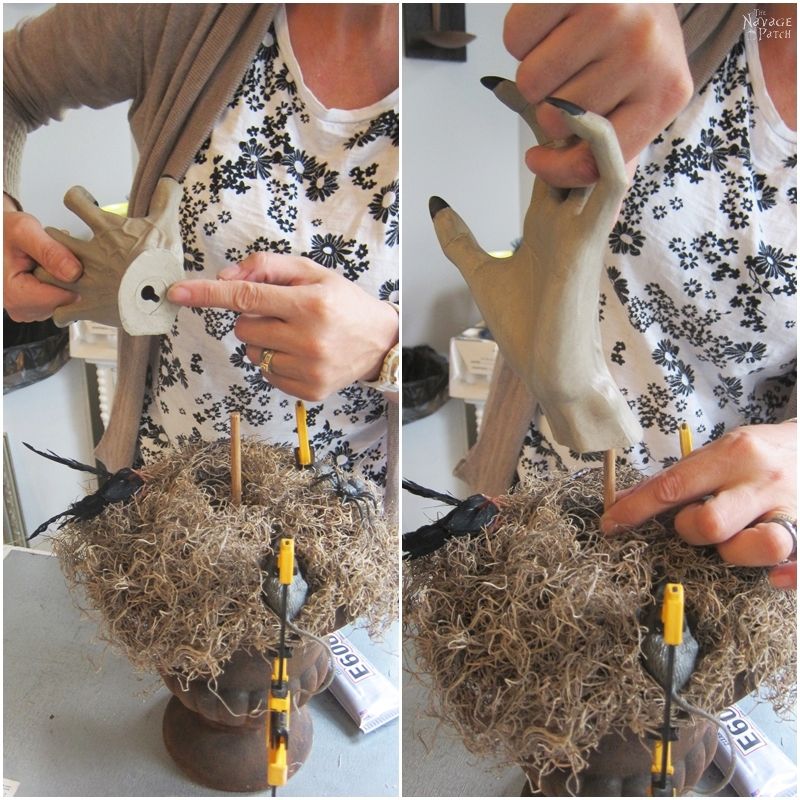
Next, I pushed a 6 inch dowel into the floral foam. As you can guess, the length of the dowel will depend on how deep your planter is. Also if you don’t have a dowel on hand, that is fine. A thin but sturdy stick you can find in your backyard will do the same job.

Once I had my dowel in its place, I placed the creepy hand over it. As you can see from the picture below, these creepy hands have a hole in the wrist for wall mounting, and that hole is wide enough to fit over the dowel.
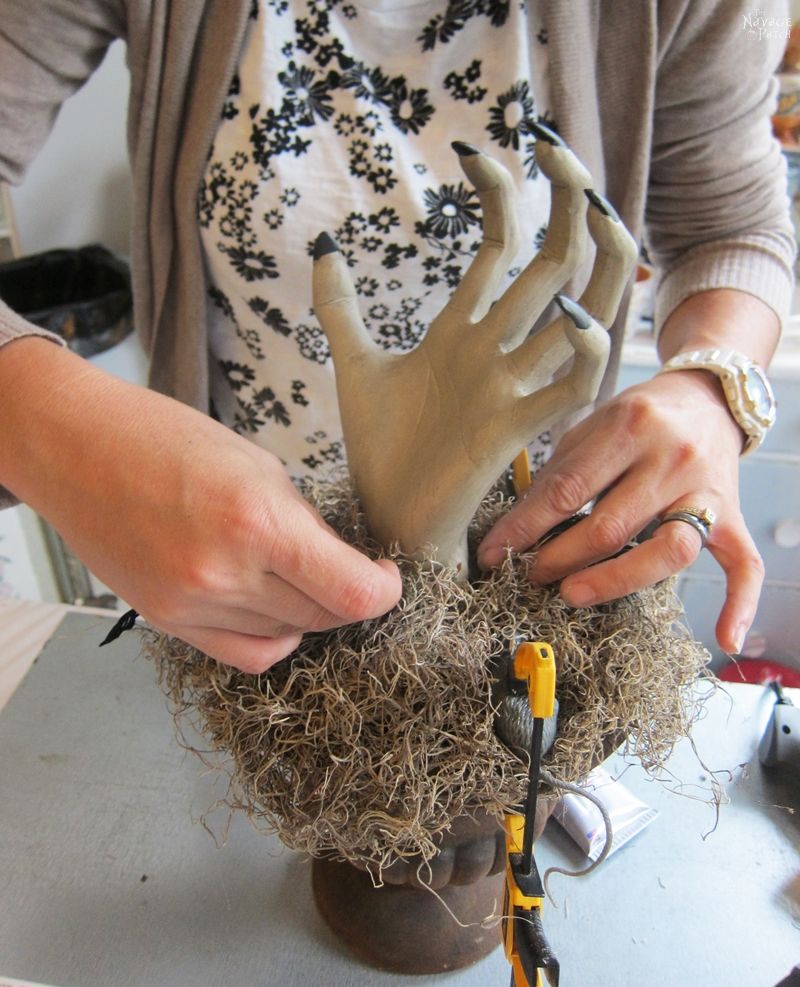
As the final step, I re-arranged the moss around the wrist so the whole thing would look more all-in-one-piece.
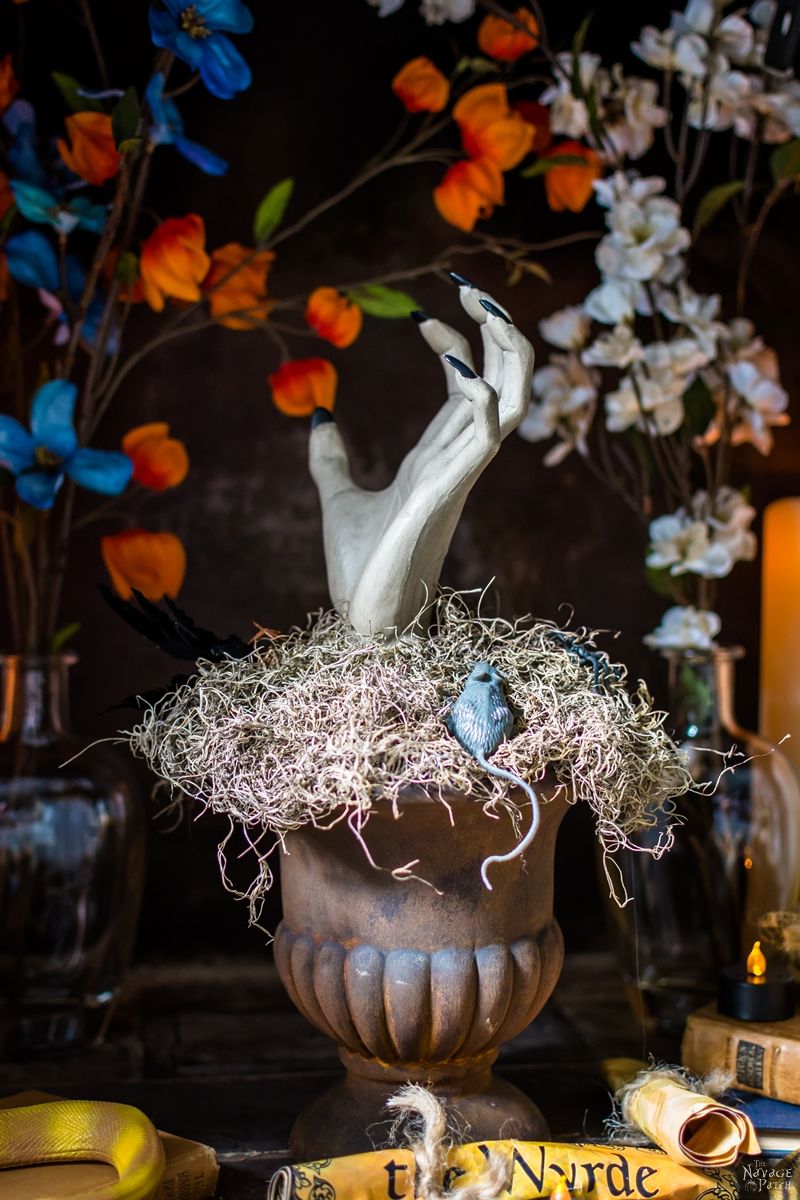
And ladies and gentlemen [insert drum roll here]…here is my potted Rosemary!

Oh ok – maybe you can’t really tell whether it is Rosemary or Basil from the previous picture, but how about now? hehehe 😀

Of course I prepared a tag for it! After all this prep, how could I miss that kind of nice touch? And no worries, as usual I am sharing the tag with you at the end of the post. And not only that – I have a little surprise for you at the end of this post. But let’s get through the beauty shots first, shall we? By the way, all the credit for these beautiful photos goes to my babes. Then again, if it weren’t for his photography skills, he could be the one posing in these pictures. LOL.
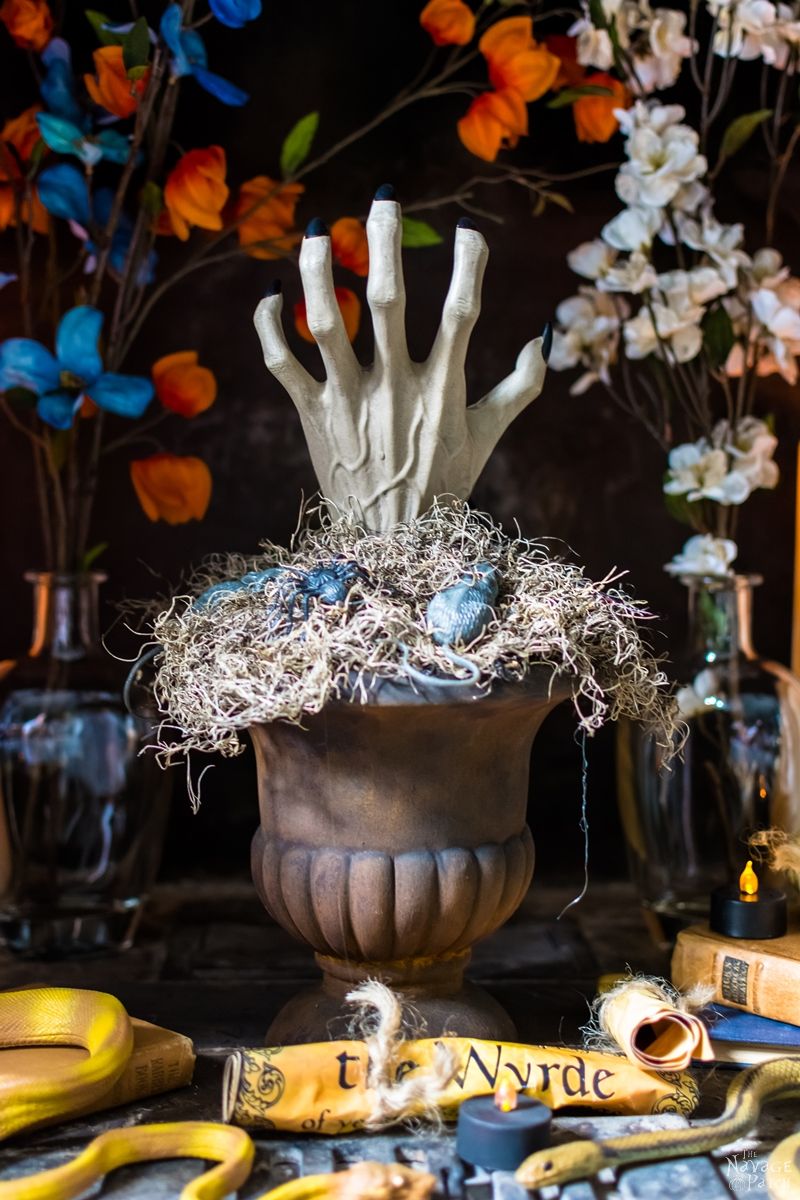

“Rosemary – You knew her once, now you can grow her again.” 😀


If you were wondering what the surprise is, it is our first Halloween treat for you: editable spice/plant tags. You see, I love my herbs, hence I went with potted Rosemary 😉 But I thought, instead of Rosemary, if you want to plant others such as Basil, Rose, Ivy, Primrose, Aster, Hazel, Rowan, Rue, Iris, Jasmine, Laurel, Olive, Violet etc. (the list can go on forever) then you can use these editable tags for marking it.
You can download the tags (including the editable ones) by clicking on the button below. You’ll find them in the Halloween section of the VIP Patch. Enjoy!
Handan, xo
take me to your
amazing freebies library
If you’re not a Navage Patch VIP, you won’t be able to access our Freebies Library. But that can be easily fixed! Subscribe for free on the form below and become a Navage Patch VIP. Once you subscribe, a password will be sent to you in our Welcome email, and that will give you access to The VIP Patch [Freebies Library].
Share it on Pinterest & Facebook!

Wow, nice!
Thank you so much, Ivory! 🙂
Fantastic prop! Where did you find the creepy hand? I also absolutely love the previous post with Handan – I must work on achieving something similar!
Thanks for all the fantastic posts!
Hi Donna,
Thank you so much for your lovely comment. I found the creepy hand on Lakeside.com. But Amazon.com also sells the same thing. I gave the links in the post but here they are once again for your convenience:
The one on Amazon.com – http://amzn.to/2wLp6uR
The one on Lakeside.com – http://fave.co/2wdqDc1
I hope this info helps!
Happy crafting 🙂
Lovely work Handan! If I wanted to change the tag from rosemary to thyme, how can I do this, please?
Hello Patty,
Once you download the editable tag file, just open it and type the spice name you like in to those tags (there is a place in those tags where you can type and you can see it easily once open the file). When you are done with typing your spice name, just simply print the tag. I prepared those tags rectangular, so you ccould either glue it over a stick (like a flag) or just place a string on the corner and hang it like I did.
I hope this helps! 🙂
OMG, I am so glad I found your blog, I absolutely love your creative minds. I also love, love Halloween so I am really looking forward to all things hallows from you. Thanks for the inspirations!
Thank you so much, Ronna! If you love Halloween, you are at the right blog. Christmas and Halloween are our two favorite holidays, hence the celebration is usually big on the blog too 😉
Here and I thought this was an idea for a rosemary topiary! What a brilliant (read sick and twisted) idea!!! Perfect! I’m forwarding this to my niece who does up Halloween like you do! And thank you for the labels! None of my bottles sold at my yard sale so I have plenty to work with!
Hahahaha – thank you so much, Derry! I am so glad you liked the labels, as there will be more to come 😉
Love this and the idea for the “rusted” urn I would use it all autumn! You two are THE BEST!
Thank you so much, Judith! 🙂
sorry i am late reading this post, my daughter had spinal fusion surgery and i have been hopping trying to take care of grandsons and her, i am too old lol, i always look forward to your halloween ideas, you could always plant gregory in the front yard and rig up a pulley system to make his arm wave lmao xx
Oh Chris, I am so sorry to hear that. I hope she has a speedy recovery.
LOL – yes that is a good idea! Maybe next year I might surprise you guys with that hahaha 😀
Oh Handan your ideas are brilliant ! Christmas has always been my favourite time of year to let my creative side go wild in the home ,but thanks to discovering your Apothecary Halloween dresser last year Halloween now comes a close second .I have been busy making stuff for hedgehog rescue fund raisers at a couple of local festivals for the last six weeks so haven’t had time to read blogs,lot of catching up to do but now Haloween is in my head ( been rattling around in there for about a month ) but now it’s out oh dear ! Love Rosemary , my cauldron on the doorstep is going to have to make room for her.
Thank you so much for your lovely comment, Catherine! It made my day! 🙂
Bwaahahahahaha, “You knew her once, now you can grow her again”. That’s just brilliant Handan and it’s such a pity that Gregory only grows in the wild, but I suppose it likes being close to agaves and limes 😉
LOL – Our nursery told me that I should plant Gregory either with juniper or agave! So I went and bought loads of juniper. We’ll see how well the thriving will go with that much juniper in it’s system…I meant eco-system lol 😀
I love all your ideas. We have made at least 10 of your banding pumpkins–all shapes and sizes. I love this idea too. Thank you for sharing!
Thank you so much, Sharon! YAY – it seems that you love pumpkins as much as I do 😀 Have you seen my sisal rope pumpkins yet? If not, then I suggest you check that out as everyone seem to love it too! They are very easy to make and costs less than $1 each ;-). Here is the link for that tutorial: https://www.thenavagepatch.com/diy-sisal-twine-pumpkins/