Sturdy DIY Closet Shelves
With these sturdy DIY closet shelves, we turned an inefficient clothing closet into a storage powerhouse that can hold almost anything!
You’d think if you built houses on swampland or other places the water table is so high that a basement would turn the house into a bobbing cork…you’d think you would include plenty of interior storage to make up for the lack of underground storage.
You’d think.
We humans are material creatures descended from dragons who gather and hoard possessions lest someone else get their grubby paws on them.
Perhaps “humans” is too broad a stroke. Maybe “Americans” would be a better choice.
Whatever the word, the simple fact is that it’s cruel and unusual to subject an American human to the depraved and wretched conditions that arise from a simple lack of a basement.
So you’d really think the bobble-headed hammer-swingers that pass for builders around here would at least try to help a fellow American out with ample room to store the copious crap we all collect from birth to death.
Instead, the plumb line pickleheads give us one-pole closets with maybe a small wire shelf or two that can hold nothing more than whispered profanities and exasperated sighs.
Such was the case with our guest room closet. This is the same guest room I made over last fall. The bedroom turned out great, as you may recall, but I never touched the closet.
It was certainly sufficient for a guest. But honestly, who allocates an entire closet to a mythical guest? And in Florida, the basementless land of suffering, who would even thing of allocating a square inch of storage space to the far-flung notion of “guests?”
Obviously, we commandeered that closet for storage from day one in this house. But because it was built by someone who calls himself a “house builder,” you know the job was quarter-planned, half-assed and fully wasteful of the allocated space. Just have a look and see for yourself.
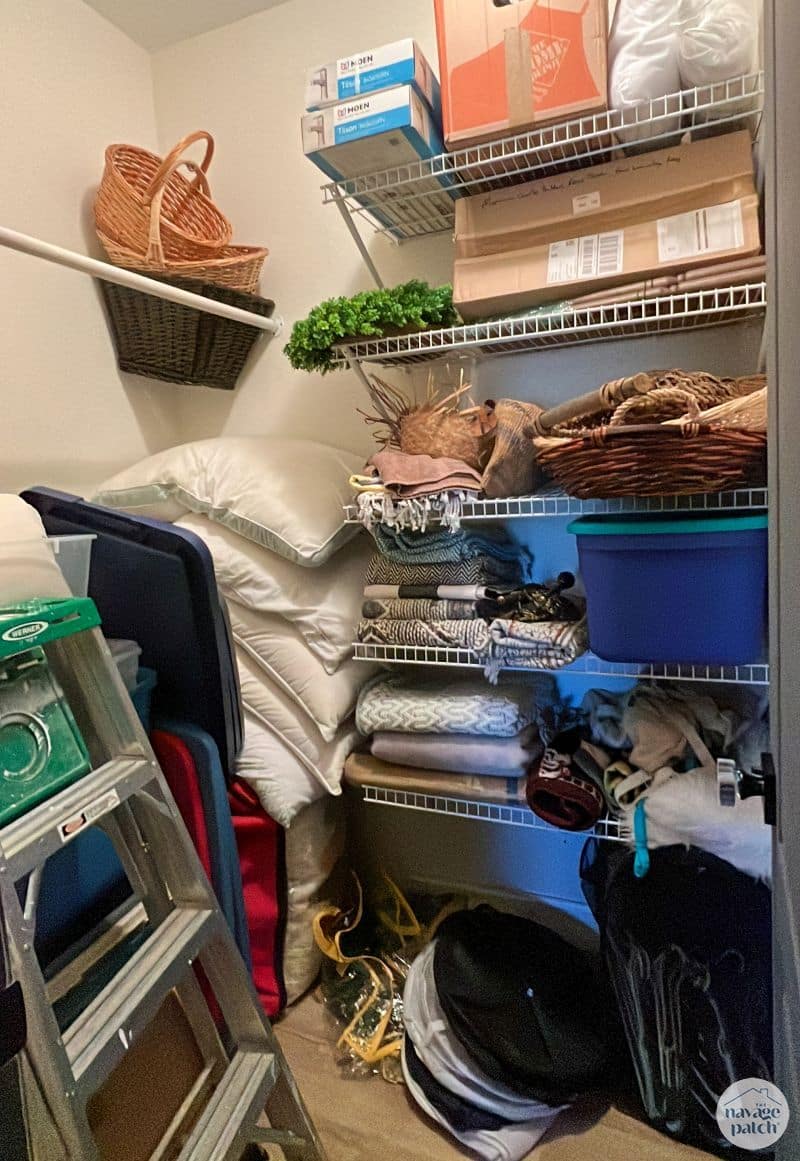
Now you may see those five abominable wire shelves and think to yourself that it’s a pretty substantial closet.
Don’t!
That’s just what the want you to think! What about the measly single pole on the other side?
What about the wasted space above?
Building contractors are a case study in the efficient waste of space. Don’t fall prey to their tricks and sleights of hand!
Our plan was to rip out the wire shelving (duh), remove that lonely and pathetic closet pole and build thick and glorious L-shaped shelves from floor-to-ceiling.
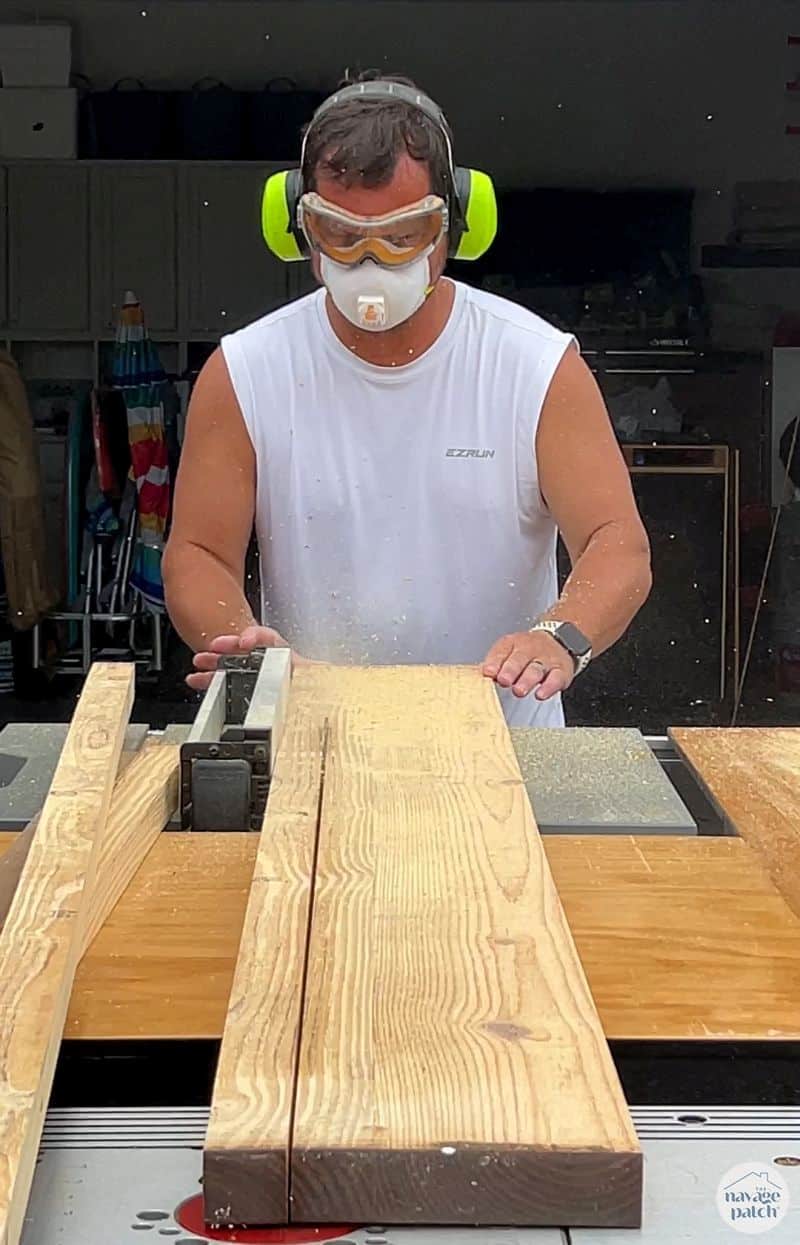
And the best part was I did it (almost) entirely from wood I had on hand.
Guest Closet Makeover VIDEO
Watch our short and fun video below for an overview of our Guest Closet Makeover before you read the detailed account.
Watch Our Tutorial On YouTube
On Tiktok
We love to see our DIY projects out in the wild! If you try this DIY project and take a picture and post it on Instagram, be sure to tag us – thenavagepatch
Closet Makeover Tutorial
Affiliate links are provided below. Full disclosure here.
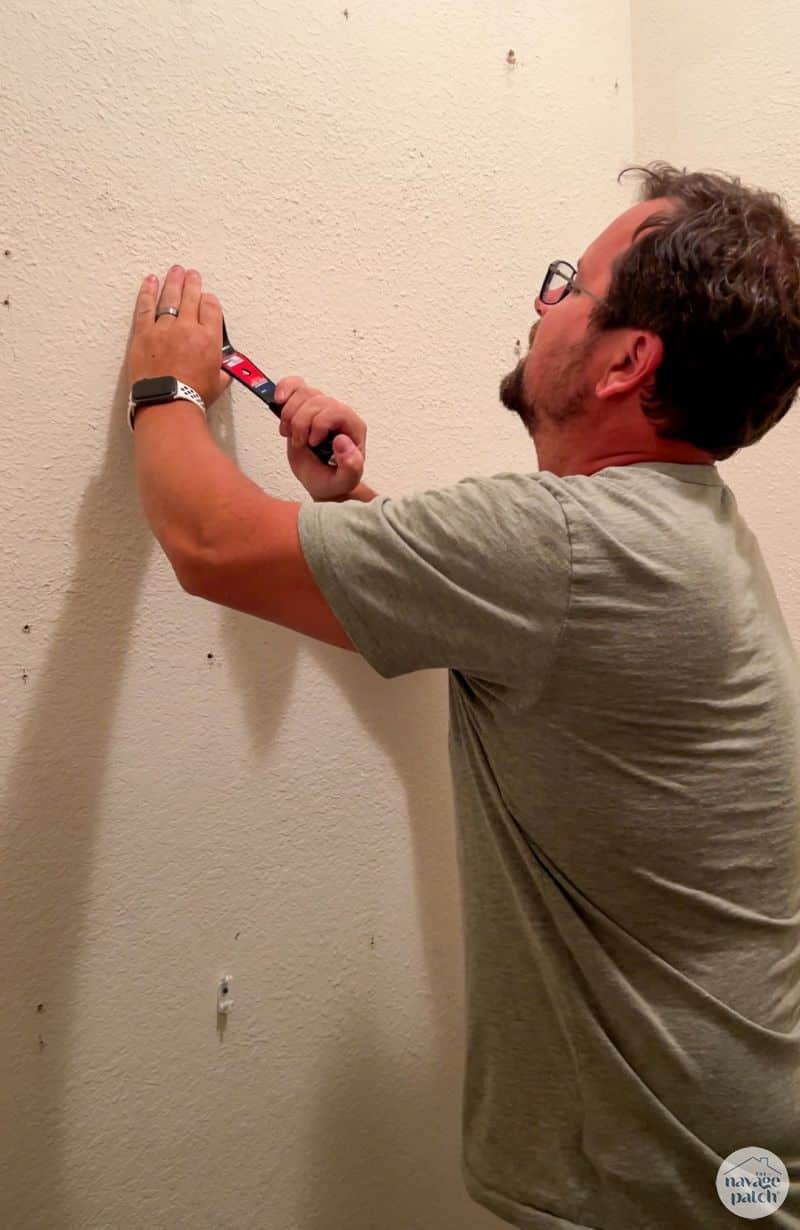
Step 1 – Exterminate the wire shelves
I’ve said it before, I’m saying it now, and I’ll probably whisper it with my dying breath – wire shelves are the reason we’re not all living in peace and harmony and zipping around the skies in flying cars like we were promised when I was a kid.
Thus, it is not only my civic duty as a proud American but my duty as a human being to eradicate wire shelves and replace them with something sturdier, more beautiful and much better built. ClosetMaid can retire. She’s done more than enough damage to the world already.
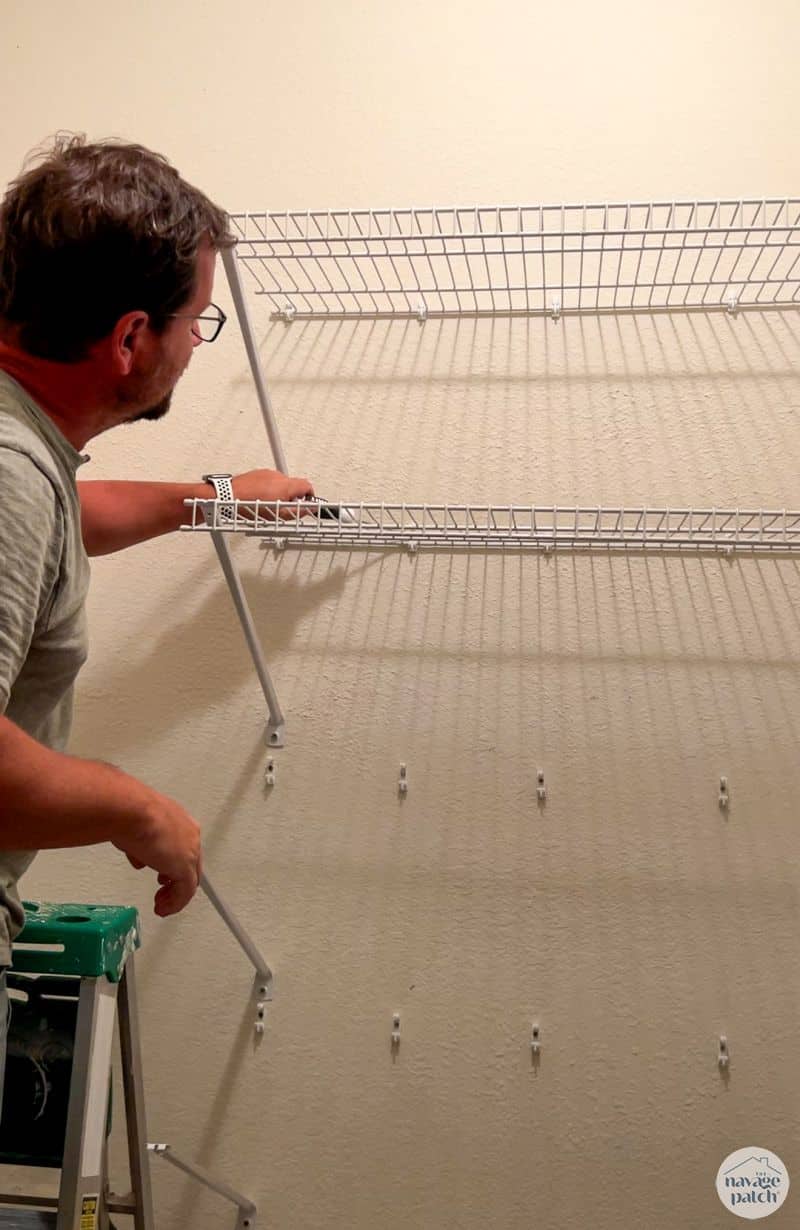
Here’s a handy tool my babes got for me. It has since become one of my most trusted lieutenants in the War Against Wire Shelving.
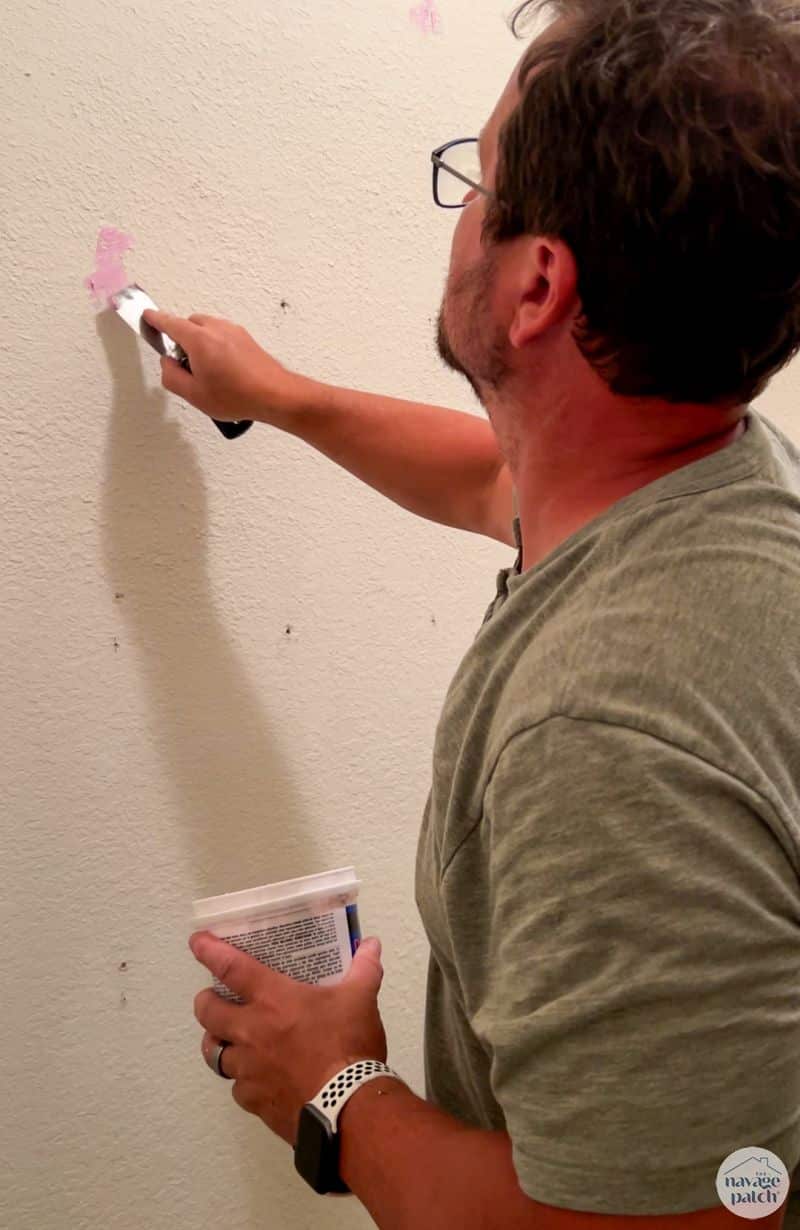
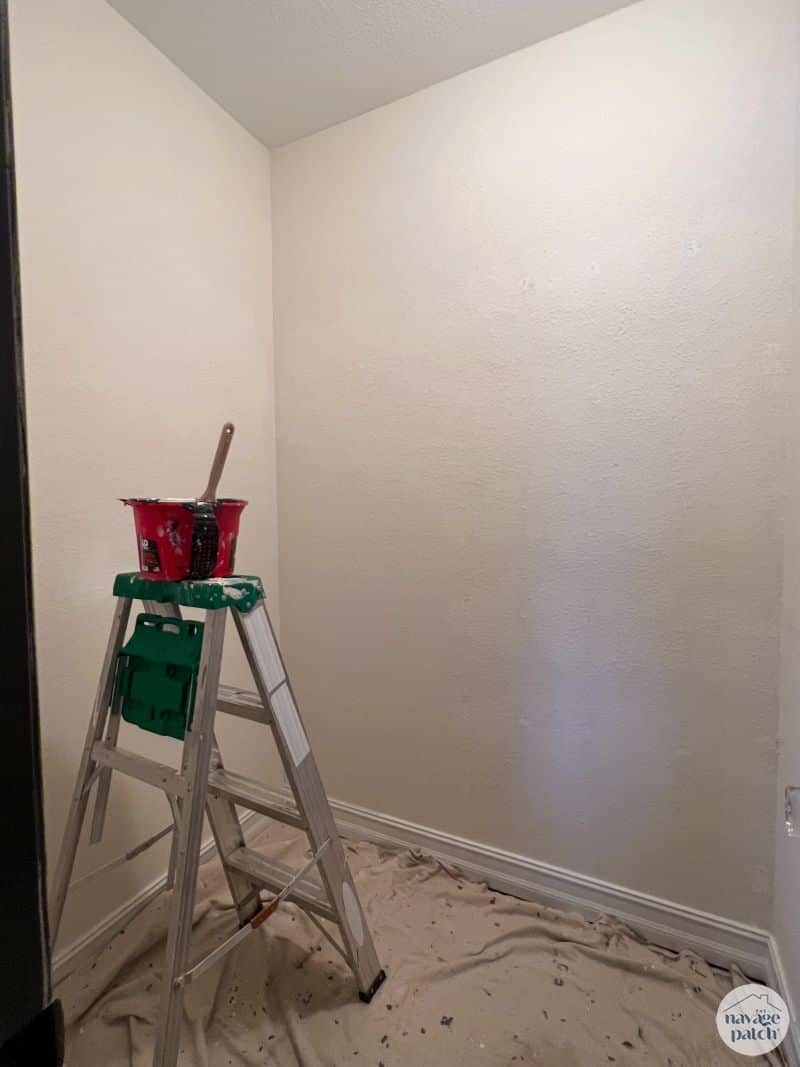
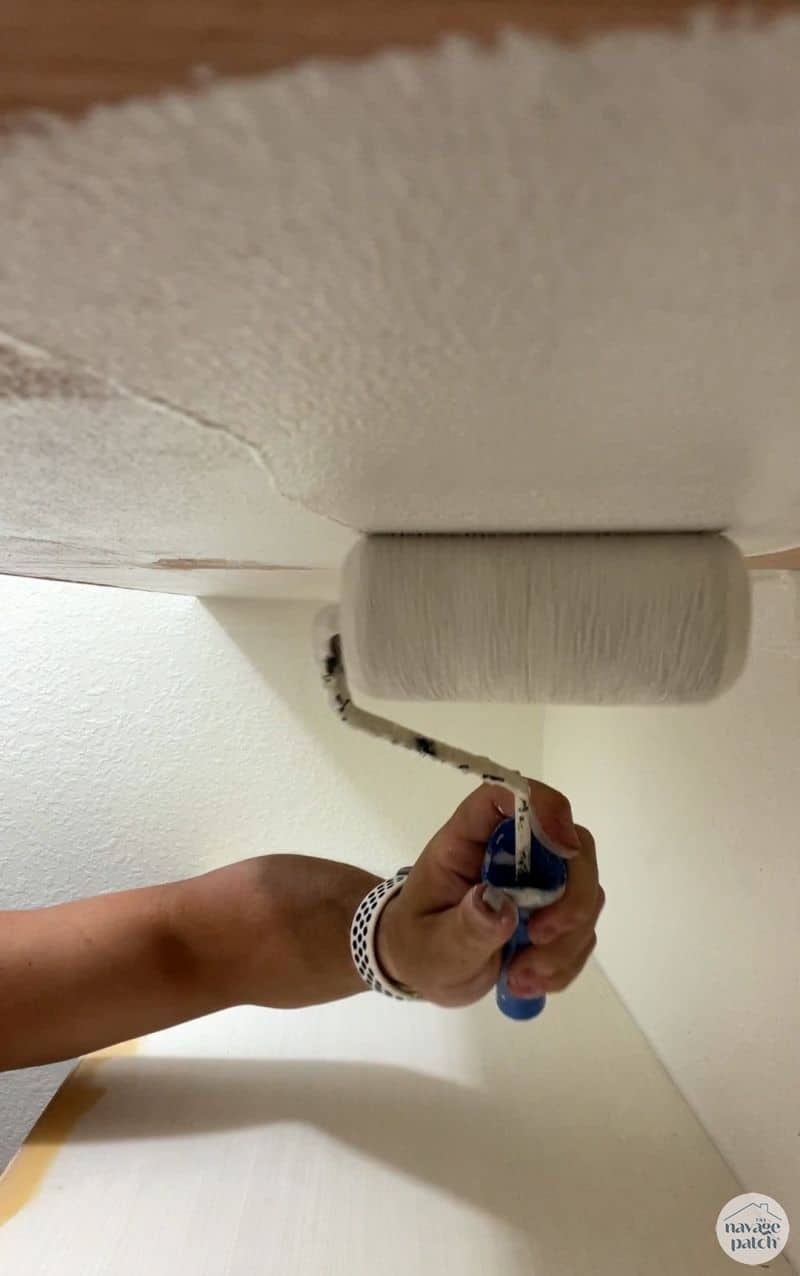
Step 2 – Repair and paint
Removal of wire shelves is never without collateral damage. I filled the resulting wall craters with spackle and then spruced up the room with two coats of SW Swiss Coffee.
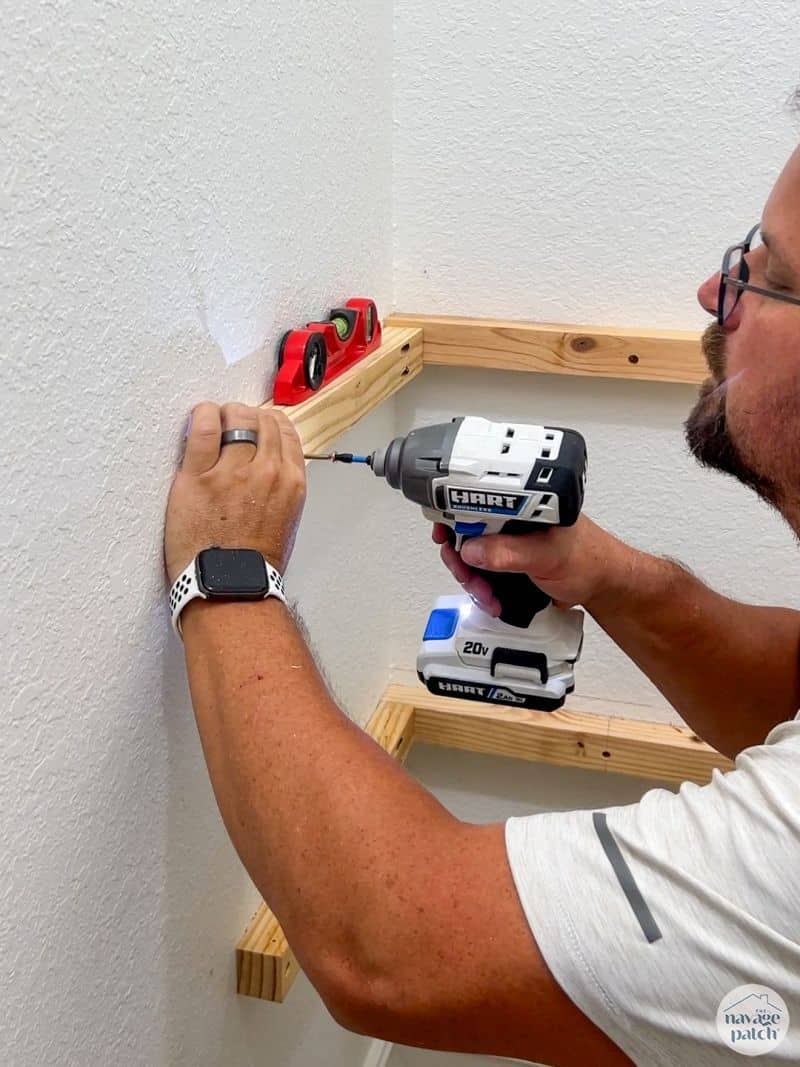
Step 3 – Make and attach wall supports
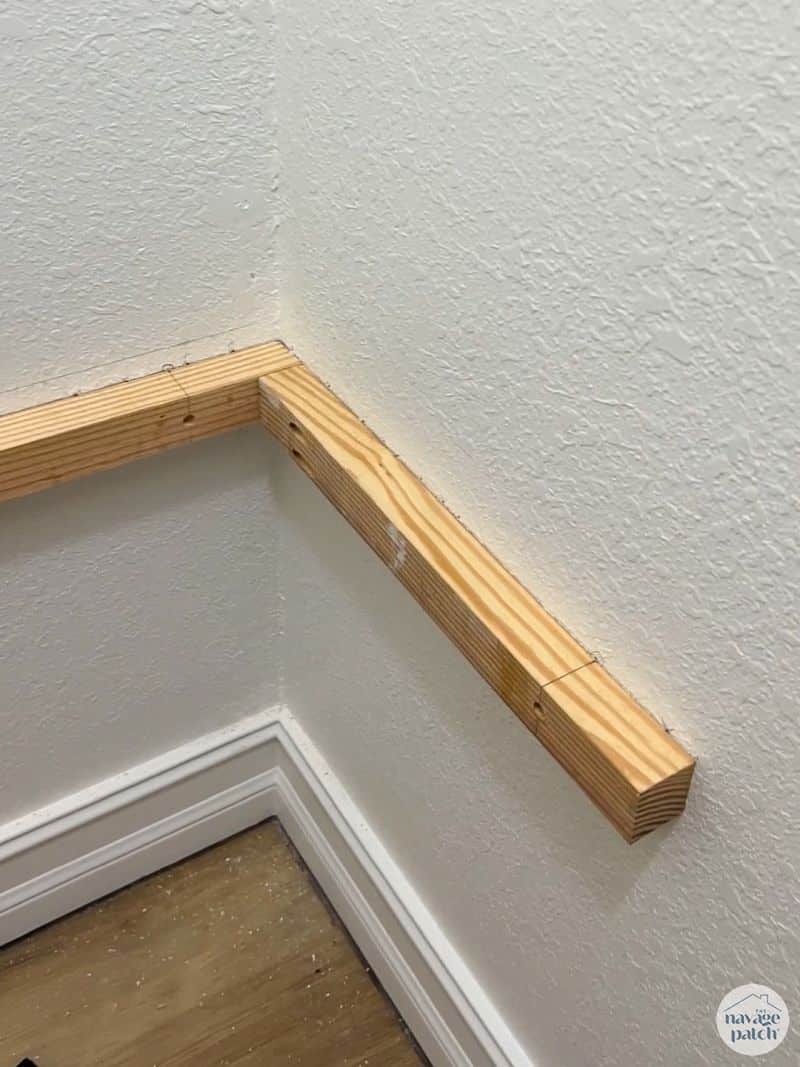
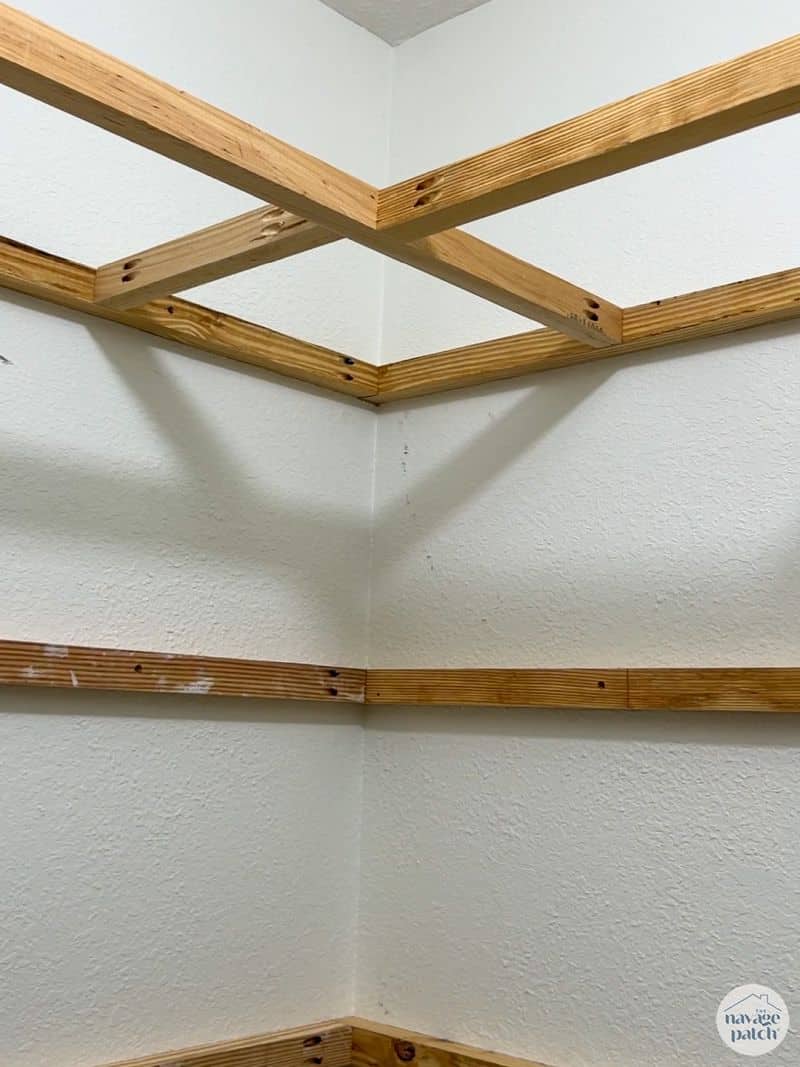
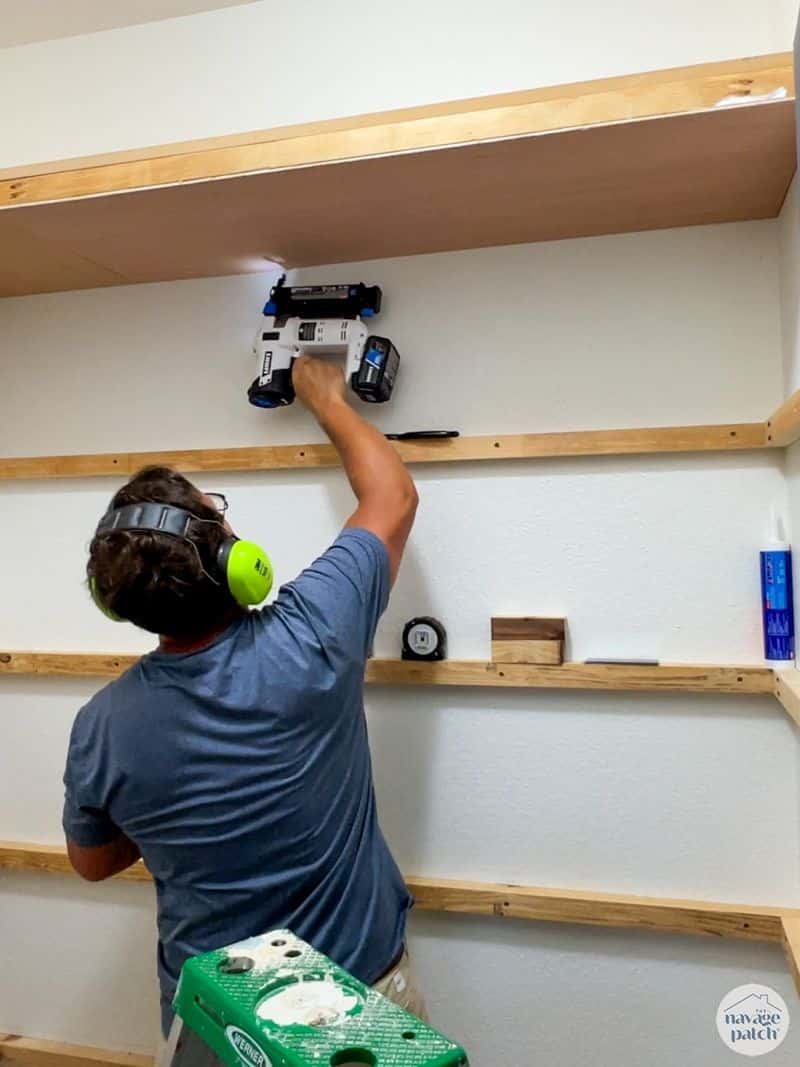
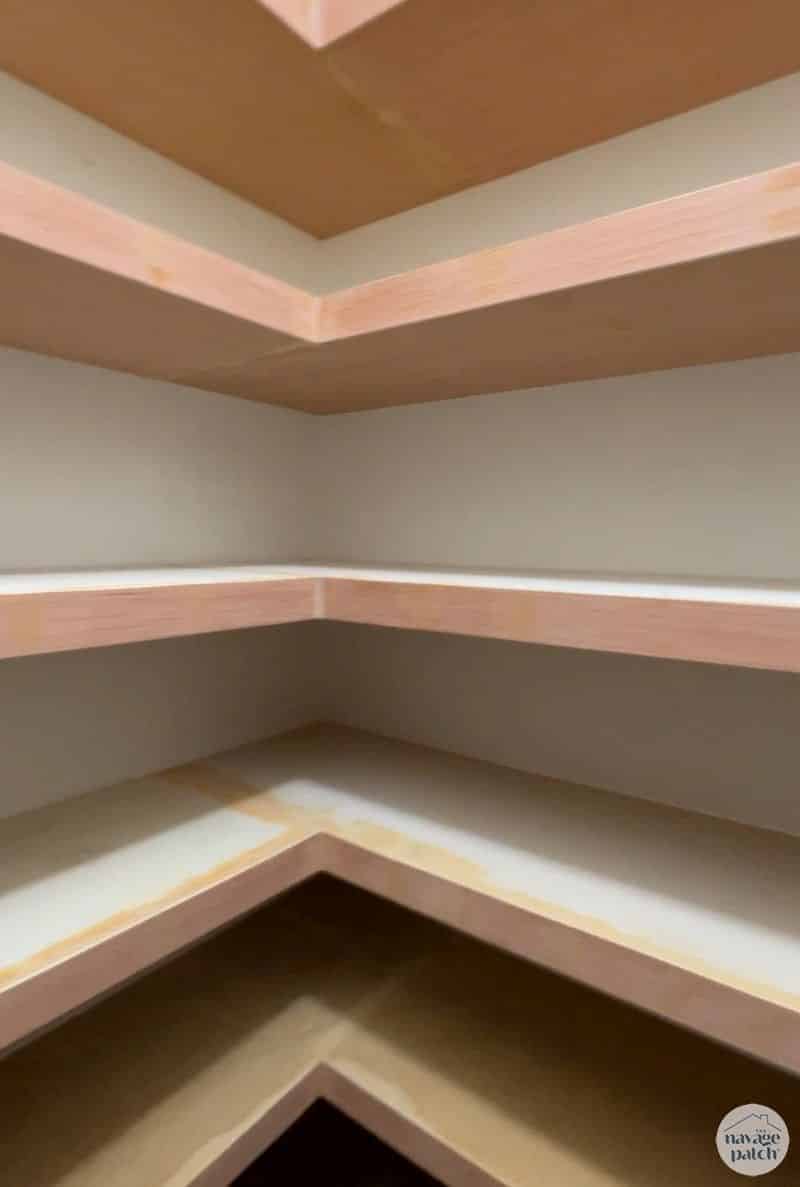
The idea for these shelves is to attach thick and sturdy supports (1 5/8″ x 1 1/2″) directly into the studs. This frame would then support 3/4 inch plywood or MDF shelves. Remember, the point of this closet (besides storage) is to use up a whole lotta scrap wood. The shelf bottoms would be made from thinner utility panel – essentially 1/8 or 3/16 inch plywood. I was able to build these shelves without the need for a vertical post because I had four wall surfaces on which to install the frame supports.
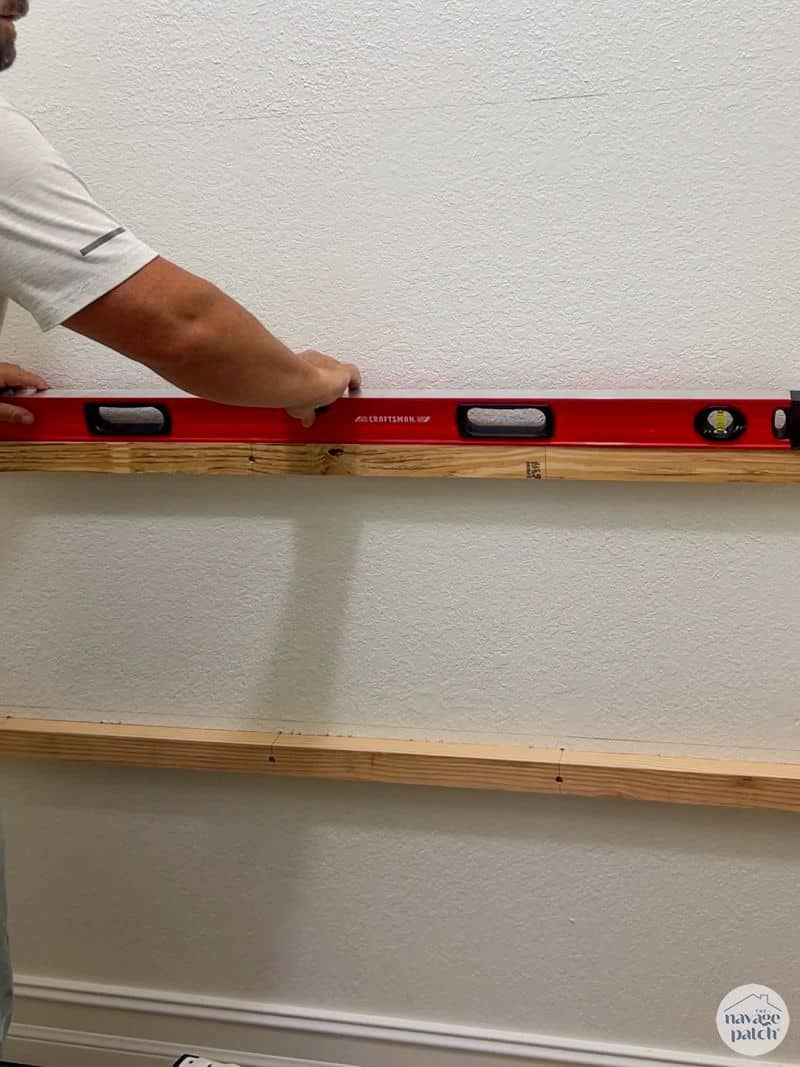
I started by determining how many shelves I wanted and how thick they would be, and then I used a measure to mark each shelf height and a level to draw a line across the wall.
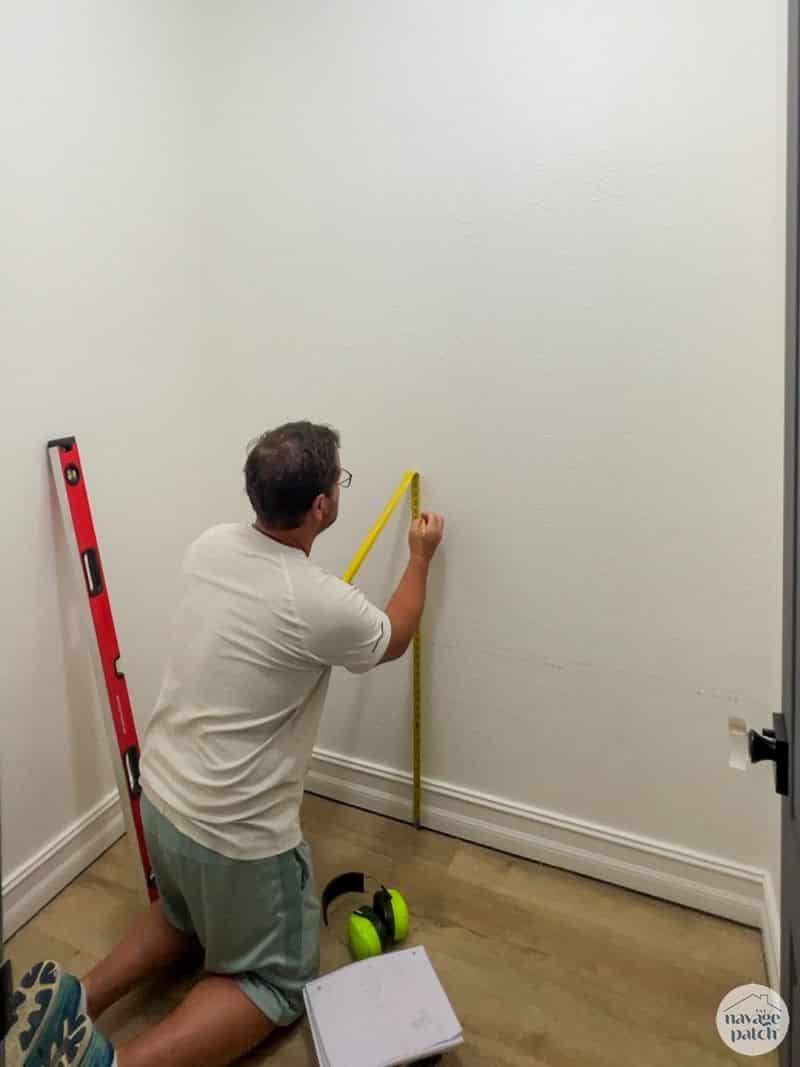
Next I used a stud finder and marked them on each line.
I cut all of my supports from scrap 2x lumber I had on hand – that’s why each support is 1 5/8 x 1 1/2.
After measuring the wall distances for each shelf (walls are never square, so this saves time and frustration later), I installed the supports from the ground up.
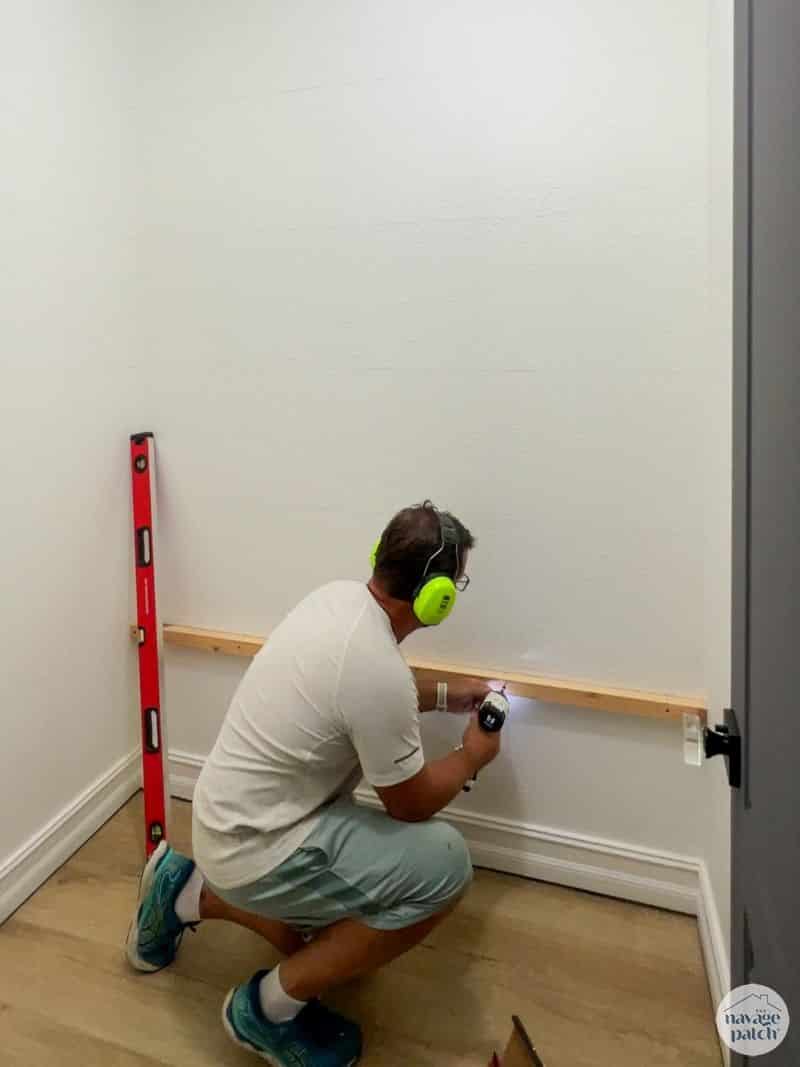
Screwing into the studs probably would have been strong enough, but I reinforced the corners with pocket screws just to be on the safe side.
I checked the level of every piece before screwing into the studs. It is essential that all supports be level or you’ll end up with wobbly or warped shelves.
Up up and up until I had the outline of five shelves.

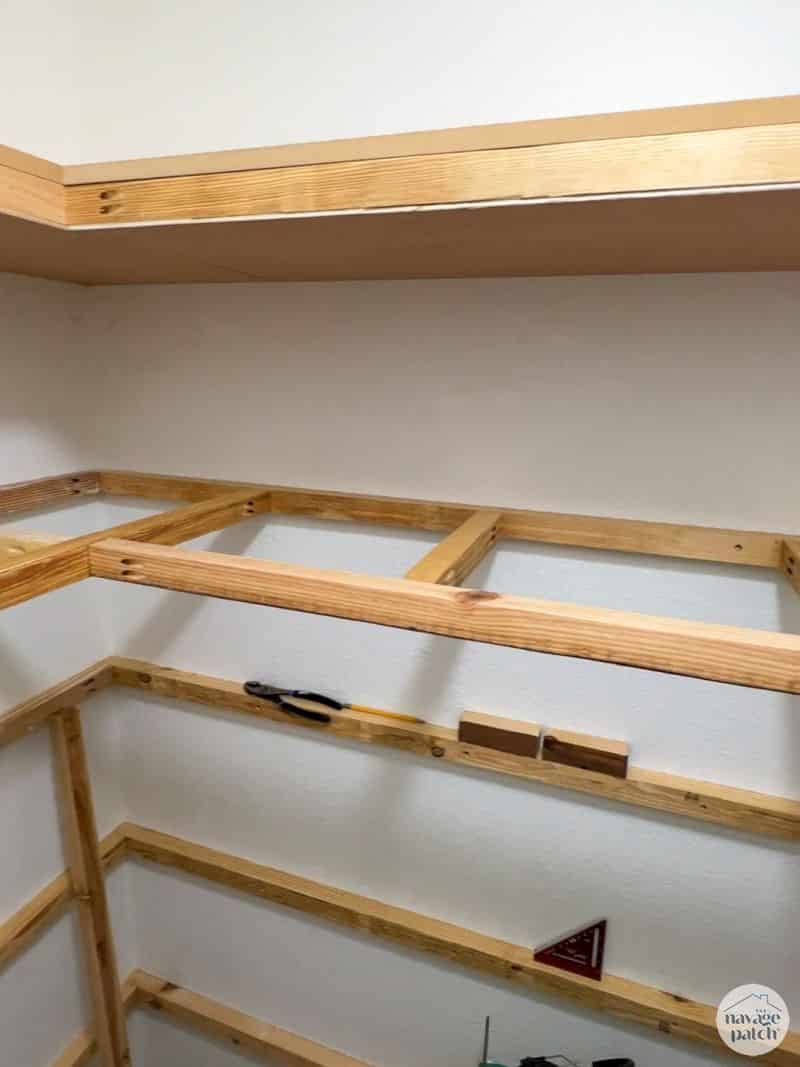
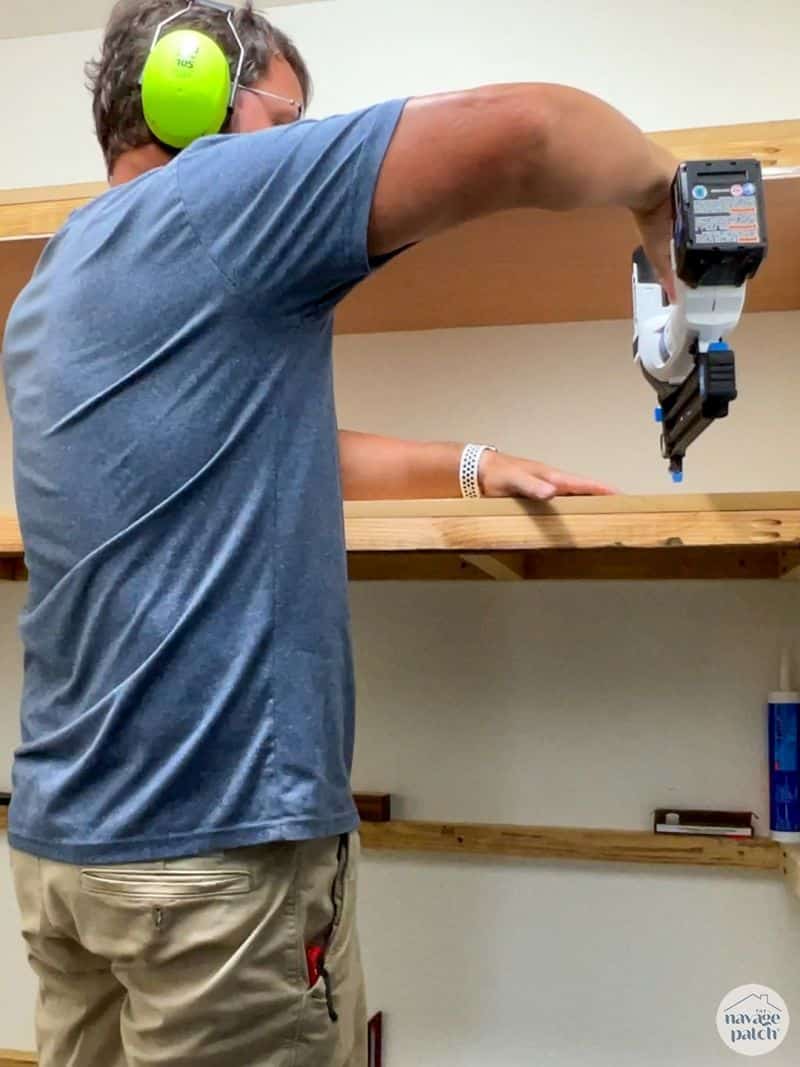
Step 4 – Build out the frames and shelves
Starting from the top and working down, I built the frames outward using pocket screws.
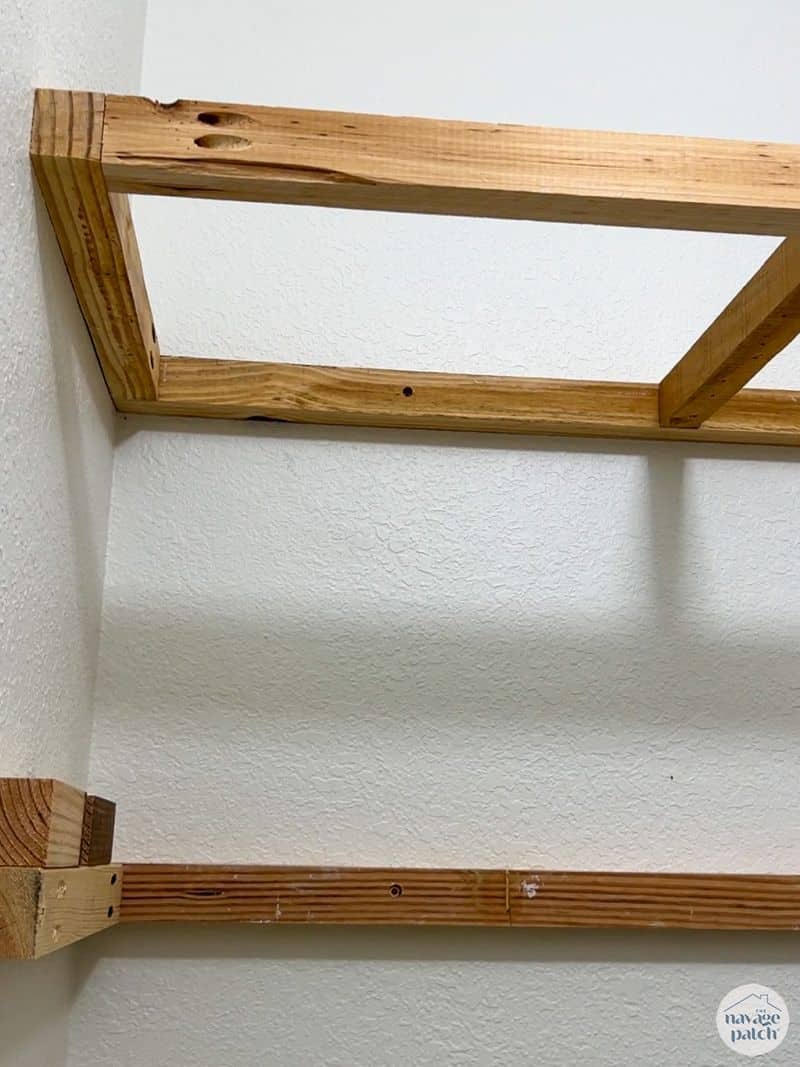
On the upper closet shelves I used my scrap MDF. After laying it and securing with a few brads, I cut and installed the bottom piece from utility panel. I used construction adhesive and brads to hold the shelf bottoms in place.

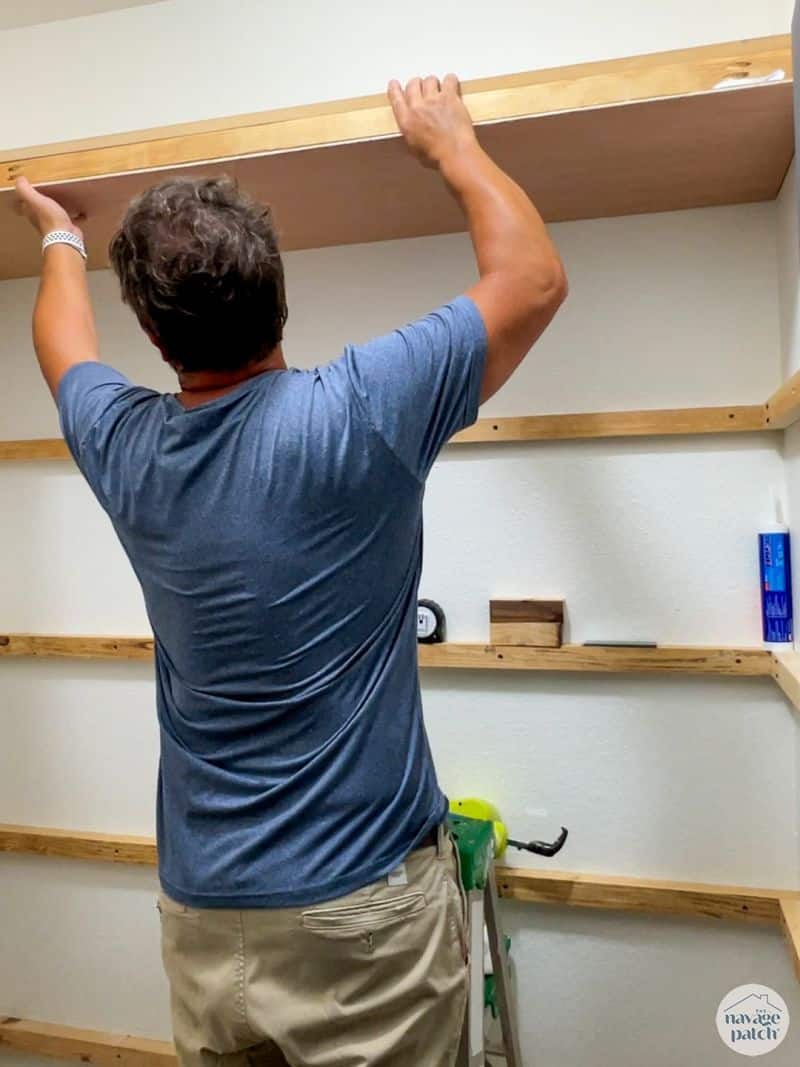
After installing the top shelf top and bottom, I moved down and repeated the process.

Step 5 – Add finish trim
To give a finished and professional look, I attached strips of utility panel to the faces with construction adhesive and brads.
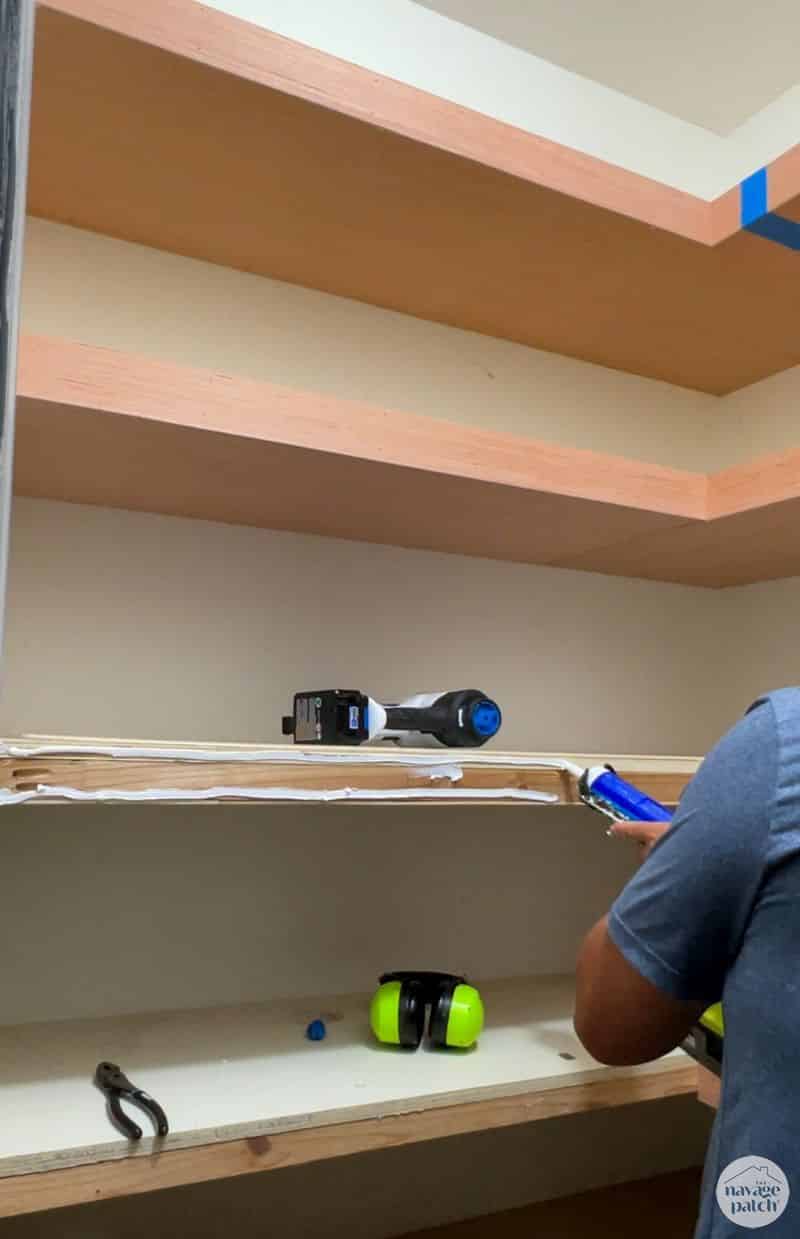

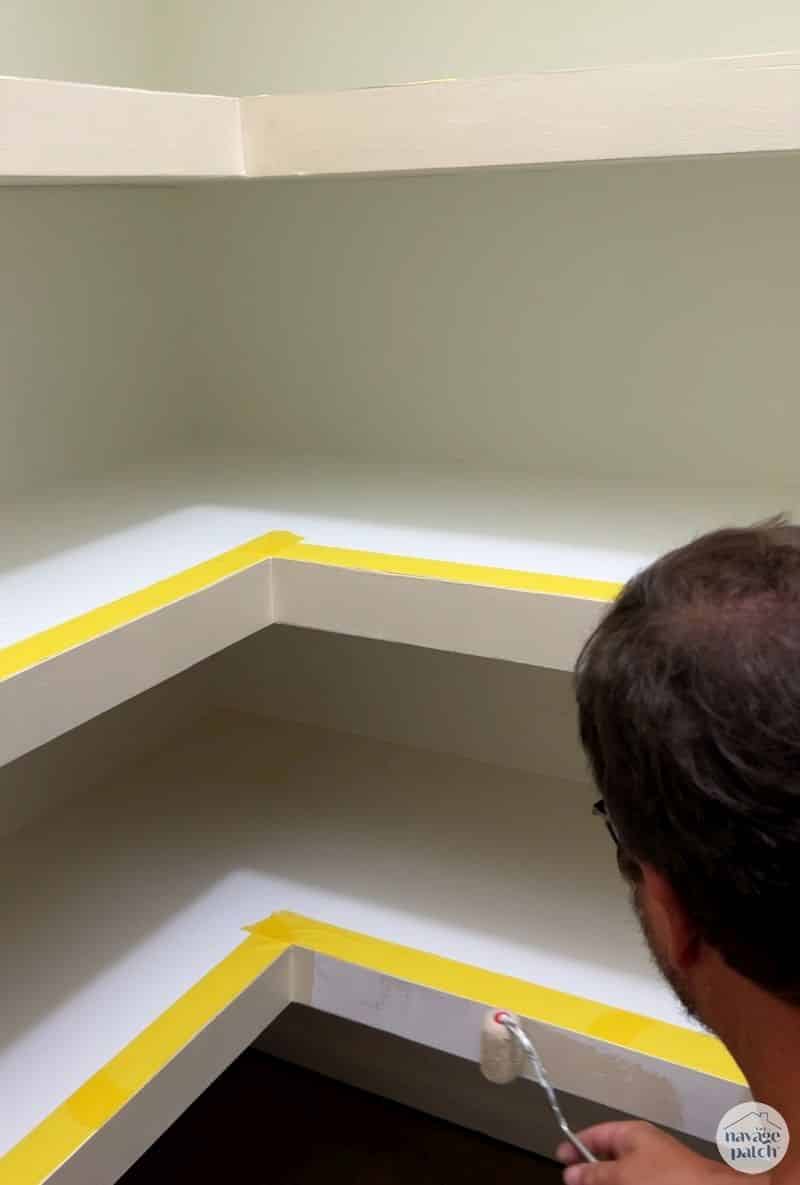
Step 6 – Caulk and paint
I filled all the nail holes and any gaps with wood filler and sanded, then I caulked all the edges.
I then painted the closet shelves with SW Swiss Coffee and the faces with SW Shiitake.
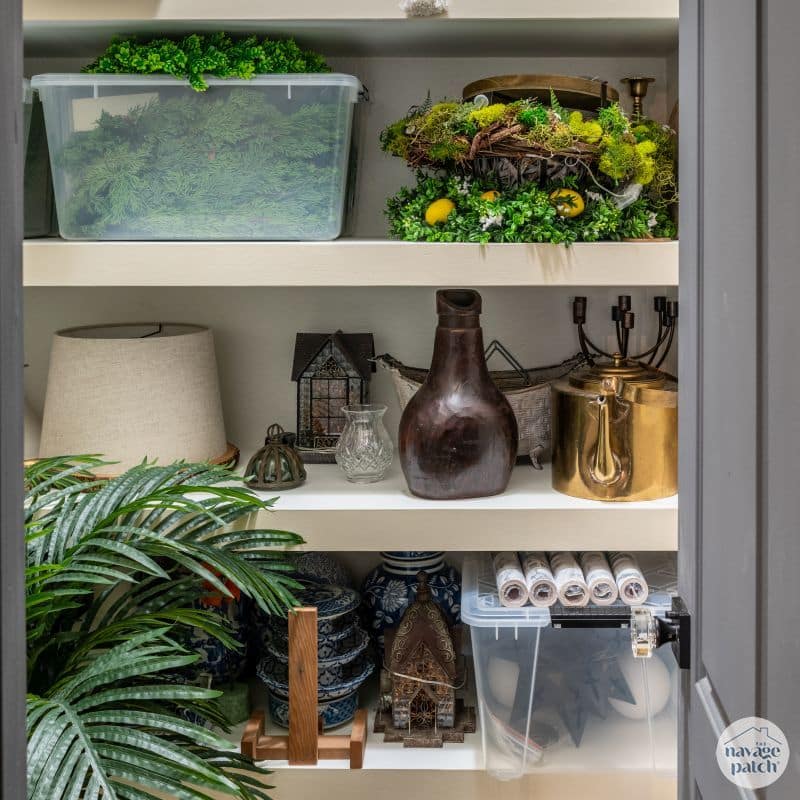
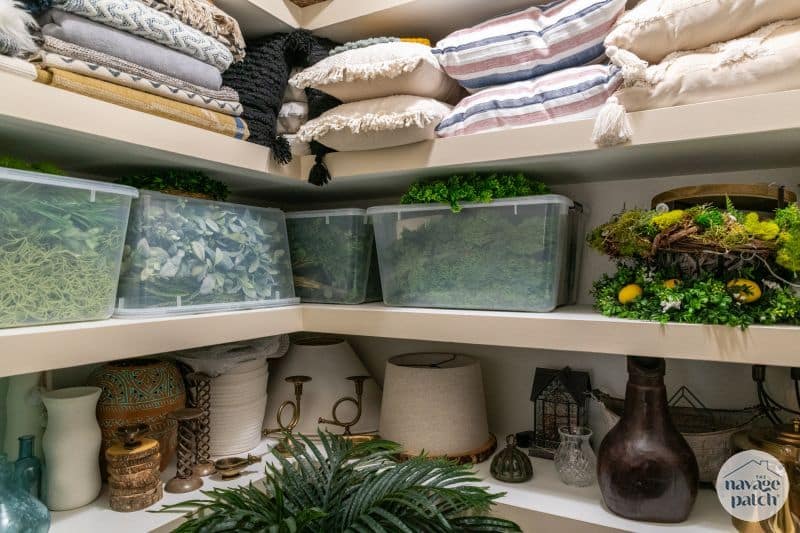
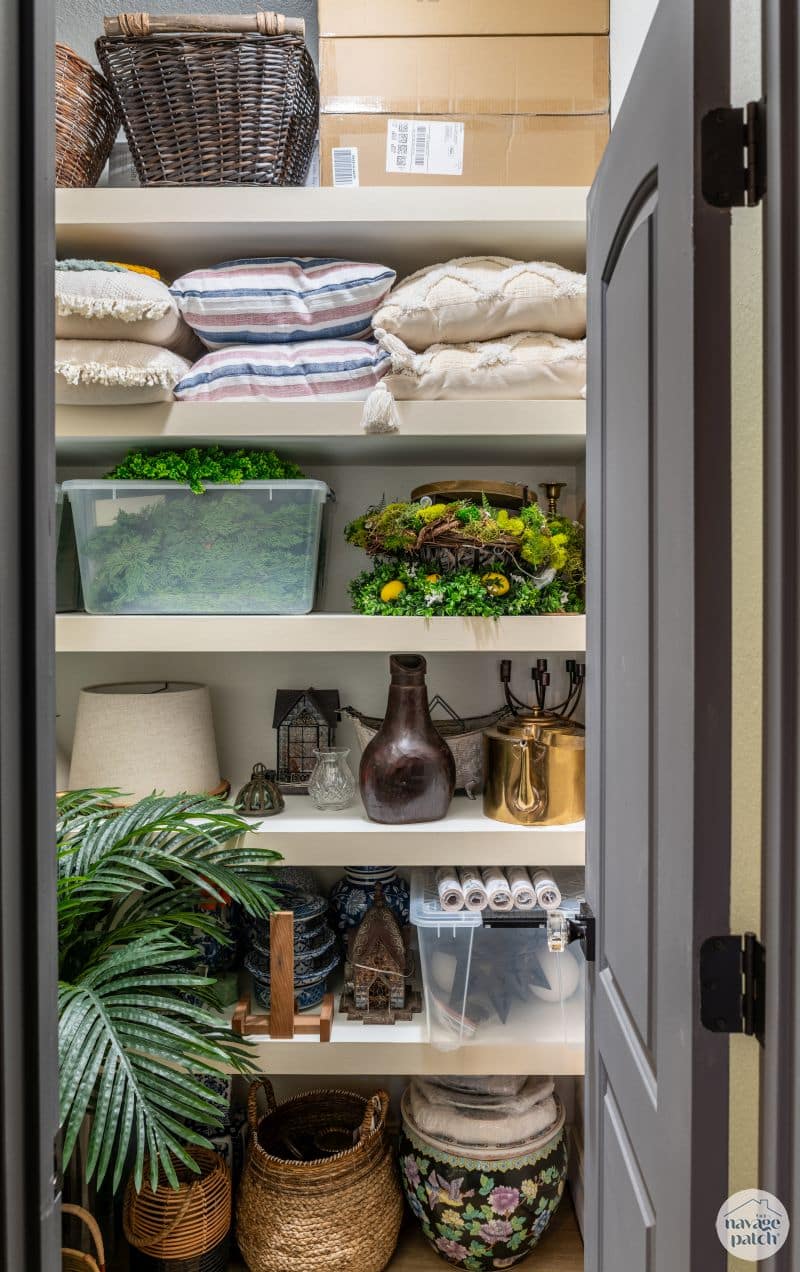
My babes’ new storage room awaited.
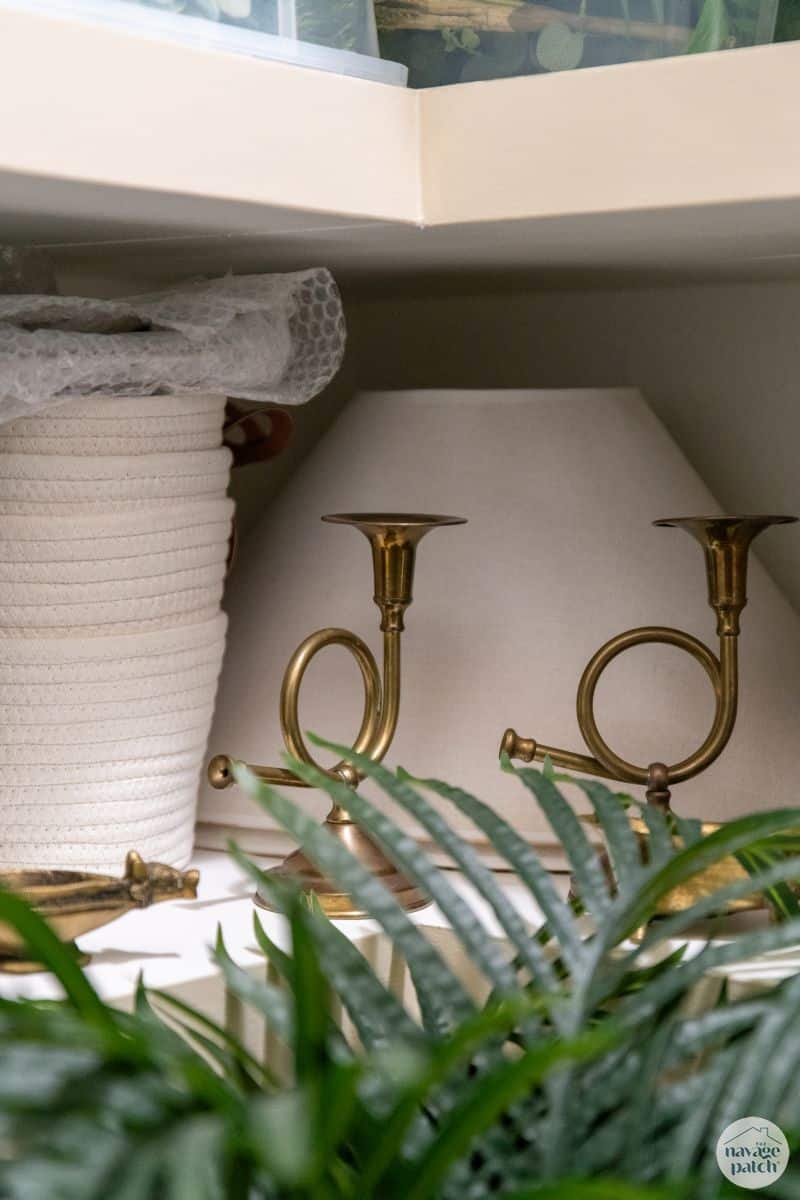
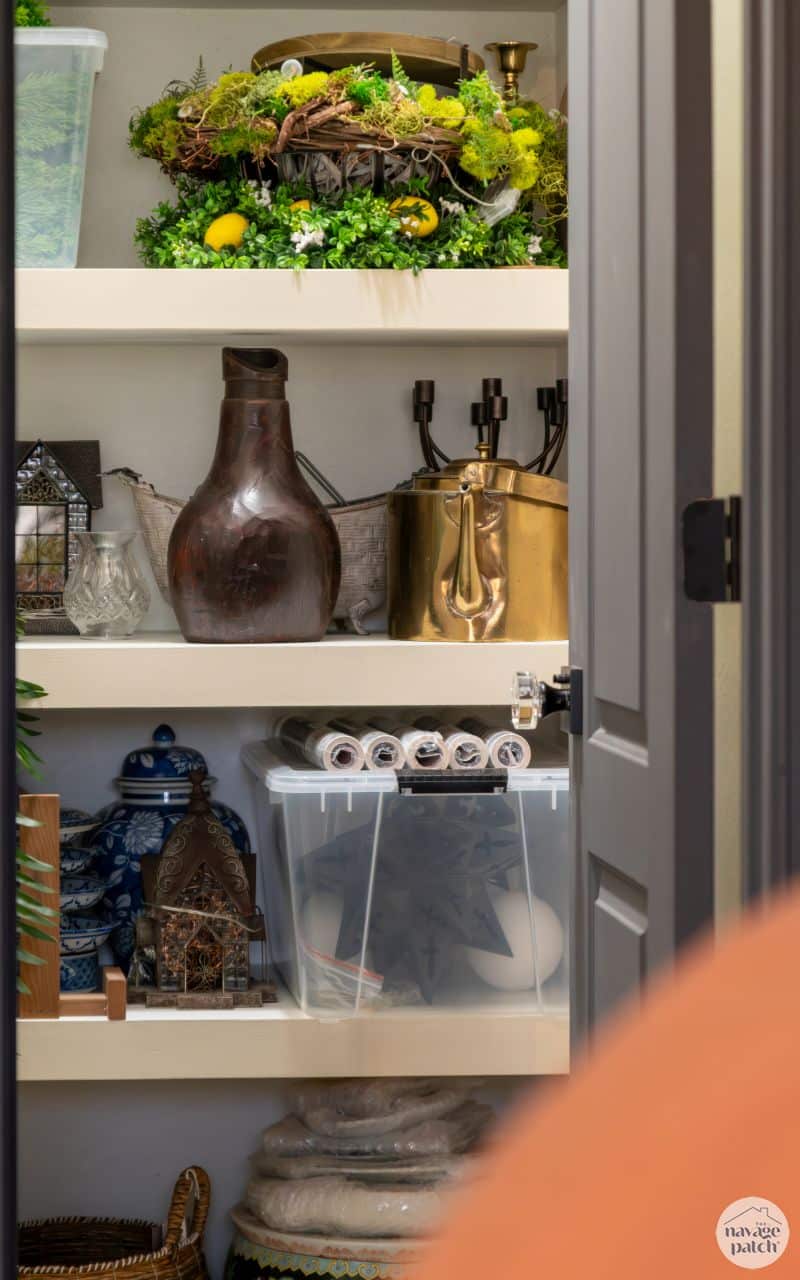
I’m happy to report she wasted no time filling her closet shelves with all sorts of goodies!
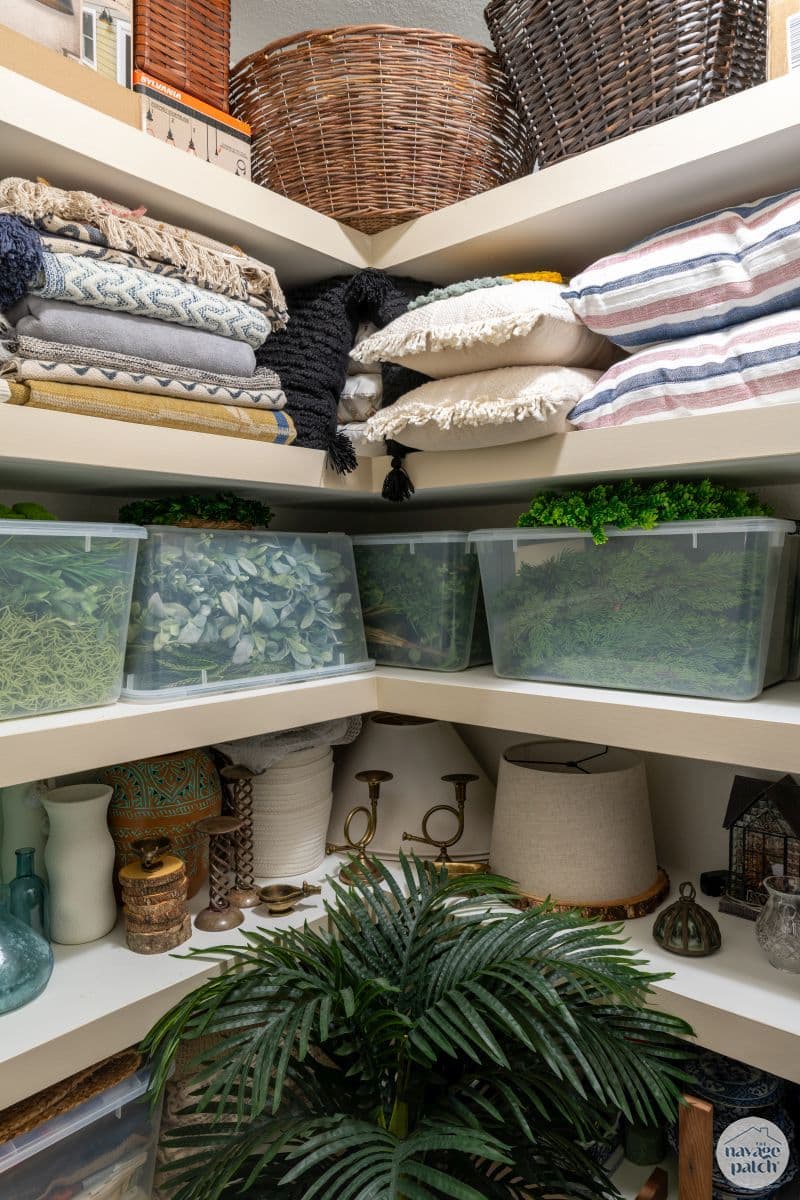
Before you go, have a look at some of our favorite holiday greenery finds under $30. It’s never too early to get the good stuff!

This is priceless!
” the plumb line pickleheads give us one-pole closets with maybe a small wire shelf or two that can hold nothing more than whispered profanities and exasperated sighs.”
Poetic, even.
Great closet building!
😁 I try my best to make my words count! 😂
Wow a true carpenter! Beautiful job here and I love that you even covered the bottom of the shelves! I’ve been trying to figure out some closets myself and now that I’ve seen this I know exactly what I am going to do! I need massive storage in my downstairs because I’m getting too old to make that trek up any stairs. I can’t even build them myself any longer so I’ll have to hire someone…are you available? LOL JK of course…but I’d sure love for them to look as good as yours.
Thanks, Shirley! Closets are always a fun DIY! 🙂
Pretty clever to turn storage bin upside down to not take up more space.
I agree!
It is!
Tetris! Is this you or your Babe? “Tetris is available on over 65 platforms, setting a Guinness world record for the most ported video game. Tetris is rooted within popular culture and its popularity extends beyond the sphere of video games; imagery from the game has influenced architecture, music, and cosplay. The game also has been the subject of various research studies that have analyzed its theoretical complexity and have shown its effect on the human brain following a session, in particular the Tetris effect.”
This is me. I see the Tetris in the shapes of the shelves, but perhaps you’re talking about how well-packed they are, and that would be my babes!
Your closet is beautiful!
My husband & I have built rentals as a retirement investment (hubby’s a contractor) & dispose wire shelving as much as you. Fortunately, we have a finish carpenter who builds beautiful walk in closets with ample storage -no wasted space.
When we built our house 20 years ago, we had California Closets install shelving, rods & built in dressers in our walk-in closet. I really dislike dressers cluttering a bedroom. We’ve never regretted spending the money on them, & they’ve held up beautifully.
*despise wire shelving 🤦🏼♀️
🙌
The right closet makes all the difference!
May I ask why you didn’t lay the extending supports on top of the wall boards? Aesthetics? Better weight support? Beautiful!
These instructions are so helpful. I find a lot of instructions for this sort of thing very confusing because I am brand new to the whole DIY thing. I am curious what type of screws i should use to attach the supports to the studs?
How much weight do you suppose the 2×2 construction can hold?
Hi Kevin, I can’t say for sure since I didn’t do any sort of load testing, but I can tell you they are very sturdy and more than strong enough to hold anything we may want to store in there.
This is such a helpful post! I love the step-by-step breakdown, especially the tips on choosing the right materials for durability. I can’t wait to try building my own shelves! Thank you for sharing your expertise!
Fantastic work on these shelves! Looks fabulous! Quick question – I could not find the link to the video. My husband would like to know what exactly is utility strip that you used on the front of the shelves. Thanks for making such great content and sharing it!
Hi Thesa, it’s this stuff here: https://www.lowes.com/pd/RevolutionPly-5mm-Poplar-Plywood-Application-as-4-x-8/50121135
Great tips! I love the idea of using brackets for extra support. Can’t wait to try this out in my closet makeover project!
Been watching your videos for ages and finally got around to building these shelves in our new storage closet – thank you so much for everything you do! You have prevented many fights with your detailed instructions 😀
So happy to hear it Ginger!