Gorgeous IKEA TARVA Nightstand hack
Is this the most beautiful Tarva nightstand hack? We certainly think so, and we’ll show you how it’s done in this step-by-step tutorial!
Look, I don’t know what the big stink is about, okay? It’s not like I took a decade to do it or anything. Yeesh, what a bunch of clamoring nowniks!
Ladies, it’s a well-established fact and a damn near universal law that when a man tells you he’s going to do something, that right there is money in the bank. You can write large checks against his word, because it is gold.
In fact, it’s better than gold. It’s bacon-wrapped gold…with melted cheese.
Now, since our word is ironclad, when we tell you we’re gonna to do something (like a DIY project at your request), we’re gonna get to it right quick. We might already be fixin’ to do it! There’s really no need to keep pestering us about it every six months. It gets old, ya know?
So, as I was saying, it may have taken me a touch longer than I anticipated to hack the IKEA Tarva nightstands we bought back in Connecticut, but there where a lot of Important Matters keeping me occupied.
Okay, fine, so it took me nine years! What of it? I got it done, didn’t I? And I think all three presidents who’ve served since we bought those Tarvas in 2013 would agree that this particular Tarva nightstand hack just might be the best and most gorgeous one out there!
Here’s one of the ancient Tarvas.
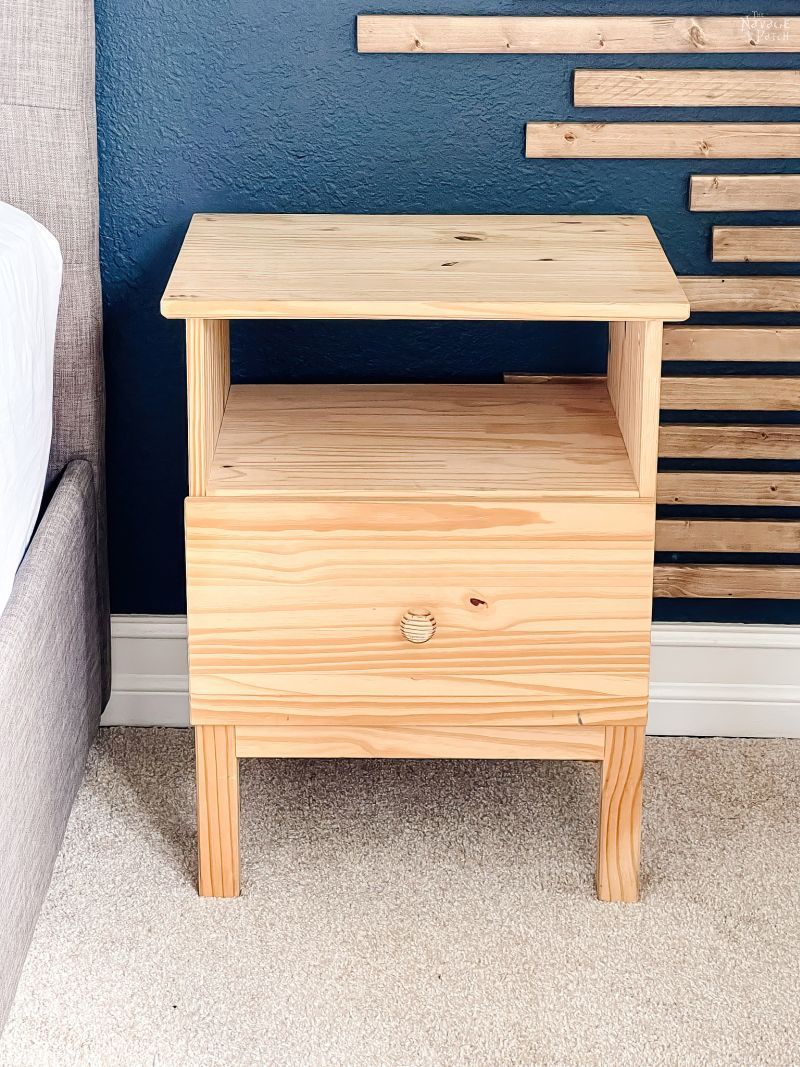
We bought them before we ever owned a home. It was August of 2013, and we had just settled into a condo in Glastonbury, Connecticut. Those were back in the days when I despised IKEA and everything it stood for. I’ve since softened considerably when it comes to IKEA – in fact I’ve done a complete 180! I just wish we had one closer than Jacksonville, 5 hours away! That same store was only 5 minutes away last year!
Anyway, when we bought them, I assured my babes that I’d give them a fantastic makeover. I was gonna get right to it!
But then nine years happened, and I never got around to it.
That might sound like a bad thing, but I assure you, madam, it is quite the opposite! You see, if I had hacked those Tarva nightstands back in 2013, the absolute most they would have received (in accordance with my skills at the time) would have been a coat of paint (undoubtedly some shade of blue) or a stain job (dark walnut or the like).
If, for the sake of argument, I had waited until 2015 or 2016 to hack the Tarvas, then they may have received a two-tone paint job, or (more likely) a combination of white paint and dark stain, which was all the rage back in those innocent early days of the The Navage Patch blog.
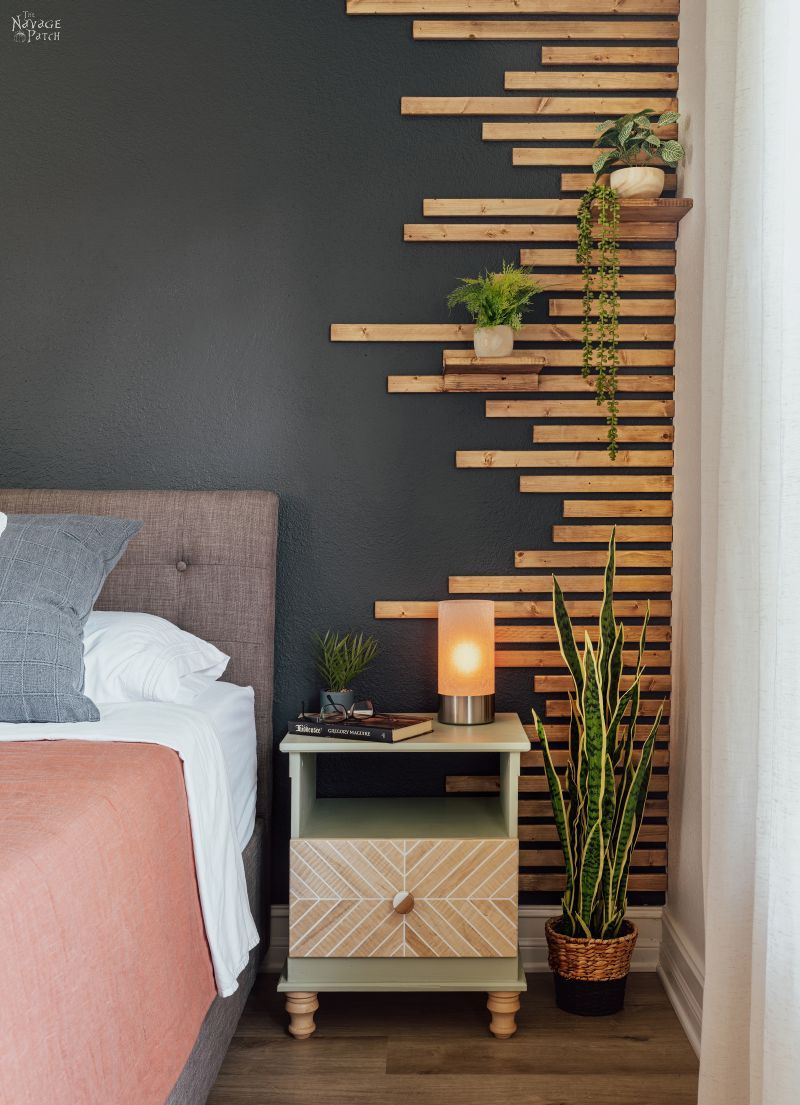
We are much wiser now. Or maybe we’ve just developed a new sense of style. Whatever the case may be, I’m so happy I waited until now to hack these Tarva nightstands, because we came up with a stunning design that looks absolutely amazing in our son’s bedroom. Let’s take a look at how we did it.
TARVA Nightstand Hack Tutorial
SUPPLIES LIST
Affiliate links are provided below. Full disclosure here.
- IKEA TARVA nightstand
- 16 x 48 edge-glued board
- Cricut maple wood veneer
- 4 bun feet
- Cricut Maker 3 or other smart cutting machine(optional)
- X-Acto knife
- Straight edge
- Multi-angle miter shear (optional)
- Drawer knobs
- Primer
- Paint – we used Sherwin-Williams Clary Sage
- Clear wax
- Wood glue
- Super glue
- Wipe-on polyurethane (optional)
- Tape measure
- Brad nailer
- Miter saw
- Circular saw or table saw
- Router with chamfer bit (optional)

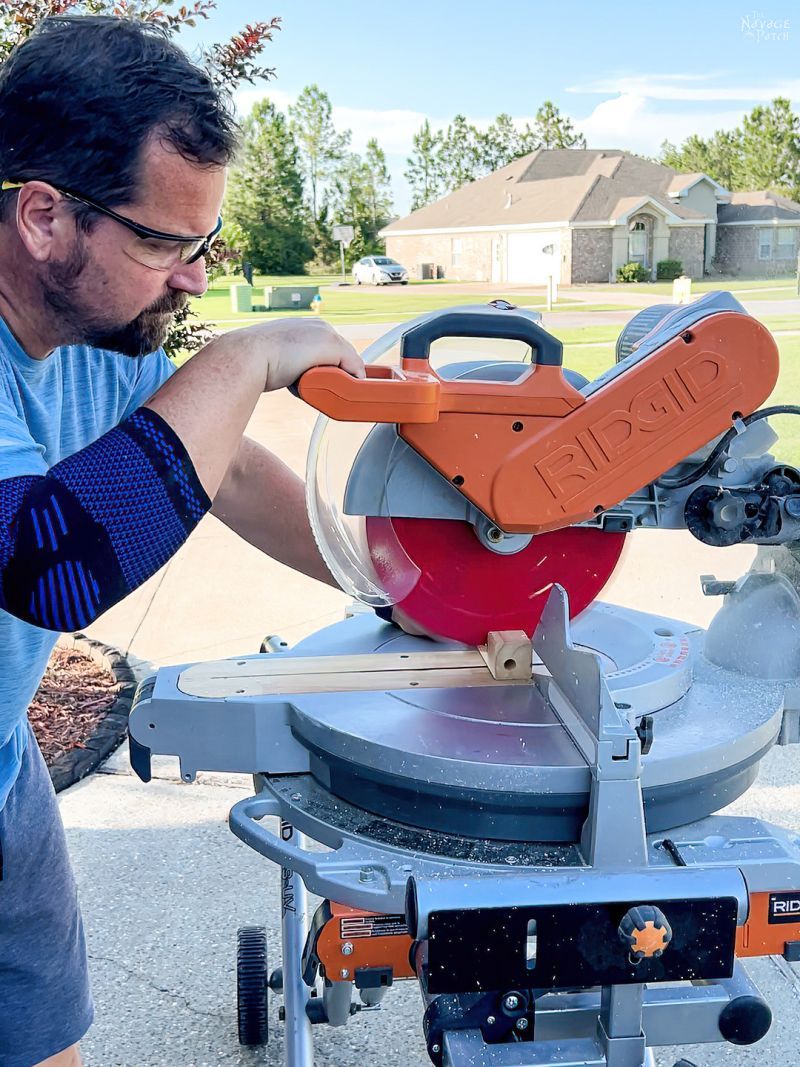
Step 1 – Cut the legs
We wanted something a little fancier than the square wooden legs that come with the Tarva nightstand. But since the stock legs are built up into the frame of the Tarva, I first had to remove them and cut them flush with the bottom of the nightstand. To do this, I grabbed a pencil instead of a tape measure and listened to my wife. The easiest way to measure for cutting is to mark a pencil line on each leg using the base of the nightstand as a ruler.

After marking the legs, I unscrewed them.

I took the legs outside and cut them down to size.
Then I reinstalled the legs. The resulting nightstand vaguely resembled an amputated R2-D2. Or maybe a legless Spongebob Squarepants?
Step 2 – Make a new base
To give a fuller and more balanced look, we wanted to install a new base that would mirror the top piece. I got an edge-glued board from Lowe’s big enough (16 x 48) to give me two bases.

The width of the edge-glue board was a near-perfect match for the Tarva nightstand (about 15 3/8 inches for both), so I just needed to cut two 18 7/8-inch lengths.

By the way – you’ve been seeing a lot of pictures of me wearing an elbow brace recently. I’ve been wearing it for a few weeks now, and I’m not sure when I’ll be able to work without it. I’m operating on the self-diagnosis that I have tennis elbow (though I haven’t touched a racket in 30 years), so I’m treating myself accordingly. If anyone else suffers bursitis in the arm, I highly recommend the brace I’m wearing. I’ve had this issue on and off since 2008, and I’ve always treated it with arm bands. Well, when Handan learned of my issue, she went into SuperMom/MegaWife mode and scoured Amazon until she found the best product to relieve my pain. With this brace, I’m able to work with acceptable pain levels. Without it, my arm is useless. Give it a try and get back to work!
Step 3 – Chamfer the base edges (optional)
The top of the IKEA Tarva nightstand is chamfered – more so on the bottom than on the top. For this hack, I mirrored that chamfer on the base with my router and chamfer bit.


Step 4 – Install the base
I spread wood glue around the bottom perimeter of the Tarva nightstand then centered the base.


When I had the base centered, I secured it with brad nails.

For those following along, I love my new DeWalt pneumatic brad nailer! My babes got it for me after my arm almost fell off brad nailing the slats for Baris’s wood slat accent wall. I’m sure that accent wall, the chandelier removal and installing LVP throughout most of the main floor all contributed to turning my arm into the useless pain factory it is today. Fortunately, this brad nailer is a fraction of the weight of my old one, so I don’t feel like such a decrepit geezer when using it.
Oh, speaking of decrepit geezers, in 3 months I’ll be eligible to join AARP. How’s that for a sweet summer kick in the groin? Hey, at least I’ll get my gramps discount at Bonefish Grill – my babes likes the mahi mahi there.

Step 5 – Make trim
The downside to such in inexpensive and basic nightstand is that it’s, well…kinda ugly. Everywhere you look on the thing, there’s some unsightly seam or junction.

With the effort I’m putting into this hack, I wanted to make my Tarvas look a little more refined. I had some scrap wood, so I cut the pieces to 2-inches wide, and then I cut slices from the thickness of about 1/8 – 3/16 inch.

The pieces were wide enough to cover the seams and just thick enough to give some interest. I brad nailed the trim pieces along the side top and bottom and along the front bottom. I was alone when doing this part, so I don’t have pics of nailing them on, but here’s how it looked when I finished.

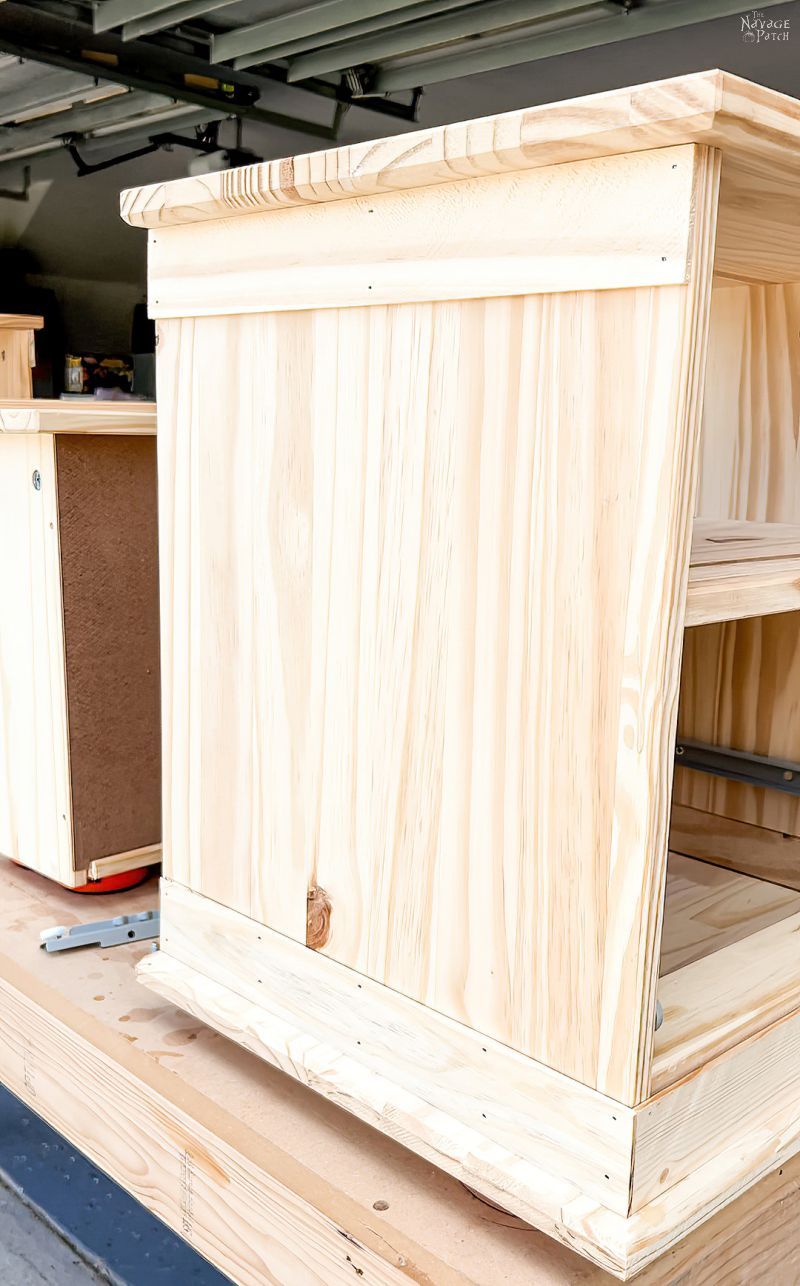
Next, I filled the nail holes with spackle since I didn’t have any wood filler on hand. I also filled any other seams or gaps that stood out. I ran some caulk around the top edge of the bottom trim to give the whole thing a more finished look.


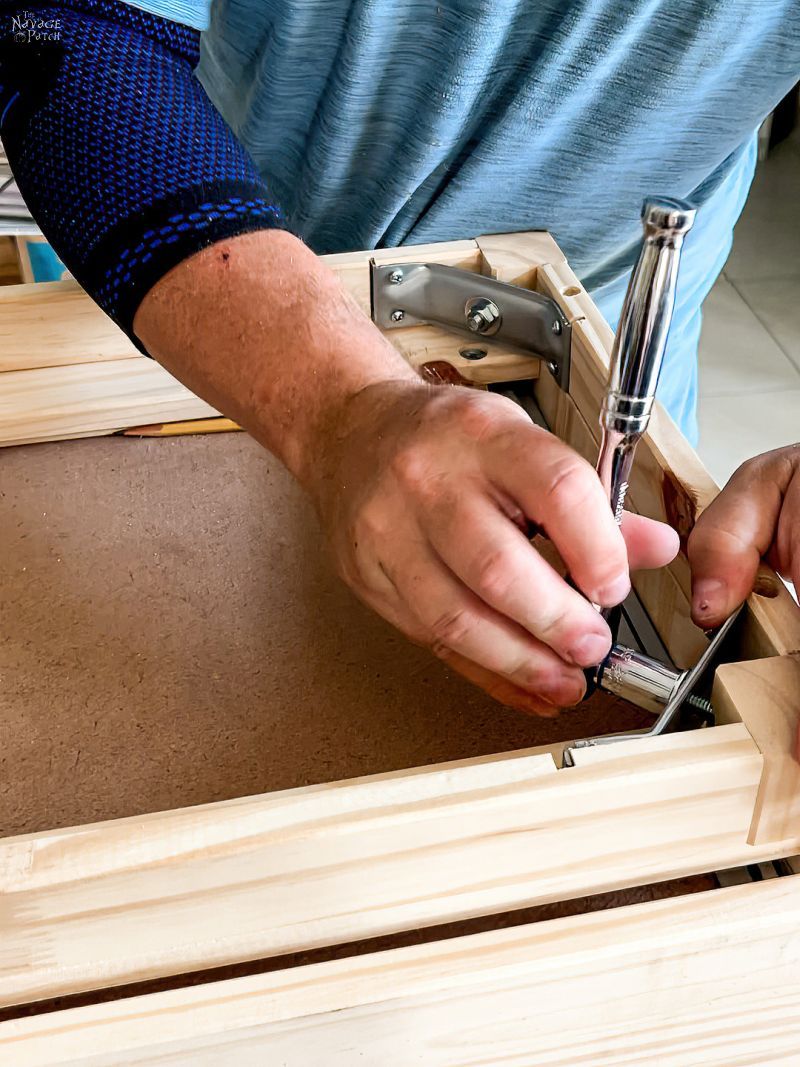
Step 6 – Raise the slides
With 2-inch trim, the drawer needs to be raised 1/4-inch or it will hit the bottom front trip piece, and it won’t have the clearance to close all the way. By raising the drawer slides 1/4-inch it also accomplishes a more important objective – the drawer top will now be flush with the cubby hole instead of leaving a 1/4-inch space below the cubby. Just look at the before picture below again, and you’ll see what I mean.
It’s a small detail, but it has a big impact on the finished piece!
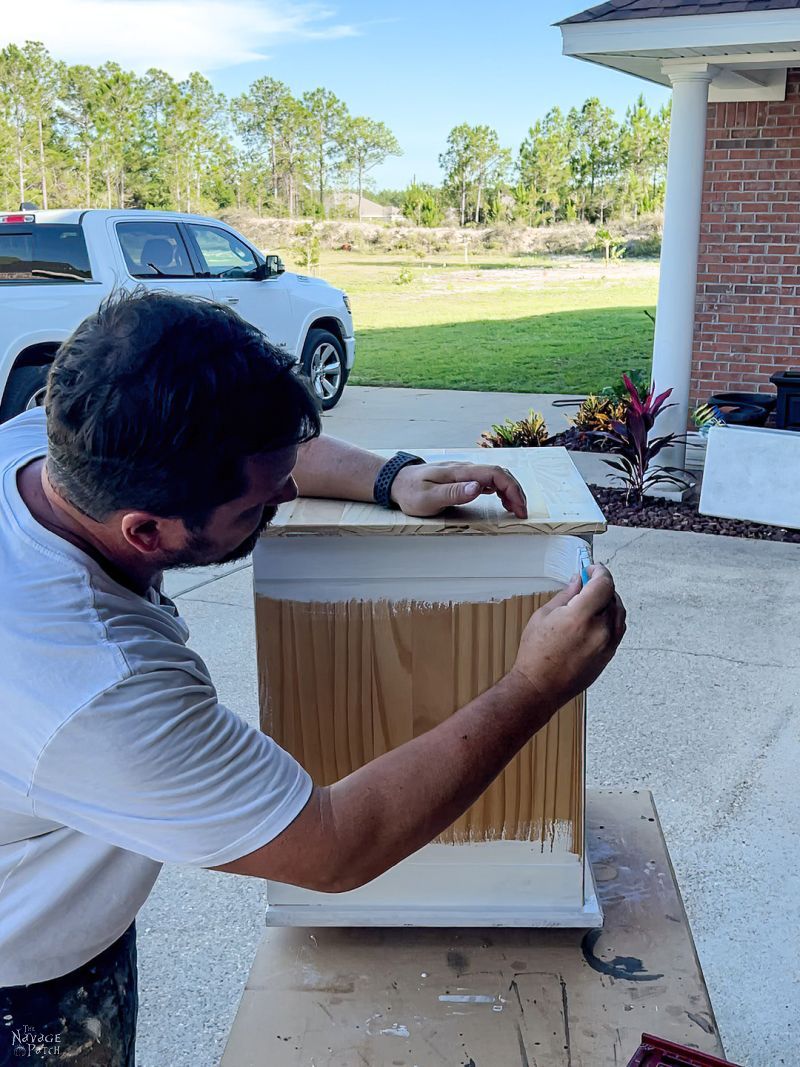
Step 7 – Prime & paint
These IKEA Tarva nightstands are made from knotty pine and absolutely must be primed prior to painting, lest the oils and sap ooze through the paint and ruin the hack. Our local Sherwin-Williams store was pretty bare in the primer section due to supply chain issues, so I ended up buying a gallon of oil-based exterior primer. When it comes to sealing of pine, I prefer oil-based to latex. I think it does a much better job on oily and sappy woods.

This stuff is thick and legit.
And I can sleep easy knowing it’ll take an act of God to allow anything to ooze up from the wood.
Oh, I found this knot on one of the Tarvas. What do you think it looks like? Give your answer in the comments!

The next day, I sanded both Tarvas with a random orbit sander and 200-grit sanding discs.

After cleaning them thoroughly with a damp rag, I brought both nightstands up to the craft studio to paint them.

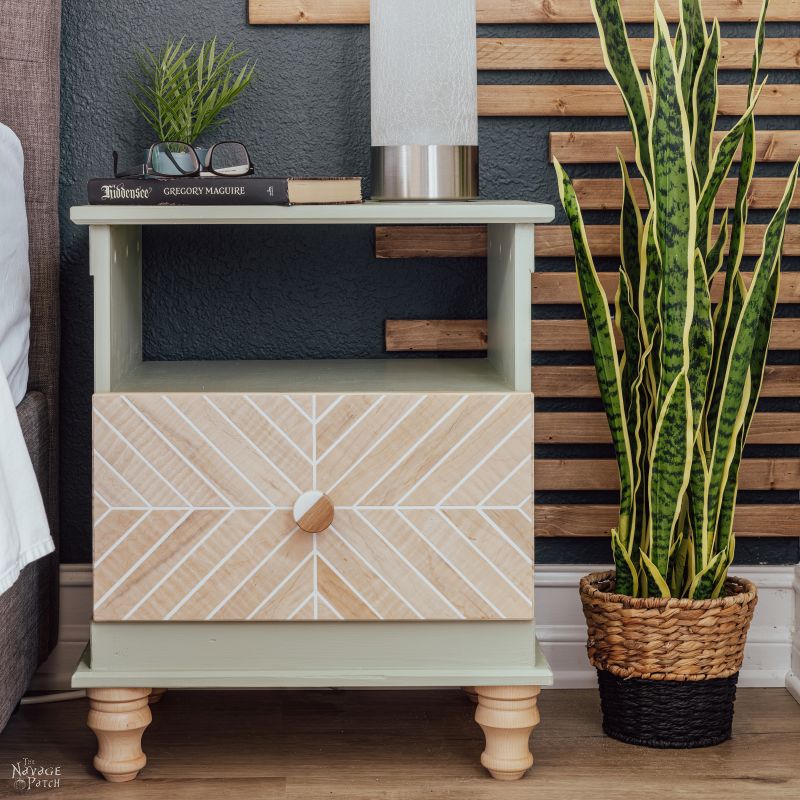
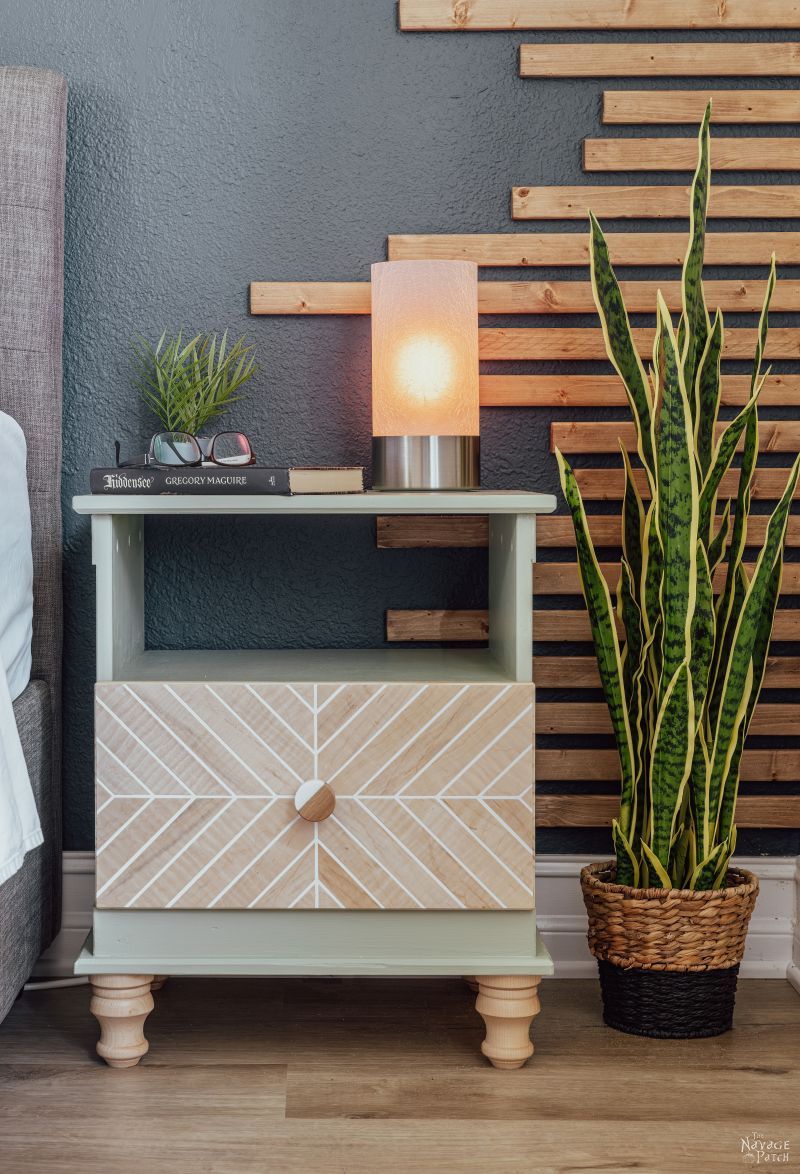
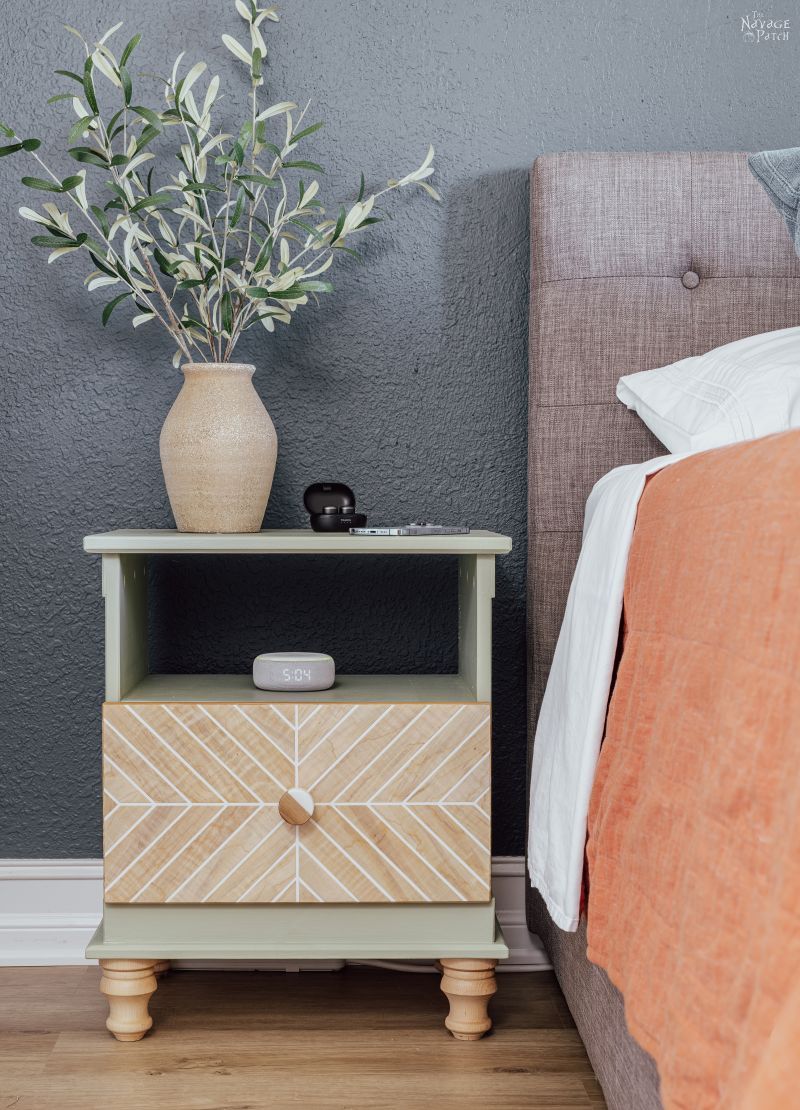
The color we chose for this IKEA Tarva nightstand hack is called Clary Sage from Sherwin-Williams.

Clary Sage was one of three contenders we picked before starting the hack. The other colors were Evergreen Fog and Sage. We held a poll on Instagram to help us select the color. Sage came in dead last with almost no votes. Evergreen Fog and Clary Sage were very close, so we gave the deciding vote to Baris. He wasn’t aware of the poll, nor did we influence him in any way. He chose Clary Sage, so that’s the color I painted the nightstands.
I used a small brush on some of the tight interior spaces and a foam roller for the rest.

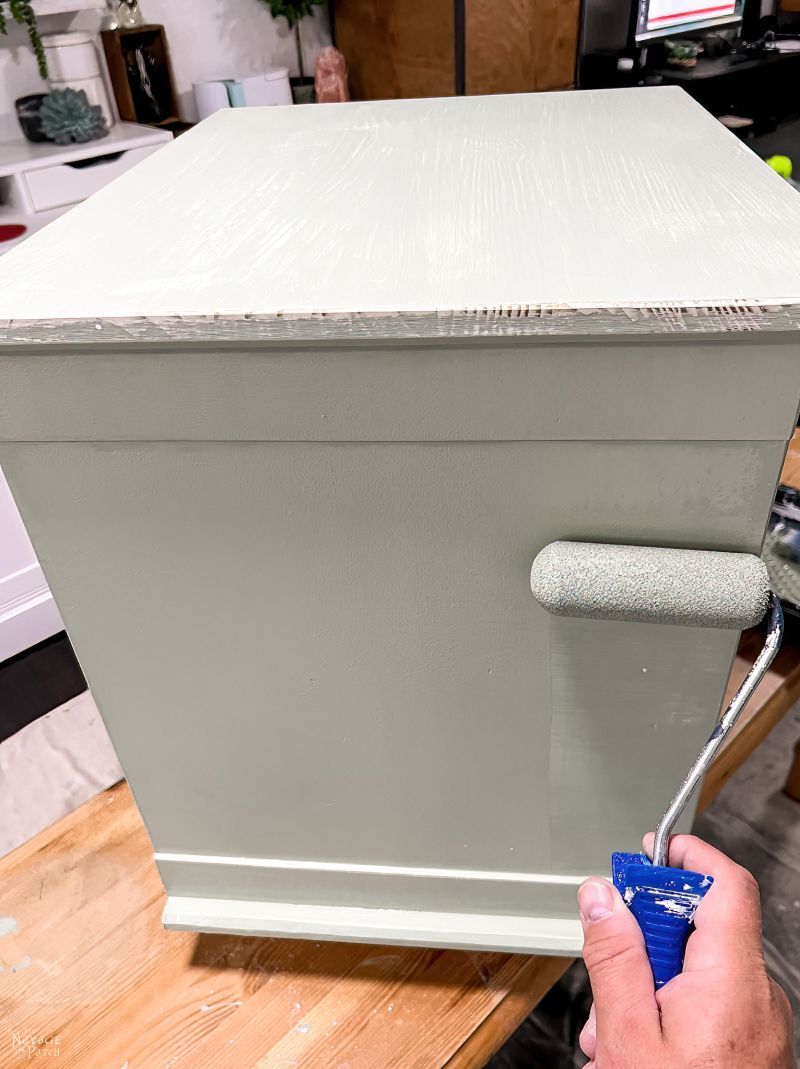
After the first coat…

After two coats of paint, Handan put on two coats of clear wax.
Step 8 – Install new feet
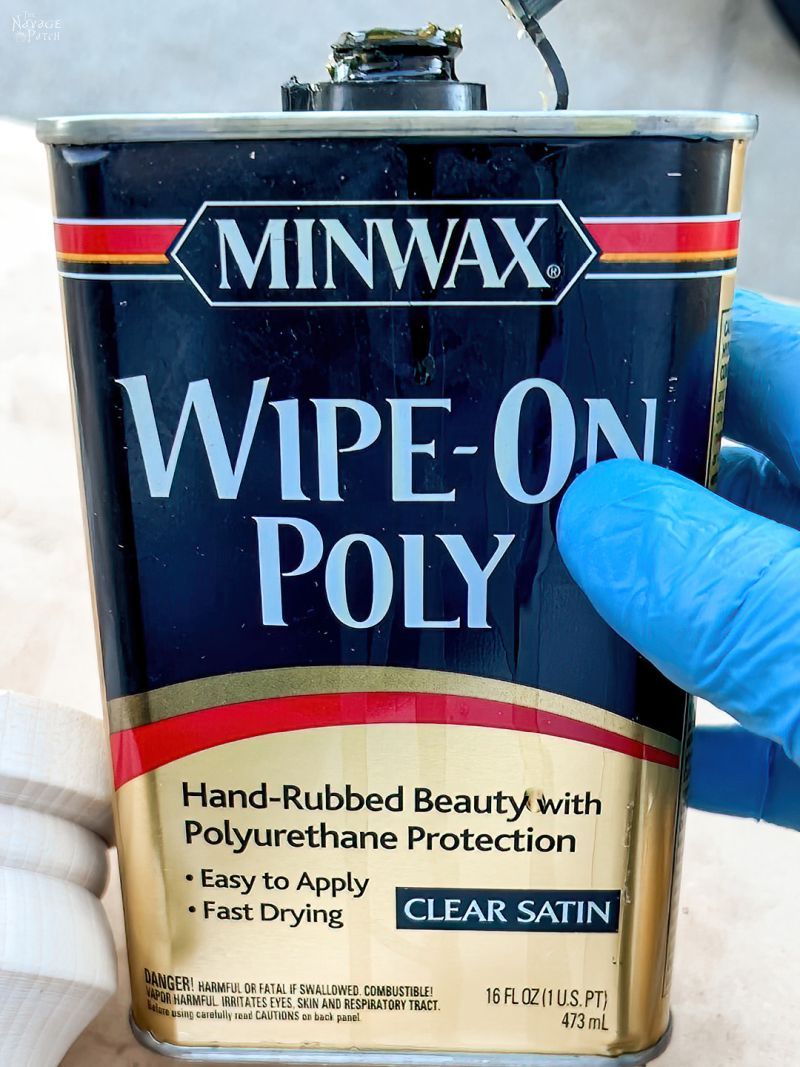
We went back and forth about feet for our Tarva nightstand hack. We tried Home Depot, but they were ridiculously expensive. Then I was going to DIY some legs from old bed spindles. In the end, we found some reasonably priced bun feet at Lowe’s that looked perfect, so we decided to splurge on them. We wanted to keep them unfinished to complement what we had planned for the drawer faces, but the original wood was just a little too light. To darken them a little (and add some protection), I applied wipe-on polyurethane to the feet.
Here’s a look at an original foot and a poly-darkened one.

I marked where I wanted to install the feet on the bottoms of the nightstands, and then I drilled a 5/16-inch hole to accommodate the screw at the top of the bun feet. The hole was big enough to allow the screw to slide in without turning. To keep the hole perpendicular to the base, I used my DrillBlock. It’s a handy tool when you need accurate drill holes.


I used thick super glue to install the new feet.
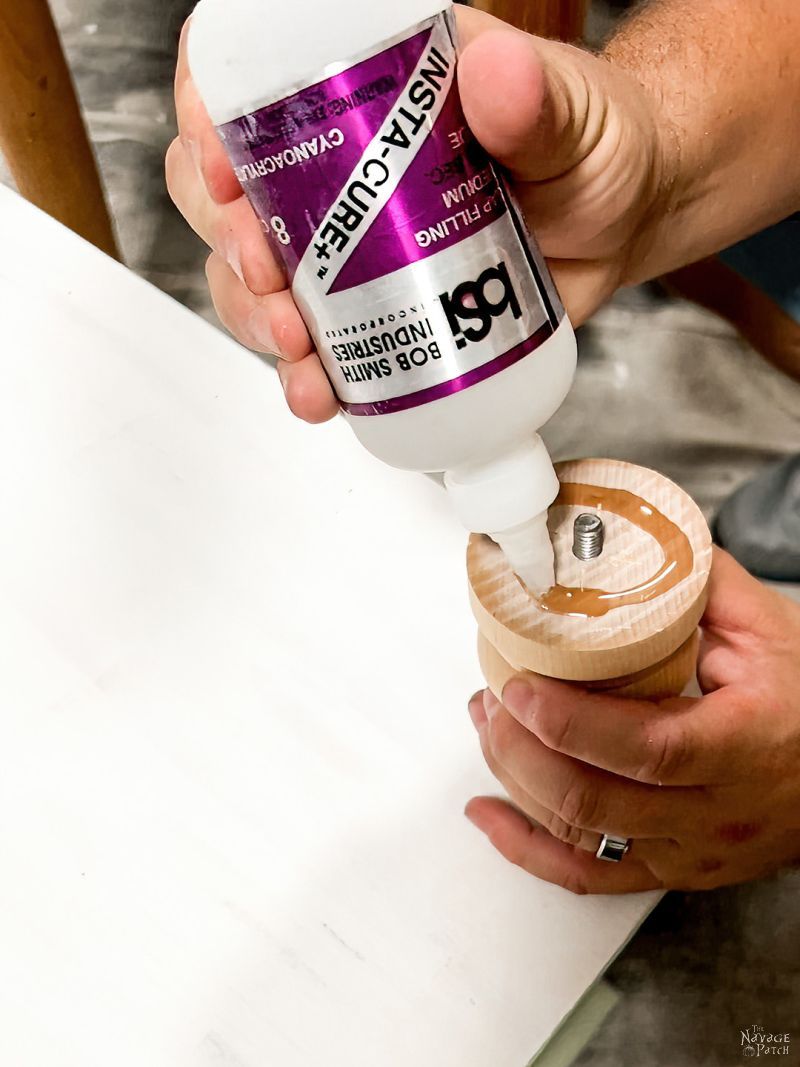

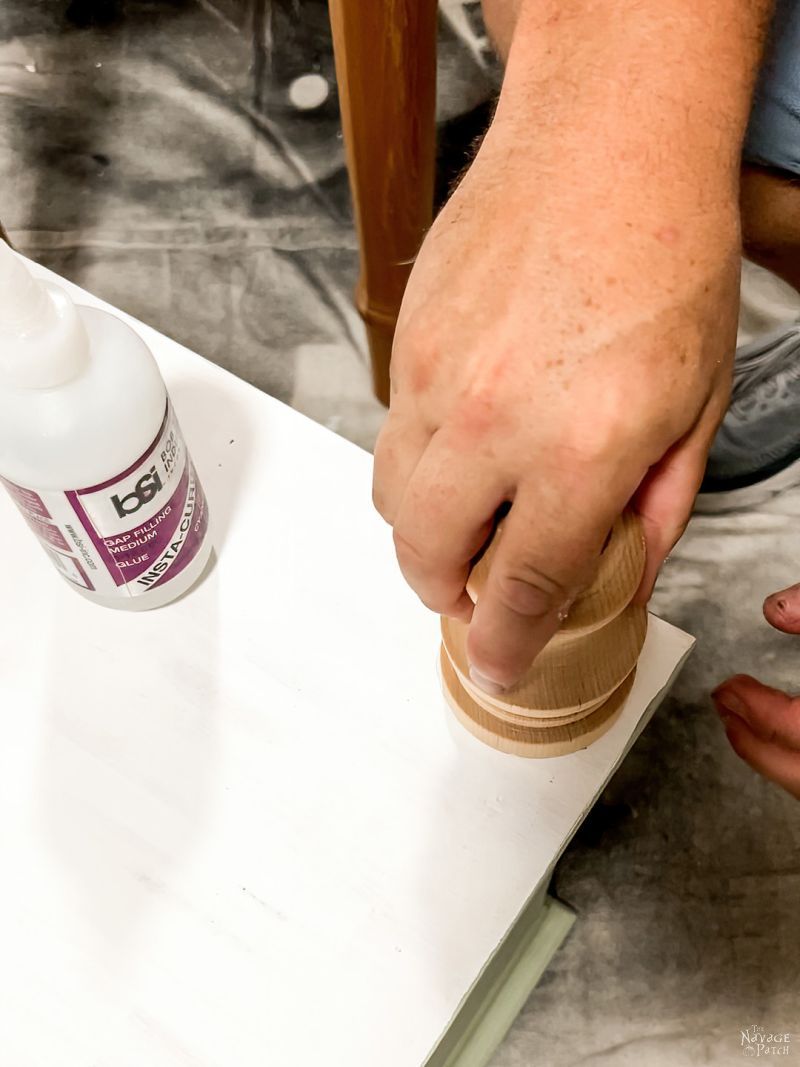
I could already see that the new legs were perfect for this Tarva nightstand hack! To speed things along, I sprayed the joined area with CA glue accelerator.

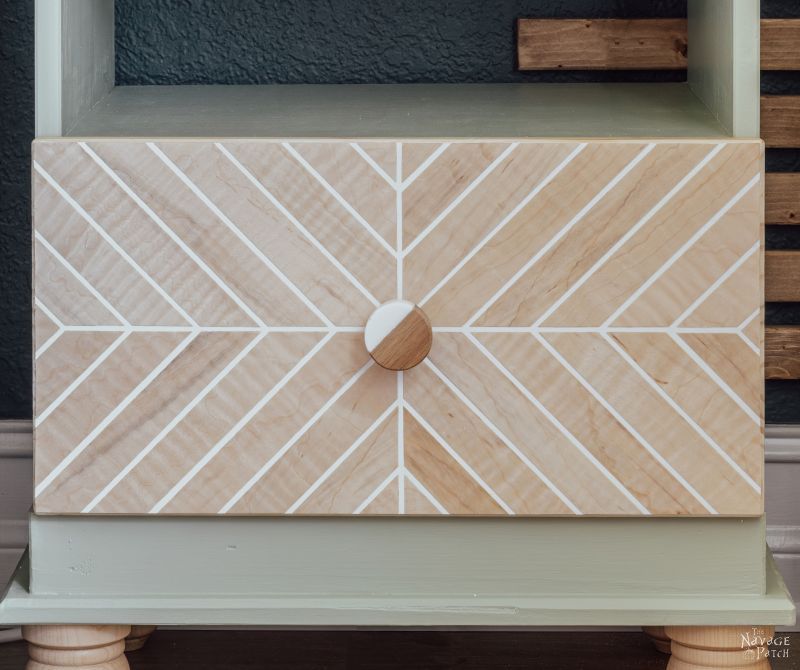
Step 9 – Make the drawer design
First, I painted the drawer faces with Sherwin-Williams Bohemian Lace – it’s a white we have tons of in the garage. I was careful only to paint the flat part of the face – not the chamfer around all the edges. Once the paint dried, I took the faces upstairs to work on the veneer design. Let’s jump ahead so I can show you the finished product, and then I’ll go back and explain how I got there.

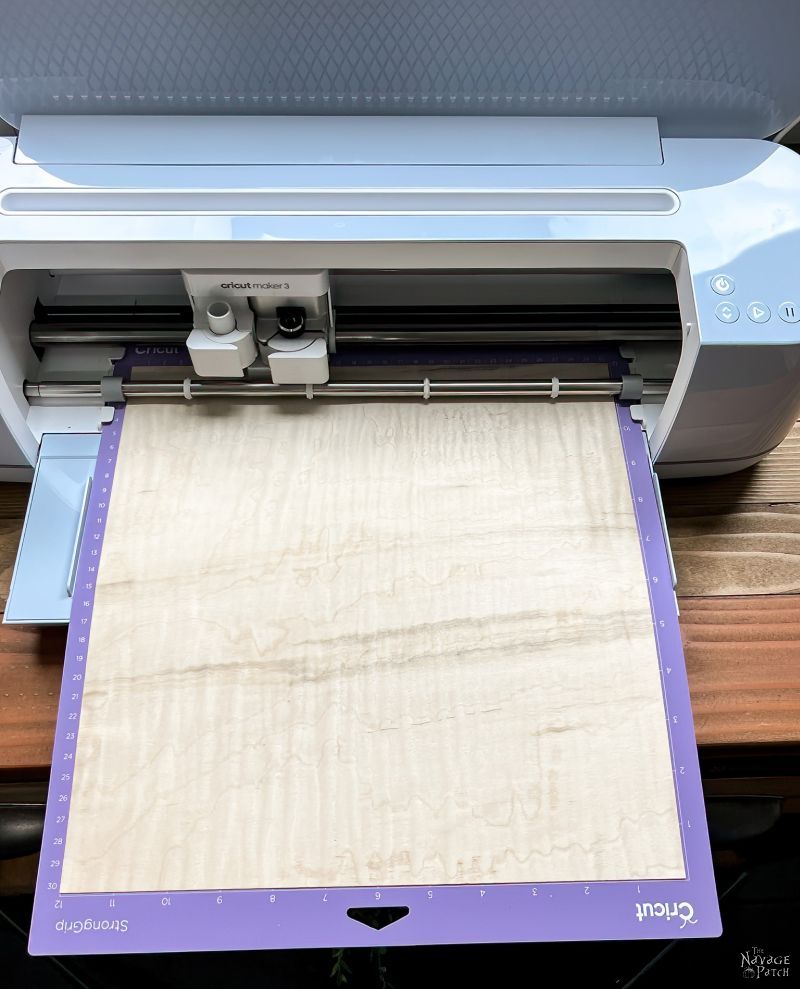
I used Cricut maple veneer for this project – it is strong because it has a plastic core sandwiched between two ultra-thin veneer pieces. We used our Cricut Maker 3 to cut the strips, but they can easily be hand cut for those without a cutting machine. The pieces are 1 inch wide, and we ended up cutting 3 sheets – 1 1/2 for each drawer. It can be done with 1 sheet per drawer, but we had some waste in the beginning, so it’s best to plan on using 3 sheets.
Cricut Maker 3 in action – first time in the new house!
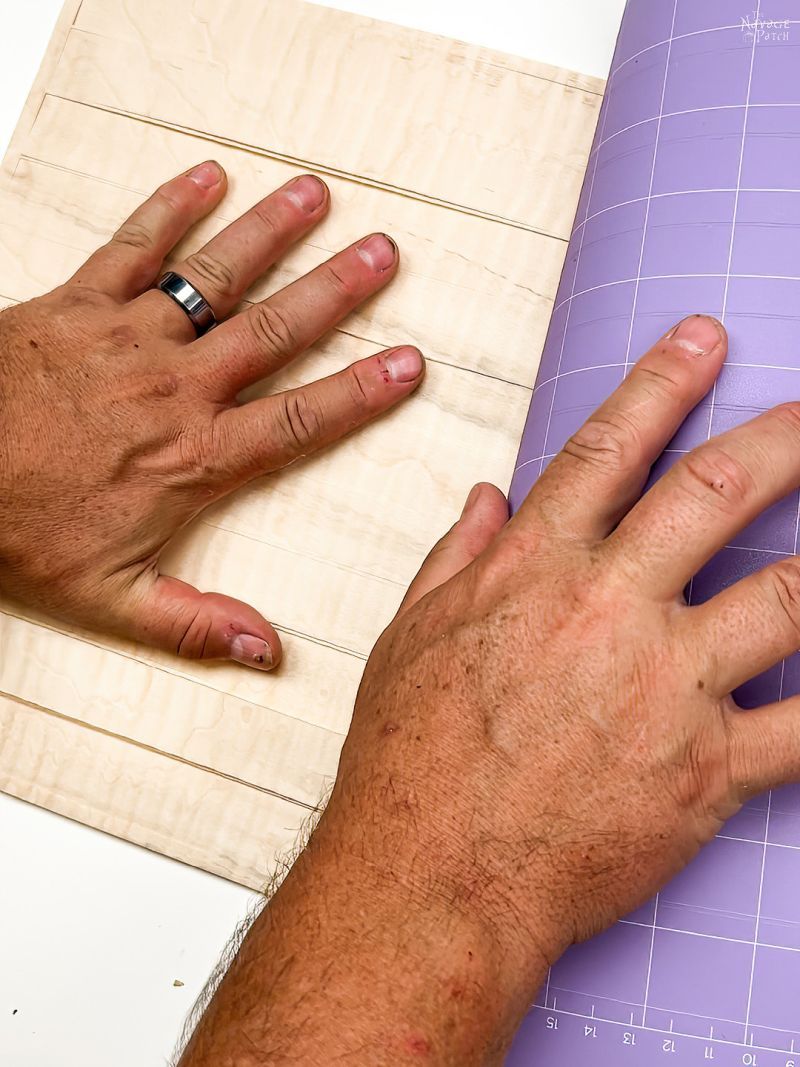
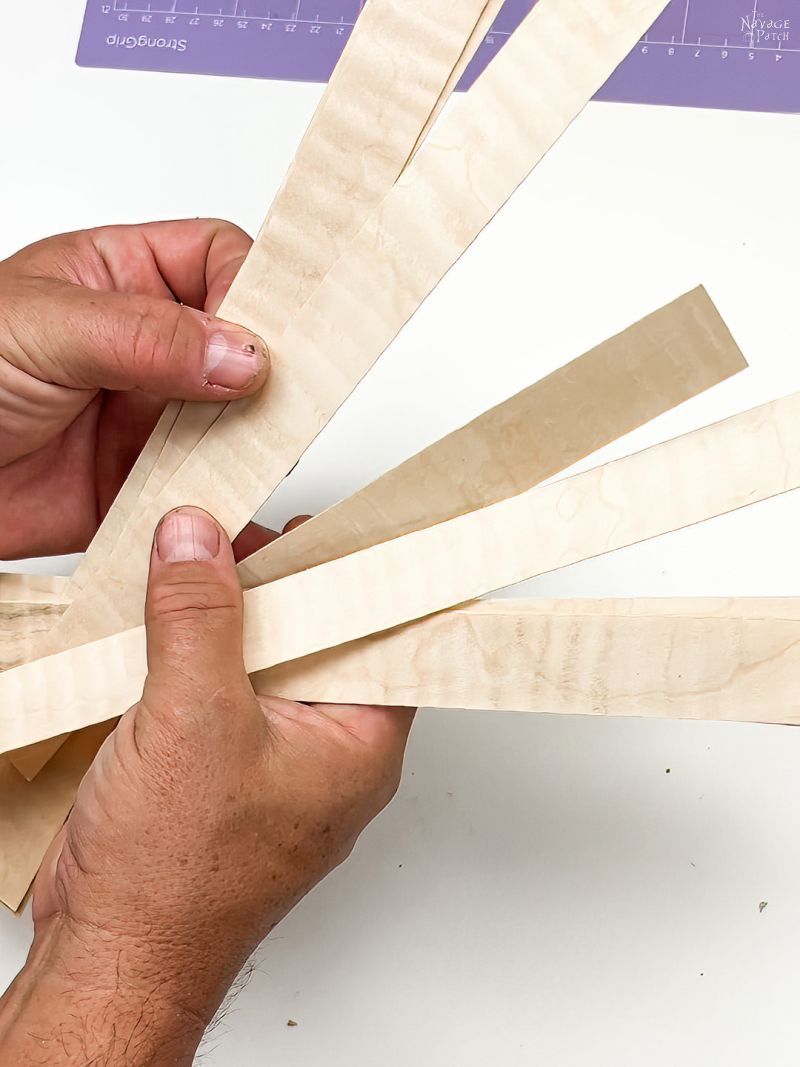
Peeling back the mat to reveal the cut veneer strips.
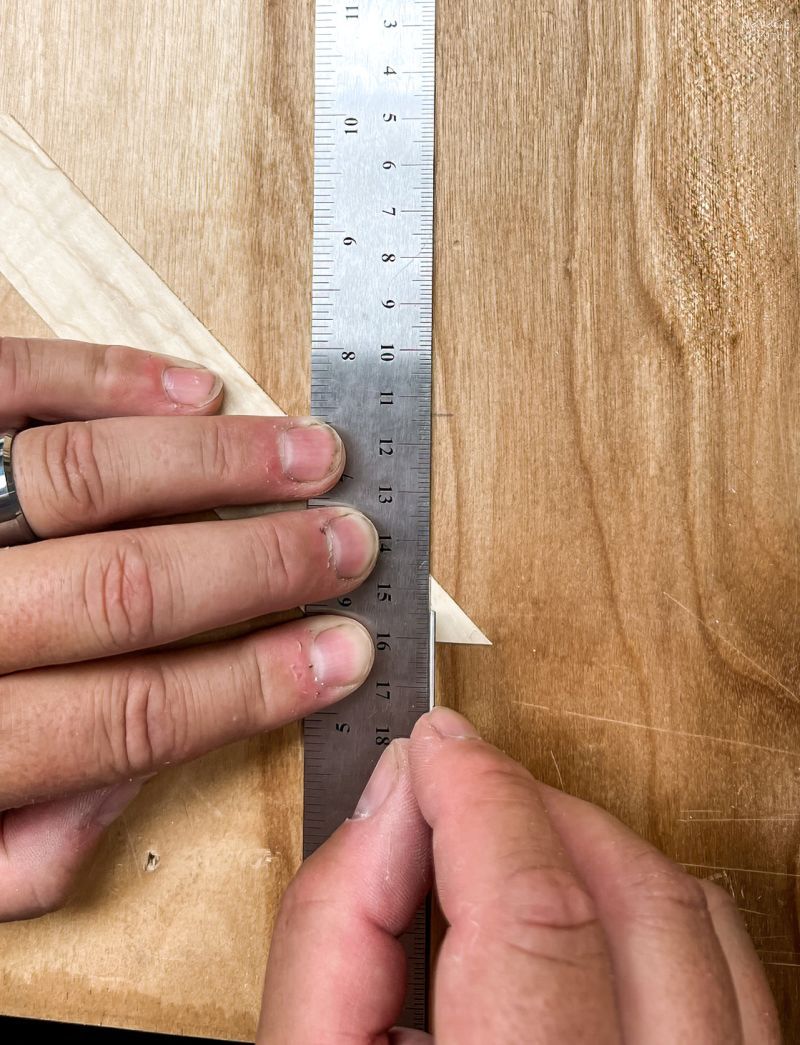
To get the initial 45-degree cuts, I used a multi-angle miter shear, but you could also use a speed square and X-Acto knife or even program the Cricut to make the angles for you.

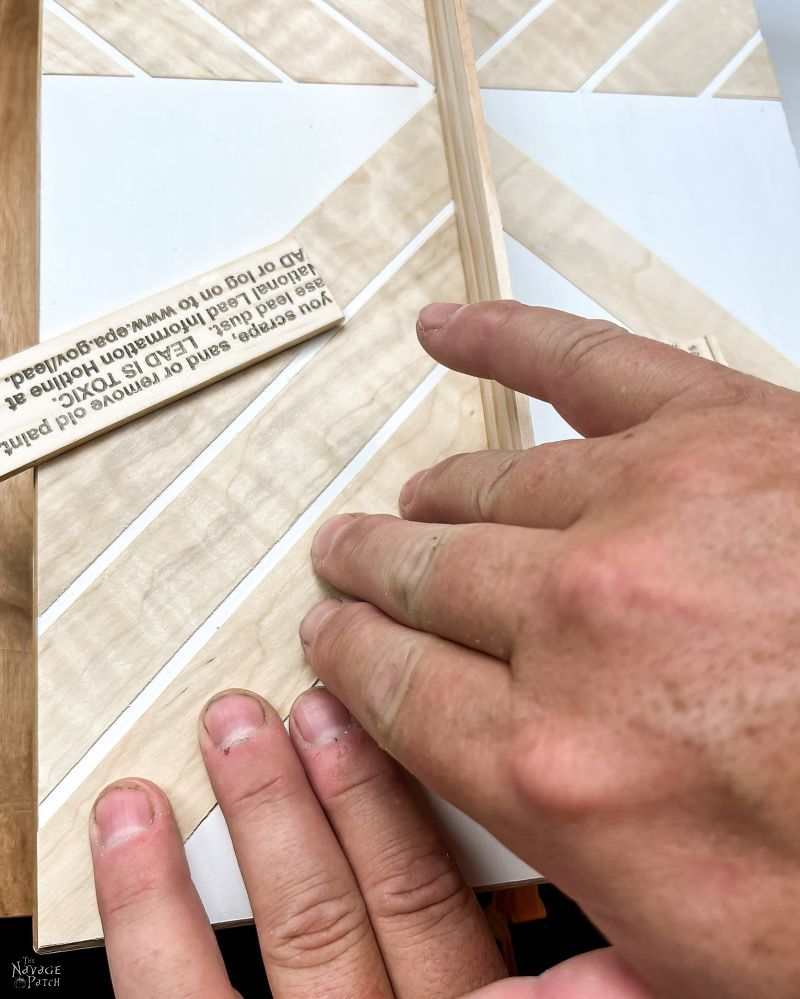
Our layout was based on 45-degree cuts spaced with a paint stick as shown below.

We later discovered it was better to clamp the centerline paint stick to keep it from moving or falling over. Then it was just a matter of fitting a strip onto the drawer face, marking where it meets the edge and then cutting the excess with a metal straight edge and X-Acto knife.


With the strip cut to size, I applied thick super glue to the back and spread it around with a small plastic spatula knife.


Then I carefully placed the glue-covered strip on the drawer face.

I pressed down on each strip until the glue set.
This was the most time-consuming part of this IKEA Tarva nightstand hack, but it was well worth the effort! nce I had finished both drawer fronts, I reassembled the drawers and installed new drawer knobs that complement the faces perfectly.

Handan and I couldn’t be happier with how these Tarva nightstands turned out! This is by far our best IKEA hack to date, and as an added bonus, Baris loves them as much as we do!


We love to see our DIY projects out in the wild! If you try this DIY project and take a picture and post it on Instagram, be sure to tag us – thenavagepatch

Share it on Pinterest & Facebook!


Those look so nice. I love sage greens and natural wood together. I actually used Evergreen Fog on my powder room vanity when I refreshed the bath decor, added a new white quart top a couple of years ago, and changed the cabinet hardware from satin nickel knobs to black bar knobs.
Evergreen Fog is a great color. We have a quart of it, so we’ll definitely use it somewhere!
Very nicely done! I’m not a fan of green but the work involved is very impressive and the night stands are gorgeous!
Thank you so much, Shirley! 🙂
That knothole looks like a Guinea pig with a Mohawk 😁.
Nicely done on the nightstand, sir.
LOL, that is a creative interpretation, Donna!
Nicely done, a raccoon or a gnome that is tweaked out of his mind
LOLOL! Yep, I can see that!
Gorgeous as usual. Surprised you used any shade of green after covering all those walls. I think the knot looks like an evil gnome
Thank you, Debi! I know, right? We realized that Clary Sage was eerily similar to the green we’re trying to cover on all the walls, lol! I guess the difference is application and restraint! 😀
Awesome, and inspiring. I have two Rast dressers that I fully intend to gussy up, but I don’t have the tools or the space that you do. My “workshop table” is my ironing board. I do have an Exacto knife, though!
The knot looks like an Irish Setter coming in hot and about to jump on you.
Thank you, Corky! Yes, and X-Acto knife, veneer and some glue and you’re good to start hacking! I also think it looks like a dog, and you’re right about the Irish setter coming in hot, lol!
Love this remake … they look fabulous!
Thank you, Debbie! 🙂
Stunning results!!! I’m a quilter, so I immediately see a quilt block in the design on the drawer!!! The knot…Eye of Horus is what it immediately reminded me of!
Thank you so much, Susan! Oooh, Eye of Horus – that’s a good one!
Love your hack although I’d call it a “glam makeover”. I think the knothole looks like a possum wearing a wizard hat! Just a pesky note: I noticed you using a lot of power tools without your ear protection…
LOL, that it is, Angie! And possum wearing a wizard hat is pretty spot on! As for the hearing protection, I can get away without it for short periods outside! 😀
Great work, as always!
Question: if you use an oil-based primer, do you have to use an oil-based finish paint?
The knot: it looks like it has a pointy nose to me, so I’d say a little mole with a (pointy, elf-like) hat on!
Thank you, Cynthia! Regarding oil-based primer – any paint can go over it. Now, if you’re trying to paint latex over existing oil-base paint or an oil-based finish, you absolutely need to use an oil-based primer, otherwise the oils in the paint or topcoat will seep through a latex primer. Experience talking here, not Google. 🙂
Finally got back to looking at your answer… Thanks, Greg!
Hiya! What a cool makeover!! I love green, so of course I think it’s the perfect color. Looks terrific in your son’s room. Here’s a little known secret regarding becoming a member of AARP; when I signed up, I bought the 3 year subscription. That way I would only have to be old for 3 years! That was 5 years ago, so I’m happy to say I haven’t eaten dinner at 4:30, had to use one of those gigantic days-of-the-week pill boxes, or fallen asleep in the middle of a movie for two years now!! I’m also back to welcoming children on my lawn. Just an fyi 😁
Thank you, Pam! Good tip on the AARP! Can’t wait for those 4:30 early-bird specials, lol! 😀
Your best IKEA hack, for sure, I definitely agree! I’ve been a potential AARP member for 10 years now, and my advice for you is: don’t fall for their bullshit. The knot seemed obvious to me: A rogue fox with a three-day stubble after a four-day drunk. Why did no one else get this? LOL
LOL, you win the knot contest, Vickie! I know very little about AARP, but if they’re an organization that wants me to pay dues, I’ll stay independently geriatric! 😀
love the color you used with the wood.
I saw a bird swooping down on a fountain.
But can you do a post on how to make those shelves on the wall between the wood slats please? I want to copy your idea, shhhhhh…lol
We will be, Elida! 🙂
This has to be my favorite project of yours and I love everything you do! It’s just gorgeous! I may get the same knobs to switch out on my daughter’s dressers. I saw a bearded fox in the knothole and my 89 year old mom saw a uterus🤣🤣
LOLOL! Go mom! Thank you so much, Tammy! This was a fun hack, and we love how it turned out!
Great makeover.
Love the color.
So the knot… I wanted to see a gnome, or a dog or anything but what I actually thought when you first asked for opinions…
My cats butt… 🤷♀️🙂
LOLOLOL!
I’m guessing since (I don’t THINK – but only did a quick scan to check because it’s so hard to r ead) no one else has mentioned it, that I’M the only one finding this page hard to read. Why make the font so faint? Maybe it’s my monitor/browser/?? but no other tabs I have open are this faint.
Hi DesignDreamer, thanks for the heads-up. I darkened the font color a little bit. How does it look now?
The knot looks like Pepper 🙂
LOL, it does!
I love it. You two are so talented. Gave me a few ideas for my old nightstand. I’ve been wanting to add feet and paint it. Now I’m inspired. Keep all the ideas coming. Hope your enjoying the house. Have a great summer.
Thank you, Joan! We’d love to see a before/after of your nightstand. Send the pics my way when you’re done!
That there is a gnome, Good Sir. If I ever saw one. Clearly these side tables knew who they would be going to. I remember those old Navage Patch jobs and I still look at them and think WOW because I know my own attempt would be poor.
Thanks, Jay! Definitely the best IKEA hack I’ve done!
I must know how you did that beautiful accent wall in the photo! Please share article.
It’s right here, Lisa!