Vintage Desk Makeover
When we moved into this house two years ago, before we learned how to craft and woodwork, before we figured out how to do-it-ourselves and find-it-for-cheap, we went on several IKEA sprees. Handan had been a big fan of the store, since they could be found in many countries and provided an easy solution to furnish apartments as an expat. On the other hand, I have been at odds with the Scandinavian behemoth since my first visit to the Emeryville, CA store in 2004. I detest the way they turn customers into maze-rats. Once entered, forever trapped! Shoppers are forced to wend through inescapable and endless warrens of gleaming, happy-colored crap. It is like traveling down the hallways of Hades, each step taking the hapless consumer farther from the world of the living and closer to some eternal damnation, where souls are forfeit for flat-faced furniture with unfathomable names. Bend your ear to the east; you’ll hear the kronor piling up around a delighted Swedish family and hear their laughter as they haul that money to the bank.
During one of these slogs through swamps of oak and frosted glass, we picked out a desk for me: a flat, black monolith, devoid of charm, beauty, and drawers. It was a perfect study in efficient minimalism. The absence of drawers or storage forced the user to adopt an ascetic work style. All material possessions (paper, files, pens, etc.) had to be shunned while at the desk, lest they spoil the clean, sterile form. I have no idea why we picked such a thing (besides price), and soon I was longing for drawers. Lots and lots of drawers.
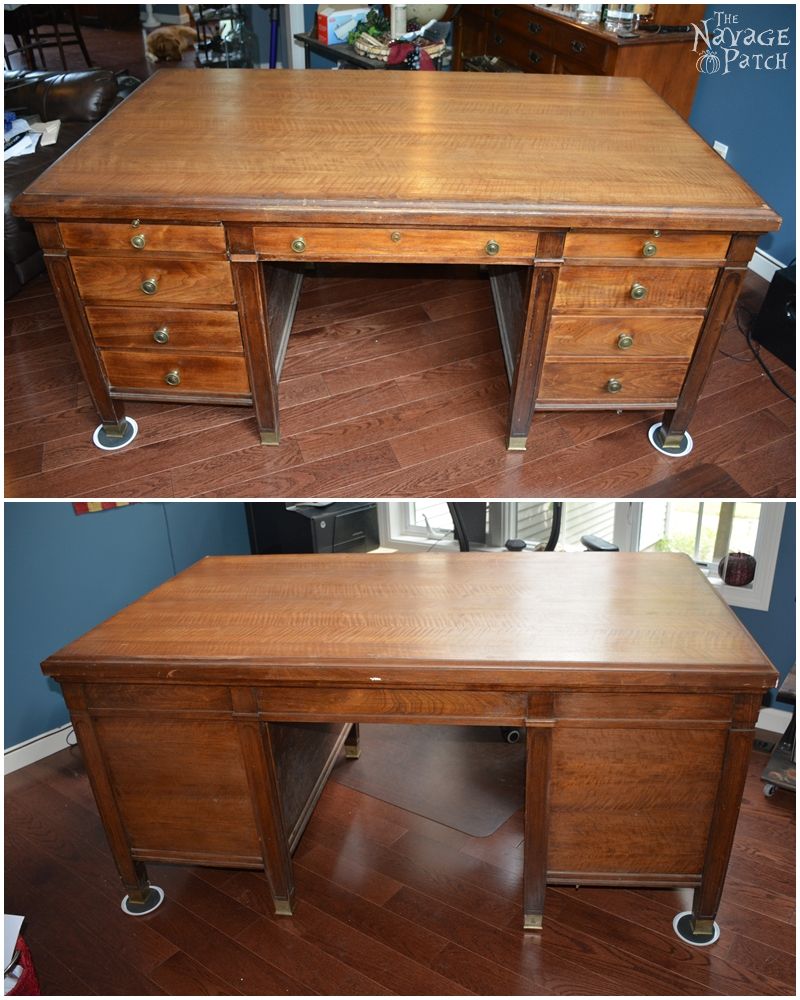
This past summer, we began the search for a suitable replacement. Handan hit the jackpot with an awesome old desk she found listed on Craigslist. We bought the desk for $150, but ended up offering an additional $50 to the seller for driving it in his pickup from the storage area to our house, since it wouldn’t fit in our car. The desk is huge and has to weigh around 350 pounds. It took four adults, struggling, to move it from our driveway into the house.
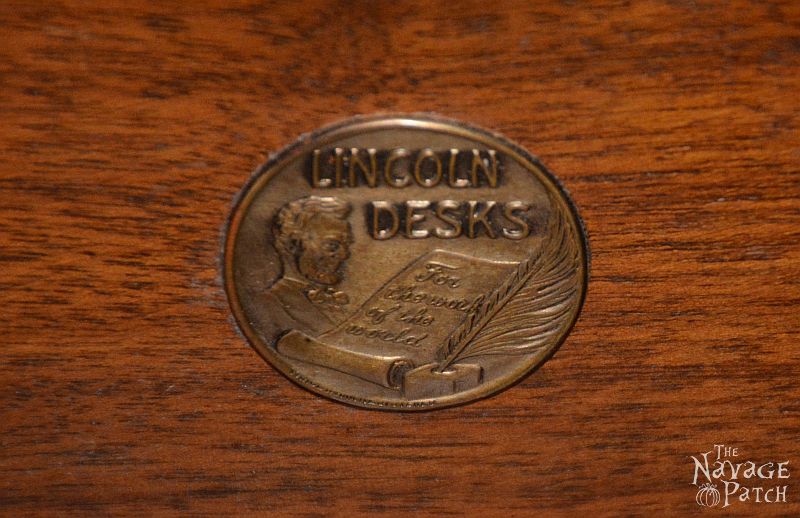
I examined the desk and discovered that it was made by the Lincoln Desk Company in 1928.
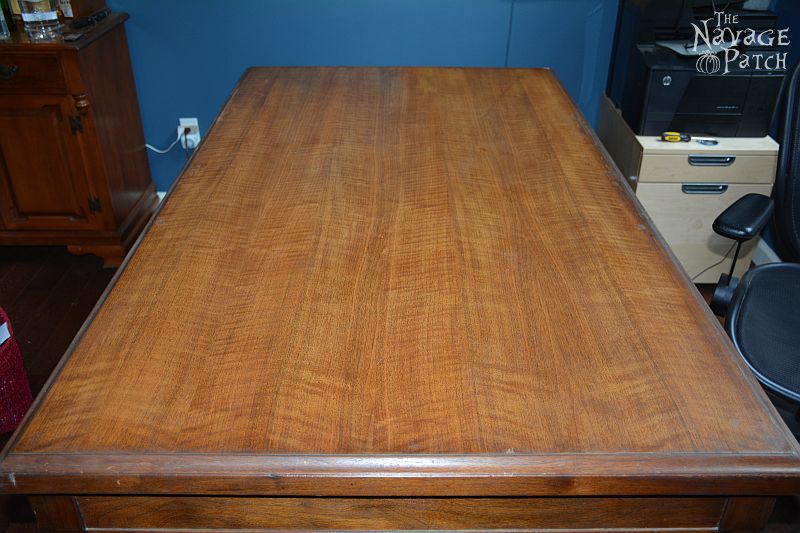
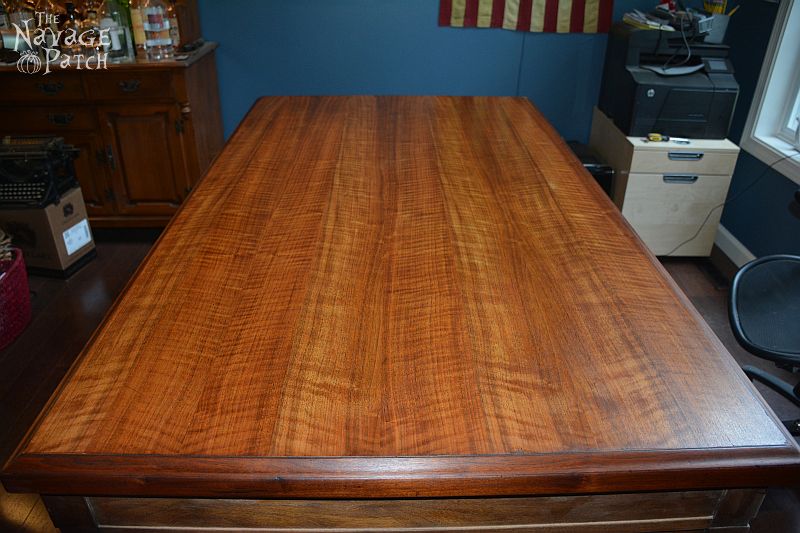
The top has a beautiful fiddleback veneer of what looks to be African cherry, but could be American cherry or another wood I can’t readily identify. This is the kind of desk you dive under during an earthquake.
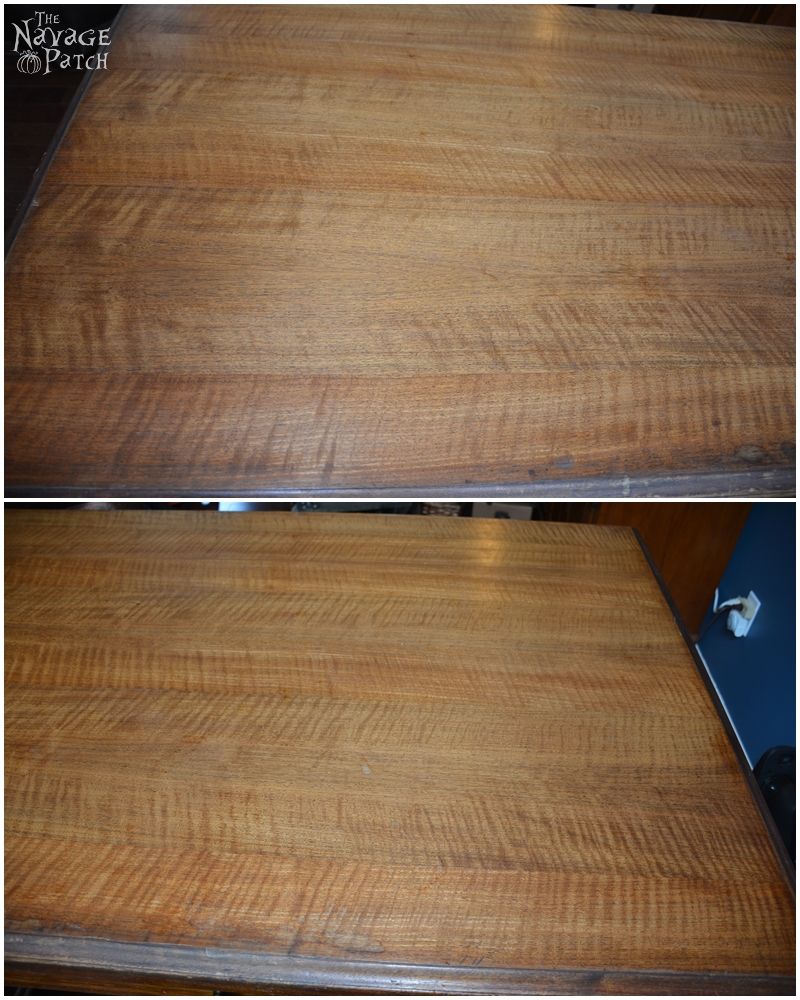
In some places, the veneer was peeling from the substrate, and in one of the corners it was missing altogether.
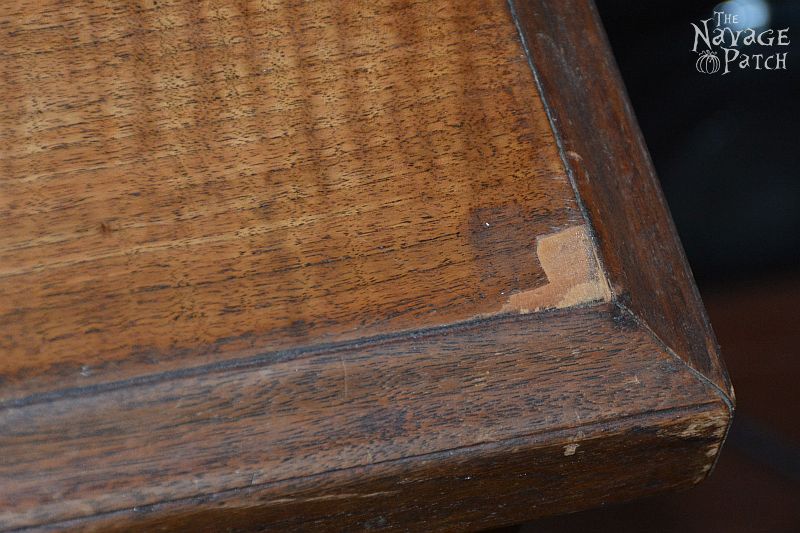
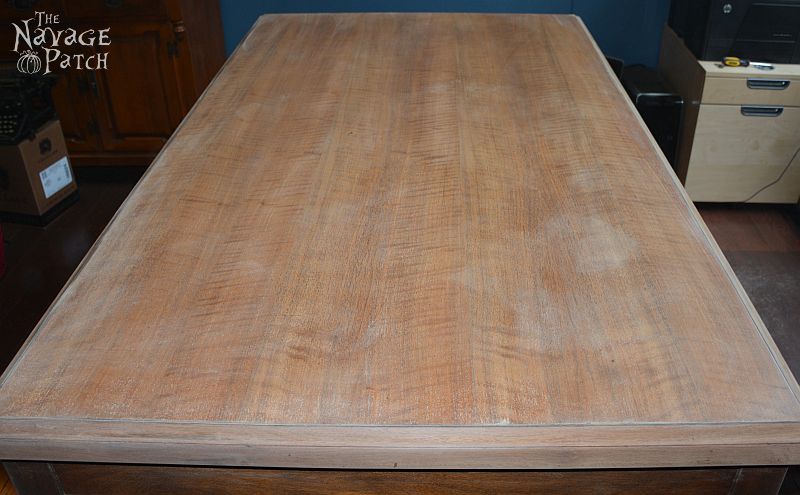
I repaired the veneer that had come unglued by squeezing some wood glue under the veneer and spreading it around with a toothpick. I clamped it and let it dry. The result was good enough. For the corner missing the veneer, I planned to leave it as is. Once I re-finished the top, it wouldn’t show as much. Besides, this was going to be a working desk, so I wasn’t worried about making it a perfectly restored show piece. I liked the character it had, and I just wanted to spruce it up a bit. The first step after gluing the two small patches of veneer was to sand down the top to get rid of any old varnish and dirt. Since veneer is so thin, any sanding must be done very carefully, especially when using a random orbital sander. I already learned the hard way that an orbital sander will chew through veneer faster than you can say “OH, SH!T!” What followed was a series of errors and course corrections that took an easy two-week project and twisted it into a Sisyphean summer of tears and despair.
First Attempt
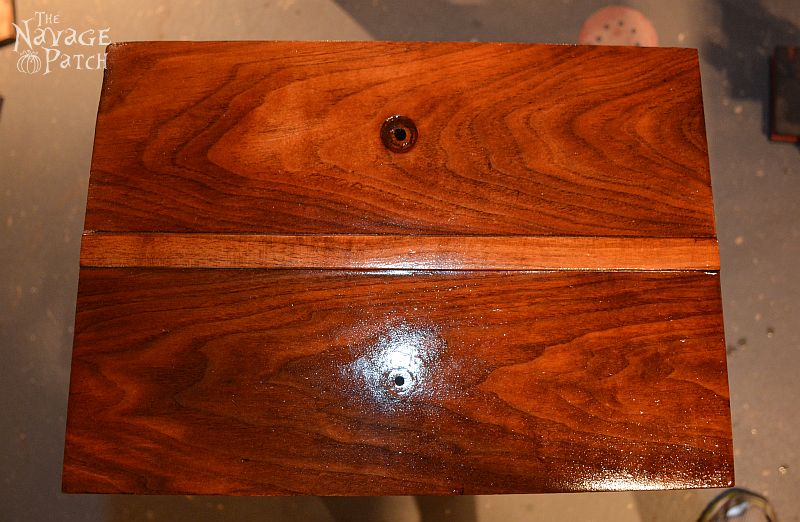
When the top was sanded and cleaned, I applied a couple of coats of Watco Danish Oil. Danish oil is what is called a “hard drying oil.” It is usually a blend of either tung oil or polymerized linseed oil and a varnish. It deepens the color of the wood and gives a subtle satin finish. Since the desk would be heavily used, I wanted to add more protection. After the Danish oil had cured, I applied a coat of satin finish polyurethane. I took the following picture when the polyurethane was still wet, hence the glossy look. So far, so good.
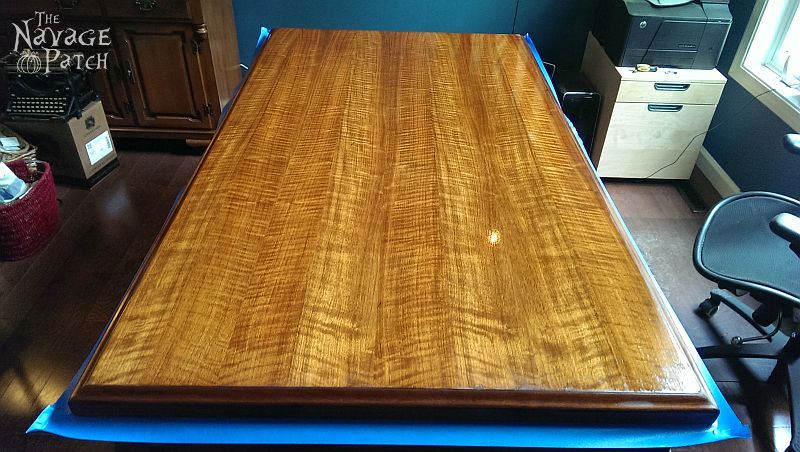
After a few hours, I checked to see how the poly was drying. The glossy sheen was mostly gone. I looked at it a while longer and realized something: I wanted it a little darker and a bit more red.
Second Attempt
Once I again I sanded, careful not to blast through the veneer. When all the old poly and Danish oil were cleared away, the desk was ready for stain. I made a custom blend of a few Minwax stains I had on hand: Red Mahogany, Jacobean and a touch of Ebony. Those are my three favorite colors of stain, and I use them almost exclusively in various homemade blends.
When the stain was dry, I applied a coat of satin polyurethane.
Okay…so it looked good, I guess. But, I don’t know. Maybe it would look better if it were glossy?
Third Attempt
I sanded yet again. Oh, brother was I careful! I knew the veneer must be getting dangerously thin. Since the sanding took off some stain, I grabbed my custom blend and restained the desk. I let the stain dry, then reached for my new can of glossy polyurethane. With gloved hand, I brushed on the first coat of the shiny stuff. This time…this time I nailed it! Deep color? Check. Glossy finish? Check! Now I just had to wait before applying a second coat.
The directions on the back of the can recommended waiting 2-4 hours between coats. The day was warm and a little humid, so I gave it 7 hours. I approached the desk, brimming with confidence and swagger, and started sanding just like the back of the can told me to. The beautiful glossy desk turned into a gunky mess. What the heck, I figured, I’ll just slam it with another coat, and that gunk will melt right in to the next layer. I was a polyurethane neophyte. I didn’t know that polyurethane doesn’t work like that. Shellac and lacquer do…but not polyurethane. I applied the second coat, wondering why it looked like crap, but still holding out hope that some magic would happen in the next 4 hours.
The magic never happened.
Fourth Attempt
[There are gaps in the recorded history here. It is believed that the subject suffered a psychotic break and ran off into the wilderness for some time.]
Handan, my sweet wife and savior, suggested I try wipe-on polyurethane. She had been reading about other bloggers having good luck with it, and she thought it might work for me as well. As with all things wife-suggested…who was I to argue? I got myself a can of Minwax Clear Gloss Wipe-On Polyurethane and set out to right the wrongs of my desk.
But first I painted the lower parts of the desk. I made an odd mix of blues using latex paint, chalk paint and milk paint. The result was hideous. But, a few coats of white would cover that eyesore and add some interest when distressed.
Time to finish the top. I grabbed a rag, shook the can, then popped open the wipe-on poly.
Wow, this stuff was great! It went on smooth and easy. It was a joy to work with! What a smart wife I have! I give wipe-on poly my highest recommendation, and I have used it extensively since this project.

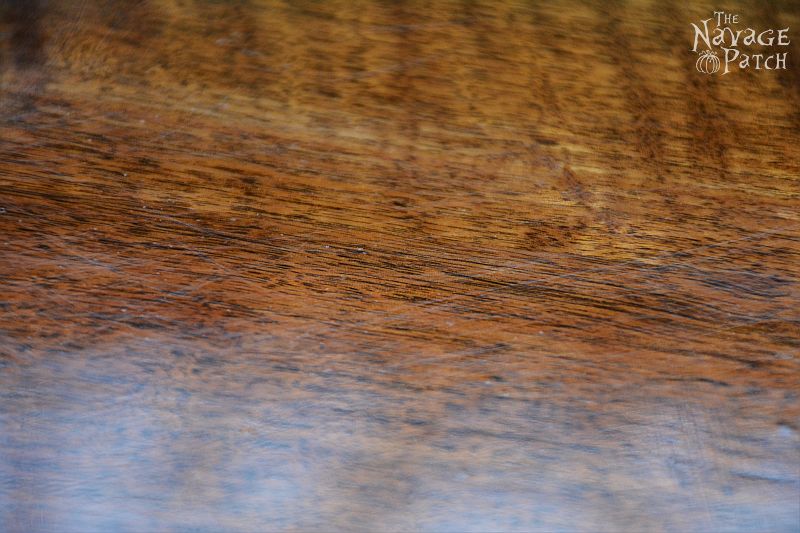
But…I still hadn’t fully learned how poly works. Even though the can says to “sand with 220 grit,” they’re basically full of crap. Sanding with anything less than 2000 or 1500 is going to leave noticeable swirls and scratches.
Fifth Attempt
At this point, I was so used to starting this project over, that I just started working like an automaton. I sanded, stained, waited, and applied the first coat of poly. After each coat of poly, I lightly sanded with 1500 grit. And I mean LIGHTLY. No more pressure than the weight of my fingers. Once I had about 6 coats of wipe-on poly, I decided it looked good enough. It was now time for Handan to paint and distress, while I started to work on the drawers. I took no pictures during the final do-over. No pics of me staining, no pics of me finishing. I was a little bit sick of the project at that point and just wanted to finish. My spirits were lifted, however, when I saw the results, and that carried me through the drawer part of the project.
I approached the drawers much in the same way as the desk. First I sanded them down to bare wood.

But instead of stain, I applied some Watco Danish Oil (like I did on my first try with the desk).
When this had dried for a few days, I gave them all a coat of Minwax Special Dark Paste Finishing Wax![]() .
.
Meanwhile, Handan was a busy beaver, painting the whole desk with her DIY chalk paint (see her recipe here), custom color-matched to Annie Sloan Old White. After some light distressing to highlight both the natural wood and the blue under-painting, she waxed the desk with Annie Sloan’s Soft Clear Wax.

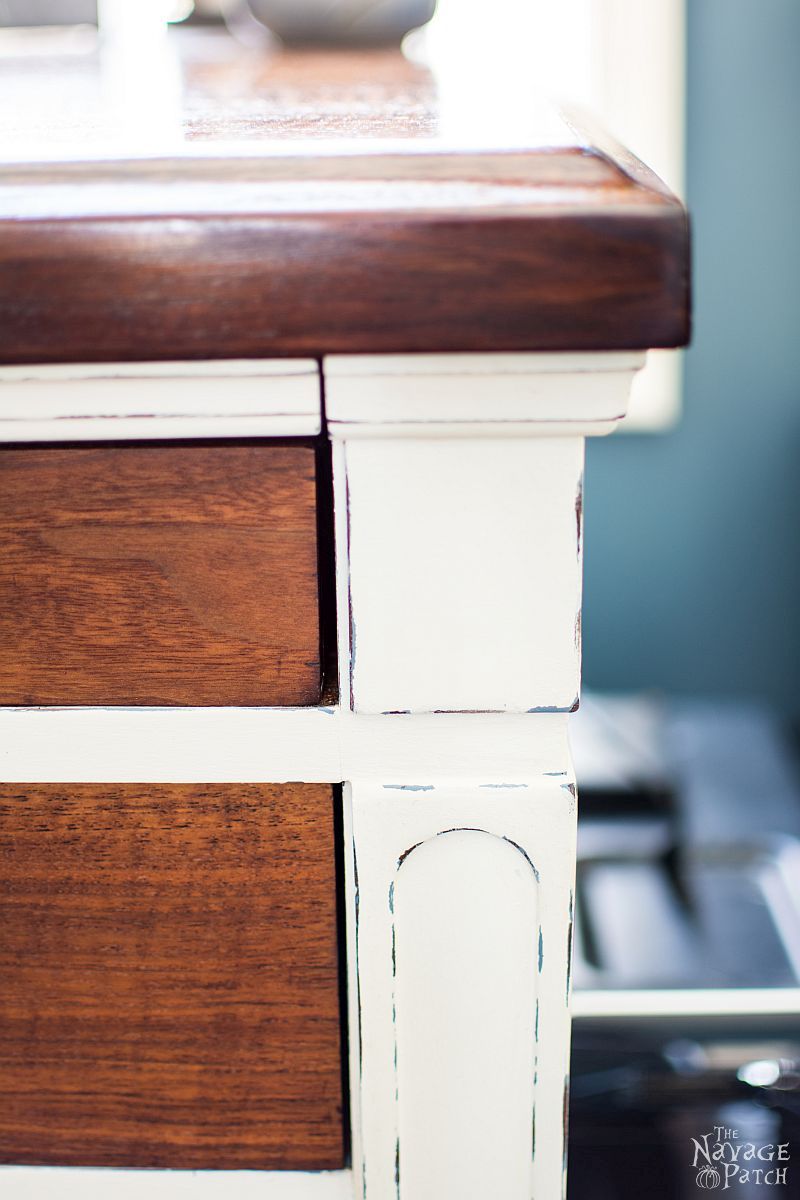
After Handan finished, I re-attached the drawer hardware, put the drawers back in their places, and put a final protective coat of Minwax Special Dark Wax on the desktop.
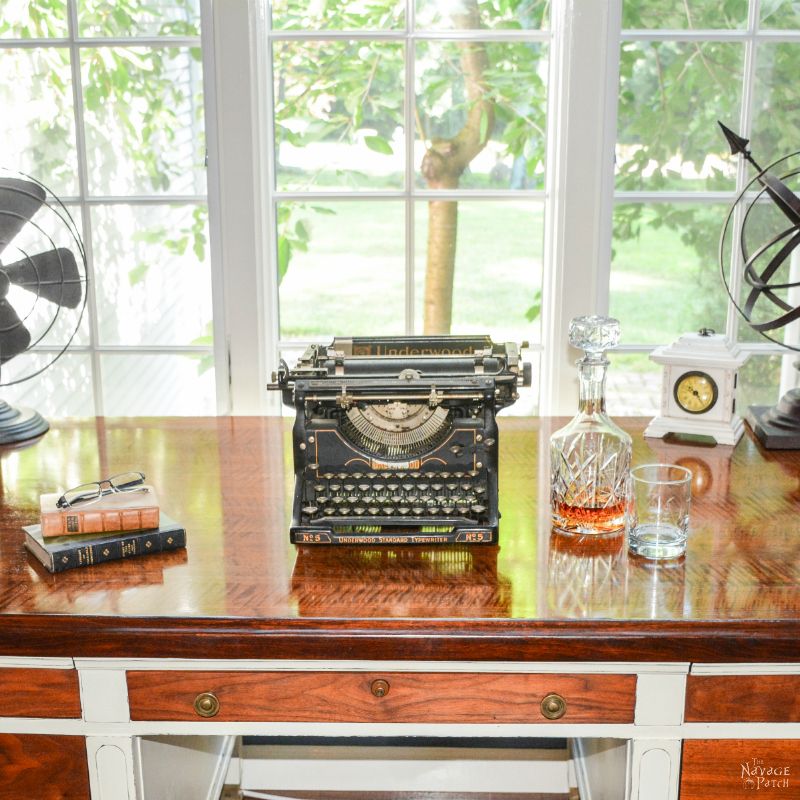
What had started as a quick refinishing turned into a brutal test of will and determination, not unlike a trip to IKEA. But the results are well worth the effort, and I sit at the desk now, typing this post.
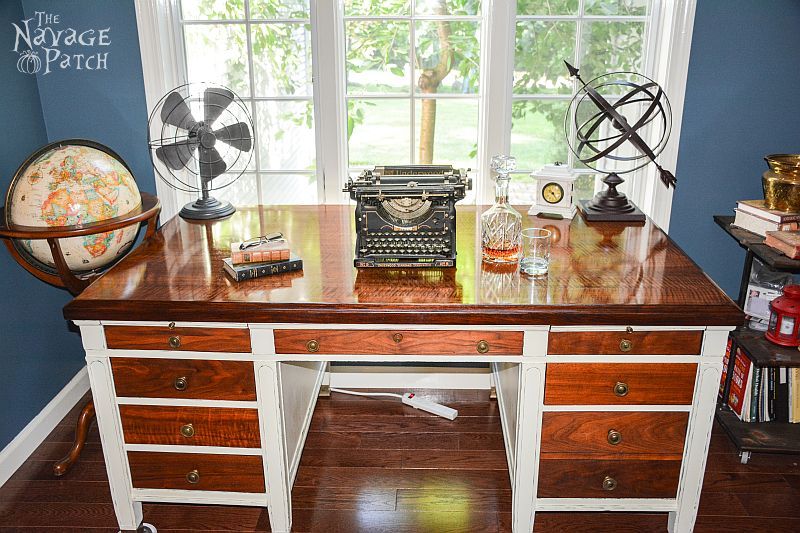
(Okay, so maybe I upgraded the typewriter)


When I saw how that top turned out I literally gasped out loud. Isn’t it just astounding what a little elbow grease and a refinish can do!? Oh my gosh this piece is gorgeous!
Thank you, Tarah! It is indeed astounding. It’s what makes us keep doing what we’re doing!
I think this desk looks absolutely gorgeous! Kudos to you for staying at it. And I totally agree about the frustrating trapped-in-a-maze vibe at Ikea. I have also sanded through veneer using an orbital before (correction, my mother who was helping me sanded through the veneer) and I did learn a way to salvage it–drawing in grain lines with artist color pencils in varying shades. It’s not perfect, but it will do to salvage the top. I’ve written a post about it, buried down somewhere in my blog 🙂 Anyway, thanks so much for linking up to Friday’s Furniture Fix, and enjoy your amazing new desk!
Thank you, Melanie! That is a great idea to paint the grain back on! I will try that in the future.
What; a fantastic job you did! Your hard work really paid off; it’s beautiful
Thank you so much, Carol!
I think the desk turned out wonderful. I love the wood and paint together. Nice job!
Thank you, Erlene!
Oh, how I enjoyed reading your amazing journey to restore this desk. I’m sorry you had so many troubles, but you certainly have a beautiful result. Thanks so much for linking to Friday’s Furniture Fix. We are so pleased to have this lovely desk among our features tonight. Susie from The Chelsea Project
Thank you so much, Susie! 🙂
I never would have had the determination that you had but this turned out beautifully! I love the two toned look. The top is stunning!
Thank you, Stacey!
Gave you a “wow”! Your desk is gorgeous, and all your hard work paid off. I’m sure you’ll have it for years and years to come. Enjoy!
Thank you, Cynthia!
What a STUNNING makeover! All of your hard work definitely paid off! Thank you so much for sharing at The Wonderful Wednesday Blog Hop! Pinning!
Thanks, CD! 🙂
Nice look. I like the lighter color you added. Made a great touch.
Thank you, Lilith!
Oh my goodness, it is stunning!!! Great job!
Thank you, Lora!
WOW! Another beautiful piece well done! You have staged it so pretty too ! Love it!
Have a great day!
Smiles!
Terry
The Curator’s Collection & Making Broken Beautiful
Hi Terry! Thank you so much!
Stopping over via May Pretty Projects Party. Gorgeous makeover. I love this desk! 😉
Thank you, Rebeca!
This is so gorgeous! Wonderful job…
Thank you, Sarah!
Love this and your patience at getting it just right!
Thank you, Sarah!
You guys are amazing with the work you do in remaking furniture into a beautiful piece of furniture.
Thank you for hosting and stopping by the #OMHGFF this week. I hope you have a wonderful weekend!
Karren
Thank you, Karren! 🙂
Incredible results! I used to like IKEA, but grew tired of it after a while and prefer re-purposing old furniture like you’ve done. It’s not always easy and requires patience at times, but it’s well worth the effort. Congrats on a great job!
Thank you, Brooke!
I love the glossy shine on the top. It is beautiful.
Thank you, Sherry!
Your desk turned out beautiful. Thank you for sharing at the Talented Tuesday link party. Have a great week, Kim
Wow!! That came out beautiful -you really brought out the beauty of the wood grain – Thanks for sharing at the DIY party on Pleasures of the NW
Thank you, Helen!
I can do anything else but to bow… what a gorgeous desk!! I admire your patience and all that hard work was worth. No Ikea furniture could be compared to your desk, no matter how well you hack it. I also hate shopping there but I’ve mastered in finding shortcuts to get what I want as soon as possible.
Thanks for sharing it with us at Sweet Inspiration party, I hope you both have a wonderful week!
Thank you so much, Pili! Kudos to you on finding a weakness in IKEA’s defenses! 🙂
You did an amazing job on the desk. I will be featuring this tonight at my Swing into Spring party. Please stop by and pick up an I’ve Been Featured button. Thanks. http://diybydesign.blogspot.com
Thank you so much, Judy!
Even though it took several attempts the final result is lovely. You did a wonderful job on the desk. Plenty of room and drawers now. Thank you for sharing at Vintage Charm.
Thank you, Sharon! I am so happy with the storage space of this desk. I still have room to spare! 🙂
Absolutely beautiful makeover! Thanks for sharing it and come back again next week. #HomeMattersParty
Thank you, Jeanne!
I really love the contrast of the white against the wood…so pretty! Thanks for sharing yet another gorgeous project with us at Share The Wealth Sunday! xoxo
Hi Lisa, thank you so much!
This turned out SO beautifully!!! What a stunning piece-despite all the hard work and elbow grease! ??
Thank you so much, Sarah! Yes,it was worth it in the end 🙂
I love the end result, and I feel your pain with the process! I love wipe on poly, it gives such a great finish. And the way that you’ve mixed the chalk paint and stain created a gorgeous piece! I’m not sure I could have stuck with it, but when I have a faux pas in the future I will remember this and keep on the job until I love it!
Hello again, Nikki! Yeah, wipe-on has been a real life saver. I swear, for the life of me, I can’t figure out how to use regular poly without it looking like a two year old did it. I consider myself fairly resourceful, but just following the directions on the can leads to abject failure!
What a beautiful makeover…absolutely a gorgeous desk!!!
Thank you, Michelle!
What patience and perseverance you have! But what a beautiful end product. Great job!
Thank you so much, Cathy!
Greg, you had me on the floor with this one. Does sandpaper even come in 1500 or 2000 grit? Or is the European system different? I’ve only seen up to 300.. humm. Poor guy, this one really had you stumped. But it turned out great in the end. And the blue looks really great peeking out from under the white. I’ve not heard of wipe on poly, but one day when I get to the States, I’ll raid home depot! Great project and you must be so happy sitting at that desk.
Hi Mary! Oh yeah, sandpaper goes up to P6000. I don’t use anything higher than 2000, and anything in the 1500-6000 is primarily used for sanding finishes. Depending on the look i’m going for and the finish I’ll be using, I usually sand wood to 150 or 220. Here’s a cool technique I use on knotty pine though. Try it out sometime if you can find sandpaper up to 1500 or 2000. Sand the board starting with 80 or 100, then progress through all of the grits: 80,100,120,150,220,320,400,600,800,1000,1500. It is time consuming, but not difficult with a random orbital sander. You’ll be amazed at the result. The pine will shine as if you finished it with high-gloss poly, especially the knots. Then take ebony stain, apply it and immediately wipe it off. The colors are incredible!
Here is a detail from pine rolling shelves I made a couple of years ago using this technique. This wasn’t sealed with poly or anything…just been sitting out like this for the past two years.