How to Install Luxury Vinyl Plank Flooring
Learn how to install luxury vinyl plank flooring as I walk you through the prep, the process and the pros and cons of LVP.
The sliding tile puzzle has begun.
With the dining room walls and arches framed, I wanted to remove the carpet and install our new LVP flooring before the brickwork begins on the walls. The areas to receive the new flooring are the living room, dining room, master bedroom alcove, foyer and spare room across from the dining room.
But why LVP Flooring?
There are so many ways to go when making the switch from carpet to something harder. In our Georgia home, we installed hardwood after ripping out the old carpet, so why not here? Well, we thought about it. There’s no doubt wood floors look great, and you’ll never see a repeating pattern no matter how hard you look. But our biggest worry about hardwood here in Florida is the humidity and the potential for flooding. We wanted something a little more resilient to the elements, even though we don’t anticipate any water intruding into our new home. Luxury vinyl plank flooring combines most of the great looks of wood with the resilience of linoleum.
But more than that, an LVP floor is something we can install ourselves, and with prices spiraling out of control, we need to save money anywhere and everywhere we can. By installing this floor ourselves, we are saving about $3000 – that’s equal to the flooring cost!
It floats!
Yep, it’s a “floating floor,” but what exactly does that mean? Well, unlike a hardwood floor that is nailed together and nailed into a subfloor, LVP floors are neither nailed nor glued. They are laid onto the floor with a gap purposely left on the sides. This gap will be later covered with baseboard, shoe moulding or quarter-round moulding, and it will allow the boards to expand and contract with the seasons.
Got Gaps in Your Floating Floor?
Fixing those gaps is a snap if you know the trick! Click here to learn more!
Though the floor technically “floating,” you won’t see it wandering around your house – it’s far too heavy for that. It will only expand and contract along the length of the boards, and never so fast that you’ll notice!
Pros and Cons of Luxury Vinyl Plank Flooring
Like everything else in life, there are pros and cons to an LVP floor. Let’s take a look at four of the biggest.
Pros of an LVP Floor
- Easy Installation – unlike wood floors, any LVP floor is a DIYers dream. You’ll save big money installing it yourself!
- Durability – today’s LVP is designed with kids and pets in mind. It’s far more scratch-resistant than wood flooring, and it’ll stand up to most anything you throw at it.
- Maintenance – just vacuum and mop. There’s no need for fancy waxes or polishers. Air and water is all an LVP floor needs to look its best.
- Cost (usually) – most LVP is priced far below its real wood counterpart.
Cons of an LVP Floor
- Pattern repetition – most brands give you four distinct patterns in any given model in two different orientations for a total of eight different looks. On a big floor, it can get tricky to keep things interesting. Furniture and rugs can help hide the repetition.
- Difficult to repair – damaged LVP can be tricky to repair, and you have have to call someone in to do it properly, or get creative with cutting and gluing.
- UV resistance – some of the cheaper LVP brands don’t have the best UV resistance, so any parts of the floor that see regular sunshine will tend to fade over time. Of course, I’ve seen the same thing with wood floors, so I guess it’s a toss up.
- Cost (sometimes) – certain brands of LVP are over-the-top with their pricing. There are good values for the money though. You just have to shop around.
What color LVP is best?
Obviously, that’s an entirely subjective question. For us, the choice was clear – the living room doesn’t get a ton of natural light because of the lanai, so we wanted something very light. But not gray! My babes wants nothing to do with gray floors! Gray walls? Bring ’em on. But gray floors? Go give yourself 40 lashes with a wet noodle for even considering it!
We don’t advise picking LVP floor colors online – computer monitors vary in how they interpret color, and photographers are notorious liars when it comes to showing reality. For this step of the project, you’ll need to deposit your butt cheeks onto your car seat and drive to a flooring store – preferable more than one.
You need to see the floor in person. You need to touch it (and smell it if you’re into that sort of thing). And then you need to ask the nice lady or man working at the store to take home a sample of the planks you liked. There were so many planks that looked amazing in the store only to end up looking like a used sandwich when placed on our floor in our sunlight.
After all our browsing and in-home comparison, we settled on a clear winner: Trucore Prime XL in Chambord Oak color.

Then we called every flooring store between Pensacola and Panama City to find the best price. If you ever embark on a DIY flooring journey, once you find the floor you love, call every retailer, wholesaler and distributer in as wide a radius as you’re willing to drive – you’d be amazed at how much the prices can vary between stores. When you’re talking about a big space, the differences can easily add up to hundreds or even thousands of dollars!
Luxury Vinyl Plank Flooring Preparation Before Installation
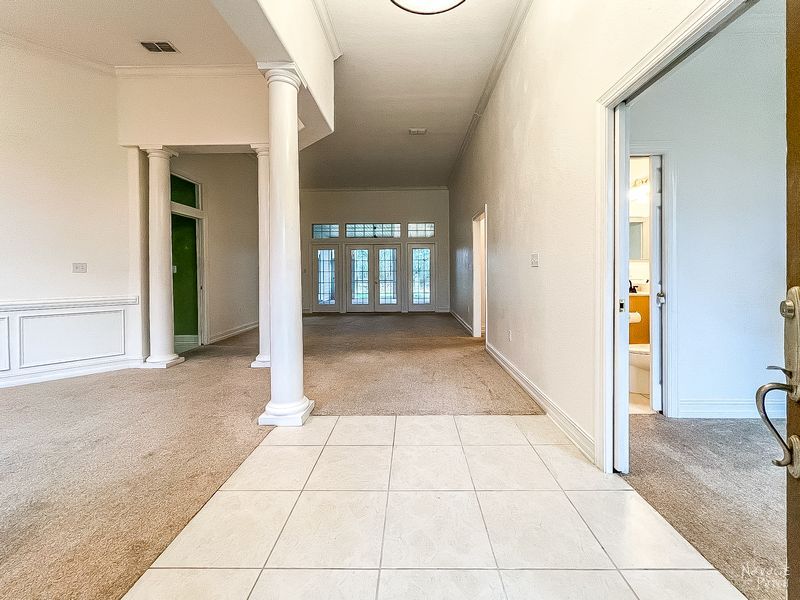
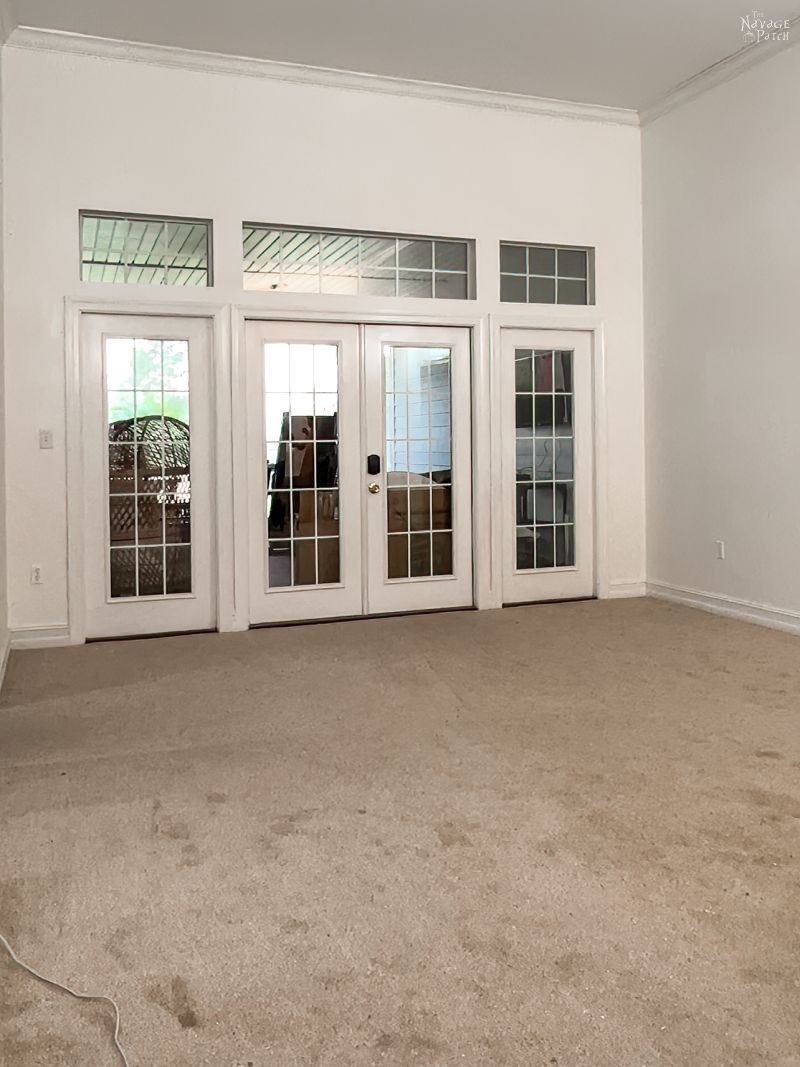
Here’s a look at the carpeted areas to be re-floored with LVP. This is how they looked when we moved in.
But after moving much of our stuff in (though not really setting anything up yet), this is how the rooms started to look.

This presented me with a human-sized version of a sliding tile puzzle. Each room was filled with wrapped and unwrapped furniture, boxes, rolled carpets and various other elements of an unsettled home.
In order to start, we’d have to shuffle the stuff from one room into another. Then, as we laid a bit of floor, we’d start shuffling some stuff back onto the LVP. In this manner, we’d be a wave of cleared floor flowing through the house.
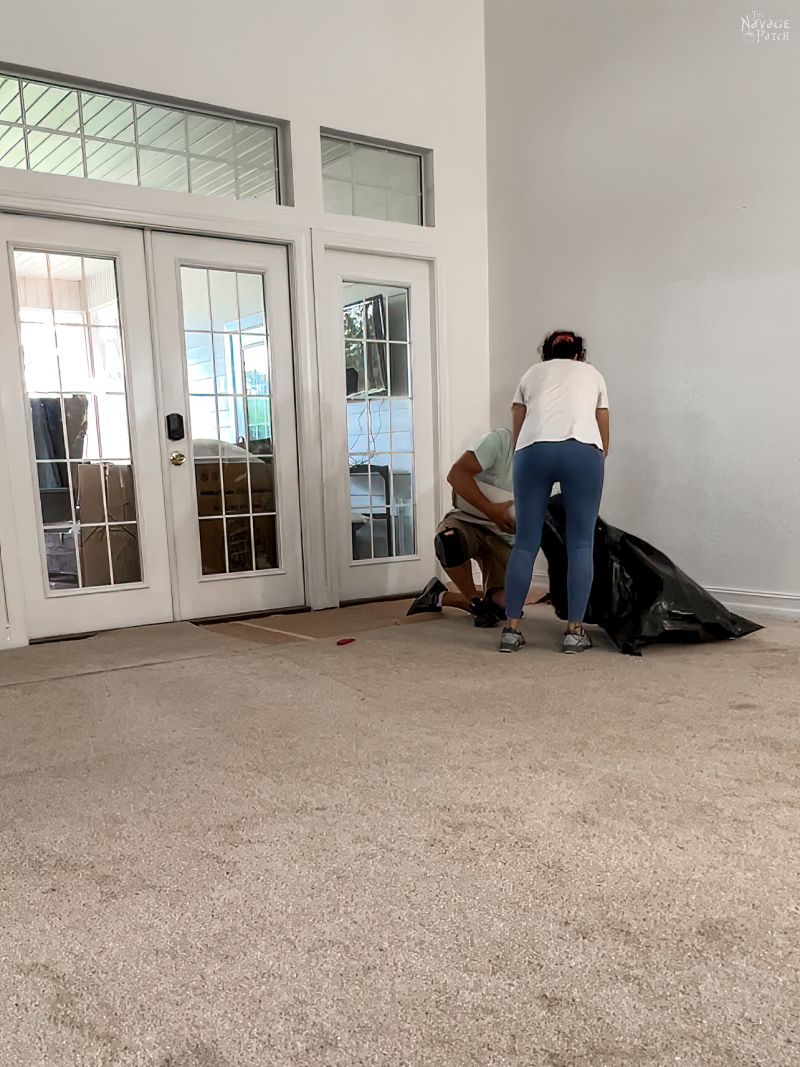
Remove Existing Floor Covering
The first step to re-flooring an already-carpeted floor is to tear it out. But first, we had to temporarily relocate the crap in the living room.
Fun fact that could save you time!
LVP is generally thin enough to install over an existing hardwood/linoleum/tile/LVP floor. Think of the time that will save! Just be sure to consider door openings – will the door still be able to open? If not, it’s pretty easy to remove a door and shave a little off the bottom. Also beware of transitions. If you’re going to layer on the LVP, make sure you don’t end up with a drastic transition into another room.
There was a thunderstorm outside while we cleared this room, and it’s a well-known from Northern Appalachia to Cascadia that our dogs are the biggest buk-buks when the sky is booming. Penny couldn’t bear to be anywhere but right next to daddy. When Baris and I tried to remove a chair…someone hitched a ride.

Our very own Egyptian pharaoh in her sedan chair.

Eventually the dogs settled enough to allow us to clear the room.
We’ve found the easiest way to remove carpet – both from the floor and from the house and property – is to cut it into strips small enough to fit into contractor bags when rolled. This allows us to put it out with our household trash and have it collected. If I cut it bigger, I’d have to put those rolls in my truck and drive 40 minutes to the landfill. I prefer the time savings of not having to drive!

LVP Floor Installation SUPPLIES LIST
Affiliate links are provided below. Full disclosure here.
- 1 – Flooring installation kit w/kneepads
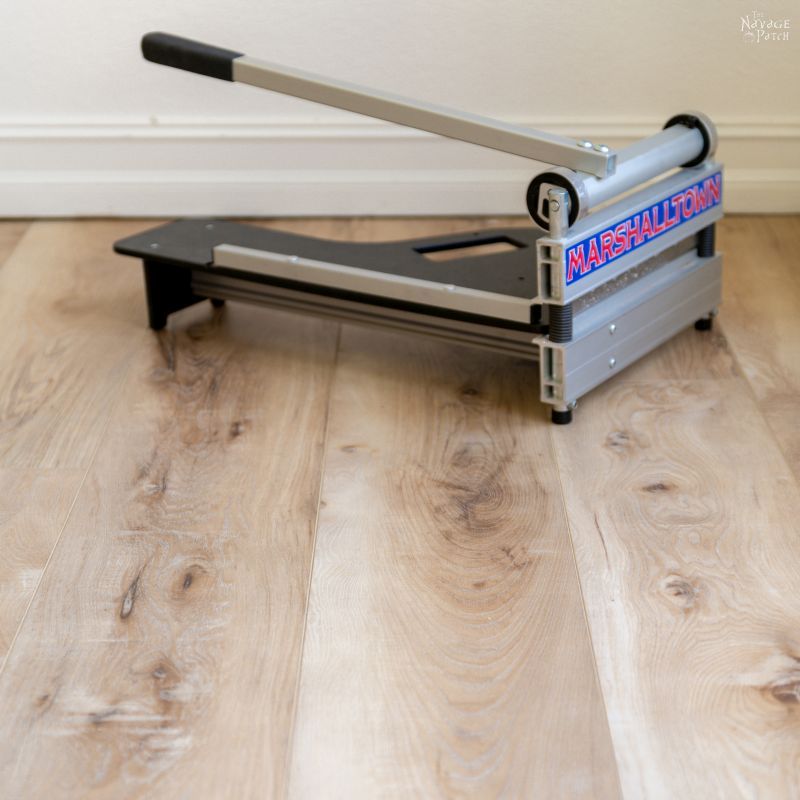
- 2 – LVP flooring cutter
- 3 – Rubber mallet
- 4 – Pry bar
- 5 – Tape measure
- 6 – Tapping block (optional)
- 7 – Angle finder (optional)
- 8 – Jigsaw


Removing carpet is like opening presents on Christmas mornings, except the exact opposite. You know you’re going to find some sort of surprise, but it’s never something you want.

Some notable un-Christmassy surprises from this carpet removal included:
Cat pee stains that somehow still smelled like cat pee.

Cracks running through the foundation like interstate highways (more on that later).
Evidence of past water intrusion – oh joy!

And the final little discovery (and this confirms what our neighbor told us when we moved in) is that the house had been remodeled in the past – we found evidence that walls in the foyer had been removed.
But, all in all, this carpet removal was far less disgusting than our Georgia home’s carpet removal – now that was grody!
Once the carpet and padding were rolled, bagged and removed, I set to work on the tack strips. Since the strips where nailed into concrete, I used a mallet and pry bar to pop each nail from its cementitious prison.
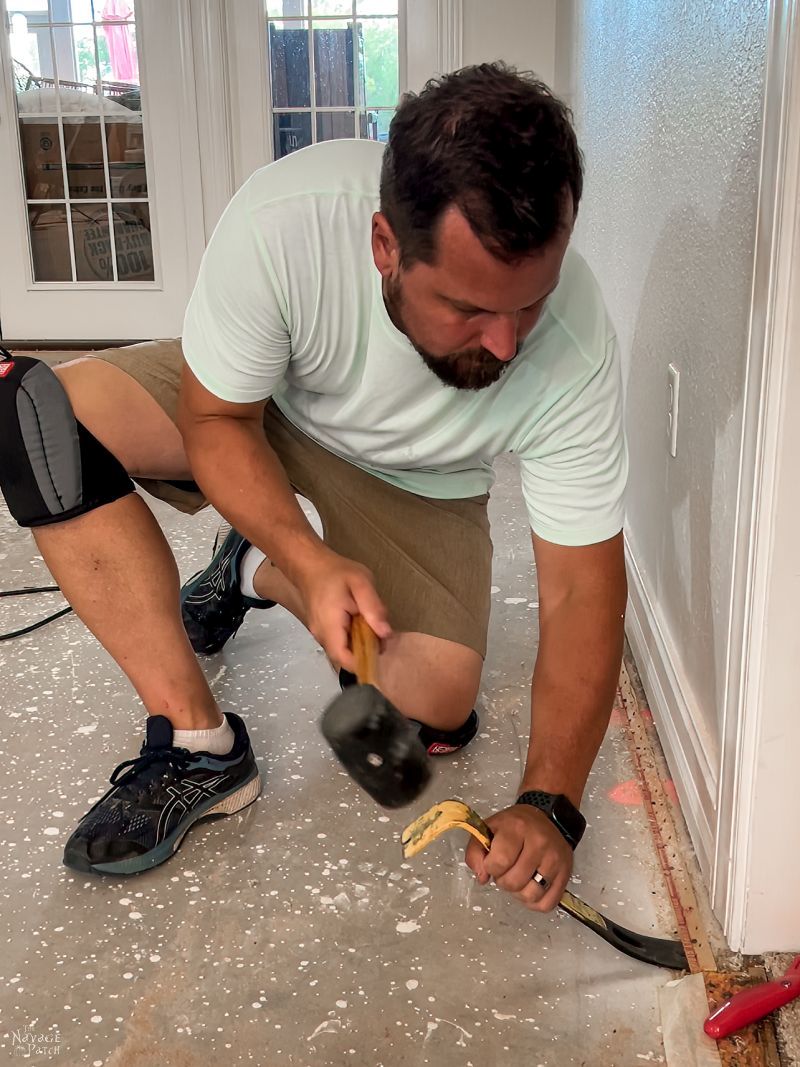

Carpet Removal and How to Easily Remove Carpet Tack Strips (& Staples!)
If you have wood subfloors, removing carpet might be a little challenging if your carpet was installed with staples. Check out tips and tricks to make that process as easy as possible.
After removing the carpet tack strips, I started to vacuum the concrete but was quickly muscled out of the way by my babes. Instead of wasting my time vacuuming, she decided my energies would be better spent painting the walls. Why not, right? With a concrete floor, there’s no need for tarps. I painted a fresh coat of the existing color – Swiss Coffee by Valspar. I used the same satin sheen as was on there already, but instead of Valspar brand, I used Sherwin Williams paint.

Remove Baseboard…or Don’t
If you have run-of-the-mill baseboard, I’d recommend removing if before installation – it’ll save you having to install shoe moulding or quarter-round moulding after the floor is installed. But if you really don’t want to deal with removing it, that’s okay, too. We didn’t remove the baseboards in this house because they are 6-inch-tall custom baseboards that are only available through special order. If I broke one during removal (which is practically guaranteed), it’d be no small feat to replace it. We chose the shoe moulding route – it was the easiest for this installation.
Layout
There is a school of thought out there that teaches running your planks parallel to the longest wall. While this may work in some circumstances, there is another school of though that emphasizes the flow of sunlight. Within that school, one sect says to run the boards parallel to the light, and the other (like our manufacturer) insists that the planks must be installed perpendicular to the light entering the room. This perpendicular orientation helps to prevent buckling of the floor if exposed to sunlight and heat.
If sunlight is not a concern, you’re free to orient the planks anyway you see fit, though certain orientations can change the feel of a room.
The back of our house faces south, so it sees direct sunlight. Though the living room is off the lanai and doesn’t see direct sunlight, we decided to run the planks east-west for a number of reasons:
- Our warranty would be voided by installing any other way. Since we’re planning to extend this flooring into the kitchen and beyond someday, this is pretty important.
- We like the look better this way. Our main area is an odd duck – lots of heres and theres, turns corners, doorways and alcoves – and this orientation looks better.
- For the same reasons given above, this orientation is much easier to install.
To ensure you don’t end up with a small strip at one end of the room, you should first measure the room and divide by the width of a plank. If the last plank is much less than 1/2 its normal width, you’re better off cutting the first row a bit narrower and going from there.
Repairs
The walls were painted, the floor was clean, but before we could start in with our LVP floor installation, we wanted to fill the cracks in the concrete. DAP makes an inexpensive and easy-to-use product for filling cracks in concrete.
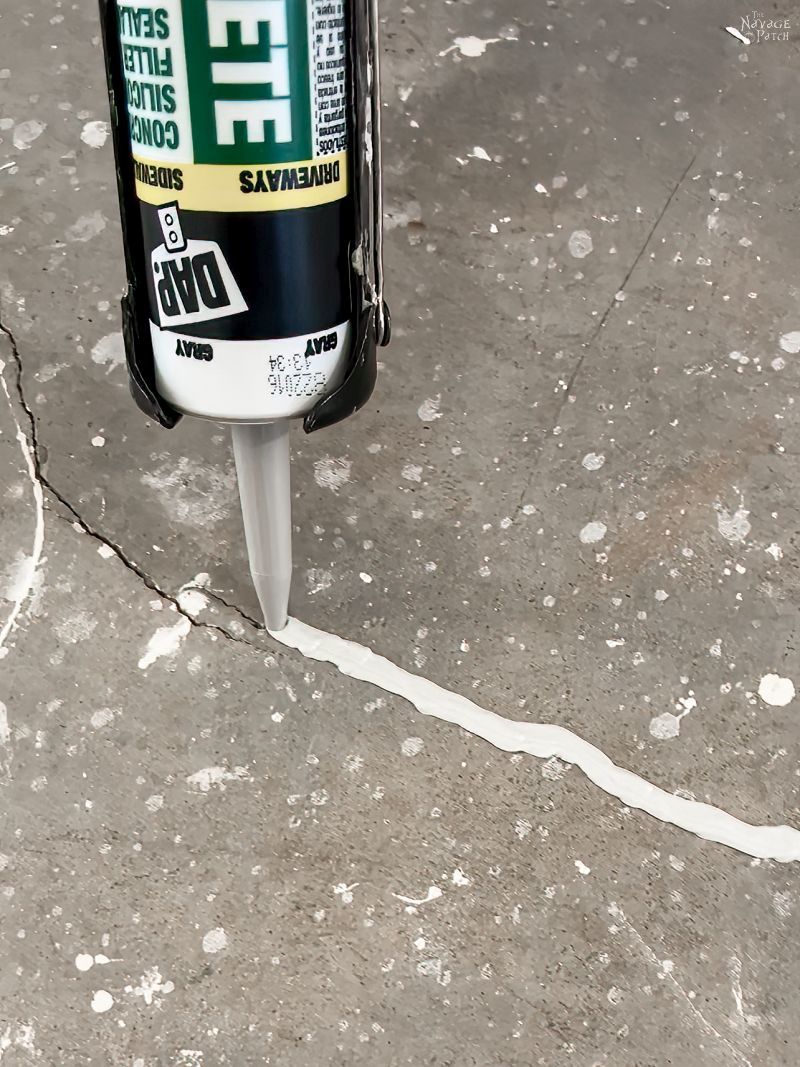

With Handan and I working together, those cracks were filled in a jiffy!
Luxury Vinyl Plank Flooring Installation
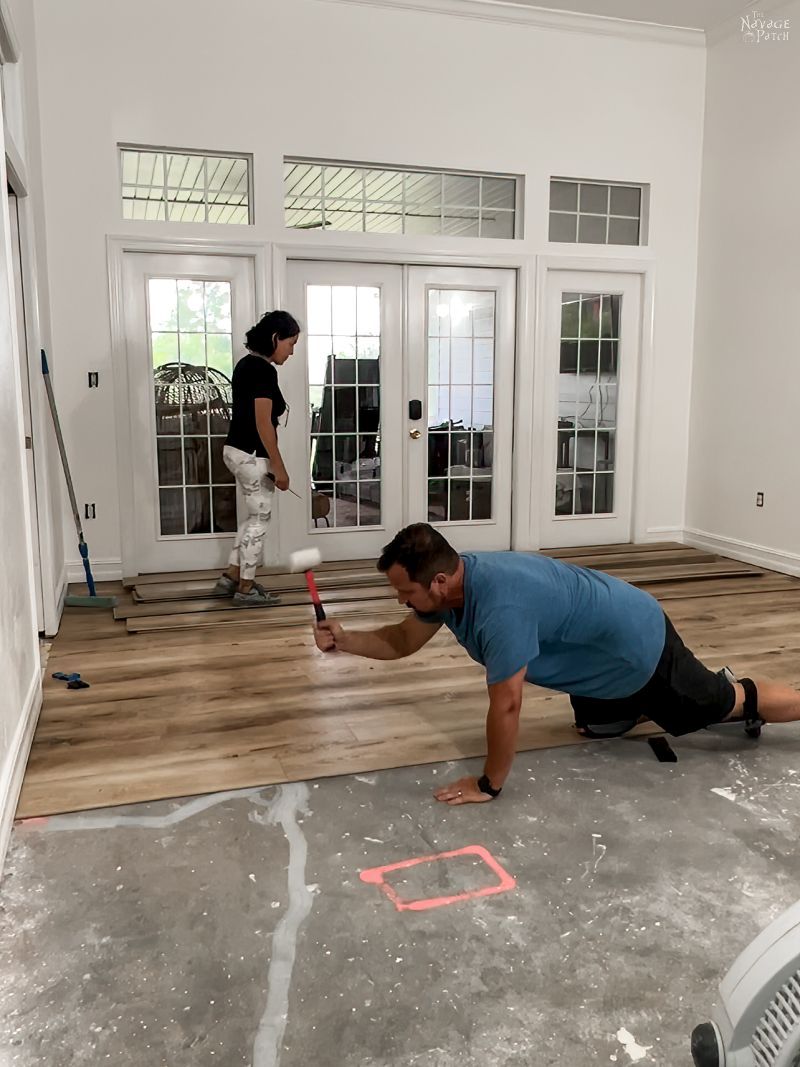
Finally, it was time to start laying the LVP flooring! We got the whole gang together for this install. What could possibly be more relaxing for a family and more interesting for a college kid on summer break than installing an LVP floor together? o_0

Oddly enough, this house is reasonably square. We laid the first course directly butted up against the lanai doors. We left a small gap by the baseboards, but there was a much larger gap underneath – more than enough expansion room for the LVP planks.

Handan was the plank-picker and pattern-layer, Baris was the cut-man on the LVP guillotine, and I was Mallet Boy, the knee-shuffling simpleton whose job was to fit the planks and tap them into place. Of course Mallet Boy (simpleton that he is) initially had trouble with the whole “tap them into place” concept and instead preferred to bash the living vinyl out of them resulting in more than a few destroyed planks.
I think this is why they say to buy 10% more than you measure for.
Once I learned that gentle is more productive than mental, we proceeded quicker and with fewer mishaps. They make LVP flooring pretty foolproof these days. The click-lock systems are easy to use and hold the planks together well.
Transitions
Though most DIY installers will use transition strips and/or reducers between rooms, we left a purposefully big gap.

Soon I will show you what we’re going to do in those gaps. We think it’s going to look good!
Angled and specialty cuts
For this installation we used a dedicated LVP guillotine – aka flooring cutter for the straight cuts and 45 degree cuts. But we had some cuts that weren’t quite 45 degrees, and some the were custom shapes, and for those I used a jigsaw and my miter saw.

A professional crew would get a space like this done in a day, but it took us a few days working on and off.

There were so many quirks to our floor, and we found several boards with cosmetic flaws. If we had paid someone to install this LVP floor, the imperfect boards would have been installed without a second thought, and the little areas of weirdness in the floor would never have been addressed. There are some jobs that really are better done yourself, and I think flooring is one of them. No one will ever care as much as you do about your floor – no matter how much you pay them.
We finished the floor, and it really looks fantastic.

Finishing up
I’ve yet to install the shoe moulding and the transition pieces, but I’ll be getting to them this week. And of course, the brick wall! Once all that is done, we can settle this huge area of the house, and I’ll finally be able to share some beautiful photos with you.

Oh, and there was one thing I left out of this post. I think I’ll share it as its own post (with video) in the coming days. I had to remove the floor tile by the front door before we could lay the LVP there, so I’ll show you how I did that.
We love to see our DIY projects out in the wild! If you try this DIY project and take a picture and post it on Instagram, be sure to tag us – thenavagepatch
This is so beautiful! I just love your sweet family and your story. You guys are reno beasts! Barish will follow in the mighty footsteps of his parents I’m certain. We have used LVP in several houses now and truly love it. The color and texture of this one is perfect and timeless. Can’t wait to see what’s next.
Thank you so much, Sheri! We’re teaching Baris here and there, and I’m sure it is being filed away somewhere deep down inside, lol!
Looks great guys! We just put some down in our master bedroom and closet last summer and I love it. Plans to put it in our living room soon because, carpet+ kids+ dogs= 😖.
Thanks, Nicolette! I’ll be doing the whole house eventually!
Looks great. I plan on putting this type of floor in my two basement rooms (to replace the carpet in the rec/exercise room and the grody old linoleum in the laundry/utility/mudroom.
So much better than carpet or linoleum. You’ll love the change!
Looks gorgeous!!! Can’t wait to see everything put together!
Handan, where are your jammies??? 😄
LOL, too hot for jammies here in FL – even for Handan! 😀
I upgraded them LOL 😉 These leggings are as comfy as my PJs (if not more)!
No underlayment required? Looks great.
None required with the one we bought – it has cork on the back already. How easy is that?
Great info about LVP. I’ve wondered about the pros and cons of the material and DIY installation, and this is very helpful. (The home reno shows don’t cover these details.) The pic with everything piled in the room caught my attention, especially that box labeled, “Kitchen Oil Vinegar Coffee Tea RUM”. Best box in the house! If you need help moving it, I would totally volunteer…to move it right to my car. Those are hot commodities in my house! As always, thanks for sharing this family project!
LOL, it’s like the cargo hold of a pirate ship after a good season in the Caribbean! :D:D:D
looks great! i am picking up my order of LPV this week i am going to lay it over the existing floor…and old herringbone wood floor.
do you think that will be an issue??
joy
Hi Joy, there’s no problem laying LVP over an existing floor, but there are two things to watch out for. You want to make sure the floor is level – an unlevel herringbone floor will translate into an unlevel LVP floor. And you want to make sure your new floor height will accommodate your existing doors. Good luck with your installation!
i think i missed something. what is the machine shown in the beginning of the post?
Hi Susan, that is a flooring shear – it makes straight and 45 degree cuts in vinyl planking. It’s much easier than using a miter saw, and it doesn’t create any waste or sawdust! It is linked in the supplies section of the post.
Doing it yourself is never an easy job. You are right about removing the carpets being like opening Christmas presents. We are remodeling our house and have removed our carpeting only to find uneven and messed up subfloors beneath. We have decided to go with Lifeproof Scratch Stone – Luxury Vinyl Plank Flooring (Home Depot). Thank you for this how to blog post – you actually make it look easy (Any chance you could come help us out – when we are ready to install ? We live only about 1 hour or so from you – in Navarre) 😉 I will save it and refer back when we are ready to install our plank flooring.
Love the new flooring. You make it look easy.
You said that you use the color Swiss Coffee in satin on the walls, if I may ask, what do you use on the baseboards and trim?
Thank you!
In this room, I just kept it simple and used the same!
Hi, in this article you mentioned that you left a wide gap that would normally be filled in with some kind of transition strip, but you had a different idea for that gap. Did you share that in another post? If so, where could I find that information? Thanks so much!