Upcycled: Old Chest of Drawers to Wine Bar
Okay, now that inspiration had struck, I got back to my drawer work. I reinforced the drawer bottoms by gluing on some pine I had in my scrap pile. I also shot brad nails into the pine from the sides to give it more strength. The pine would eventually be covered, so I didn’t worry about making it look perfect.
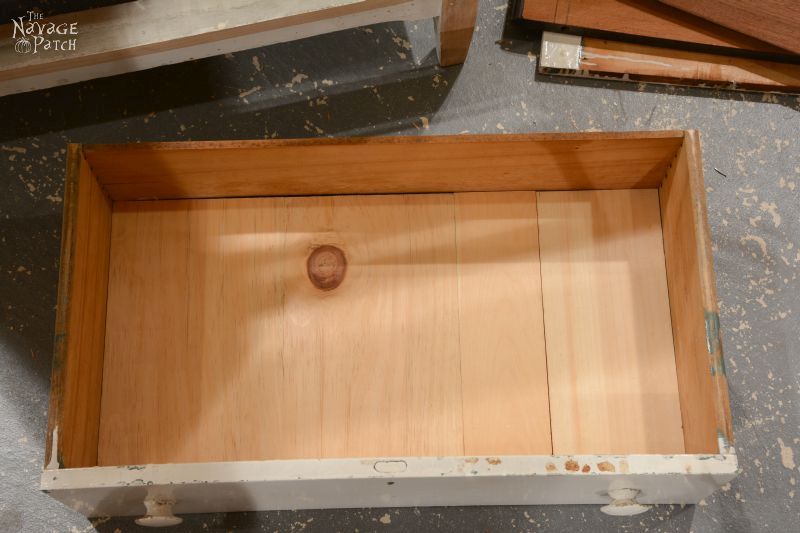
I flipped the drawer over and attached the slides.
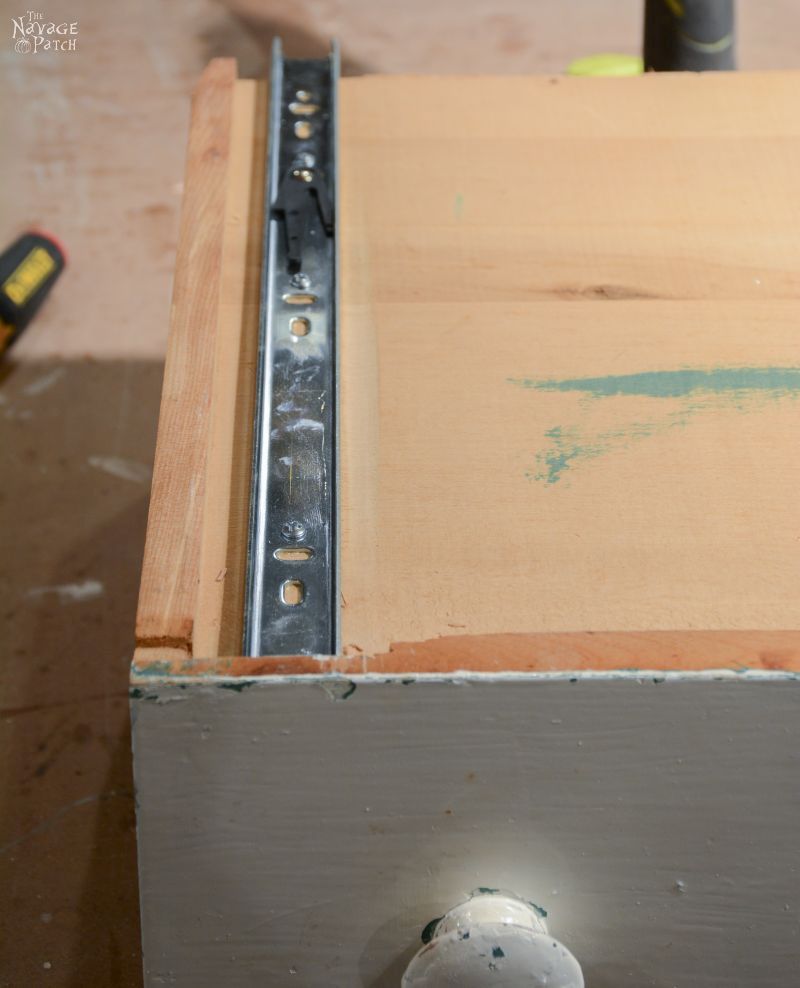
I then attached the slides to the drawer frame.
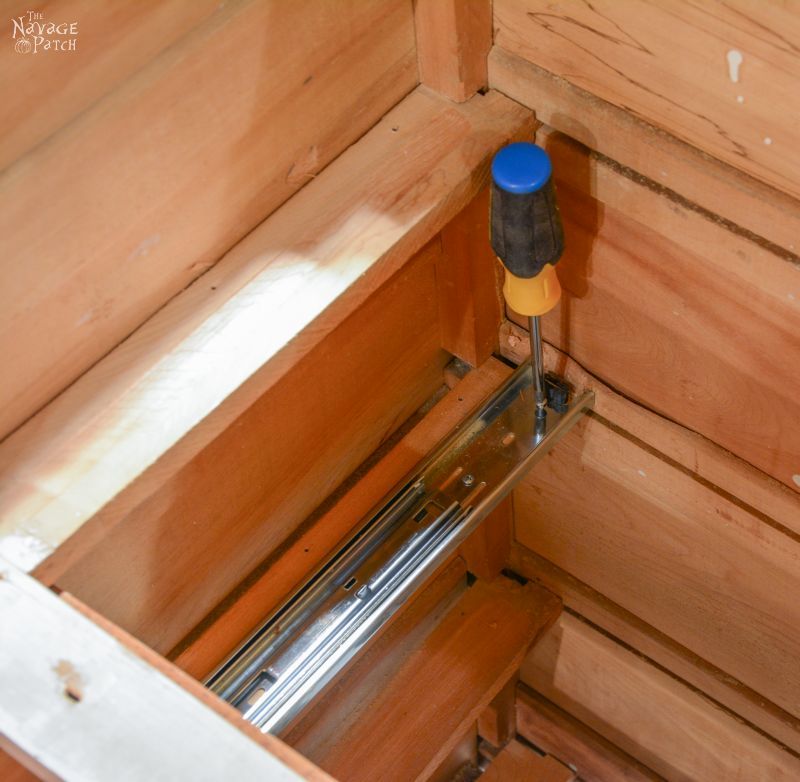

It was a tight fit, but it will work.
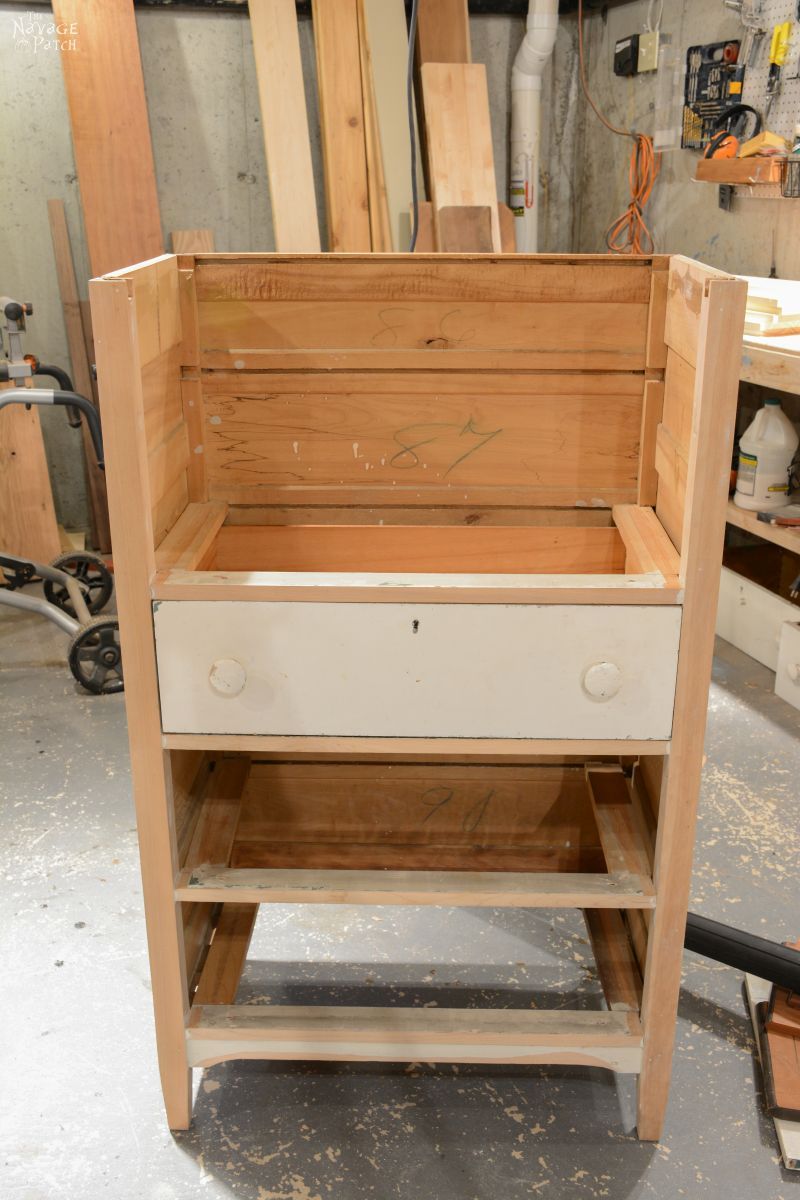
The drawer wanted to push in past the frame, so I built stop blocks and glued them to the back wall.

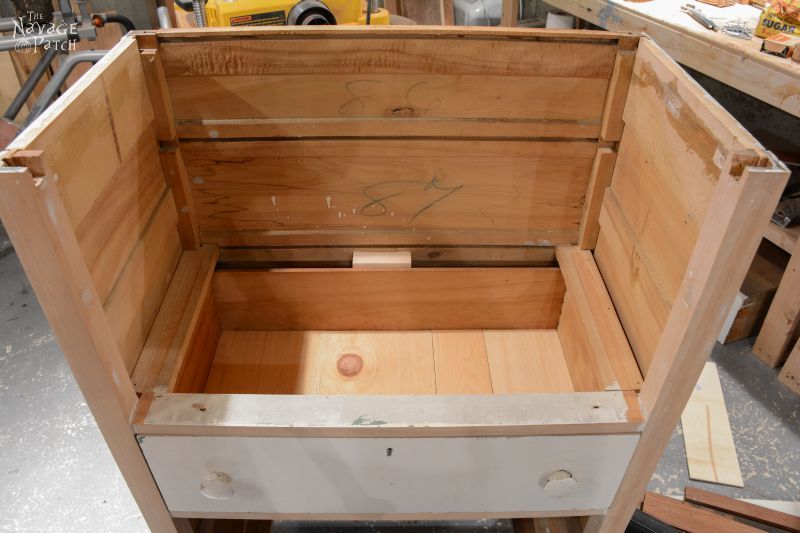
As you can see in the picture above, I also removed the top support from the front. Now that I had my plan for the final product, I was starting to get a clearer picture of what I would do in that top area. The main bar top would be just above that drawer pictured above, but the very top would have a perimeter of wood that could hold a few glasses or bottles. I still hadn’t fully fleshed it out, but the idea was growing. One thing was certain – I’d have to do something about those inner side walls and back wall. I couldn’t leave that unfinished-basement-look in my wine bar.
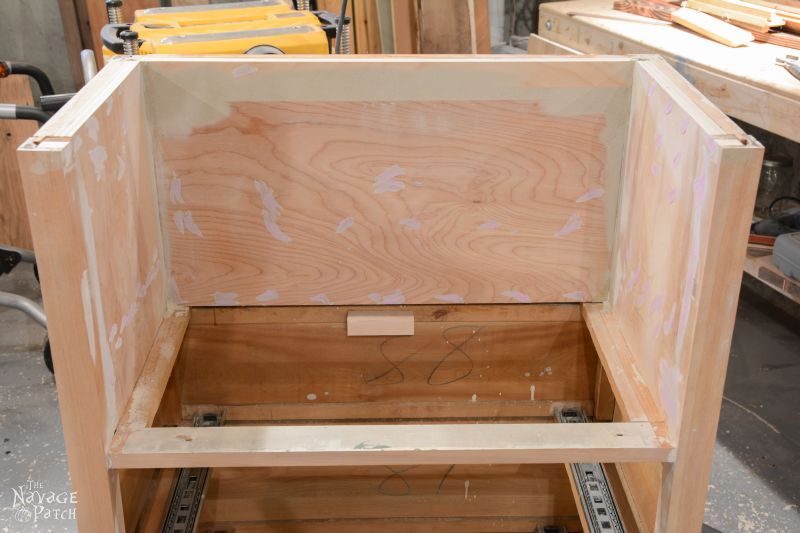
I measured everything and cut some 3/4 inch plywood to cover those spaces.
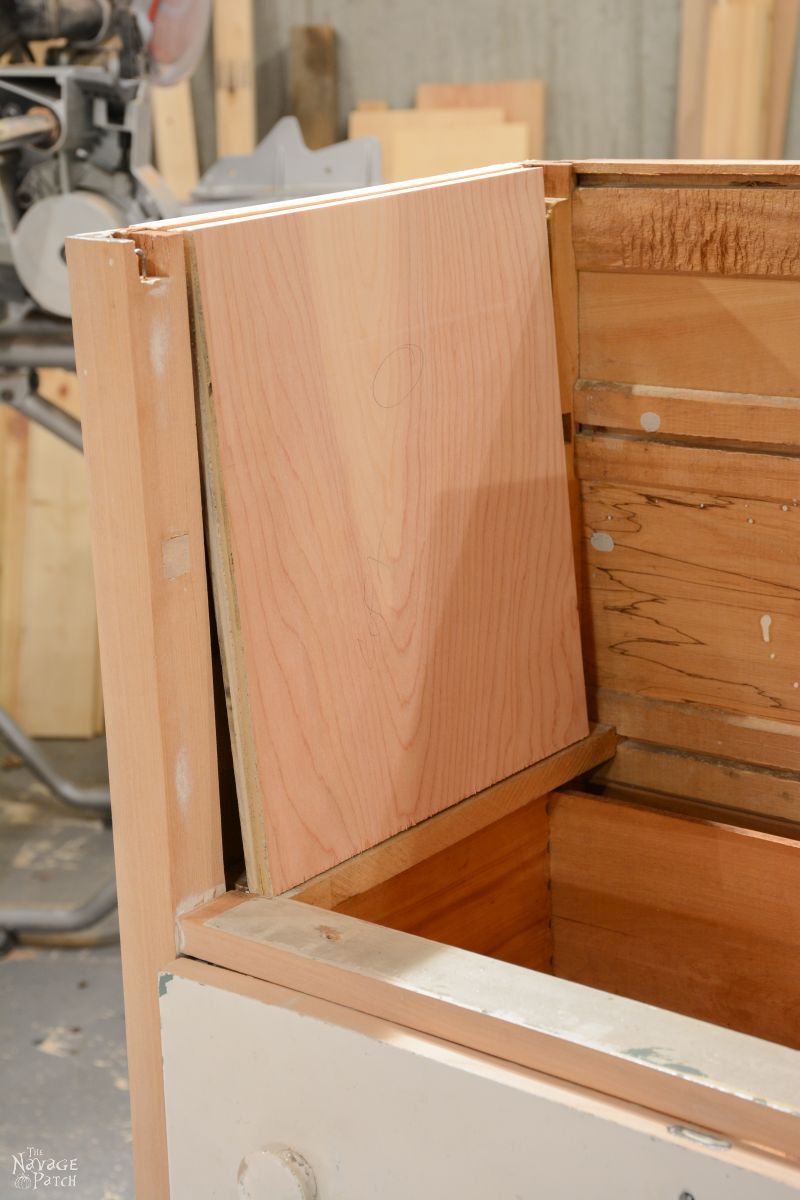
I glued and brad-nailed them into place.
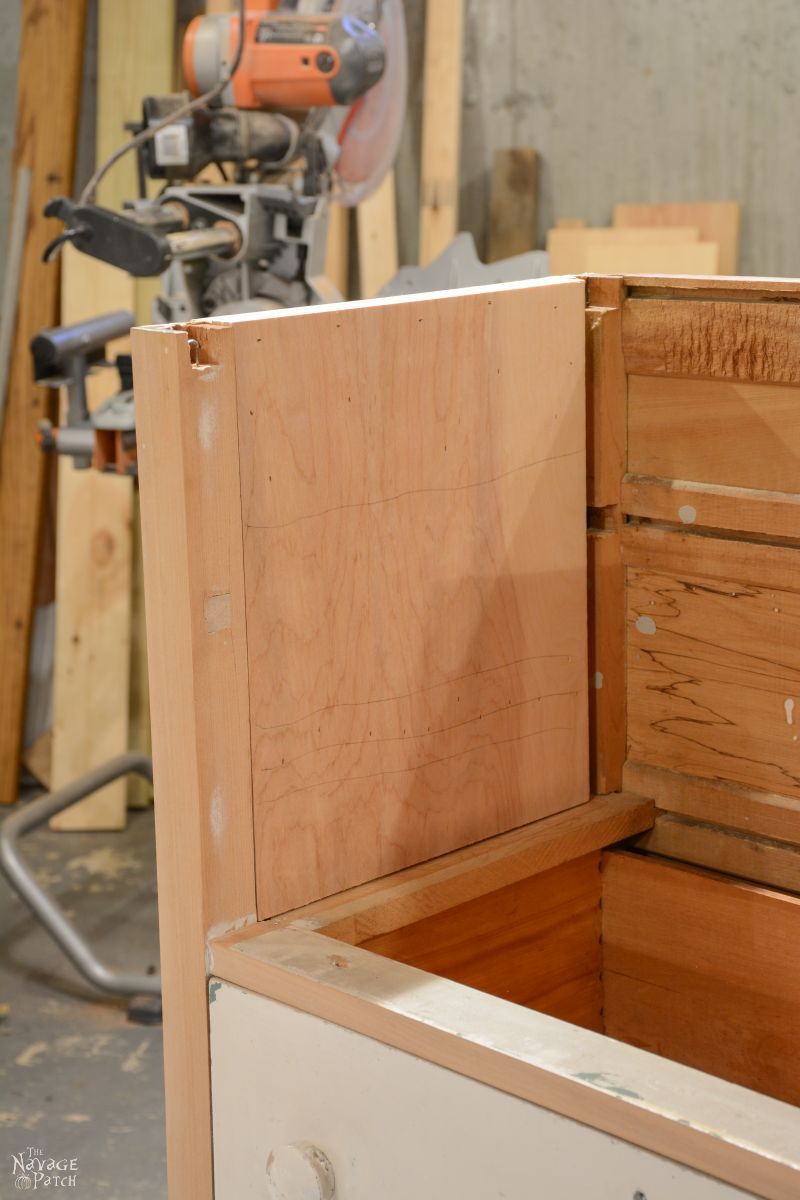
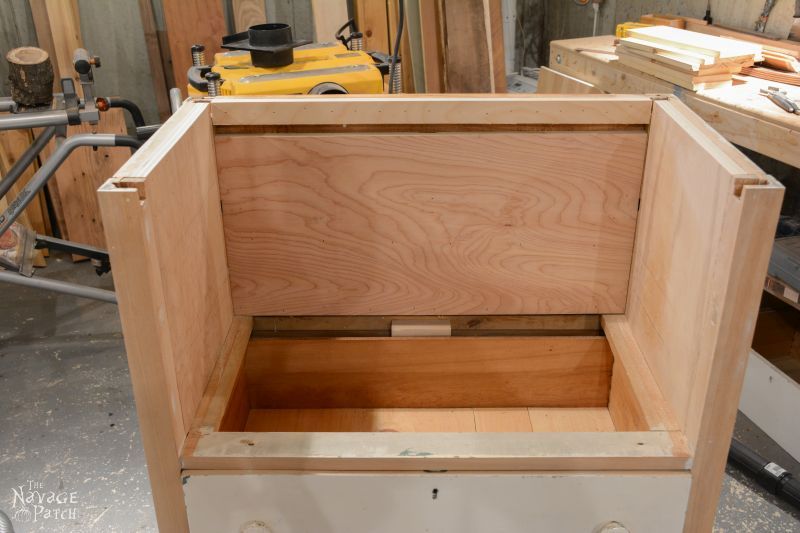
I left that gap in the back wall in case I wanted to install recessed lighting. Then I changed my mind and decided to fill the gap. I still wanted lighting, but I would install it underneath the bar top, not inside the back wall. I also filled all the other nail holes and gaps with wood filler and spackle.
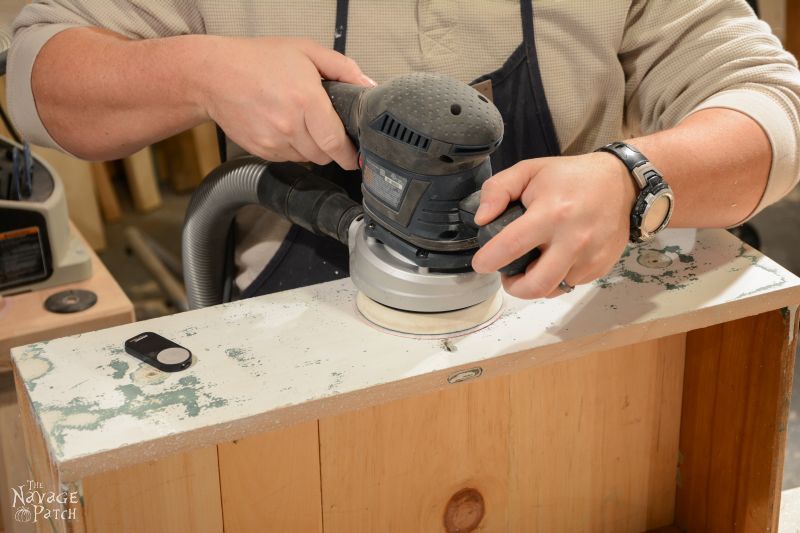
I left the bar area and focused on the drawer faces. I started by sanding them.
Each drawer had a keyhole. I puzzled over that for a while and decided that it would be a brilliant idea to fill the keyholes with crushed turquoise.
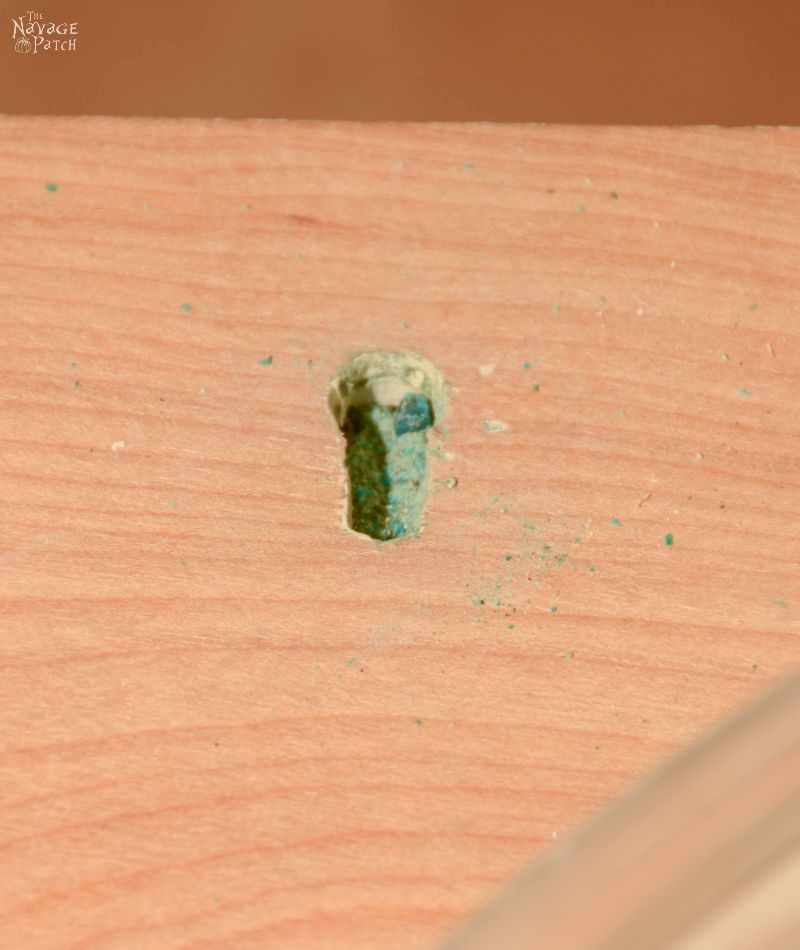

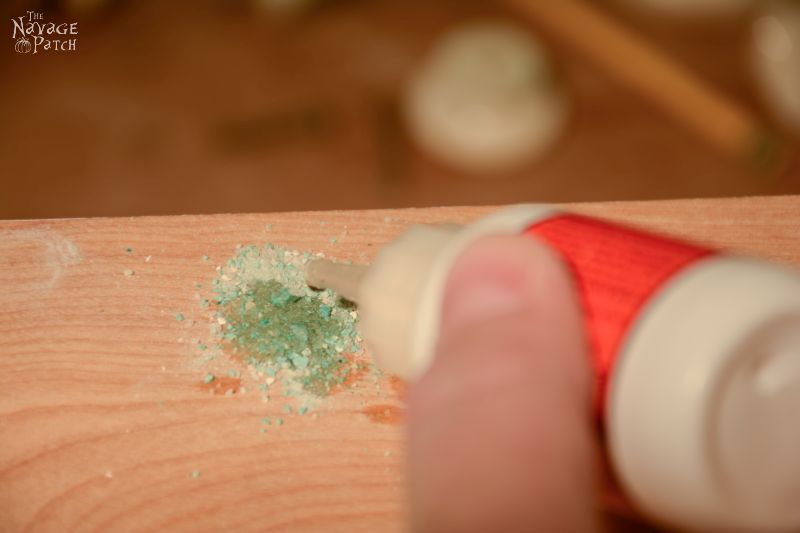
So. Ya think it worked out? I bet you want to see a picture of it, don’t you? I’m sorry, but I don’t have one. It looked so bad that I must have forgotten to snap a pic. I just sanded them all down and set the drawers aside. *Sigh*
Okay, what next? Ah, yes! The bar top! That will take my mind off of the damn keyholes.
If you read my Beauty in the Beast post, you’ll be familiar with some stunning mahogany I have stashed in my basement. I salvaged a few scraps to make the bar. I would need three pieces to get the right size. I cut and planed and got them ready for glue-up.
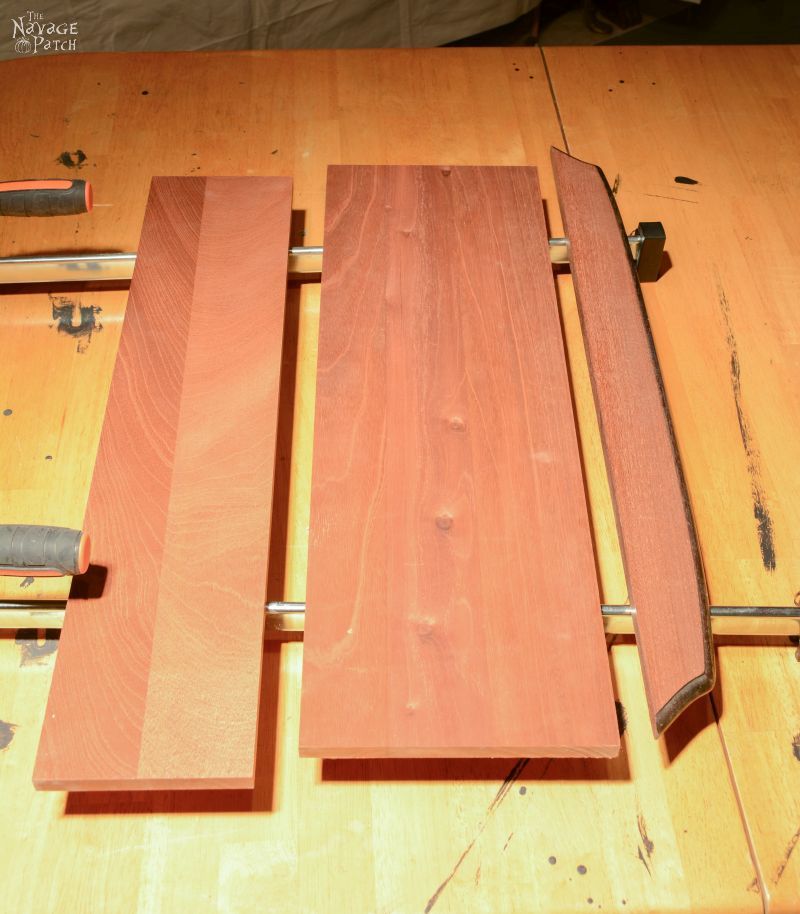
The first two pieces…
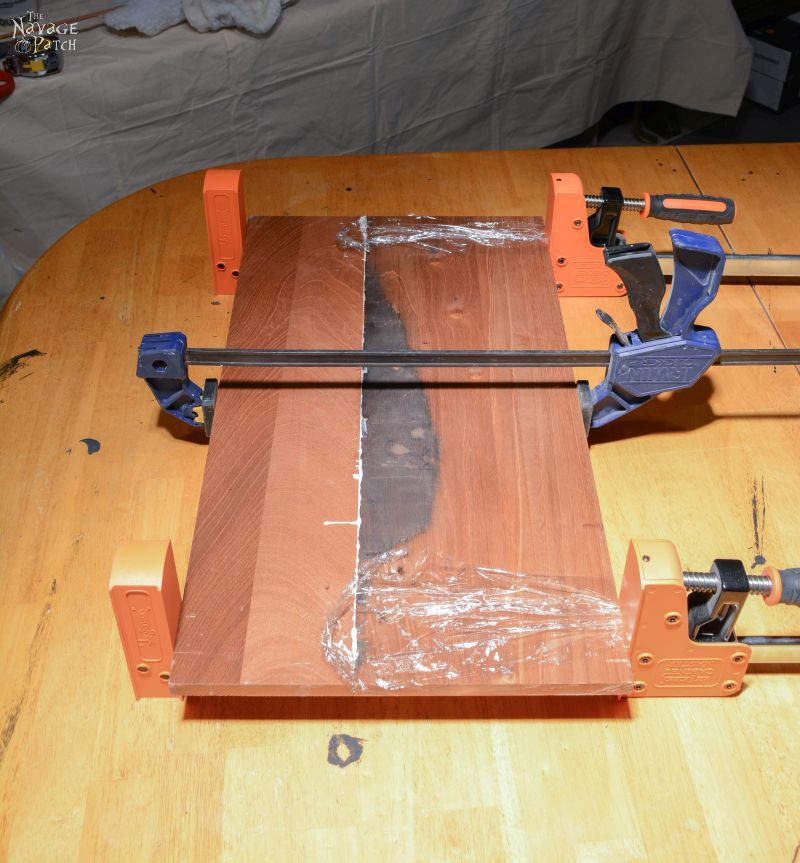
But for that little curved piece – the front piece – I wanted to do something more…something special. Hey, I know! How about if I do a turquoise inlay! (Because, you know, it worked out so well for the keyholes)
I didn’t know what to do…I didn’t know what I could do – except maybe some overlapping circles? I really wasn’t sure about this, but that didn’t stop be from bumbling forward. I laid out my pattern in pencil.
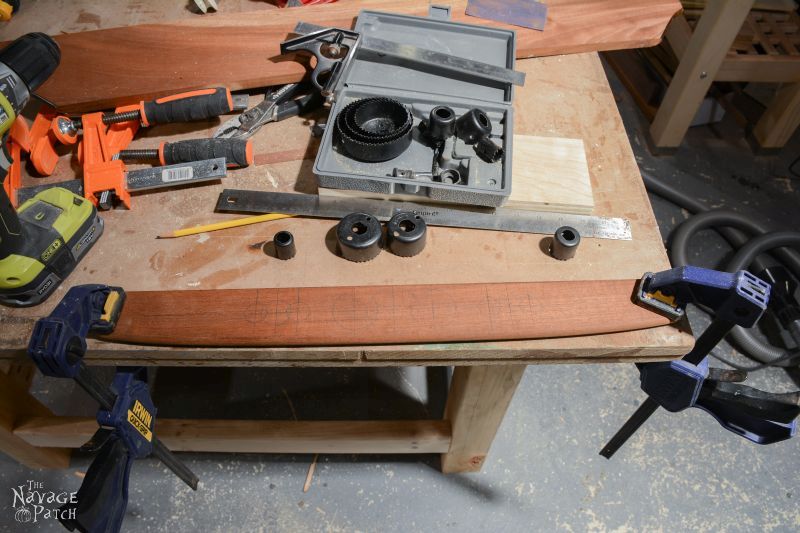

Why are those circles jagged? Excellent question! Those circles are jagged because the only tool I had to cut out the circular pattern was a cheap Chinese hole saw kit. You can see in the picture above that my pattern wasn’t even symmetrical! But did I stop?
I finished the pattern. I hated it. But did I stop?
No, of course I didn’t! I shuffled over to my drill press with all the acumen and mental acuity of a garden slug. I placed the piece of mahogany on the press and clamped it down.

Somewhere deep inside my head, a rational being begged and pleaded for me to stop. The garden slug excreted a thick blanket of mucous over those synapses, and the rational voice was silenced. My reptilian brain sent jolts of primal fear to my cerebral cortex. The garden slug countered with slime. The garden slug knows only one direction: forward. Forward at all costs…
I switched on and started to make my circular cuts. The first was on target. The second missed its mark, but that was okay – I just needed to miss on the other side to make it symmetrical. I did miss on the other side, but in the wrong direction. I could have stopped there. I should have stopped there. But the garden slug won’t be denied. I re-positioned the board and started in on the smaller circles. I couldn’t get the drill in the right place. The circles didn’t line up. I kept pressing. I kept drilling. Sweat gathered at my temples and faint voice echoed in my soul. “Nooooooo….Stop…..”
The garden slug didn’t stop.
I took the piece, marred by non-symmetry and brought it to the workbench. A sane man would look upon the disaster and give up, change direction. I was not a sane man. I was the garden slug. I gathered more crushed turquoise and started to fill the circles.

I filled them all, and the garden slug smiled.
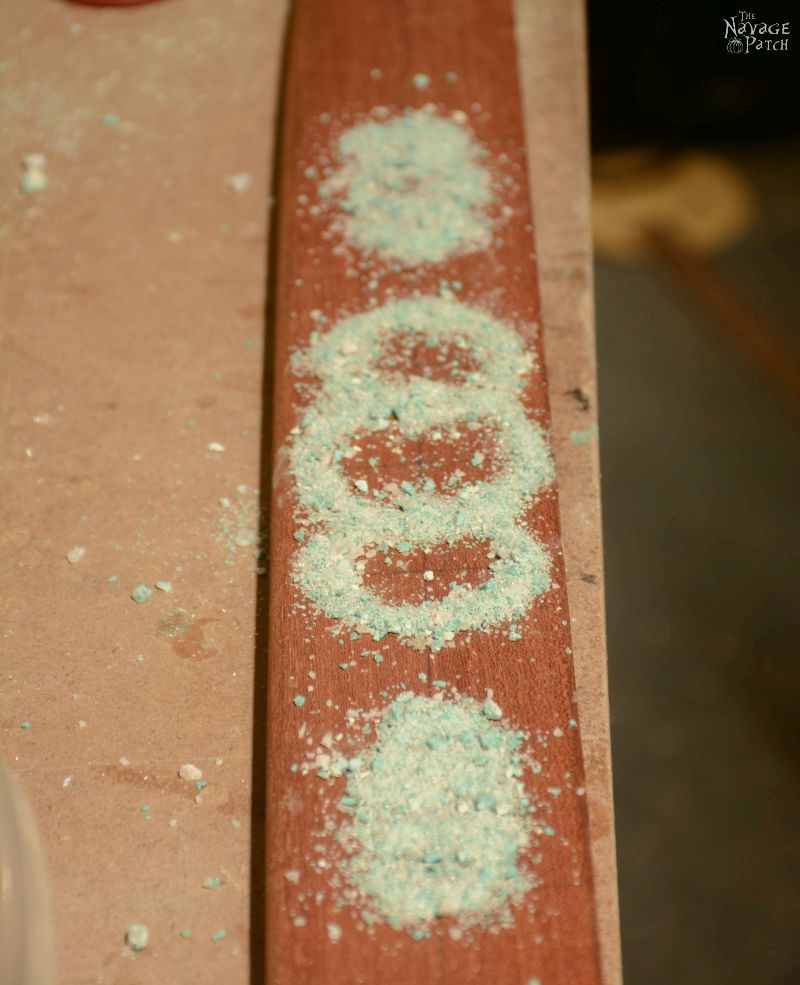
I drenched it all in super glue. My synapses shrieked, and the garden slug smiled. The glue dried and I started sanding.
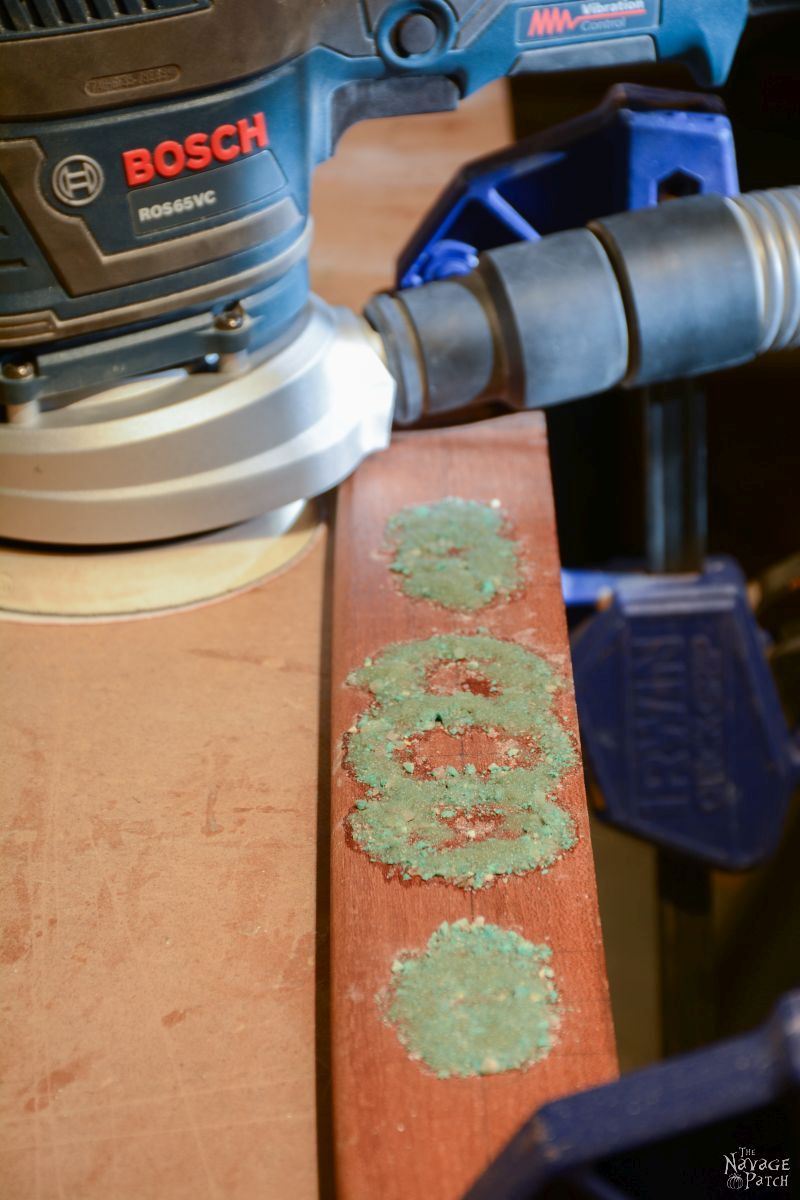
Layer by layer, my shame was revealed.
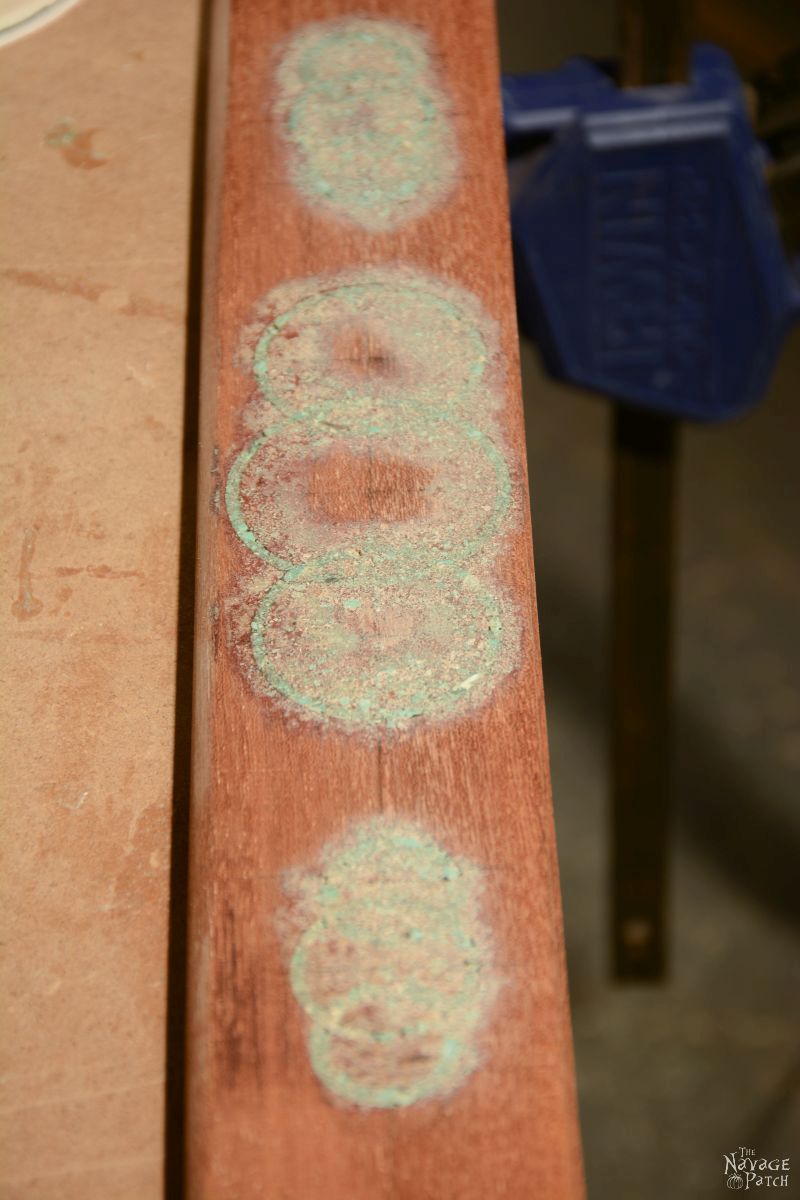
The garden slug looked upon what he had wrought and fled, screaming, from my mind.

At last free from the madness that overcame me, I was able to size up the situation:
- The rings were hideous and must be hidden at all costs.
- I needed that piece of wood! I didn’t have another!
Solution: flip the piece over and glue it on to the rest of the bar top. I had another surface to work with! (hehehehehe)
This time…this time I would not fail! This time would be different! I needed a better design! I ran upstairs and scoured the internet for a suitable design…something worthy of my wine bar!
[The garden slug turned and began its slow journey back into my mind. The madness…the madness…]
AH-HA!! I found it! When Handan came home that night, I ordered her to make me a stencil! [*ahem*…someone certainly lives in a fantasy world. “I ordered Handan”…pppfffttt -Handan]
I flew down the stairs, a man possessed. I slapped the stencil on the board. YES! This is what I want! But…
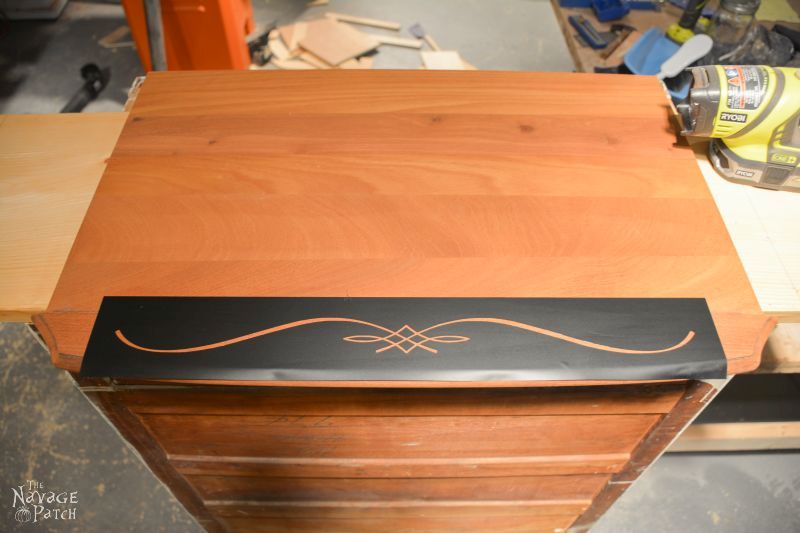
But how would I carve it out so I could fill it with turquoise?
[The garden slug whispered]
Of course! I needed a new router! A plunge router! I raced to Home Depot in a thrall and bought a plunge router. This was gonna be GREAT!
The garden slug smiled.
I ripped the plunge router from its box, slammed a bit into place and jammed the plug into an electrical outlet. I held the machine above my head, flipped on the power and let out a primal scream. I advanced on the stencil, a hunter stalking its prey. I closed to striking distance. The router bit quivered and my lip trembled in anticipation. I thrust forward, eyes wide and teeth bared. I stopped.
What the hell was I doing? I looked at the router, a stranger in a strange hand.
My eyes focused. The fog lifted. The garden slug screamed and fled once more.
I’d never used a plunge router before. I’d never done any decorative routing before. Shouldn’t I at least practice first? I had an extra stencil, so I slapped it on a piece of scrap wood. I pulled up a chair and bent over the wood, new machine in hand. I switched on the router and made my first cut.
Damn, this thing is hard to move! Crikey, I can barely see what I’m doing! Better get my magnifying goggles. Jeezum Crow! Now everything is so big, I feel like my hands are shaking! Argh! Dammit, I went outside the stencil line!
Ah, screw this!
I switched off my new plunge router and tossed the test piece in the trash. Precision routing was difficult, and I had only one shot at this thing. I couldn’t risk it. There would be no inlay. I needed a new plan. I looked at the stencil. The black looked pretty good against the mahogany. Perhaps a black stencil, then?
But first, I would paint the frame and the drawers!
Click on ‘Next’ to continue.

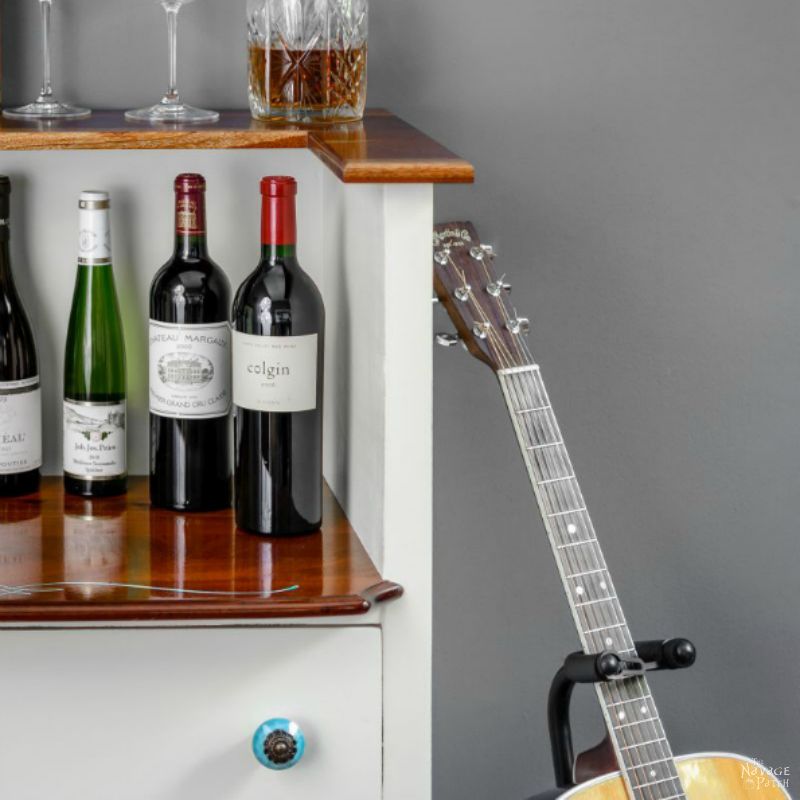
Turned out good Greg but I am going to say something you probably don’t want to hear. It would have been perfect in black! But the stencil in turquoise is beautiful. Love the choice of nobs also. So glad you didn’t rough it up to give that aged look everyone is doing. It looks good and you get the gold star this week buddy!
Thank you, Kat! I also think black would have looked great, but I love the combo of old white and mahogany, too! 🙂
It turned out great! Love the touch of turquoise.
Thank you, Cecilia!
Creative idea Greg, it looks great! Looks like you have fun doing the shoot!!
Thank you, Sandra! Yes, the best part about using a glass of wine as a prop is drinking it at the end 🙂
(And the bottle, too…)
Wow. Before I tell you what a great finished product you did, I have to tell you something I have been wanting to write for quite a while. O.M.G. DO NOT ever give up this blog unless you go pro as a comedian! I laugh till my face hurts! I swear, between the dialog and the pictures I think I will explode from laughter! I not only love the work you and Handan do, I adore you both for your approach to all you seem to do. You talk my talk, you walk my walk!!!
yes what she said xx
Thanks, Chris! 😀
Thank you, thank you, thank you, Linda! Comments like that keep me going! 🙂
Ditto what Linda said. Great way to start my Saturday morning! You need a warning at the top though that reads, “Warning: Do Not Read While Drinking A Beverage”, my computer monitor got a coffee spray. Clever dresser upcycle and gorgeous bar!
LOL! Thank you, Marie!
Once again, you both did an amazing job. I absolutely adore this wine bar. Handan, you’d better get the baseball bat ready to keep the neighbors away. 🙂
Thank you, Susan! No neighbors yet, but Handan is on the lookout! 🙂
You did a fabulous job. What vision you have to come up with this fantastic piece of furniture.
Thank you, Debra! 🙂
Greetings from East TN! I’m visiting this morning from “Inspire Me Monday”. Y’all did a fabulous job upscaling an old dresser to a wine bar. I always enjoy seeing how inventive others can get with old furniture. 🙂 Have a good week and I invite you to hit the dance floor with Curious as a Cathy with sci-fi theme mewsic from my favorite TV shows!
Thank you so much, Cathy, and welcome! I love the music from Stranger Things…and what a great show!
Wow! A lot of work but well worth it. Looks awesome! Visiting from Creativity Unleashed party.
Thank you! Yes it was a lot of work. Too much, really. But, now that it is done, I’m enjoying the result! Thanks for stopping in! 🙂
That really turned out great. I love those wine label collages.
Thanks for sharing at Funtastic Friday.
Thank you, Kimm!
Love this post and the wine bar turned out gorgeous! Love the blue stencil and the labels. It is certainly a beautiful one of a kind piece you should be proud of. Loved reading this post your writing style is so much fun. I think if I would have held up a router and let out a primal scream it would be because I dropped it on my foot. Great job.
Thank you, Melissa! 🙂
You just crack me up! love your style and your projects always turn out awesome sauce! I would like to invite you to share your pieces and sense of humor at my weekly furniture party Fridays Furniture Fix over at my place!
Thank you so much, Brenda! We’ll see you at the Furniture Fix!
Great job you guys. It’s perfect for storing all that precious cargo and thank for the heads up about the turd color. That did not look good
Thanks, Michelle! Yeah, that color was the worst, but Handan found a way to make it awesome with white wax!
What a difference!! (And I think Greg was having too much fun!! LOL) I’m a little behind but I wanted to stop by and thank you for sharing on last weeks Pleasures of the NW’s DIY party
Thank you, Helen! 🙂
Awesome project. Thanks for sharing at the Inspiration Spotlight party. Shared
Thank you!
Very creative ….both the bar and your writing style. Great job.
Thank you, Denise! 🙂
This turned out awesome! I love to see great upcycles! Great post too!
Thank you, Cassie!
That is a might fine looking wine bar and what a story to go with it – I had to read it all lol
Thank you, Amber!
Awesome project! Thank you for sharing at Ravenwould.
Thanks, Kileen! 🙂
Love the turquoise stencil, where’d yo find the stencil?
Thank you, Yvette! I found the stencil just searching online. I was hoping to email it to you, but now I can’t find it on my computer! I’ll see if Handan can find it on hers tonight.
I have laughed so hard reading this post! I’m so glad someone else does stuff like we do! The wine bar is absolutely beautiful! You have a new fan!
Thank you, Susan! If you like to laugh, you’re in the right place!
Perfect post to cheer me up for the night. Honest, you could just start going to open mic nights at some comedy lounges and telling your stories, Greg. If you can recount them as well in person as you do on paper, you’ll be a hit. Just reading the stories behind every (frankly gorgeous) piece you and Handan make is what really sets your work and blog apart from the many others.
And then the final products are mind-bendingly beautiful like this wine bar. Would have never believed it was that old chest of drawers!
Thank you, Jay! Hmmmm….DIY standup comedy…you may be on to something, lol!
Wow, nice job. I’m building a wine bar in a vintage television console and did a search to get some ideals. May I ask where you got your lights. I know it’s been a while. You do beautiful work and love all the steps you show…big help to me.
Thanks, Lois! Those are LED light strips from IKEA.