DIY Dollar Store Mop Wreath
This DIY Dollar Store Mop Wreath is a bargain beauty that no one will guess came from such humble beginnings!
It’s like déjà vu all over again.
So a few years back we made a little post that we called a “throw-away.” It was meant to be a space filler between “real” posts – ones that documented projects that we deemed far more important. It was just something to fill your eyeballs while I readied something bigger, better and (frankly) more difficult.
That post was our DIY Winter Loop Yarn Wreath.
And it went on to become our most viral post ever! Just goes to show, you never know how a project will be received. There are projects I was absolutely certain would be viral sensations that did bupkis.
Just goes to show what I know about what crafty madams want.
(If your first thought was, he knows nuthin,’ then kudos – you hit the nail on the head!)
So why are we doing it again?
Because we’re like the Six Million Dollar Man…minus the six million dollars. But while he was “better, stronger, faster,” we’re all about showing you crafts that you can make “better, cheaper, quicker.”

Our first loop yarn winter wreath was easy enough to make, but it will cost about $20-$30 depending on if you hit upon a good yarn sale or have to pay full price.
$30 for a beautiful wreath isn’t so bad when compared to some other wreaths out there, but it’s more than some people may be willing to spend.
Then how about a $5 wreath that looks just as good but is just a little smaller?
Now that might be of interest to more people, especially in times like these.
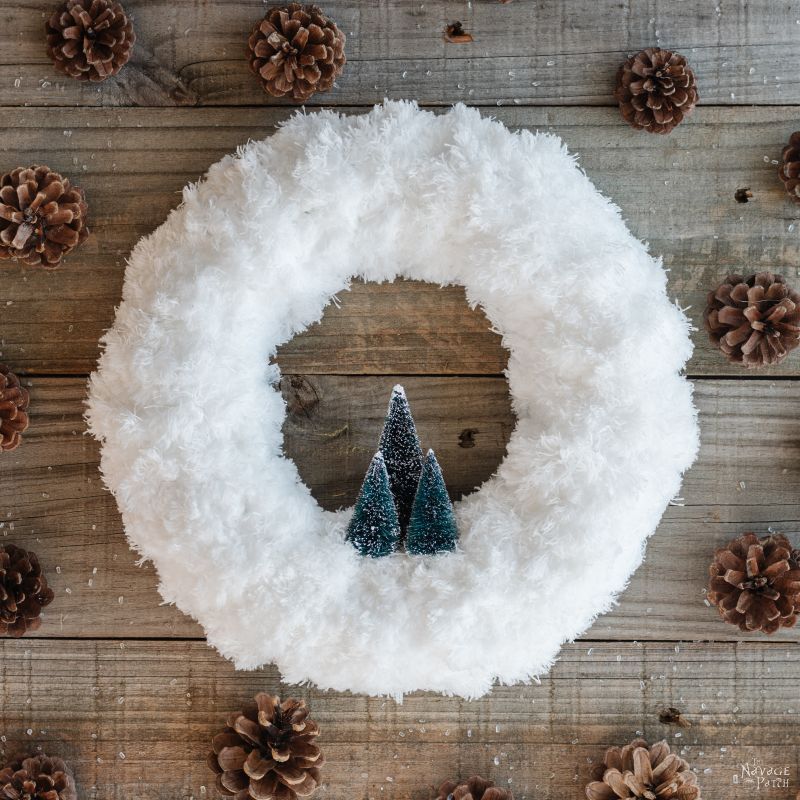
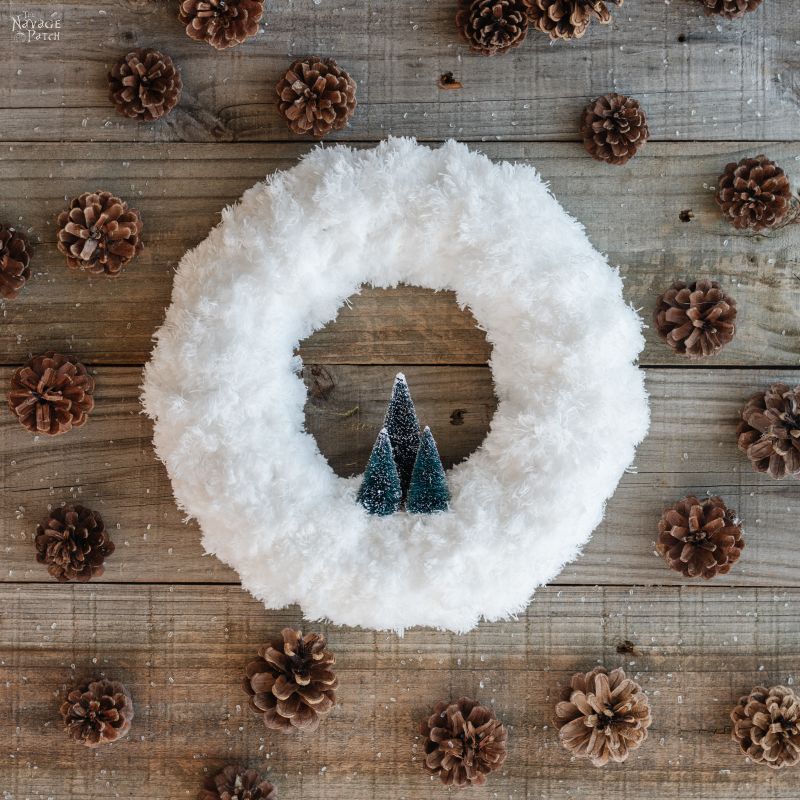
So my babes figured out a way to make a beautiful, soft and cloud-like winter wreath from simple and humble dollar store duster mops. You won’t believe how easy it is to make, and you will be floored by how good it looks. Let’s get started!
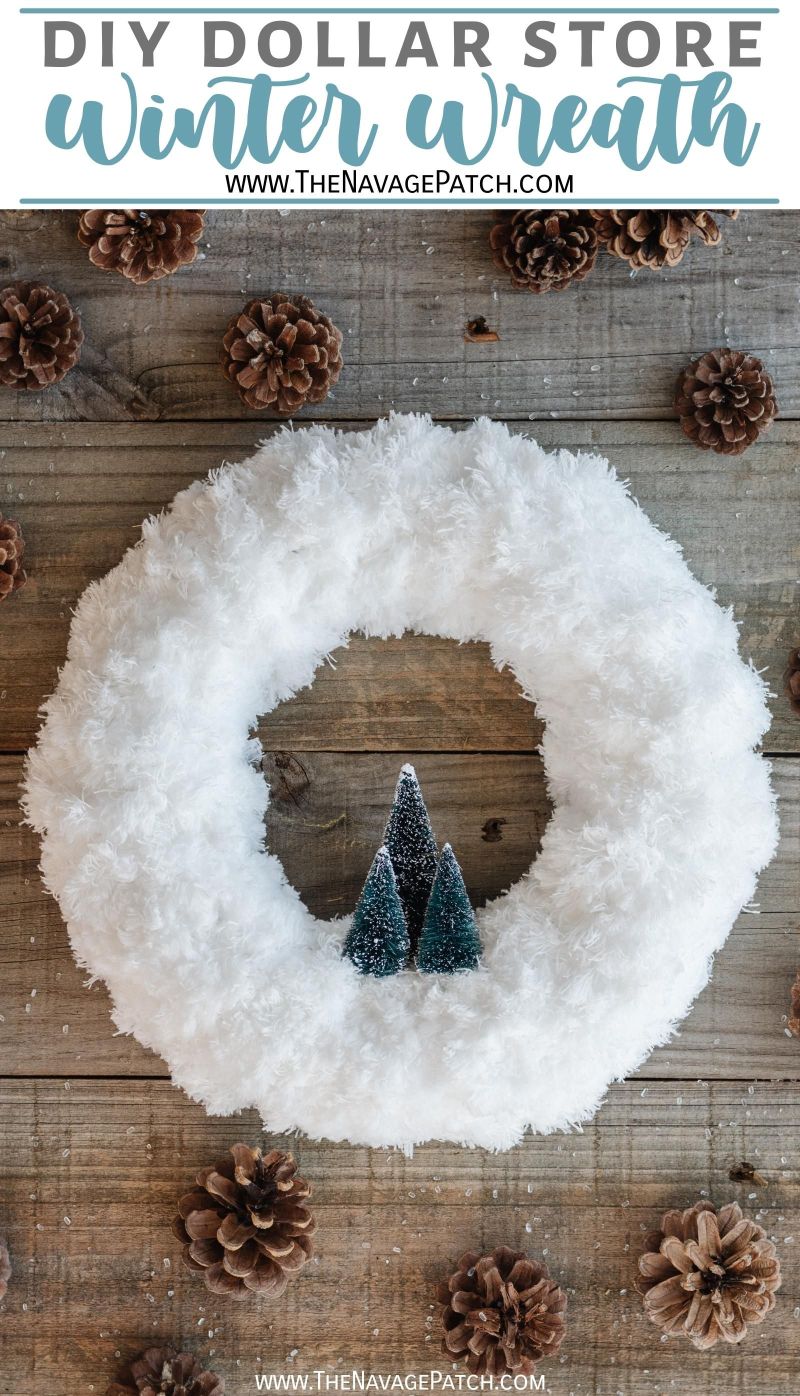
DIY Dollar Store Mop Wreath
SUPPLIES LIST
Affiliate links are provided below. Full disclosure here.
- Dollar store 10-inch foam floral wreath form – we got it at Dollar Tree and they sell it online in a 5-pack for $5
- (3) Dollar store duster mop heads – we got them at Dollar Tree. They are sold individually in stores but as part of a 5-piece cleaning system online.
- Bottle brush trees (you can find them at any dollar store, Target dollar spot or Walmart)
- Scissors
- Hot glue gun – By the way, I’m starting to see hot glue guns in Dollar Tree now. I stocked up on them for when I need to use colored glue sticks – now I have one for each color! Look for them in stores, as the minimum online order is 48 pieces for this item.

We love to see our craft projects out in the wild! If you try this seasonal craft project, take a picture and post it on Instagram, be sure to tag us – thenavagepatch
DIY Dollar STORE Mop Wreath VIDEO Tutorial
Watch our short and fun video below for an overview of our DIY Dollar Store mop wreath before you read the detailed step-by-step tutorial.
On Tiktok
DIY Dollar Store Mop Wreath Tutorial
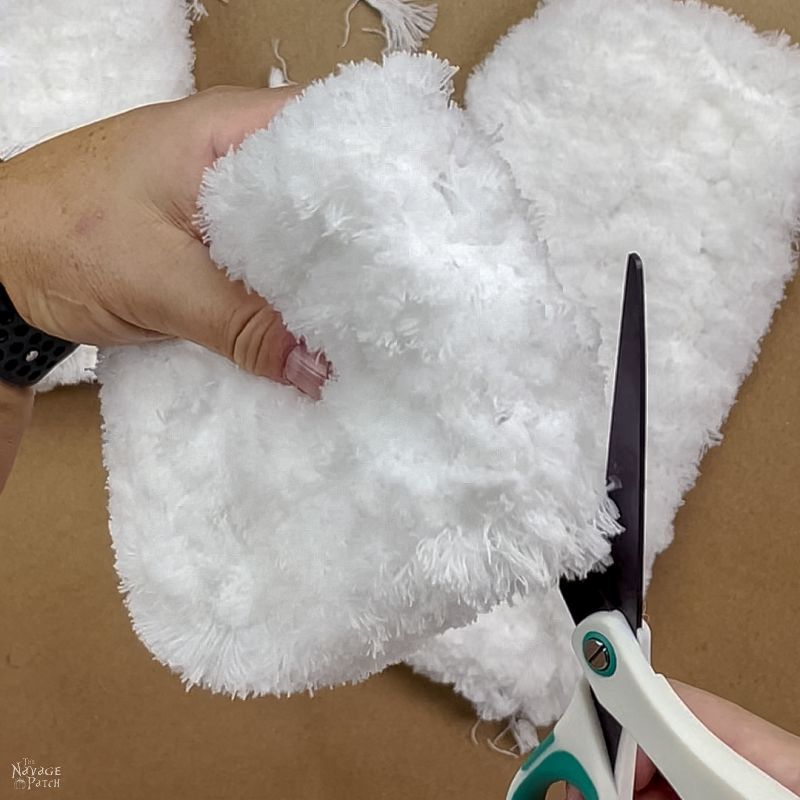
Three microfiber dust mop heads are that’s needed to completely cover the wreath form. But first we need to cut them in half. I simply folded one in half…

…and cut.
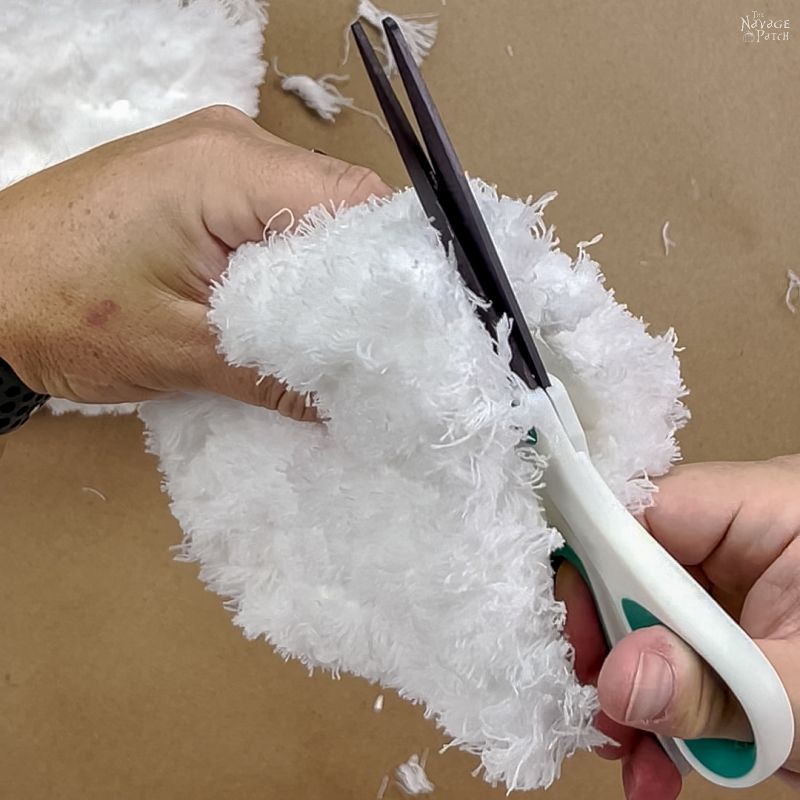
The mop heads will shed where you cut them. I cleaned a little at first and then more when the wreath was finished.

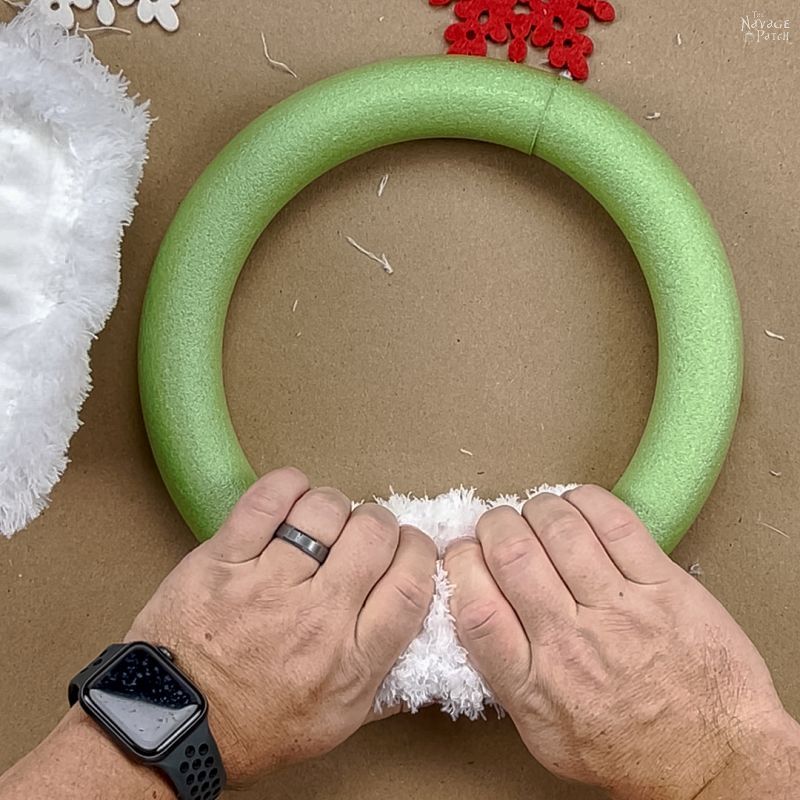
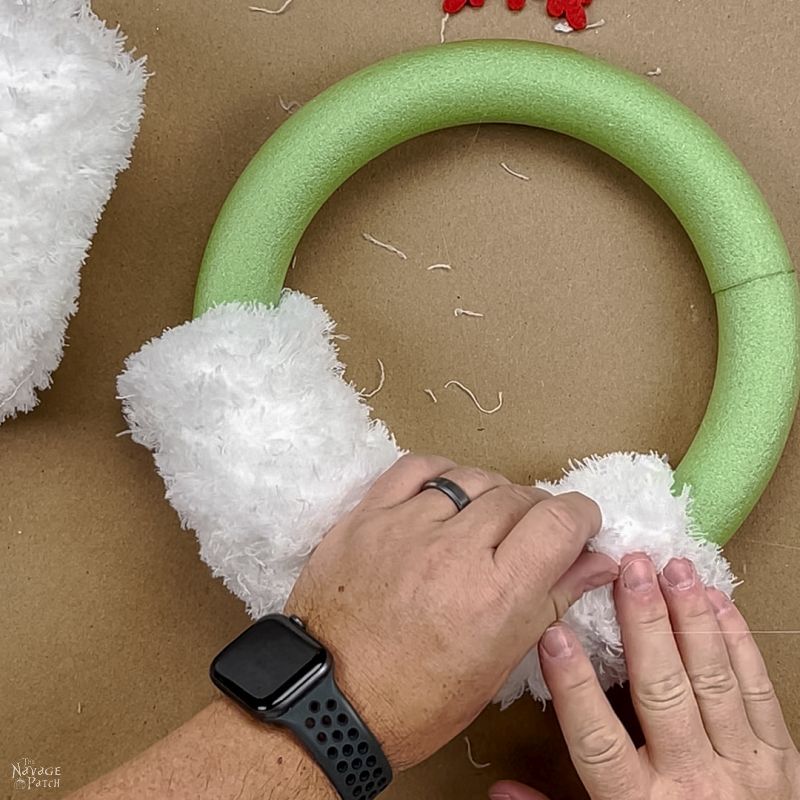
I placed the wreath form onto one of the mop halves as shown in the picture below. The cut side should be on the outside of the wreath form.

Then I put a line of hot glue across the top part of the mop head.
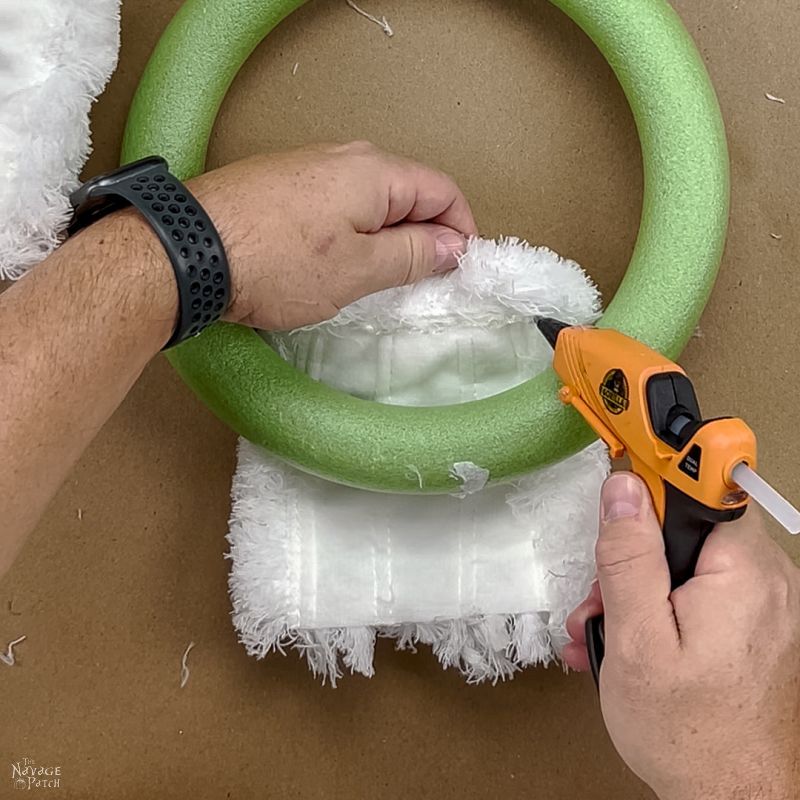
Then I folded the mop over onto the wreath form.
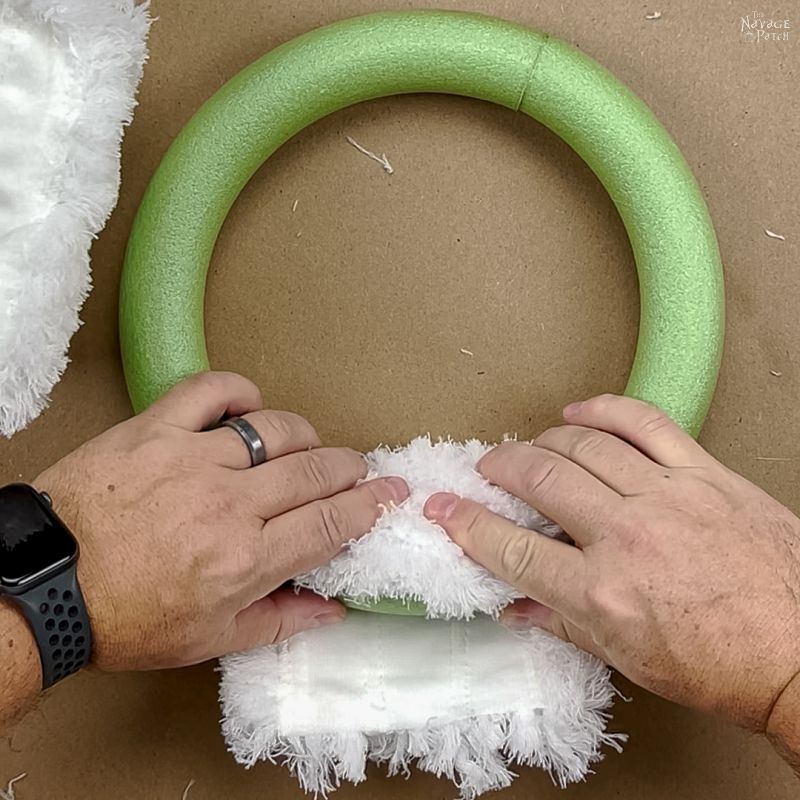
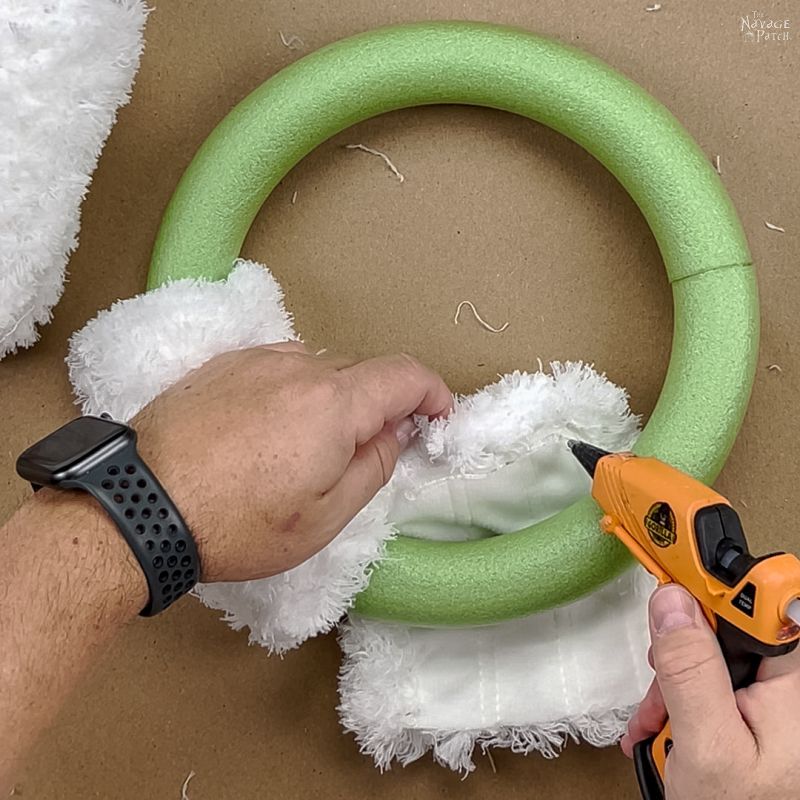
Next, I ran a line of hot glue along the bottom edge.

And folded the mop up onto the form, making sure to pull the corners tightly outward.
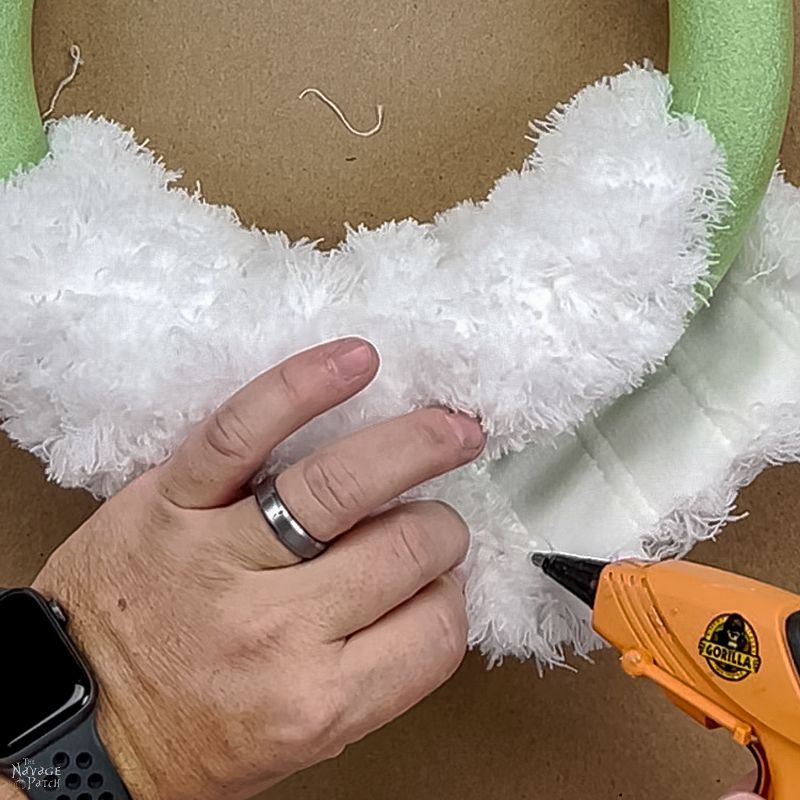
I put the next mop half under the wreath form and ran a line of glue across the top just like I did for the first piece.
And again, I folded it over just like I did with the first one.

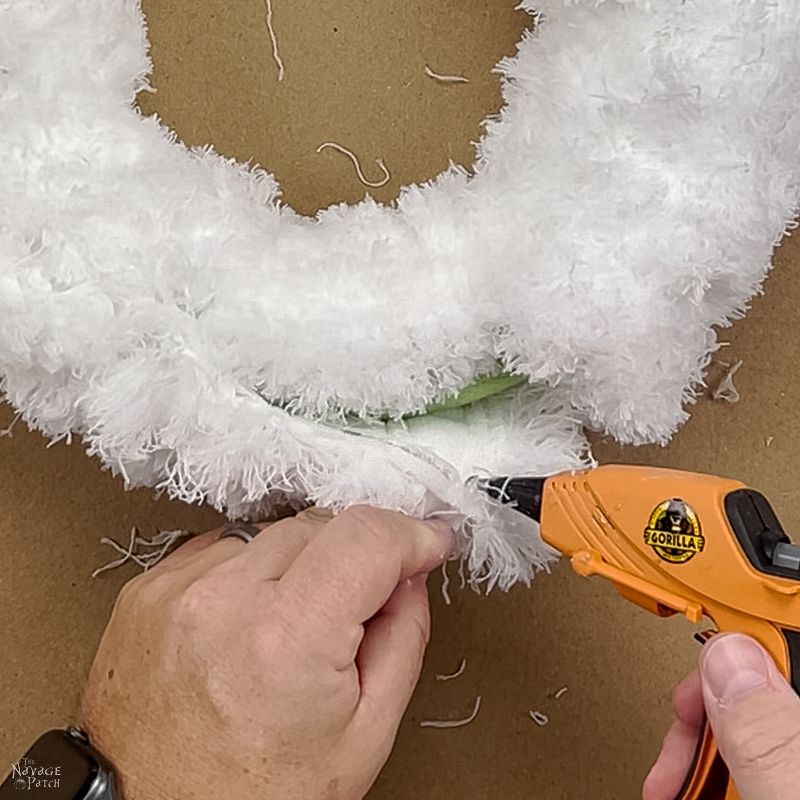
For the bottom piece, I found it worked best if I put a dab of hot glue on one corner…
…and then pulled that corner up and over as close to the first mop piece as I could.
Then I continued with the hot glue along the rest of the mop.

Followed by folding the other corner up and pulling it tight.
I followed these steps for the remaining mop halves.

It’s a perfect fit – six mop halves entirely fill the wreath form.

First one side.


And then the other side.

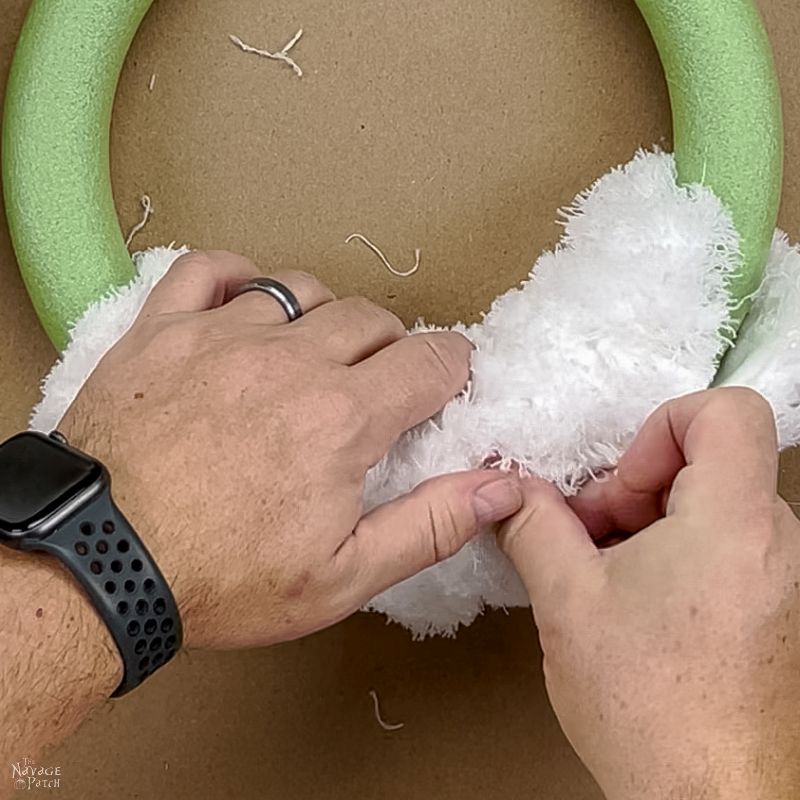
The wreath was finished, but first I gave it a check to make sure all was covered. I found a loose area where I had glued the first piece, so I glued it down.

At this point, my babes took over and cleaned up the loose fibers with her fingers and in a few spots with scissors. [I used to be the crafter in the family and now I get called for the clean-up LOL – Handan]

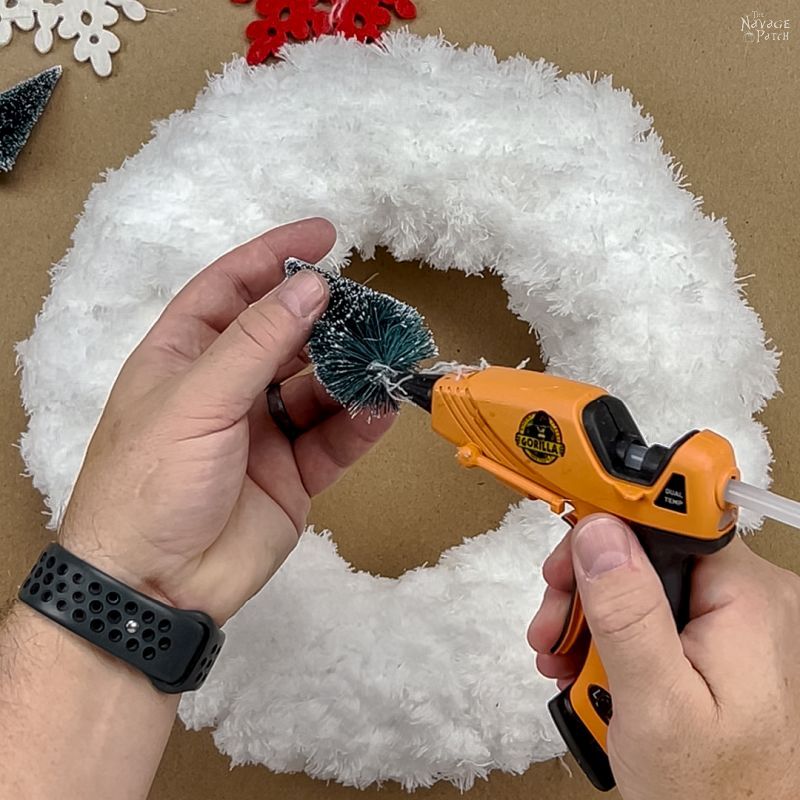
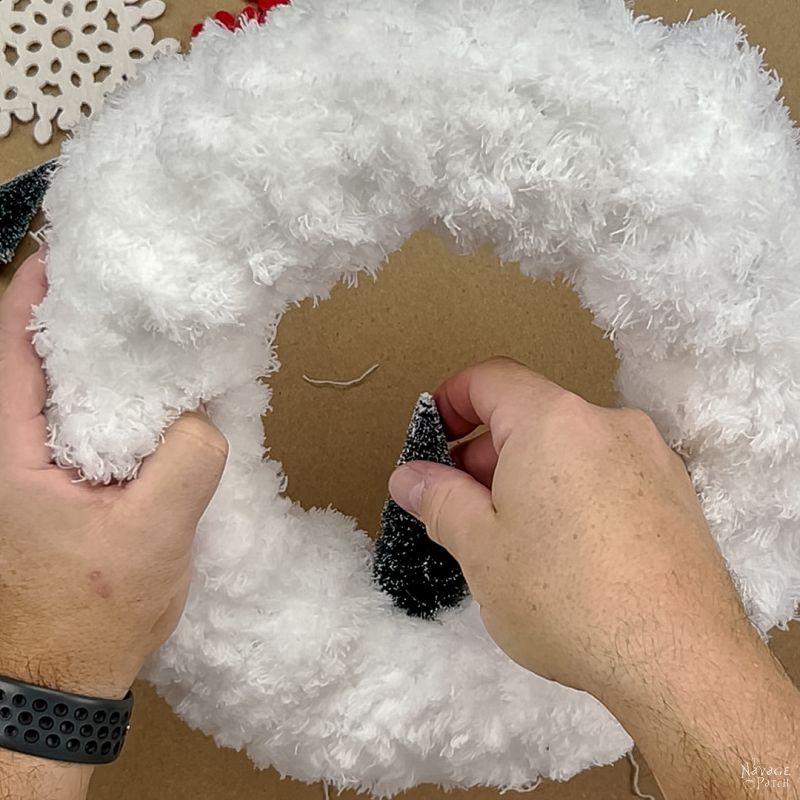
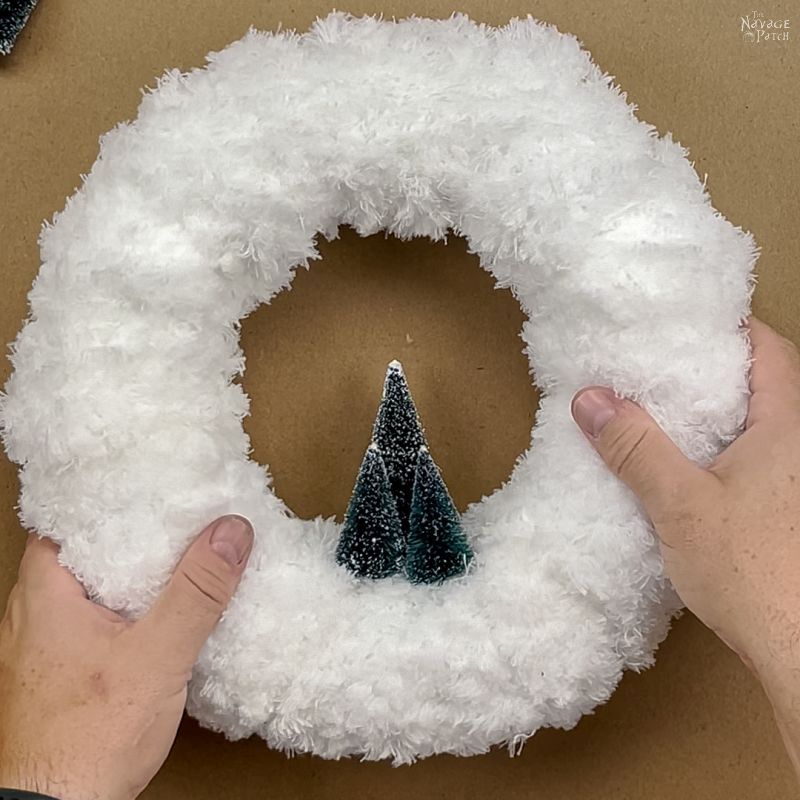
Next, I gathered a few bottle brush trees. Since this is a smaller wreath than our original loop yarn winter wreath, I went with 3 instead of 5.

First, I cut off their bases.

And then I hot-glued them in place. If you’d like to swap the trees out during the year, you can use double-sided tape to hold them in place. With the loop yarn wreath, I was able to nestle the trees into the yarn, but with this mop wreath, I needed a little something to help them stay in place.


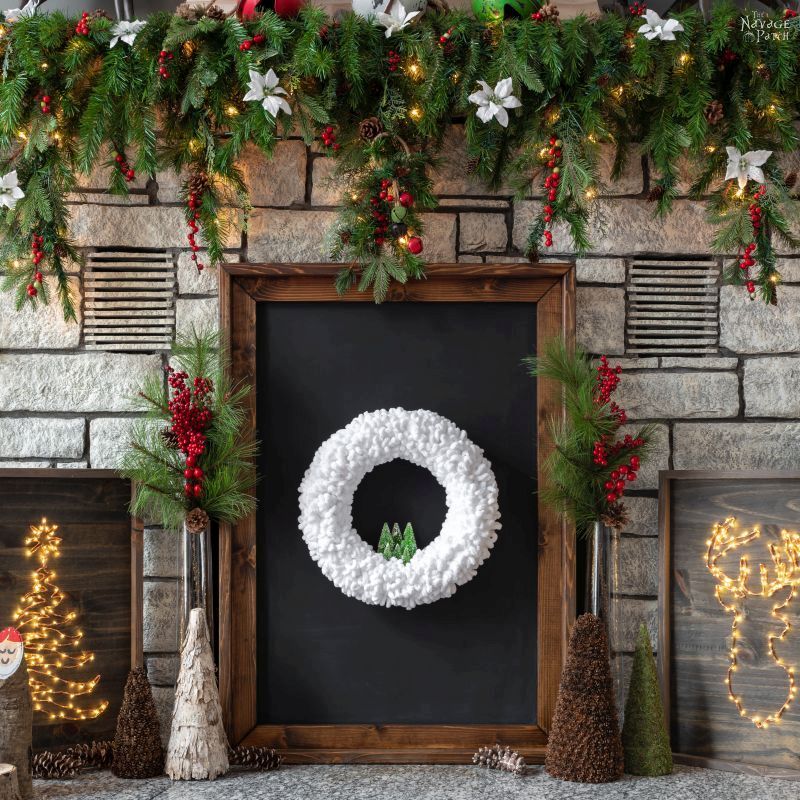
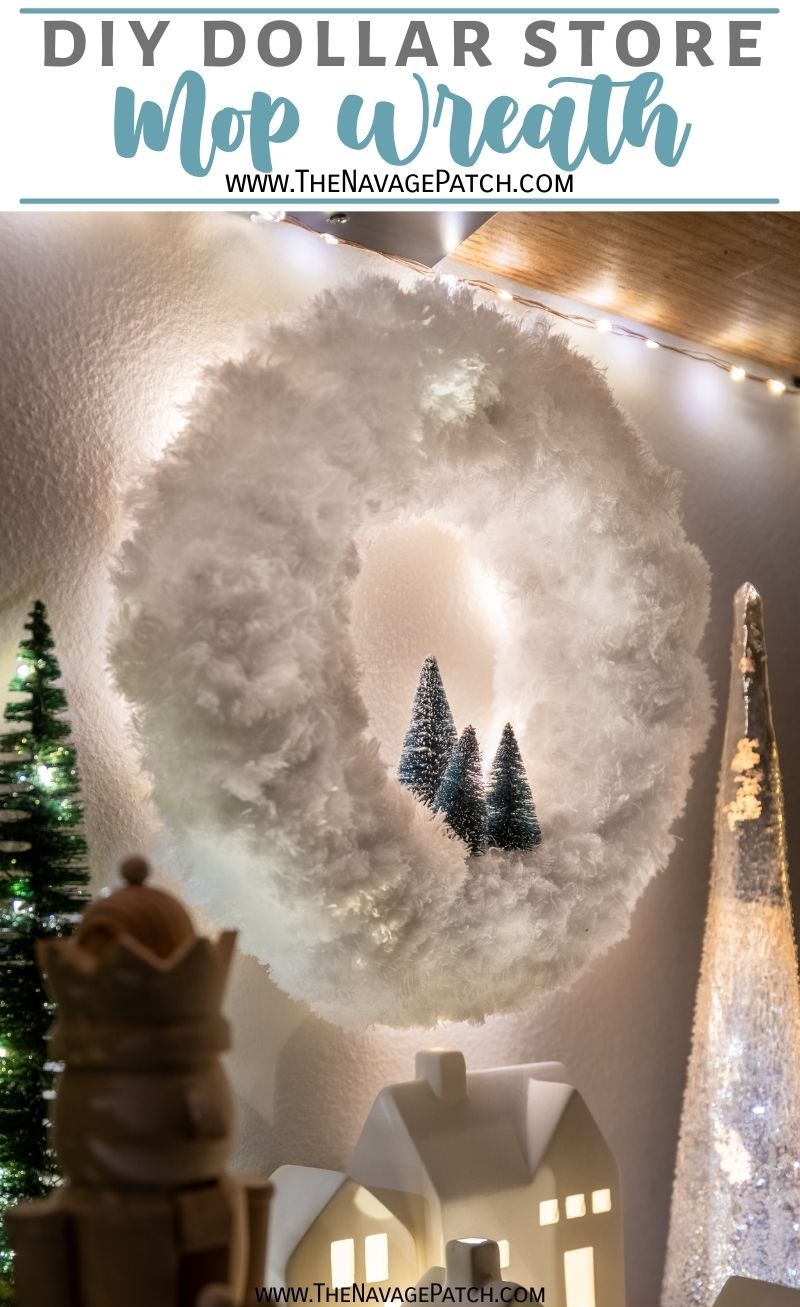
And that was it! My dollar store mop wreath was finished and ready for my babes to hang it on the wall. I can’t believe how good it looks, and it’s even softer than our original loop yarn winter wreath!
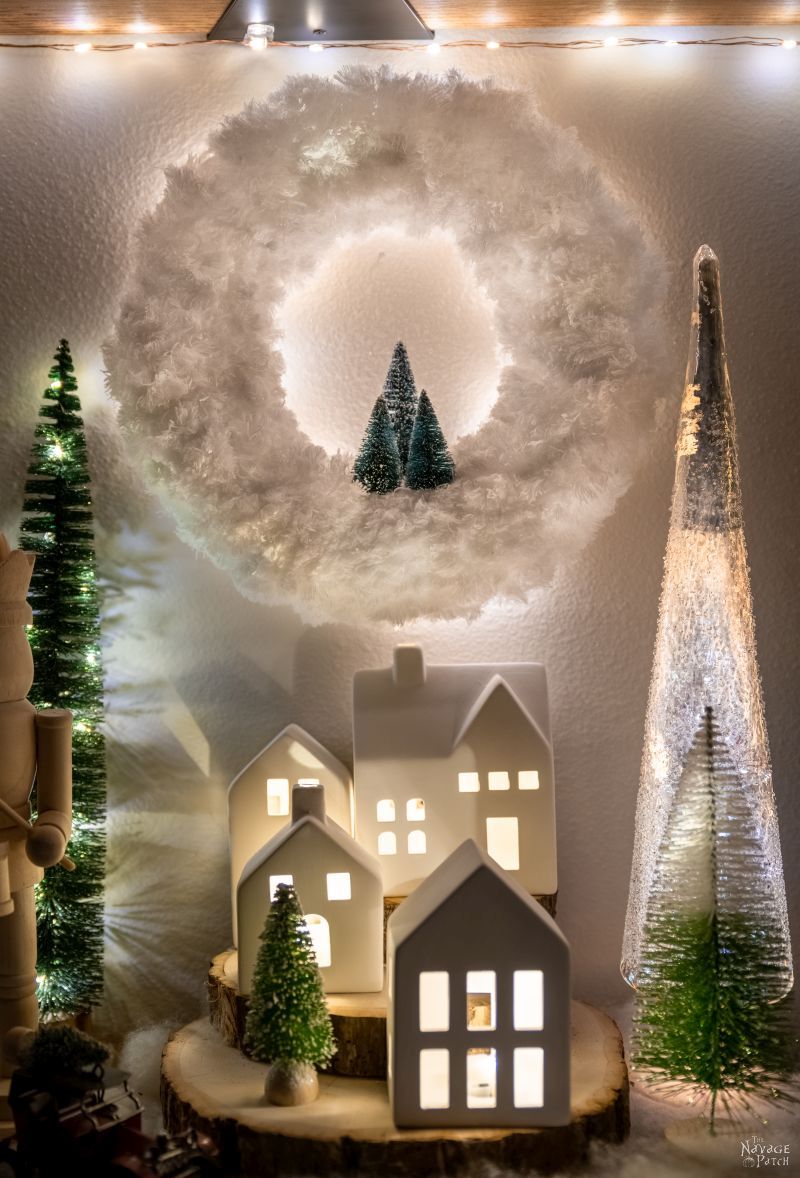

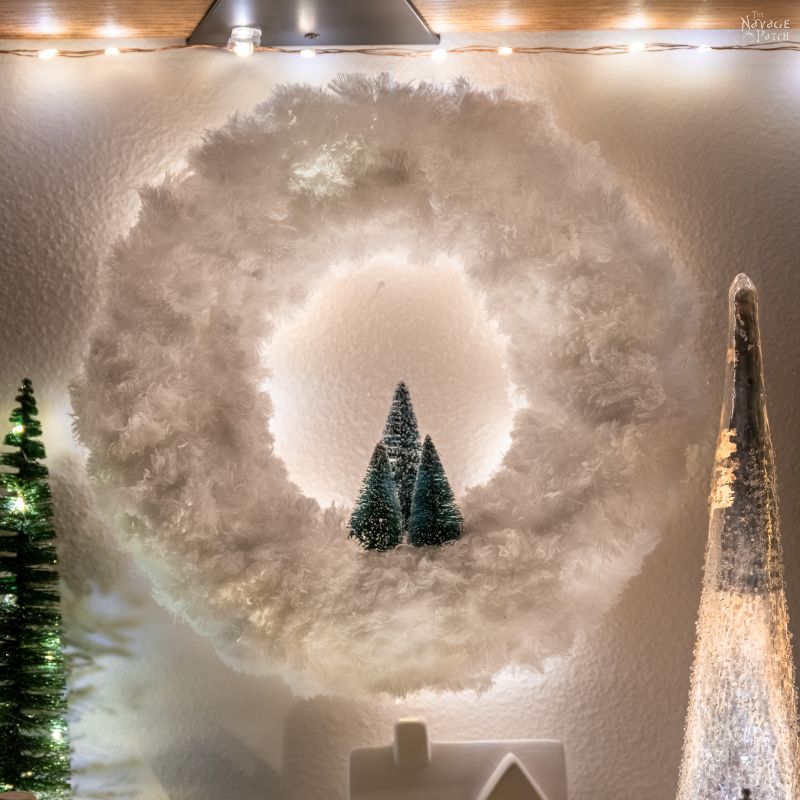
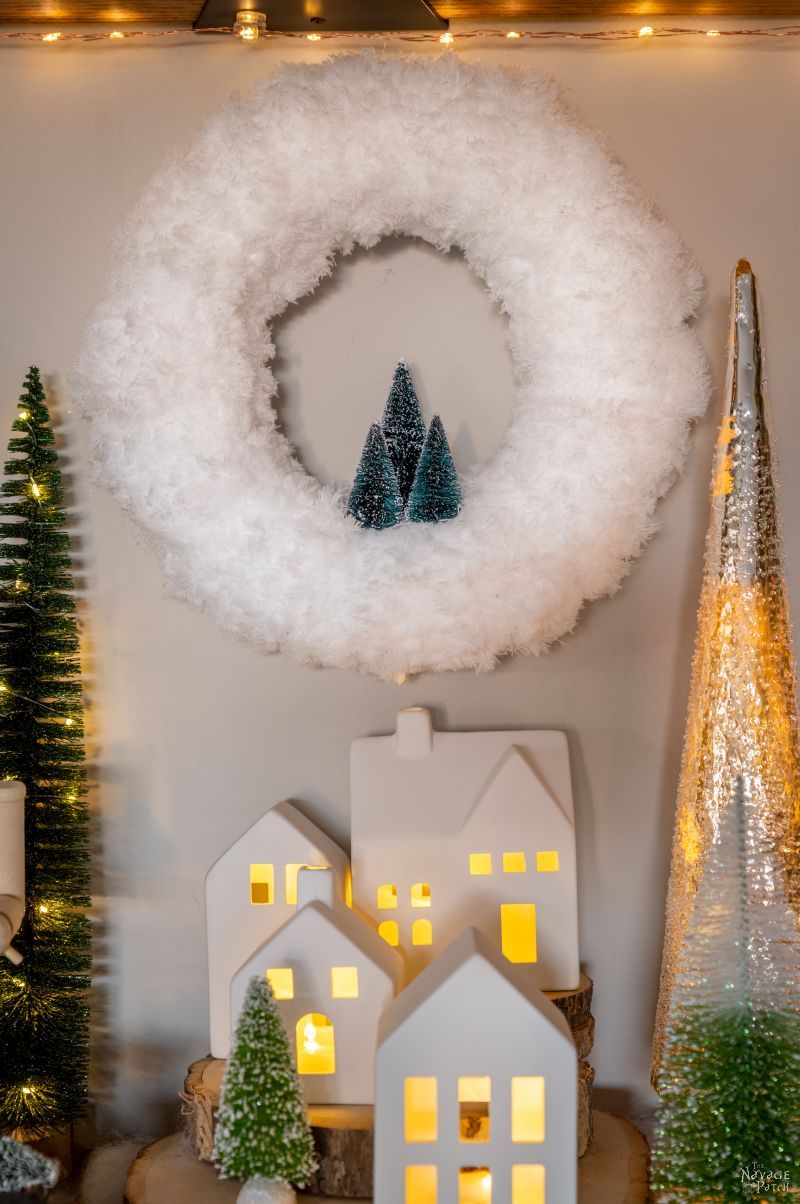
We taped some fairy lights to the back for a little added effect. We think it looks amazing! I actually like it better than the original. It looks more like a cloud…and it feels like it, too!
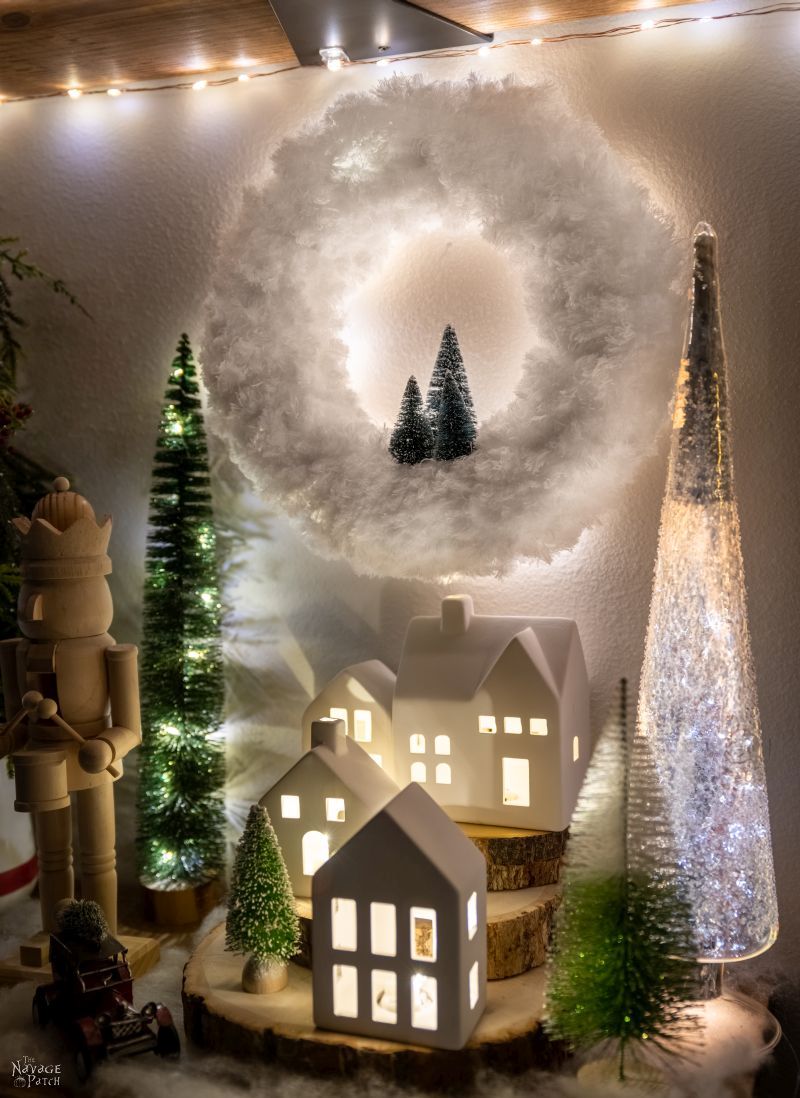
Can you believe this beauty came from such lowly beginnings and only cost five dollars to make??


Share it on Pinterest & Facebook!

OMH. I really, really love this mop wreath.
Great step by step instructions / photos. Thank You. I have a tiny church that would be perfect on the wreath along with some small trees. Many possibilities in decorating up this mop wreath. My mind is spinning with many ideas and what a great gift to give to a neighbor, friend or family member.
Hi Colleen, I’m so happy to hear you like it! If you’re on Instagram, please post pics of your wreath and tag us! 🙂
This is so cute and it also gives me so many ideas for other projects. The mops would be a great option for “snow” for my Christmas houses (and looks so much better than the felt option). Love love love!
It’s amazing how soft and pure white those Dollar Tree mops are! Have fun! 🙂
I was just wondering about doing the same thing, only making white trees using them styrofoam cones and the mops
You’re tuned into our thoughts, Colleen! 😉
Brilliant! I’m pretty sure that no Dollar Tree will have mop heads left by this afternoon!!!!
LOL, you may be right, Audra! 😀
Great idea, Greg, and as always, fantastic instructions! By the way, next you’ll have to decorate your Dollar Spot houses! I painted mine with Folk Art paint in the colour Nutmeg. Next I used Tulip 3D Fabric paint to outline and decorate the houses. Of course, they are adorable in white but I wanted to try my hand at this. I’ll be looking for the hot glue guns at Dollar Tree as well. I only have an industrial size one!
Thanks again!
Carol
Thank you, Carol! Yes, those dollar spot houses are a blank canvas! I don’t have much artistic skill though, so I’m afraid if I took a brush to one, it’d end up looking like it was attacked by a nursery school! 😀
I made this exact wreath but a year or two before you posted it! I didn’t know about the cool mop heads at DT back then. I used chunky cream colored yarn instead. But the end result is the same. It’s still one of my favorite DIY wreaths! Just goes to show you that some designs are truly timeless!
They surely are, Karen! 🙂
I absolutely love the tutorial!!! The pictures make such a difference. This is my 1st time seeing the Navage patch, but Not the last time❤!!!
Awesome! Welcome, Kim! 🙂
Beau-ti-ful!!! Now lets see your idea on how to make the Christmas trees. Thanks for all of you and Handan great craft ideas!! I always look forward to your crafts. Keep on doing what you guys are so good. Have a great Thanksgiving!!
Thanks, Mona! You’ve read our minds…just wait, and you’ll see! Happy Thanksgiving to you! 🙂
I will definitely be adding it to my decor, along with the white yarn wreath. I had a thought about putting a few stick pins into the map heads, perhaps at each corner, just for further reinforcement. That’s the good thing about those green styrofoam wreaths!
P.S. Last year I made a yarn wreath in their school colors, added a little “Welcome” sign, and gave it to school secretary for the school Office door! It was a big hit!
Good good! Why settle for one when you can make both! Great job on the school wreath – that’s a fantastic idea to make school-color wreaths!
Love the fluffy, friendly look of this wreath! Highly unlikely to find any of the parts in my CDN stores, but I’ll keep my eyes open! I’ve Pinned this for later reference! Also- those little wee houses are adorable- I appreciate the clean, simple, classy look they bring to the scene! I’ve not seen those in my travels either !
Keep up the awesome work! I’m enjoying Vicarious crafting through your e-mails!
Thank you, Laura! Do you guys have Target up there? If so, those little houses are sold in the dollar spot area in the front of the store. Unfortunately, they don’t sell them online.
Hi Greg! I love this wreath !! I made last years and it has a place of prominence in my home. In fact I left it up all year! Would love to make this one as neighbor gifts but Dollar Tree doesn’t have the mop heads. Do you have any idea where I might find them? Would appreciate your help. I’m making the Mop Gnomes…so cute! Thanks so much and Happy Holidays to you and Handan🎄🎄🎄
Hi Davene, you might want to check Family Dollar and Dollar General. Also, do you live in an area with more than one Dollar Tree? We’ve found there can be huge variability in what they carry. One DT might not have mops, but the one 5 miles away might be overflowing. Jacksonville has a tone of DTs and we regularly hit about 6 or 7 of them. It’s rare not to find what we’re looking for at at least one of them. Good luck!
Hi Greg! Thank you for your quick reply! Just tried them all and no luck. I searched far and wide but no white pads anywhere. So disappointed. Love your blog and am looking forward to your new home and the magic you and Handan do with it. Happy Holidays in Florida!
Awww, I’m sorry to hear that. Do check again soon. Those mops area staple at (probably) all DTs. I must say since our post that they’ve been harder to find in both Florida and Georgia (we’ve been looking). They’ll come back in stock.
OK….I finished my mop wreath! LOVE IT! But….this is all your fault…..they know me by name now at the Dollar Tree!!! Oh well…it could be worse. Thanks for all the great ideas! (Are you sure…you don’t have a brother???)
Just wait until they recognize you at 10 Dollar Trees! 😂
What did you use to mount/hang the wreath?
Good question Lisa! I was wondering that same question. Especially with the lights on the back. So while we are asking, can you also tell us what did you use to mount the fairy lights?
Thanks!!
We taped the fairy lights on the back. But since the wreath form is made of foam you can even pin them if you prefer a neater back. 🙂
Hi Lisa, we used a small command hook as this is a very light wreath, but any kind of wreath holder will also work.
I can’t find the mop heads either at DT or DR and I really want to make this wreath….I have everything else needed for tghe wreath. Would you happen to have the product number of the mop heads so that I can order them please….I don’t want to get yarn becase that would cost me too mudch money.
Thank you in advance
Hi MarryAnn,
Click on the link below and you’ll be taken directly to the product page where you can get the SKU number and the full name of the product:
http://shrsl.com/qcj2-1e2g-l02n3e_1-1
I made one of these wreaths, it was very messy and the mop heads didn’t stretch all the way around like yours I ended up putting pieces in the gaps Not sure if I would make one again.
What a gorgeous and classy looking Christmas wreath and you helped me make it. At a time when I thought all those hundreds of dollar wreaths were out of my reach, I saw your lovely and inspiring creation. Thanks for all the precise clear instructions, o.k. I did struggle with the first one, not bad at all, the second one went faster and smoother. The dollar store had white frosted raindeer and white frosted old fashioned steeple churches. Oh my, how beautiful, how cost effective, for such a thing of beauty.
Thanks you so much.
I’m so happy to read this, Boo! Merry Christmas to you and your family! 🙂
SAW THIS POST AFTER I READ ANOTHER WAY TO WRAP THE WREATH
I KEPT MY MOP HEADS INTACT AND WRAPPED THEM AROUND THE WREATH (PINNING IN PLACE )
I DREADED THE THOUGHT OF BURNING MY FINGERS AND HOT GLUE STRANDS ALL OVER THE FLUFF
I USED 4 MOPS AS I WANTED IT TO BE FULL
I ALSO WRAPPED THE STYROFORM WREATH WITH PAPER TOWELS TO HIDE THE GREEN AND GIVE SOME BULK
THE MOP HEADS AT $ TREE WERE ONLINE ORDER I FOUND NONE IN STORES
THEY ARE SHEER IN SOME PLACES SO THE GREEN WREATYH SHOWS THRU
I LOVE YOUR SITE
Thank you, Neanie! Pinning is a great alternative for those who don’t want to bother with hot glue! 🙂
Neanie, I bought the green wreath, only to get home and find I already had a white one the same size. I used it, of course, as it was so much easier than worrying about the green showing through.
the mop heads could you cut the middle sewing and tread them on the ring —also what could you use for decoration after the holiday season thank you for your time
Hi Mary Ann, you may be able to cut the middle sewing, though I can’t say for sure as I haven’t tried it. Since the wreath is plain white, you could decorate it for almost any season by swapping the trees for florals, butterflies, pinecones (for non-holiday winter), colorful fall leaves – the possibilities are nearly endless! 🙂
great wreath can you tell me the outside measurements when finished –thank you for your time
Hi Mary Ann – I used a 10-inch wreath form, so I’d say the final wreath was 11-12 inches in diameter.
I am just wondering what you used and how you hung your wreath?