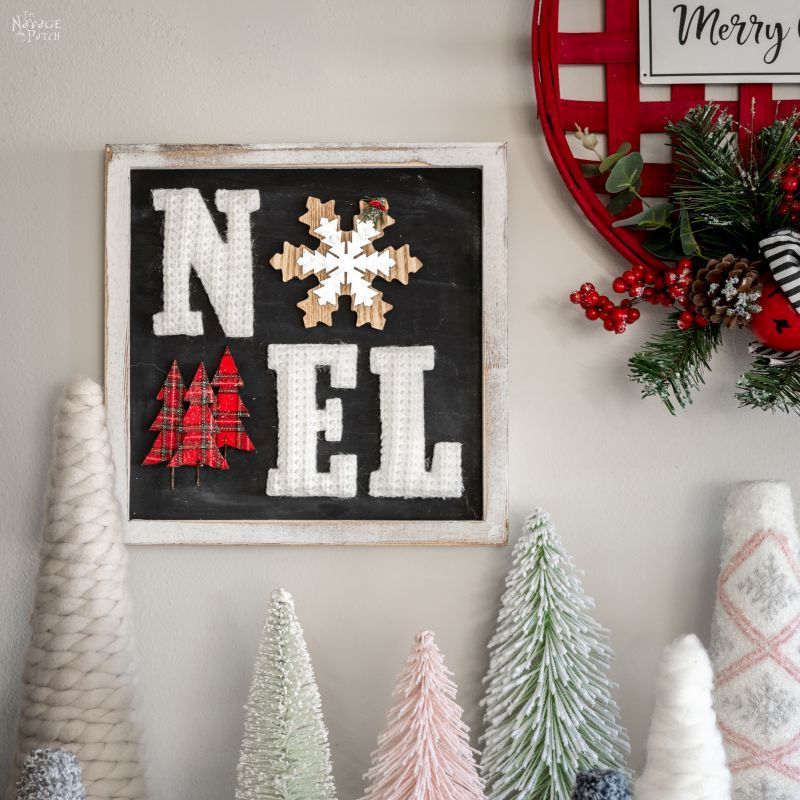
DIY Farmhouse Noel Sign
This DIY Noel sign is a simple craft that’ll bring a little farmhouse style to your Christmas decor with its whites, blacks, wood and metal.
You’d think they would stock more popular letters, ya know?
I mean, it’s Christmastime, fer cryin’ out loud – would it kill them to stock the letters people are actually looking for?
Okay, let’s think about this: what do people want to spell with those individually-sold wood letters this time of year? You know, the ones in the Target dollar spot bins?
It doesn’t take an engineer with a slide rule to figure it out.
People want to spell out Christmassy words like CHRISTMAS or JOY or MERRY or NOEL! Maybe even a SANTA or ELF or NAUGHTY or NICE thrown in for good measure!
But because of Target’s infatuation with the letters K, D, and W, we can’t find the good letters to spell the Christmassy words we want to spell.
WERRY KRISTMAS just doesn’t have the same charm, you know what I mean?
NOEL? More like no L, amirite?
Hello?
taptaptap
Is this thing on?

My babes and I raided every Target in Jacksonville this past weekend, pawing our way through bin after bin after bin of wood letters, desperately (vainly) searching for a damn N and L, so we could make our farmhouse NOEL sign.
Kerry, Debbie and Wyatt sure had a good time, though.
Anyway, what we couldn’t find in wood, we did manage to find in…stuffed yarn? When Target closes one door, they open another, it would seem. Not ones to shy away from a change of plan or a new challenge, we gathered up our stuffed yarn(?) letters and made a beeline for the exit.
Did I say beeline? Silly me.
What I meant to say is that we exited the building by way of a jaunt through the Magnolia Hearth & Hand area where my babes inspected each and every garland looking for the perfect one with perfect red berries that were neither missing nor chipped. This was followed by a leisurely stroll through the Christmas aisles whereupon my babes handled and scrutinized every item currently for sale. Not one of every type of item, mind you. Oh, no – Handan don’t play it like that. She likes to eyeball each item individually like she’s searching for the perfect ripe tomato in an outdoor Turkish bazaar. Satisfied that her selection of Christmas doodads was the very finest Target had to offer, we then trekked approximately 7 kilometers from the Christmas section in one corner to the women’s clothing section in the absolute farthest corner from the Christmas section. Don’t they realize who shops most in the Christmas section? Can’t they put the two sections together? Of course they can’t. That would deprive Target of all the additional revenue generated on the 7 kilometer walk between departments, so I guess that’ll never happen.
Once our cart was sufficiently top-heavy with garments of every shape and color, we…
(made our way to the checkout line?)
…turned our backs to the checkout line and drove headlong into the dressing room wherein my babes tried on the mountain of textiles while I propped myself up on the cart and did my best not to fall asleep standing up.
Confident that she was now in possession of the finest threads available in the women’s clothing department of that particular Target, my babes announced that our shopping was concluded and I may point the cart towards the front of the store and make haste for the checkout line.
Then we left.

DIY Farmhouse Noel Sign
SUPPLIES LIST
Affiliate links are provided below. Full disclosure here.
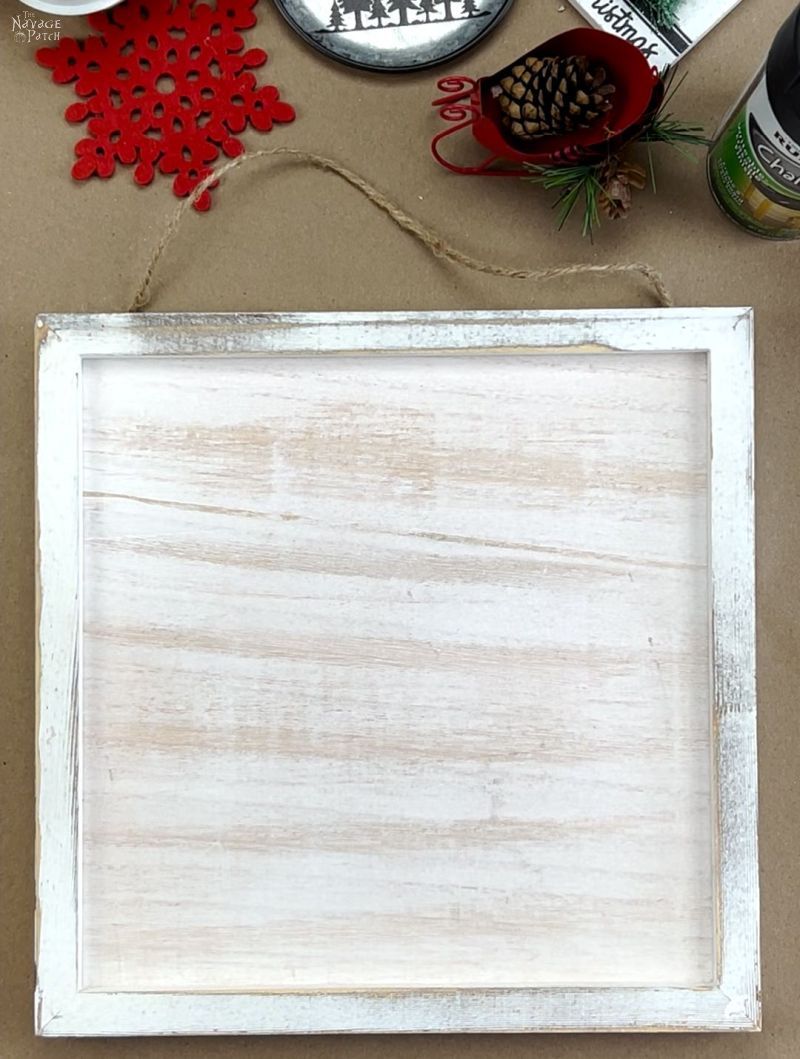
- Farmhouse sign blank (we got ours at Walmart, but they’re sold anywhere “Farmhouse” is still a thing, so…pretty much everywhere)
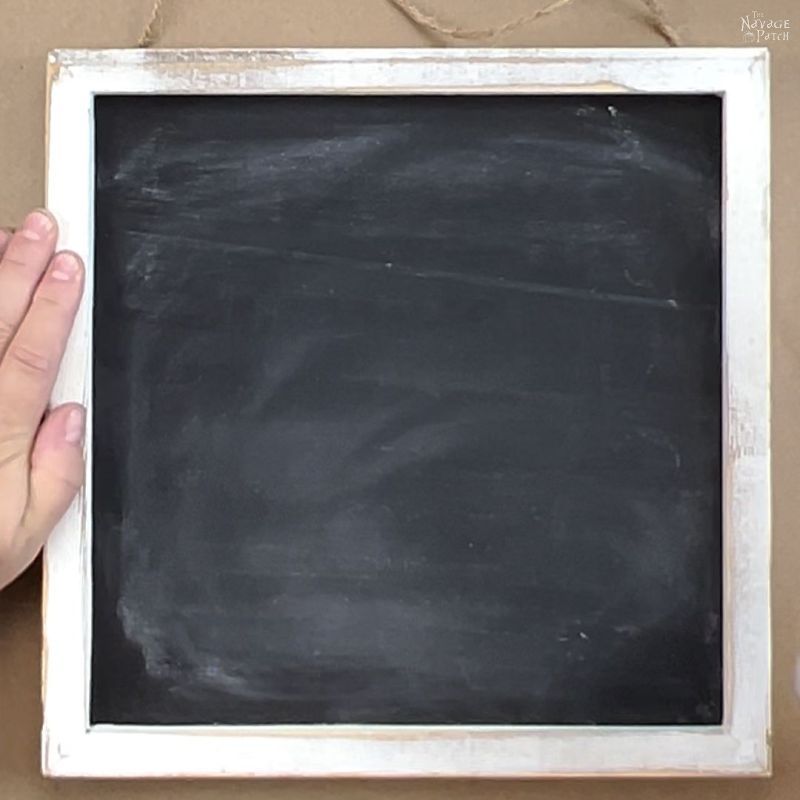
- Chalkboard paint
- White chalk
- Puffy yarn letters that spell…wait for it…NEL
- 4-inch wood snowflake ornament, aka the letter O (or just buy an O along with your NEL)
- Small Christmas greenery and doodads for the empty space (we used plaid trees from a Christmas pick we got at Walmart)
- Hot glue gun
The farmhouse sign blank we started with looked pretty good, but my babes thought it would look better and make the lettering pop if I first sprayed the interior sign are with black chalkboard paint.
I just happened to have 4 cans of chalkboard spray paint sitting in the closet, but brush-on would work just as well. I taped off the areas not to be painted and gave it a few quick coats.

To tone down the black a bit, I rubbed chalk on it.


Then I wiped the chalk with a dry towel.

My babes proclaimed it to be ready for letters.
Huzzah.
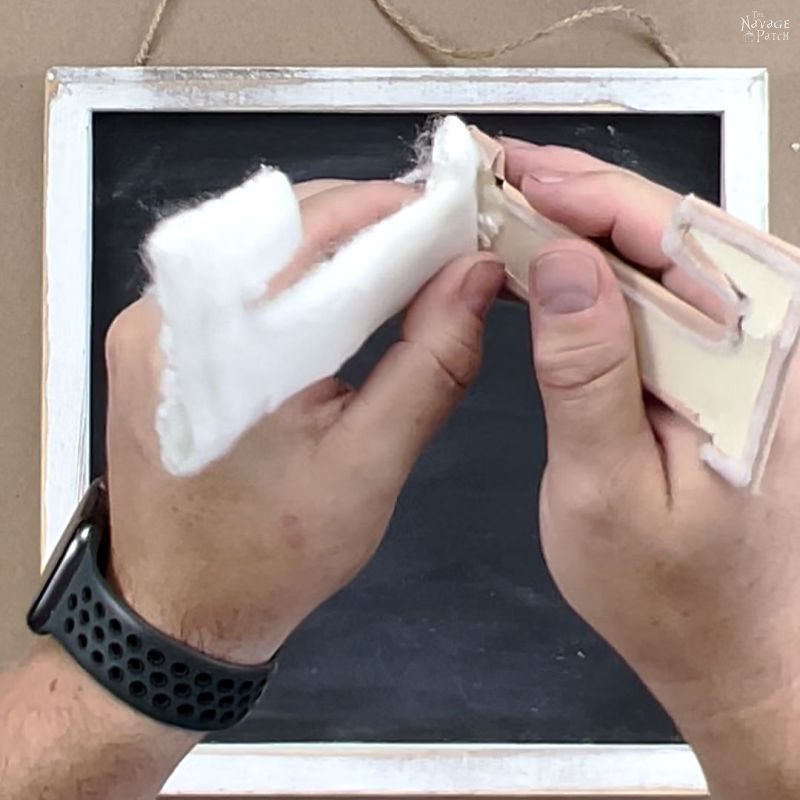
The puffy letter ornaments we used had wrapped wood backing that I first removed by simply peeling with a bit of force. You could certainly leave the backing on if you want, but we think it looks better with it removed.


Next, my babes and I monkeyed around with letter placement, what we’d use for the O and what we’d put in the empty space. I made a little time lapse from the footage I was shooting for Instagram for you to see our creative process. There was actually much more trial-and-error before we settled on the 3 trees in the corner, but I had the camera turned off to save the battery.
Who’s got two thumbs, one babes and loves martinis?

Letters arranged and ready for glue.

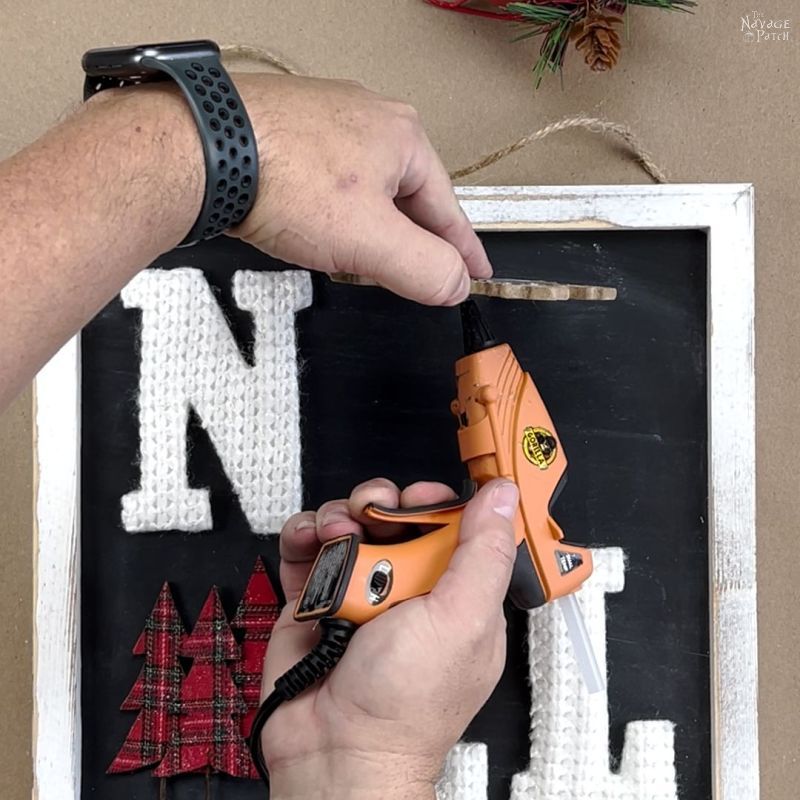
I found it easiest to place the letters first, then add a little glue to the corners. While holding the letter in place with my left fingers, I peeled back one of corners of the N.

I added a little blob of hot glue…

Then I put the corner back in its place.

I repeated these steps for all the corners of each letter.


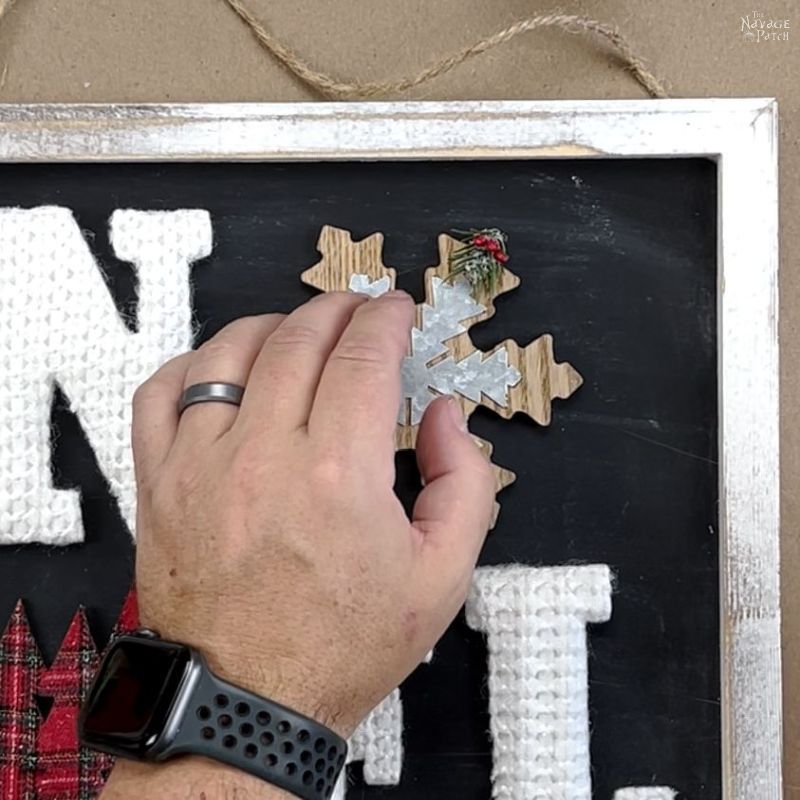
A little glue in the center of the snowflake.

And a few dots of glue for the trees. Note that these were individual trees on a pick. I glued them to each other off camera.


And last, I pulled a small bit of pine and berries from a faux sprig we had lying around. This would be a perfect cover-up for the string hole in the snowflake ornament, aka the letter O.


With that little sprig glued in its place, our farmhouse Noel sign was finished and ready to join the Christmas display!


We love the winter village feel of our Christmas display thanks to these pre-lit houses from Target dollar spot.

As I mentioned in my last post (Christmas tray upcycle), we try to use as many of our own creations as we can each year. Scroll down for a list of our DIY Christmas crafts seen in the photo below.

- Christmas gnomes
- Faux fur trees
- Mambo yarn trees
- Epoxy wood shim trees
- Pedestal tray
- Felt trees
- Snow-white nutcrackers
- Christmas book page printables
- Wood stars
- Dollar store signs
- Dollar store Christmas signs
- Christmas tray upcycle
- Lighted dollar store Christmas sign (post coming soon!)
And we’re not done decorating yet!


Cute! Super super cute! You spelled my name wrong, though.
But seriously, I love everything about this whole setup and your explanations of why/how/when you did your arrangements. So very inspired. Thank you.
Thank you, Noelle! You can make a modified version for yourself, lol! 😀
Cutsie patootsie!
Thanks, Ju!
Love this display. I’m sure I missed it, but where are the small white houses from?
Thank you!
Thank you, Gretchen! Those little white houses are all from Target dollar spot.
This looks like a quick and easy project, if you don’t count the day-long shopathon in Target to find all the parts. Two things: I’m most impressed with your reference to a slide rule. You and I are of a certain age and remember those things being used for actual math (like my dad could do). And, did you keep the wood backs from the letters? The N, E, and L? There’s the letters you were looking for–they were just hidden by a puffy front! Clean those up a bit, slap some paint on them, and you’ve got the makings for another sign. Just throwing it out there.
We didn’t keep the wood, Deb. It was pretty flimsy, and all but one of them broke while removing the fabric. But I like your thought process!