DIY Drawers for Fireplace Built-Ins
I made DIY drawers for our fireplace built-ins, and it’s a huge improvement over the yellowed wood doors that were there before!
I have a problem with doors.
Not the big one leading into the house or the slightly smaller one leading to the toilet or the smaller one still leading to the pantry. Those are all well and good.
I have a problem with cabinet doors, specifically the ones on base cabinets.
A base cabinet with doors means one thing and one thing only; me crawling around like a two-ton toddler trying to retrieve anything from its bowels. Cabinets like those are for the young and limber, not the old and lumber.
One solution to this beached whale of a problem is to build sliding shelves, as I’ve done many times in the past.
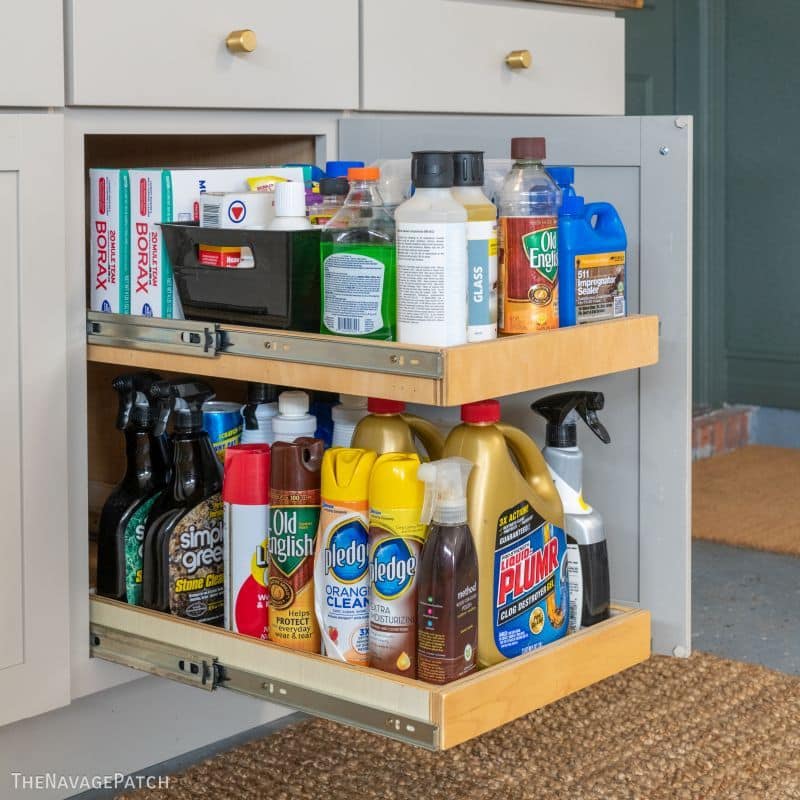
Slide-out shelves are a necessity in the kitchen, and they’re lifesavers in the laundry room and bathrooms too. But they’re not the perfect solution for every base cabinet.
I told you guys in my Kitchen Remodel Plan post that we’d be concurrently remodeling the family room which shares the large open space with our kitchen.
One of the key elements of the family room remodel is making over the two built-in cabinets flanking the fireplace.
Like all the thoughtless acts perpetrated by uncaring builders, these cabinets were your garden-variety 2-door jobbies with a fat stile in the middle and oversized face frame to pointlessly hamper access to the cavernous space within.

Like all the other cabinets in the house, these were a lovely shade of rotten pumpkin, which was apparently the style at the time.
Normally, I’d rip the entire cabinet from the wall and throw it into a volcano or launch it into the heart of the Sun, but these were practically cemented into their nooks, and I feared tearing them out would rip out more than I bargained for.
Besides, these weren’t kitchen cabinets, so a box is a box is a box.
But the doors had to go.
Like I said, not all cabinets are best served by sliding shelves. In this family room setting, I think it would look a little awkward.
But drawers? Well, that’s a horse of a different color, isn’t it? And what are drawers except very deep sliding shelves!
So I’d keep the carcasses because a box is a hole is a cave is a cabinet, but I’d make some big, functional, and easy-to-access drawers.
As usual, The Magnificent Shrimp already had a vision and a plan – she’s rarely without either – and that made my job a heck of a lot easier!
DIY Drawers for Fireplace Built-ins VIDEO recap
Watch our short and fun video below for an overview of our DIY drawers before you read the detailed account.
Watch Our Video On YouTube
On Tiktok
My babes has really been on a design kick lately – she’s still riding the high of designing our kitchen (currently in production with an April 15 install date). Every good plan ends with a cut sheet before the work can really begin.

Okay, time for a small rant. Of all the shitty economic turns the world has taken in the past few years, the one that galls me the most is shrinkflation. It is a horrid and deceitful practice that allows some companies to outright lie while others merely try to obfuscate the truth. And worse, it allows governments to lie about inflation because, hey, that “1/2 gallon” of ice cream is still the same price, sooooo….NO INFLATION! Wooo Hoooo!
But that’s nothing compared to the shrinkflation in the lumber industry, because 3/4-inch plywood is no longer 3/4 inch and 1/2 inch plywood is no longer 1/2 inch. In a world without the need for accurate measurements, this shrinkflation would be just another annoyance in long line of annoyances. But we live in a world where measurements matter – especially to DIYers like Handan and me. So their pathetic attempt to save a few cents on each sheet of plywood means that all of our measurements and planning have gotten more complicated by an order of magnitude, because fractional math involving halves, quarters, eighths, and sixteenths is mental math, but now that these sheets are measured in 32nds, it takes the arithmetic and to pencil-and-paper or computer. Sometimes you get lucky, and get a 1/2 inch sheet that’s 7/16, but other times it’s some god-awful 13/32 or 15/32 or worse, something in the 64th range!
I hope the lumber executives of America eat nothing but sawdust until this injustice is reversed.
Anyway, back to the cabinets.
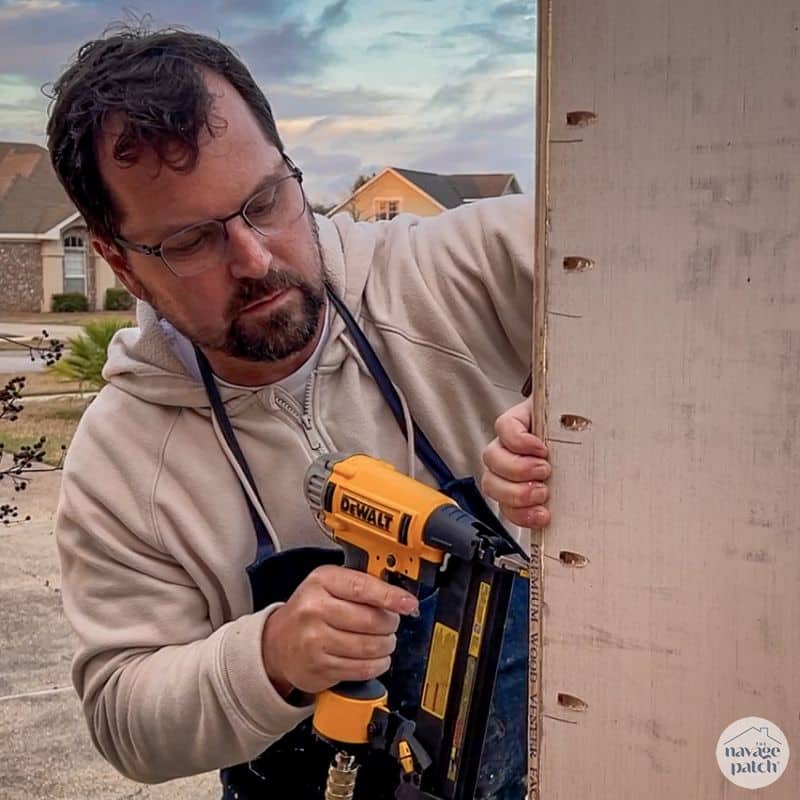
Before starting in on the drawers, I had to modify the opening to accommodate 3 long drawers. First, I removed the doors.

Then I cut off the center stiles with a circular saw.


These stiles are not load-bearing so there’s no issue at all removing them.

Now I had an accessible space I could work with!

I cleaned up and then went outside to build some drawer slide frames.

I make drawer slide frames whenever I’m installing multiple slides in cabinets with face frames. I built 4 identical frames like the one shown below.

I will mount a slide on each of the horizontal members before installing the whole frame into the cabinet. This saves a lot of crawling around and awkward measuring and screwing inside the cabinet.
Normally, a cabinet face frame extends inward 3/4″ from the cabinet wall, so I make my frame from 3/4 inch plywood. But for these cabinets, the face frames extended one inch, so after building and trying to fit my 3/4″ frames with shims only to have my drawers not fit in, I tore everything out and installed 1″ frames I made by sandwiching 1/2″ plywood.

I would normally make drawers entirely form 3/4 inch plywood, but Handan thought drawers of this size would be too heavy if made entirely form 3/4 inch, so I relented and made the backs and bottoms from 1/2 inch. This also allowed me to use up some more scrap plywood, so that was a bonus. I’ve been carrying a dragon’s hoard of plywood scraps since Connecticut, so it feels good to start chewing through that pile!
I have two ways I make drawers – with glue and pocket screws or with glue and brad nails. Pocket screws add an added level of strength, especially if the drawer is going to carry heavy loads, but really, glue and brads are fine for most applications.
For this build, I started with pocket screws, but I ran out of the size I needed, so I switched to glue and brads to avoid a time-consuming trip to the nearest Kreg retailer.
First, I glued edge banding to the tops of the drawer sides.

Then I carried on joining the drawer components with glue and pocket screws.


Switching to glue and brads…


I built all the drawers without faces – I’d be adding those later with the drawers installed into the cabinets.
I attached the drawer faces with construction adhesive and brads. After putting some adhesive on the edge of the drawer where the face will attach, Handan and I worked together to make sure each face was perfectly aligned, and then I shot a couple of brads to hold everything in place. Then I removed the drawer and shot more brads to reinforce the adhesive.


My babes had an idea for the drawer faces involving pole wrap – this is the stuff that…wraps around poles, just as the name implies.
I cut pieces with a miter saw, and I used tape to hold the roll together and prevent tear-out.


Smooooooth.

I cut the pieces to the length of the drawer faces.


Back inside, I squeezed wood glue onto the drawer faces…

…brushed the glue so it covered every square inch of drawer face…

…and laid the pole wrap onto the face.

Then I clamped it all up to dry.

After painting the cabinets and drawers with Behr Kaffee, I installed knobs with my new Kreg Cabinet Hardware Jig.

Now, I hate to be a turd, but the following pics are carefully cropped to conceal what’s going on around these cabinets because I don’t want to spoil the surprise! Don’t worry, you’re going to see it all very soon, and though you won’t know it, you’ll be glad you waited, because I’m still working on the surrounding area!


I must say, your work is fantastic. But “The Shrimp” has exquisite taste! Absolutely love the drawer fronts !
She really does, Cindy. She never ceases to amaze me!
Wow! These drawers look amazing, and you’re right, drawers are WAY better than doors.
I appreciate the timeliness of this post as I am designing a 2 drawer monitor stand (actually for my Sizxix Big Shot to hold all of the things (markers, scissors, exactos etc) cluttering my workspace. It will be 12dx18wx8h My husband is verrrry leary of building drawers, but I feel it is doable. It’ll be select grade pine.
Thank you for this post, the pipe wrap is fantastic!
Hi Jean, it’s a very doable project! And drawers for a project like yours make much more sense. Good luck with it! 🙂
1. Is jobbies a technical term? 😆
2. Did you remove the doors or did you remove the drawers? Just checking. Looks great.
1) It’s very technical, Ruth! 😀 2) Good catch! I corrected it!
Amazing! Turned out very nice.
Thank you, Teddee, I can’t wait to reveal the rest!
This is beautiful and I love the addition of the pipe wrap! I have never heard of pipe wrap before, where did you buy it? Also I’m guessing you sprayed the piece in order to get in all those grooves so well. I’ve been wanting to change an old tv cabinet that has doors into drawer storage instead this might be the nudge i needed!
Home Depot carries it.
Hi Angie, we order it from Home Depot, and we painted the pole wrap with brushes!
This looks great. Don’t give me ideas. Can’t wait to see the whole finished wall. Thanks for sharing and these teaching moments.
I can’t wait to show the whole wall!
I’m finding drawers more to my liking than doors. Maybe that’s age-related? Your project looks so stylish and elegant without being overly so. I greatly appreciate your step-by-step instructions with pictures. Is pole wrap the same as tambour slats that are found in roll-top desks?
Thank you, Rebecca! It probably is age-related…or maybe just experience-related! Pole wrap is similar to those slate but not the same thing. Pole wrap has wood slats on a paper backing.
I believe you and Handan deserve your own show on tv. Her ability to see creative ways to use things is amazing. Then your ability to put it all together and make it entertaining is the stuff great shows are made of. Until fame and fortune come your way, I’ll just keep reading and watching.
Ditto. But would we get Greg’s humor?
Absolutely! 😁
Well, that would sure be awesome! 🙂
Absolutely amazing. Love love love this idea!!!!!!!! Thank you for sharing.
Wait until you see the whole wall! 🙂
Wow! I’m glad I checked my email today. Can I just say that I just LOVE what you did here with the pole wrap, the knobs etc. it looks so professional. Making drawers is still something I can’t get right so I was sure impressed by this build. Thank you for sharing. I absolutely love the outcome- Kelly Norwich, CT.
Thank you, Kelly! Making drawers is not too hard if you use pocket screws or even glue and brad nails. “Professional” drawers as made by true woodworkers are a different story, but they’re not a necessity!
What a change. Looks amazing.
What an improvement! Beautiful. When this kitchen/family room is complete you need to have an open house of the main floor for your neighbors. Between the dining room and this remodel, it is a whole new house!
Thank you, Claudine! We do intend to show it off when all is finished! 🙂