DIY Floating Christmas Candles
These DIY Floating Christmas candles not only light up top, but they also glow from within. You won’t believe how easy they are to make!
You just can’t have Christmas without candles, and I suppose the same would be true for Hanukkah, Eid, and Diwali! Like the star shape, there is something universal and supremely comforting about a small flame burning close at hand.
We certainly embrace light during the holidays. If we’re not burning real candles with real flames, we’re at least throwing some light from the dozens of LED tea lights and fairy lights we love to work into our seasonal crafts.
These floating Christmas candles are a follow-up to our DIY Christmas candles I posted a while back. If you haven’t seen those, you may want to check them out, because you missed this gorgeous masterpiece:

And this fun little guy:
And a couple more easy DIY Christmas candles.
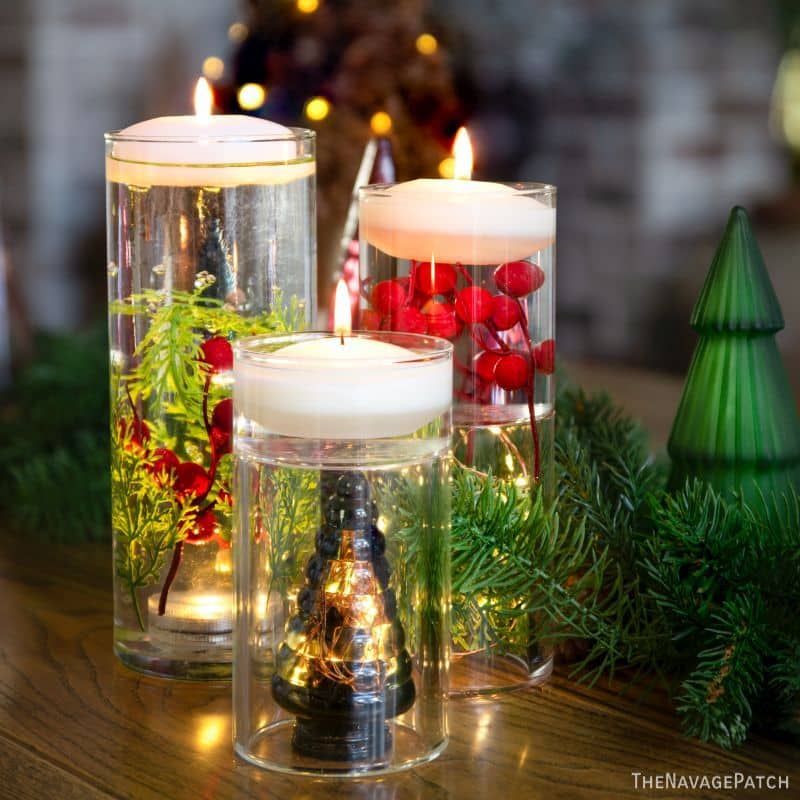
With these 4 floating Christmas candles, we wanted to explore the interplay of glass, water and light. These candles not only have a flame burning up top, but with the addition of waterproof, remote-controlled, color-changing, battery-operated tea lights, they glow beautifully from within.
Let’s have a look. Oh, and a lot of you were asking about what we do with the empty Dollar Tree candle jars once we melt their wax for use in other candles. You’ll find your answer here!

DIY Floating Christmas Candles SUPPLIES LIST
Affiliate links are provided below. Full disclosure here.

We love to see our craft projects out in the wild! If you try this seasonal craft project, take a picture and post it on Instagram, be sure to tag us – thenavagepatch
DIY FLOATING CHRISTMAS CANDLES VIDEO Tutorial
Watch our short and fun video below for an overview of our DIY floating Christmas candles before you read the detailed step-by-step tutorial.
Watch Our Tutorial On YouTube
On Tiktok
DIY FLOATING CHRISTMAS CANDLES Tutorial
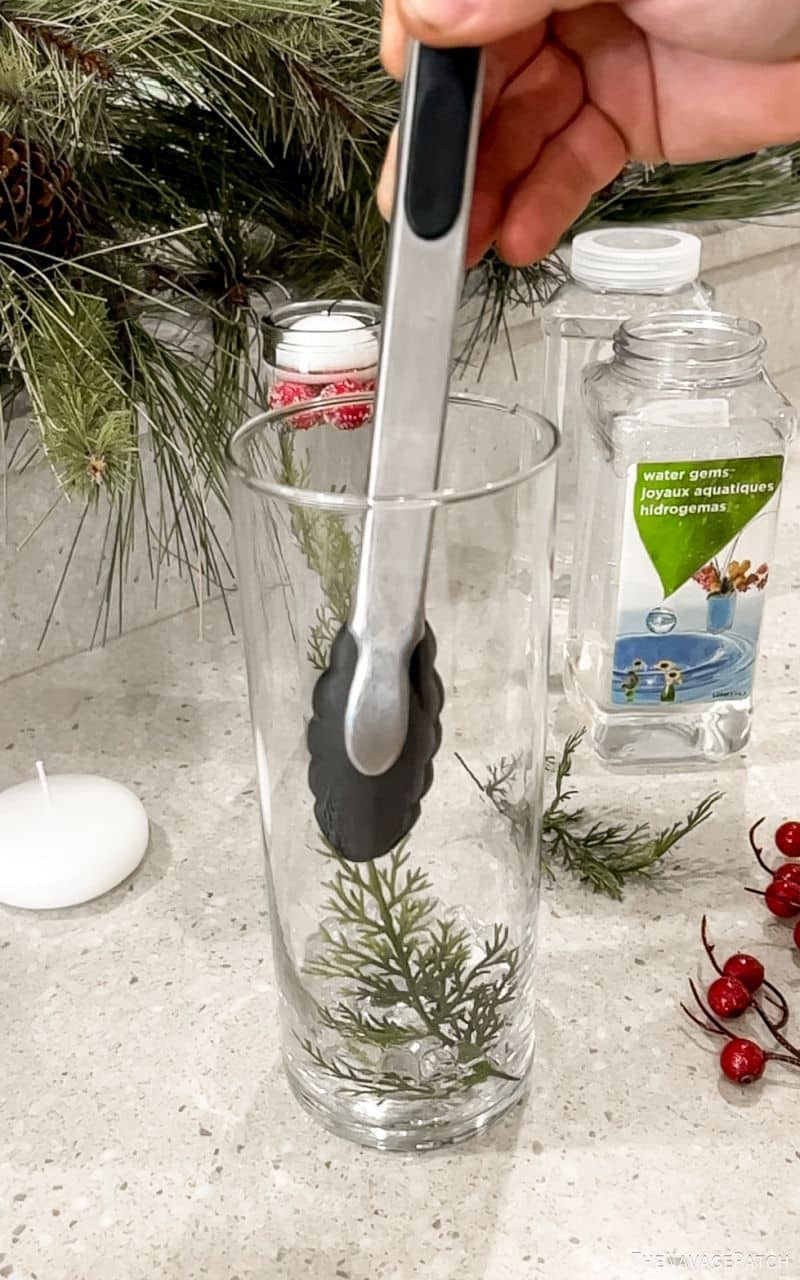
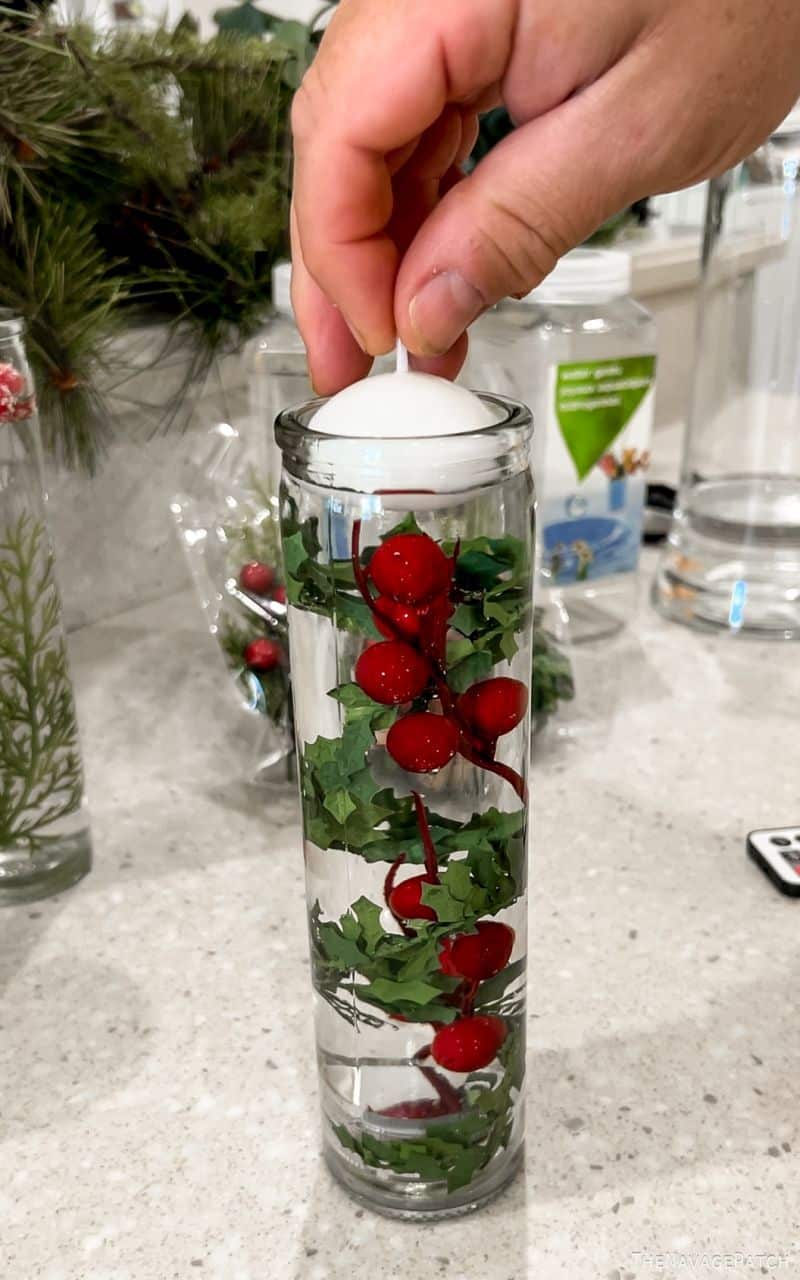
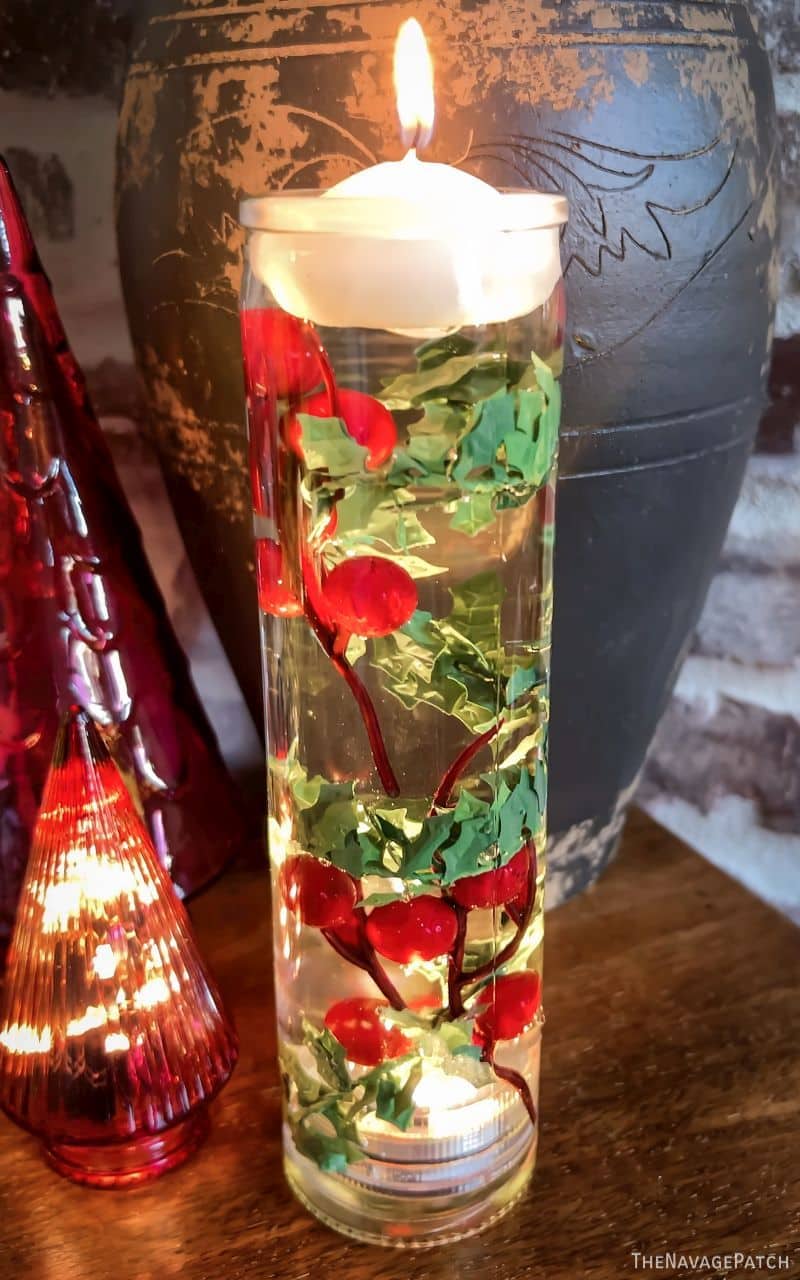
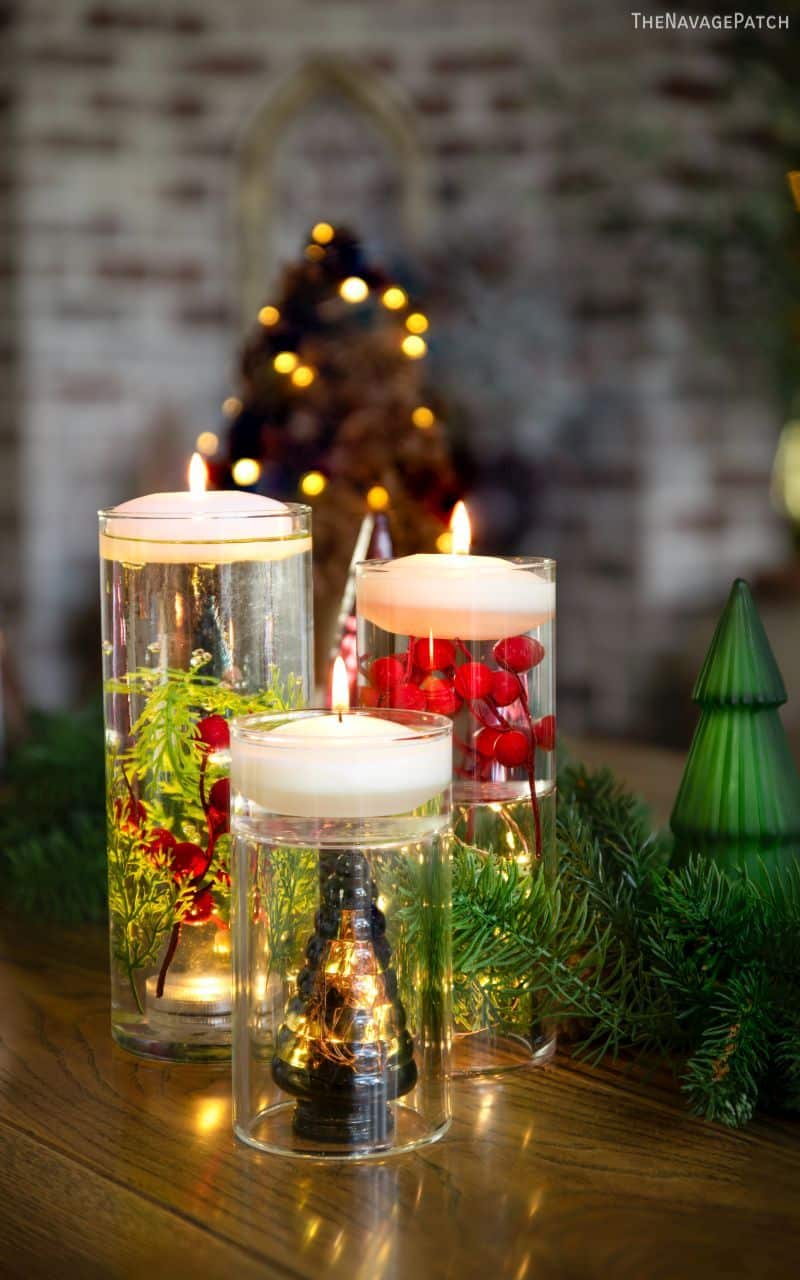
Candle 1 – Water gems
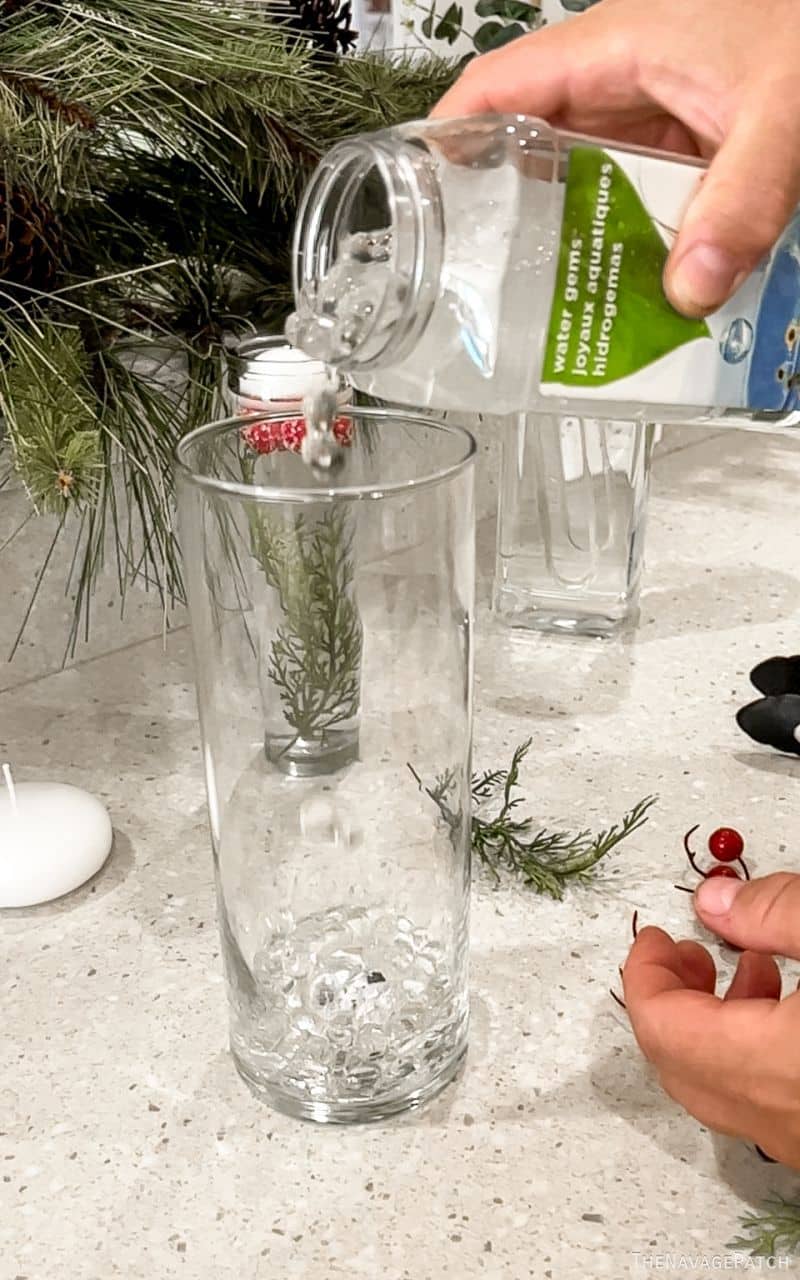
If you’ve never seen or used water gems before, you’re in for a treat! They’re pure magic to work with! These are the same beads in those DO NOT EAT silica gel packs used to keep products dry. It’s also the main ingredient in Pampers.
In their dehydrated state (like the ones we linked to in the supplies list), they look like tiny little spheres. But when you add water, they just grow and grow and grow. A very small teaspoon of dehydrated beads can fill a large pitcher when fully hydrated. Buying them dehydrated is the way to go. It’s far far cheaper than buying the hydrated ones. We didn’t know this when we did this project, so you’ll see me pouring them from a container of hydrated ones we bought at Michaels.
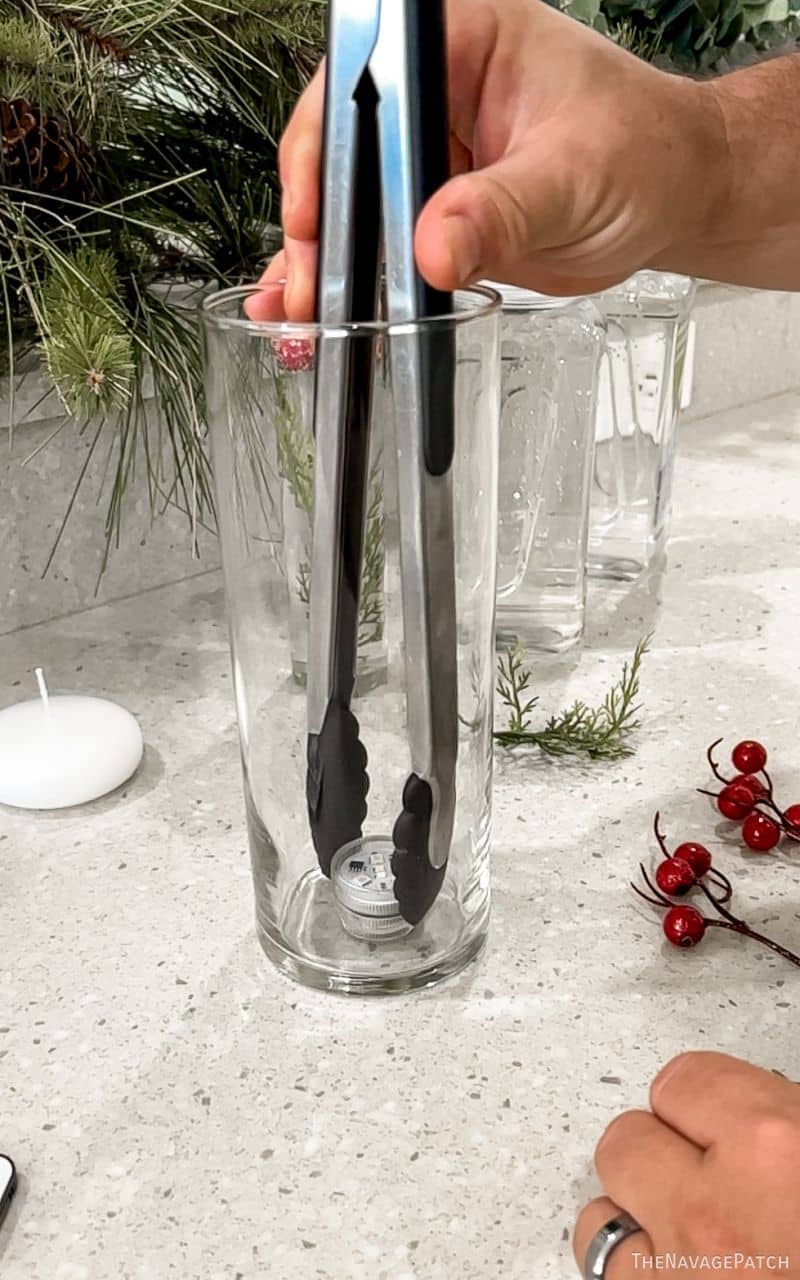
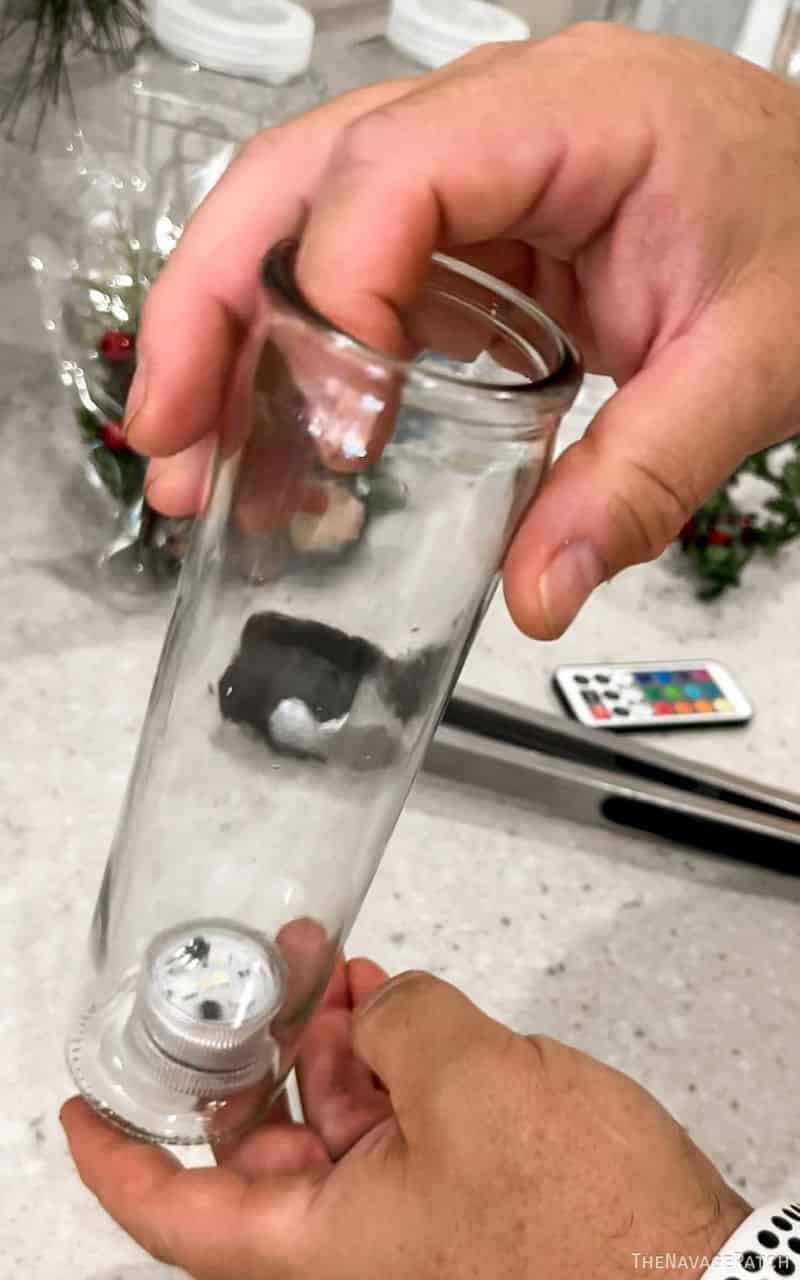
I started with a medium-sized glass cylinder vase into which I placed an LED tea light.

Since my hands are like honey-baked hams, I used tongs. You can probably use your slender hands.
I poured a small amount of water gems into the vase – just enough to cover the tea light.
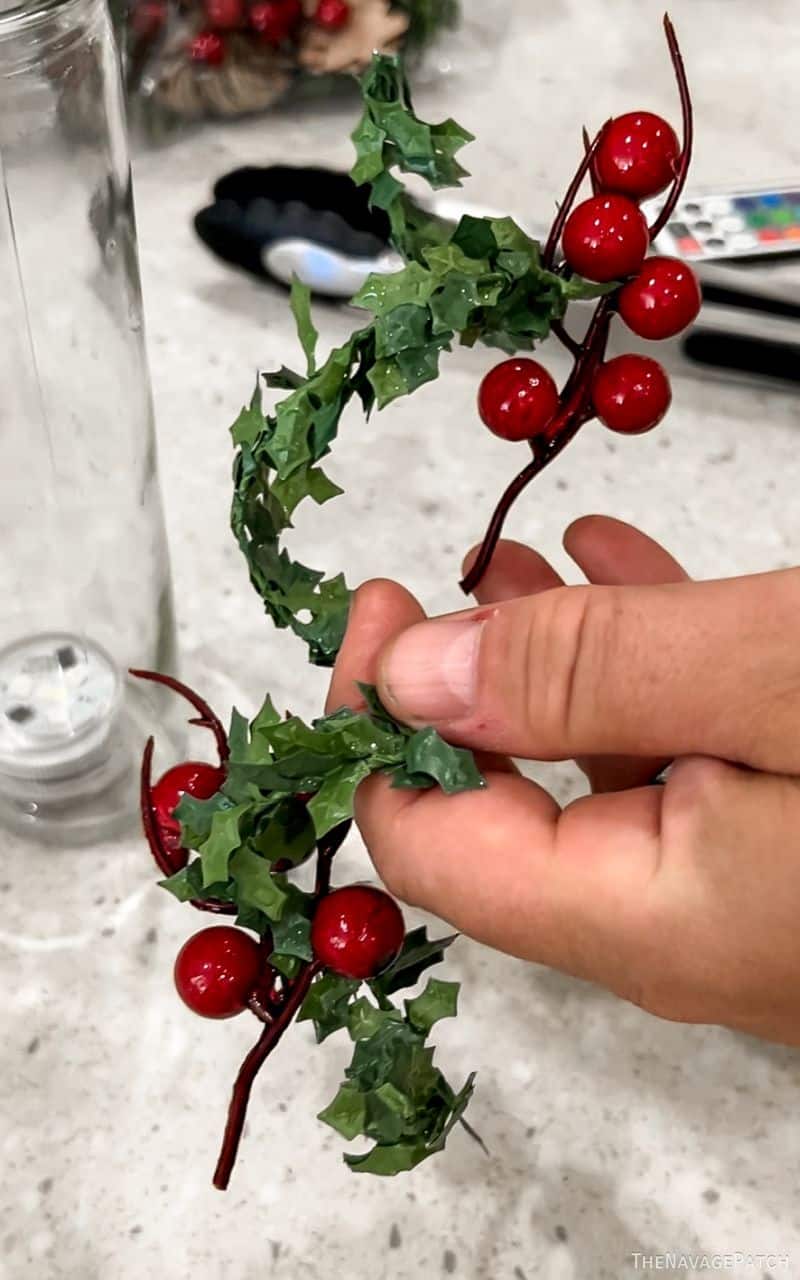
Then I placed a few greens into the vase. Again, ham hands, so tongs.
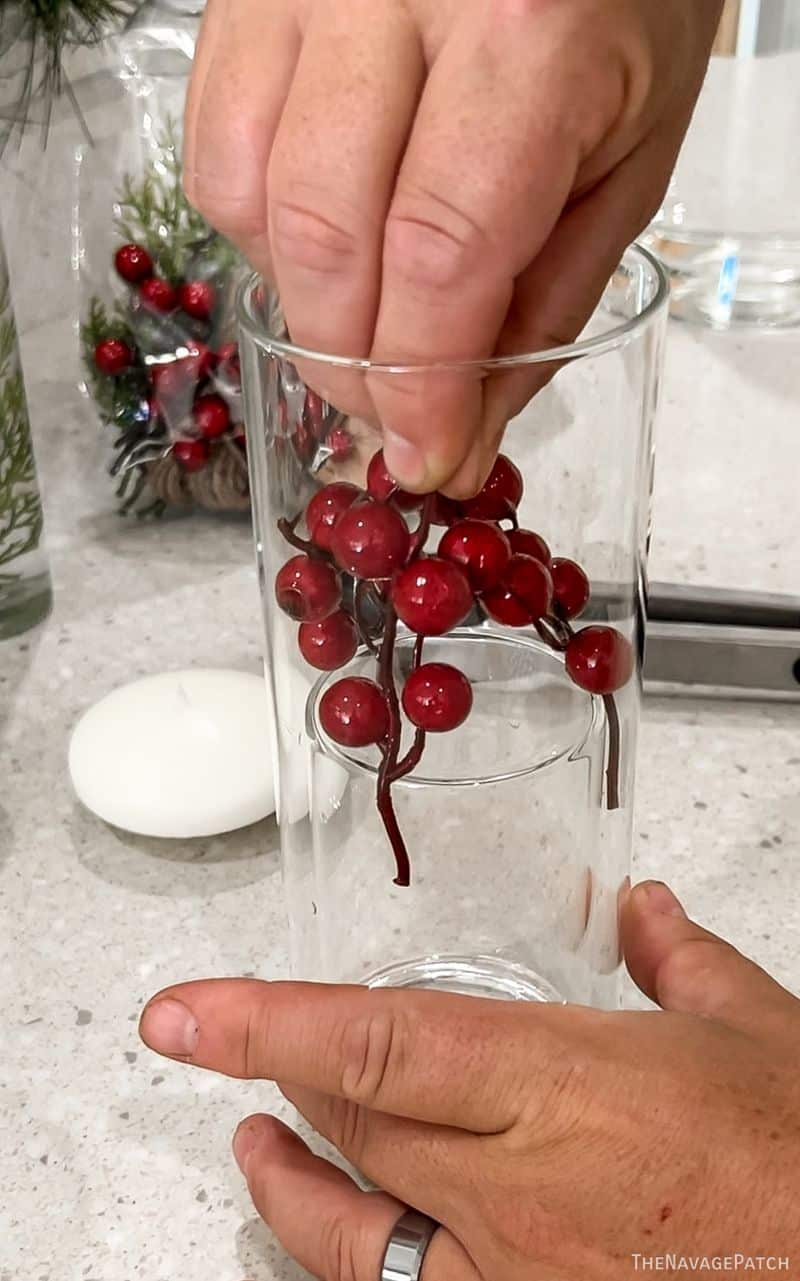
I also added red berries.
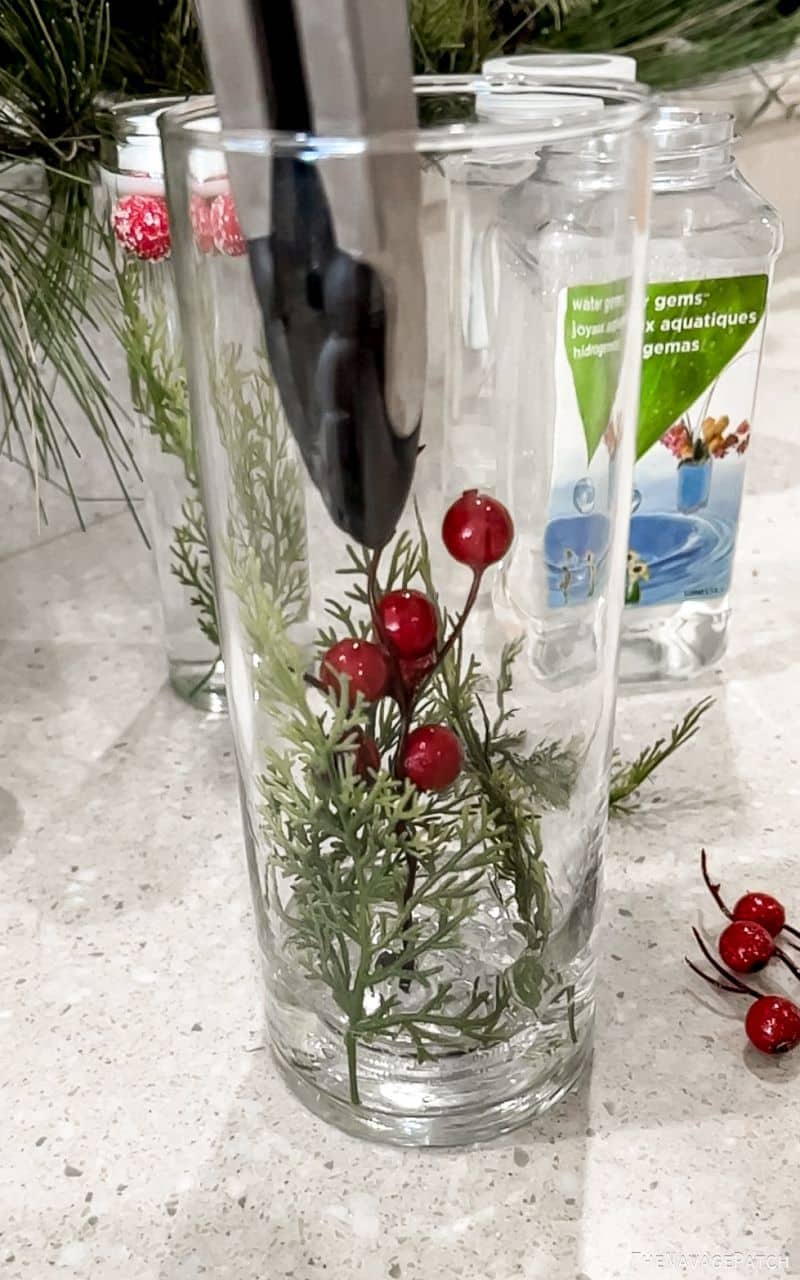
I poured in more water gems to cover the greens and berries.

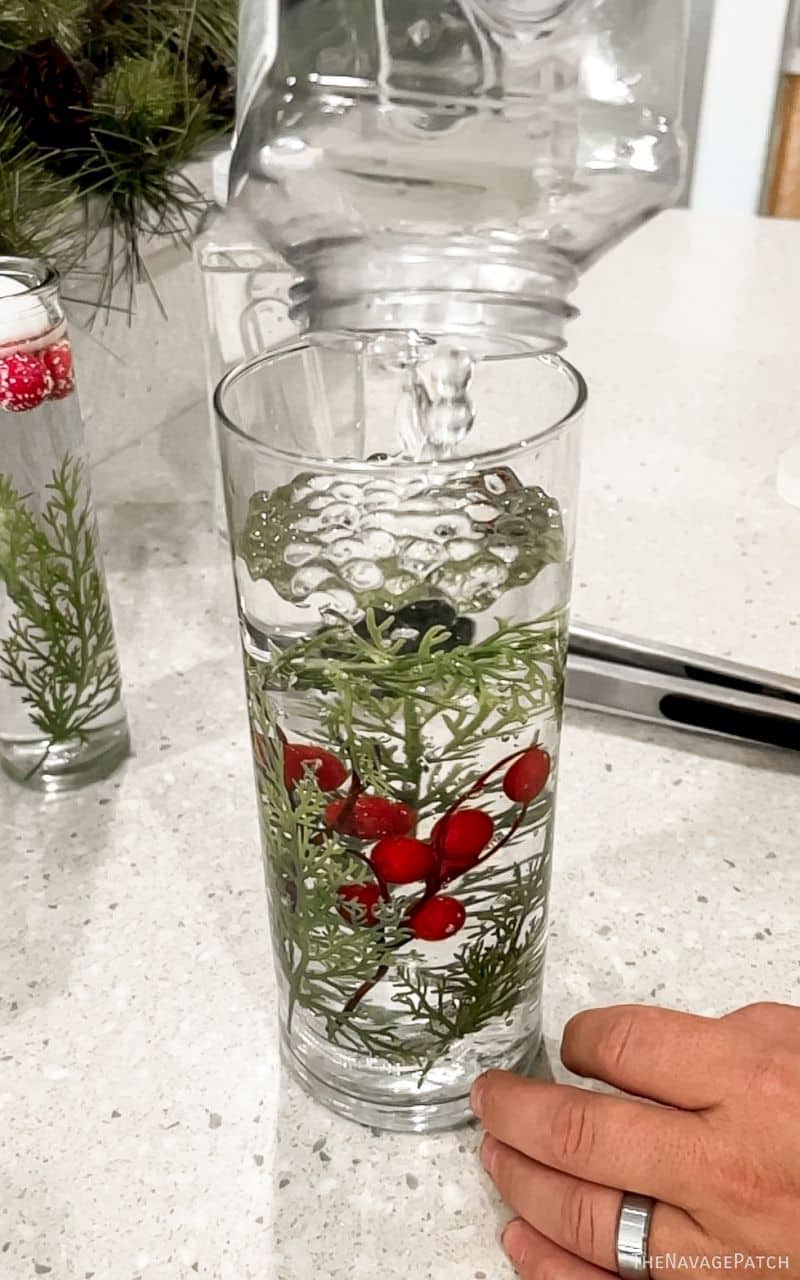
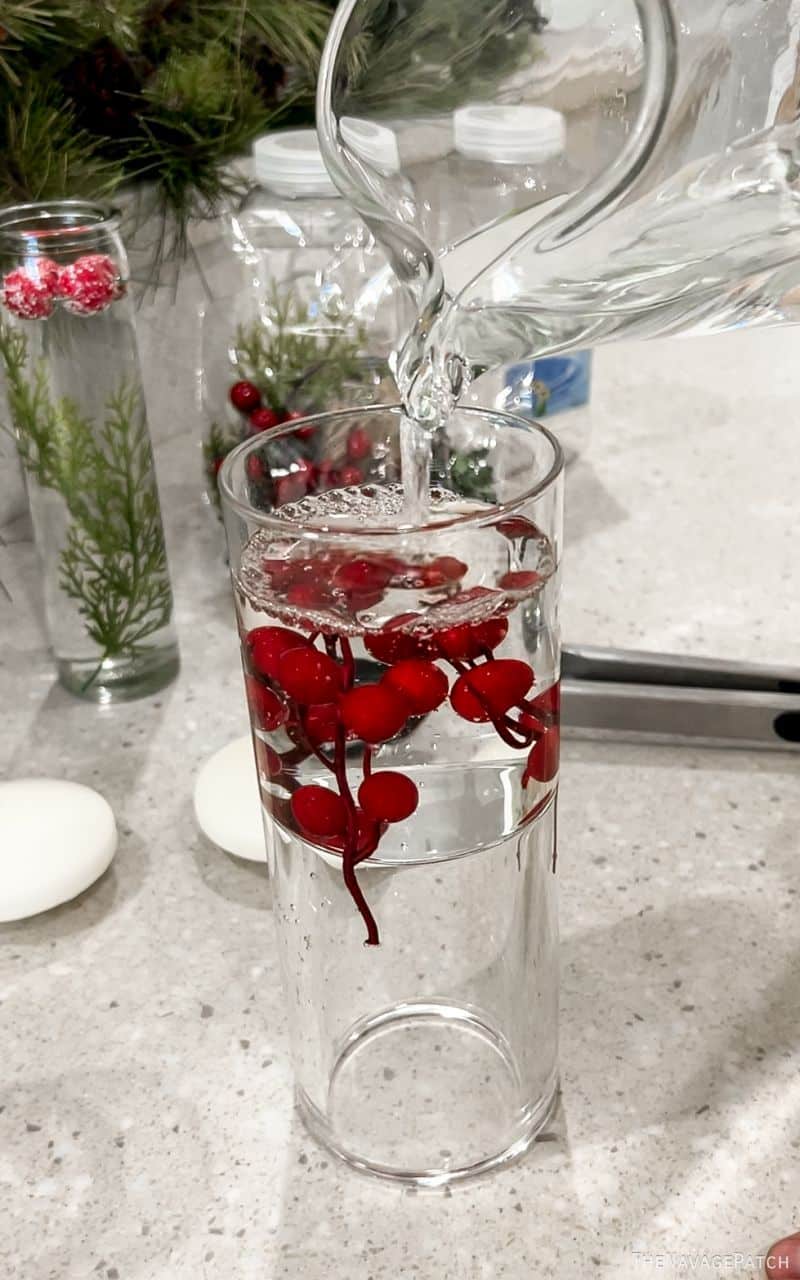
I added one more sprig and then filled the vase. Since these gems were already hydrated and they came packaged in more water, there was no need to add water at the end. But if you hydrate your own gems, after filling the vase, you’ll add water, and then you’ll see the gems magically disappear! It definitely one of the more satisfying crafts to watch!
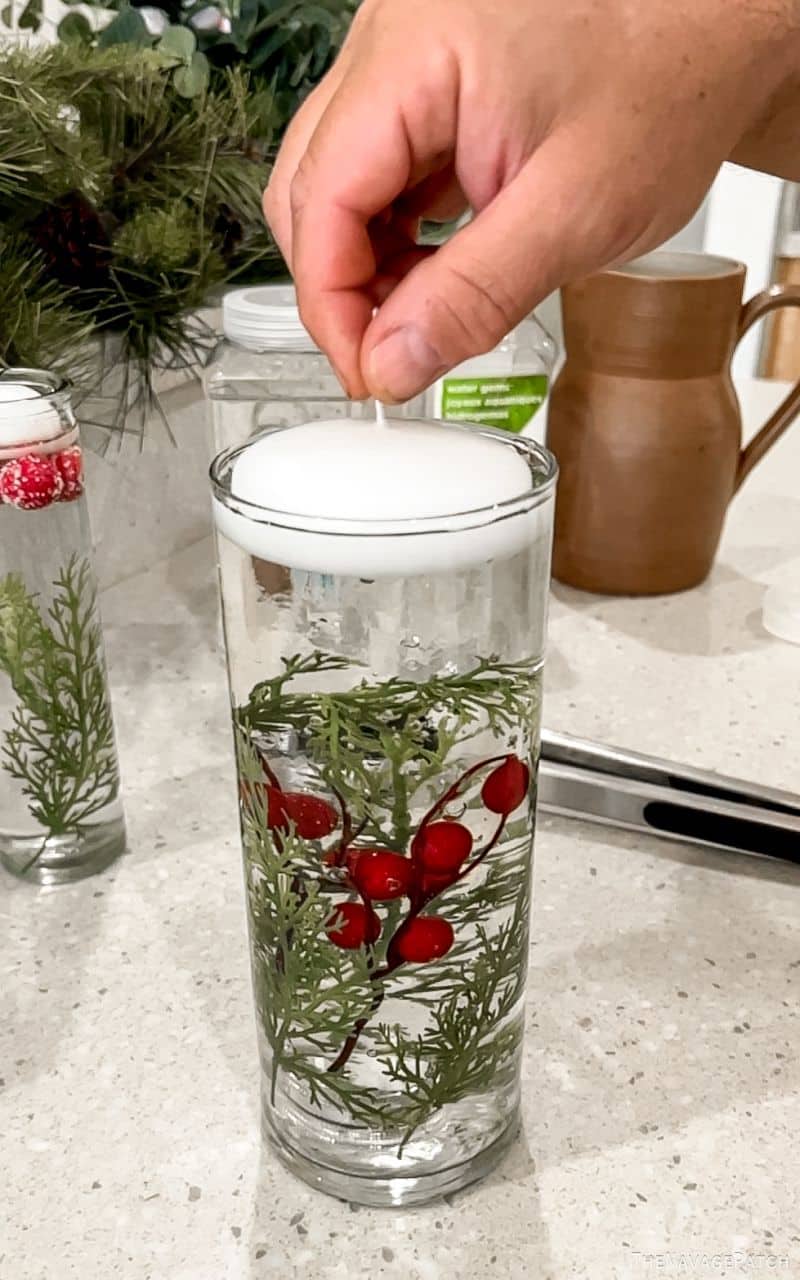
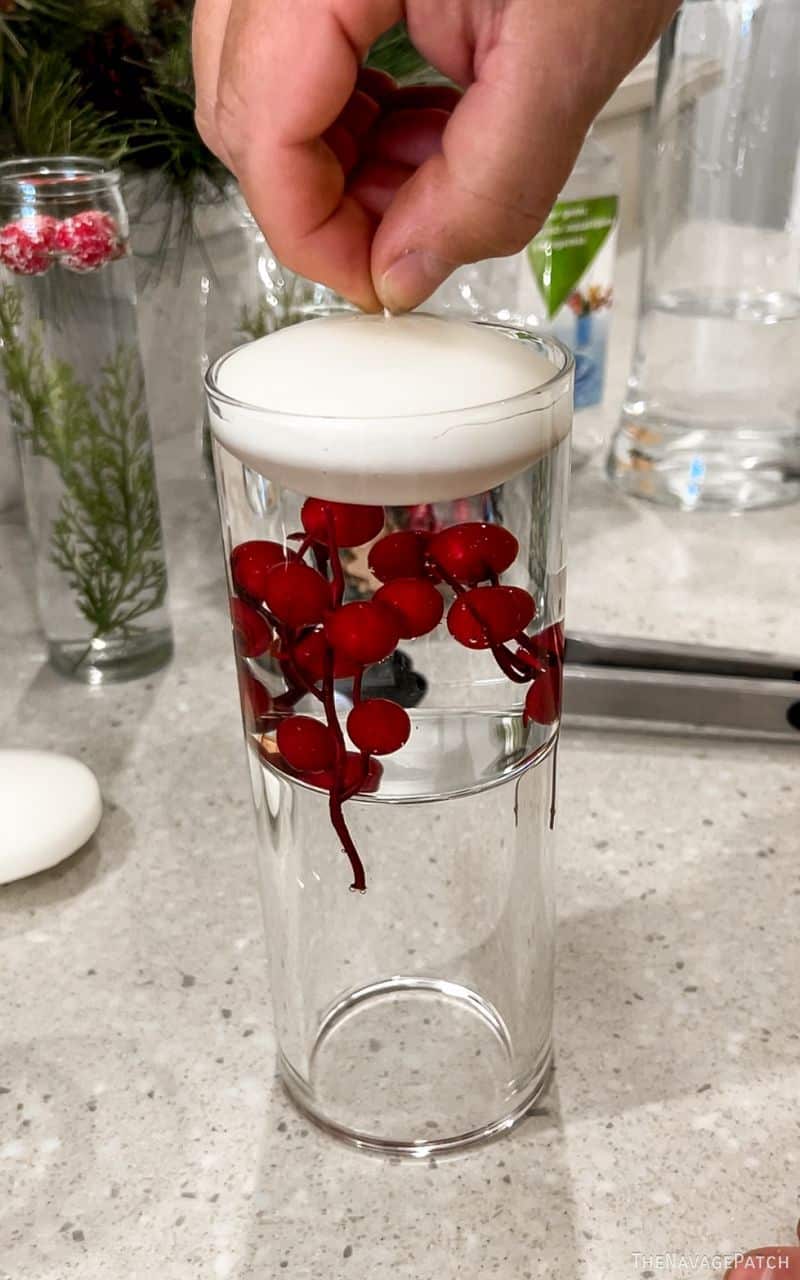
I placed a floating candle on top of the water gems, and that was it for candle #1.
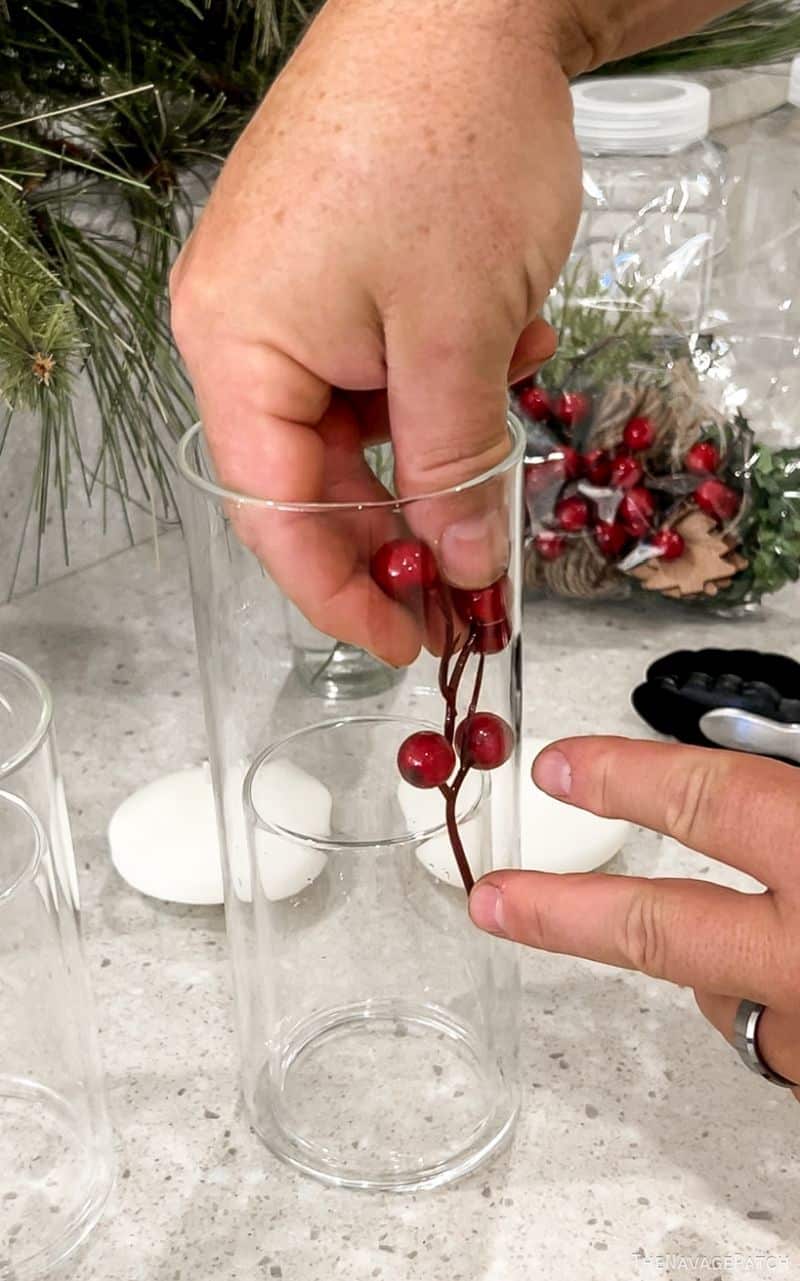
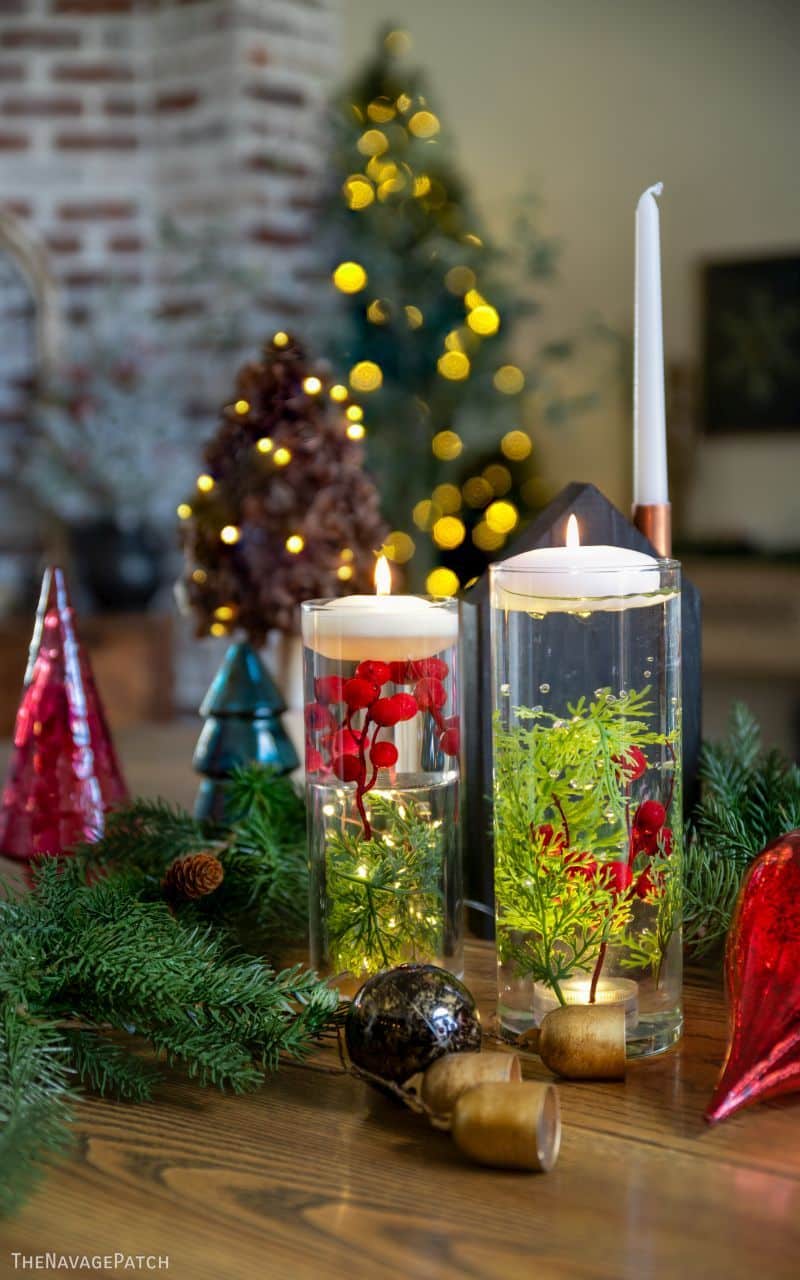
Candle 2 – Inversion
This candle uses a dual-cylinder glass candle holder sold in Michaels stores (not available online). But instead of using it as Ashland intended, we turned it upside down! I then added some berries by wedging the stems between the two cylinders.
Then I simply filled the rest with water and placed a floating candle on top.
There’s an open cavity in the base into which you can place anything you’d like. Since it’s air space and not water space, you can even put fairy lights!
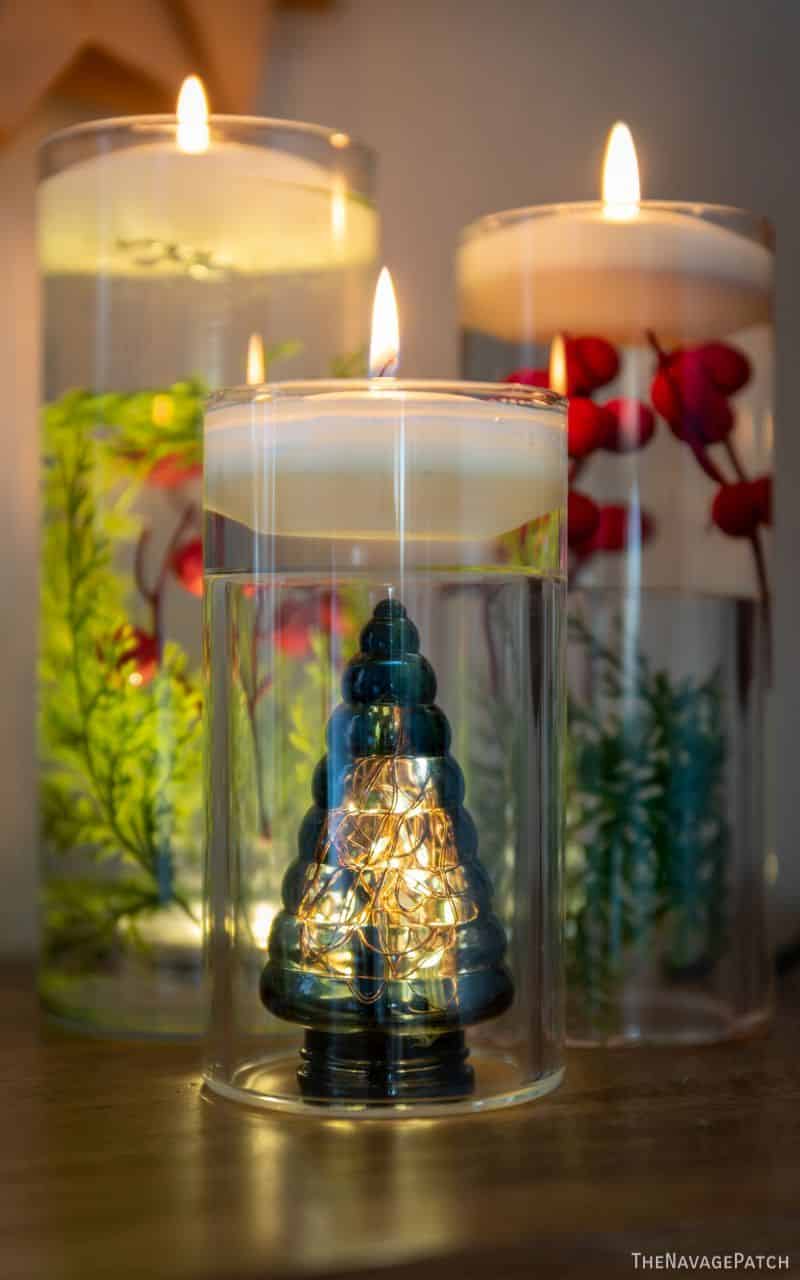
Candle 3 – Inversion #2
The third candle is the easiest ever. I used a smaller dual-cylinder candle, flipped it upside-down and simply filled it with water and then added a floating candle.

You’ll see in the final photos what I put underneath.
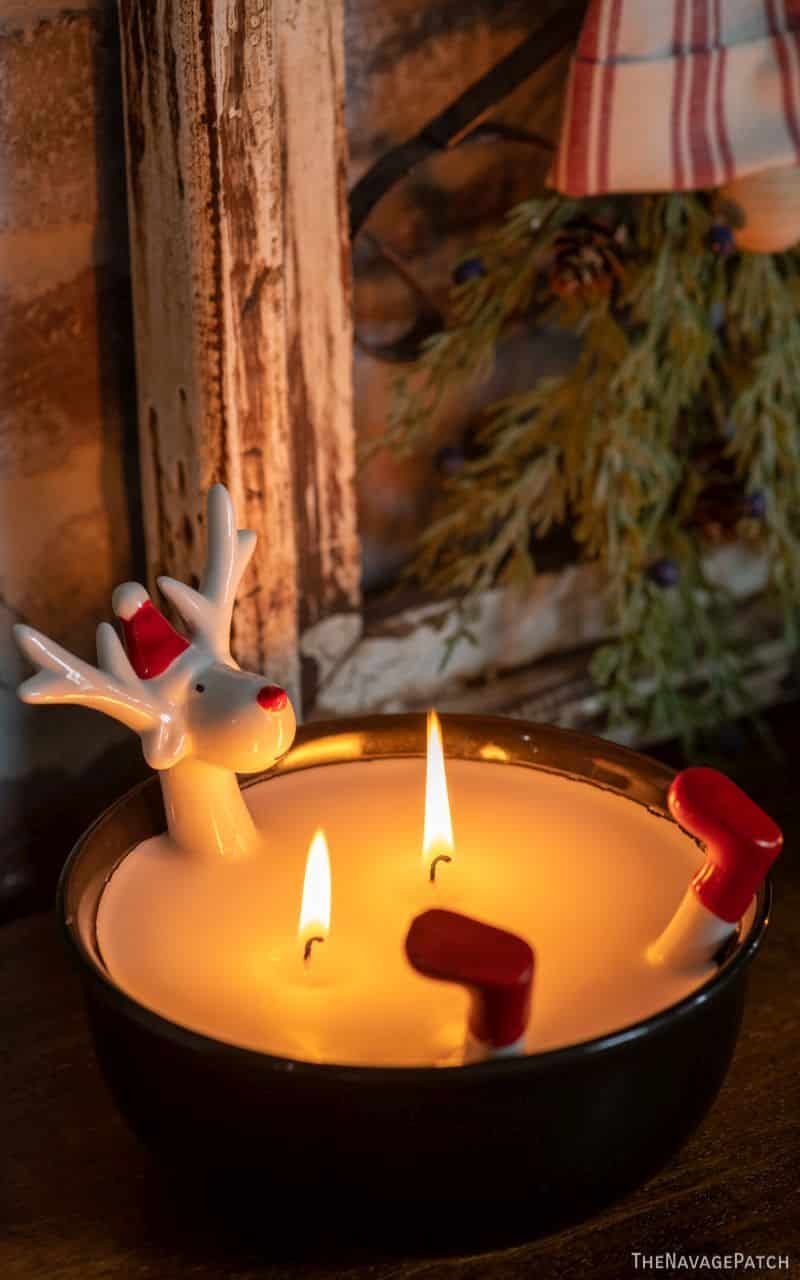
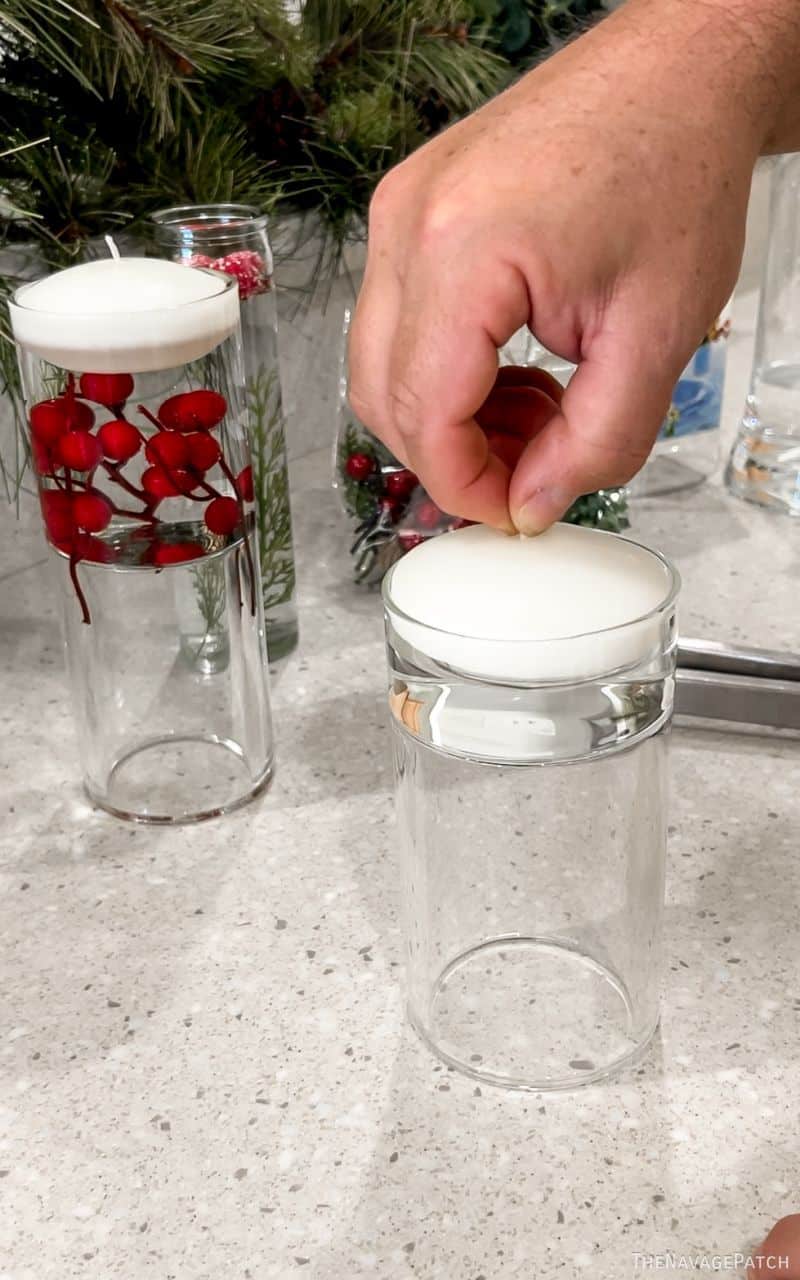
Candle 4 – The Dollar Tree upcycle
If you have leftover jars from Dollar Tree jar candles, this is a perfect upcycle. LED tea lights fit perfectly into these jars.
Next I coiled up some greens from a gift wrap kit we got from Micheals and stuffed them into the jar.
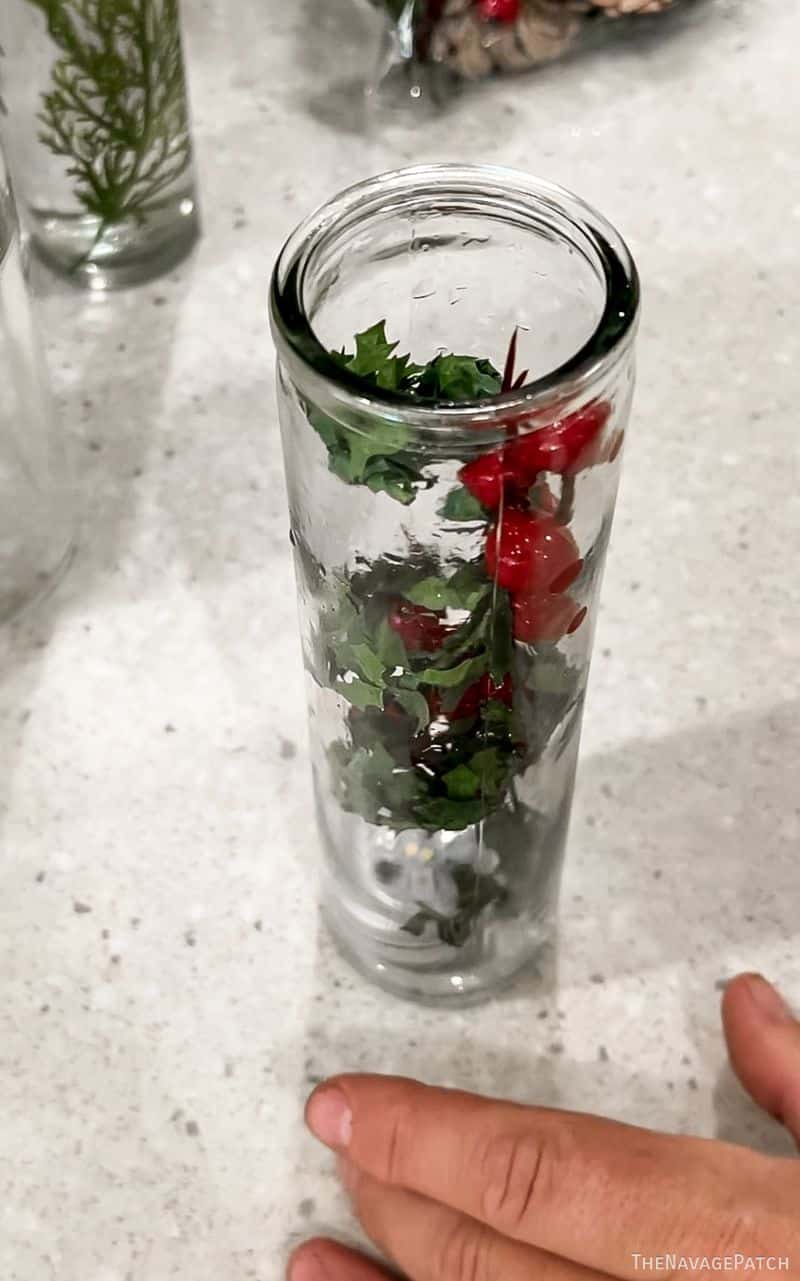
Then I filled the jar with water and added a small floating candle on top.

And here they are – easy floating Christmas candles to add warmth and cheer to our home this holiday season!
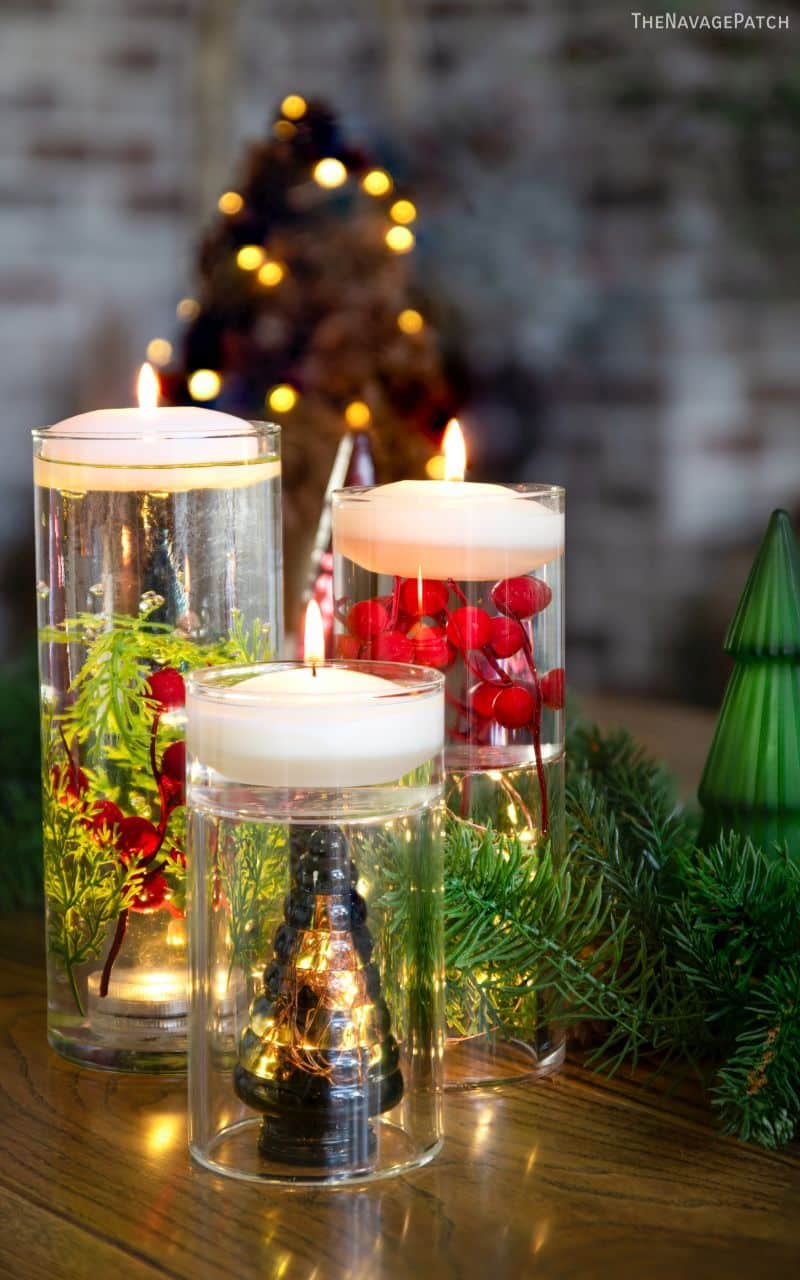
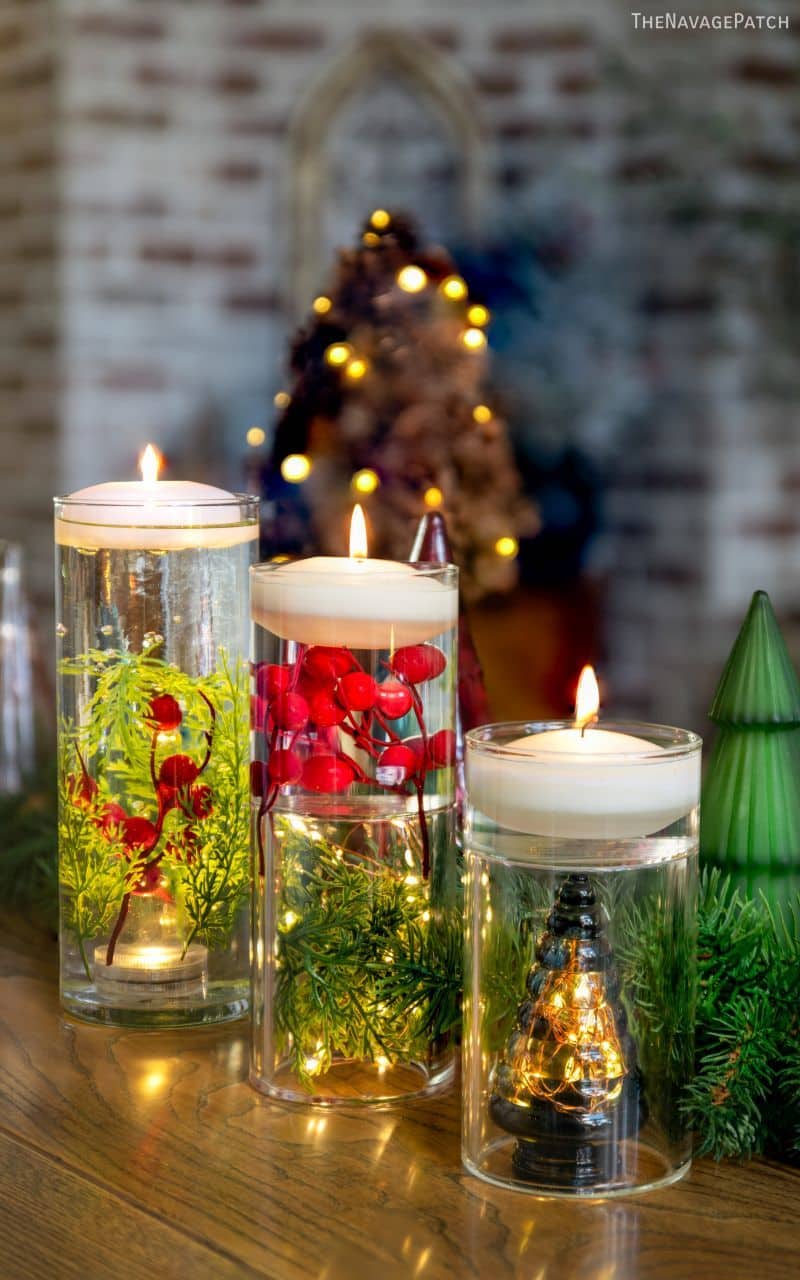
That’s a Target Dollar Spot Christmas tree stuffed with fairy lights inside the air cavity.
Really like the tealights & floating candles!!
Can you buy just white tealights with remote or only multi colors??
I have some I bought years ago, but did not have remote access so had to turn off manually. I prefer the white to other colors I may not use.
Thank you for tutorial.
The ones we buy have a white setting, but as far as I know, there are no pure-white tea lights that are waterproof and remote-control.
Very pretty!! I was a little confused about the water gems. Why that and not just plain water? You said they disappeared, so does it just look like water in the end? That’s what it looked like to me. Thanks. You always do such wonderful crafts.
Hi Karen, the water gems keep the greenery suspended. If you were to fill the vase with water, they’d either float to the top or sink to the bottom!