DIY Iron-On Mugs with Cricut EasyPress Mini (& Free SVGs)
Let your mug do the talking with Cricut EasyPress Mini! Have your morning coffee with sass & style with dishwasher safe DIY iron-on mugs!
What’s in Your Mug?
Let’s face it – without coffee, most of America probably wouldn’t make it out of bed each day.
The promise of coffee is quite literally the only thing that drags my creaking bones out of bed in the morning.
But first, my mind cycles through the same excuses it has since I was a kid, as it searches desperately for a way to stay in bed.
Am I sick? I think I’m sick! Woohoo – sick day!
Is it snowing? It’s probably snowing. WooHoo – snow day!
Is it Saturday? It’s gotta be Saturday! WooHoo – weekend!
Zzzzz.
But the realities of Dad Life intrude, and coffee’s promise lures me out of bed, stumbling and lurching like a drunken zombie.
Well, that and the fact that if I don’t wake up, there’s a good chance that no one would wake up, and Handan and Barish would sleep straight into next week!
Anyway, all movement and motion from the time the alarm sounds is geared towards relocating my mindless and drooling body into the kitchen where it can finally attend to the serious business of coffee preparation.
Full mug of coffee in hand, the day can truly begin.
That coffee mug is my lifeline. From daybreak until sundown, it is rarely out of reach. The same goes for my babes. She’s as much a slave to the (coffee) grind as I am.
And I’ll bet the same is true for most of you!
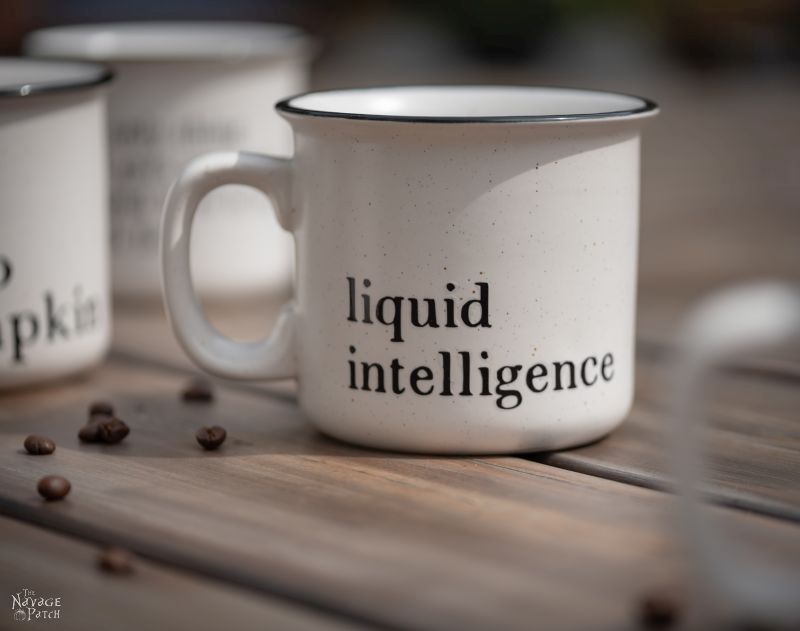
Coffee is king here at The Navage Patch, and our mugs are like extensions of our arms. It stands to reason then, that our mugs should reflect our personalities.
It’s Time For a Personalized Mug!
Handan and I have been wanting some personalized coffee mugs for a while now, but we’re not keen on buying things that we can make ourselves. Plus, I prefer to write my own little sayings (that shouldn’t surprise you).
So, yeah, we wanted our own personalized mugs, but other projects kept getting in the way, so we had to keep putting the idea on the back burner.
Plus, we weren’t sure how to go about doing it.
Heat transfer vinyl seemed like a promising avenue to explore, but what the heck would we use for a heat source?
Our Cricut EasyPress 2?
LOL, I don’t think so, Tim.
Lucky for us (and you!), Cricut has a new entry in the EasyPress lineup, and it seemed perfect for the job.
Meet the Cricut EasyPress Mini. It’s the Little Heat Press That Could!
Cricut EasyPress Mini
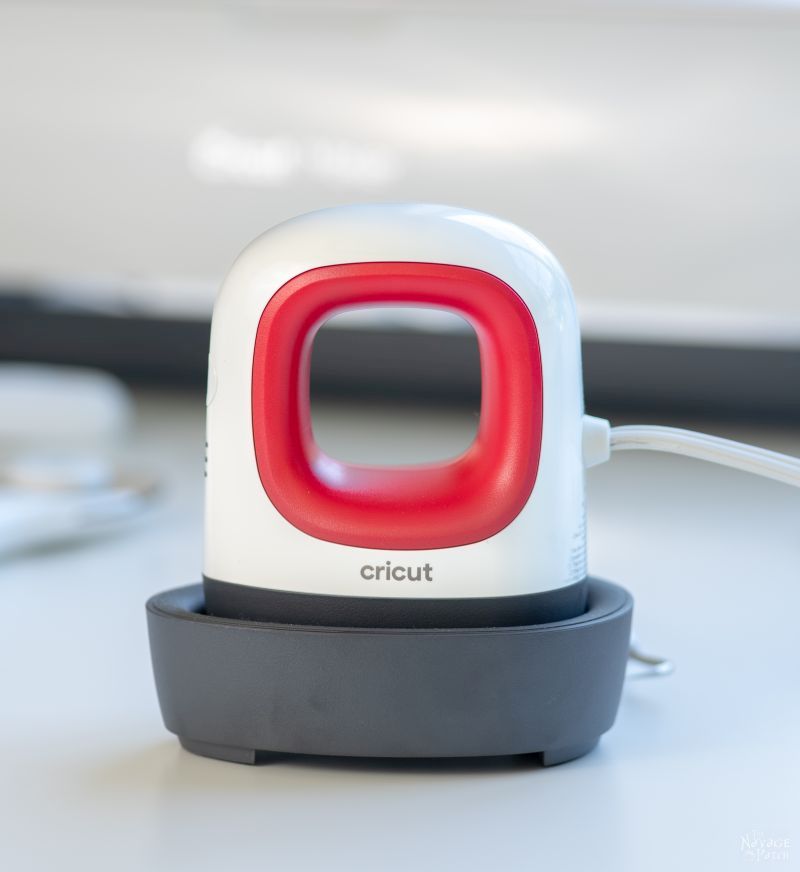
Cricut is touting this half-pint heat press for HTV transfers to shoes, hats, sleeves or anywhere a traditional heat press or full-size iron wouldn’t fit.
I’m sure it’s great for all of those things, and we will be fully exploring its capabilities in future posts.
But first?
We had other plans for it.
Plans I don’t think even Cricut has thought of.
Fashion applications would have to wait.
We needed coffee, and we wanted to drink it from mugs that made a statement!
Handan and I had a blast designing and making these little coffee mug gems, and we so enjoyed the Cricut EasyPress Mini. It’s a versatile little guy that’s already been used to make these mugs, to fix a flawed transfer on a pillowcase, and just the other morning, I caught Handan ironing a blouse with it in the craft room! [well, what can I say – it’s such a light and cute little thing, it sure is easier to handle than our iron! – Handan]
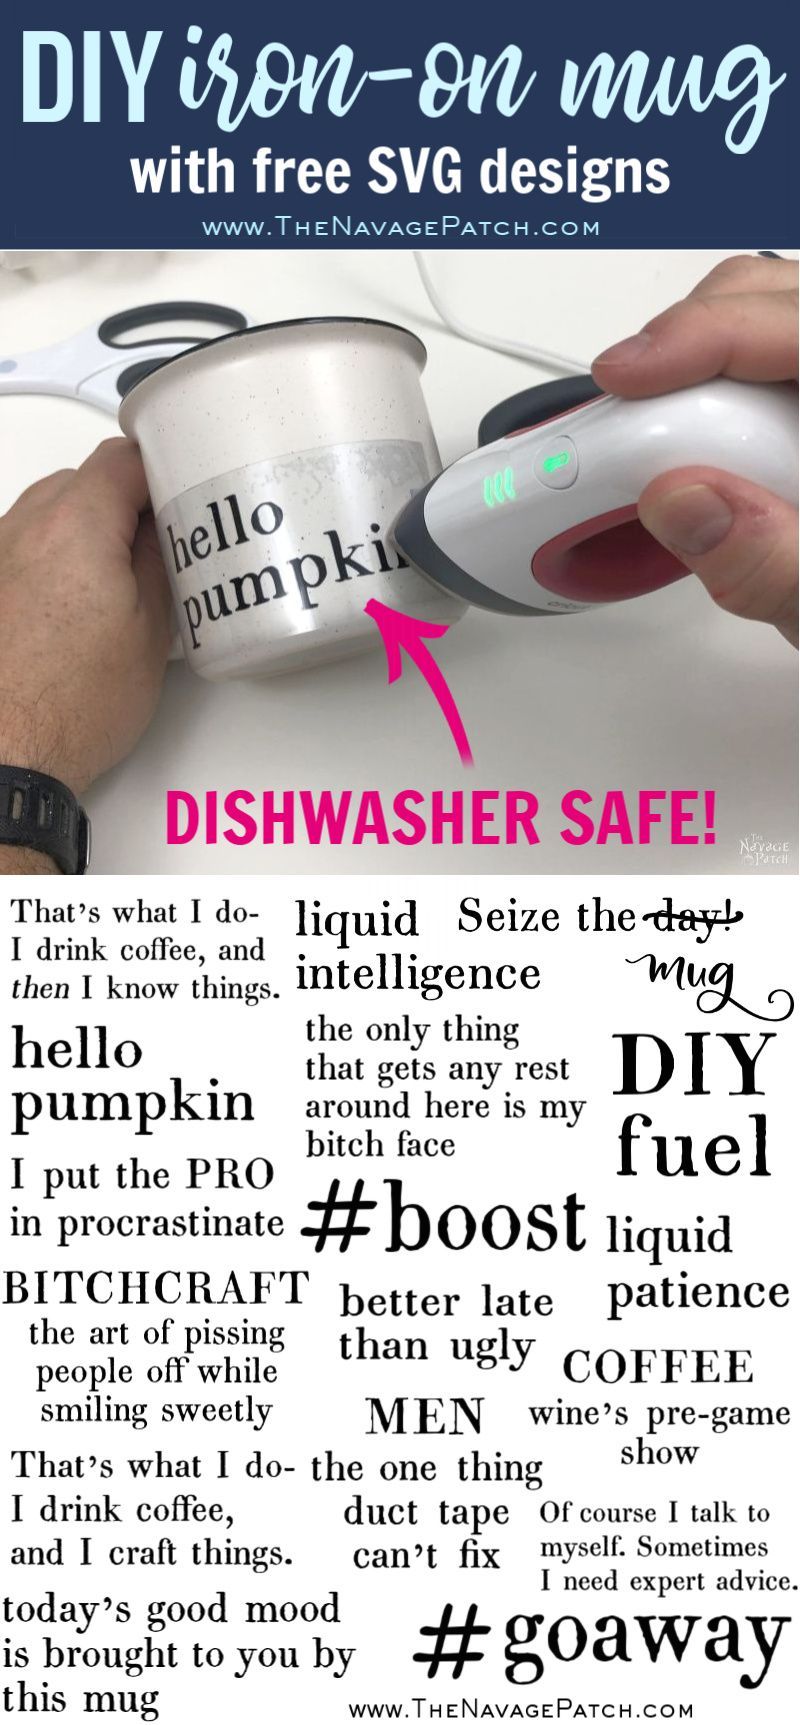
DIY Iron-On Mugs with Cricut EasyPress Mini
SUPPLIES LIST
Affiliate links are provided below. Full disclosure here.
- Cricut Maker or Explore Air 2
- Cricut iron-on foil (we used black)
- Free SVG designs (available in The VIP Patch)
- Cricut standard grip mat
- Cricut brayer (optional)
- Weeding tools
- Scissors
- Flat-sided mugs
- Rubbing alcohol and paper towels
- Cricut heat-resistant tape
- Cricut EasyPress Mini
- Oven
- Oven mitts


This is a sponsored conversation written by me on behalf of Cricut. The opinions and text are all mine.
Okay, before I get into the tutorial, let me explain why we used iron-on foil.
Why not everyday vinyl? Or glitter? Or Sportflex?
Well, we tried it all.
I spent a full day cutting, weeding and ironing much of Cricut’s iron-on product line onto our mugs.
We wanted mugs that would survive the dishwasher, so after I applied our designs, I put them right in the dishwasher.
They all failed.
Some washed off completely.
Only foil fared reasonably well, though a few of the letters washed away. But the ones that remained were stuck on there good! We felt like we were onto something…
So we thought about it a bit and decided to try putting one of the mugs made with foil iron-on in a 300 degree oven for about 20 minutes.
And that was it! The oven heat set the iron-on firmly on the mug.
The mugs then survived the dishwasher with flying colors.
We had our formula for success.
Let’s check it out!
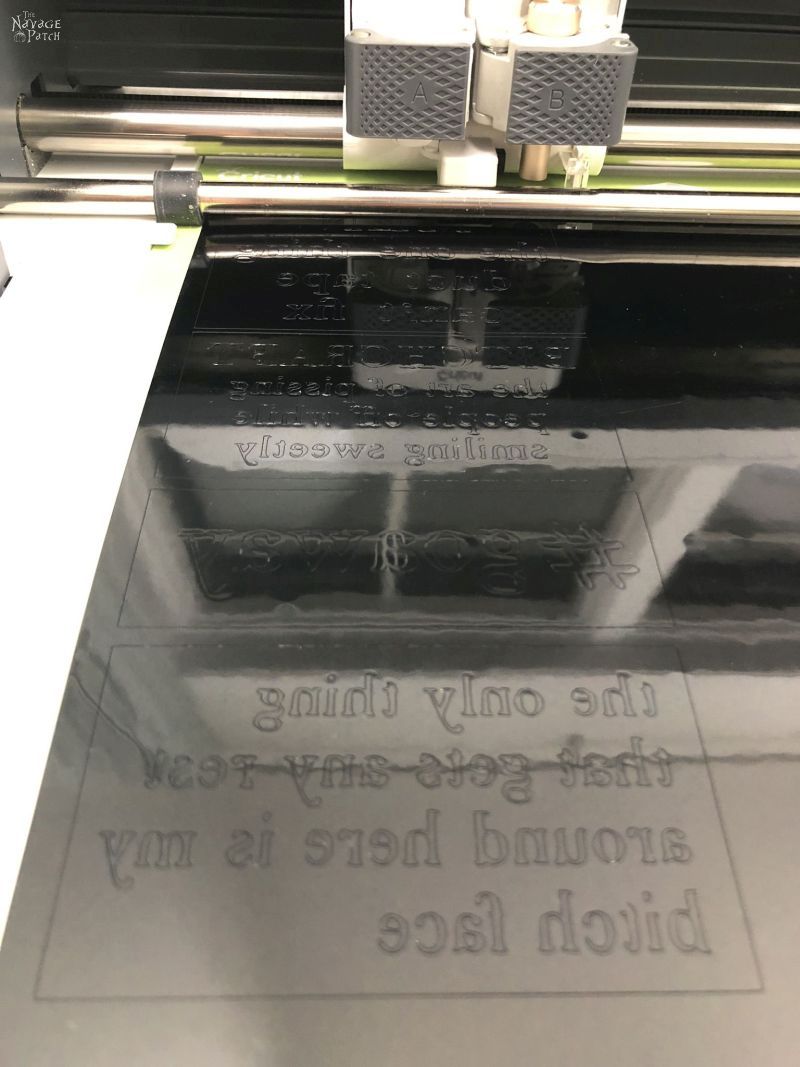
Step 1 – Load your designs into Cricut Design Space
Don’t forget to reverse the images!
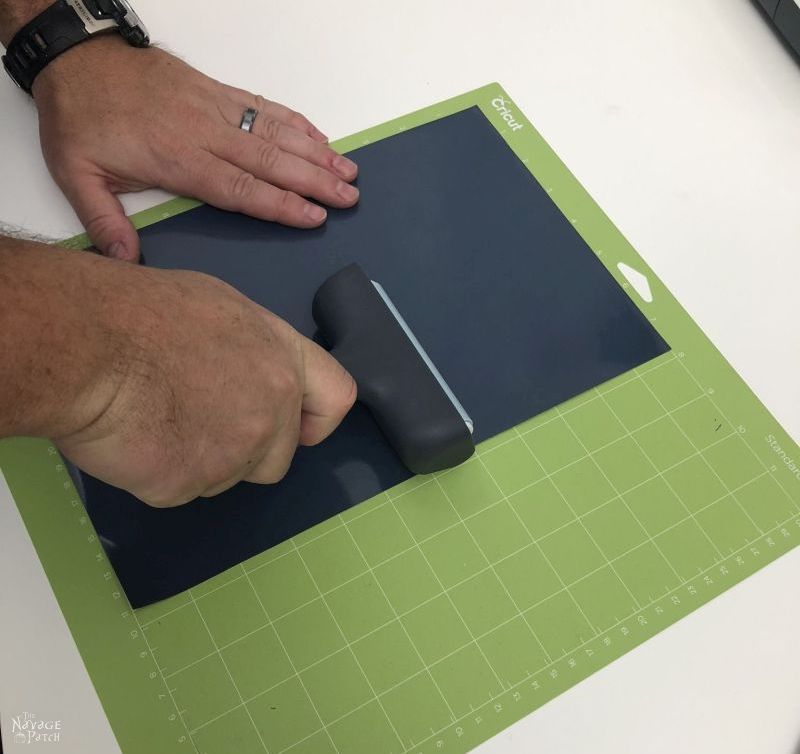
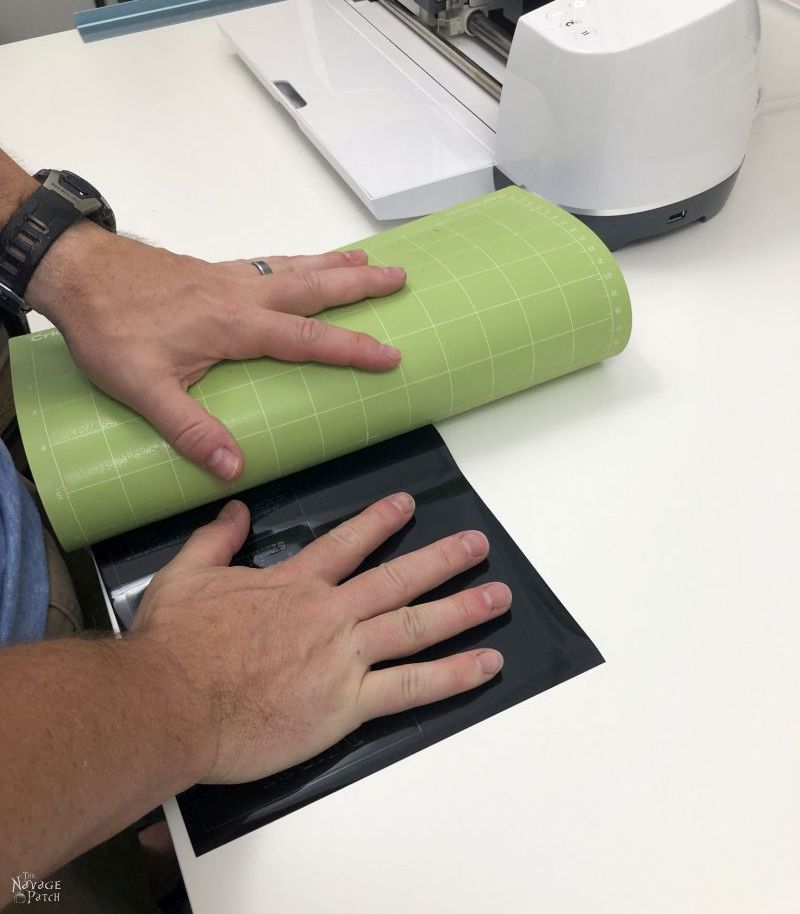
Step 2 – Prepare the iron-on foil for cutting
I positioned the foil on a standard grip mat and used a brayer to flatten and secure it. Remember – with iron-on transfer sheets, the backing goes face-down on the mat. And here’s the part that trips people up (including us): the backing is actually the side your brain wants to think of as the front – it’s the shiny side with the color. The backing is a clear plastic layer over that colorful shiny side.
Yeah, we goofed up on that a couple of times when we weren’t paying close enough attention. (Okay, look, don’t tell anyone, but it was totally Handan who screwed up with putting those sheets on backwards! Shhhhhh!!!)
Hey, at least this time we always remembered to reverse our images!
Step 3 – Cut the designs with a Cricut Maker, Explore Air 2 or other smart-cutting machine
This will take anywhere from a few to several minutes, depending on how many designs you’re cutting at once.
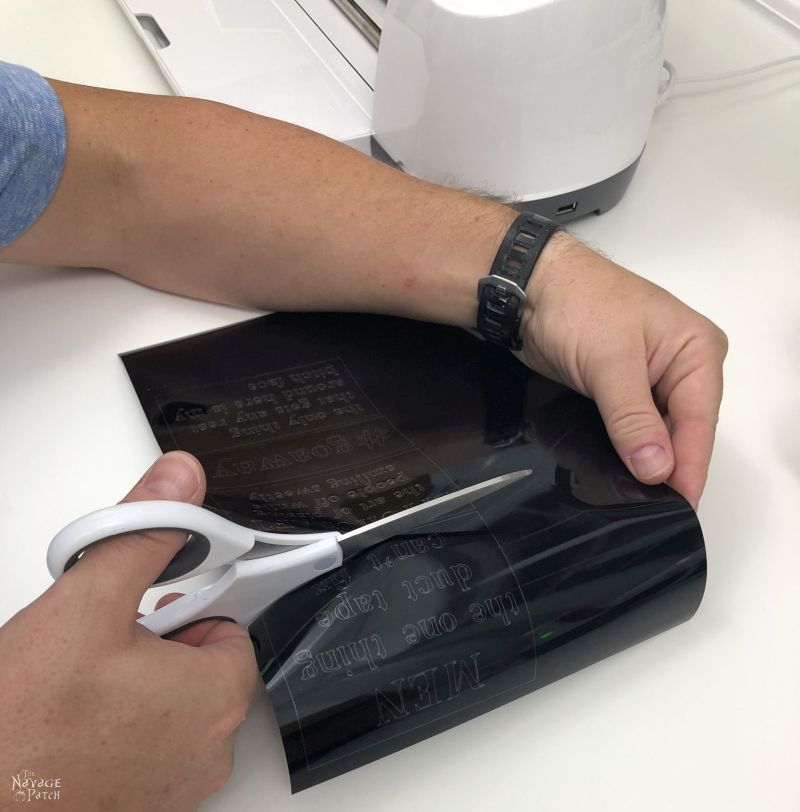
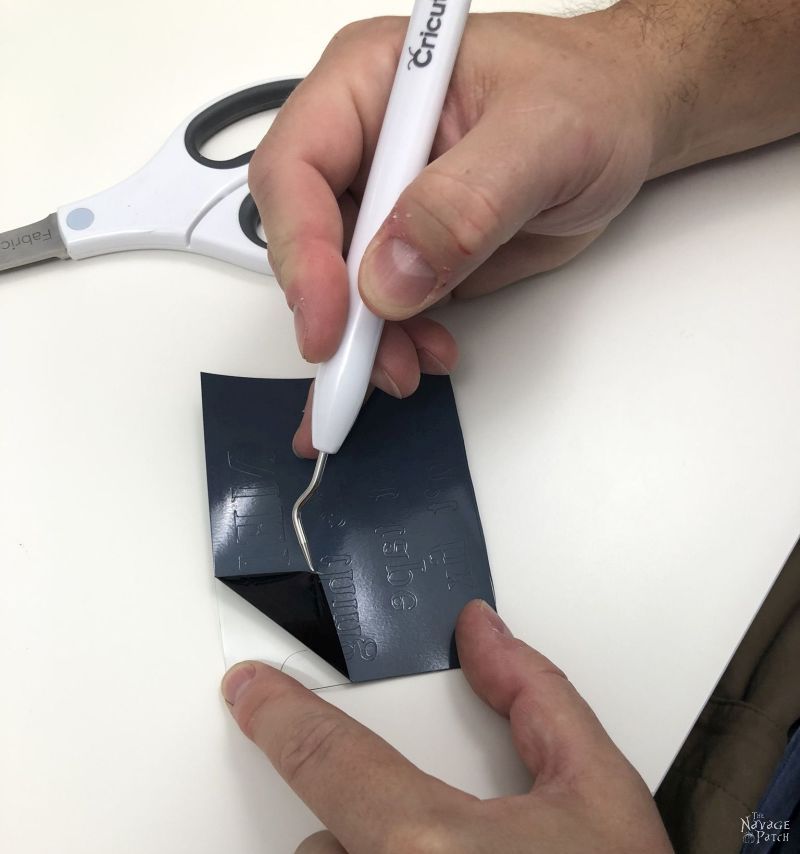
Step 4 – Peel, trim and weed
I peeled the mat from my iron-on foil.
Then I trimmed the excess HTV from the designs.
Weeding iron-on foil is very easy, though some smaller elements like periods and commas gave some occasional difficulty.
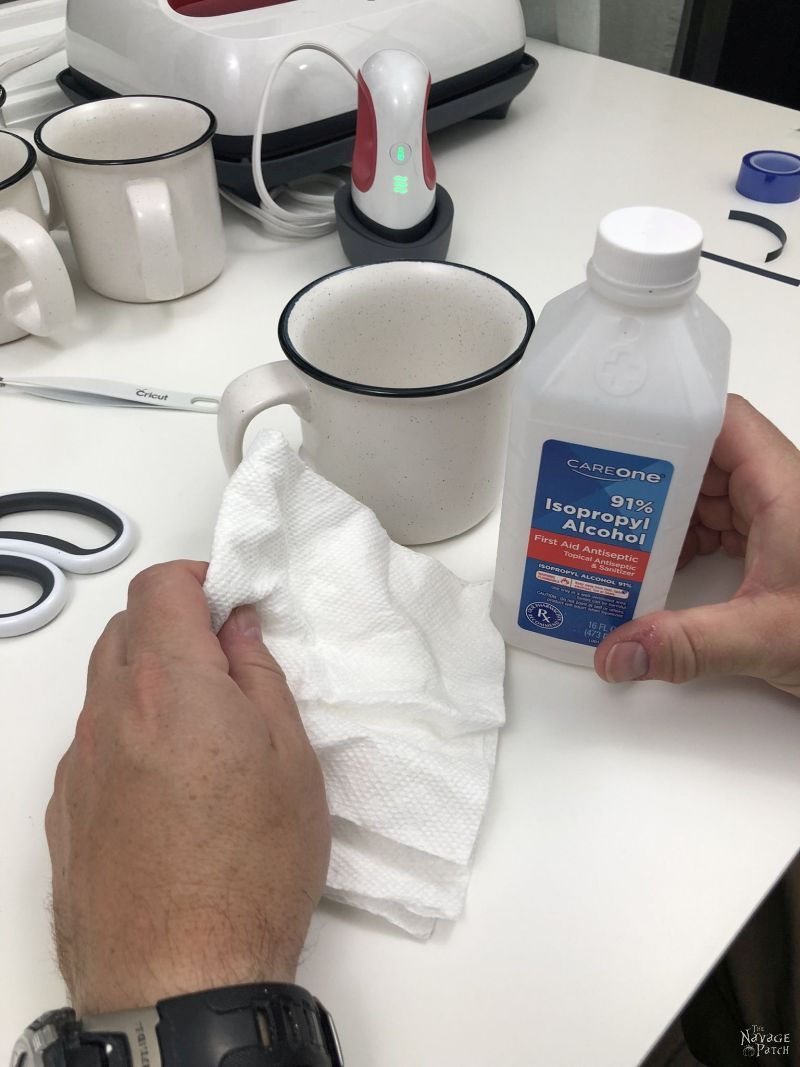
Step 5 – Clean the mug
After washing the mugs with warm soapy water and drying them thoroughly, I further cleaned each one with rubbing alcohol. I didn’t want the slightest trace of dirt or oil!
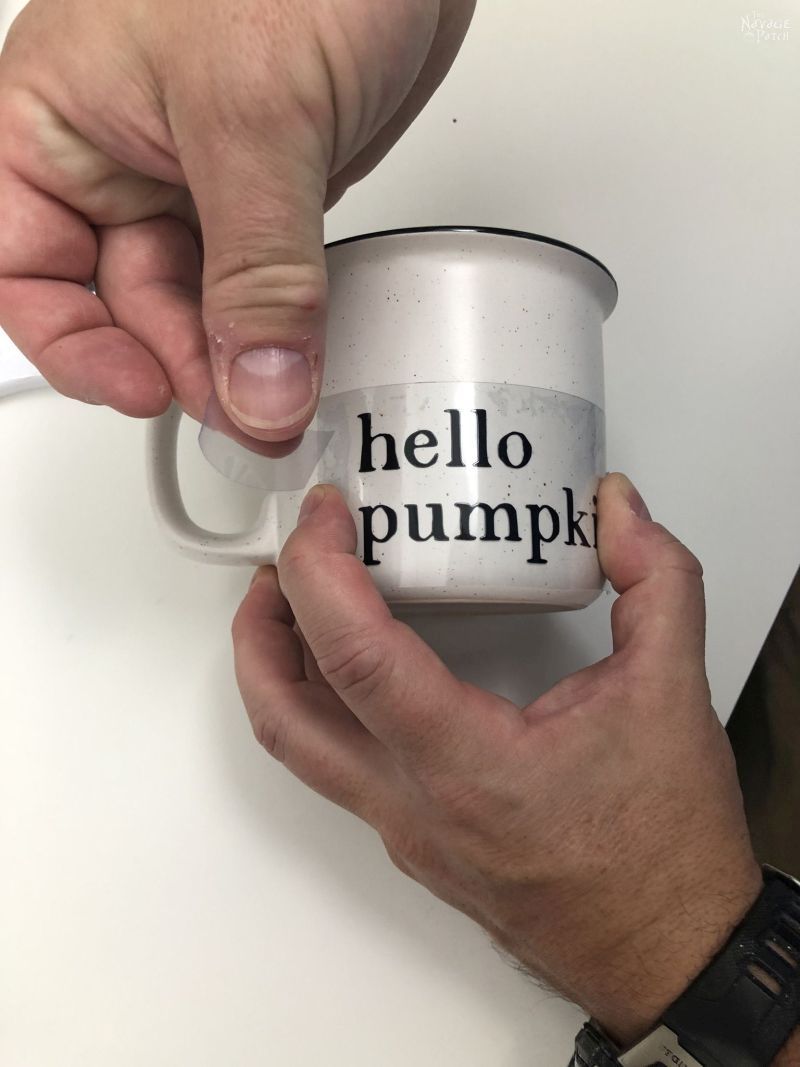
Step 6 – Position the design on the mug
The iron-on foil backing is less sticky than the other iron-ons I tried, and to keep the design in place, I had to use a couple of pieces of heat-resistant tape.
First I positioned the design, and then I taped the sides with heat-resistant tape.
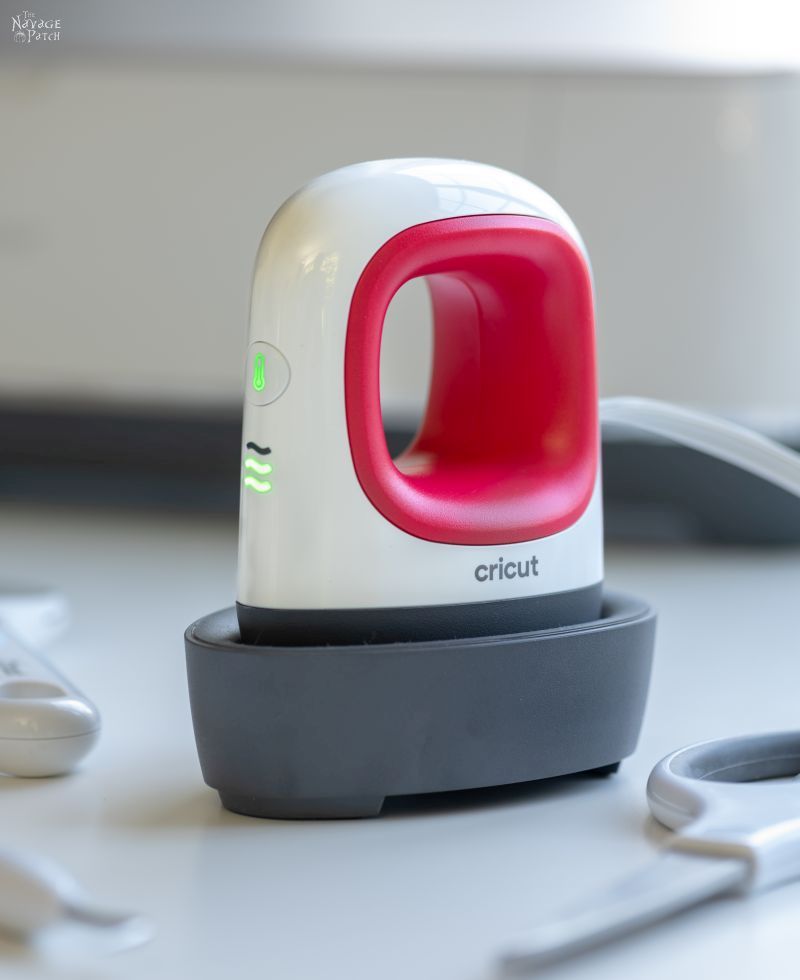
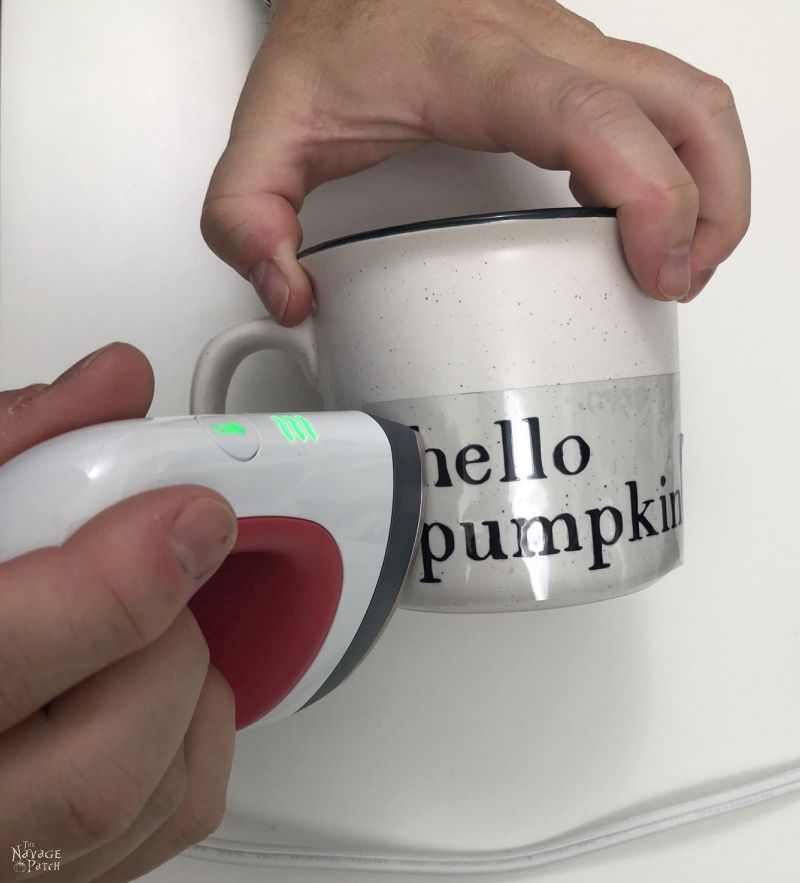
Step 7 – Transfer the design with Cricut EasyPress Mini
The Cricut EasyPress Mini has 3 heat settings. The highest of these is 400 degrees (that’s enough to transfer Cricut Infusible Inks, but that’s a different story for a different post!) For these iron-on foil transfers, I chose the hottest setting.
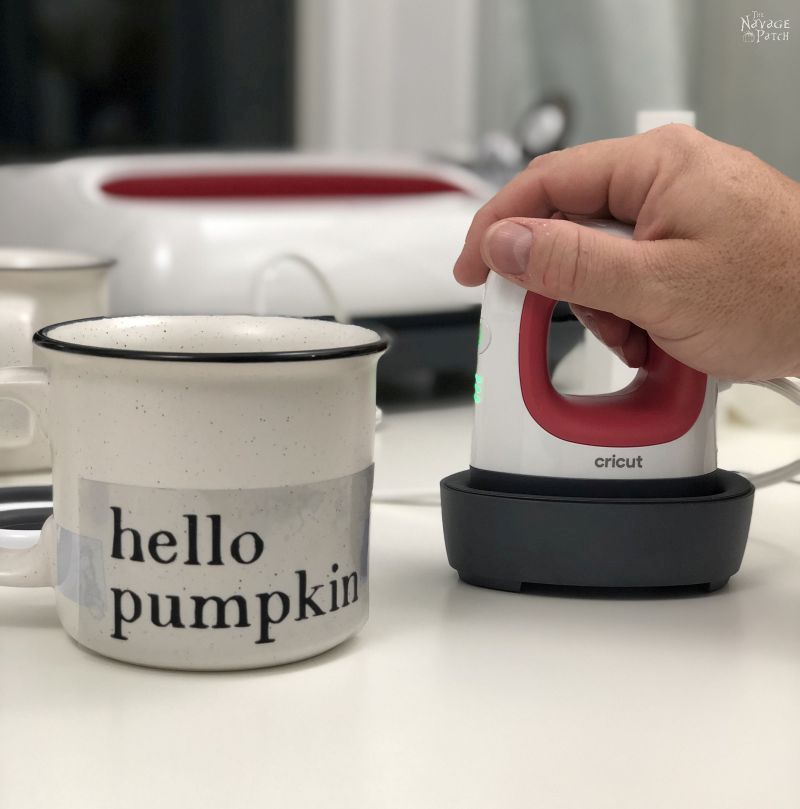
I worked slowly around the design, spending about 20-30 seconds on each letter. Patience is key when transferring iron-on foil to mugs, but it’s an easy process, and there’s no need to press beyond the weight of the Cricut EasyPress Mini.
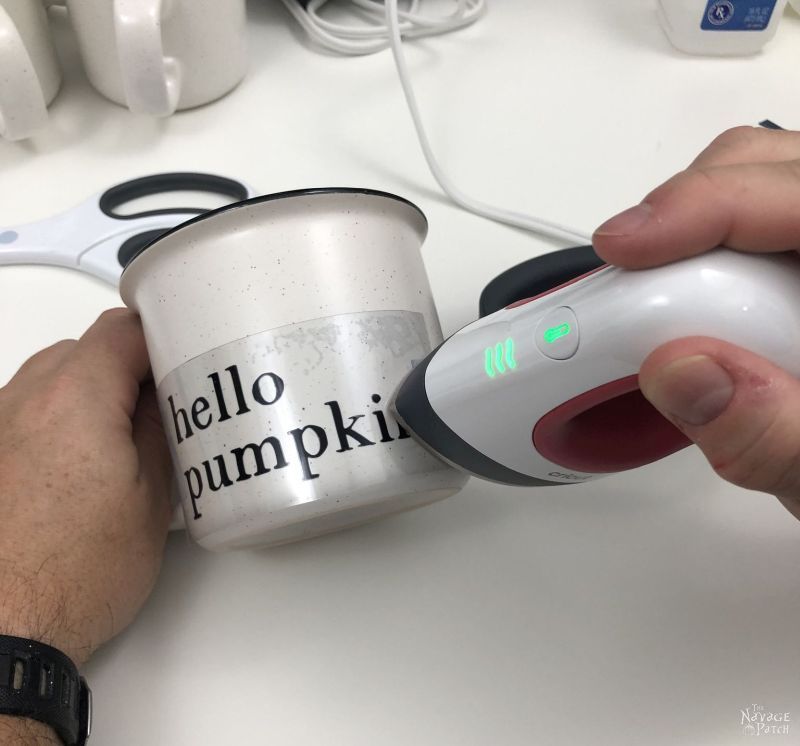
This short video shows how fast I moved the Cricut EasyPress Mini over the mug.
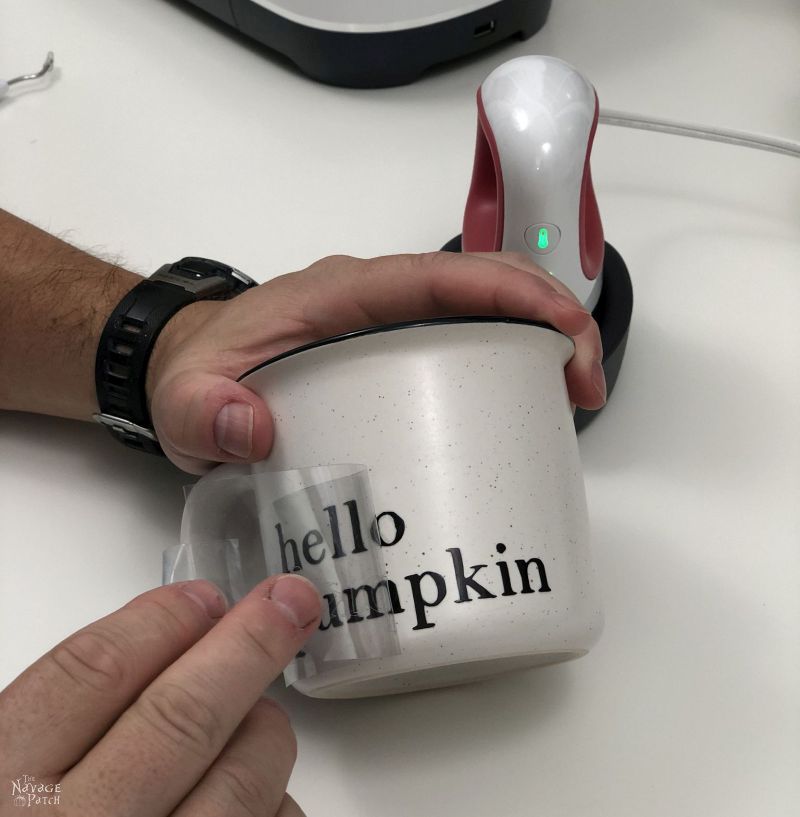
Step 8 – Peel and bake
I peeled the backing right away.
And then I placed the mug in a 300 degree oven for 20 minutes.
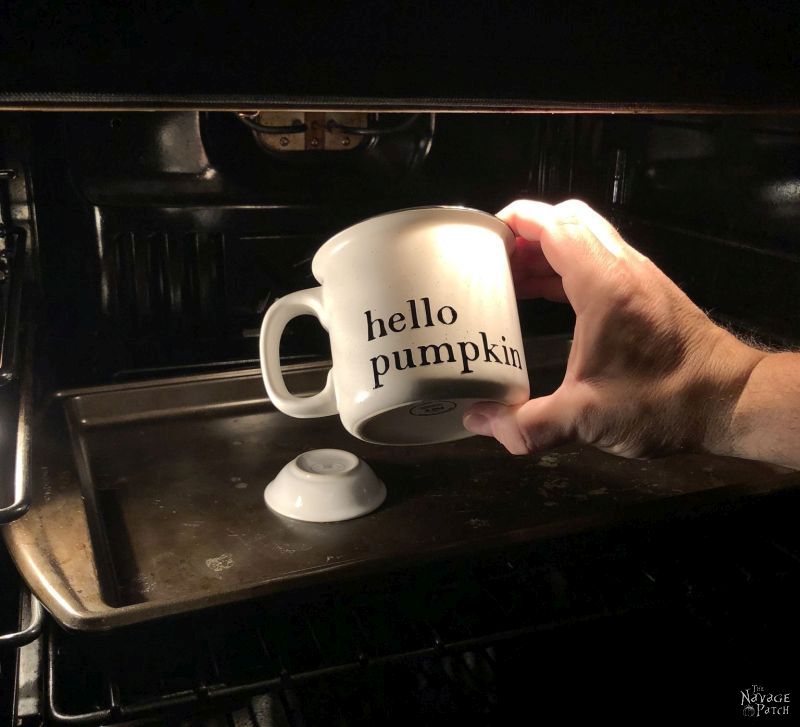

After 20 minutes, I removed the mug with oven mitts and placed it on the counter to cool completely.
DIY Iron-On Mugs Made with Cricut easyPress Mini

We couldn’t be happier with how our iron-on mugs turned out!
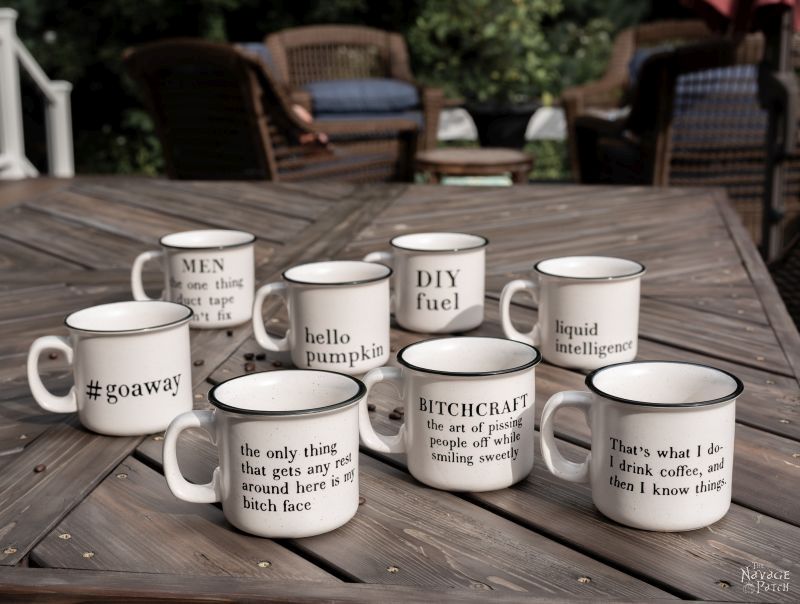
Those who’ve watched Game of Thrones will get this mug. For those who haven’t, I’ll give you the original quote: “That’s what I do – I drink, and I know things.”
I’ve modified it a bit, and in the VIP Patch, we’re giving you three versions. I like the one below the best!

We all know (well, those of you who’ve been around for a while, at least) that I’ve got a pretty mean Resting Bitch Face going on. But it’s all good! There’s no anger behind the RBF! 🙂

This is my babes when the situation calls for it!

Well, duh. You don’t fix what ain’t broke!
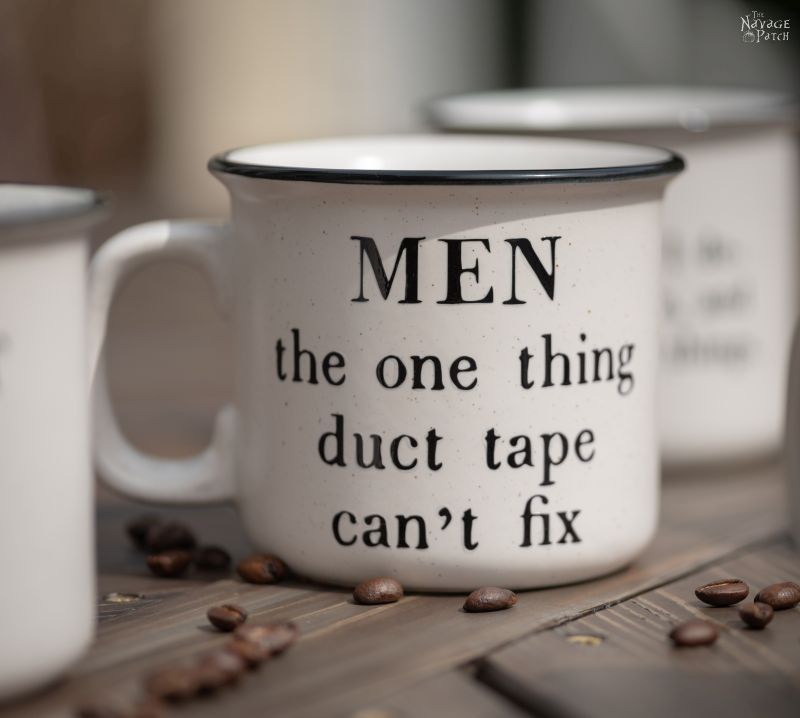
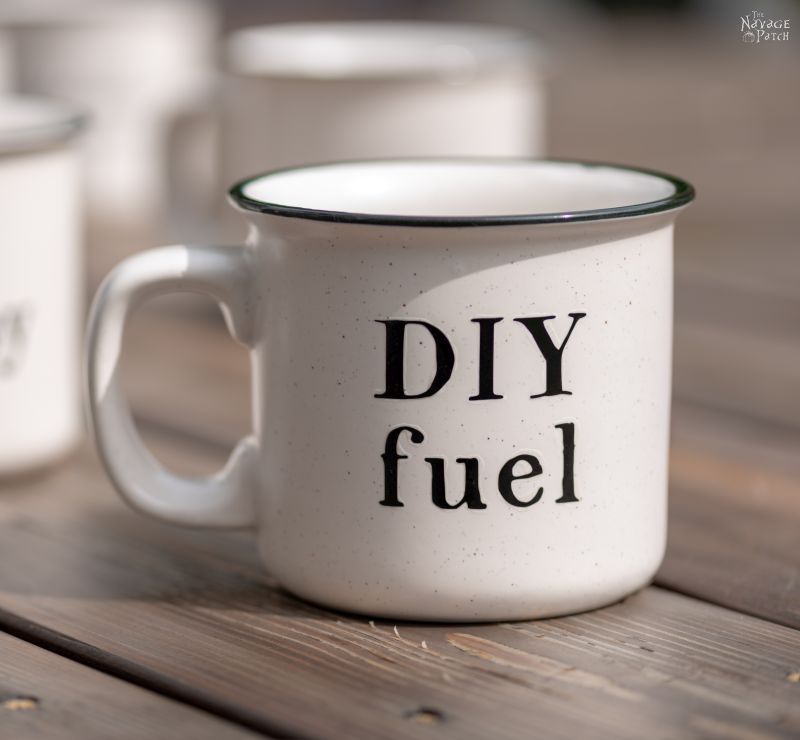
Seriously, though. No project starts without coffee.
You can have this mug when you pry it from my… Well, you know the rest. 🙂

Oh, and before I forget – even though these are foil iron-ons, they’re perfectly microwave safe. We’ve reheated several mugs of coffee with no problems. That said, if you put one in the microwave and see sparks, you may want to press “Cancel.” 😉
*******
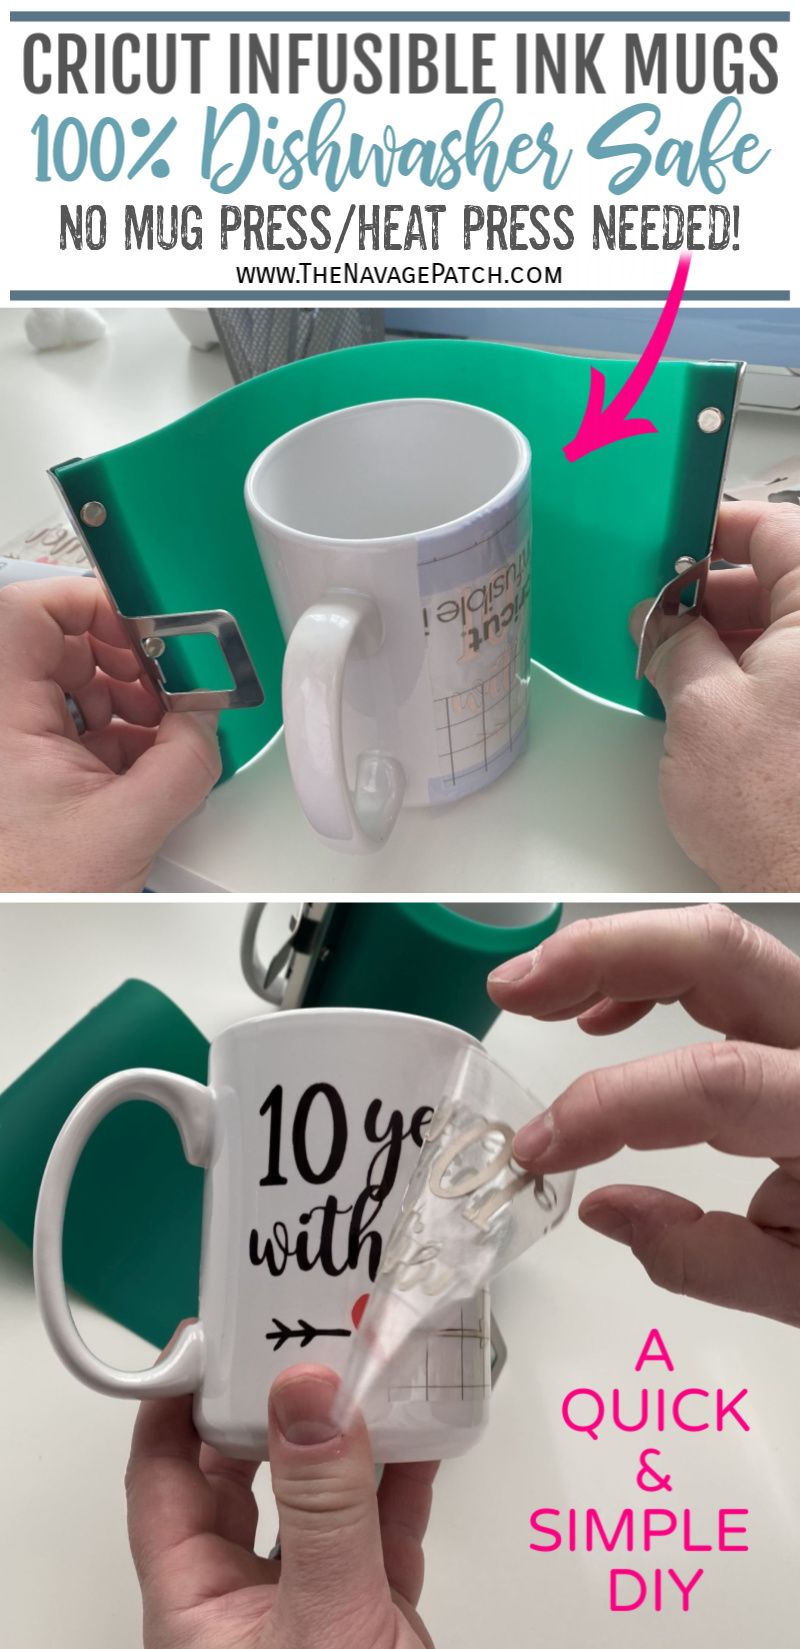
If you’d like to find out how we made some awesome dishwasher-safe mugs with Cricut Infusible Ink, then click on over and check it out!
Check These other Posts for More Free SVGs!
And if you need more mug SVGs, don’t forget to check our DIY Cricut Infusible Ink personalized dishwasher safe mugs…
and our free Star Wars SVGs for mugs and tumblers!

Free Downloadable Iron-On Mug SVG Designs
As usual, here is some information on these free iron-on mug designs: we created today’s freebies as JPG, PNG and SVG files which are resizable and compatible with Cricut and all other cutting machines.
Now it’s time to click on the button below to download today’s freebies – they are all in the “SVGs – Stencils” section of The VIP Patch.
take me to your
amazing freebies library
If you’re not a Navage Patch VIP, you won’t be able to access our Freebies Library. But that can be easily fixed! Subscribe for free on the form below and become a Navage Patch VIP. Once you subscribe, a password will be sent to you in our Welcome email, and that will give you access to The VIP Patch [Freebies Library].

Love free SVGs? Then check out our guide on Where to Find the BEST Free SVG Files!

Those mugs are brilliant. I completely agree about coffee – I’m not good when I’m decaffeinated! The more I see you guys do with Cricut the more tempted I am to invest in one, and they have reached the UK, unlike some of the good stuff I see you using… You may be endangering my bank balance!
One question – are those mugs metal enamel or ceramic? Asking because in the UK we have a brand of metal enamel mugs that are exactly that shape and style. Do you think this would work on both metal enamel and ceramic mugs? Oh, and would this be food safe if used for plates or bowls?
Ooooh, you know you want one! Don’t resist! Give in to temptation, LOLOL! Seriously, though – if you jump on the Cricut bandwagon, your crafting game will be forever changed! The mugs we used are ceramic, but I know the metal ones of which you speak. I think the iron-on should work equally well with those. Now, for use on plates – I wouldn’t put this anywhere a fork or knife would be operating. It’s a strong bond, but it surely wouldn’t stand up to repeated stabbings and slashings from cutlery. Is it food safe? I honestly don’t know, but I’d err on the side of caution. However if you simply must put it in food’s way, you could find a food-safe finish to seal it with. Wait 30 days for the finish to cure, and voila!
Thanks Greg – Good idea about the food safe seal. Will do some investigating!
Can you tell me where you got your country mugs from and the other mugs too? Thank you
Hi Marie, we got the camp-style mugs from Pier 1 about a year and a half ago, but unfortunately they were sold out of them even before they went out of business. The 15 ounce sublimation mugs we use with Infusible Ink can be found here: https://amzn.to/37Y5F2w
You said you kept on trying the mugs in the dishwasher directly after applying the vinyl, but did you take into account that vinyl needs at least 48 hours to cure before use? I’m sure you would have similar results with other types of vinyl if the application technique is correct. 🙂
I love these! (reading as I drink my coffee). Coffee rules in my house too. My hubby grabs his his cup of the day BEFORE he even hops in the shower (and leaves the empty mug on the bathroom vanity). My parrot will even ask me if I’m making coffee when she sees me head for the Keurig.
I have a sign in my work cubicle that says:
“I can’t stop drinking the coffee. If I stop drinking the coffee, I stop doing the standing and the walking and the words-putting-into-sentence doing.”
Wow – in-shower coffee – that’s hardcore! I used to drink beer in the shower back in the 90s, but never coffee! I love that your parrot understands enough to ask you about coffee, and that sign you have is AWESOME! 😀
Brilliant! I’m wondering, did you try putting the other materials in the oven as well?
We only tried baking the foil, but soon we’ll be trying again with outdoor vinyl!
Great post, Greg.
Thank you, Carla! 🙂
What made you think to bake the mug in the oven? I would have avoided that (incorrectly) assuming the vinyl would melt. What tipped you off to your final method?
Hi Marcia, we had made some painted glassware earlier in the summer, and the final step to set the paint was to bake the glasses. I figured since I was already transferring these designs at 400 degrees, a little time in the oven wouldn’t hurt. For my first attempt, I baked them for 30 minutes at 350. That was a little too hot, as some bubbles formed on the letters. But 300 degrees for 20-30 minutes worked like a charm!
Did you try the oven trick with other iron-on mediums? (Like the regular vinyl? Just curious. Excited to try this!
Hi Sara, we didn’t try it with the other vinyls. I’m sure it would help with the adhesion, but even before the oven, the foil letters seemed much better adhered than any other we’ve tried. If you try it with regular vinyl in the oven, let me know how it goes!
If the Cricut mini heats to 400 degrees, wouldn’t it work to use sublimation transfers on the mug also?
Hi Diane, it wouldn’t. For a proper sublimation transfer, you’d need to heat the entire transfer sheet at once, without moving the heat source, otherwise you risk ghosting of the design. They make special wrap-around heat presses specifically for mugs that would allow sublimation transfers.
They are very interesting and I think I will invest in the mini. Thanks Anne
Thank you, Anne! The mini is a great little tool. Though it can’t replace the bigger EasyPresses, we find ourselves using it more often for little things here and there. 🙂
I’d go and craft these right now, but first… coffee 🙂
Coffee is always first! 🙂
I have a limited income but want a circuit. I would like to be able to do a lot of different things but not sure how user friendly they are. Saw one at a maker fair hooked up to a laptop! Is that necessary? And are the supplies quite expensive? Thank you for advice!
Hi Maria, I think the Cricut Maker (and all of their products) are user-friendly, but I guess it would depend on how comfortable you are with technology. A laptop or tablet is required to run the maker, as the designs are created in Cricut’s Design Space software which then sends the design to the machine. It sounds more difficult than it is. As far as the economics of Cricut ownership go – it’s not the most expensive thing out there, but it’s not what I’d call cheap either. There is a fairly big investment in the machine, but that also comes with most of what you’ll need to get started right away. The materials may seem a bit pricey, but there’s so much you can do with them and the machines that for most people the cost is justified by the end results. Click here to go to Cricut’s page, where you can check out their products and prices and determine if it’s a good fit for you.
Coffee rules, Utah your sense of humor is like adding whipped cream and flavorings! Wonderful project!
Thank you so much, Linda! 😀
Well, as usual, your designs are genius!! I love all of them, but as the (somewhat) proud owner of RBF, of course, that’s my favorite! My daughter is the queen of “Bitchcraft”! Thanks for your hard work, so we don’t have to! ?
RBFs unite! Be proud of that face, Terra! 😀
Hi Greg, I am a little confused by step 6. Do you use transfer tape? Or do you put each individual letter on the mug? Or is the heat resistant tape also the transfer tape?
Hi Jeanne, the heat-resistant tape merely holds the design in place. The plastic backing (what you’re calling “transfer tape”) is the carrier sheet for the design, and it has a sticky back itself. For the other vinyls I tried (Everyday, Glitter and Sportflex), I was able to stick the carrier sheet to the mug and then use the Mini to transfer the design with heat. But for some reason the foil HTV has a less sticky carrier sheet, so I needed two small pieces of heat-resistant tape to keep the design in place while I transferred it with the Mini.
Oh NO! Please don’t tell the husband what I am buying next! I must have that mini. I got a cutter (non circut-sorry) and this looks to be a game changer! Coffee!! The sign in my office is May your coffee be strong and your Monday be short! Oh and I think I have a new work mug.. something about my resting face hahaha…maybe not! Thank you so much for sharing your trials and tribulations on creating the perfect gift idea!!!
LOL, I won’t tell if you don’t! It’s so versatile, Tracy – you’re going to love it! These mugs are great gifts, but you’ll certainly want to keep a few for yourself! 🙂
I love all of these! But especially the “Bitchcraft” mug!
LOL, that’s Handan’s favorite as well! 😀
The EasyPress Mini is the cutest appliance I’ve ever seen. I might need it just for the cute factor! That’s totally a legit reason right?
Of course it is, Sara!! :D:D:D
I adore those mugs you used! Where did you find them? While I don’t share your affinity for coffee (don’t judge), I do love a good snarky mug!!
We got those at Pier 1. They don’t seem to offer them online though. You can find similar ones here: https://amzn.to/2LriOap
Would this work on metallic travel mugs as well? I wonder how they would do in the oven.
Hi Katy, as long as there isn’t any plastic on the mug and the mug is oven-safe, there shouldn’t be a problem!
Love the mugs! Do you have to use the foil iron on or will regular iron on vinyl work?
Hi Patty, we experimented with Cricut Everyday iron-on vinyl, Glitter iron-on and Sportflex and Foil. The only one to withstand the washer was the foil.
Those look awesome. I made some mugs using permanent outdoor vinyl. I did not bake them. The vinyl has held up perfectly in the dishwasher and microwave.
That is a great tip, Angela! We will get some outdoor vinyl and try it out! Thank you!
These are so cute! But where did you get the mugs?! They are so cute and I’ve been dying to get some of them to press on!!
Hi Chelsea, we got those mugs at Pier 1. Unfortunately, they don’t sell them online, so you may want to check the stores in your area. Here are some similar ones on Amazon.
Hello! I love these! Where do you get these cute mugs? I’ve been seeing them a lot lately but can’t seem to find where to purchase them myself… thanks!
Hi Megan, we got those mugs at Pier 1. Unfortunately, they don’t sell them online, so you may want to check the stores in your area. Here are some similar ones on Amazon.
This looks like a great project. I am new to Cricut, and was wondering why you made the decision to use an iron-on vinyl vs a permanent vinyl?
Hi Lynn, we’ve heard that outdoor vinyl might work, and we’re going to give that a try very soon. I’ll update the post with those results. Regular vinyl wouldn’t be dishwasher safe, so we didn’t try it.
I love this! Where are the mugs from? I really like their rustic-ness.
Hi Ashlee, we bought the mugs in a Pier 1 store. Unfortunately, they don’t sell them online, but here are some similar ones on Amazon.
Absolutely love this idea! I’m really hoping to use this technique for Christmas presents this year . I notice that when you baked these you placed them on their sides and propped the handle up- was there any concern about the foil melting and running? I’d like to try an all-around pattern on some mugs and wondered if you think it would work to bake them standing up?
Did you try to bake any of the other types of vinyl after applying it to the mugs in order to see if that would adhere it permanently before washing in the dishwasher? I’d love to do this with matte black vinyl.
Hi Rhonda, no we didn’t. At first we tried all the different types of vinyl and ran them through the dishwasher. Foil was the only type to make it through the cycle without losing letters. Baking makes it even better.
Where did you buy the coffee mugs you used in this video?
Hi Patti, we got them at a Pier 1 store in our town. I don’t know if all the stores carry them, but I know they don’t sell them online. Here are some similar ones on Amazon: https://amzn.to/2LSQr57
Hi Chelsea, I don’t think it’s necessary to lay the mugs on their sides. It just popped into my mind to do it that way, but I highly doubt the foil would melt off if you put them rightside up, lol!
Oh, how I love these!!
I know what to make for Christmas gifts this year! 🙂 (I have several coffee designs in my Etsy shop that need put to use.)
Thank you for sharing!
Thank you, Stephanie, and you’re so welcome! 🙂
Love your designs!!! Will definitely be making some for myself! Out of curiosity, did you guys try baking the other materials? I live in Canada and can’t seem to find the iron on foil anywhere 🙁
Hi Megan, we did not. However, we will soon be trying with some outdoor vinyl and we’ll be baking them. Can you get outdoor vinyl there?
Of course I had to order the mini press after seeing this! I have beening looking for an easy way to do mugs. Thanks you for sharing!!
Awesome! Have fun with it, Teresa! 🙂
Hi Greg,thanks to you I just had to order the mini. No serious this was a game changer for me and I so appreciate all that you do! I have a question though about the font you used, would you mind telling me what font that is please?
Hi Janine, that’s awesome – you’re going to love it! As for the font…ahhhh that is a custom font that we use in our printables – it’s our little trade secret. and we can’t give it away! I’m so sorry! 🙂
I tried it with Siser Easyweed Extra HTV. It made it beautifully through the first time in the dishwasher. Second time, letters came off. SO, today I will try it with the Cricut foil like you recommended. Wish me luck!!!
Good luck, and let me know how it goes!
Did you try the oven method with anything else besides the foil? Like regular HTV or a different brand?
Hi Beca, no, we only tried the oven with the foil. Another reader tried it with regular HTV from another brand, and it only lasted through one cycle.
This is pretty awesome! Anything that can go in the dishwasher is a win. Do you think this same method would work for stemless wine glasses…thoughts?
Thank you, Amanda! I don’t see why not!
Hi! When it comes to the oven, do you put the mugs in an already preheated oven, or do you put them in a cold oven and bring them to temperature with the preheat? Thanks!
Hi Emily, I put them in a preheated oven, but I think either way would work.
Have you tried this with things other than mugs? (Wine glasses)
Hi Natasha, we haven’t, but I imagine it would work!
Hi, great post. Is it safe to use our regular oven – the one we use to cook with? I’ve heard many materials can give off toxic fumes and shouldn’t be used in the same oven we cook with. Thanks!
Hi Heather, I don’t think there’s any issue with these. The temperature isn’t hot enough to melt anything, and I didn’t notice any fumes at all.
Hi! Will this work on and material, such as stainless steel or ceramic? I want to do these for Christmas but don’t want to buy the wrong stuff. Thanks ! 🙂
It should, Angeline, but I haven’t tried it on stainless, so I can’t say for sure. 🙂
I attempted this today. Twice. ??♀️ There was a bit of bubbling after I pulled it off. Any thoughts as to why? Also, did you seal with anything after you cooked it?
Hi Heather, what kind of mug did you try it on? Did you use the Cricut foil iron-on? Did you bake it after, and is that what caused the bubbling? We didn’t seal it afterward. Once I get more info from you, I’ll try to troubleshoot what happened. Thanks!
I tried this today on a steel travel mug. It worked pretty well, but some of the foil came up when I started to peel the backing up. I replaced it and applied heat again. I also waited for it to cool before I removed the liner. I don’t have a mini so I used my home iron. Do you think that was the issue or was I just not patient enough with my initial heat application? Do you think a clothing iron is ok to use for future projects?
After the oven, it looks perfect! I’m about to make 2 more for gifts–fingers crossed.
A regular oven should be fine, Amy. Not sure why it didn’t stick well. Did you clean the steel first?
Great info! I have the mini so I’d love to try this. Quick question: now that’s it’s been a few months – how have these held up in the dishwasher/microwave? Thanks!
Hi Kim, we’ve had some letters peel, but mostly the smaller ones. Bigger and thicker letters hold up much better. Also, the lighter the wash cycle, the better. I think the best way for the really long-term is to mostly hand wash and only use the dishwasher when they’re really dirty.
This is a great post! Thank you for the clear, detailed instructions. I used them to create a mug and then took it one step further…wine glasses! Used the exact same instructions and they turned out GREAT!!! Thank you again for sharing!!!
Awesome! Thank you for sharing, Colleen! 🙂
Where I’d you get the mugs?
Hi Renee, we bought them in a Pier 1 store, but it doesn’t look like they sell them online.
Greg,
will you be selling these in your shop? would love to buy a few for my family.
Hi Chrissy, I’m sorry but we don’t sell any physical items! We just make tutorials so you guys can make them for yourselves! 🙂
can not get it ok, letters do not stick in the mug and I have to transfer 3 times? can you make a video how you do it step by step.
YH
Hi Yennis, can you tell me what kind of mug you are using and what kind of vinyl you tried? Was it Cricut brand? Thank you!
Hi,
I seen your DIY mug pic on Pinterest and when I clicked on it, it brought me here. Just to the comments. I don’t see any pics of instructions how to do it. Can you direct me to the right place please. Thanks.
Hi Susan, there are pics and instructions in the post. I’ll give the link again here: https://www.thenavagepatch.com/diy-iron-on-mugs/
The article isn’t actually there, it’s just your menu at the top of the page the amazon ad bar and then the comments. You may want to check your backend/post dashboard for errors on the post to see why it’s not displaying ?
Hi Tammy, thank you for the heads-up. I think you may have been led to the article (or lack, in your case) by someone who pinned a comment. My post is certainly there – I just double checked, lol – so I’m not sure why you woulnd’t be able to see it unless someone goofed while pinning.
Loved this and had to try it! Question – how did you deal with getting the large green circles to lie flat on the curved outer area of the mug? Using the mini I was fine at the start but as I got to the end of ironing there was a lot of gap. Caused me to cut and try to make due the best I could ….
I do not see the post either…only comments…..and have even used the link provided above…would love to be able to see the instructions…thank you!
Hi Rebecca, you can try reaching the post via pin below: https://www.pinterest.com/pin/281686151681623324/
If that also doesn’t work, please try clearing the old cache from your internet browser, as that should solve the problem.
Ok, I’m a little curious, what’s the green coat like thing on your photo that is wrapping around the cup, and where can I get one?
Ooooh, Bekka, that is one of the coolest tricks we’ve discovered. Read about it here (you’ll love it!) –> https://www.thenavagepatch.com/diy-cricut-infusible-ink-mugs/
Hi, thank you for that article! I’ve been trying to decide between the HTV vs permanent vinyl for some gifts I’m going to make. Have you tried this baking method with stemless wine glasses? Do you think it would work the same?
I have a Mini easy press and love it! Never thought to use it on mugs though! What an idea! Going to get all the supplies & give these a try!
It’s a fun technique, Rose!
These are so amazing! I’ve been looking for a way to make some affordable and safe gifts this year. Especially considering the pandemic, I think custom mugs would be the perfect personalized gift, because the gift receivers can also thoroughly wash the gift before using them.
Thank you, Wendy! They do make great gifts!
This was an awesome tutorial!! Thank you! I was curious, I’d love to try this on wine glasses but I’m worried they won’t withstand the heat. Have you tried this with wine glasses? I like to do fun sayings on wine glasses with etching cream and sometimes vinyl. The regular vinyl just doesn’t hold up as well as I would like. 😀
Hi Kim, I’ve never tried it on wine glasses, so I can’t say for sure, I’d give it a shot on a Dollar Tree wine glass.
Hi!
I just wanted to say that they are awesome and long lasting with this method, BUT you shouldn’t put it in the dishwasher, for your own safety. The heat of the dishwasher makes the vinyl/foil release its toxic chemicals all through your dishes and you know that you would eat out of vinyl or foil because they are not food safe. Best thing is to keep it out of there ?
Thank you!! Everything I read says the mugs are not dishwasher safe! I am SOOOO HAPPY I found this. Thank you so much!
You’re welcome! A few tips: bigger letters are better than smaller, and don’t use the “power” setting on your dishwasher!
Hey there,
I have a question about the temperature, is it in °C or °F? Just checkin 🙂
Thank you for your post.
(sorry for my “German” English)
Veronika
Hi Veronika – willkommen! It’s always F on this blog. 🙂
Any reason you chose to do iron on and not permanent vinyl?
Have you tried just the oven and not the ironing first? For any type of HTV? I would like to save the iron on step and just bake them all in the oven.
Hi Tanya, we have not, but you could give it a try. Let us know how it goes!
Once you’ve got the foil ironed on and baked in the oven, how long did you wait to start using them? (After they’ve cooled down and are safe to handle with bare hands) And how long did you wait before washing them?
Hi Jessica, we started using/washing just after they cooled, though some have said you should wait a day or two.
Awesome, I actually ended up waiting a couple days anyway worried I might ruin it so it worked out perfectly, thank you!! I’ve actually made two using this method so far on the stainless steel travel mugs and I’m literally Obsessed!
Glad to hear it! 🙂
I am SO excited about this post! I have been looking for a way to add text to tea cups for over a year. I don’t currently have a Cricut, but am totally willing to invest in one and all the equipment (and will use your links) if it will work for what I want to do. Do you know if it is safe to apply inside a tea cup? As in, food safe, so that you could drink the tea out of the teacup with the appliqué applied.
Thank you so much for this great tutorial! I just made my first coffee mugs! I purchased my blanks from the dollar store. I’m wondering if you have tried this technique on a metal tumbler or if you think it would work?
Thank you!
It should work, Tammy. We’ve also made tumblers with permanent vinyl *though they’re not dishwasher safe) –> https://www.thenavagepatch.com/free-star-wars-svgs/
Can I use my silicone mug wrap and the oven on foil instead of getting infusible ink?
Hi Kathy, we’ve never tried foil with mug wraps in the oven, so I couldn’t say for sure. That said, I say go for it!
Can you tell me where you found the coffee mugs? I love the whole look of these!
Hi Michelle, we got those a few years back at Pier 1. They only sold them in stores. Unfortunately, we haven’t found their equal, but try searching Amazon for “Camp mugs.”
Do you need any special mugs for these or just ceramic ones?
Any mugs should work!
Can you do this in enamel mugs too?
can you tell me which blade you used to cut the foil?
Thanks
Joan
Hi Joan, enamel mugs should work just fine. We used the regular blade to cut the foil. Good luck!
I’m a Cricut user, and according to Cricut vinyl is not dishwasher safe. Although I hear modge podge has a dishwasher safe version, but the vinyl itself is not. It also says do not submerge cup. Just wash with soapy water, out of the water. Same with tumblers or 20 oz. cups. I am told that to make cups you do not need to bake them…..it’s an extra step that is unnecessary. Nor do they need to be sealed. The easy press is what seals them with heat. I would check with Cricut, just to make sure.
Hi can you do this with every mug? Or is this a special heat mug?
I love this article. Would this work on a wine glass?
I don’t think it would, as the glass surface isn’t porous enough, and I’d be worried about the glass shattering from thermal shock.