DIY Minimalist Wooden Christmas Tree
A minimalist Christmas tree is a great way to save space (and energy!) this holiday season. This DIY wooden Christmas tree looks great and is easy to make!
There’s a minimalist current flowing through the season. Have you felt it?
We sure have. We first felt its gentle tug back in October while Handan was scrambling to get her spooky projects completed after spending months preparing for Halloween. It beckoned with a promise of less stress and more freedom. It seduced us with simplicity. We were tired, and the minimalist current offered rest. We tested its waters and took it easy on Halloween night. We put out a bowl of candy and a sign warning the little ghouls and goblins not to get greedy. They got greedy anyway, despite our admonitions. But throughout, Handan and I sat by the fire and watched a movie. Only the dogs’ barking marked the arrival of candy-grabbers on our front porch while we sat unaware, watching scary movies and eating popcorn. It was bliss.
By Thanksgiving, we were caught in the minimalist slipstream, and we liked it. A lot. Thoughts of a grand and complicated turkey-based feast were quietly shelved in favor of simple steak and mashed potatoes. It was wonderful. Instead of cooking for three days and then running around like a headless chicken on Thanksgiving Day, I was able to socialize, relax and be in the moment with my family. And let’s be honest here. What would you rather stuff into your face on Thanksgiving? Dry turkey with half-congealed gravy, green bean casserole and ambrosia or a juicy steak seared over hot coals? That’s what I thought.
As we head into Christmas, stress levels at The Navage Patch are at an all-time low. There are no lights to wrestle with outside – searching for the stupid blown bulbs with frozen fingers while trying not to step on more bulbs or trip over the whole tangled mess. There are no wreaths to hang with numb hands while booted feet perch on the ice-rimed rungs of a rickety ladder.
And there is no 10-foot Christmas tree sprouting from our living room floor in the space where Handan normally crafts. No tree, so Handan doesn’t have to move her tables and carts and shelves full of paints and supplies and frames and brushes and tools and fit them into another room for the season, only to drag them all back out on December 26th.
No tree.
No branches for Handan to trim all by herself while Barish plays video games and I sit on the sofa asking halfheartedly if she needs help.
No lights to wrap around the tree, again, searching for the one jerk bulb that won’t light and screws up the whole set.
And no ornaments for her to place with an engineer’s precision – a job that takes her three full nights, again, while Barish plays video games and I sit on the sofa in silent guilt that I’m not helping more.
Nope. None of that.
Not this year.
This year our tree is one that Handan made last year, small and simple and perfect.
This year our gifts will be opened whenever the giver sees fit to give them. In most cases, they’ve already been opened, and they’re already being enjoyed. (Mine is so awesome! I’m using it right now!)
This year, the Christmas meal will be simple, just like Thanksgiving. (But it will taste amazing, I promise you that. I’m still deciding between two things…)
This year, we will have more time for each other.
…
Ah, who am I kidding, Barish will just plow those extra hours into his video games! 😀
So in the spirit of minimalism, I’ve created the ultimate minimalist Christmas tree.
(Spoiler: it’s a triangle, people)
It won’t be our main tree this year (that honor goes to Handan’s tree), but this is a great tree for those in small spaces or those looking to jump into the minimalist current that is sweeping the across the land (I just made that up). It’s especially great for the geometry lover in your family!
(I’m not kidding, folks. It’s a freakin’ triangle)
All you’ll need to make this minimalist Christmas tree is a 1×4 pine board. A six foot length will do just fine. There are some angled cuts, so you’ll need access to a miter saw. You’ll need some wood glue and some brad nails. You’ll need a couple of small eye screws, a pair of needle-nosed pliers and an ornament or two. I made two minimalist Christmas trees to show you, with two different finishes: white paint and flame charred/stained.
Ready?
Let’s begin.
To figure out what lengths to cut, I had to cast my mind back to sophomore year in high school and dredge up some geometry. Anybody remember the Pythagorean Theorem? No? That’s okay, I’ll do the heavy lifting with the math. In any case, Pythagoras only got me an approximation. I had to build this thing in Sketchup to arrive at the exact numbers.
Here are the boards, already cut and angled:

The top piece in the picture (which is actually the base) is 19 3/16 inches.
The middle piece is 24 5/16 inches.
The bottom piece is 24 inches.
The bottom piece (let’s call it the left side) needed a 45 degree angle cut at its top. I marked it in pencil and set my miter saw to make a 45 degree cut.
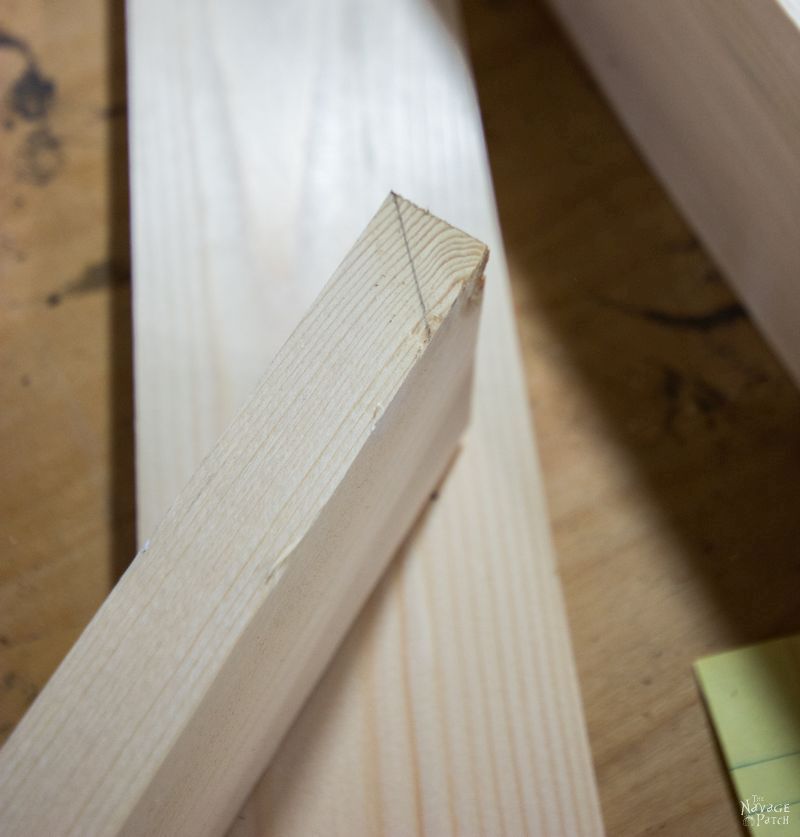
Here is the angled cut.

And here is how it looked next to the right side (the 24 5/16 inch side).

You may be wondering why I cut a 45 degree angle on one side and no angle on the other. In order to make a triangle with a 45 degree angle at its peak and both sides equal, you’d need to cut each piece with a 67.5 degree angle, and that’s more than my saw (and most others that I know of) is capable of. The way I’m showing is not only much easier, I think it gives a cool look to the top of the tree.
Now for the bottom, we have a few different options. The way I chose for this wooden Christmas tree is to have the sides come down and meet on top of the base. I liked the look this gave, especially with the slightly off-kilter top. The other way would be to have the sides meet with the ground and the base in between them. You are free to try this way, but you’ll nee a slightly shorter bottom piece. A third option, and one that I chose for my charred and stained minimalist Christmas tree, is to have the sides meet the ground and have the base an inch or two up from the ground.
Whichever path you choose, you’ll need to cut the bottoms of both sides with a 22.5 degree miter cut so the sides will sit flat on the base or on a table.

Here’s the rough mock-up before gluing.

For the glue-up, I used wood glue and brad nails.

I started with the top of the tree by adding a bead of glue to the 45 degree cut and spreading it out with my finger.


By the way, those aren’t lobster claws – they’re my hands. I was wondering why there was a bearded lobsterman in my basement who kept tossing a wooden trap at my feet. I thought he was just confused.
I pressed the pieces together with my big red claws hands and then secured the joint with brad nails.

Next, it was time to glue the sides onto the base.

I applied glue to the angled cuts at the bottom of each side, spread it with my finger and placed the sides onto the base.

I secured the joints with brad nails shot up from the bottom of the base.
My minimalist wooden Christmas tree now had its shape.

My cuts may not have been perfect, so there were some gaps showing at my joints.
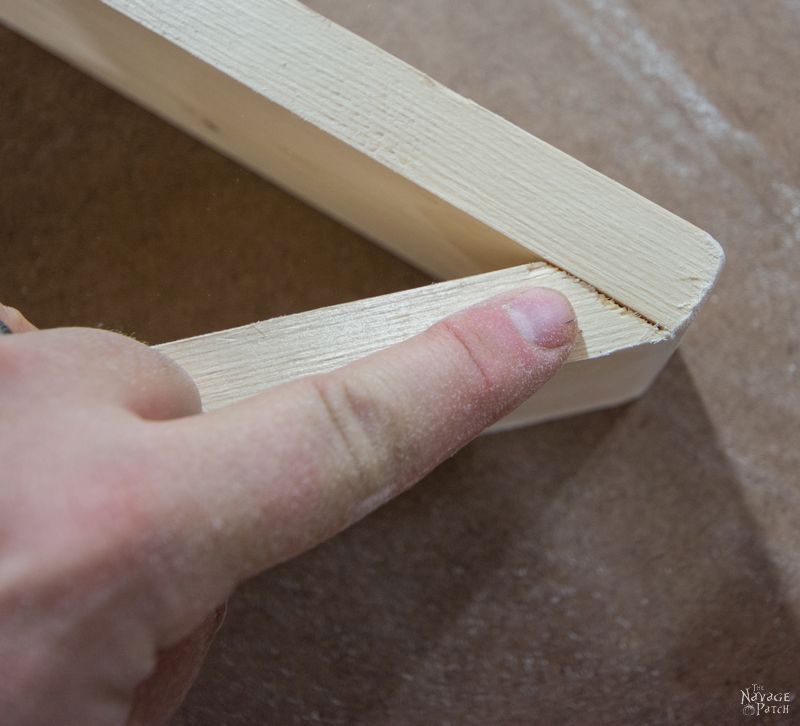
No big deal! I’m going to show you a woodworker hack to fill small gaps, cracks and holes. First I started sanding the entire tree, especially all the edges and corners.

Not only did this improve the appearance and feel, but it gave me a little pile of sawdust that I would use to fill the gaps and brad nail holes.

That chubby finger keeps photobombing my pics. I think he’s just looking for a little fame.
I squeezed a little bit of wood glue onto the joint gap.

Then I sprinkled some sawdust on the glue.

And then I mushed it all around with my chubby finger, making sure to press it into the gap.

I did the same thing with the brad nail holes.

That finger again!

Once the glue dried (only takes a few minutes), I sanded all of the repaired areas until they were smooth. The finger will show you in the pic below.

Please note. The glue and sawdust technique works best when you’ll be painting the finished product. Since glue blocks stain absorption, you wouldn’t want to do this on a piece you intend to stain.
Before painting, I drilled a small pilot hole in the top for the eye screw.

You could wait until after painting to install the screw, but I put it in before with a pair of needle-nose pliers.

My minimalist Christmas tree was now sanded and shaped and ready to paint.


I went rooting through Handan’s paint supply and found the jar of homemade white chalk paint pictured above. Handan’s recipe is awesome, and it has a long shelf life. I opened it up, added a few drops of water to thin it a bit and headed down to the basement to paint the wooden Christmas tree. That’s right, folks. I painted it! Not Handan! I’ll bet you didn’t think I could paint, did you?
Well, I’m still not as good as Handan. After the first coat, I noticed the white was a little splotchy with yellow, and I realized that I forgot to seal the pine with shellac, so the sap wouldn’t bleed through. No problem, I just sprayed a coat of shellac over my first coat of paint, let it dry, and then continued with my second coat.
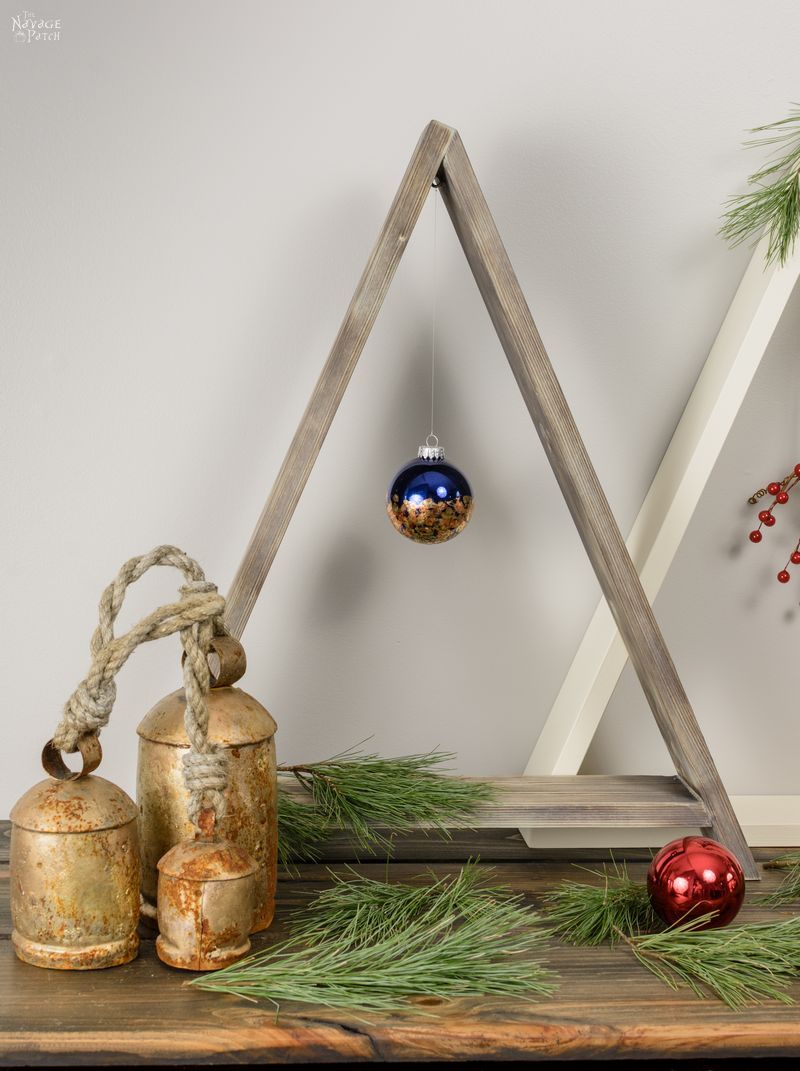
Now for my second minimalist Christmas tree (which I didn’t document building), I first burned the wood all over with a propane torch. I then lightly sanded with 60 grit paper and then stained the board with a custom blend of 50% Varathane Bleached Blue and 50% Minwax Classic Gray.
And that was it. My DIY minimalist wooden Christmas trees were all finished and ready for ornaments. I chose a spray of faux holly berries to accent my white tree and one of Handan’s gilded ornaments for the charred and stained tree.




These guys had to make an appearance. They are the three Magi, and I made them a couple of Christmases ago.

We love it when you share our posts on Facebook and Pinterest!



i love this, and they go great with the wise men and the bells but this house will never be minimalist ho ho ho, but i would give this vignette a place amongst our chaos xx
LOL, Chris, this house isn’t exactly minimalist either, but we’re trying! 🙂
Simple, yet beautiful and elegant . I love it.
Thank you so much, Annetta!
Love this! I did Handen’s HoHoHo now I have to try this!
Thank you, Barb! Email me a picture of the HOHOHO and this one when you do it. greg@thenavagepatch.com
The trees are adorable. We’re going minimalist, too. Some years you just have to take the season off and look at other people’s purdy things.
Thank you, Anna! That’s exactly how we feel this year 🙂
I like your style! I’m going to surprise my husband with a wooden tree this year. He’s the chief baker in the family, and baking is how we met. I’m making it out of old rolling pins.
Wow, Derry, that sounds cool! Can you send a picture when its done? I’m curious so see how you did it.
I really like both trees and the Magi just make me smile! I love them. I find Christmas to be getting even busier with all the family events so I can really appreciate wanting a simpler holiday!
Thank you, Giselle! Simple is good! While it snowed yesterday, Handan, Barish and I stayed in and watched Four Christmases – a pretty good Christmas romcom. Your holiday will feel simple by comparison! 🙂
I only found the Navage Patch this year! I love your ideas, crafts and above all your chat! Happy Christmas Greg, Handan and family, from Chrissie in Weymouth, UK.
Welcome, Chrissie, I’m so happy you found us! Happy Christmas to you and yours across the pond! 🙂
I am totally late to the game, but I just found your page through your Harry Potter SVGs and got sucked down a rabbit hole. I am dying to find a DIY for bells like the ones you have here. Did I miss that somewhere, or might you have any ideas for them? Love your work and all you share!
Hi Rebekah and welcome to The Navage Patch! It’s funny – you’re the second person today (well, yesterday actually) who asked about making bells like that. Apparently the original ones from Pottery Barn (which are not what we have) are $99. Anyway, here’s a link to some cheaper ones on Amazon (though galvanized, not gold).