
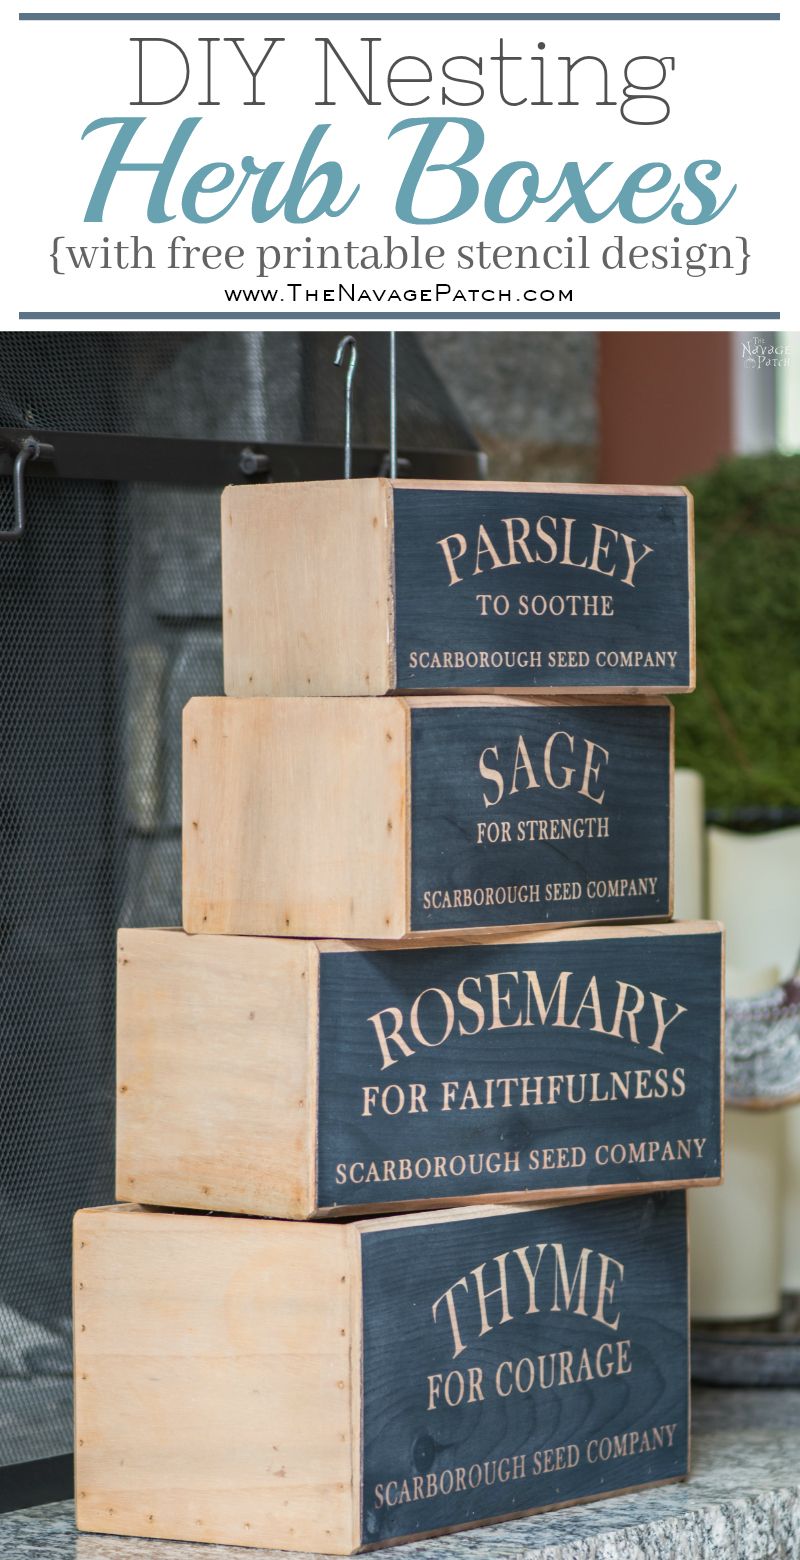
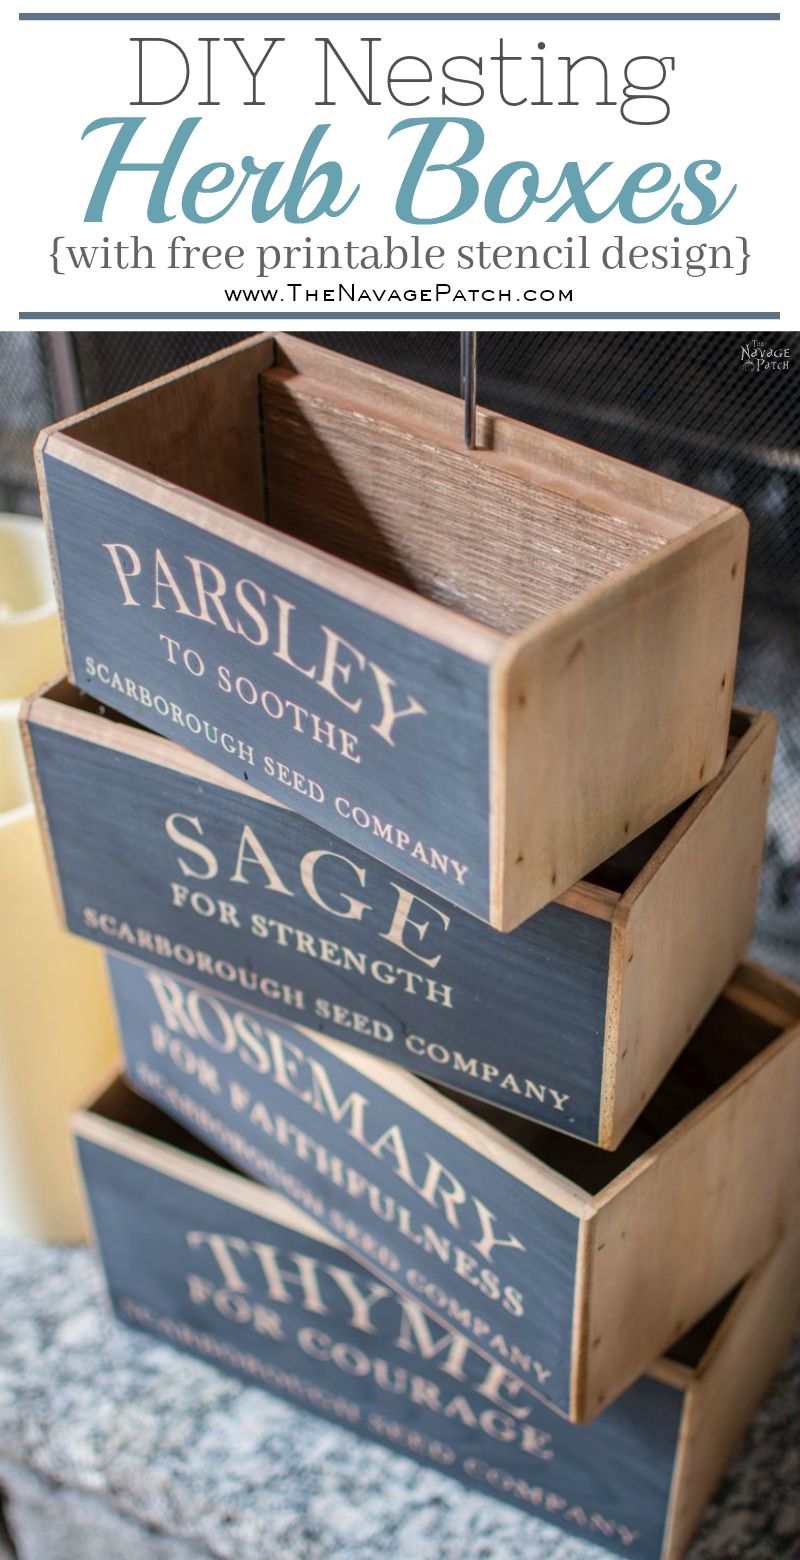
DIY Nesting Herb Boxes
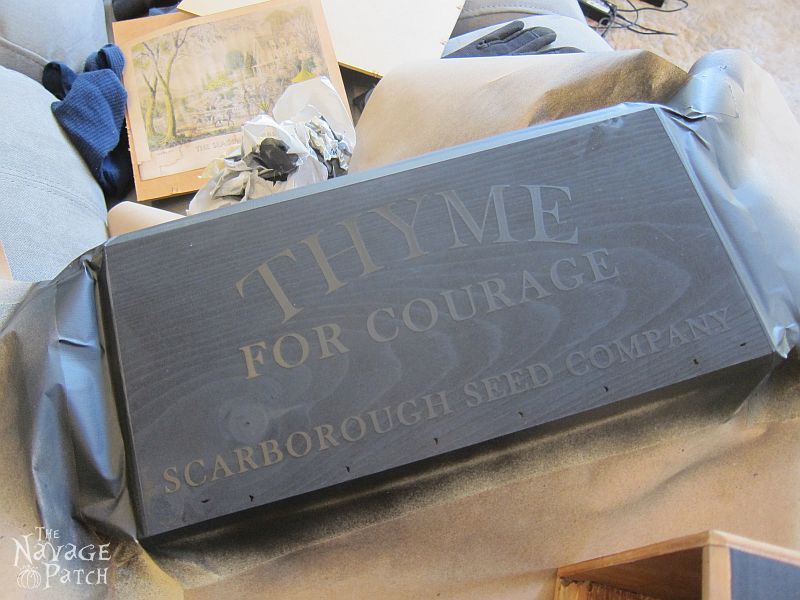
It was time to stencil. Handan printed out the stencils on her Cricut. When I applied the stencil and peeled out the letters, I noticed that it looked really cool with the black stencil vinyl covering the whole face and the letters in natural wood. Handan agreed, and so she went off to cut another set of stencils. We applied this lot to the boxes.

Yeah, I know, rosemary is missing her stencil. Don’t you worry, she got it after I took this picture. So this is what the boxes would have looked like, if we followed the original plan. They look great! But just you wait.
Handan taped all around the faces, then took the boxes outside for a spraying of matte black paint. We didn’t want to cover the grain completely, so she just applied two light coats.
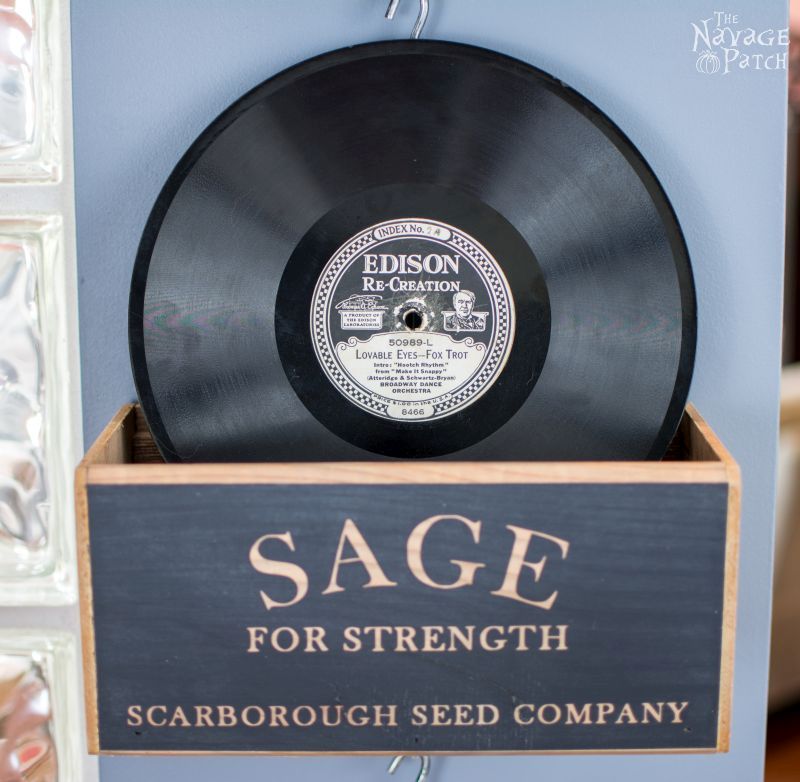
Handan then peeled off the stencil letters to reveal the wood underneath.

To make the hanging hooks, I used some garden/tent hooks that Handan bought from Amazon. Since the apex of the curve was offset from the shaft (as shown on the left), I had to bend the hooks until the apex lined up with the shaft (as shown on the right). If I didn’t do this, the boxes would hang at an angle.

I did this by placing the hooks in a vice and bending them with pliers until I got them lined up.


I wanted to get rid of that silvery shine, so I scuffed up the hooks with 220 grit sandpaper.

Then I applied some Baroque Art Black Gilders Paste.

After wiping off the excess, I had a nice aged-looking hook.


I then drilled a hole for the hooks in all of the boxes.

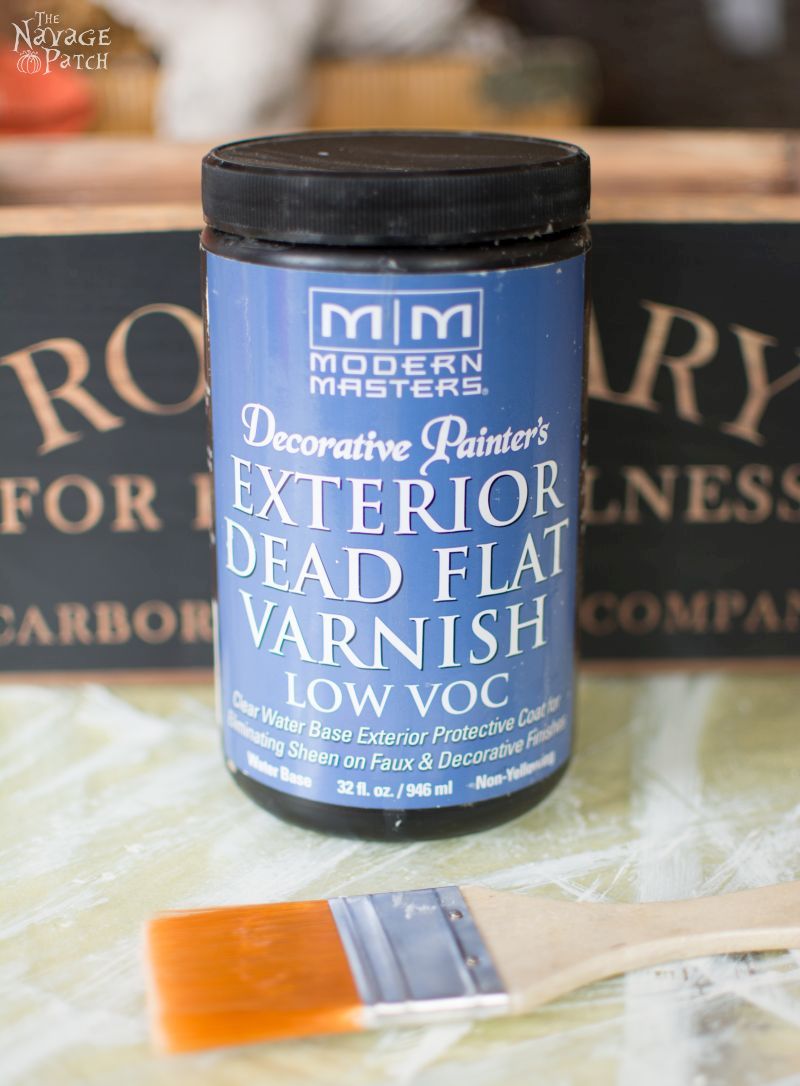
The last step was to apply a coat of Modern Masters Dead Flat Varnish.
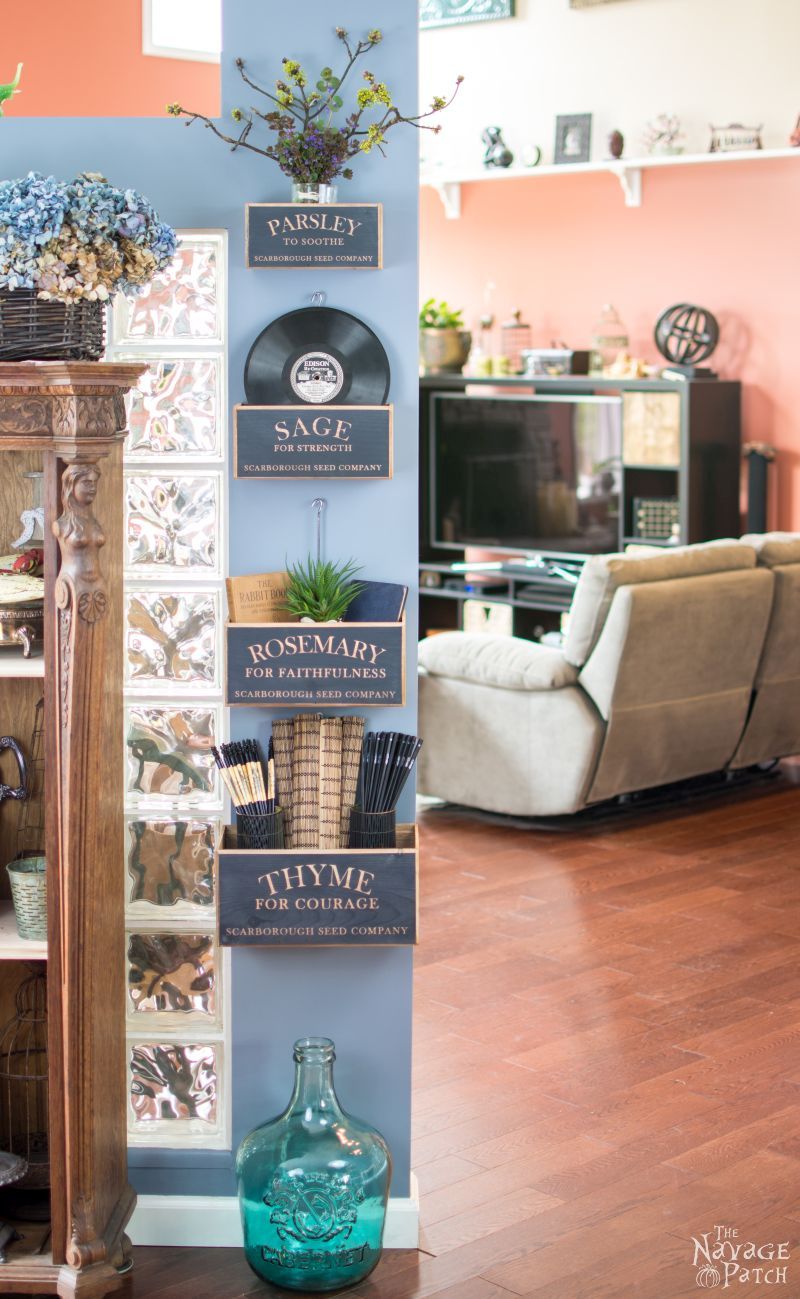
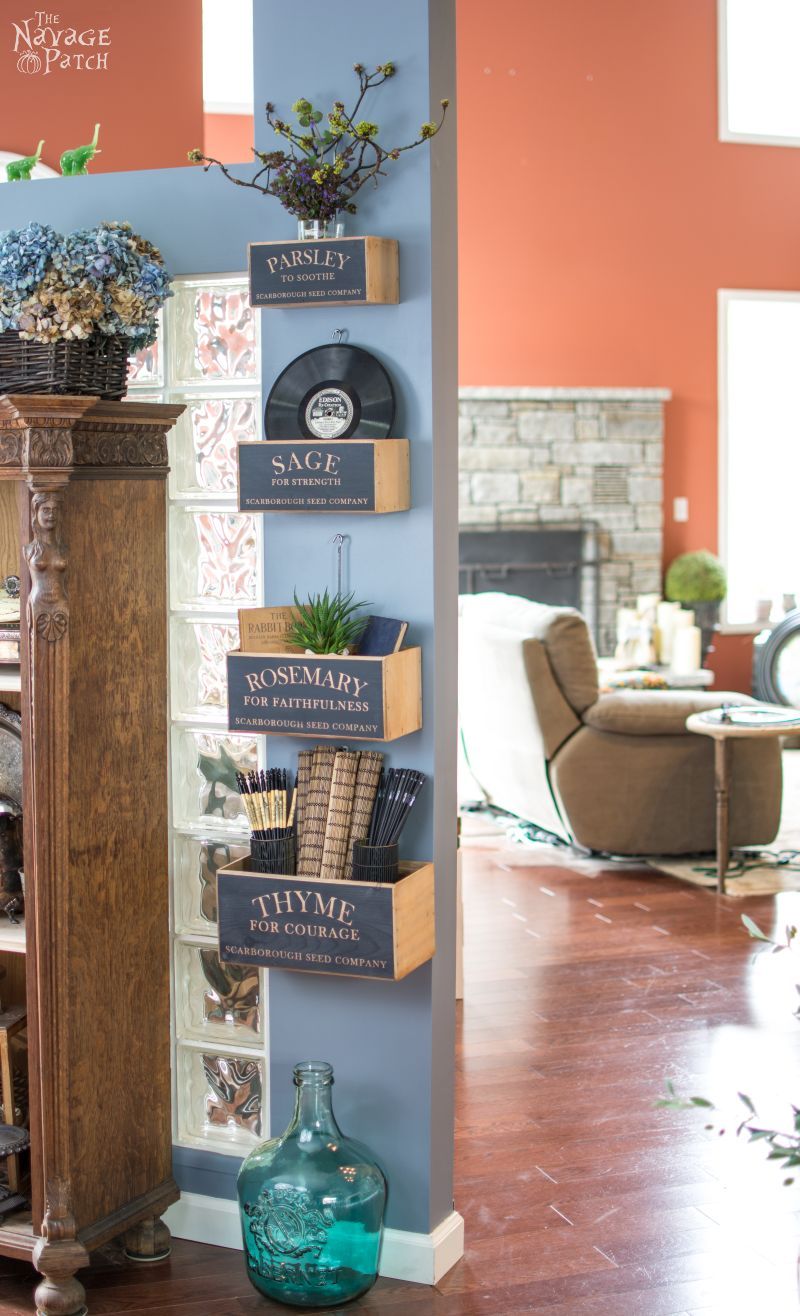
And that was it. Time for the show-off pics!


As promised, here are the lyrics to “Scarborough Fair.” Keep scrolling for the downloadable stencils!
Male part:
- Are you going to Scarborough Fair?
- Parsley, sage, rosemary, and thyme;
- Remember me to the one who lives there,
- For once she was a true love of mine.
- Tell her to make me a cambric shirt,
- Parsley, sage, rosemary, and thyme;
- Without any seam or needlework,
- Then she shall be a true love of mine.
- Tell her to wash it in yonder well,
- Parsley, sage, rosemary, and thyme;
- Where never sprung water or rain ever fell,
- And she shall be a true lover of mine.
- Tell her to dry it on yonder thorn,
- Parsley, sage, rosemary, and thyme;
- Which never bore blossom since Adam was born,
- Then she shall be a true lover of mine.
Female part:
- Now he has asked me questions three,
- Parsley, sage, rosemary, and thyme;
- I hope he’ll answer as many for me,
- Before he shall be a true lover of mine.
- Tell him to buy me an acre of land,
- Parsley, sage, rosemary, and thyme;
- Between the salt water and the sea sand,
- Then he shall be a true lover of mine.
- Tell him to plough it with a ram’s horn,
- Parsley, sage, rosemary, and thyme;
- And sow it all over with one pepper corn,
- And he shall be a true lover of mine.
- Tell him to sheer’t with a sickle of leather,
- Parsley, sage, rosemary, and thyme;
- And bind it up with a peacock’s feather,
- And he shall be a true lover of mine.
- Tell him to thrash it on yonder wall,
- Parsley, sage, rosemary, and thyme,
- And never let one corn of it fall,
- Then he shall be a true lover of mine.
- When he has done and finished his work.
- Parsley, sage, rosemary, and thyme:
- Oh, tell him to come and he’ll have his shirt,
- And he shall be a true lover of mine.
And as promised, here are the free stencil designs. Click on the button below to download your copy of the Scarborough Fair stencils from the “SVGs – Stencils” section of the The VIP Patch.
take me to your
amazing freebies library
If you’re not a Navage Patch VIP, you won’t be able to access our Freebies Library. But that can be easily fixed! Subscribe for free on the form below and become a Navage Patch VIP. Once you subscribe, a password will be sent to you in our Welcome email, and that will give you access to The VIP Patch [Freebies Library].
We love it when you share our posts on Facebook and Pinterest!
Love free SVGs? Then check out our guide on Where to Find the BEST Free SVG Files!
Cool history lesson and even cooler project! I’ve always loved that song and the herbs so I may just have to make myself a set of these. They turned out beautifully!
Thank you, Jen!
The boxes turned out fantastic! I like them even better than the ones which had inspired you.
Thank you, Julia!
Now I have an ear worm (but not a bad one) and am itching to make this! I love how you used them too.
I know, I’ve been singing it in my head non-stop for the past few days 🙂 Thanks for reading and commenting, Kathy!
I love these and such a great tutorial! Thanks for linking up to the Talk of the Town Link Party!
Thank you, Becky!
Simply awesome all round! Well done!
Thank you, Anne!
really awesome project greg and handan i have loved that song forever and i too love the way you styles them xx
Thank you very much, Chris! xx
Hi Chris! Thank you so much!
They look awesome!!
Thank you, Sandra!
Love! Want! Awsome job!
Thank you, Lori!
Beautiful project and directions! Thanks for sharing.
Thank you, Rhonda!
Love the boxes!
Thank you, Carla!
These are adorable! I can’t wait to build my own!
Thank you, Vineta!
These are awesome! Great tutorial, and I especially enjoyed the backstory. Thanks for sharing!
Thank you, Cynthia!
What a great post! I love these little crates, and LOVE that you took so many pictures to show the prosess. Thank you for sharing! 🙂
Thank you, Tone, and you’re welcome! 🙂
Your version of these herb boxes are so much more attractive. Stunning. Excellent tutorial.
Thank you so much for sharing at Homemade and Handcrafted. Great job, you guys!!! You always create amazing inspiration.
Hi Robin, thank you for your kind words! 🙂
Blown away by yet another of your projects and how you hung and styled them. Yours look better than the originals, just say’n. You two are the Dynamic DIYing Duo!
Oh, and I just read your pond plan post. Ha, I can so relate to the “next year we’re going to relax” thing.
LOL, Thank you, Marie! So are you the one saying “next year we can relax” or the one it’s being said to? 🙂
Both, our DIY addicted brains don’t know how to shut up. I’m featuring these babies this weekend at the DIY Sunday Showcase Party!
Hi Marie! Thank you so much!
The stencils are fabulous! And I love how the blackwash draws out the grain in the wood.
Thank you, Marjan!
Your work is fabulous and these would sell like hotcakes around here! Thank you so much for sharing your links with us at Celebrate Your Story. Have a peaceful holiday weekend and we hope you join us again!
Hi Sandra, thank you so much! I wish you a safe and relaxing holiday as well!
WOW is right! I cannot even believe how awesome this post is! Each and every step photographed! Fantastic! And, your boxes are way nicer. I absolutely love how you used them in your home. I love the “blackwash” trick. This is really super and I am inspired to (maybe) try something like this myself! Thank you for the incredible details you shared!
Thank you, Gigi! I hope you do give it a try! If, you do, please send us pictures of your finished project, and we’ll put it up on our FB page.
These are amazing. And you can use them in so many ways.
Thank you, Debra! Yes, they are very useful…but I’d never want to grow herbs in them! Too much work to ruin the wood like that 🙂
These came out fantastic! Pining for later!
Thank you, Linda!
Greg, you are a handy one to have around! Those boxes look fantastic and I do love how you did the ‘reverse’ stencil. You and Handan are quite a pair…doesn’t seem like there is much you two won’t conquer.
Thanks for sharing.
Hugs, Lynn
Thank you, Lynn! I owe it all to Handan! 🙂
What a fantastic job you guys did! I can’t decide which I love better that natural or the black because they are both so beautiful!! Thank you so much for linking these up to our Bewitchin’ Projects Block Party last week. You are one of my Feature pics over at Recreated Designs this Sunday. Have a wonderful weekend! Hugs, Lisa
Hi Lisa, thank you so much for featuring the boxes! Hope you have an excellent holiday weekend.
These are so cute, and I love the tutorial. Thanks for sharing at Merry Monday!
Hi Dee, thank you so much! Have a great holiday weekend!
Oh my word – these turned out So cool!!! I’m feeling a DIY coming on! 😉 Found you via Morning Cup of Joe… have a great weekend!
Thank you, Sarah! Good luck if you try them!
These turned out a treat! Thank you for the tutorial 🙂
Thank you, Sam!
Cool! I wish I had your skill.
Amalia
xo
Thank you, Amalia!
Greg great post and great work as always! I actually remember that song… from back when I was a wee baby! The herb boxes turned out wonderful and what made all the difference was the reverse stenciling. It gives them so much more character. Thanks for sharing all of your projects with us and for the history lesson. Right now I am steeped in Shakespeare. My daughter has wrangled me and we are watching this great BBC series called Hollow Crown (2012) based on the four Henry plays. Your post ties in perfectly with my mood. If you have a chance and are into that sort of stuff check it out.
Hi Mary, I’m definitely into that sort of thing! Handan and I watch a ton of BBC and PBS programming, so Hollow Crown sounds right up our alley! Thanks for the tip!
Great job, thanks so much for sharing on craft schooling Sunday!
Thank you, Sara!
Love, love, love! And thank you for the lyrics to one of my favorite ballads
Thank you, Lynette! Such a great song!
Now I have the images of this duet singing in a town square and thankful I never had to prove my love that way! Btw…that was a great project! Thanks!
Thank you, Julie!
Yours are better than the original! I love them. Thanks for sharing at You’re Gonna Love It.. I can’t wait to share this post on Facebook!
Awesome! Thank you so much, Kim!
One of the best tutorials I’ve read! Great job on everything! Very cool reading the lyrics too. Thanks?lisa
Thank you, Lisa! 🙂
These are so cute! I’ve seen them all over the web too and I think you version is much cutter! Thank you for sharing at Dream. Create. Inspire. Link! Pinning!
Thank you, Cat!
These are fabulous!!! Thanks for the in-depth tutorial! These are on my list of things to make!
Thank you, Samantha!
This is another reason, added to a long list, of why I want a Sihloutte Machine! These are absolutely stunning! I love the step by step tutorial, I will be sending it to my husband, one more thing added to his “honey do” list!! I love they way you hung them, and styled them, they are just gorgeous! This is my first time reading your site, I will be back, again and again!
Thank you, Nikki! Hey, make sure that list doesn’t get too long! Believe me, the longer the list gets, the more we want to shut down for extended beer maintenance!
I never knew that about that song!! And those boxes turned out spectacular!! Great work!! Thanks for sharing on My 2 favorite Things on Thursday!! Hope to see you again tomorrow!! Pinned!!
Thank you, Elaine! 🙂
This is awesome!! Such a great tutorial again! Thanks guys! I just pinned it. Thank you for partying with DIY Crush every Thursday!! Hope to see your latest DIY’s this week!
Thank you so much, Denise! 🙂
Oh wow! These are beautiful and so very well done! What a gorgeous addition to the decor!
Thanks for sharing (and for linking up to the #SHINEbloghop). I hope you’ll join us again tomorrow!
Wishing you a lovely evening.
xoxo
Thank you, Jennifer! 🙂
The boxes turned out so beautiful, and the reverse stencilling is fabulous. Thanks so much for sharing these at Vintage Charm.
Thanks, Tuula! 🙂
These herb boxes turned out so great! You did a wonderful job. Thanks for linking up to The Creative Exchange. We are featuring your project this week.
xo,
Laura
Thank you, Laura!
Hey Handan & Greg! I love this idea! Even if your aren’t a word worker, this could easily be applied to store bought or yard sale boxes! You are my feature this week at Funtastic Friday! Thank you for linking up!
Thank you, Lacie!
The boxes turned out great! I love the lettering. It’s so much more satisfying to make something instead of buying it!
Congrats, you’re featured at the #ThisIsHowWeRoll Link Party. Pinning now.
Thank you, Susan!
Thanks for sharing with peace love link up! This post has been chosen to be featured on the next Link Party! It starts tomorrow at 6, so grab a button and stop on by with some more great content! : )
Ohmygoodness you guys… this tutorial is over the top incredible! I love yours so much more… the black design is so stunning!
Featured you this weekend on Party Junk. Thanks for linking up! 🙂
Hi Donna! Thank you, I’m so glad you liked it!
Holy cow, thought would be scrolling to get to comment box all night. You two are rocking creating couple, really. The incredible things you two make are so awesome (little southern CA speak there), am loving every post you do.
Been seeing these boxes all over blog land, they are choice looking. I have Cricut so will be able to make stencils (if I ever learn to use it) not tech savvy at all, machine kinda scares me but that’s just cause am digitally challenged, duh!
Thanks so much for providing images for stencils, might just get me to try out my beloved Cricut. Guess better get some stencil plastic for machine. Am finding out cartridges and other goodies aren’t inexpensive at all., ouch.
What are you two creating now? Will I have to wait, see next post to find out I suppose? You are some talented couple. Have great fun weekend
Thank you, Jane! We are working on several projects (as always), and yes, you’ll have to wait to see them 🙂
Ah – another project for my hubby – he’s enjoying your posts as well! Thanks for sharing on the DIY Party!
Thank you, Helen! Your husband is going to be a busy man!
These are absolutely amazing! I’m ready to buy a Silhouette just to make these. Thanks for the detailed instructions AND template.
Thank you, Dyan! Handan swears by the Silhouette!
This is an awesome tutorial. Love how they turned out. Thanks for sharing your DIY.
Thank you, Theresa!
These look awesome. You make it look easy with your tutorial. We used to sing the song at school and now I’ve got the lyrics stuck in my head!
Sally @ Life Loving
Thank you, Sally! I know, that song has been stuck in my head for weeks now 🙂
Oh my gosh these are FABULOUS!! I don’t think I have the patience to make them though. I would probably buy unfinished pre-made boxes and finish them myself
Thank you, Karyl! I’m so sorry for the late reply. I was just going back through some old posts and noticed that I had missed your comment. 🙂
These herb boxes are gorgeous! Just want to let you know that they’ll be featured at Funtastic Friday #78. The party opens tonight at 9 pm EST.
Awesome! Thank you, Sherry!
Holy cow. I’ve loved those boxes since I first saw them online, but they’re pretty expensive too. You did a fantastic job!
Thank you, Carole!
Awesome job guys. How did you get the hooks to stay in? By the way I like yours much better than the originals.
Thank you, Naomi! The hooks are held in place by friction. The fit was sufficiently snug that no glue was needed.
Great thanks Greg. 🙂
Very cool! I like these better than the inspiration boxes. Great tutorial, I’m inspired to make a set of my own!
Thank you, Kimm!
These turned out AMAZING! I love your step-by-step detailed tutorial and how beautiful they look in your space!! Thanks so much for sharing at our party…featured today, pinning and sharing! XO
Thank you for the compliment and the feature, Christy!
Just want to be sure I didn’t miss something…..to download the letter stencils…just click on each set then “Save as” into a file??? I didn’t see one link for all at one time…am I correct?? Thanks….love them!! Going to give my also very talented hubby this project….
Hi Linda, Handan added a Download button at the end of the post (above the pictures of the stencils) to make things easier. Good luck to you and your husband!
I lost the stencils for the herb boxes. I tried to get them again but the blue letters wont show again. what can I do?
Hello Reva, no worries – I sent the download link to your e-mail. I hope you also checked the oversize book page wall art printables we’re offering today. I think you might also like them 😉
Wow, these boxes are fabulous. Now I got to try and get my hubby to make me some using your wonderful tutorial. Nicely done!
Thanks, Ivory! Send a picture if you manage to talk your husband into making them for you!
Hi! Your boxes are absolutely gorgeous, much prettier than the original!! Can’t wait to make them too! There’s only one thing I can’t quite figure out… how and where do you place your hooks (and drilled hole) so they can hold the boxes? There’s only one end of the hooks that is actually “hooked” so how do they stay in place?
Thanks so much for your post, your rock!!
Caroline
Hi Caroline. Check out the picture at the following link: https://www.thenavagepatch.com/wp-content/uploads/2016/05/Scarborough-Fair-037.jpg It shows where the hook is placed on the box. I simply drilled a hole there with a drill press (drilling with a hand drill works just as well). I then inserted the hooks and pressed them in. For my boxes, friction was enough to hold them in place. IF the fit is loose, then you can add a few drops of glue. When hanging from a wall, just the one hook coming out of the back of the box is sufficient to hold it in place. Good luck with your project, and let me know if you have any more questions!
The download for the stencils are JPG and PNG files not SVG for cutting machines. Do you have an SVG file? Great tutorial!
Thanks,
Nancy
Hi Nancy, both Silhouette and Cricut machine accept PNG files, so if you have either of the machines PNG will create a better cut (trust me when I say that as I tried it also with SVG files of these stencils and the letters didn’t cut as nice and sharp.) However, if you’re using another machine which only takes SVGs, then click on the link below to use the free online SVG convertor. It converts any PNG or JPG files to SVG files.
Online SVG Creator
I hope this helps! 🙂
Ha can you guys are awesome! I love the boxes and they look amazing in black! You have some mad building skills and make the cutest projects!
Hi Susan! Thank you so much! Practice makes perfect, and Handan keeps me well-practiced! 😀
Could you possibly tell me approximately how thick your shiplap was? I would love to make these for my kitchen!! Thank you!
Hi Hesper, shiplap is about 3/4 inch thick. Good luck!
Thank you so much!
Where can l find the herb stencils?