DIY Range Hood for the Modern Kitchen
This DIY range hood is the perfect addition to our modern kitchen. I’ve done a lot of DIY for this remodel, and this is one of my favorites!
This project sucks.
Big time.
But then again, that’s kinda the whole point, isn’t it?
Nobody walks into a kitchen store and orders a range hood with mediocre suckage.

No one’s looking for insipid suckatude from their hood vent.
Everyone wants The Big Suck. It’s just…better that way.
But when you buy an off-the-shelf suckinator from, well, anyone, you’re pretty much consigned to whatever is deemed fashionable in the snooty suck circles.
And these days, that pretty much means a stainless steel suckanomatrix that can certainly suck a sensible amount of steam, but its looks may leave you sighing instead of swooning.
Don’t get me wrong – their looks aren’t bad…usually. We had one in our Georgia kitchen, and I thought it was the bees pajamas at the time. Remember this?

There sure was a whole lotta suckin’ going on underneath that beast, but it also kinda looked like a UFO vacuum used for slurping up cows and rural folk for unspeakable probes of their nether regions.
Oh sure, you could slap a cover over that range hood – DIY or store-bought – but why not skip the cow vacuum entirely and just buy an insert? That’s what I did, and I built my babes the range hood of her dreams around it!
Of course, it is my kitchen, but The Shrimp is designing it, so the hood is her call. And though I’d be just fine with a UFO cow hoover, I gotta say, she’s envisioned a beautiful range hood to go with her stunning kitchen.
DIY Range Hood SUPPLIES LIST
Affiliate links are provided below. Full disclosure here.
- 2x4s
- Metal pipe hanger
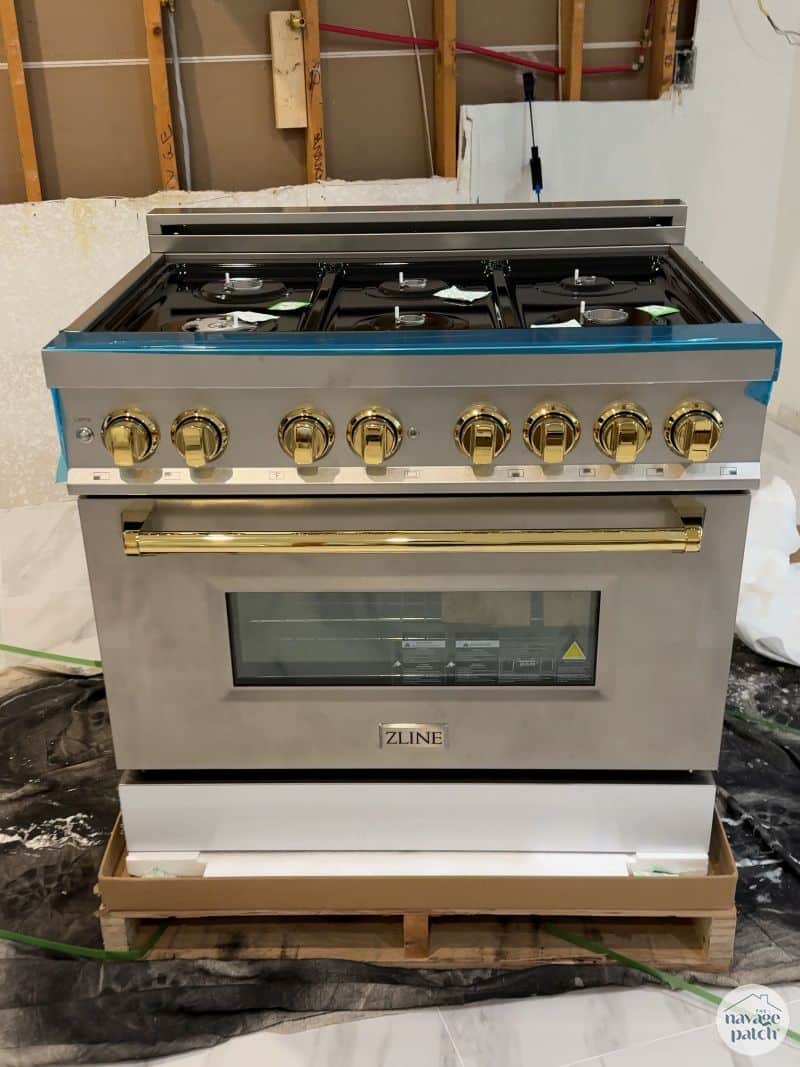
- Range hood insert (I used a ZLINE)
- Utility panel
- 1/2 inch drywall
- 1/4 inch drywall
- Bullnose corner bead
- Joint compound

DIY Range Hood VIDEO Tutorial
Watch our short and fun video below for an overview of our range hood before you read the tutorial.
Watch Our Tutorial On YouTube
On Tiktok
We love to see our DIY projects out in the wild! If you try this DIY project and take a picture and post it on Instagram, be sure to tag us – thenavagepatch
Now, I know it’s been a while since I’ve posted and an even longer while since I posted about the kitchen, so let me catch you up with a few things before I jump into the hood.
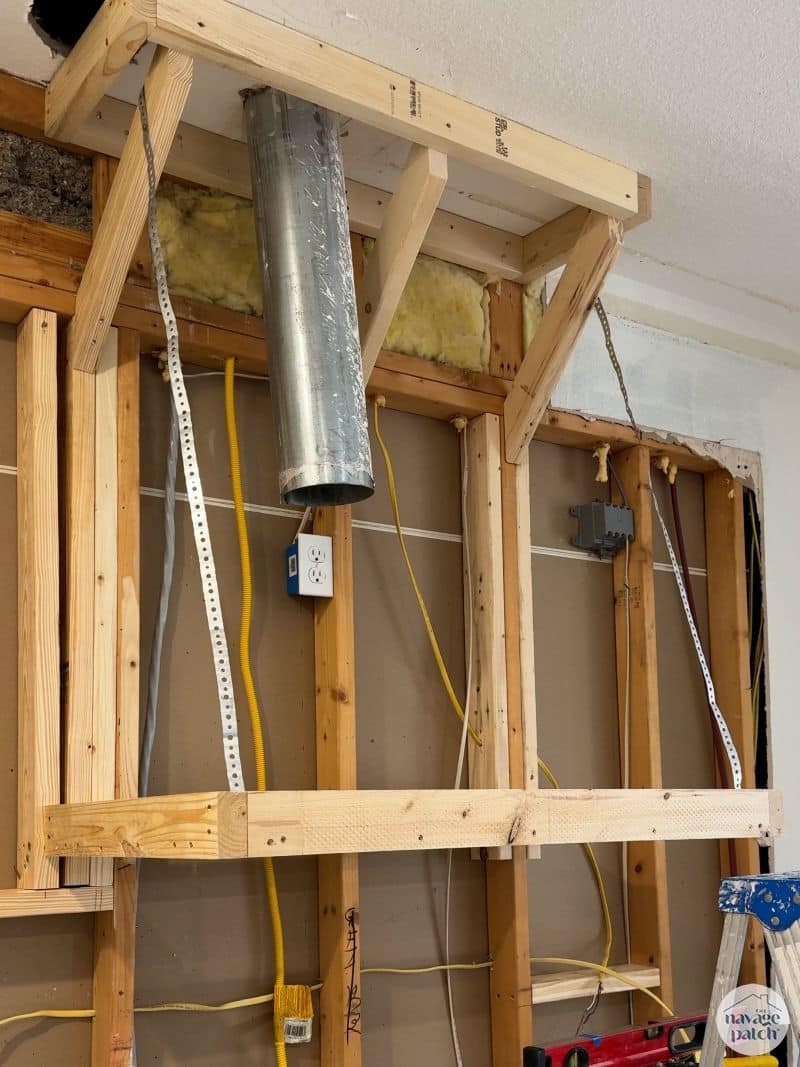
First off, here is how the range wall was looking before I began.
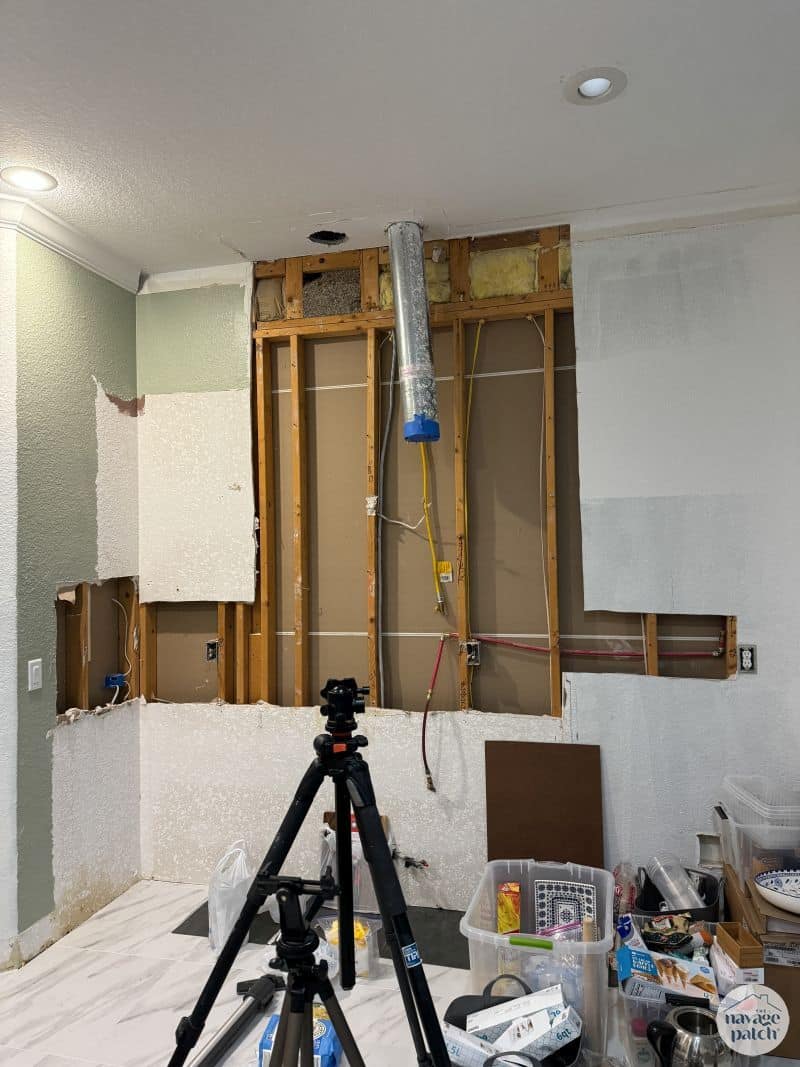
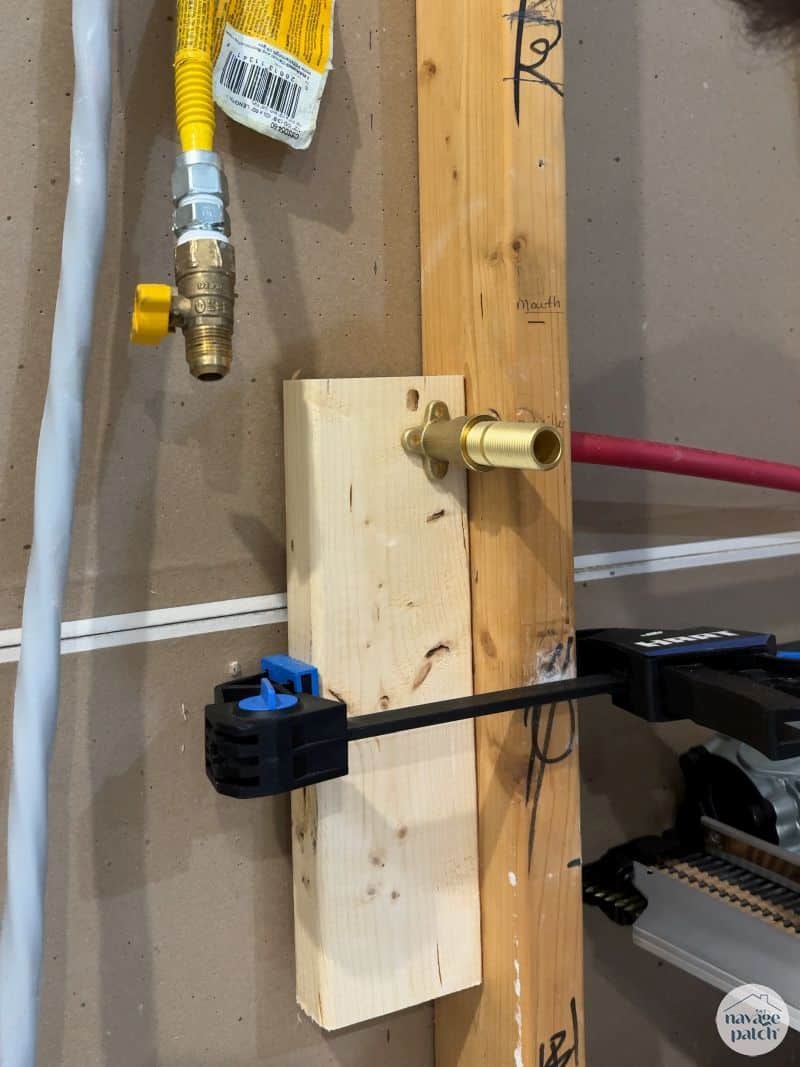
Before doing anything, I had some work to do behind the scenes, or walls, in this case. I first closed up the pantry wall on the left, and then I turned my attention to the plumbing. The red water line for the pot filler in the picture above is connected with SharkBite push-to-connect fittings which are notorious for leaking. This is a huge no-no for pipes behind a wall (and soon to be behind a stone backsplash.
I removed the line and drilled new holes through the studs at the correct height for our future pot filler.
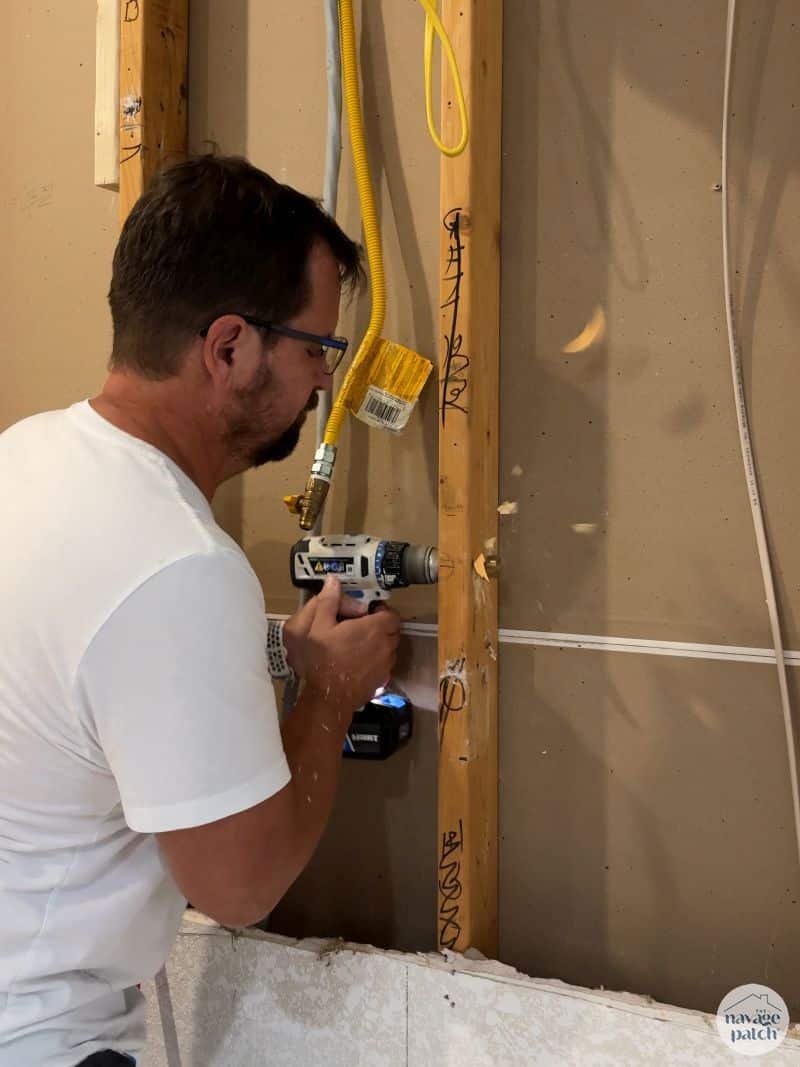
I feed the pipe through the holes and connected everything with compression fittings.
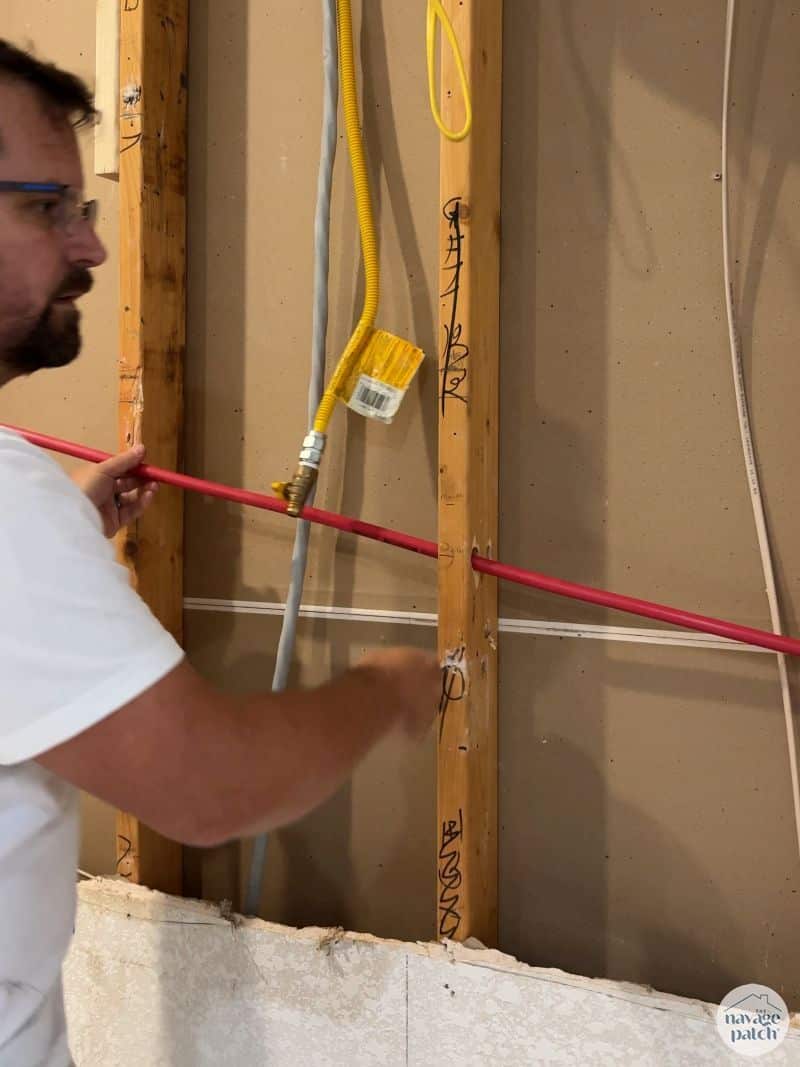
I added a backing to heep the brass nipple securely in place. I have a feeling that the double-threaded nipple that came with the pot filler (shown below) won’t be long enough after we install the 3-cm-thick backsplash, but I’ll deal with that later.
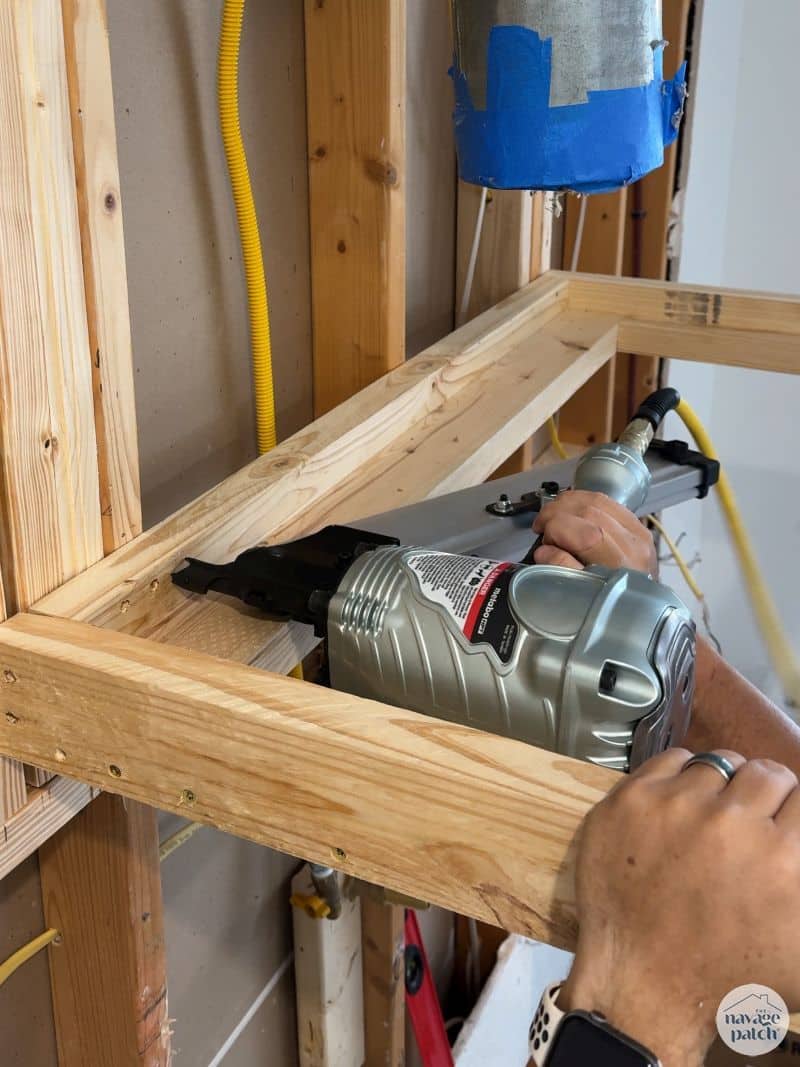
Before starting in on the range hood, I first nailed a few studs onto two existing studs to give more anchor points for the hood.
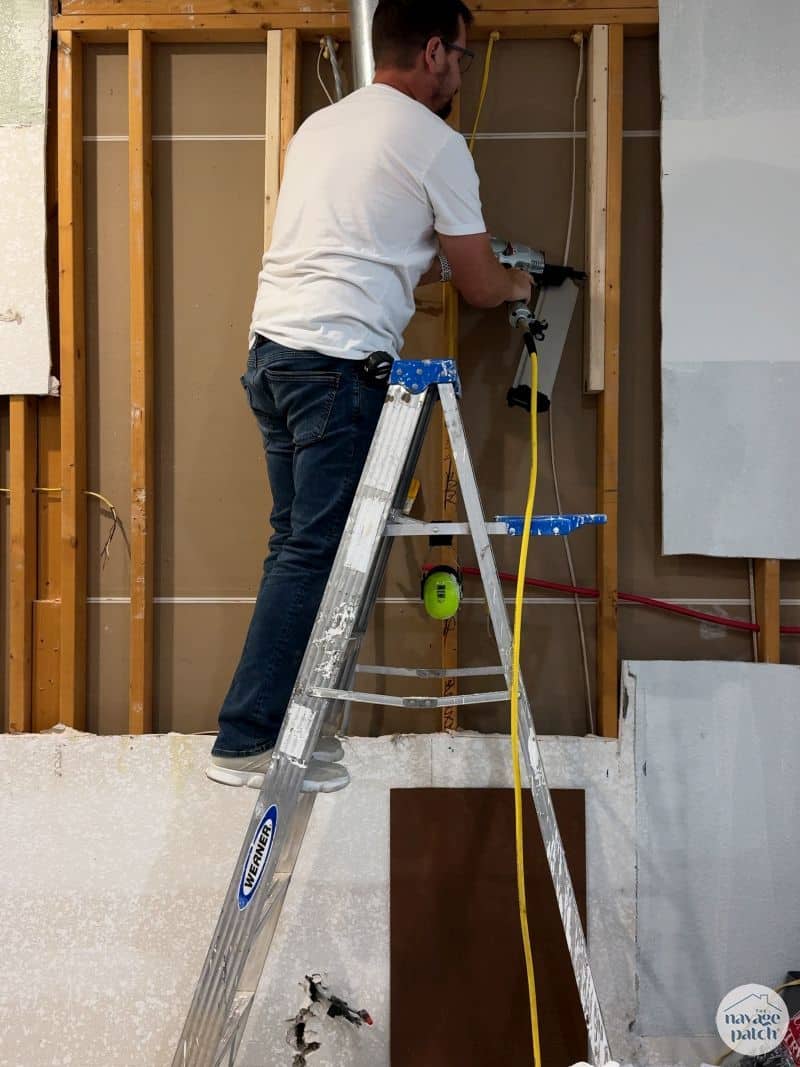
This was the first time I got to use my new framing nailer – a toy tool I’ve been wanting for years. I’ll be using it again this summer to build a shed!
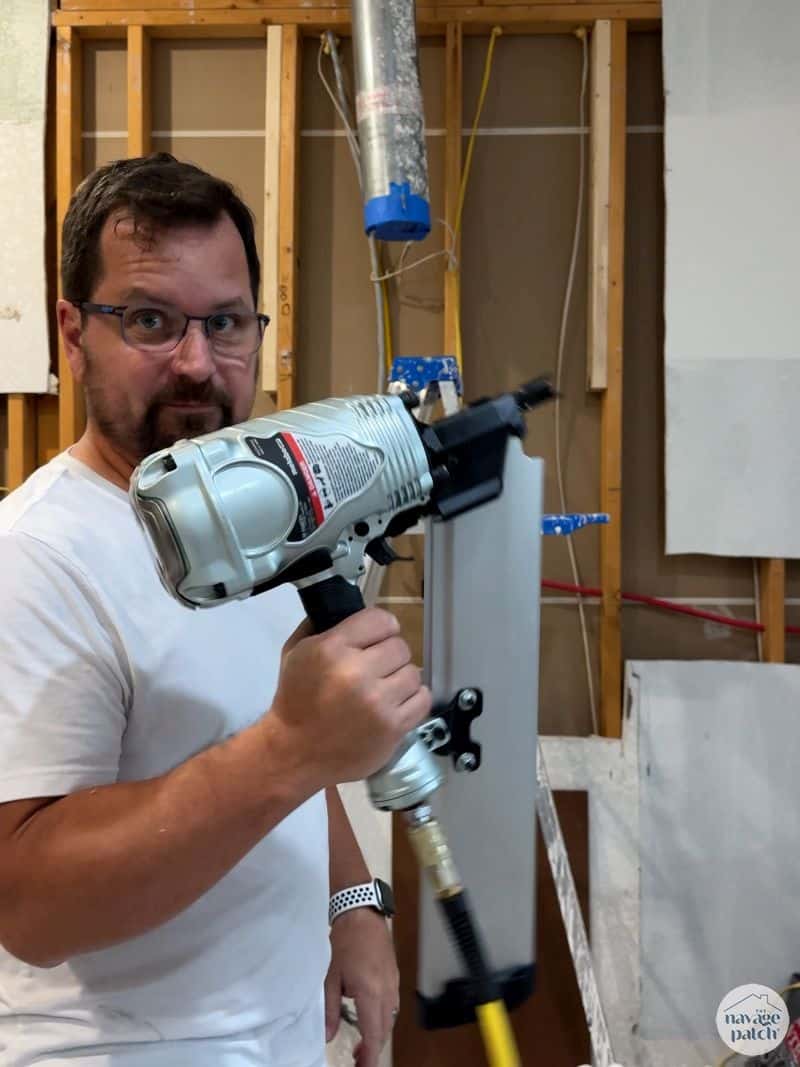
Onto the hood build!
How to Build a Range Hood
The main components of this hood are an upper and lower frame made from 2x4s with bracing (I squared the edges of my 2x4s, so they are all 1 1/2 x 3 instead of 1 1/2 x 3 1/2). These were then covered with plywood and drywall. My ZLINE insert is 34 inches wide and 15 inches deep, so all measurements are based off those numbers.
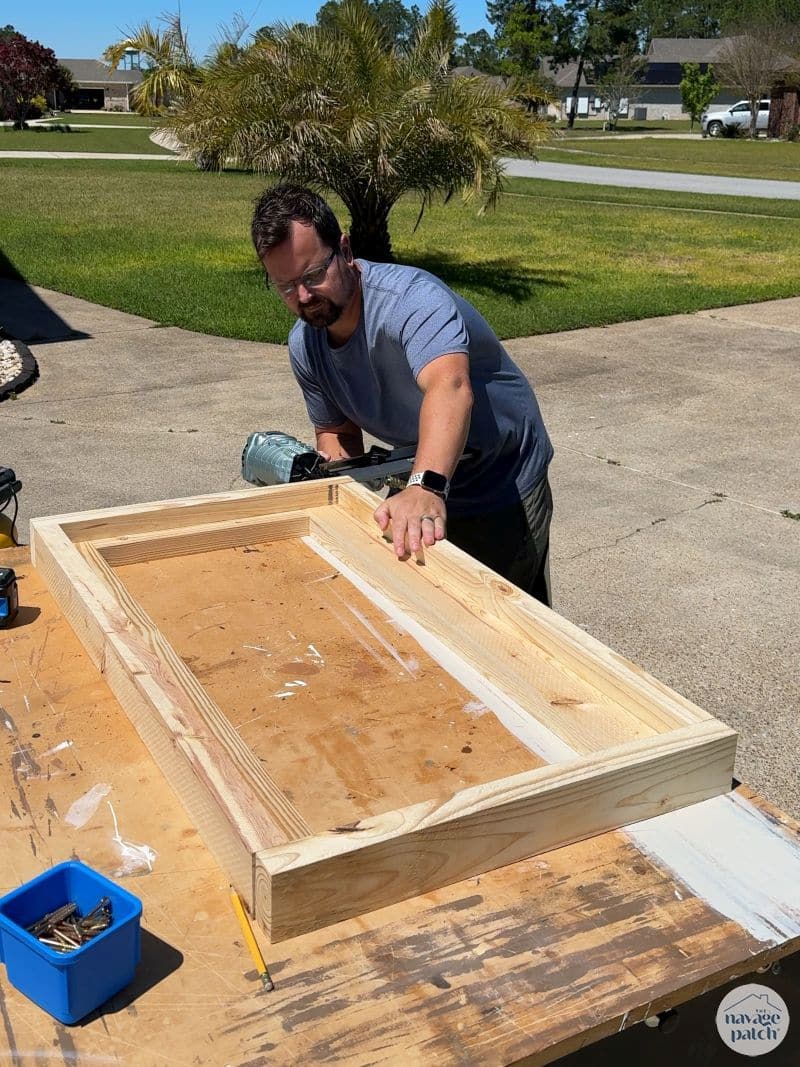
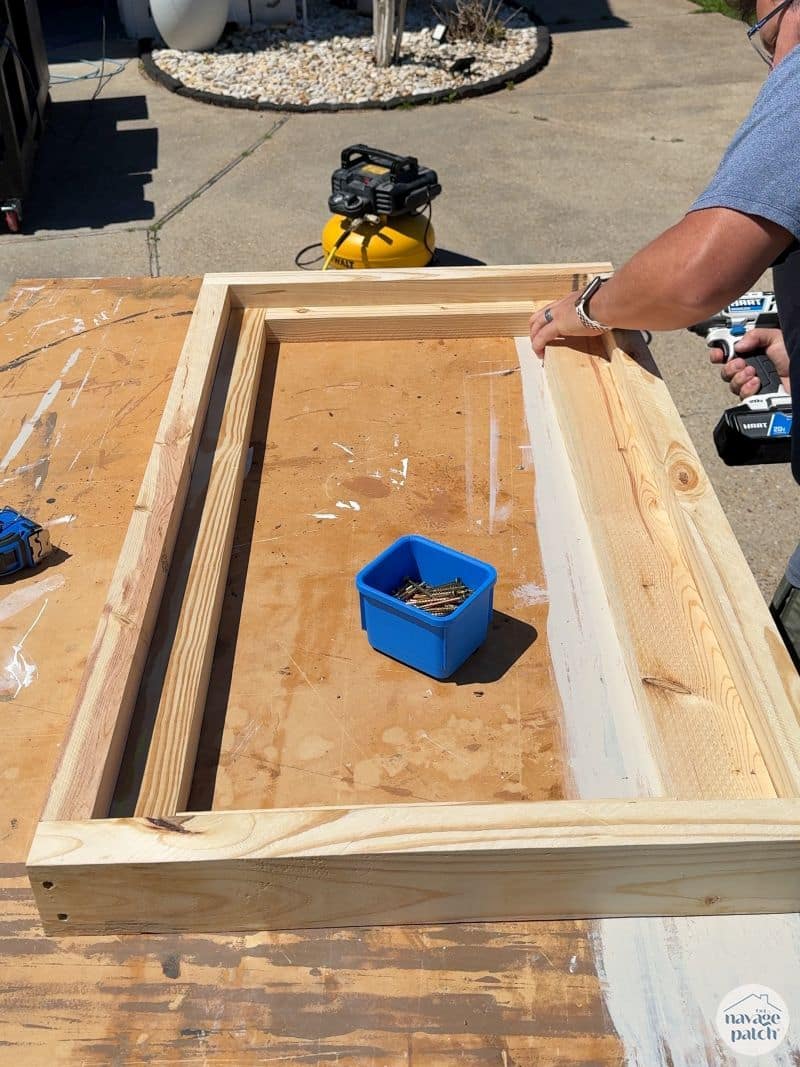
I made the lower frame from 2x4s (1 1/2 x 3) and 2x4s ripped to 1 1/2 x 1 1/2 and 1 1/2 x 2. The outer dimensions of the lower frame are 40 1/8 inches wide by 23 1/8 inches. The opening is 34 1/8 x 15 1/8. I added an extra 1/16 all around just in case the lumber was a little wonky. Here is how I laid out the pieces for the frame.
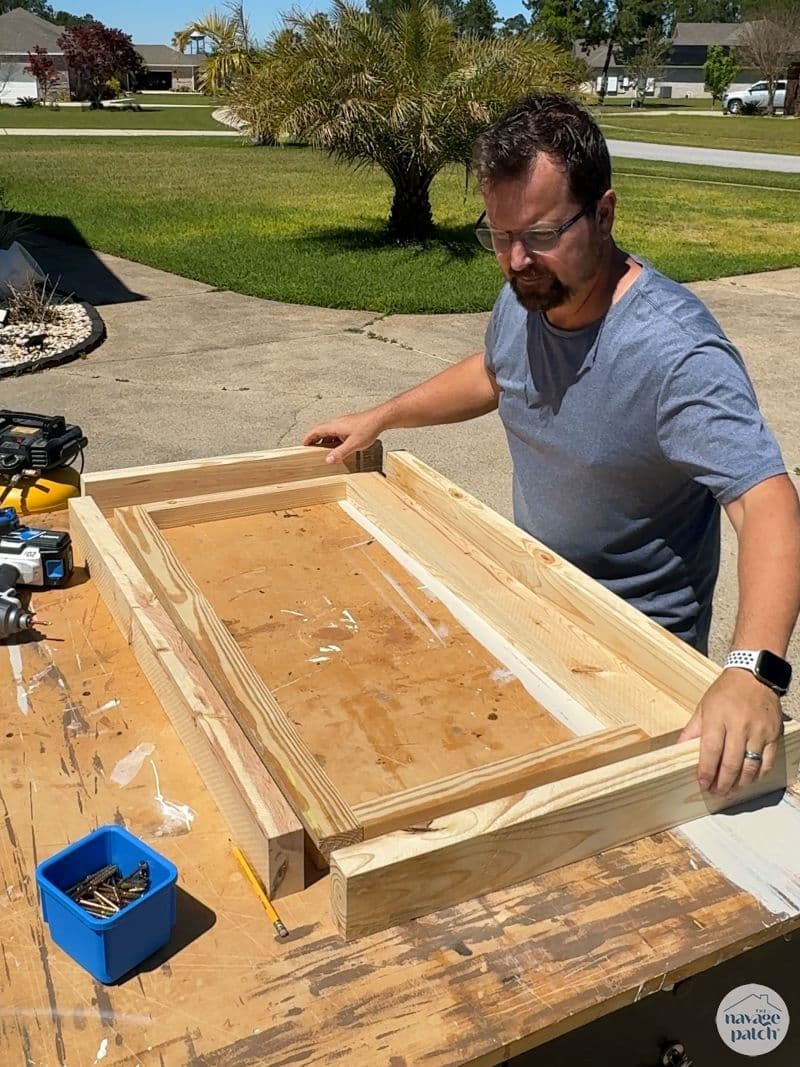
The back of the hood cover is facing me in the picture above. The outer pieces are all 2x4s on their sides. The inner back is a 2×4 on its face. The inner side pieces are 1 1/2 x 1 1/2, and the front inner piece is 1 1/2 x 2.
I nailed the corners and screwed the sides.
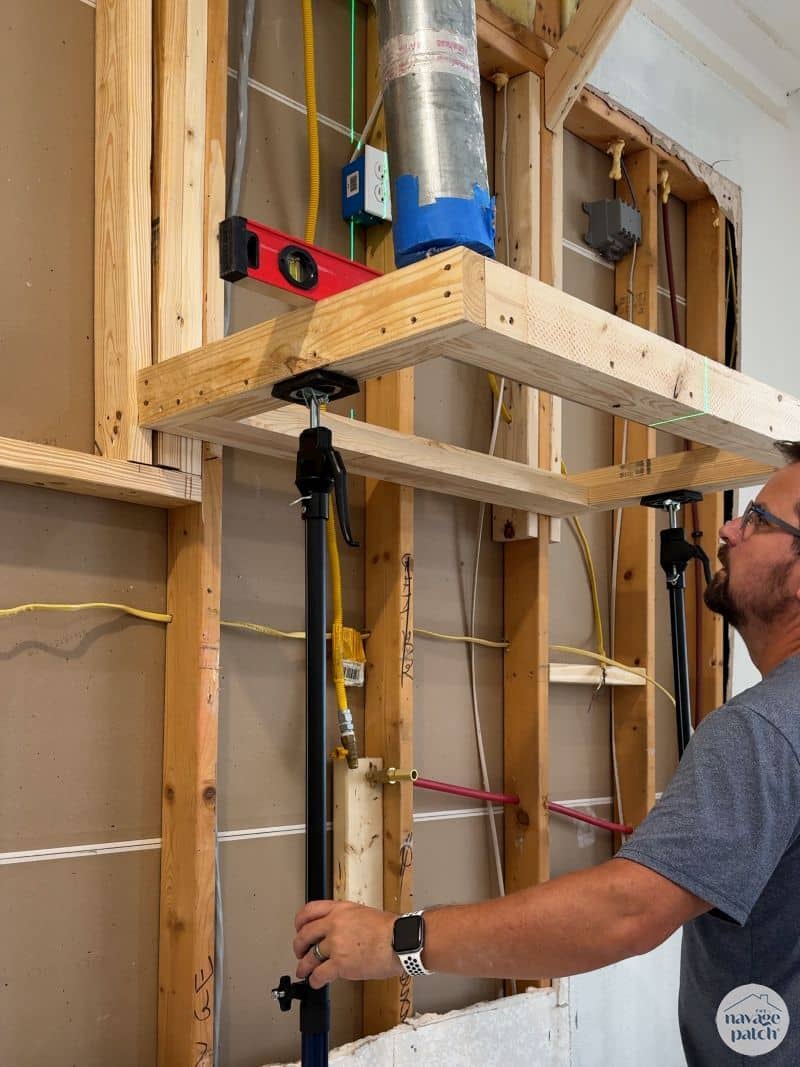
The upper frame is smaller than the main lower frame, and that will allow for a gracious curve along the front edge. It’s a simple rectangle measuring 14 inches deep by 40 1/8 inches wide. I propped the upper frame up and held it in place with two incredible handy (and very long) third arms, though I suppose in this case they’re third and fourth arms!
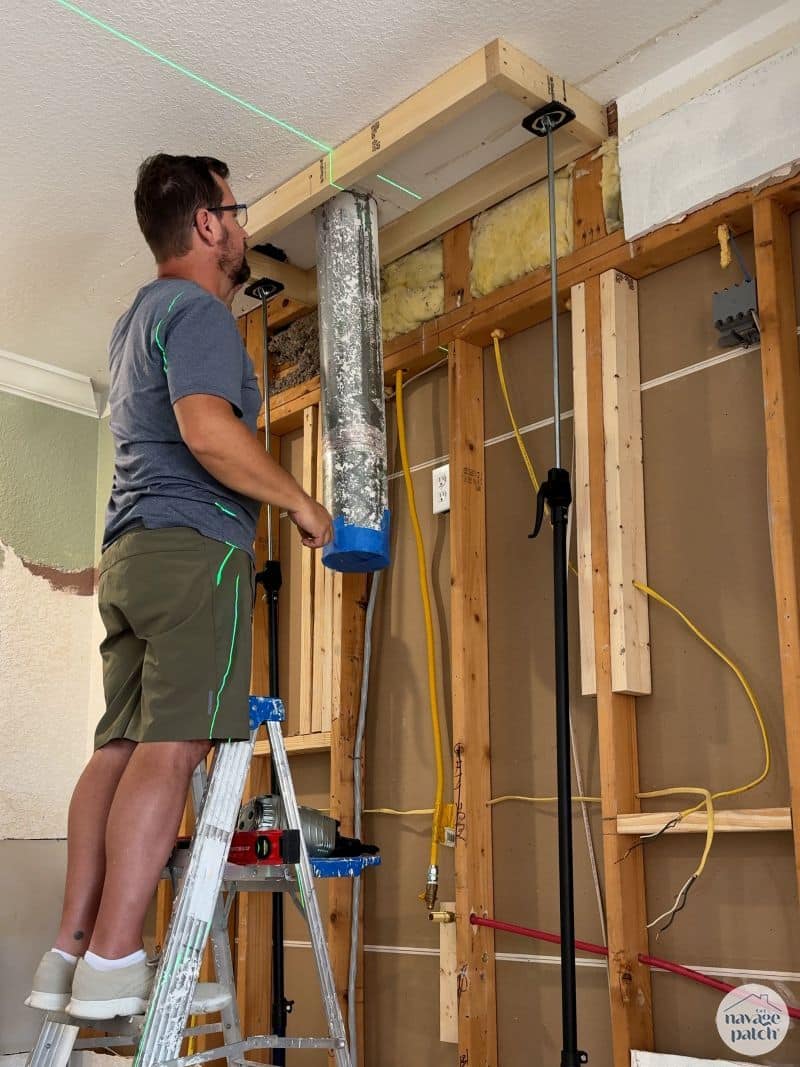
I nailed the back of the upper frame to the exposed wall plate.
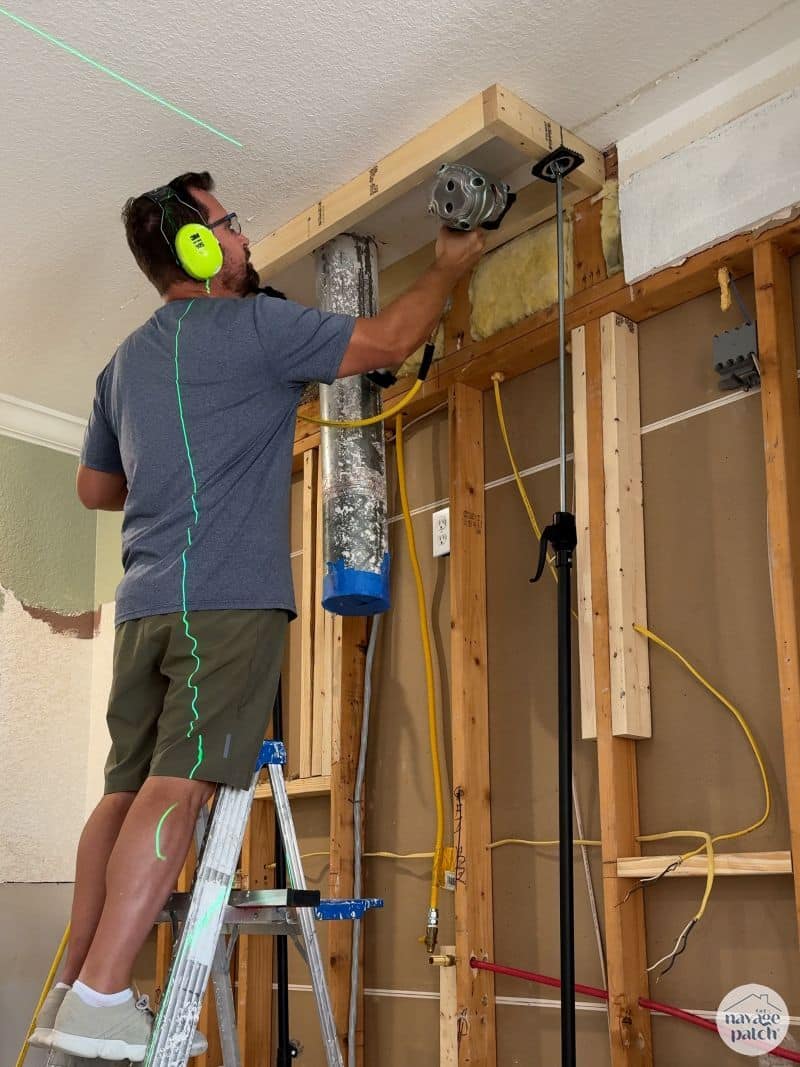
There weren’t any joists in the ceiling close enough to nail the rest of the frame to, so I built and installed two brackets from 2x4s.
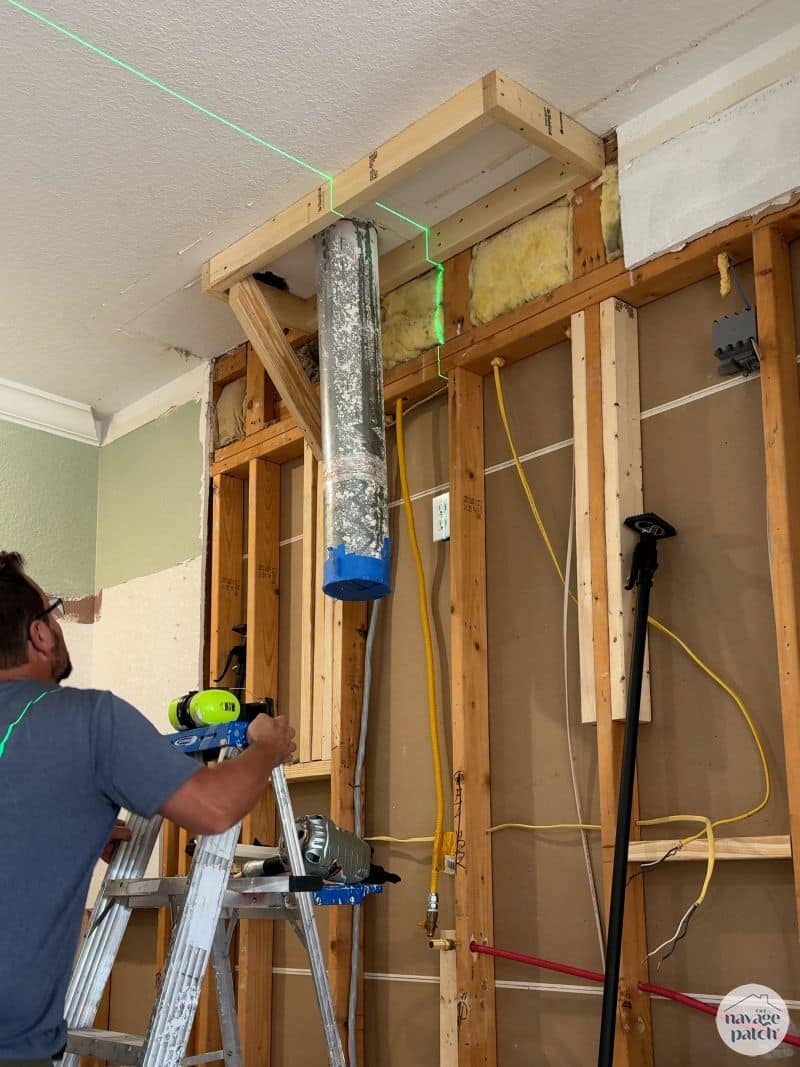
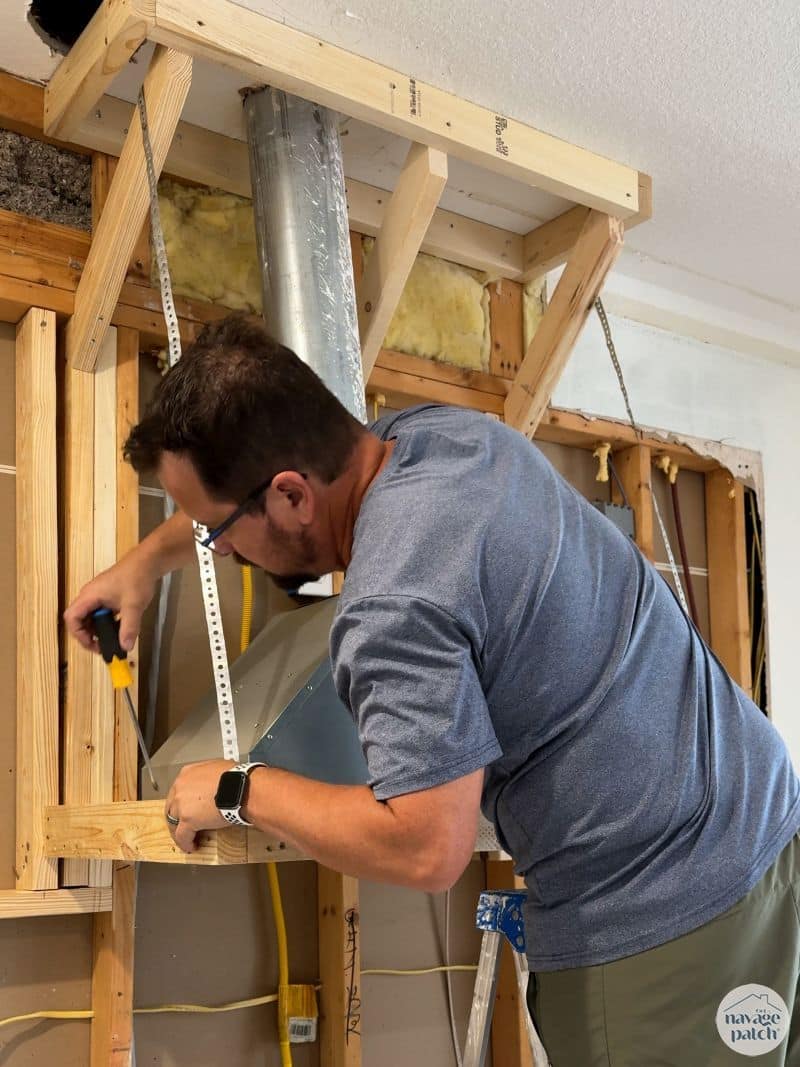
I positioned the bottom frame about 36 inches above countertop height and held it up with the third arms while I nailed the back to the studs.
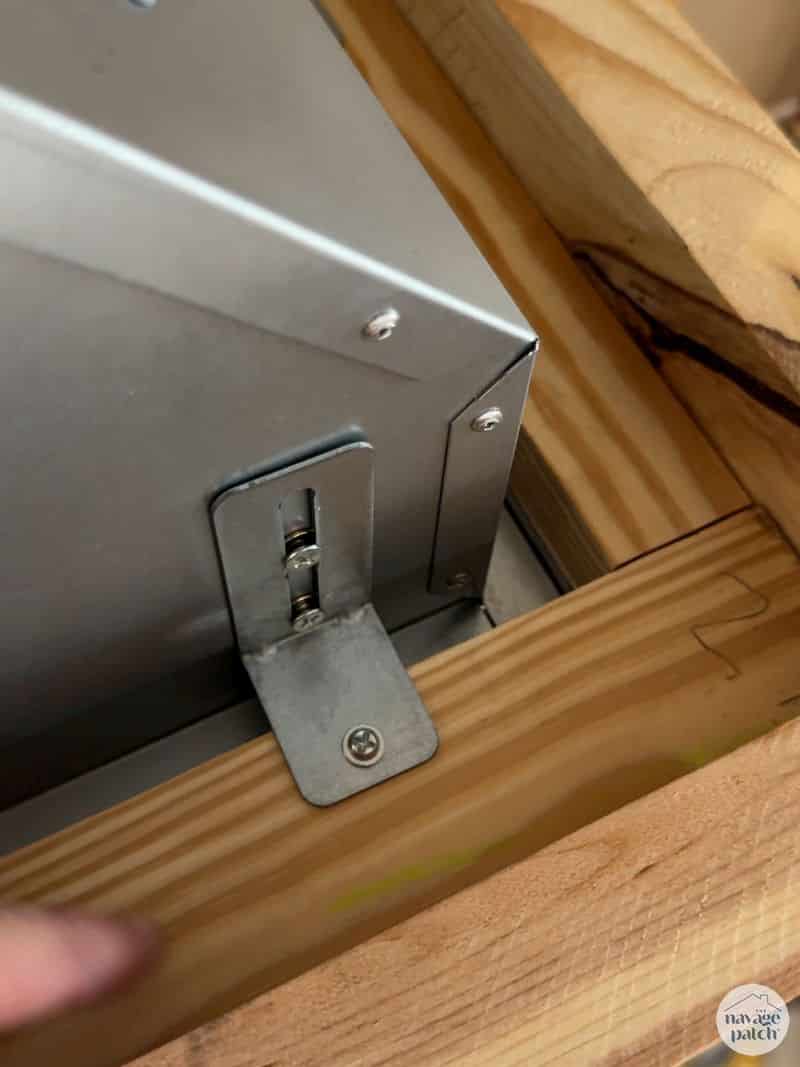
To support the frame (it would soon be carrying a heavy load), I attached metal pipe hanger straps to the font and ran the straps up to the brackets.
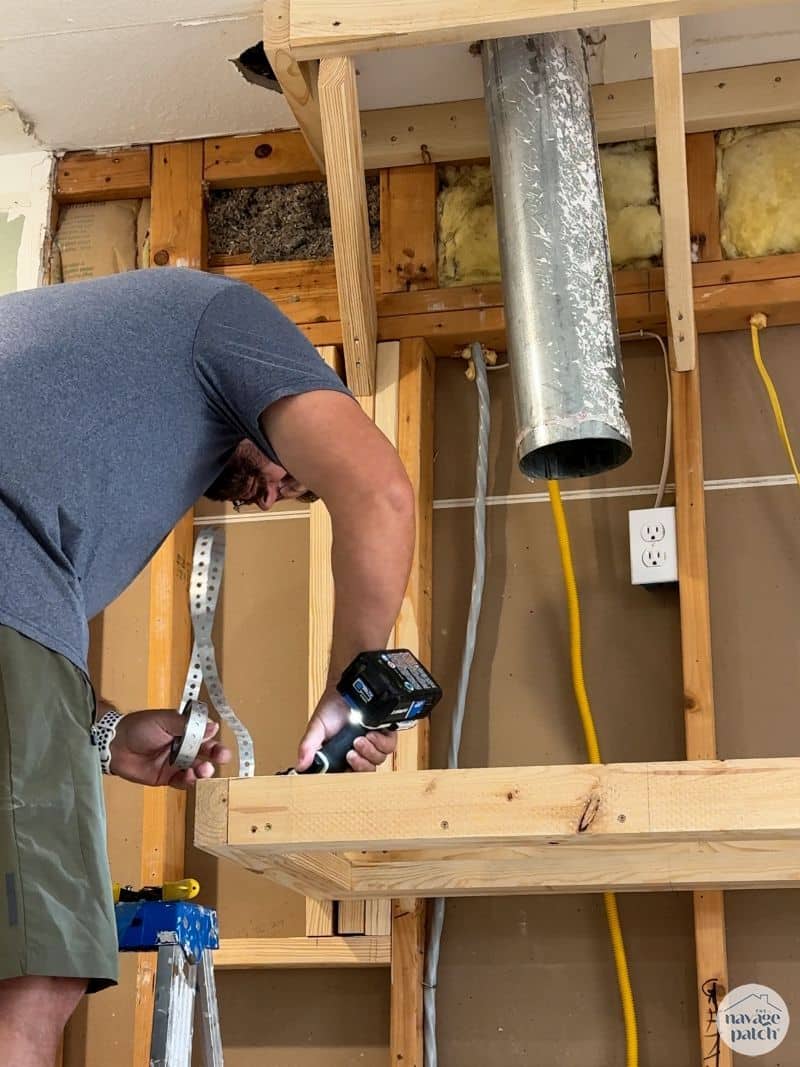

Here’s the hood ready for the insert. The straps are a little loosey goosey, but I’ll be tightening them after I put the insert in place.
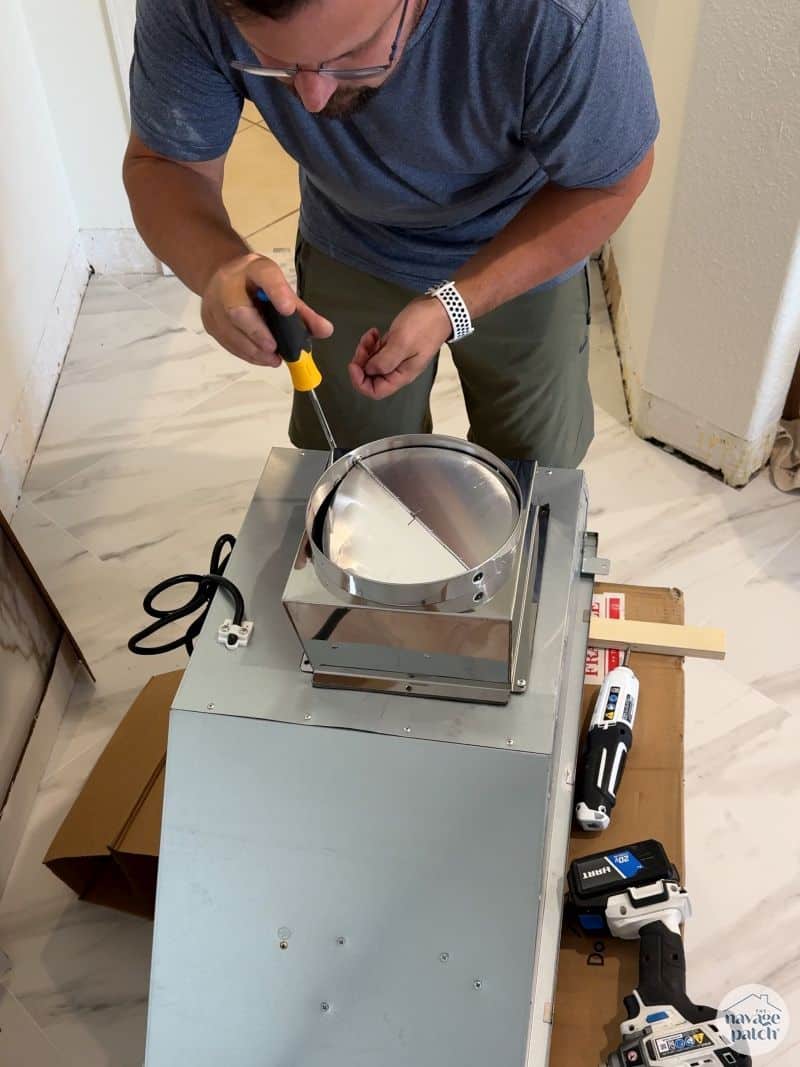
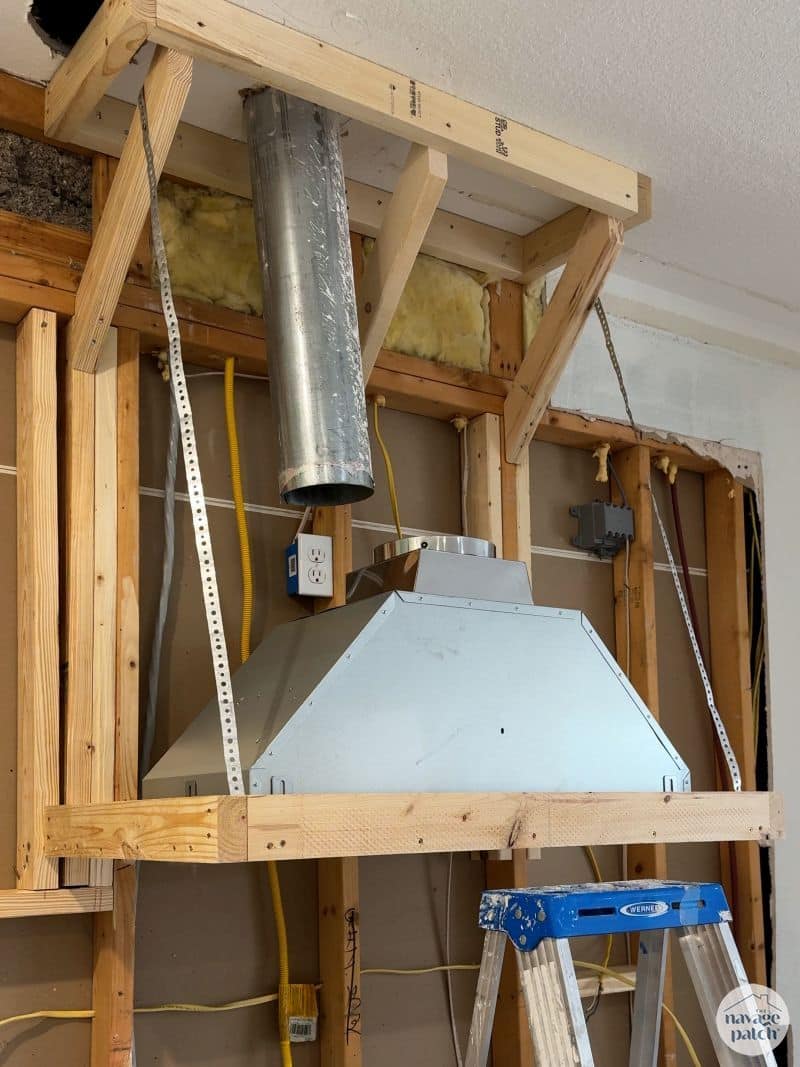
I prepared the insert for installation…
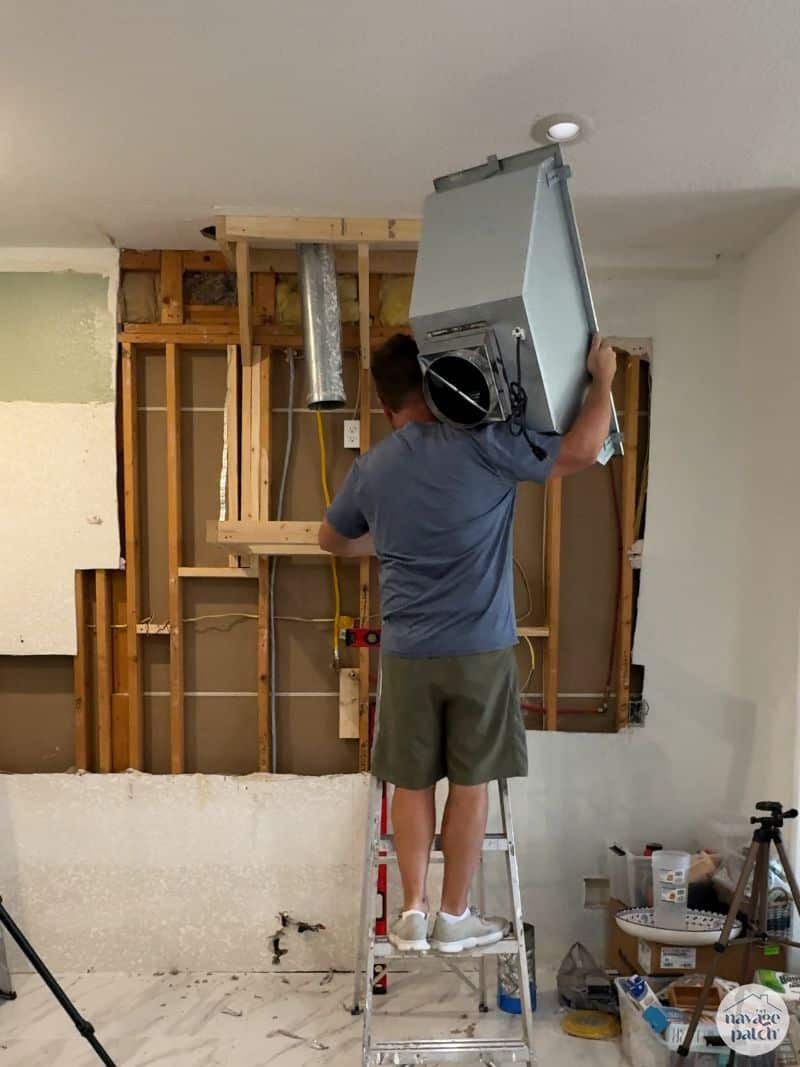
And then I lugged it up the ladder and (gently) plopped it onto the bottom frame.
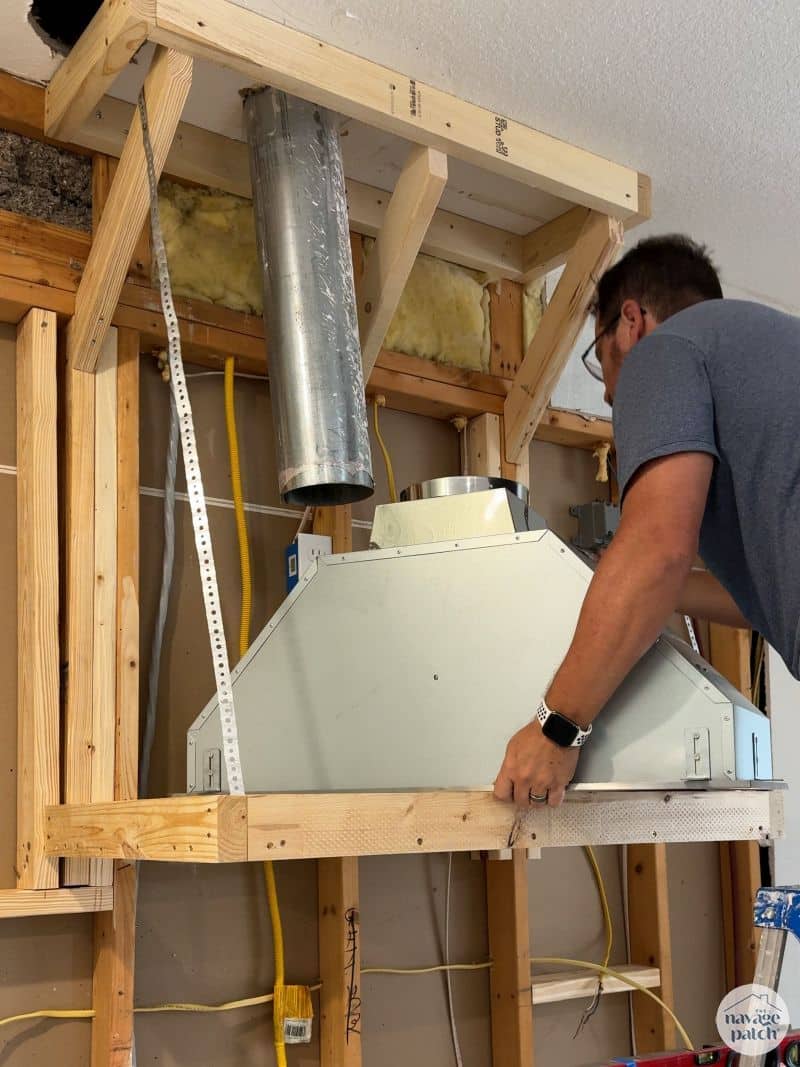
I screwed the brackets to the frame.
You can sorta see how perfect the fit is.
Here’s how I stood. I still need to tighten those straps and then I have to deal with that pipe.
The weight of the insert took the bottom frame out of level, but it didn’t press down enough to fully tension the straps. To take up the slack, I lifted the front of the frame with my third arms until it was slightly above level, and then I pulled the straps tight and re-attached them to the upper brackets. When I removed the third arms, the weight of the insert tensioned the straps until they held the frame level.

Next, I cut a piece of 1 1/2 x 2 and screwed it to the top front of the frame.
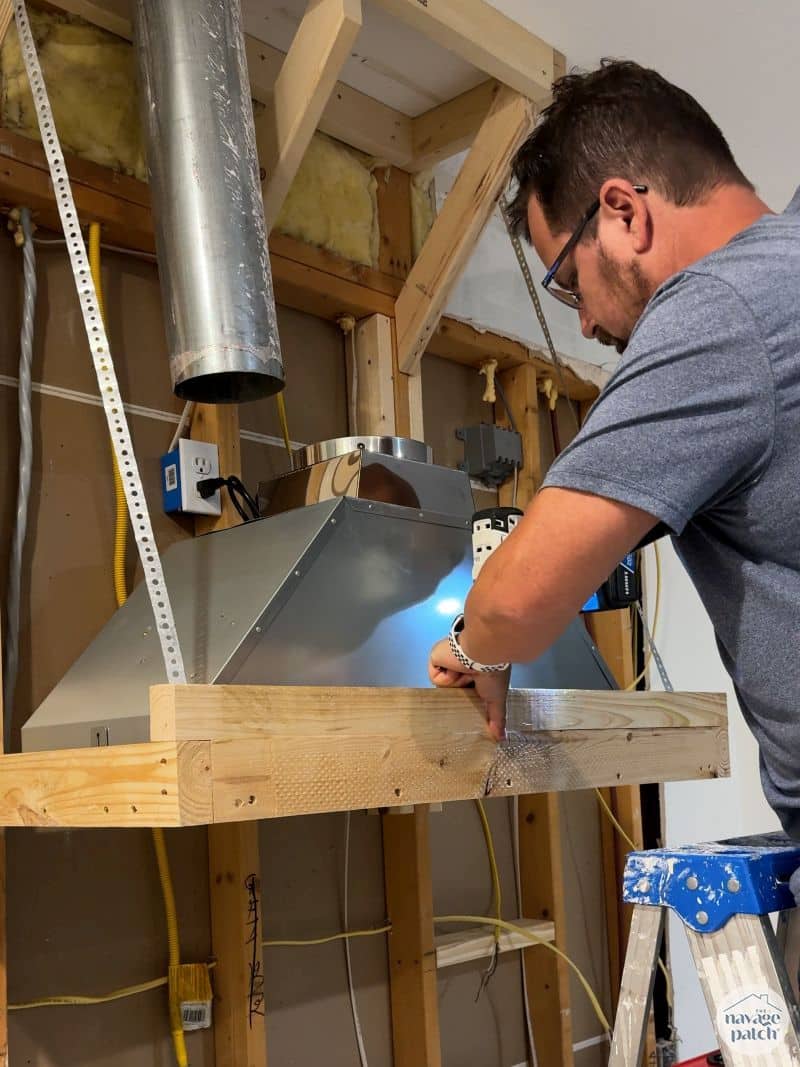
To figure out the length the curve, I measured from the ceiling to the strip I’d just installed.
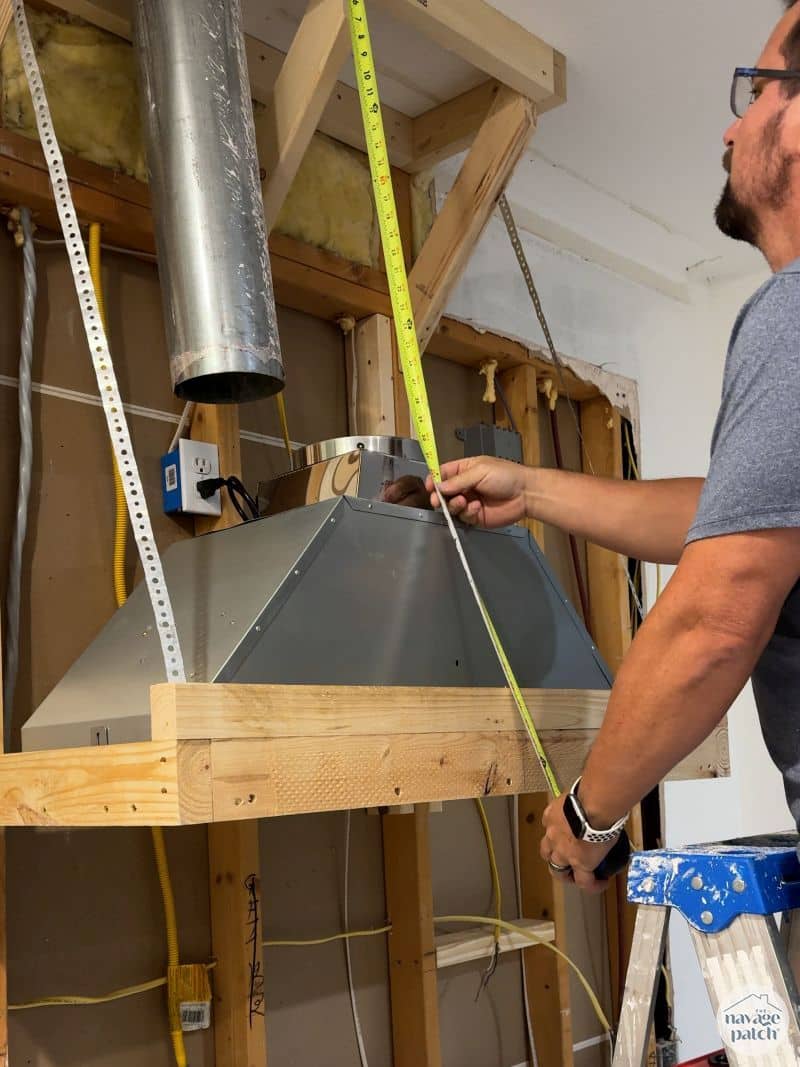
Then I cut a test strip from scrap utility panel and fit it onto the hood.

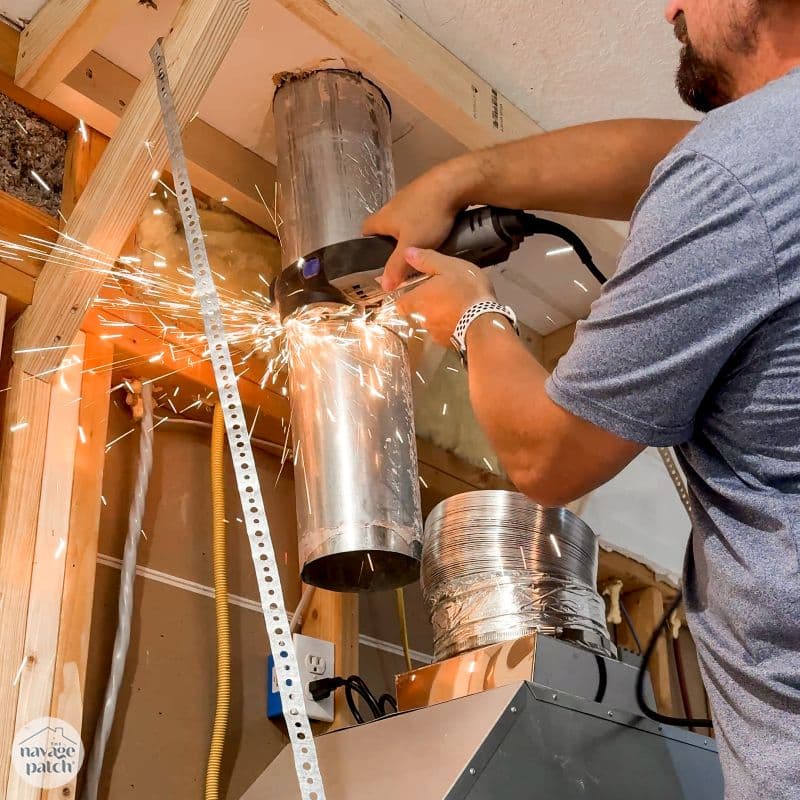
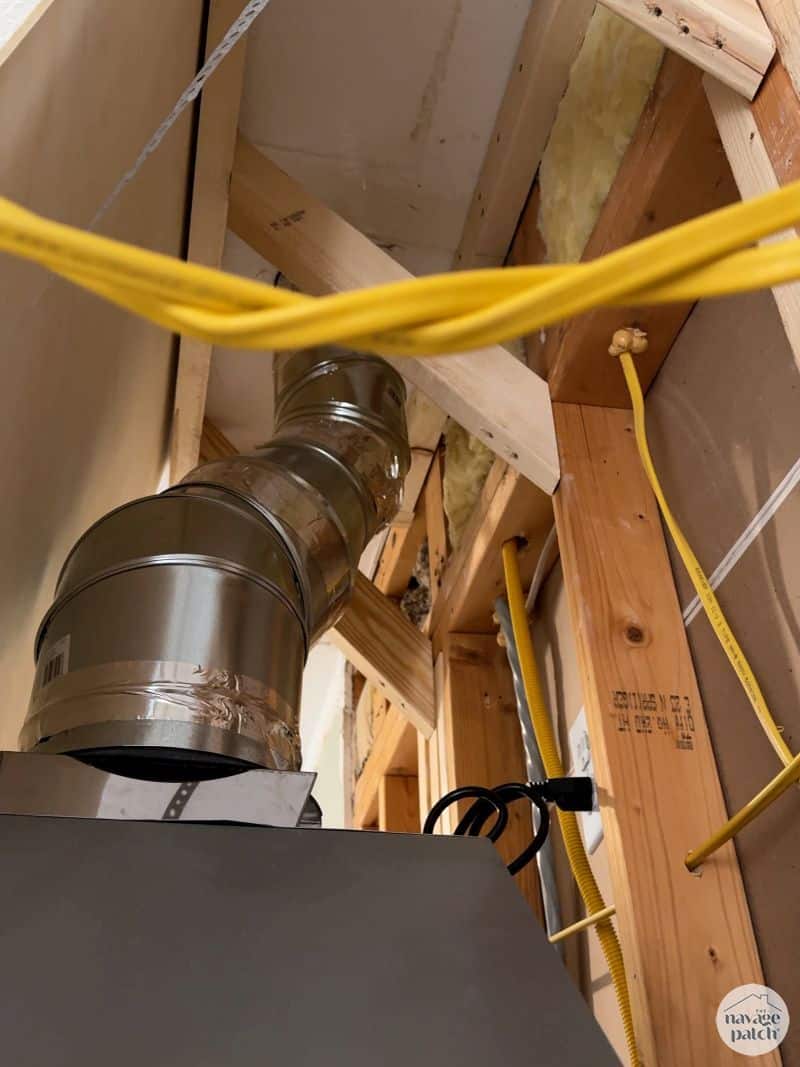
It was right here that I remembered I needed to do some work on the vent pipe before I took away my access with the front panel.
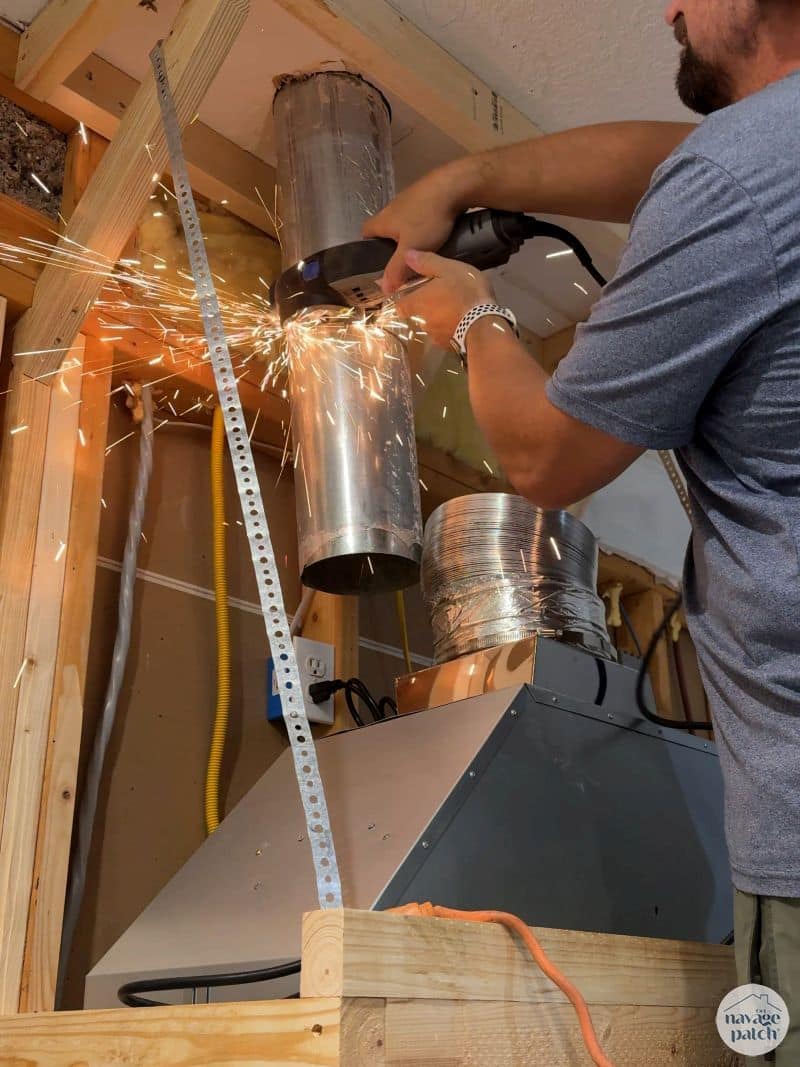
The flexible vent hose supplied by ZLINE was too big for my existing vent, so I scrapped that and bought a series of hard pipe reducers and connectors to join the vent to my existing pipe. I’m jumping ahead in time here, but here’s how the plumbing turned out.

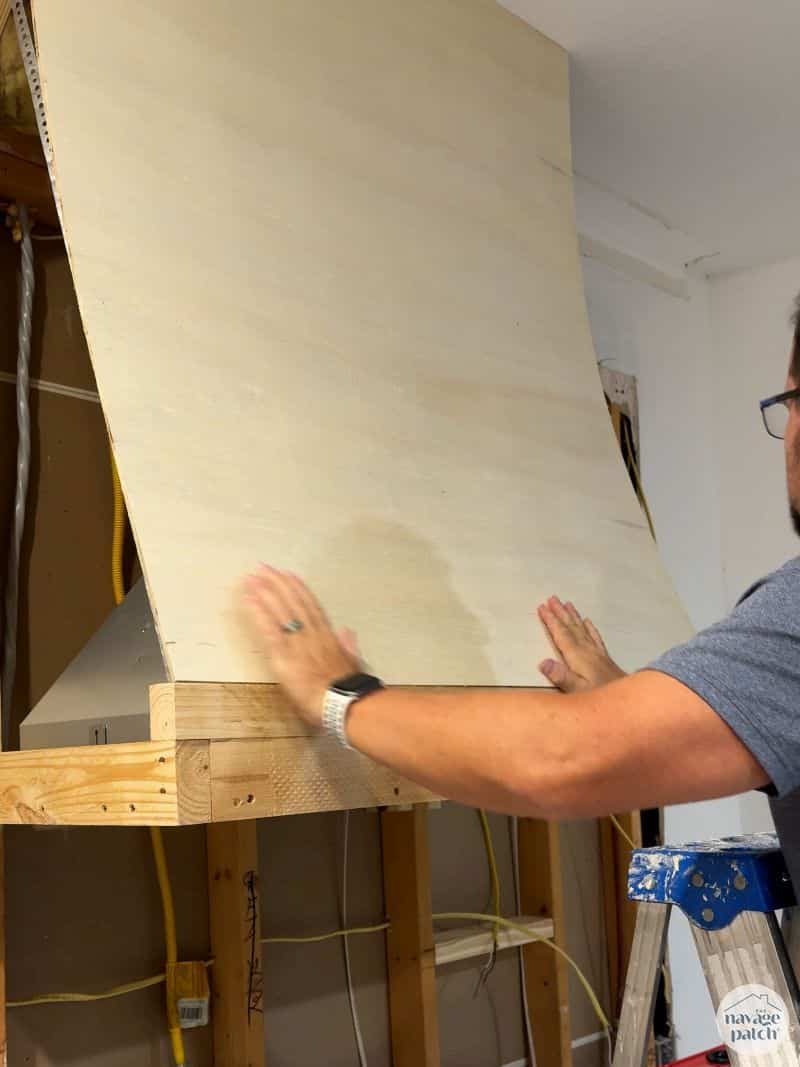
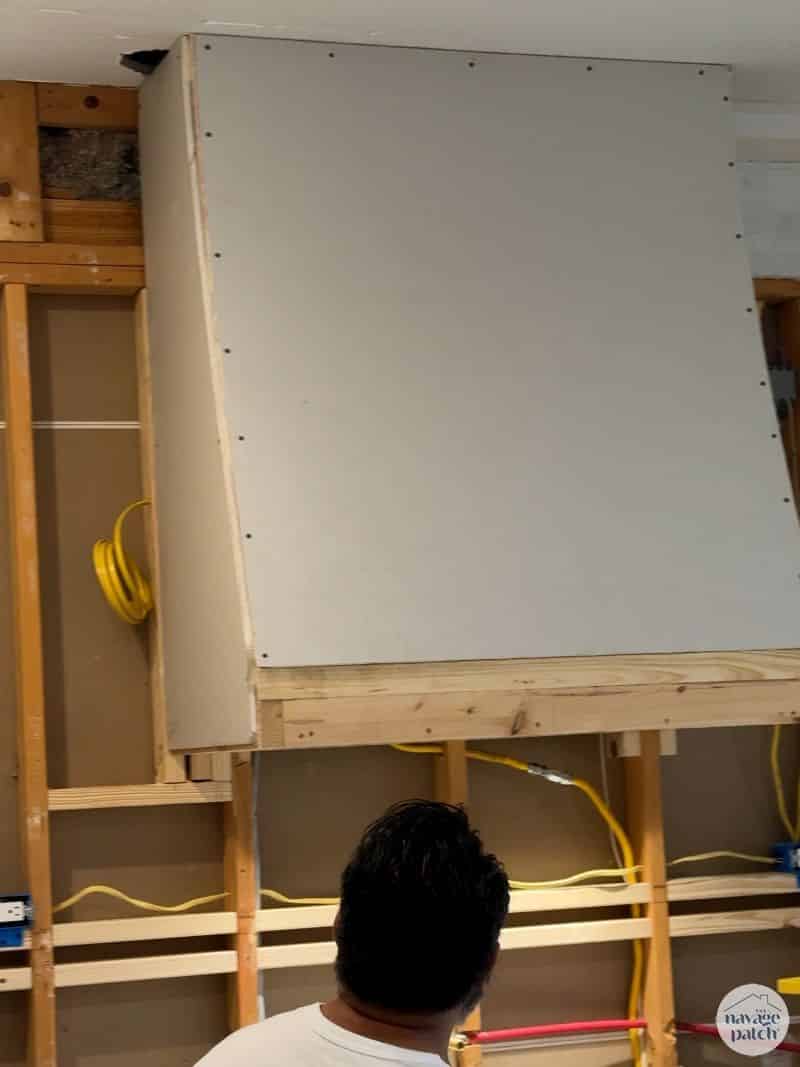
I cut a piece of 1/4 inch plywood and fit it onto the range hood frame.
I then cut a wedge-shaped piece and glued it behind the plywood face.
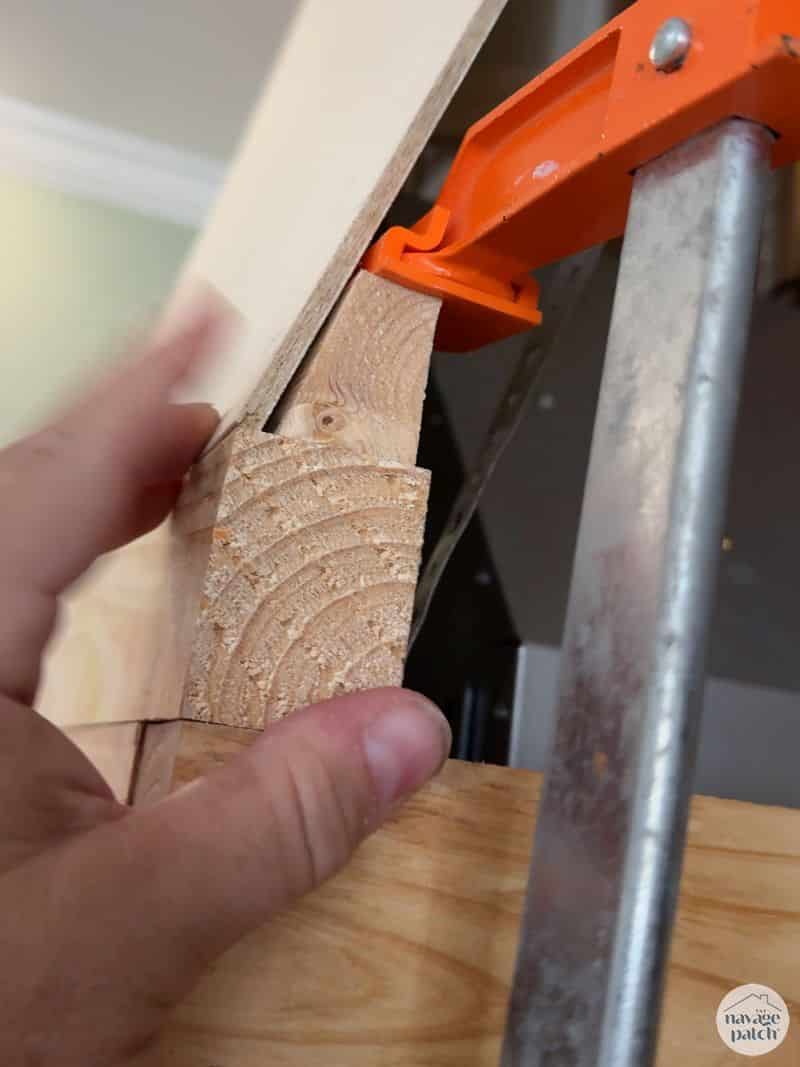
When the glue dried, I brad-nailed the bottom of the plywood to the wedge.
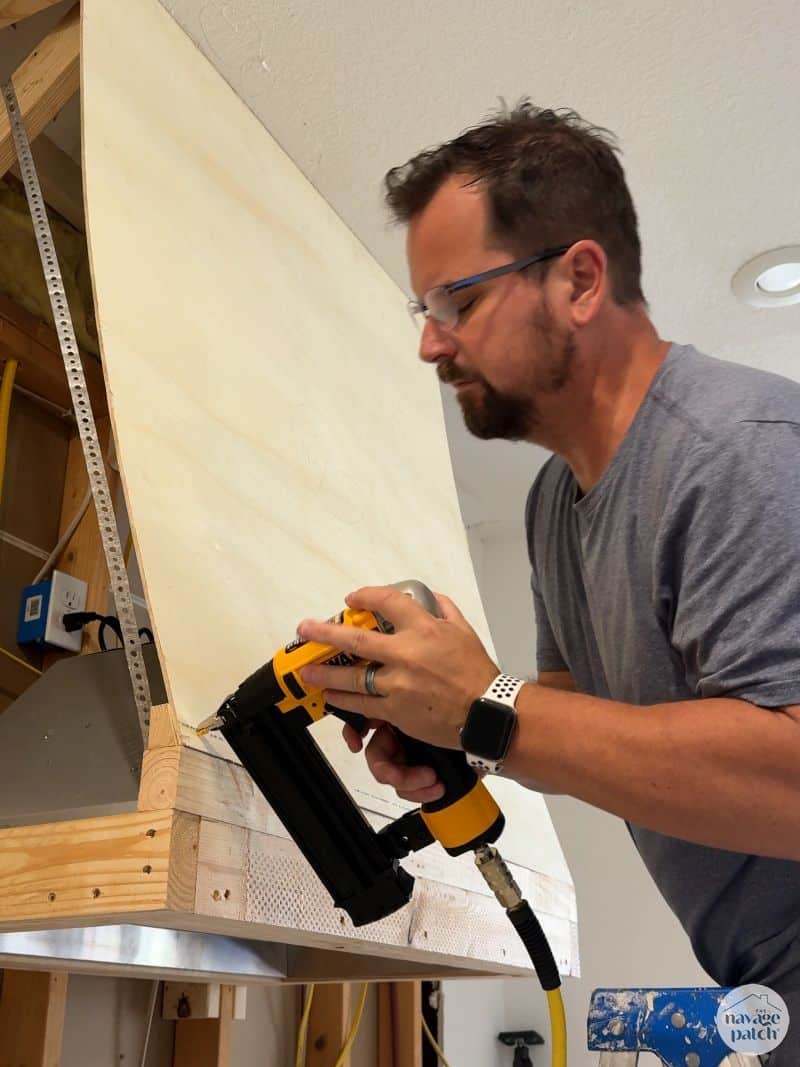
I attached the top to the frame with screws.
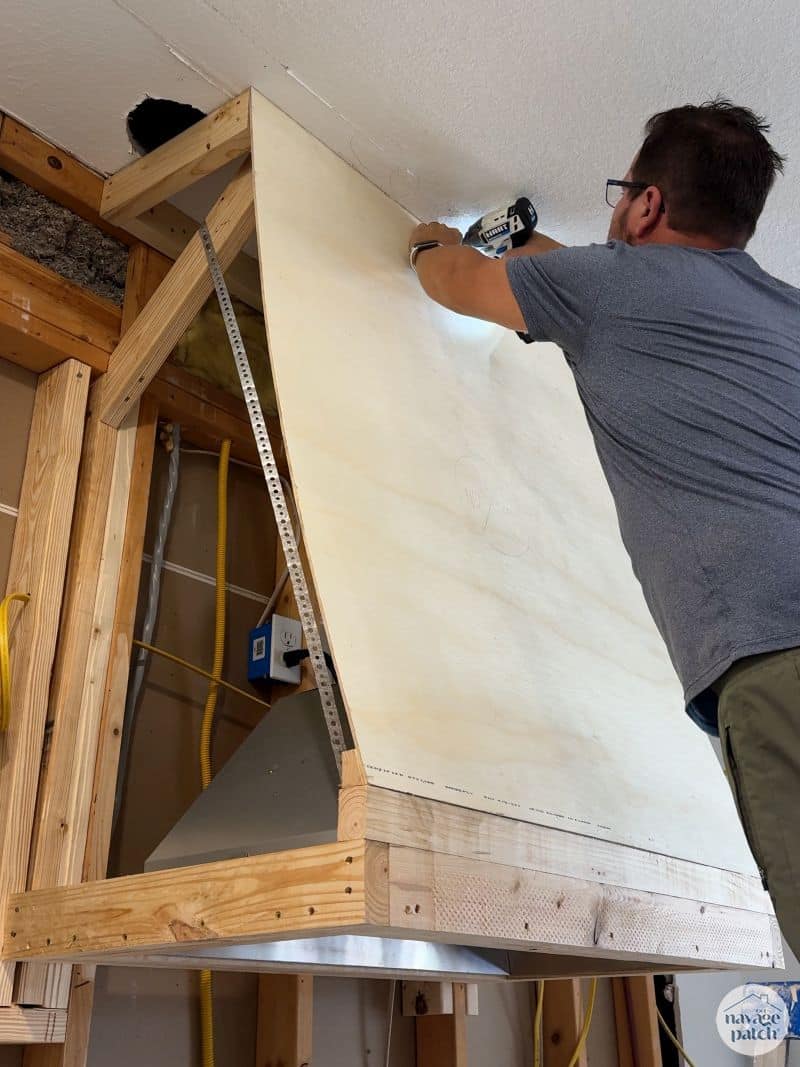
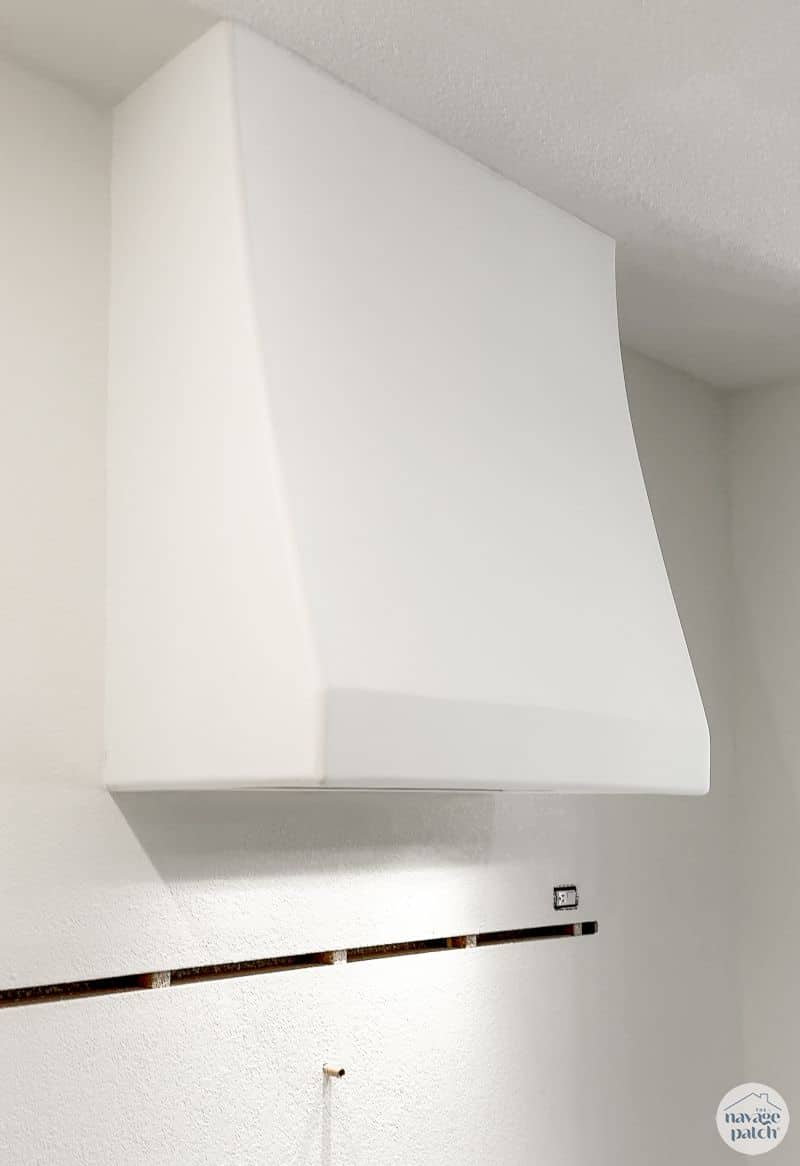
Here’s how my DIY range hood looked after installing the curved front.
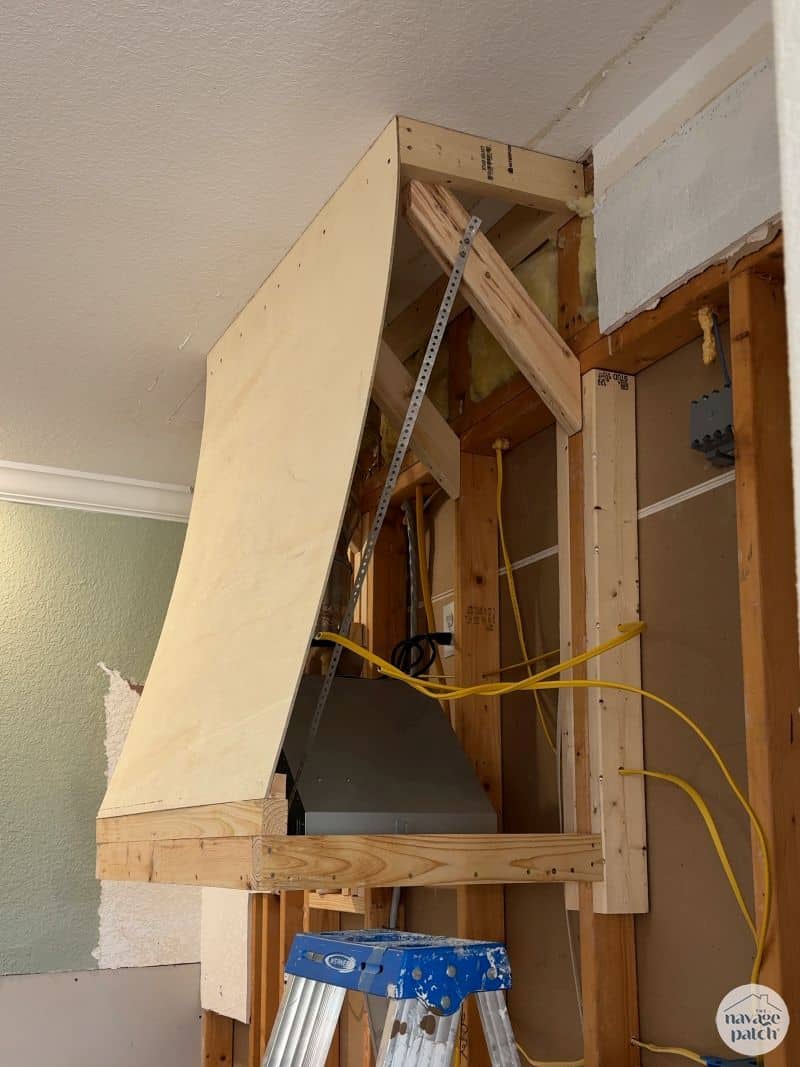
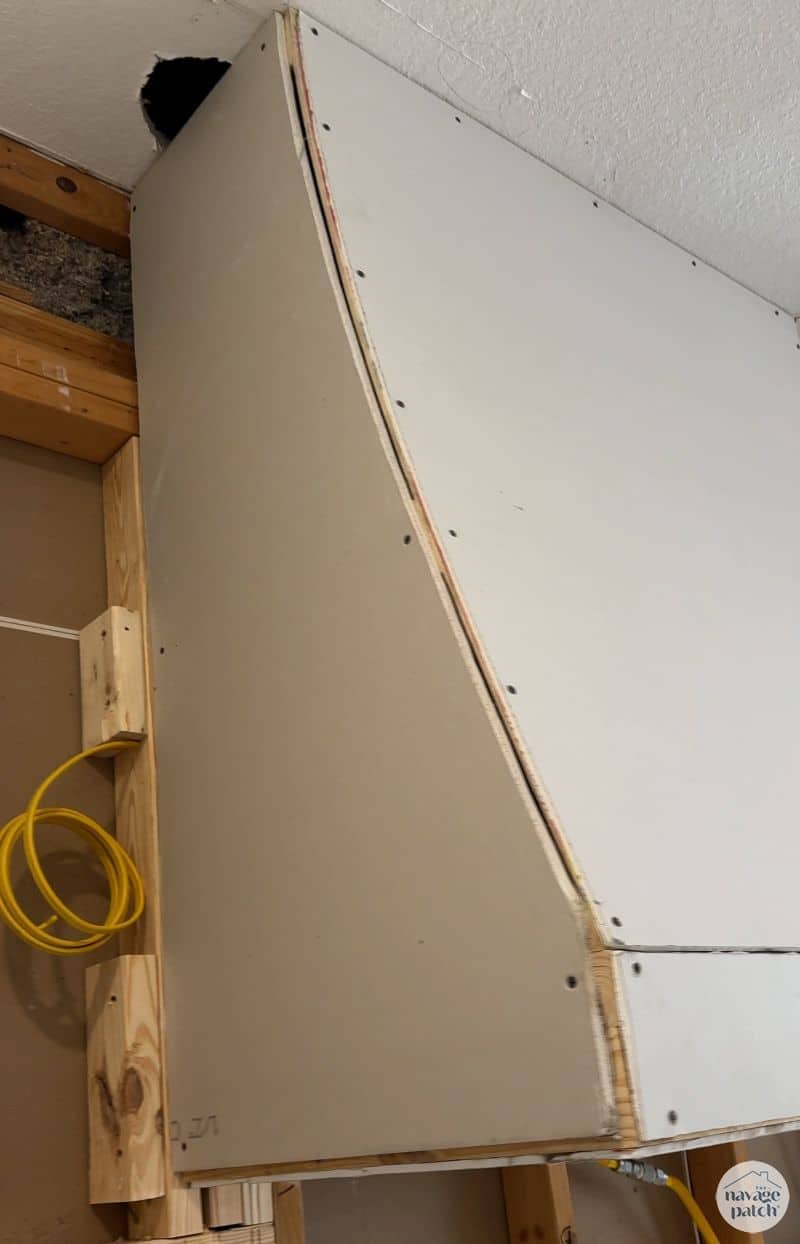
The last structural step was to install a side support for the drywall. I secured it with pocket screws to the studs in back and then I brad-nailed the plywood to it in front.

All this work is for this shining beauty!
At this point, I turned the job over to my drywall expert Carlos.
He added sheetrock, bullnose corner beading and mud to create the final form.
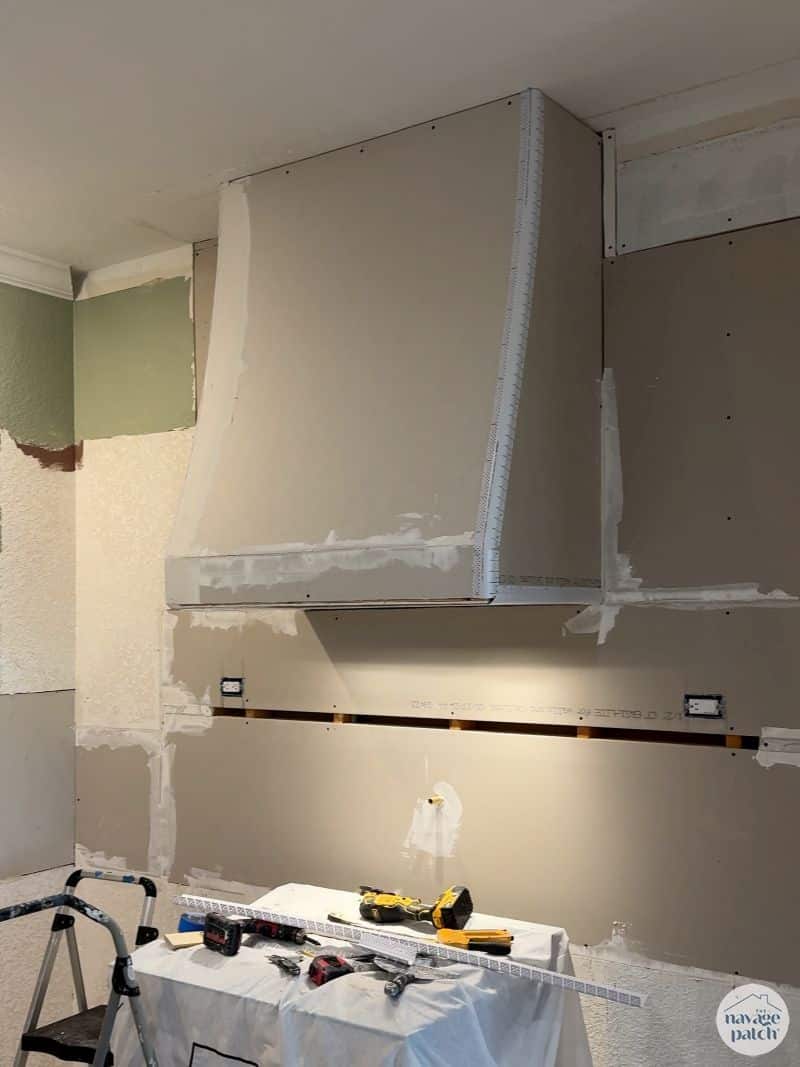
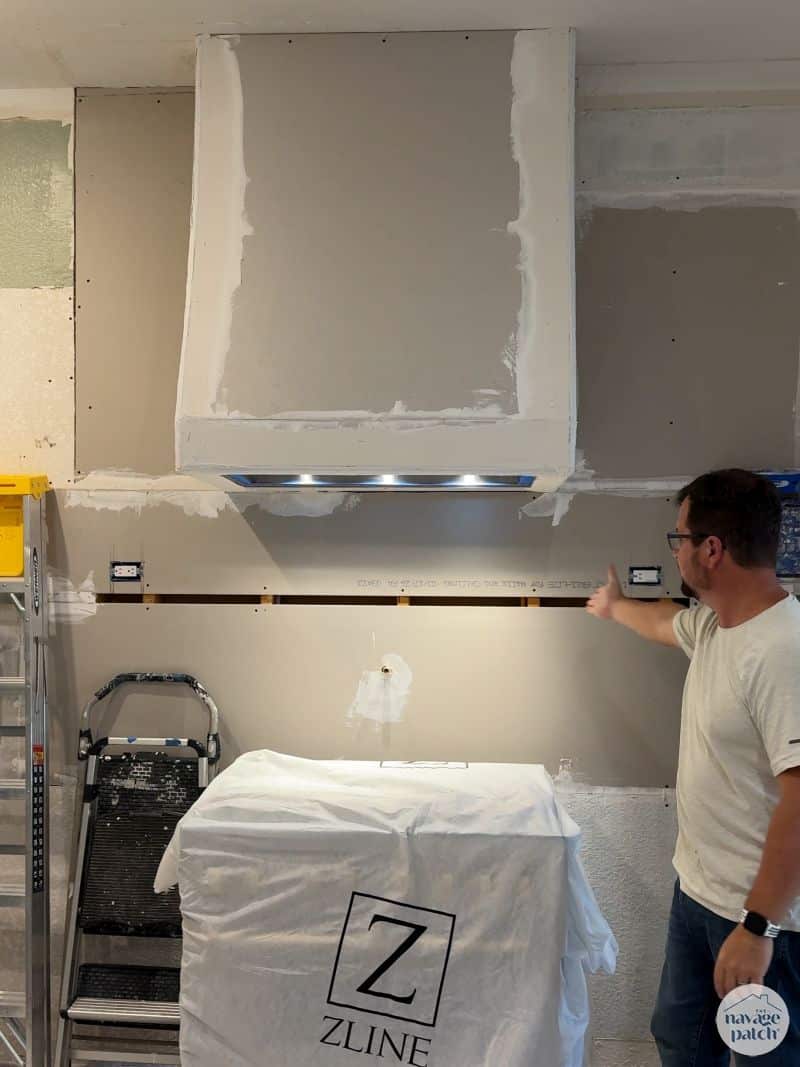
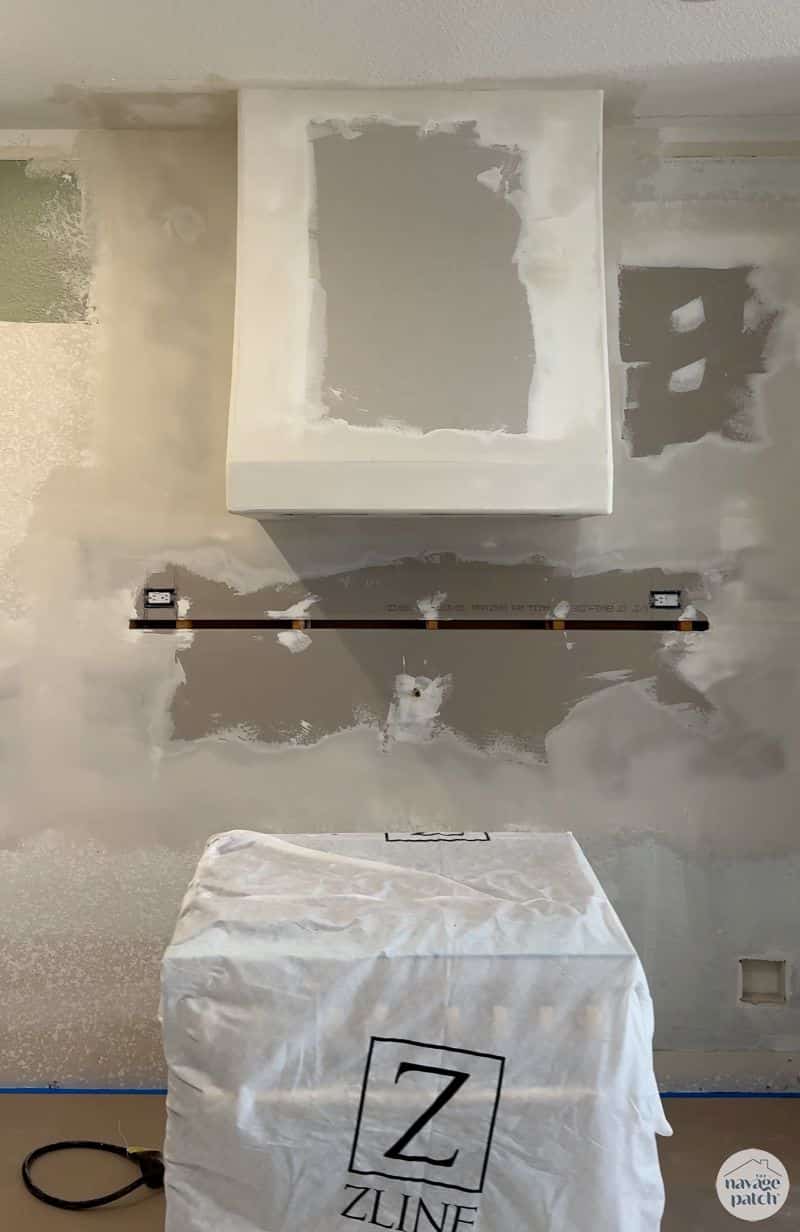
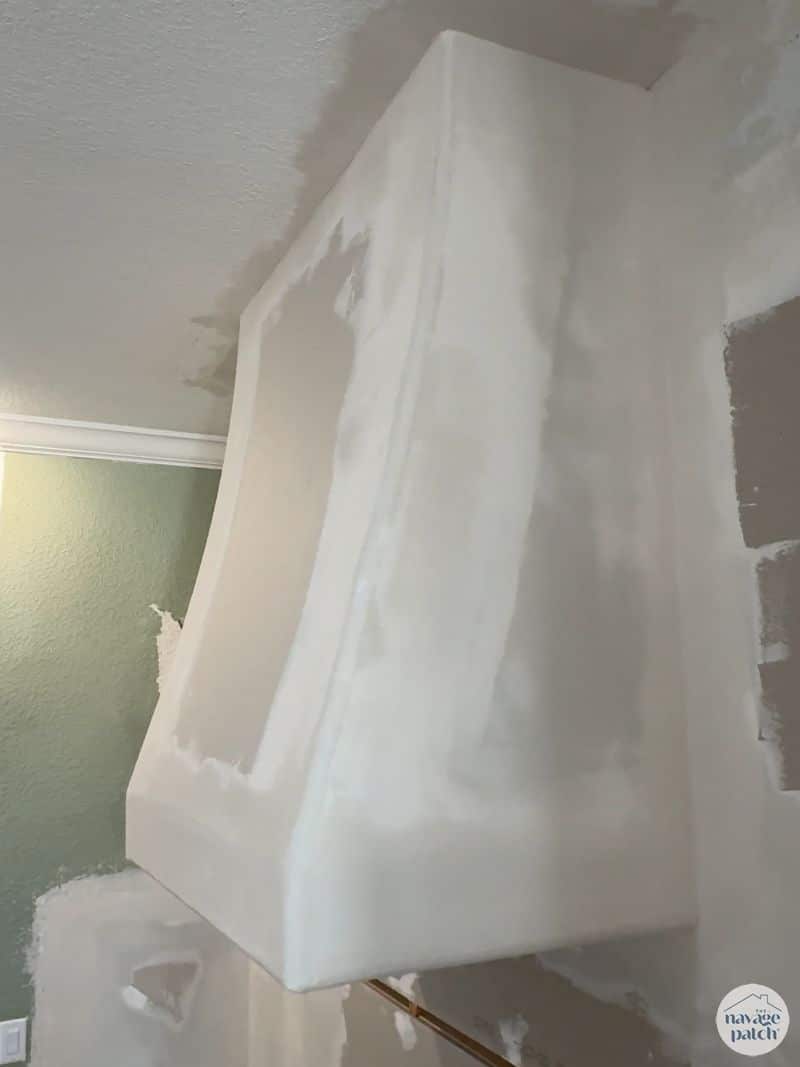
And here it is – The Sultan of Suck.
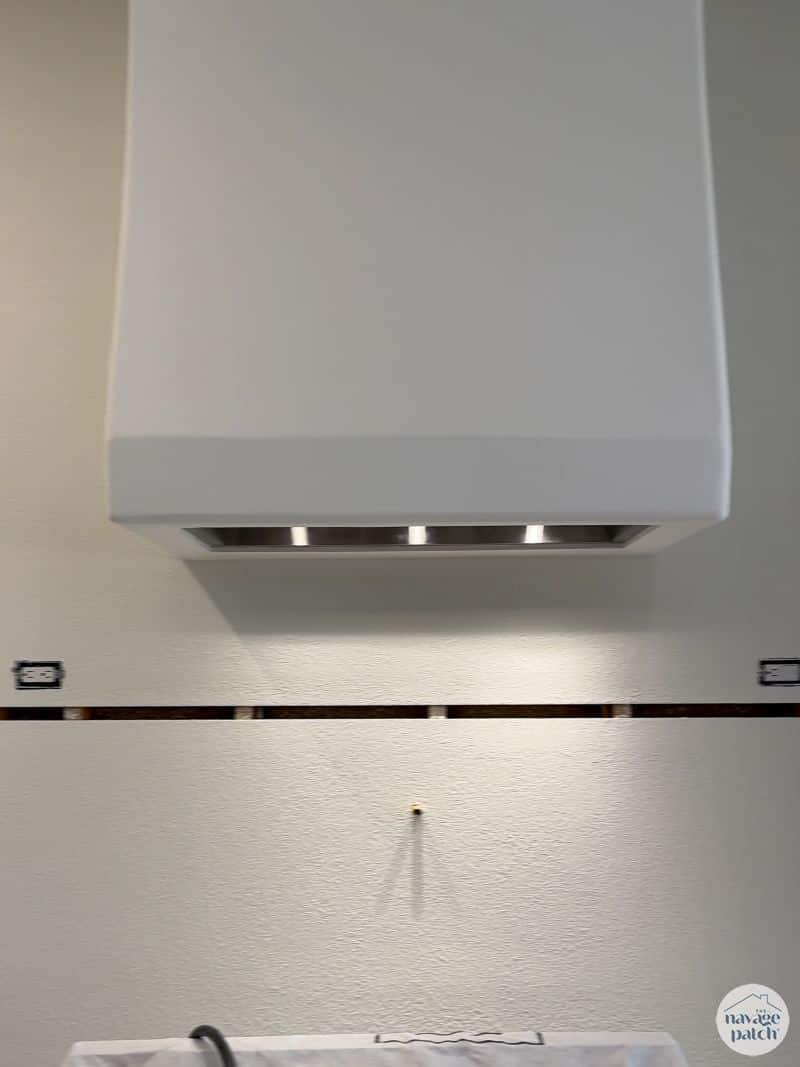
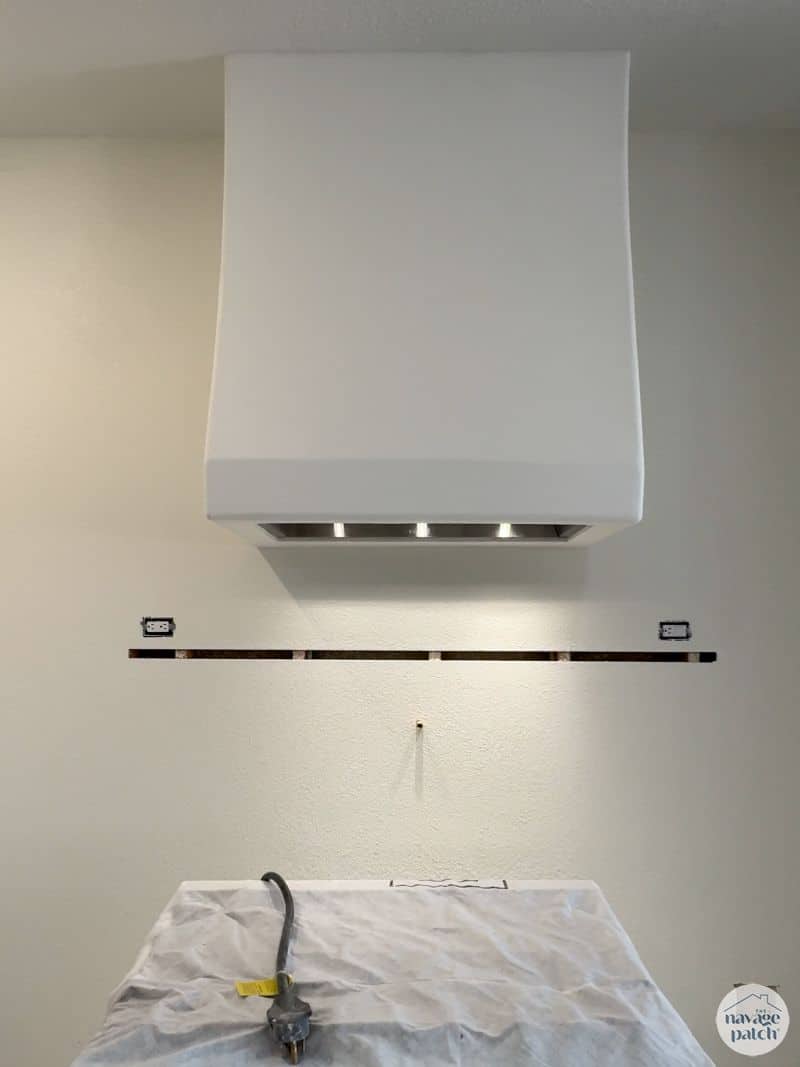
That slot in the wall is for a small stone shelf. More on that later!

I’ll be finishing the hood in a very interesting and beautiful way once the kitchen is installed, so stay tuned for that (and proper photographs)!
Check out the kitchen remodel plan!
Check out the gorgeous and inexpensive custom pantry I built!
Welcome back, we missed you guys!!
Well, well, well we certainly have upgraded our skills from making macrame ghosts and simple wooden stick christmas trees, haven’t we??? 😋 I know I can’t do what you have done in your kitchen. Great Job!!
I will have to wait for something a little more of a simple craft I can duplicate. Saying that, I do greatly admire what you have accomplished in your home. I will just patiently wait for the more humble crafts you do that I can duplicate. No hurry, I am going to enjoy the summer days ahead of us. Love watching you make everything and posting the details. That is a big job itself. You and Handan enjoy your home and your lives together!!!!
Thanks, Mona! I’ve been building my skills since the very beginning back in 2015! In fact, I didn’t make a single craft until about 2018ish! 🙂
Please tell me you are going to Venetian Plaster the hood! I just did this technique on our range hood and I think it looks pretty darn good (for an amateur, and for a first attempt.) Photos and a lot of details are in order!
Hi Jan, I won’t be doing plaster, but I will be doing something else that’s going to look amazing! 🙂
OK, I’m kinda over you Navage Patch. I’m envious/jealous/pissed that you have the unlimited resources to remodel any and everything inside and outside your entire house to the best of the best…pretty typical of the new breed who move to FL – ya’ll got the bucks and the locals don’t. I liked you best when you posted simple craft tips. Ta ta.
“I liked you best when you posted simple crafts.” According to history, you never really liked us much at all.


😆 Boom! Love your work Greg.
Thank you, MJ! 🙂
Personally, I loved the “olden days” when you spent countless hours figuring out how to build stuff and making gorgeous cutting boards and then I loved it when you installed a pocket door, then I loved it when you redid whole rooms and took on huge yard/landscaping projects. Then again, I also love it when you do crafts and make inexpensive pieces look like crazy expensive decor from high end shops. I also tend to love it when you build cabinets and now, a range hood. Can I do all the stuff you and Handan do? Nope, no way. I still love seeing the fantastic ideas that Handan (and you too!) have come into being. I think most of us do. 🙂
Thank you so much, Claudine! You are right! Back in the old old days, I was the big project/brute force guy while Handan did the crafty stuff. I took over everything in 2018(ish), but I still love the big projects best. And as it turns out, we just have a ton of big projects that need to be completed ASAP, so we can start properly living in and enjoying our “new” house instead of feeling like visitors to a construction site! 😂
Bigly ‘SNAP’ to Lady Di! I love all you do, from small crafts, to house projects!! I love them all!! Some I can do, some I cant!
Always interesting, no matter what you guys post.
Keep them all coming!!
Thank you so much, Mona! This blog has and will evolve as our lives evolve. We’re coming up on our 9th blog anniversary in September, and looking back, I can see a lot of changes in style and content!
I missed hearing your charming wit recently – I figured you were super busy with your kitchen. It’s looking awesome! Looking forward to the next installment!
Life just got ridiculously busy for a while, but things are settling into a new routine which gives me time to keep writing! 🙂
As usual you are amazing. That gorgeous stove and it’s hood partner will give you much pleasure while you’re wearing your chef’s hat.
I can’t wait, Cynthia! I may never leave the kitchen! 😀
Good to have you back! 🙂 This range hood is going to be a stunner when finished off. That was a lot of work!
It sure was, Claudine, but it’s so worth it!
Glad to see that things are moving right along for your project. I always get a bit of motivation from your posts. Even though my house is nothing like yours – it still gets my creative wheels turning. I’ve missed your wonderful humor — which is motivational as well. I’m looking forward to the next post.
Thank you, Kelly! I’m back and plan on staying back! 🙂
Creating a custoCreating a custom range hood through a DIY project blends style with practicality, making it a standout kitchen feature.m range hood through a DIY project blends style with practicality, making it a standout kitchen feature.