Garage Entryway Remodel Part 1
Our garage entryway was once a laundry room, but we have a much better future in store. Come check out this mighty little remodel!
It was inevitable, I suppose.
I mean, we weren’t very well gonna keep the damn hole in the wall where the dryer vented under the stairs.
Yes, you heard that right. The dryer vented under the stairs.
Of all the birdbrain decisions that went into the post-framing construction of this house, that one may just be the birdbrainiest. Fortunately, the entryway from the garage to the kitchen wasn’t the only laundry room. It was merely the youngest.
The original hookups are in the garage, and that particular sudsatorium (which I built out last spring) has a dryer pipe that sanely vents outside.
So yeah, it was inevitable that The Room Formerly Known as the Laundry (TRFKatL or simply “Turf-Cattle”) would get a makeover at the very least.
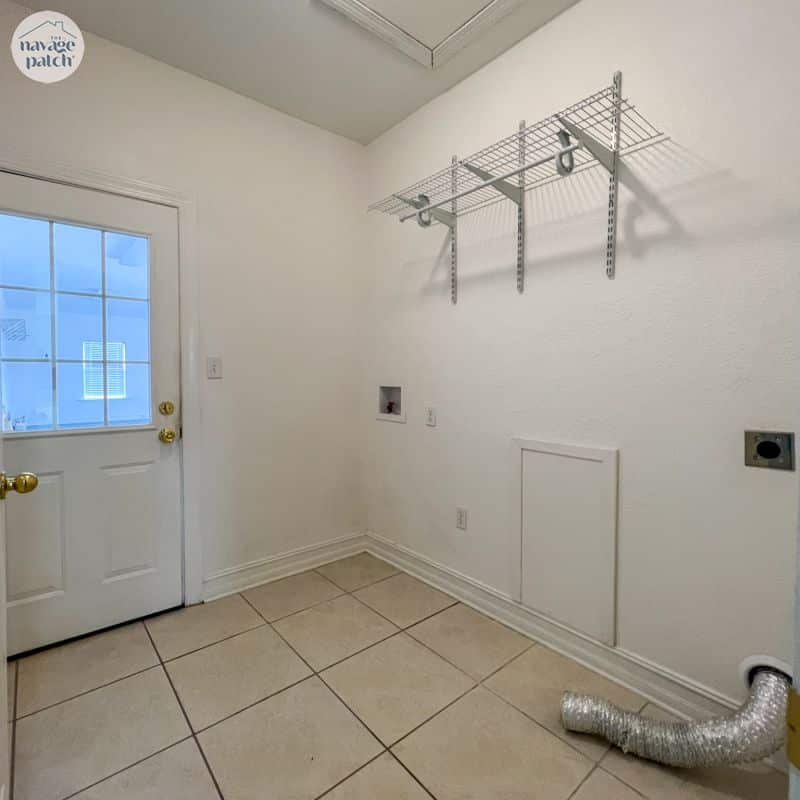
This is how it looked when we moved in.

We even used it for a while since the garage became a wall-to-wall-to-ceiling storage cavern immediately after move-in.
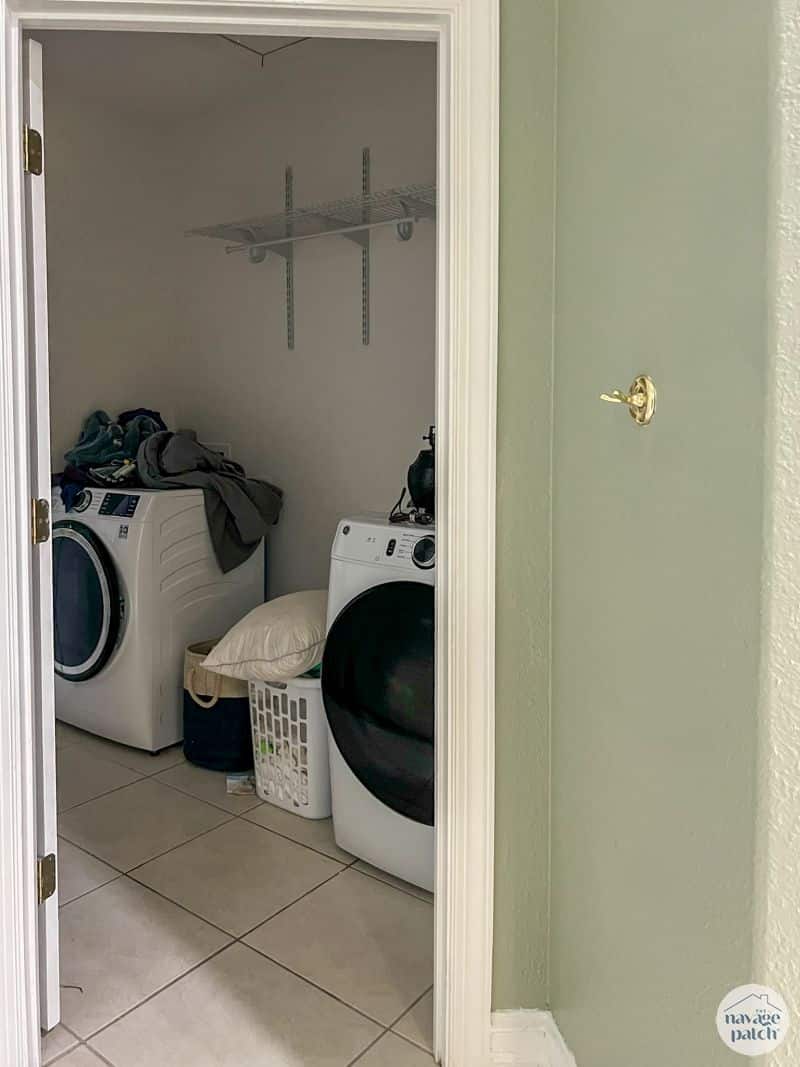
Now, apparently the deal with such a setup (meaning a dryer that vents under a staircase behind a wall) is that one must periodically crawl through that mouse hatch in the wall (pictured in the empty room photo above) and fill up a box the dryer hose vents into with water. This both minimizes the proliferation of lint bunnies and mitigates the risk of the house burning down.
Did I mention birdbrain already?
Anyway, I filled the infernal box precisely once – on the day we moved in. After that and until I moved the laundry into the garage a year later, it was Russian roulette each laundry day with a side of swirling fresh-scented lint.
On the plus side, the staircase to the Craft Room was always warm and Downy-scented on laundry day.
Since spring, the room has served as a temporary storage depot for Amazon returns and assorted crap that I just couldn’t be bothered to put anywhere else.
And if it weren’t for My Babes, aka The Magnificent Shrimp, fast-tracking our kitchen remodel, it may have stayed as a waystation for the foreseeable future. [Why do you think the kitchen remodel is fast-tracked? – Handan]
But before we can tackle the kitchen, there was the little issue of the stairs from the craft room descending down to and spilling smack dab in the middle of the kitchen.
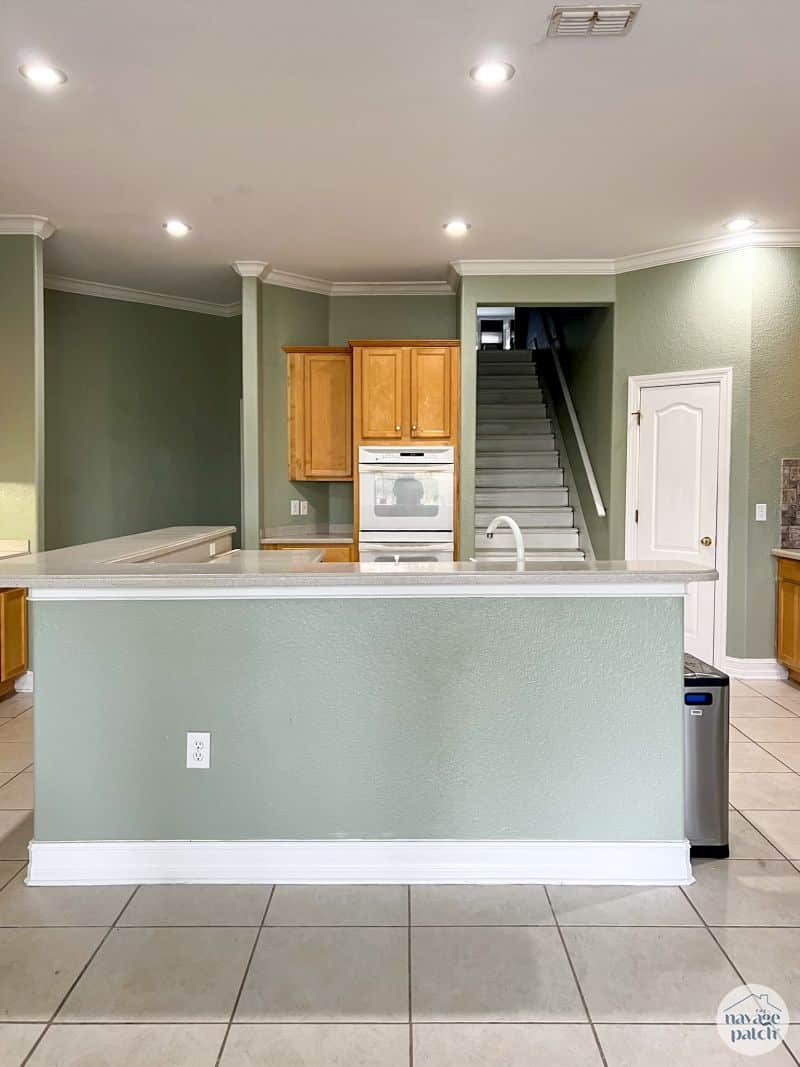
I can’t blame this bridbrainism on the builders unless they happened also to be the architect…which very well may have been the case. They also probably sold each other hot dogs during lunch hour.
Yep, that staircase was not only poorly situated and hogging up valuable real estate, but the stair risers and treads looked like they’d been stolen from a Goodwill dumpster and slapped into place by Ritalin-snorting middle-schoolers.

No joke, there were visible-but-inaccessible cat food kibbles left by the previous owners’ fleabag trapped in those gaps. I could never get them out, but Pepper would give it a go about once a month until her tongue tired from the effort.
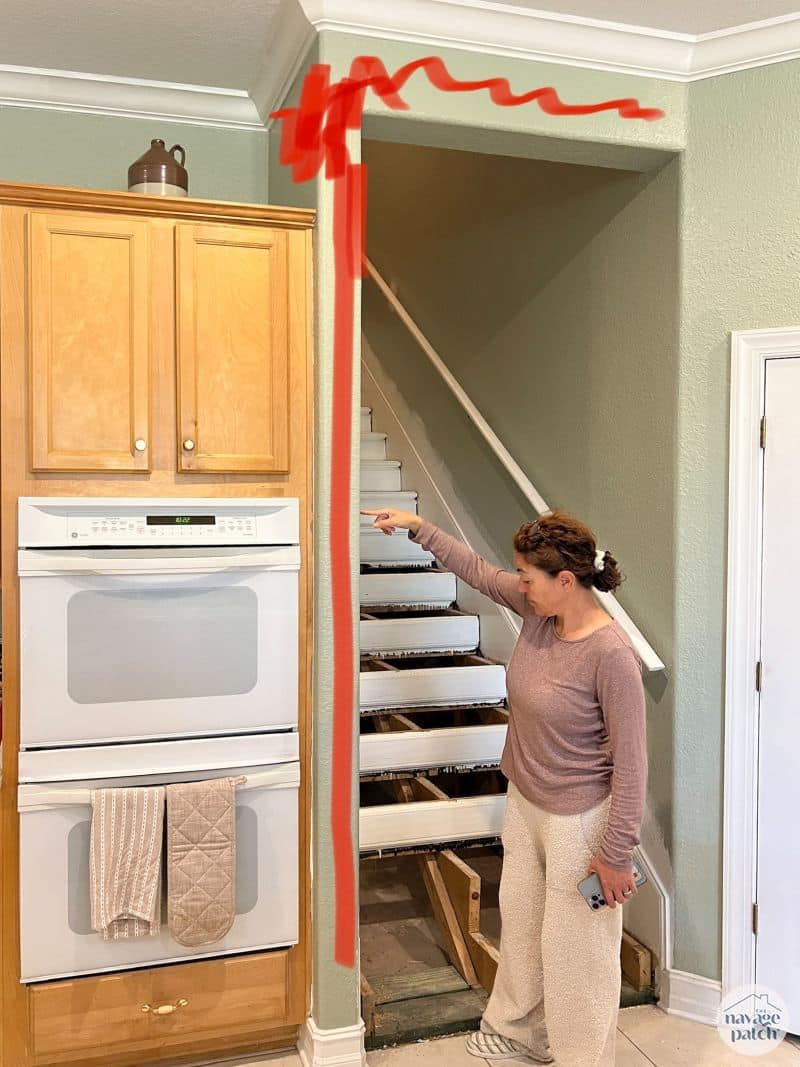
Handan’s plan was to re-route this staircase by turning it 90 degrees and having it empty into the unused laundry room. We could then wall up the open area pictured above and claim more usable kitchen space.
Since stairwork like this felt like more than a middle-aged martini-inspector like me could safely handle, we decided to call in some professionals for this part of the job.
A couple of guys with hammers and a hearty appetite for destruction made fairly quick work of the demolition aspect of this project.
First they removed some of the treads and risers. No word on what they did with the cat food. At the same time, they punched through the wall separating the garage entryway and the stairway.

The same scene filmed from the entryway.

Taking shape already! Just need to remove those pesky studs, and we’ll have ourselves a new passageway!

We then decided to ask them to remove even more. Demolition is addictive stuff! With the wall and drop-down indicated by the red squiggles below removed, we’d have even more kitchen space!
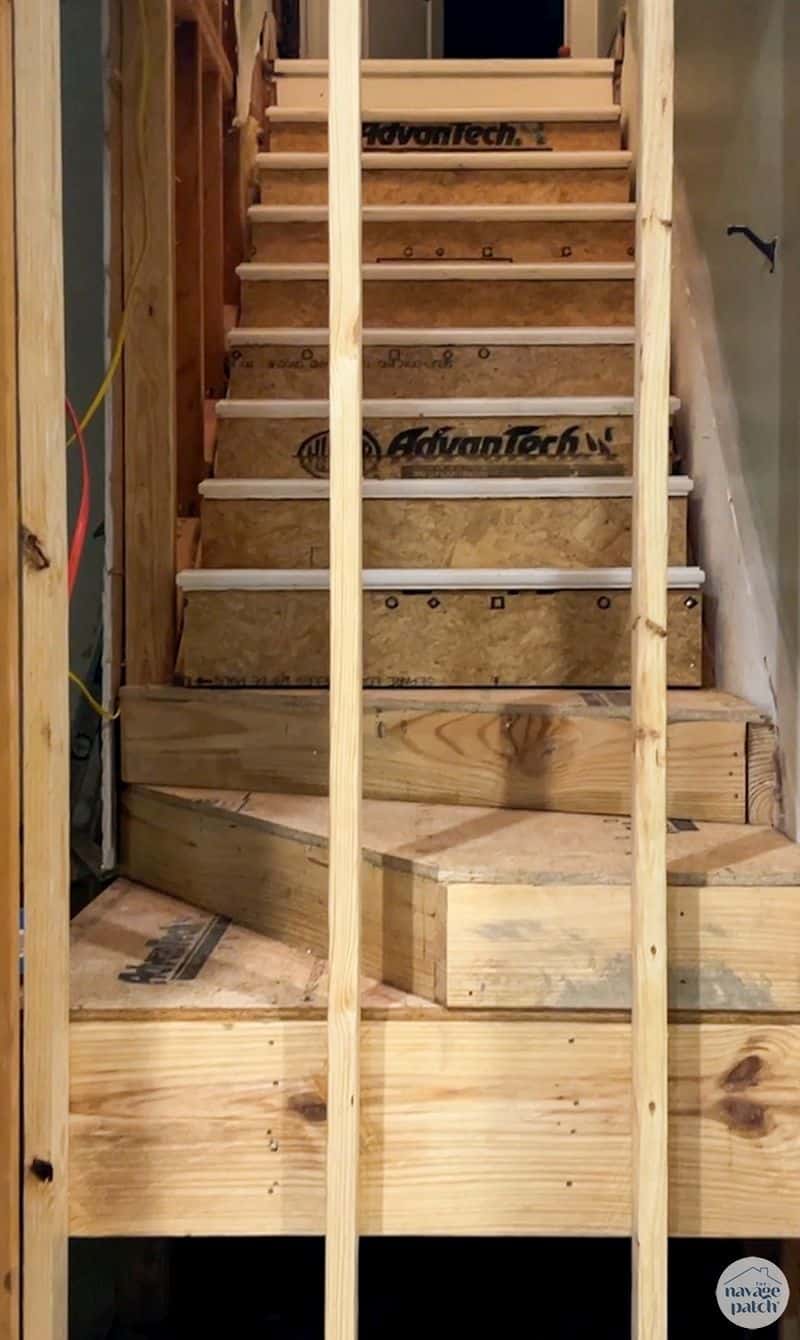
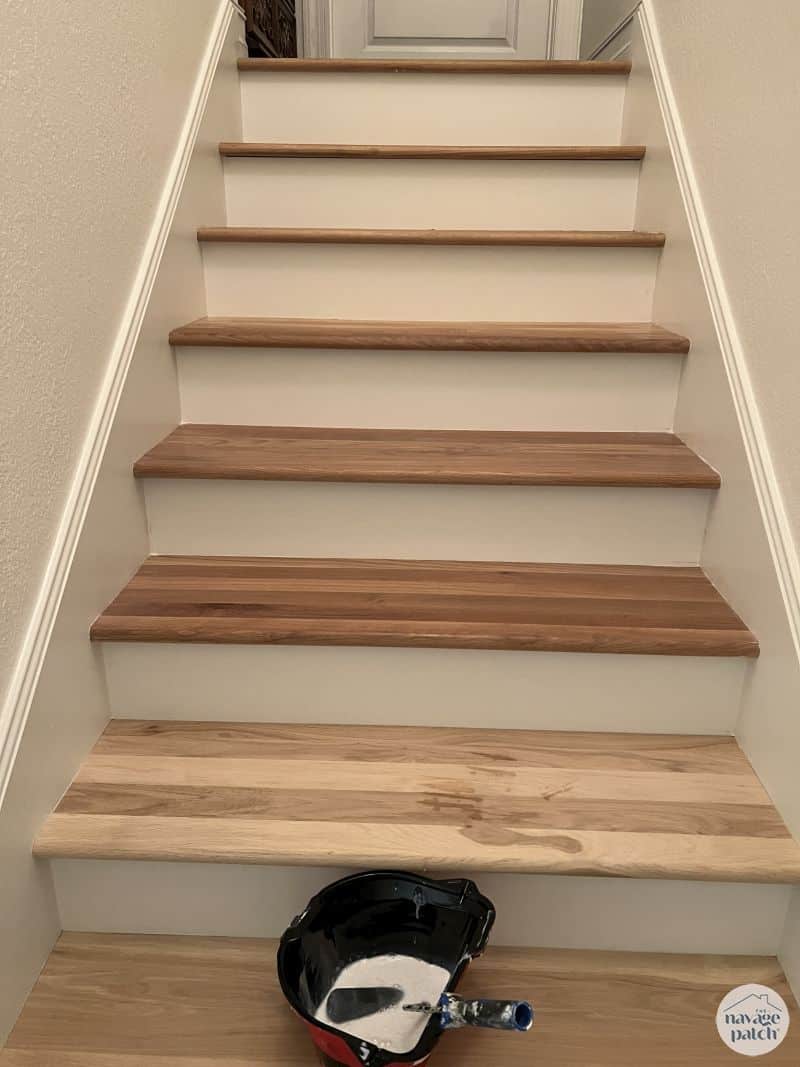
They removed all the old treads and risers, removed the center stringer and then cut the side stringers where the new stairs would take a turn.
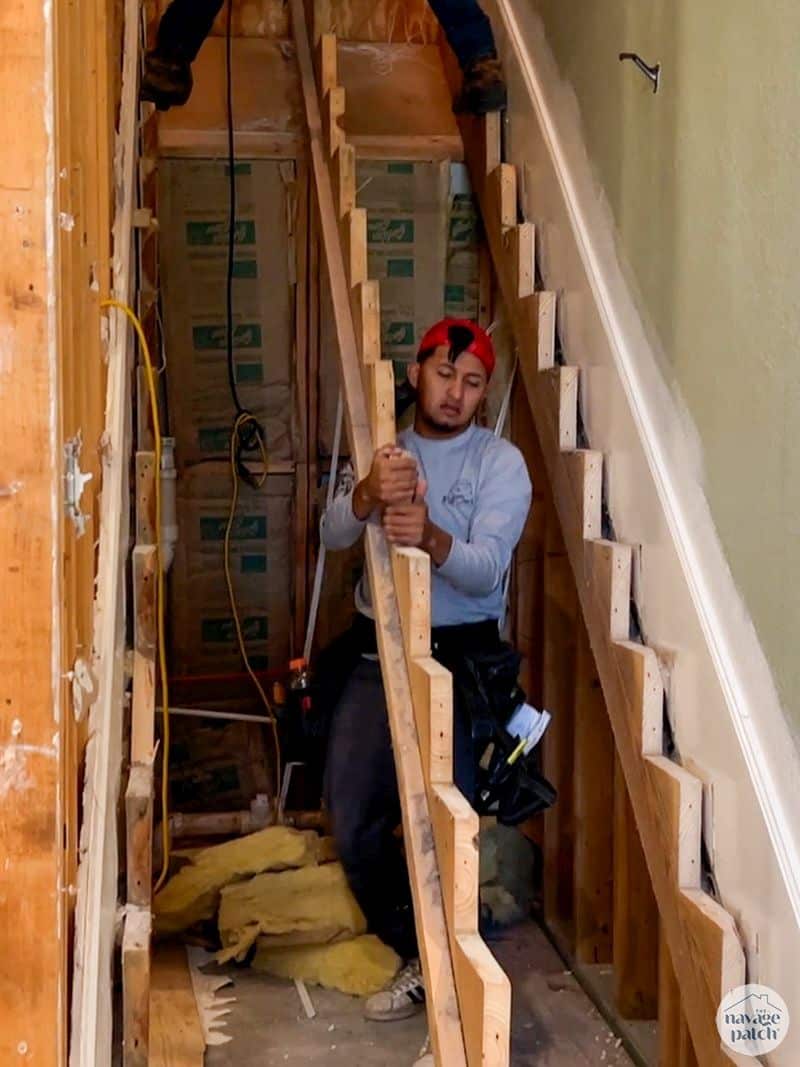

They used the old treads as placeholders until a new set of guys came in to lay new oak treads. They made custom treads for the winding part of the stair.
I was working elsewhere when they laid the new treads, so I didn’t get video or pictures until the new work was masked off for painting.
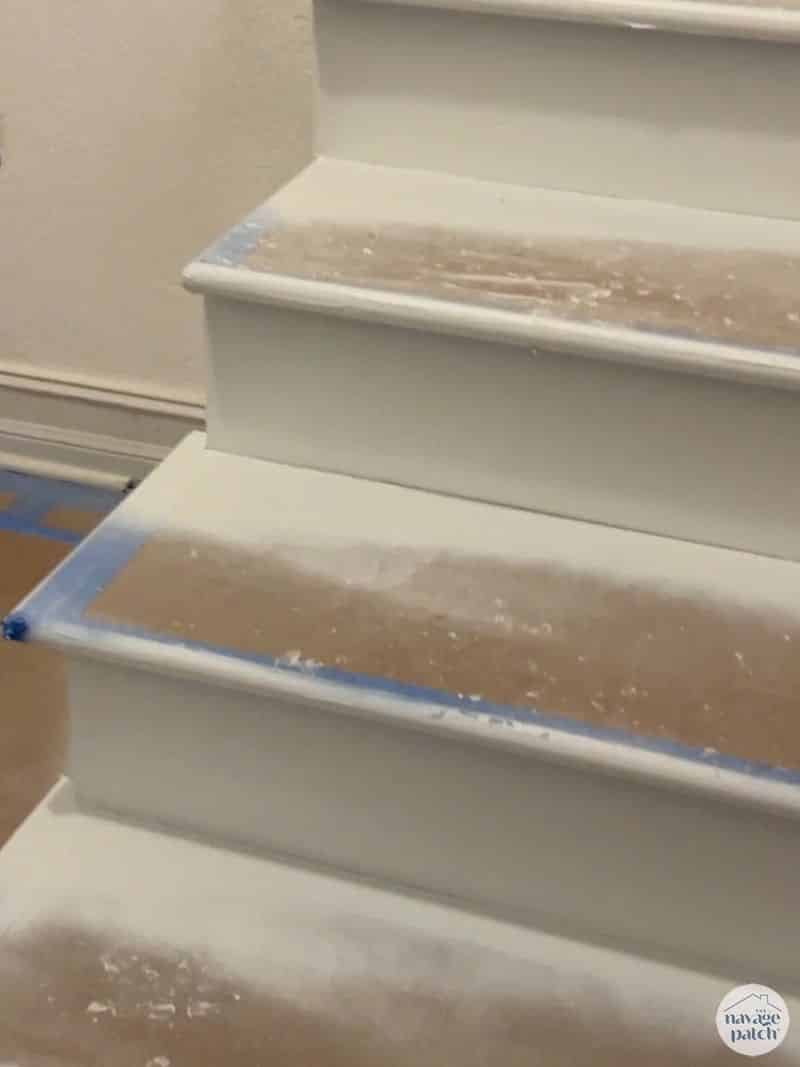

After painting, I sanded and sealed the new oak treads with dead flat poly. When dry, the stairs look like the unfinished tread at the bottom of the photo.
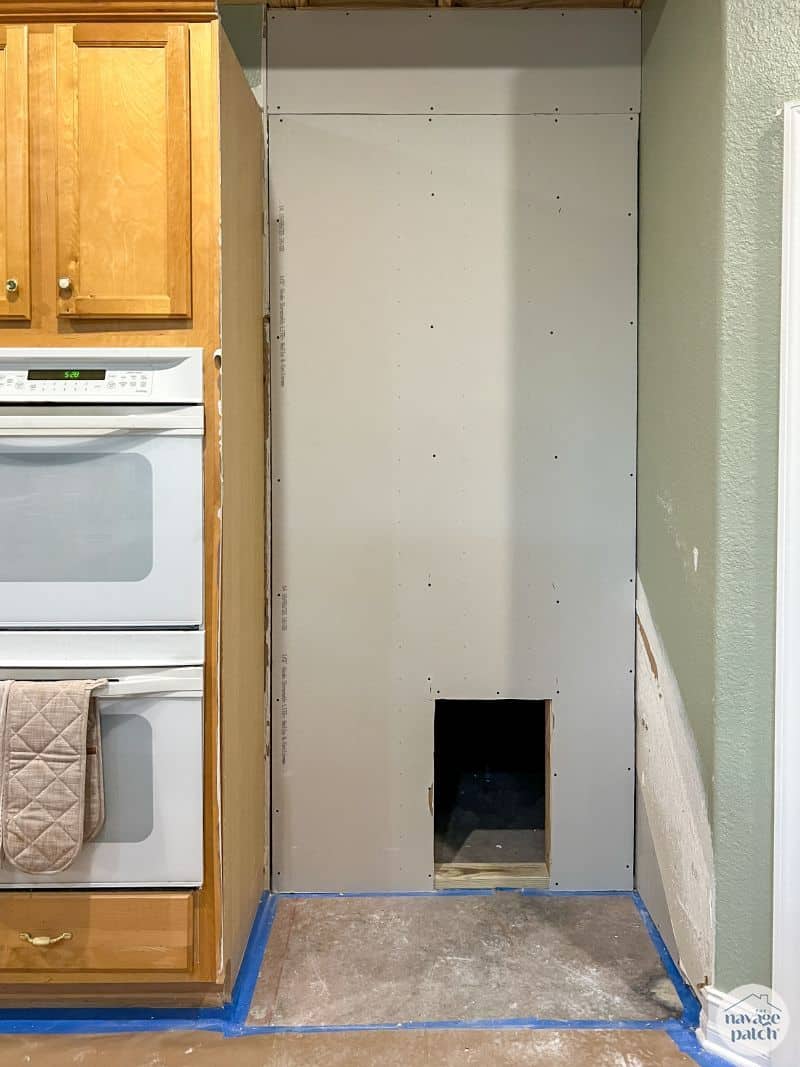
Back on the kitchen side, we got our new wall with power and water hookups for a refrigerator (not shown below). I asked them to keep an access panel so I can crawl around under the stairs to access various electric and water lines. If this was New York City, I could rent that hole for $2000/month.
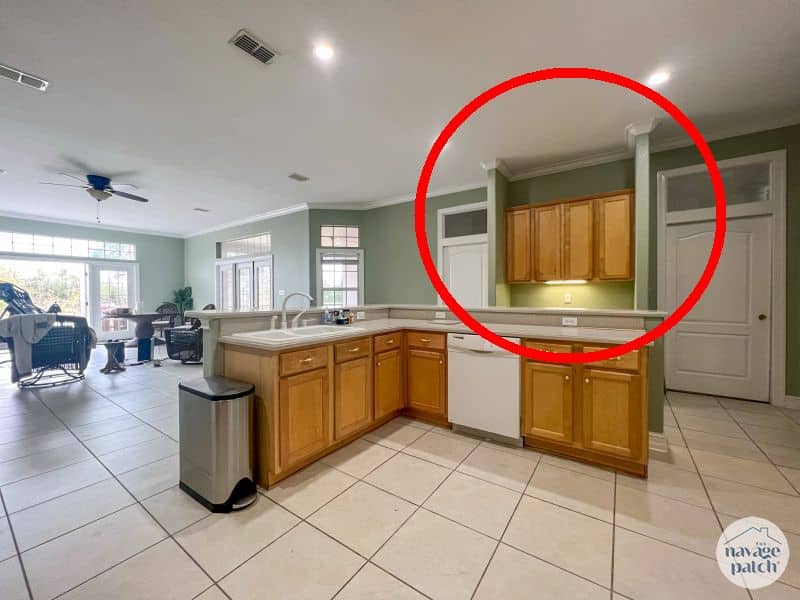
Now while all of this was happening, we also demolished the wing walls circled below and remove the cabinets there. This is part of the kitchen remodel, but it is also part of updating the dining room and living room which are on the other side of that wall. There are two pocket doors in the picture below – one on either side of the little nook. We walled up the one on the left and widened the passageway on the right.
This left me with some old cabinets to refinish. I took one of the Golden Turds outside to give it a new life. The base cabinet pictured below would be the cornerstone of the rest of the garage entryway remodel.

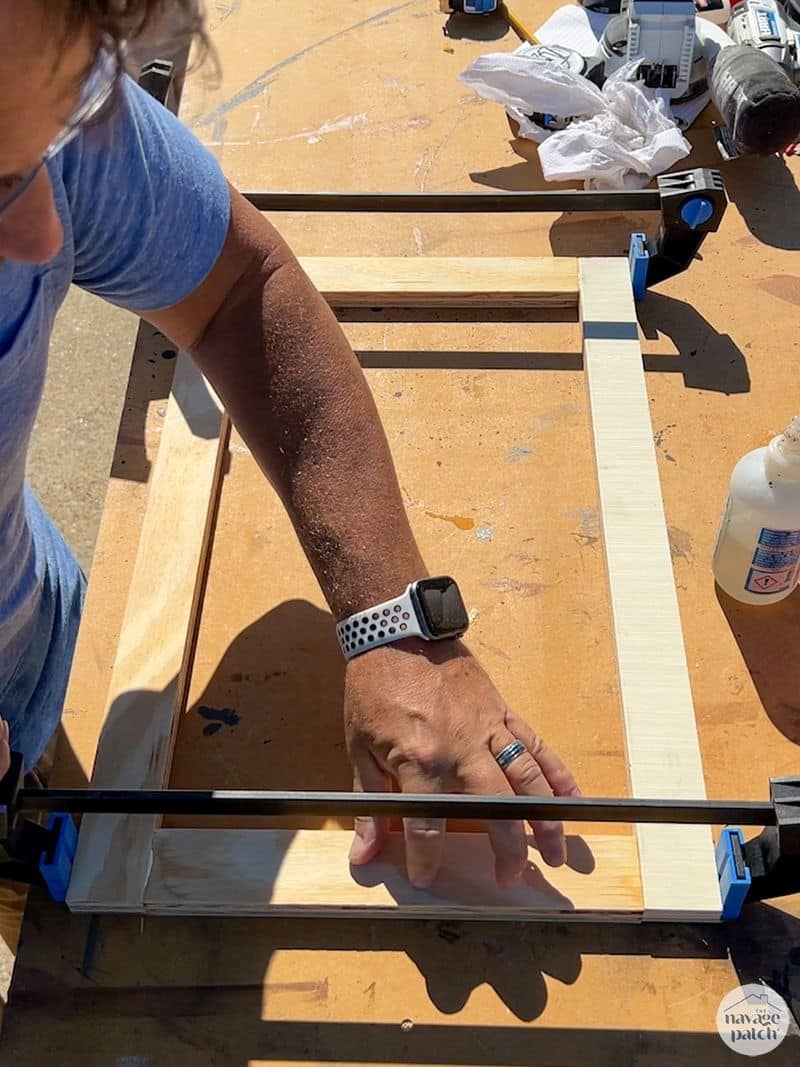
Instead of doors, The Shrimp wanted two big drawers. I got to work. First I removed the crummy old slides and wimpy plastic corner braces.


Then I used a small circular saw to remove the center stile and cross piece.


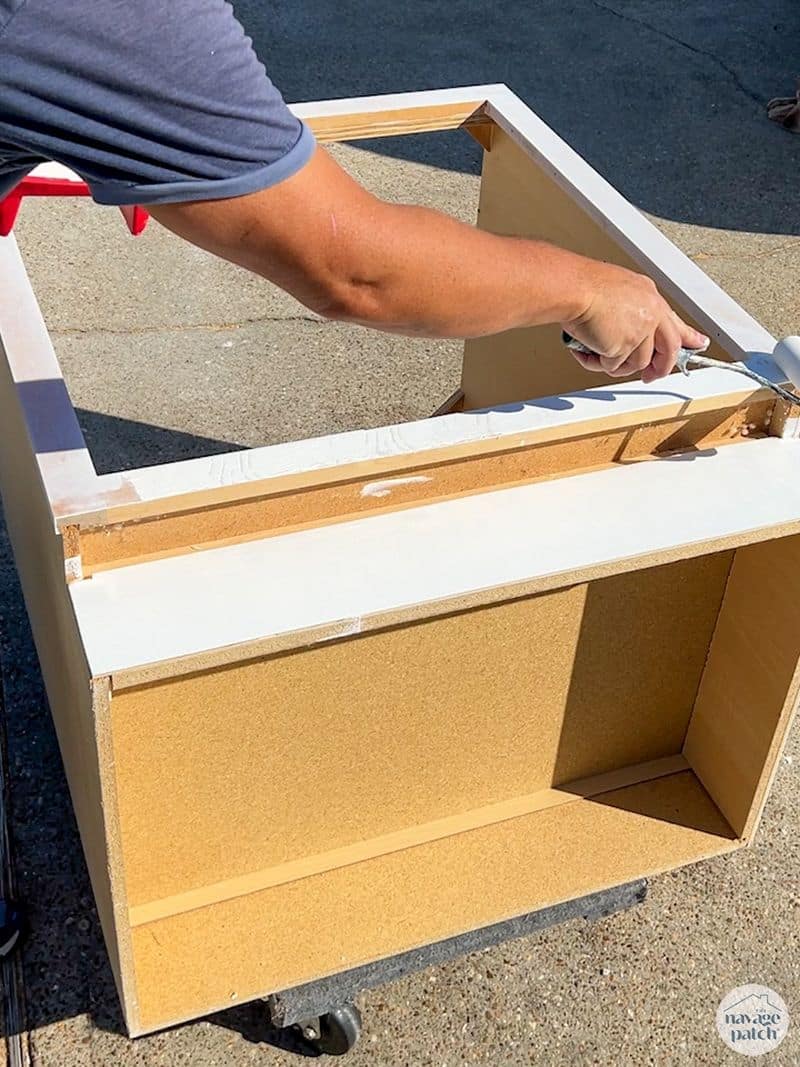
With the center stile gone, the cabinet would need some reinforcement, especially since I planned to have some weight on it. I cut some strips of 3/4 inch plywood and attached them to the front and back with construction adhesive and countersunk screws.


I also cut new corner reinforcements from plywood and glued and screwed those in place.

I mounted drawer slides using the method I developed when making sliding shelves for the garage laundry.

You can read all about it here, but essentially, the method involves making identical wood frames sized for the cabinet interior upon which I mount the drawer slides.
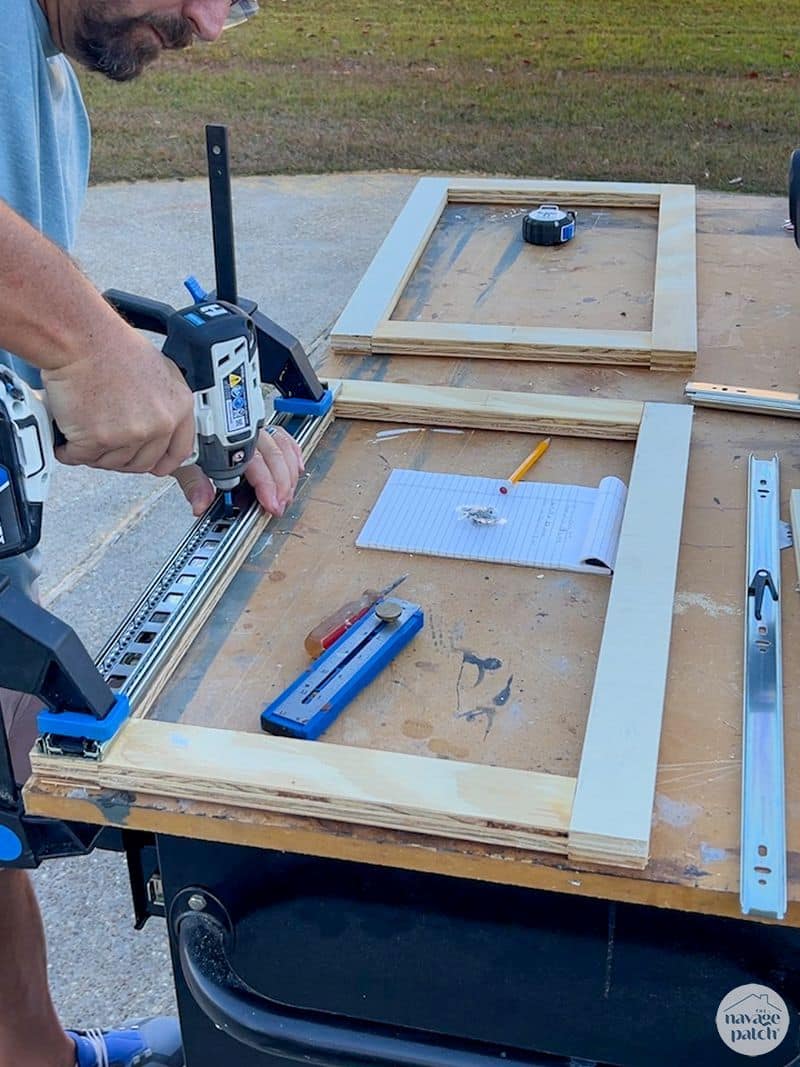
Installation is then as easy as putting a little construction adhesive on the frames, placing them in the cabinet, and following up with some brad nails.
I made a skin for the exposed side of the cabinet from 1/8″ utility panel which I attached with construction adhesive and brad nails.

Then I filled the brad holes with spackle and brought the carcass outside for painting.

I painted the cabinet with a white I had color matched to our existing dog-feeding station that will be sitting next to it.
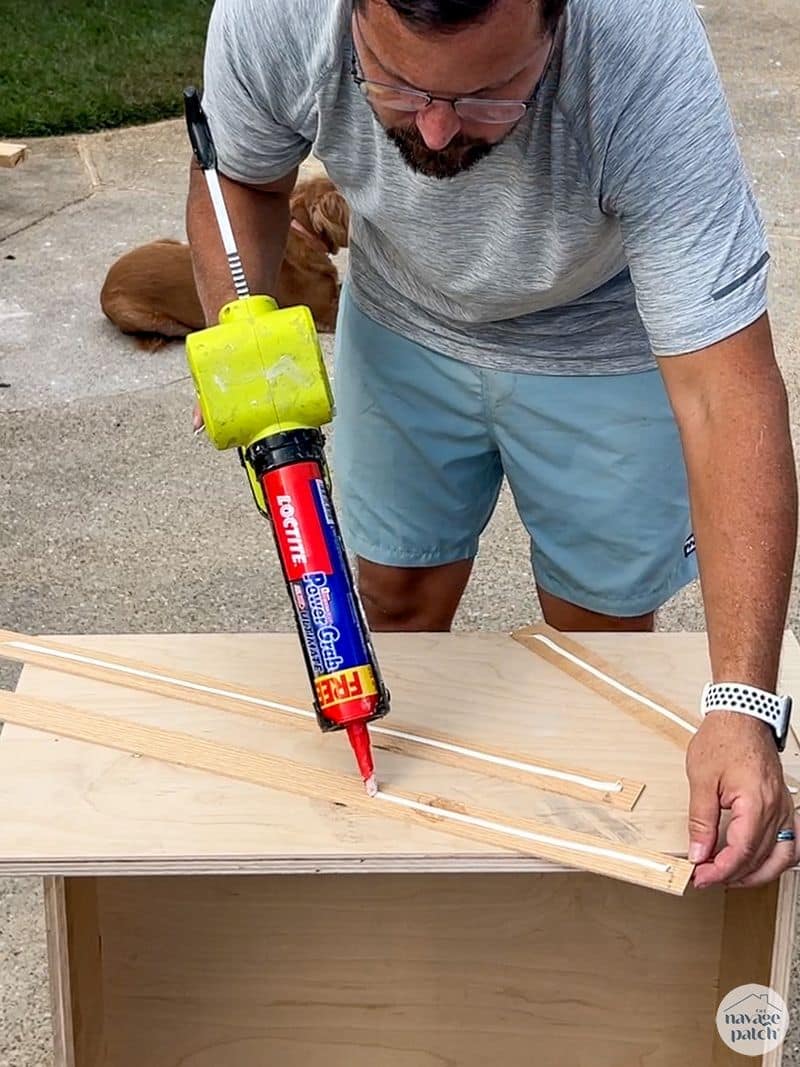
Next, I built two big drawers for the cabinet from 3/4 inch plywood. I joined the pieces with wood glue and pocket screws using my Kreg Foreman – an incredible upgrade from my 10-year-old Kreg Master Jig.


The Shrimp wanted shaker-style trim, so I cut some strips of utility panel and attached them to the drawer faces with construction adhesive and brads.

I filled the holes with spackle and then primed and painted everything white.

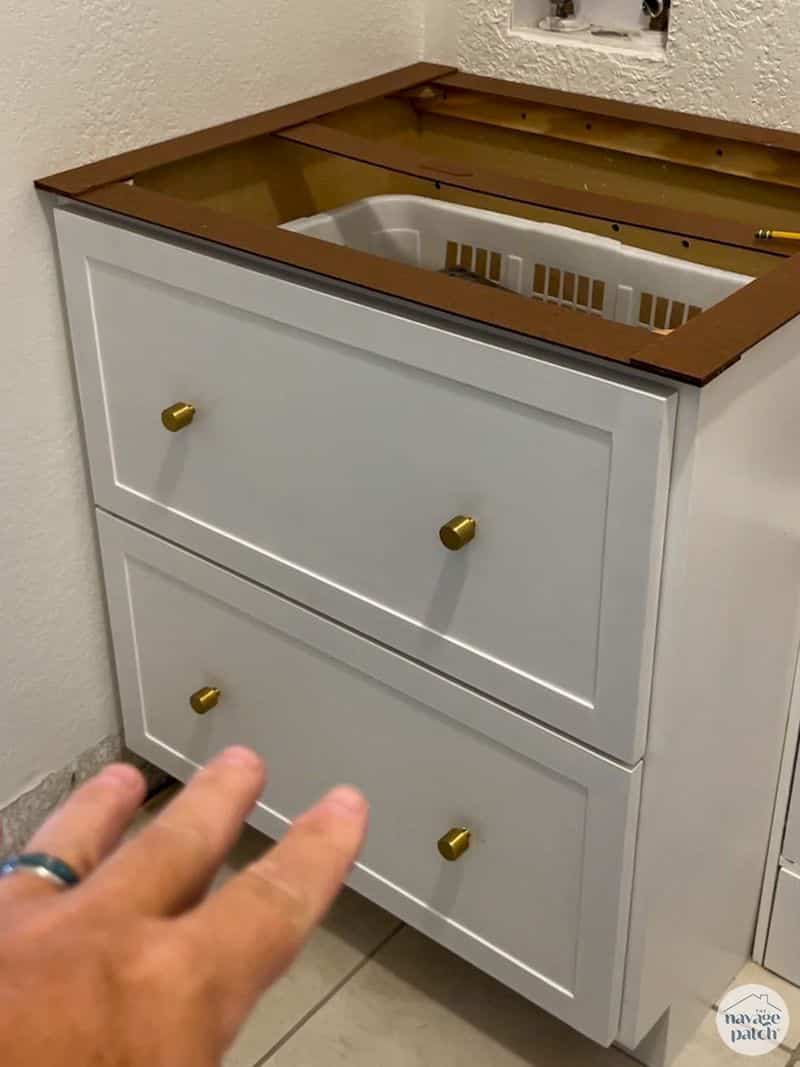
When the paint dried, I drilled holes for hardware and installed some brass pulls.

I brought the carcass back inside, installed the drawers and then placed the dog-feeding station (aka SnarfStation) next to it.
We wanted a beautiful countertop to cover the cabinet and SnarfStation. We settled on either white or black granite – basically whatever we could find that a stone-cutter could make for us quickly. But first, we made a template from a scrap piece of backer board and hot glue. This is how the guys who made the countertops for our Georgia kitchen did it, and we borrowed the technique.

On a rainy Thursday, I set out with my template in hand to find a rock and a guy who could cut it for me.
Wow, just wow! I can’t believe the builders who “built” those old stairs let that pass as a finished staircase!! And then whoever bought the brand new house……..that would drive me insane to look at everyday!!!
Beautiful transformation!!
Thank you, Marlene, just wait till the reveal! 🙂
OMGosh, you had us cracking up!! The description of the dog licking away at the stairs and the “golden turd” made me snort-laugh 😂
Looking forward to part 2!
😁Thanks, Mo!
Hey Greg, Handan is one lucky lady! Now I know you’re going to say that you’re one lucky man. You do amazing work and have such a great work ethic. Love watching how you transform things. Keep up the good work; I wonder if you’ll ever finish everything you’re prepared to do! You won’t know what to do with yourself!
Thank you, Paula, I AM the lucky one! Oh trust me, if I ever finished everything and I could do as I please, there would be a whole lot of fishing going on! 😀