Floating Potion Bottle
Learn how to make this magical floating potion bottle Halloween craft, and add some mysterious fun to your Halloween decor this year!
Halloween is just around the corner, and as the Witch of the Patch, I still have quite a lot of catching up to do with my crafts. I have tons of potions to make, dozens of spells to cast and a Toad to kiss! Keeping up an Apothecary Shop like this takes quite a bit of witchy work, you know! 😉
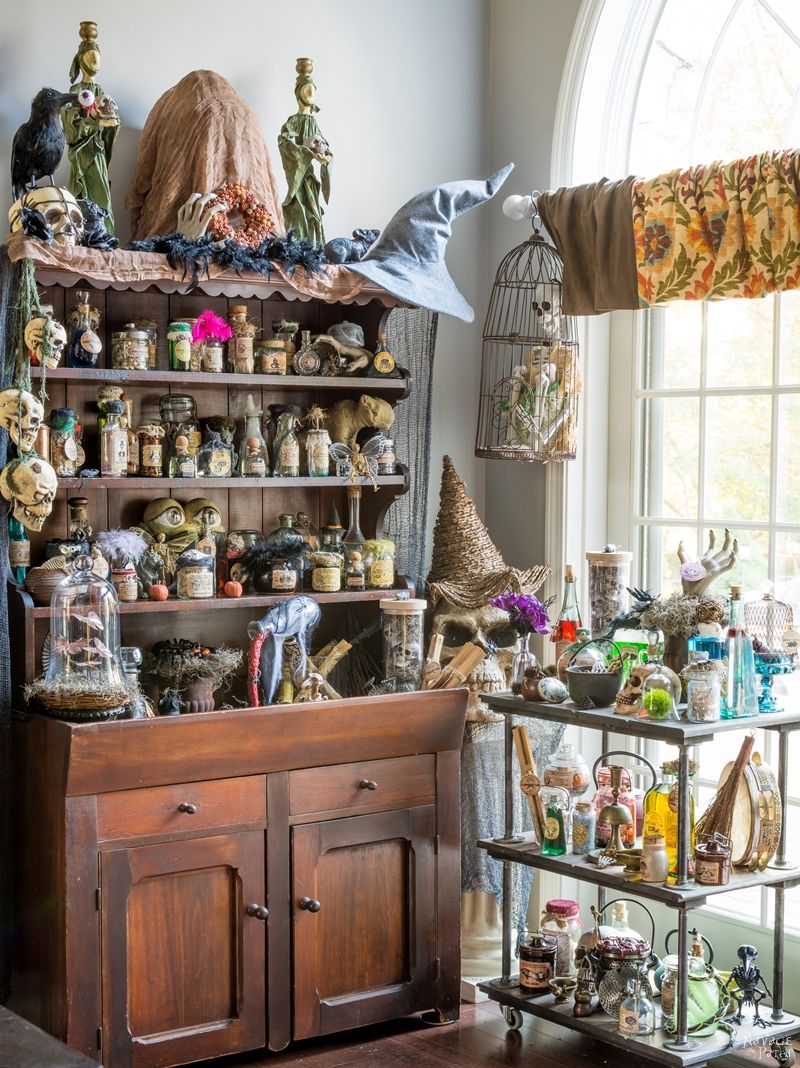
On second thought, kissing the Toad can wait for a little while. But you know what can’t wait? Showing you how to make your own floating potion bottle!
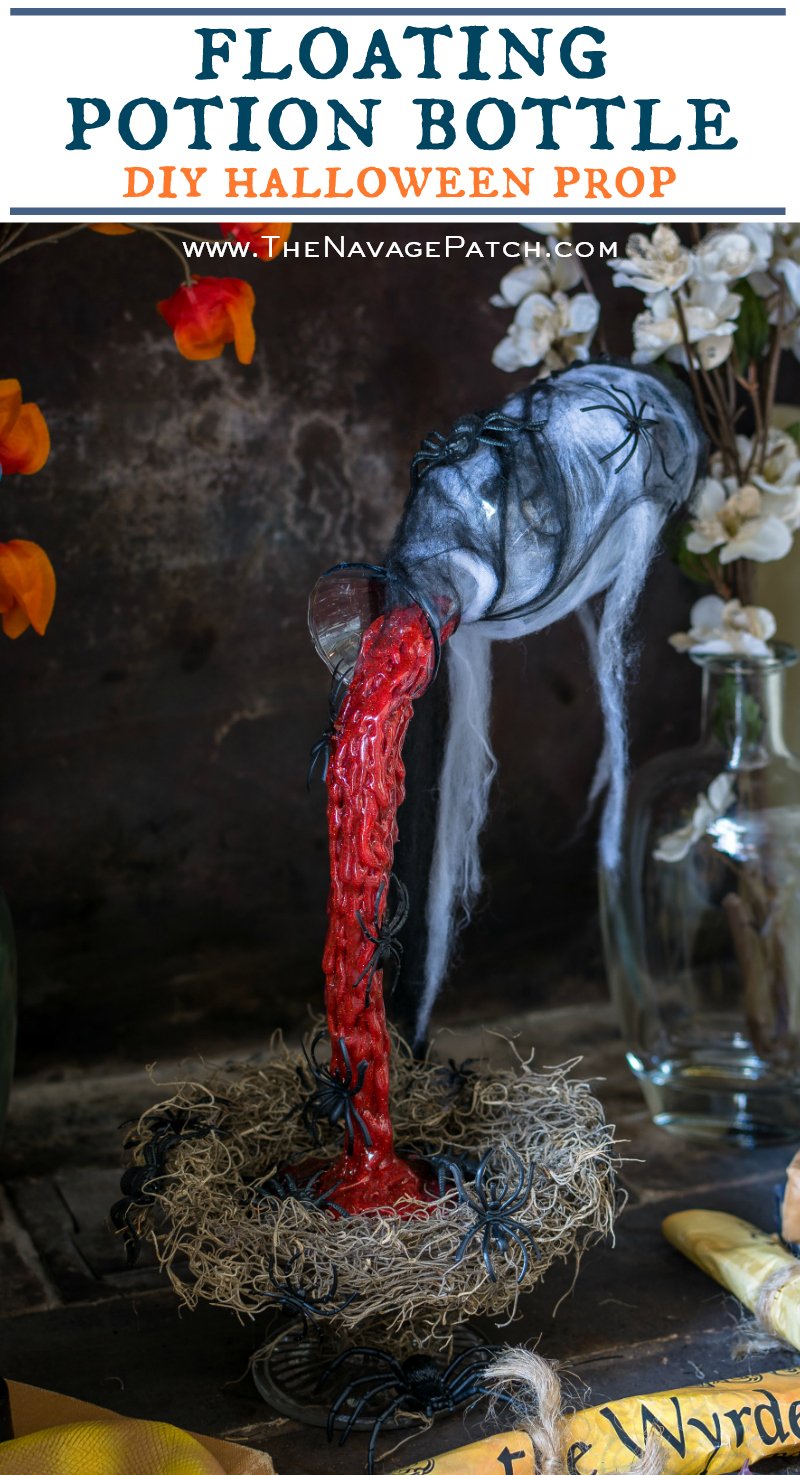
Now how do you like that? Looks pretty amazing, right? Ok then – let’s jump right into the tutorial, shall we?
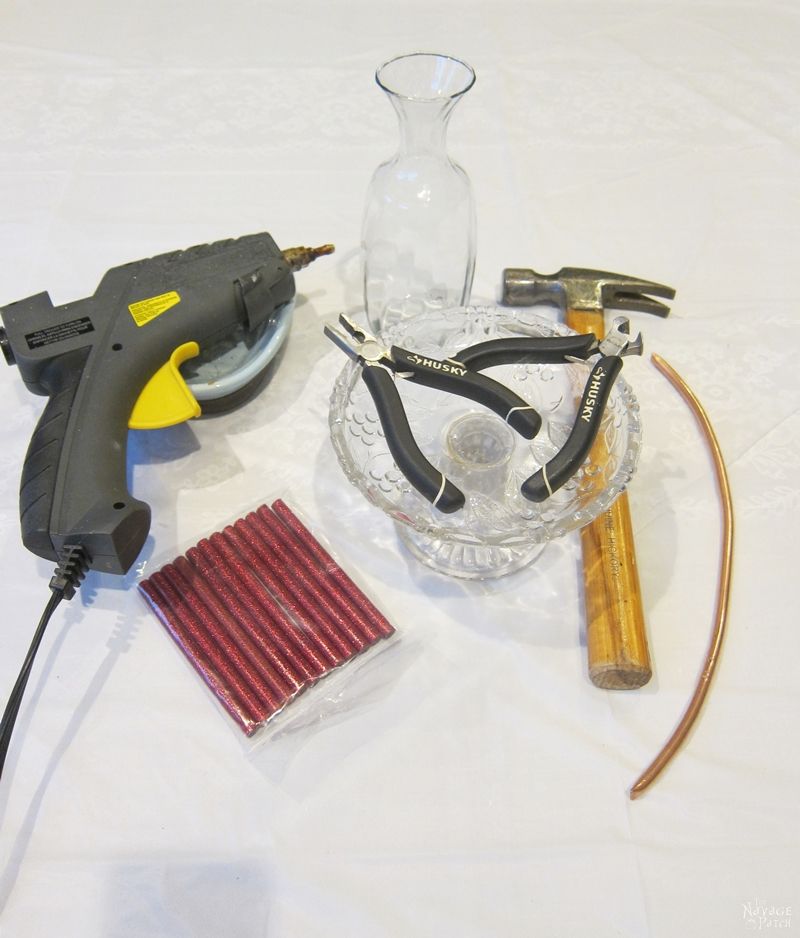
Floating Potion bottle SUPPLIES LIST
Affiliate links are provided below. Full disclosure here.
- A glass cupcake stand or a plate – you can use a small plate, or anything that has a somewhat flat surface. It doesn’t have to be glass. You just need to make sure that your plate is heavier than the bottle you are going to use, or the whole thing might tip over.
- A small bud vase – I used a glass bud vase, but basically what you need is something similarly shaped and colored. It can be a plastic test tube, or a thin glass bud vase or maybe a thin glass test tube.
- Hot glue gun
- Colored hot glue sticks – now you may chose to use clear hot glue sticks and then paint it over, or if you want to save time like I did, then use colored hot glue sticks, as it makes it easier. If you’ll be going for red glittered hot glue sticks, click here to see what I used. If you want a different color hot glue stick, click here to see all the colors they have on Amazon.
- E6000 glue
- Duct tape
- A hammer
- Copper tubing – old or new doesn’t matter. A little hint here: you can find this at any hardware store for much cheaper than they have on Amazon. 😉
- Pliers and wire cutters.
- Various plastic creepers – this is optional. I used plastic spiders, as I like them.
- Creepy cloth or spider web and Spanish moss – this is for dressing your potion bottle and plate. If you don’t already have them, you can get them from the Dollar Store.
How To Make A Floating Potion Bottle
Once I had all the supplies ready, I cut two pieces of copper tubing. The long one is approximately a foot long and the short one is 3-4 inches long.
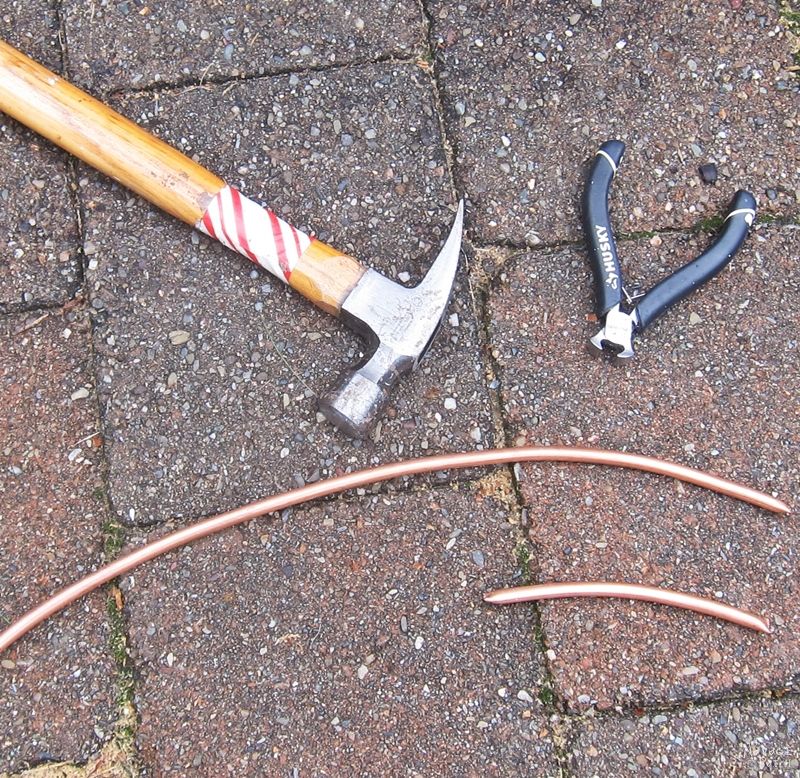
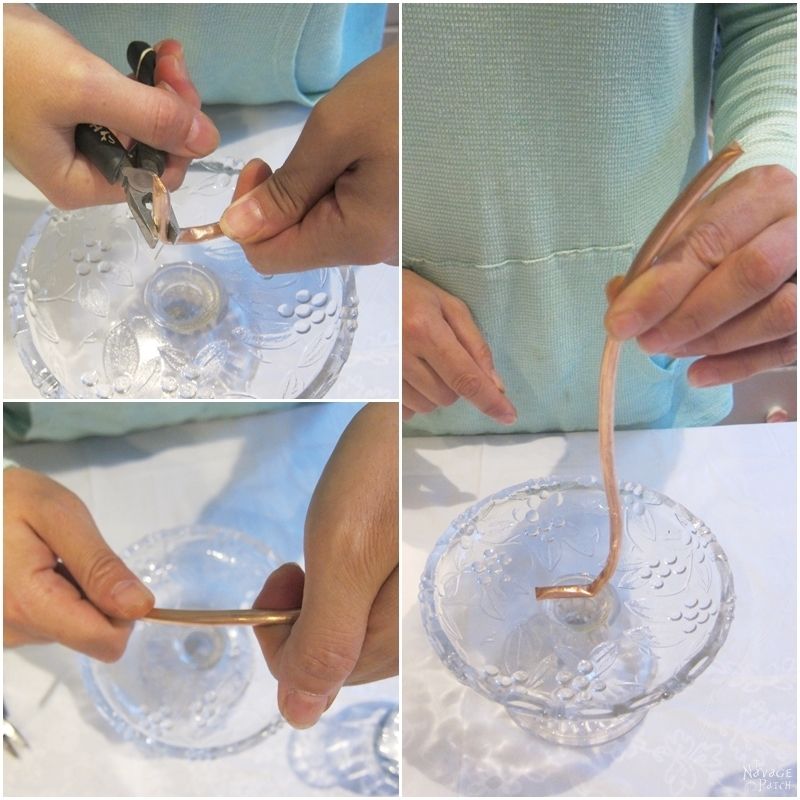
As shown in the pictures below, first I bent about an inch of the long copper tubing at a 90 degree angle and then gave a slight “S” shape to the rest of the tubing.
Then I took the copper tubing outside, and hammered both ends to flatten them.
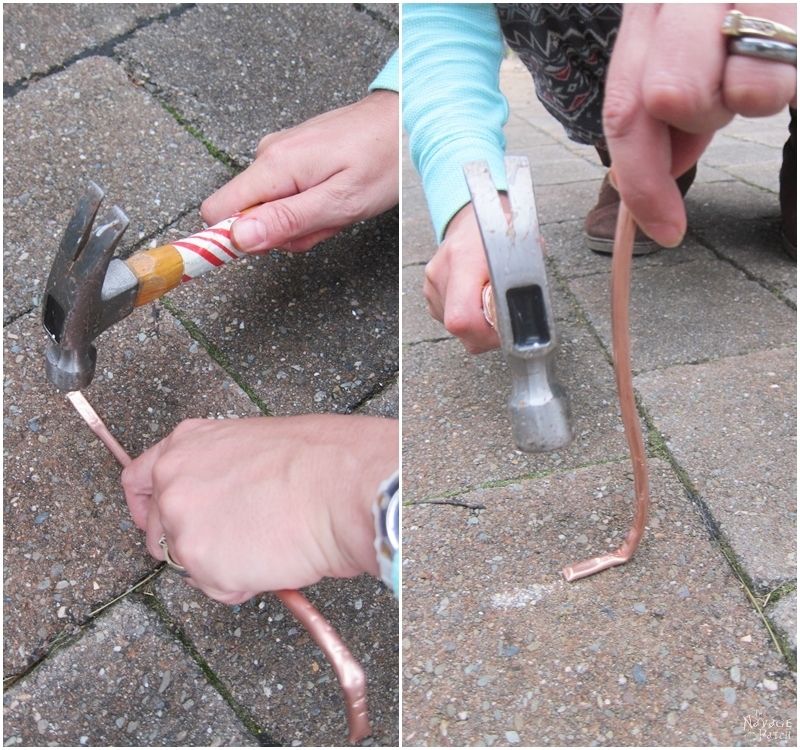
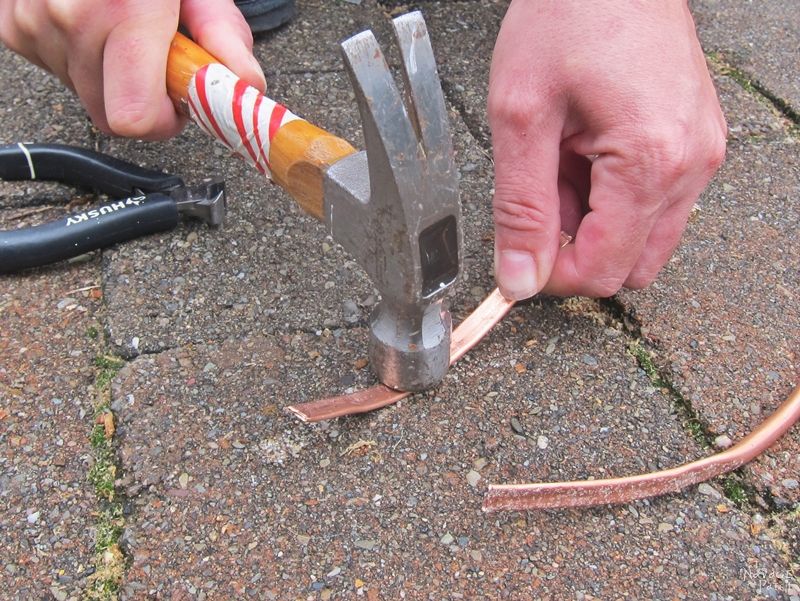
Next, I flattened the short copper tubing. This time it wasn’t just the ends, but the entire length that I flattened.
Once I was happy with their shape, I put the short tube on top of the long tube (as shown in the pictures below) and…

…using duct tape, I taped the two copper tubes together. Do you see the space in between the two tubes? That space should be only as wide as the thickness of your glass/plastic, because you are going to place your potion bottle right in between those two tubes. Therefore, you want to make sure you don’t have a lot of space in between the tubes when taping them together.

Once I had my tubes taped nicely together, I placed my bud vase in between the tubes as shown in the pictures below. Perfect fit!

Next, I started covering the copper tube with hot glue. I covered all the copper parts except the bottom part of the tube, because the plan was to glue the bottom part to the cupcake stand. But other than that, all the copper got covered with hot glue – including the parts that go in and under the potion bottle.

Before gluing the copper tube to the cupcake stand, I cleaned the stand and wiped the surface with some alcohol for better glue adhesion. Then I poured a good amount hot glue to the plate, and glued the copper tube while supporting the tube and the bottle with my other hand.

I carried on squeezing more and more hot glue and letting it dry over the copper tube. While all this ‘hot gluing and waiting for it to dry’ was happening, I kept supporting the potion bottle and the tube with my other hand. Once I had a really good amount of hot glue built up, I didn’t need to support anymore.

Here is a little hint for you: hot glue can come off pretty easily from a glass surface, especially if you are using a slightly heavy bottle/vase. Regardless of how much hot glue you use, you can’t really trust the hot glue to carry that bottle weight. Knowing this, I started lightly rocking the tube back and forth just to check the adhesion. A couple of back-and-forths later, the bottom got freed from the glass, and that is when I decided to use the right glue for this kind of work.

Here is another hint for you: E6000! It is the best glue for this kind of application. And it is dishwasher safe! [Did you know that? Awesome isn’t it? ;-)] Anyway…
I put a good amount of E6000 on the bottom, and using a clamp, I glued the whole thing to the cupcake stand as shown in the pictures below. Then I let my prop sit over-night for the E6000 to cure.

The next day, I took my clamp off and embellished my prop with some spiders and Spanish moss. This part is optional, as it is only for dressing your prop to look more Halloweeny 😉

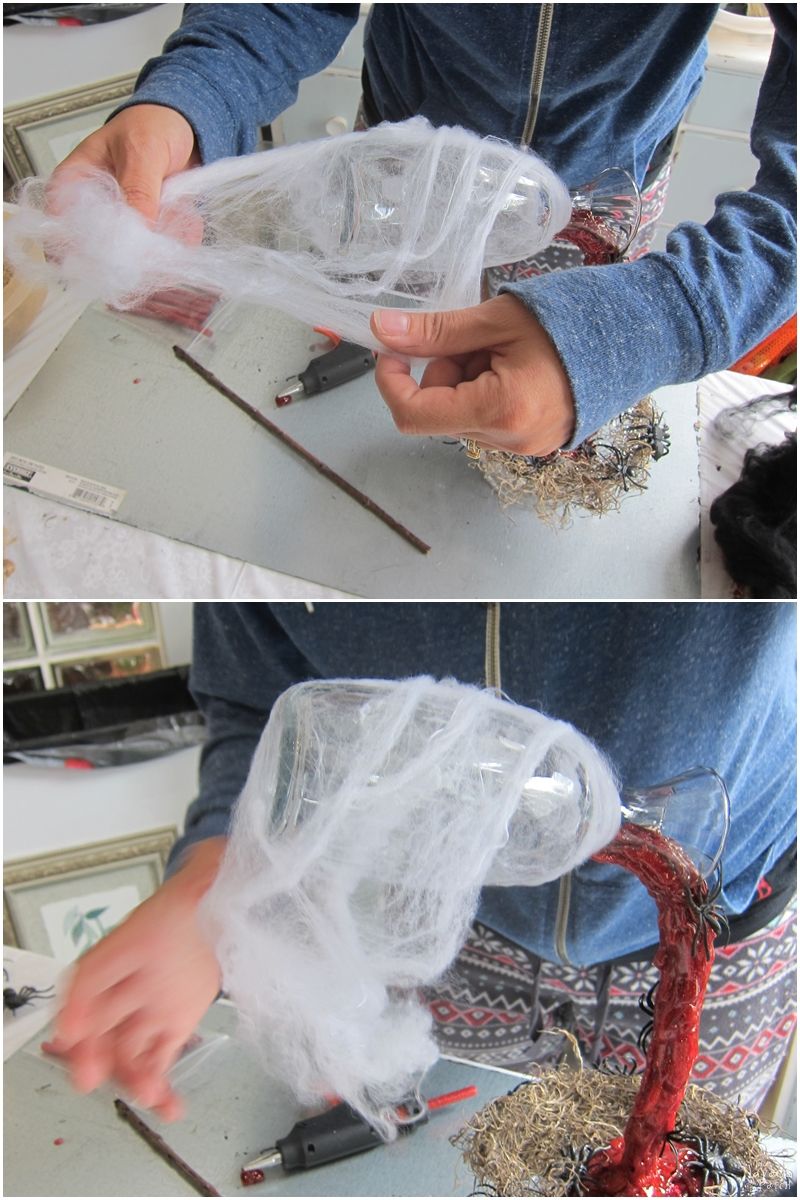
As the final step, I placed some white and black spider webbing around the bottle and also some spiders on top the webbing. Again, these are all optional things as they are just to dress up your prop.
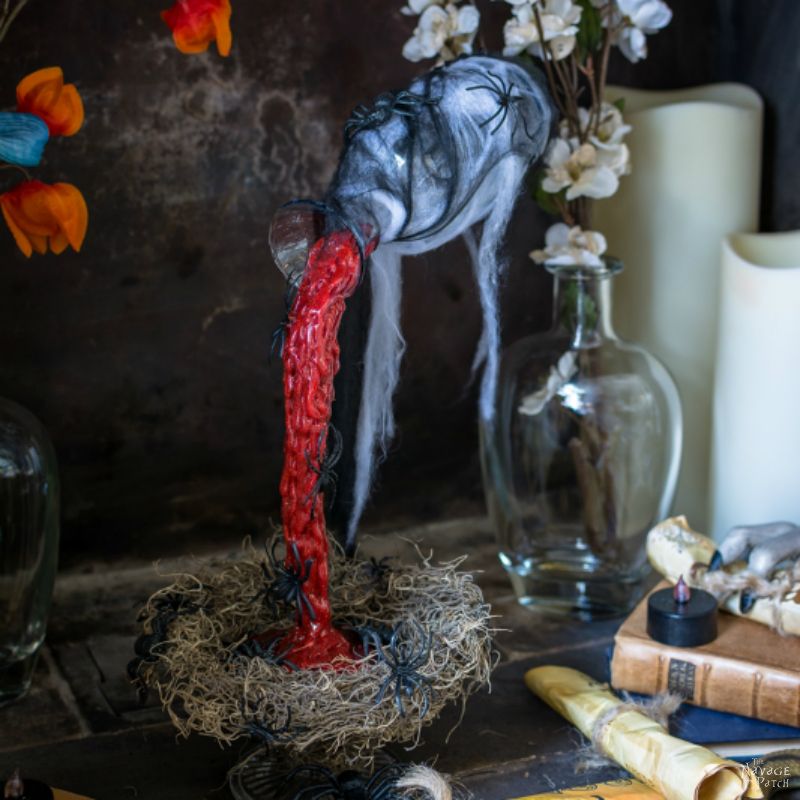
Are you ready for the beauty shots? Well then – here is my magical floating potion bottle! 😀

Looks pretty cool, right?
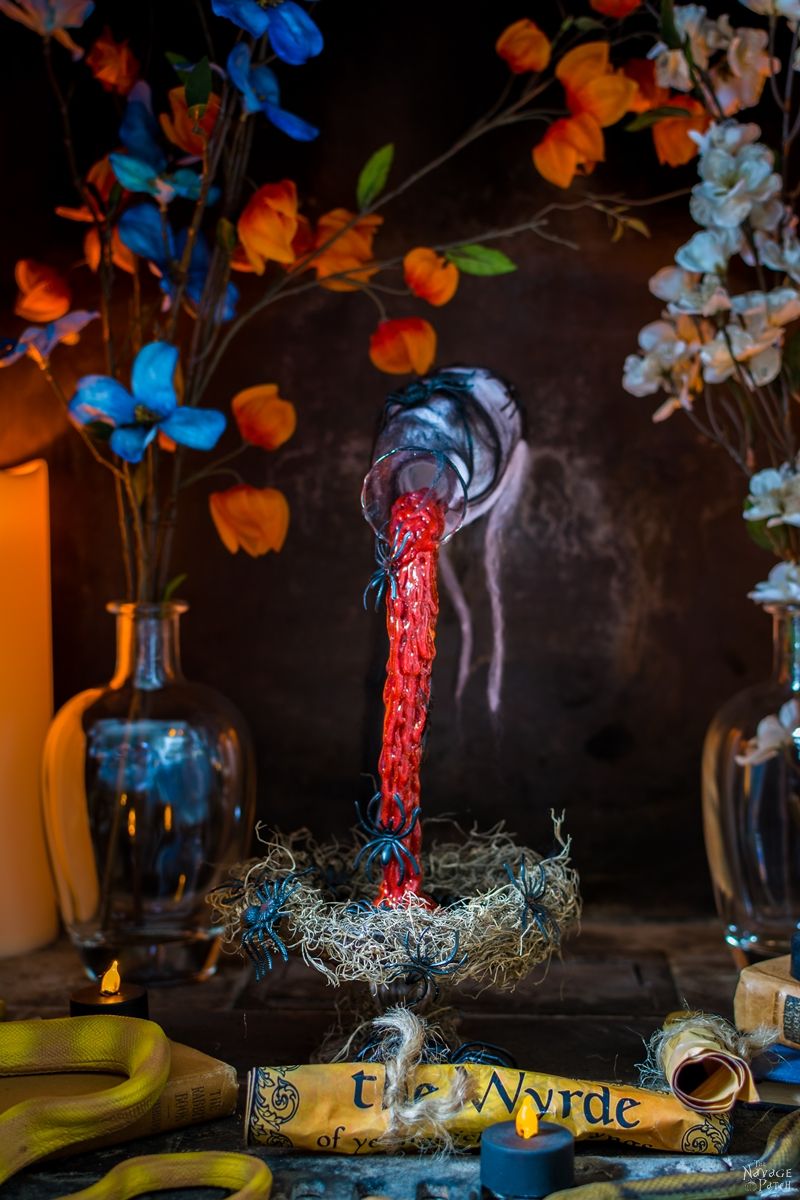
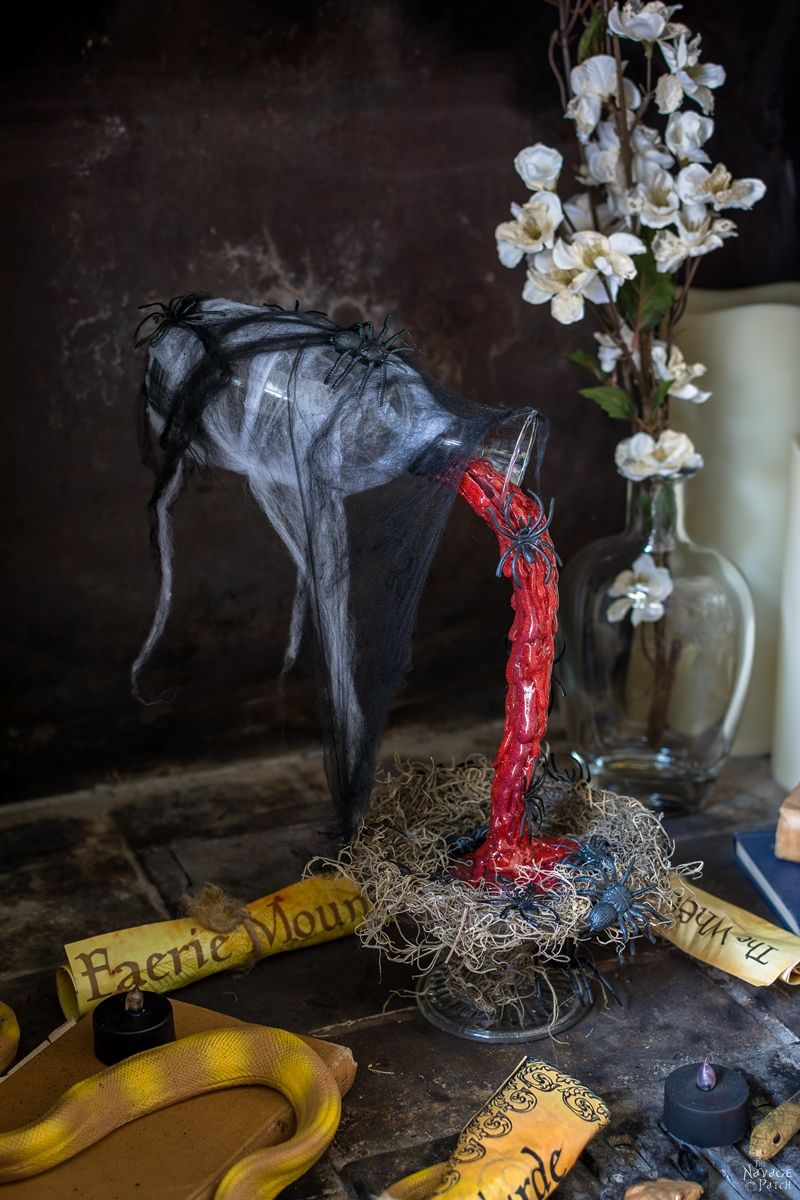

Do you see the difference in the potion thickness on these two pictures (above and below)? The one below has thinner potion than the one above. That is because when I first finished my floating potion bottle, I used only enough hot glue to cover the copper tube. But then I decided to make my potion thicker, hence I went back and put more and more hot glue to create that thick potion look. And of course, I asked Greg to take pictures of both versions, so I could show you how a slight change in this project can give quite a different feel.

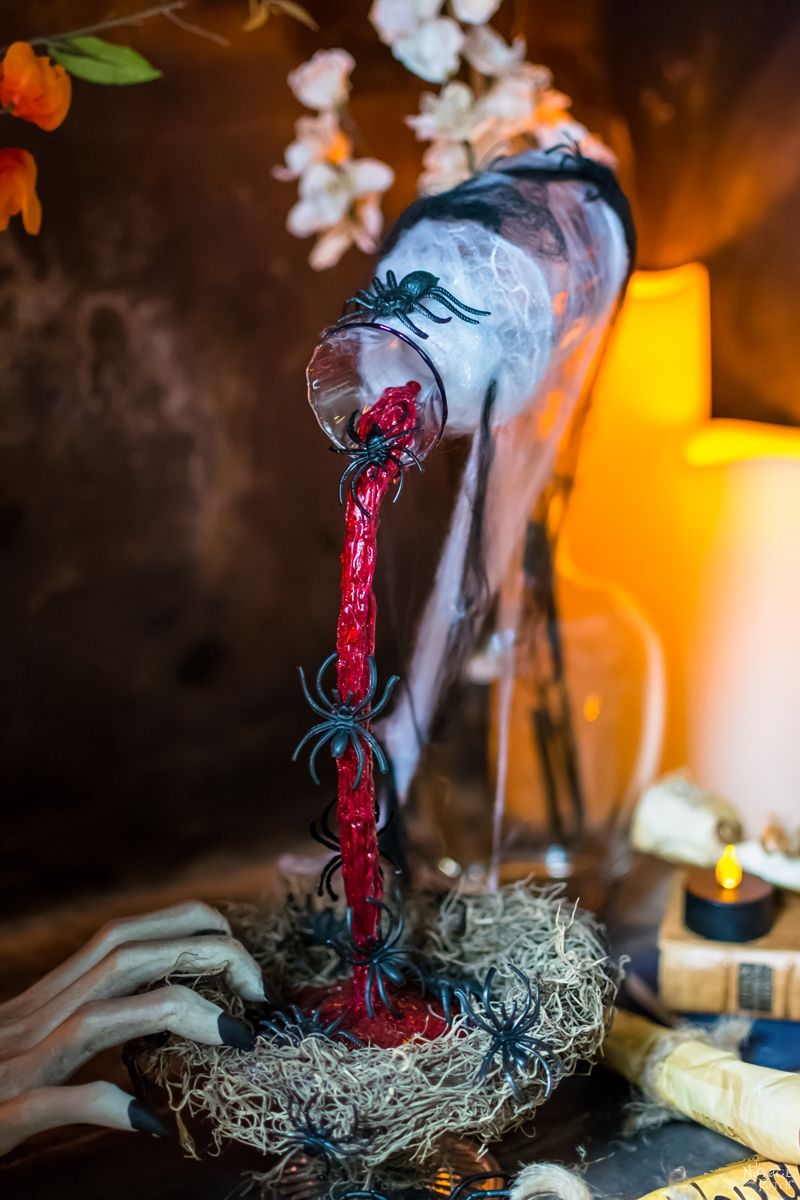
If I make another one, I will most likely make it with blue glittered hot glue sticks. I also think this prop would look good with glittered blue potion.
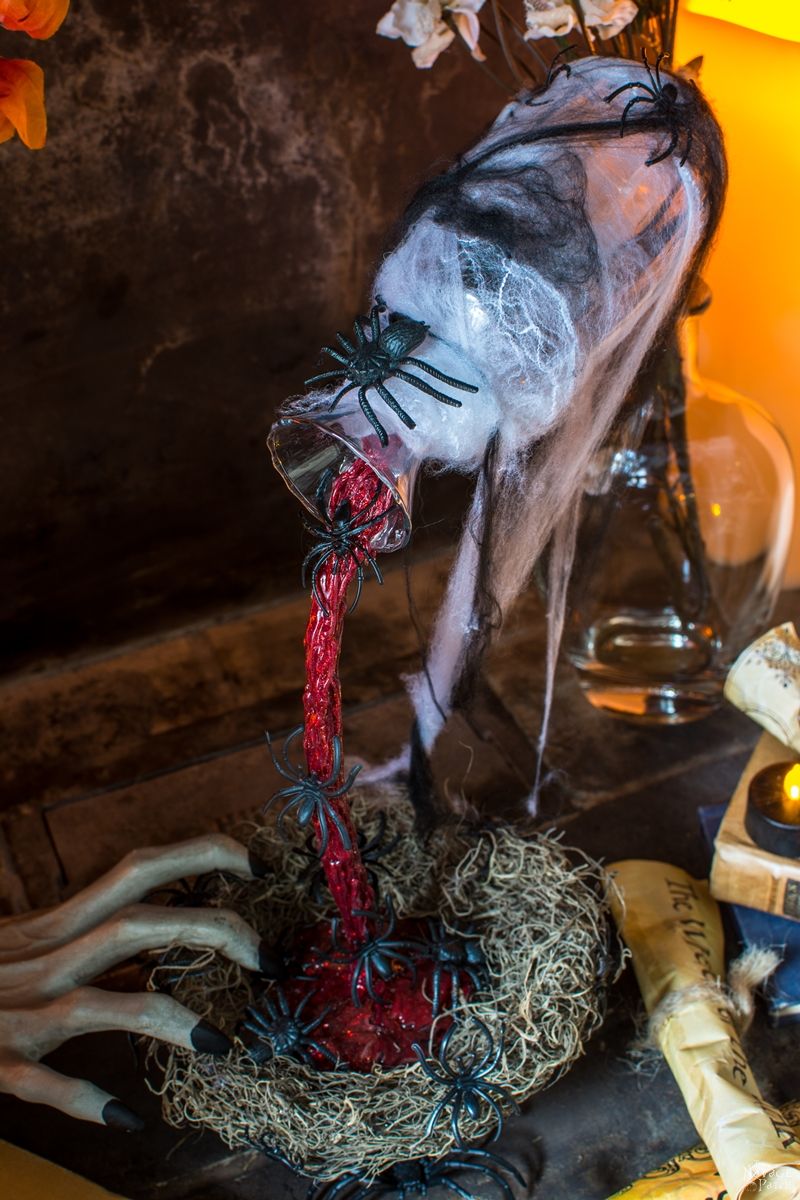
And some more pictures on its own and with a lighter background, so you can see the details a bit better 🙂
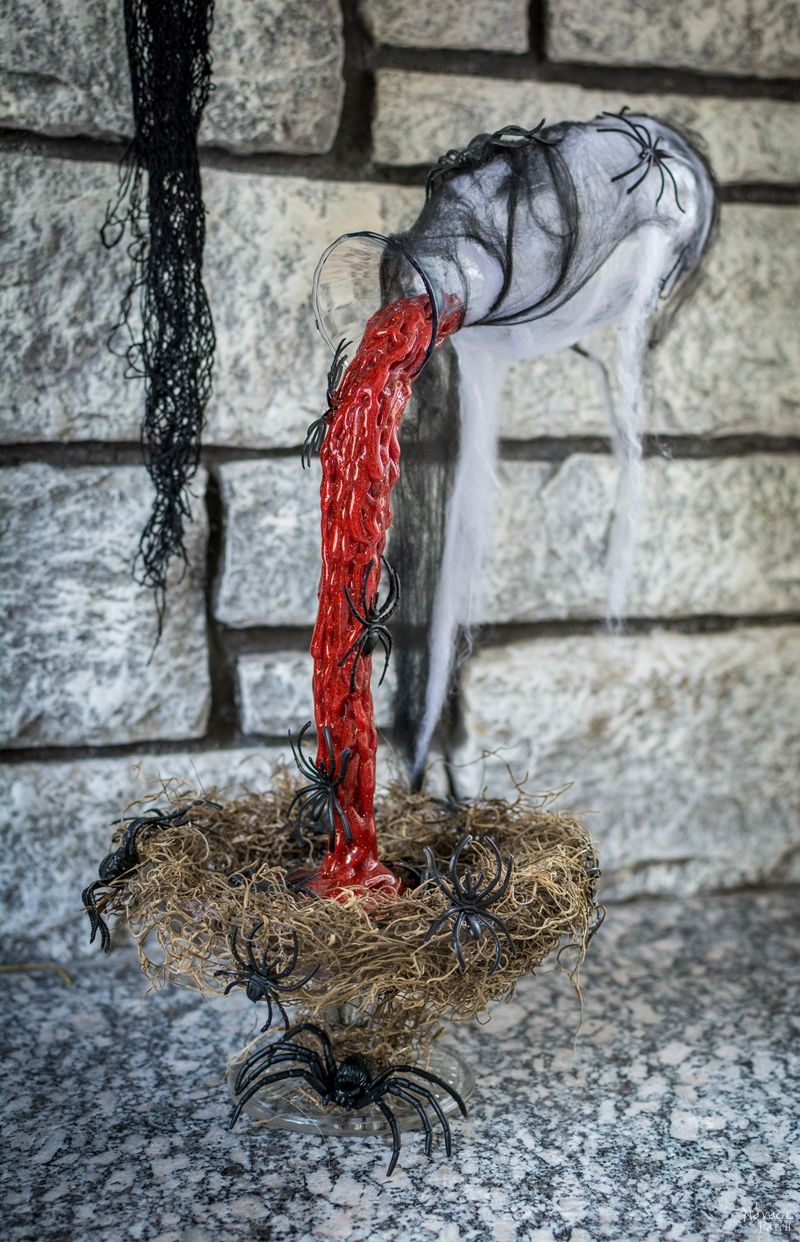
I hope you liked my magical floating potion bottle. As it is unique, I wanted to share it with you as soon as possible. Hence my Halloween wreath will have to wait a little longer 😉
Handan, xo
We love it when you share our posts on Facebook and Pinterest!


Wow! This is great! As last year’s apothecary jars were such a hit, can’t wait to add a couple of these to the display. The kids were so intrigued by the stuff in the bottles, i know this will be fantastic! Thanks again Handan for your generosity in sharing!!!
Laura Impastato
Oh wow – thank you so much for your lovely comment, Laura! I am so glad you liked it!! I hope you keep checking back in as more fun stuff is on the way 😀
Damn it Handan ! You got to stop dreaming up this spookey stuff ! I can’t concentrate because my heads full of Halloween and things i should be doing aren’t getting done ! ILOVE IT! Now the daft thing is i have a serious spider phobia but thanks to your Halloween ideas i now own several dozen little plastic spiders and a large hairy one,I have to be careful when decorating wiith the little ones that i don’t drop one somewhere as they are quite realistic and can cause me to panic.Er keep meaning to appologise for the size of my profile photo ,don’t know why it’s so big on your site it ‘s normal small size everywhere else?
Thank you so much, Catherine! I love it when you all enjoy our projects! 😀
LOL- I hear you. I have the same phobia for snakes, and I too make sure that I didn’t leave any of them in a place to surprise me later on hahaha.
I love your picture! Let it be big! I love the puppies you have – they make me smile every time I see this picture! How old are they?
This is fabulous!
Thank you so much, Derry! There will be more bottle and potion projects. I hope you are keeping some of your bottles 😉
handan, i have always thought you were one of the sweetest people i know, but sometimes with projects like this i wonder lol, this is so spooky xx
Hahahaha – I know, right? Why do you think Greg always treats me oh-so-nice. Perhaps, he doesn’t want to go back to his toad years with a quick spell – LOL 😉
Oh this is awesome, I can’t wait to make it for the grand kids, they will love it! And I think you should know as much as I love my Pinterest, I think I love you both more. Heeheehee! Awesome tutorial.
Thank you so much, Ronna! I am so glad you liked it! 😀
Handan, I absolutely loved the potion! You are so right about the thicker potion though. It looks so much more detailed (and scarier!). I might have to use this myself lol!
Thank you so much! Yes, the thicker the potion, the better and richer the prop looks 😉
Another great project! Thank you for sharing your creativity with us all! Now, I’m off to gather the supplies for this awesome prop…
Awesome! I am sure you’ll enjoy working this project! Let me know it turned out as I would love to see it 🙂
Great job! Very clever. I think I like the thicker red glue potion bottle one the best!
Just a note to those going to use E6000 make sure you use the GENUINE stuff. The ‘fake’ one, when you use it, goes all stringy and will not stick anything to glass!It peels right off the next day. Never buy it on Ebay from China, because that one is the fake one! Only the US one is genuine. Wouldn’t want a nice project to get smashed because someone got ripped off.
Thank you so much, Aletheia! Agreed – everyone seemed to like the thicker potion including myself. 🙂 And you are so right about E6000, so thank you for that note, too! 😉
ps awesome ideas….very
creative
Thank you so much, Jackie! 🙂
Hi. I just ran across your site today and have been sifting through one project after another. I absolutely love your and Greg’s creativity and generosity! Not many are so giving when they’ve put so much work into a project like the wall art, the apothacary labels…..all the free printables, all of your projects actually. Plus I am impressed with the detail of your instructions, including all of the helpful tips, references to where you acquired your items, what worked for you and what didn’t and why, the detail of your pictures and their explanations. Thank you both. Your site is an exciting addition to the sites I choose to return to again and again. (And I will. I am impressed with the cleverness of the projects and the detailed (dare I say, even intellectual) conent of the research contained in the posts – regarding the word wall art, etc.)
As for this project, I remember years ago, as a girl, I saw a giant faucet floating in the air with running water coming from it at our state fair. Even then I figured out how it worked. Although I never thought of an application of that knowledge. You did. And a good one too. I have an idea I think will make it even more realistic. I hope you don’t mind if I share it. As the vase is tipped downward so that the “potion” can “run out of it” contents of remaining “potion” would naturally “pool” in the wider portion of the vase on the lower side. I can see how it might be difficult to put the hot glue in there effectively and in a realistic manner. I was thinking it might be possible if a toilet paper roll was covered in plastic wrap and sprayed with something like Pam for easy release. Then run the hot glue over the tube and elongate it some coming off the tube. Do this 10-12 times. Then let it dry. Pull it from the tube, turn it upside-down and place it inside the lip of the vase fitting it into the hollow. This will give you an idea of where and how to add more glue to make it the right shape. Do so. Now, make the beginnings of the potion pouring from the bottle/vase, but keep it only one layer. Once that’s done, before going on with the “potion” that flows forth from the bottle/vase, put glue on the the underside of the “pooled potion” and affix to the inside of the bottle. At this point the remaining portion of “potion” can be created making it appear both pieces are actually one in the same. Do you think that would work? Do you think it’s even necessary? There doesn’t need to be much inside but I think it would be more realistic and not cause people like me to wonder “shouldn’t there be some left in the bottle since it is not turned upside down to get it all out?” Please, don’t think I am saying anything negative, I’m not. I’m just detail oriented and I did a lot of theatre in college and designed a lot of sets. Because of that my just notices incongruences. (Boy have things come a long way in that field since then!!) I know being detail oriented can sometimes be a pain but I have an idea you and Greg may be the same way. Could that be why the details in your posts are so good?
Since I’m writing this years after the original post I hope you see this.
Thank you so much Debby, and sorry about the late reply. But I wanted to find an easier way to do that pooled potion part before I replied to you, and I finally did. 😉 Apparently they are making these thin and long nozzles for the hot glue guns and even Amazon carries them: https://amzn.to/2Jxy9C3. I didn’t even know before they would make these long nozzles, so thank you for giving me the idea. And of course once I saw these nozzles, I just had to have a set of them hahaha 😀
OMG I am in love!!!! I can’t wait to make this!!!
I’m so glad you liked it Carol! Make sure to send us a picture or two when you finish yours as I’d love to see it!
PS: You can post the pictures on our facebook page. 🙂
This is fabulous! I am definitely going to try it.
One question…do you have a ballpark number of glue sticks that you used?
Colored glitter glue sticks are not something I need in abundance, so I want to purchase a number close to what I will need.
Thanks.
Oooh, that’s a tough question. We did this so long ago, we can’t quite remember. But here’s a tip: Make the bulk of the pouring liquid with regular glue sticks and then make an outer layer of glitter red. You can get glitter sticks at Dollar Tree, so you won’t have to spend much!