Painting IKEA Furniture (or any Laminate Furniture)
Painting IKEA furniture (or any laminate furniture) is an easy DIY project if you know the secret. Lucky for you, we’re in a sharing mood! 🙂
I don’t know how they do it.
I really don’t.
My best guess is that they have a bunch of diaper-wearing babies crawling around their factory floors.
That might explain it.
It really might.
When one of the workers on the Quality Control Line is unsure if his coworkers on the assembly line have achieved the level of perfection required to bear the IKEA name, he reaches down below his knees, fishes up one of the wandering tots and tugs down on a corner of its powdered Pampers.
Rosy butt-cheek thus exposed, the Swedish inspector gives it a quick swipe with his Swedish finger.
Nodding to himself, he turns to whatever unpronounceable piece of Swedish furniture sits in front of him, and he swipes the same Swedish finger along one of its finished faces.
If the furniture finish is as smooth (or smoother!) than the baby’s butt, he slaps on an IKEA label and orders the piece to be loaded onto the fastest boat bound for American shores.
If the furniture fails the butt test, he proclaims it to be a bit av skit1 and sends it back up the line for further refinement.
He smiles at a job well done and daydreams of Swedish meatballs.
*******
Part 1 – Painting IKEA & Laminate Furniture
If you’ve ever tried to paint a piece of IKEA furniture – the laminate or the painted kind – then you know where I’m coming from.
Okay, laminate is laminate, so really IKEA isn’t exactly reinventing smooth there. But their painted furniture?
Jeezum Crow!
I don’t know what they put over that paint, but Teflon might be a good guess!
So, can you paint IKEA furniture?
Of course you can, but if you try to paint IKEA laminate furniture or their painted furniture without knowing the secret, you’re going to be taking a little stroll down Misery Lane.
The paint. Won’t. Stick.
I can hear some of you now, you know.
“Oooh, oooh, but can you paint IKEA furniture with chalk paint? I use Annie Sloan! Her paint sticks to anything!”
To which I reply, “Bosh and balooey, madam!”
Her paint fails like a bumpkin at a calculus contest when it comes to IKEA.
My first time using Annie Sloan was attempting to paint a finished IKEA chest of drawers. I didn’t use any sandpaper, nor did I give it a coat of primer, nor did I engage in any type of prep work at all! Instead, I just dove right in with The Sloan and assumed everything would be awesome.
It wasn’t. If disappointment and frustration have names, they are “Annie” and “Sloan.”
What I didn’t know back then was that even the best and most expensive paints need something to hang on to, otherwise they’ll just flake off and fall to the floor, leaving behind a peeling, ruined makeover and a frustrated and swearing painter.
Okay, so how do you paint IKEA laminate furniture?
And not just laminate, how do you paint that crazy smooth paint like I encountered in the picture above?
There is a way to get no flakes.
No tears.
No disappointment and no frustration.
I know you’re just dying to get to the action, so I’ll tell you the story of how the following IKEA makeover was supposed to go at the end of the post.
Our original plan wasn’t to paint it.
Our original plan was to fix the scratches with products promised by Pinterest to fix and repair all scratches and imperfections.
Obviously, that didn’t happen.
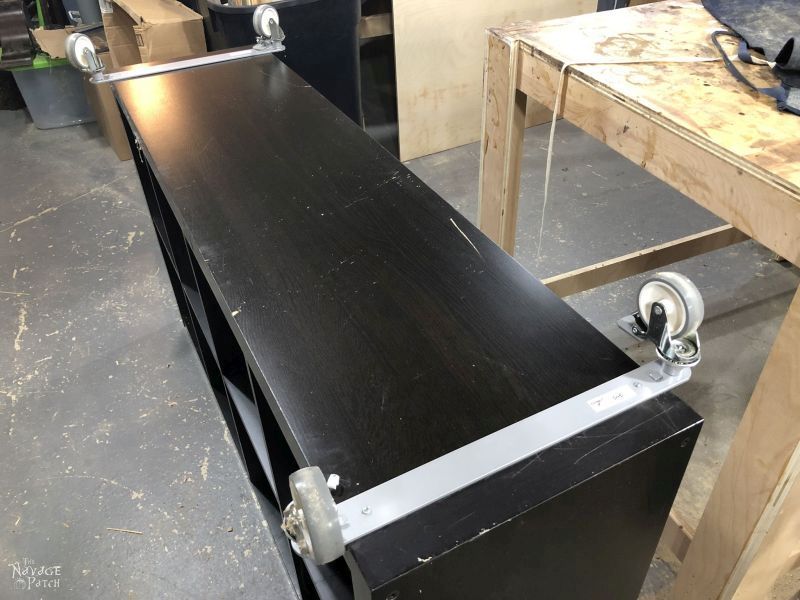
How to paint IKEA furniture
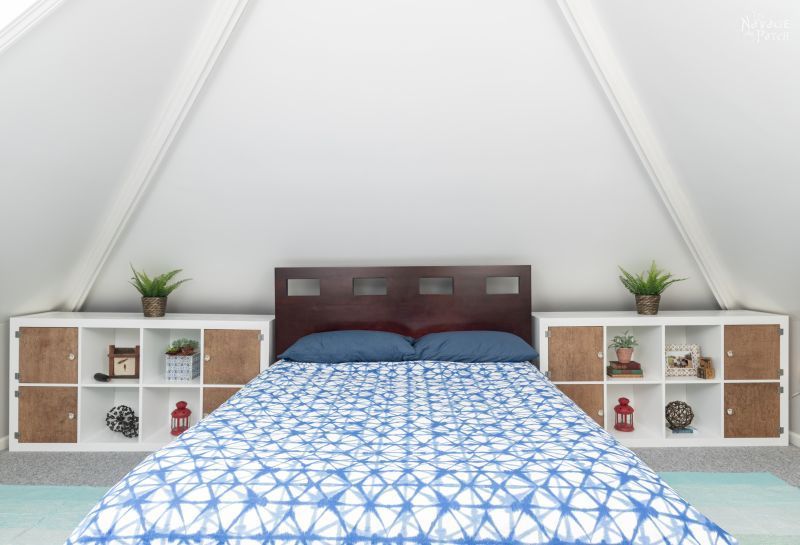
Okay, so Barish has this weird sloping ceiling behind his bed that creates an unusable triangular void.
We first considered building a tiny wall to block off that area and bring some normalcy to that wackadoodle room, but that would have been a big, nasty job.
Fortunately, we discovered that an IKEA Kallax on either side of the bed would fit perfectly and block off the useless void!
The plan was to make some doors for half of the cubby holes and slap a hardboard backing on the back. Easy!
The best part was we already had the two black Kallax units!
One had served us for years in the dining room before we gave that room a big makeover last year.
The other served as a bookcase to Barish’s desk before we gave a makeover to his first room earlier this year. That’s the Kallax in the background with the trophies on it.
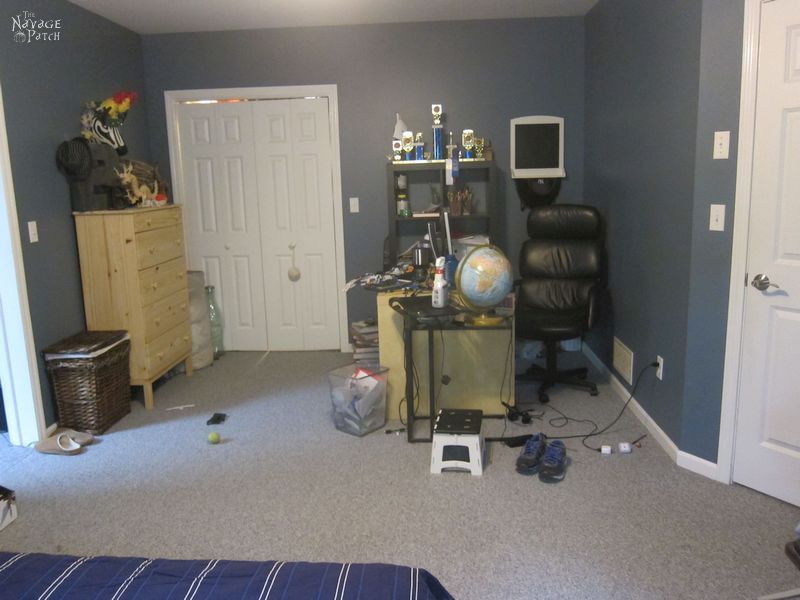
Lucky guy! I don’t think I won a single trophy growing up.
I do remember winning a bronze medal at a swim meet once, though.
The funny part?
I wasn’t on the swim team!
I just happened to be beached on the grassy slope next to the pool at Woodledge Pool Club in Glastonbury, Connecticut one day when the coach asked if I could fill in for an absent team member.
What the heck? Why not?
I rolled myself over to the light blue starting blocks and heaved myself up onto one of them. I must have looked like a walrus mounting an iceberg.
The starting gun fired, and I launched myself into the cool, chlorinated water. For the next minute, my whole world was splashing water and gasping for air.
When it was over, I discovered I had placed third – good enough for a bronze medal!
Though I can’t remember for sure, I think there may only have been 3 people competing in that event.
Anyway, back to painting IKEA furniture.
I’m going to tell you the secret now.
Are you ready?
Good!
The secret is primer.
I know, I know, you feel totally let down.
What kind of a stupid secret is that?
But wait!
Not just any primer!
It must be shellac-based primer – the best primer! And the one we like (really, the only one I know), is Zinsser B-I-N.
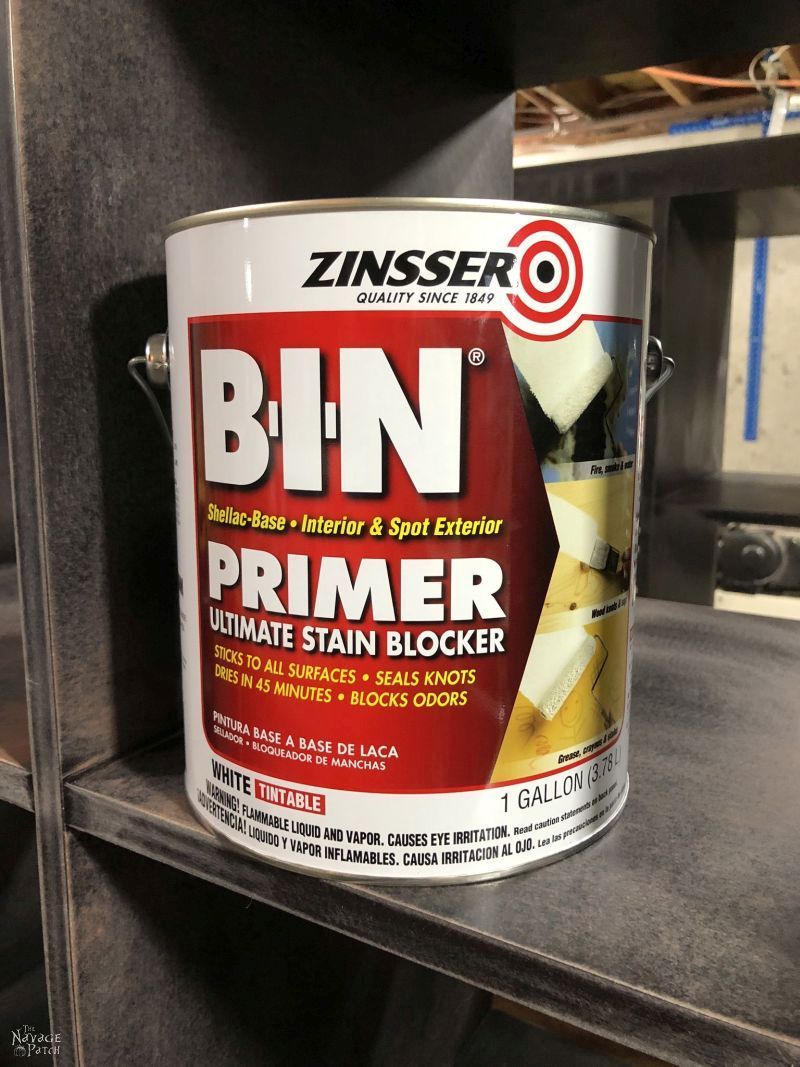
Now, you may be wondering what the BIN stands for.
Oddly, no one seems to know. It is therefore up to us to give it meaning, so let’s hear your suggestions in the comments.
It probably doesn’t stand for Baby, I’m Naked! But then again, what do I know?
(That’s right. I know nuthin‘!)
Okay, so it’s a shellac-based primer. Big whoop. Why does that matter?
Well, if you’ve ever worked with shellac and gotten some on your hands, you’ll know exactly why it works for painting laminate furniture or other super-smooth surfaces: it’s incredibly sticky!
Shellac has the ability to stick to surfaces that other paints and primers would just flake off of.
But even shellac-based primer has its limits, and it’s best not to test those limits, especially with the smoother-than-a-baby’s-butt IKEA finishes.
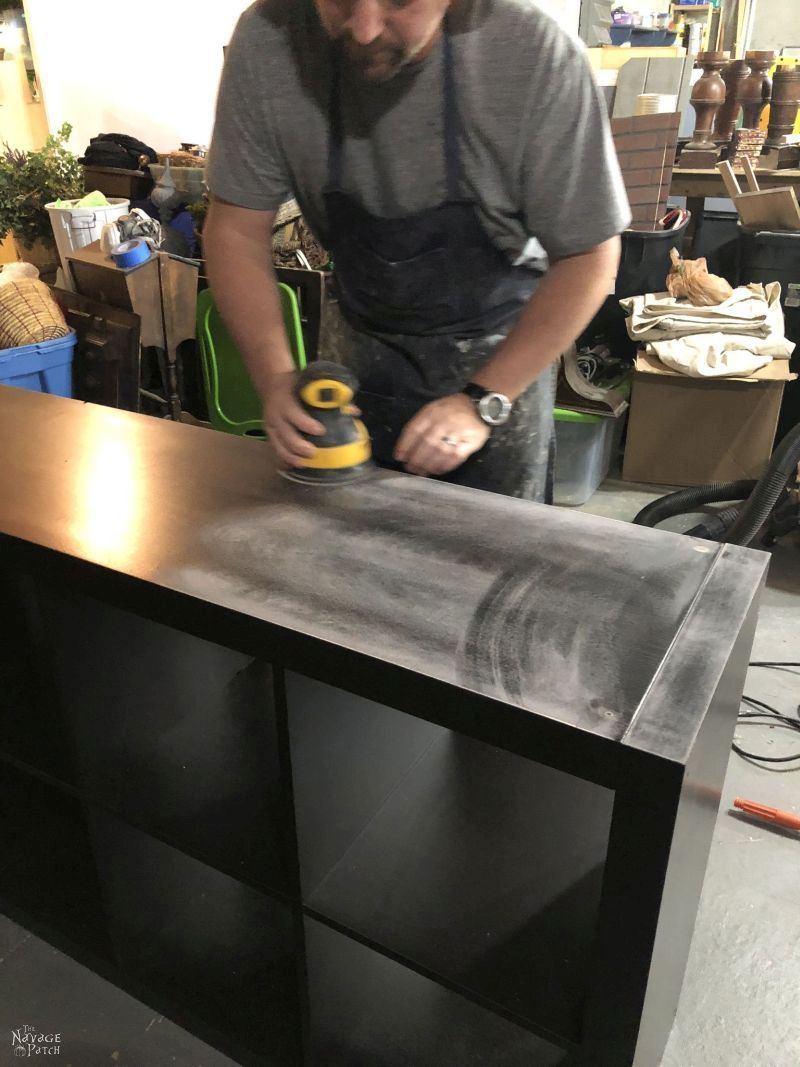
So just to be safe and give the primer a little something extra to grab onto, you’ll want to sand the piece of furniture first.
Now, relax! I don’t mean to sand down to bare wood (for painted IKEA pieces). I just mean a light sanding – a simple scuff-job with a random orbit sander.
You just need to rough up the surface a bit, but It makes a huge difference.
I used a 120 grit SandNet for this project. Never used a SandNet before?
Ooooh, you’re in for a treat!
Once I finished sanding, I could have wiped off the dust and dove right in with the Zinsser B-I-N, but I wanted to take it one step further.
This step is optional, but since I had the product already on hand, I went for it.
Instead of wiping the dust off with water or mineral spirits, I cleaned my Kallax with Krud Kutter Gloss-Off.
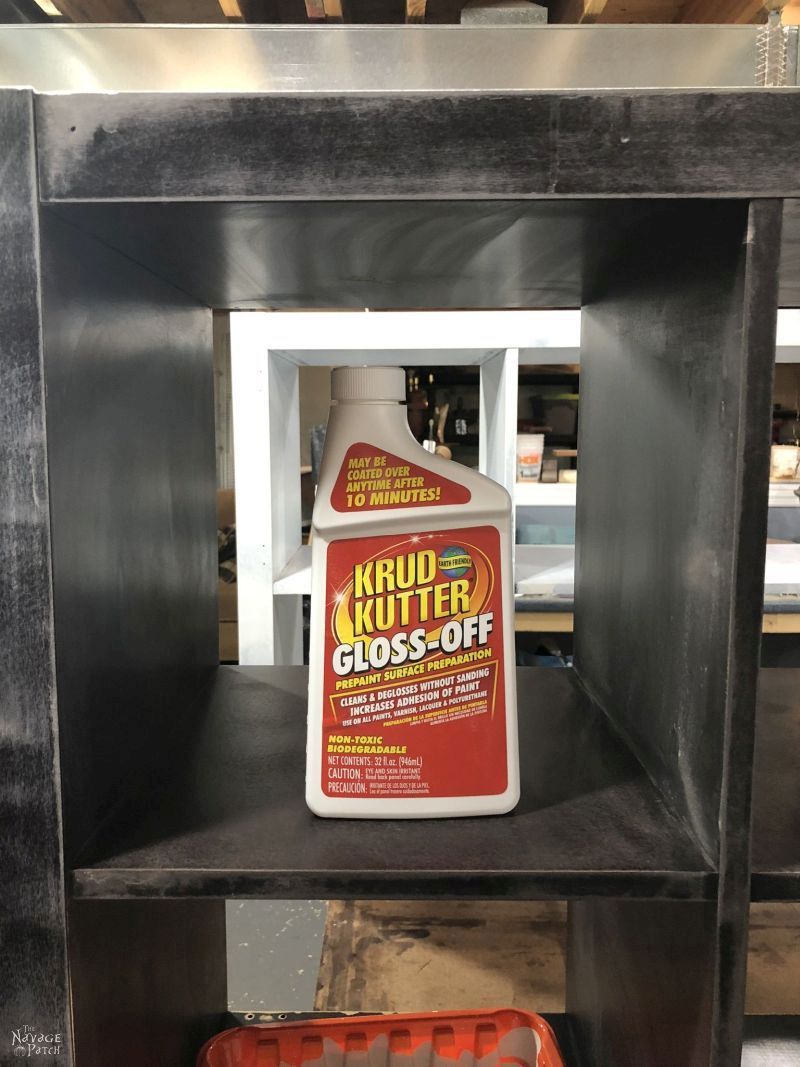
Deglossers are a great sanding alternative for some previously-painted pieces of furniture. The chemicals in the deglosser scuff up the old paint at the microscopic level – that’s why the gloss goes away – and allow, say, an old piece of trim to be repainted without sanding off the old glossy paint first.
But as good as deglossers are, they are not perfect, and even they have limits.
Very-high-quality paints, industrial lacquers and (yup) IKEA furniture laugh at deglossers and shrug them off with ease.
So really, I didn’t need to use a deglosser to clean the Kallax before priming, but I figured, since I had it on hand, it couldn’t hurt! As a bonus, the Krud Kutter cleaned any dirt and grime that may have been lurking unseen on the Kallax.
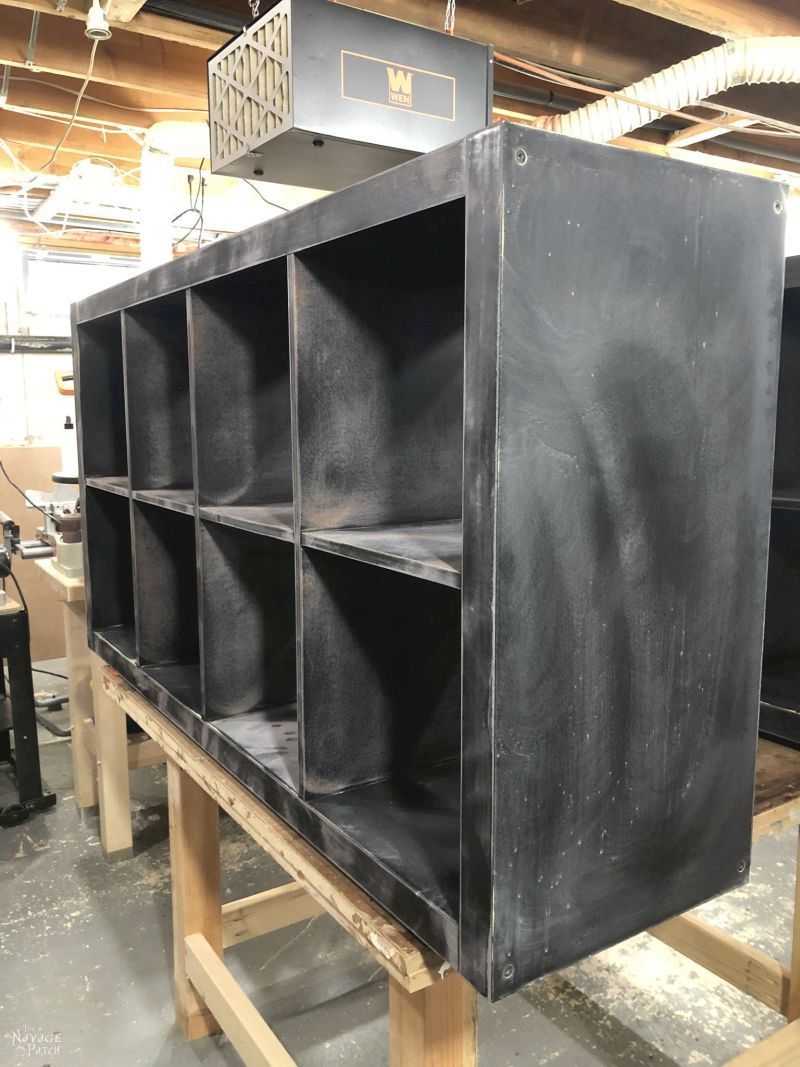
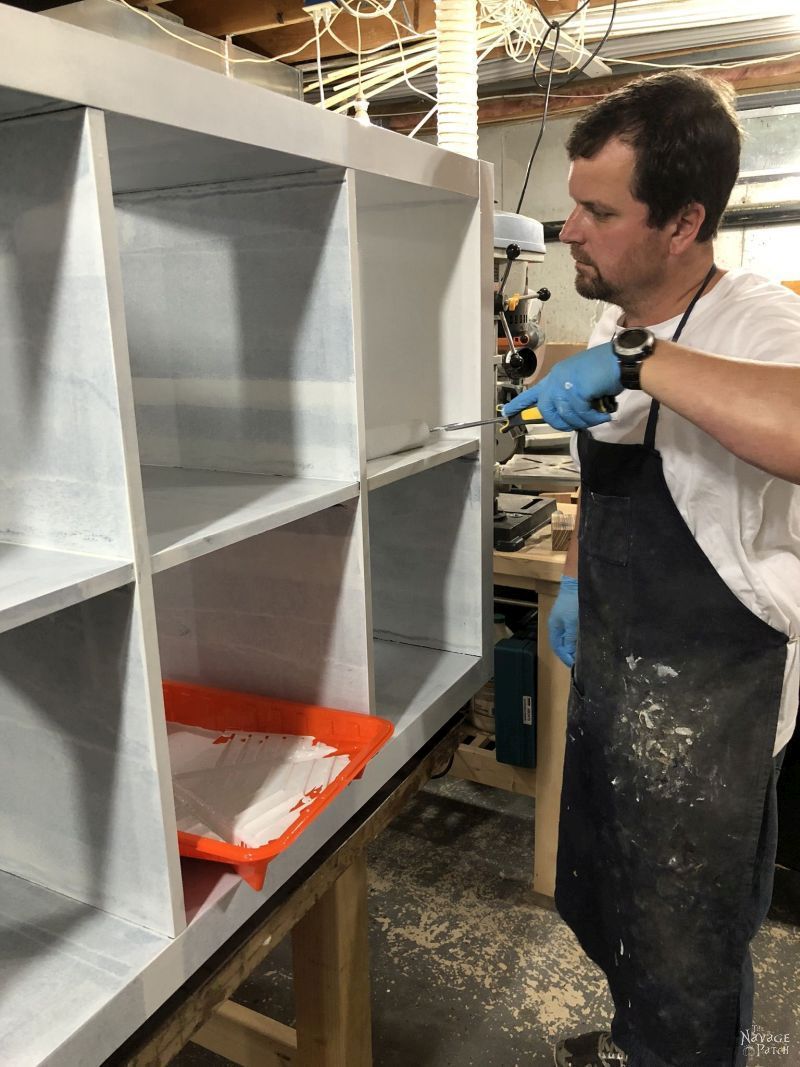
My sanded and deglossed Kallaxes were rather handsome without their usual satin finish. Those are dried deglosser drips on the side. I wiped those away before applying the primer.
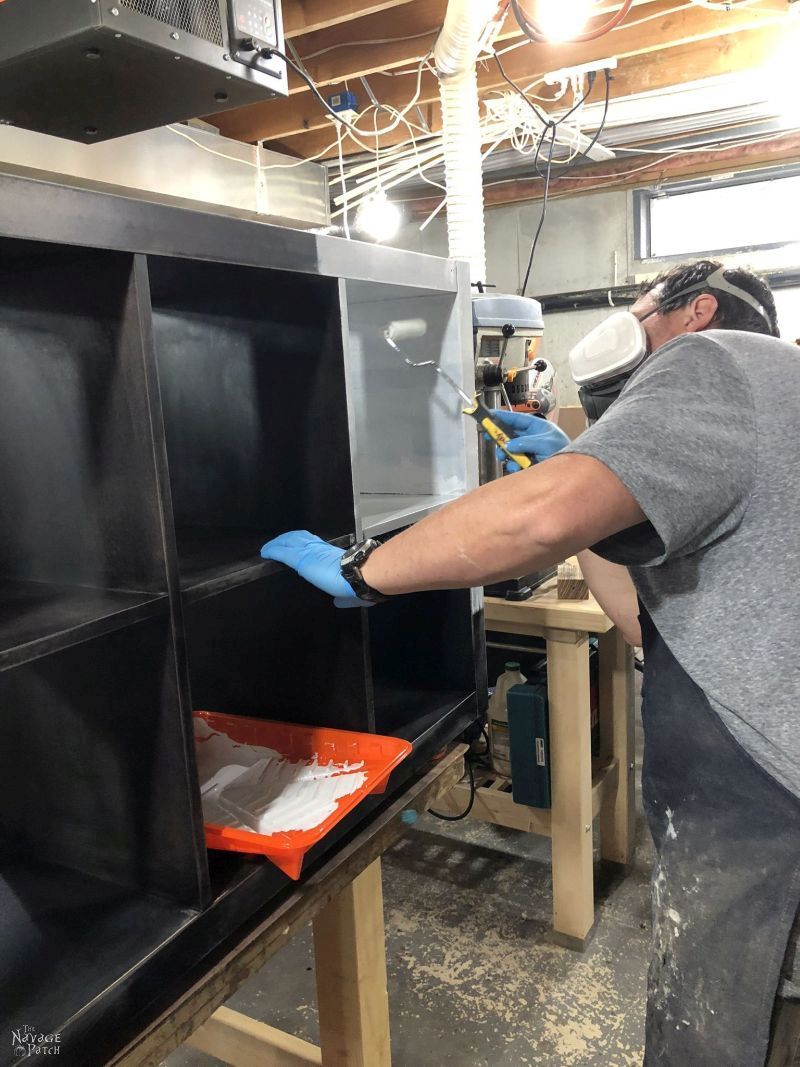
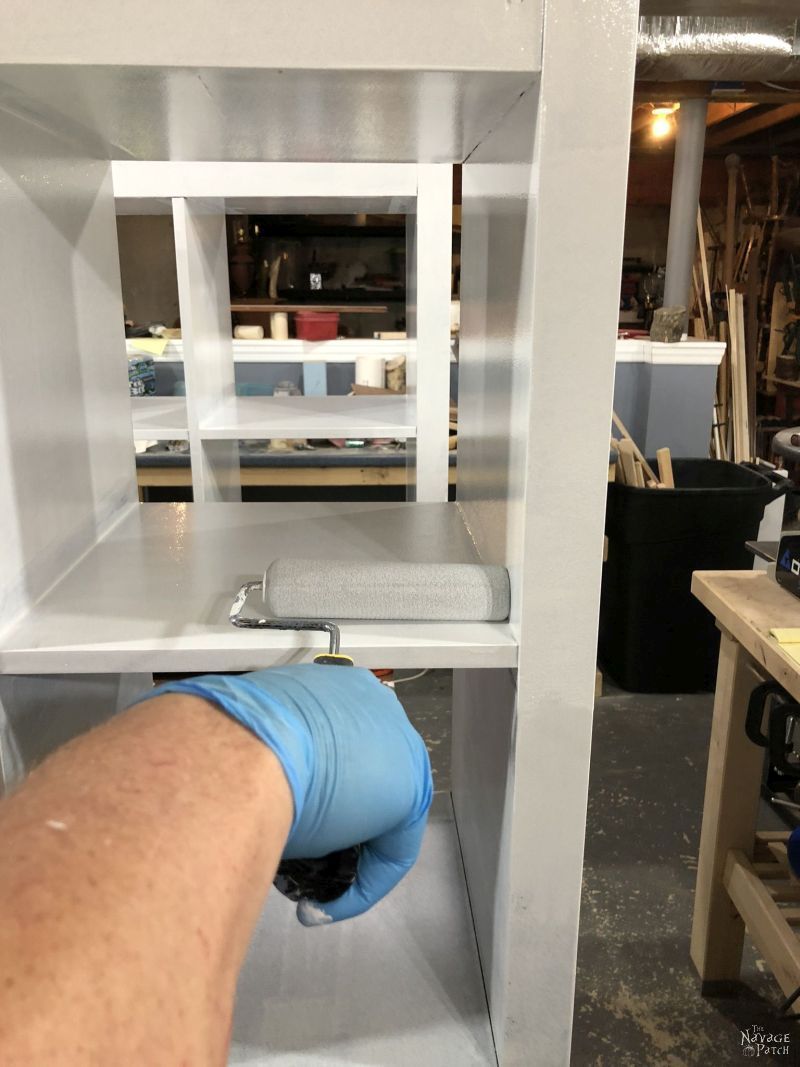
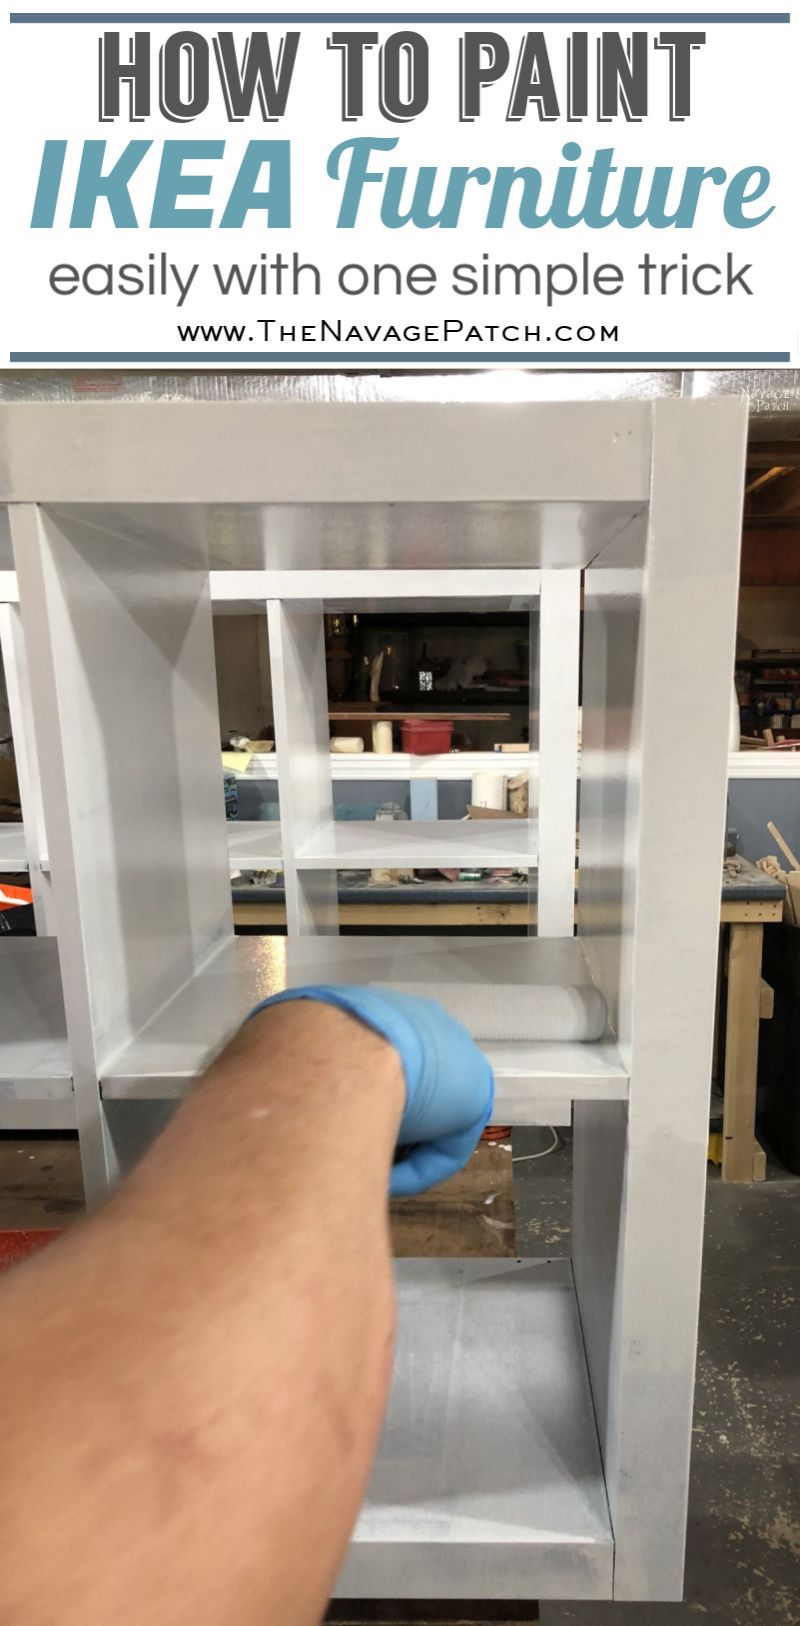
To apply the primer, I used a small foam roller, as foam gives the smoothest finish when rolling. Zinsser B-I-N has some powerful vapors, so a respirator is a must if working indoors.
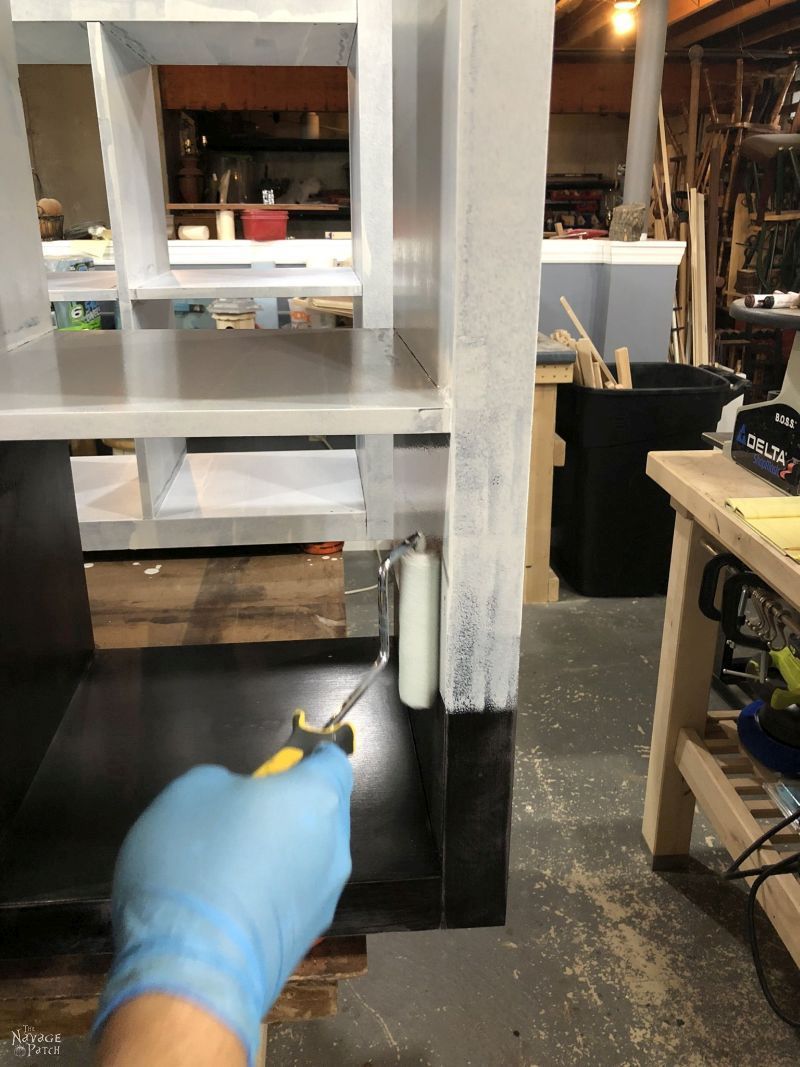
When the primer had dried, it was time to start painting the IKEA Kallax.
Pro Tip!
For the smoothest finish, sand after you prime, as primer can dry a little rough. Any fine grit sanding block will do, or hit it again with an electric sander with at most a 220 grit disc. A second coat of primer won’t be necessary for laminate or painted IKEA furniture, but it would be a very good idea if you’re trying to paint over raw pine or cedar.
We wanted to go a little higher-end with the paint than we normally do, so we chose Benjamin Moore Aura in Chantilly Lace color and a satin sheen. The type of paint you use is important – some are better-suited for high-impact, high-use pieces like cabinet doors and the like. If you want the ultimate protection, I recommend something like Sherwin-Williams Emerald Urethane Enamel. It’s going to have much more durability than the usual latex paint from the big box stores.
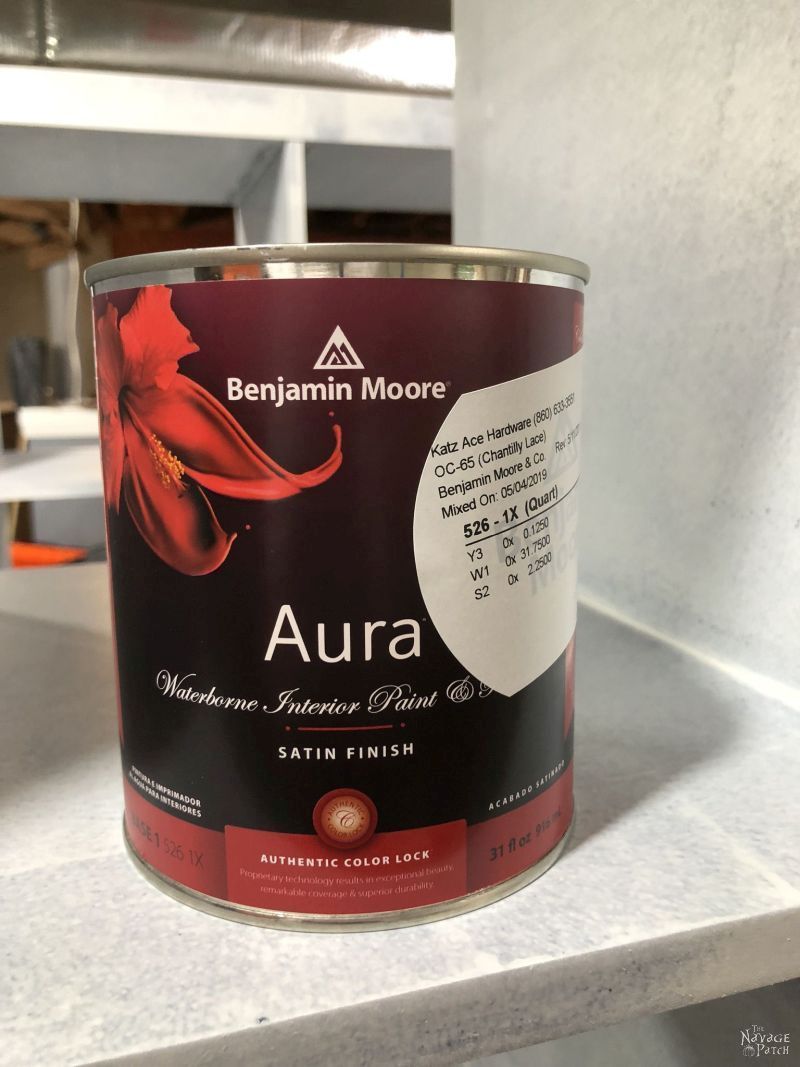
This is the same paint we used for Our DIY IKEA Tarva Hack.
I know “Chantilly Lace” isn’t the most manly-sounding color, but it’s one of the best whites out there, in my manly opinion.
Besides, I love strolling into the local hardware store and announcing that I need a gallon of Chantilly Lace.
Hey, it’s better than Bra-Strap Beige!
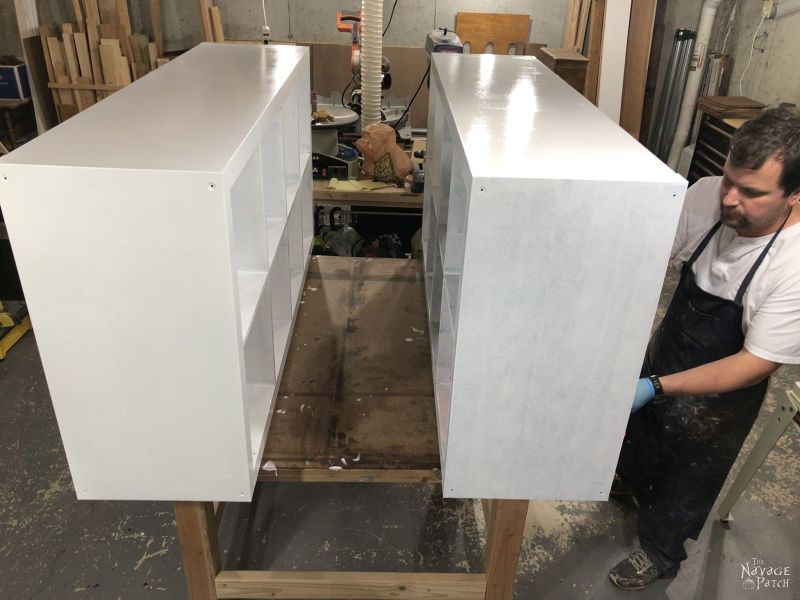
For the paint, I again used a foam roller cover, but I upgraded to Wooster Pro Foam, as I wanted the best finish I could get (without spraying).
It took three coats of paint to get perfect coverage. You can’t rush painting (unfortunately). The best results require multiple coats and a fair amount of time.
Wouldn’t it be better to use a paint sprayer?
Of course it would! Everything is better with a paint sprayer (just don’t you dare use spray paint from a can)! But at the time of this project, I still wasn’t adept with wielding one, so I went the roller router. If you have a paint sprayer, by all means, use it!
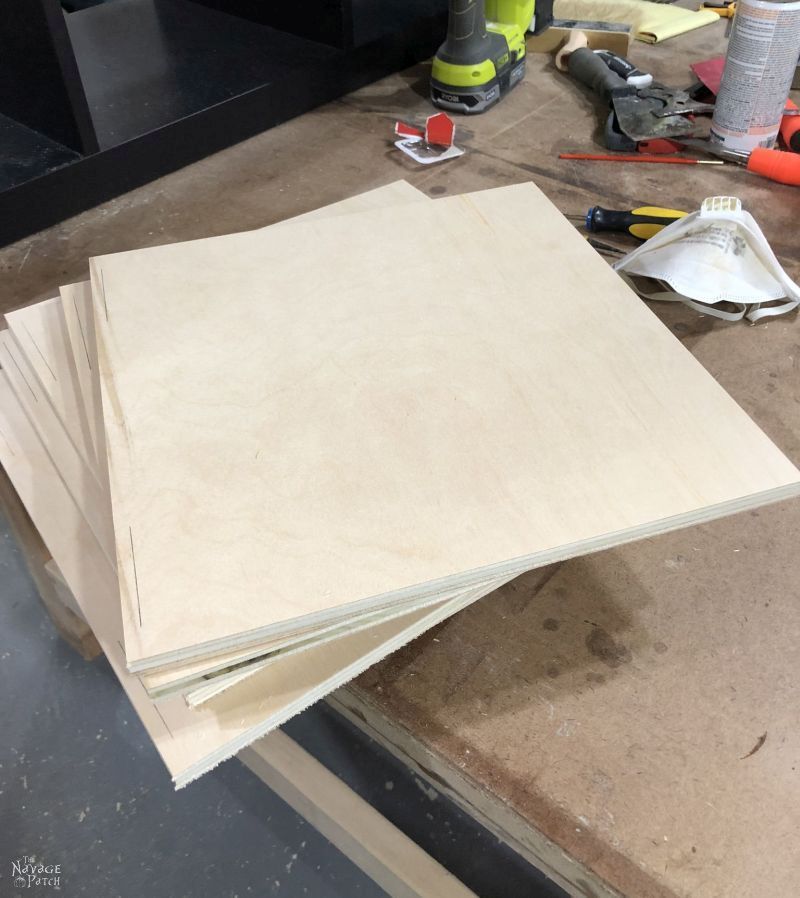
After the third coat of paint, I turned my attention to the doors.
Simple plywood fit the bill perfectly.
Whoa, there! What about a sealer on that paint?
Okay, look, at this point you could wax your furniture (a must if you painted with chalk paint), or you could venture into Poly town, if you’re feeling particularly saucy. But for most of us, if we use a good and durable paint, a topcoat won’t be necessary.
Part 2 – The IKEA Kallax Hack
I measured one of the cubby holes and then started measuring the plywood.
This was a mistake.
I assumed that IKEA – the company that rivals Germany for precision engineering – would make furniture that is plumb, level, square and consistent.
I assumed wrong (as usual).
Perhaps these Kallaxes were plumb, level, square and consistent at one point in their past. Perhaps the ravages of 6 years in The Navage Patch had sullied their once-perfect forms.
Whatever the case may have been, the cubby that I measured was just ever so slightly bigger than most of the others, and even more slightly bigger than one other.
When did I discover this?
Oh, at the very end, when they were in Barish’s room, and I was trying to attach the doors.
Learn from my misfortune. Measure in multiple places and assume nothing!
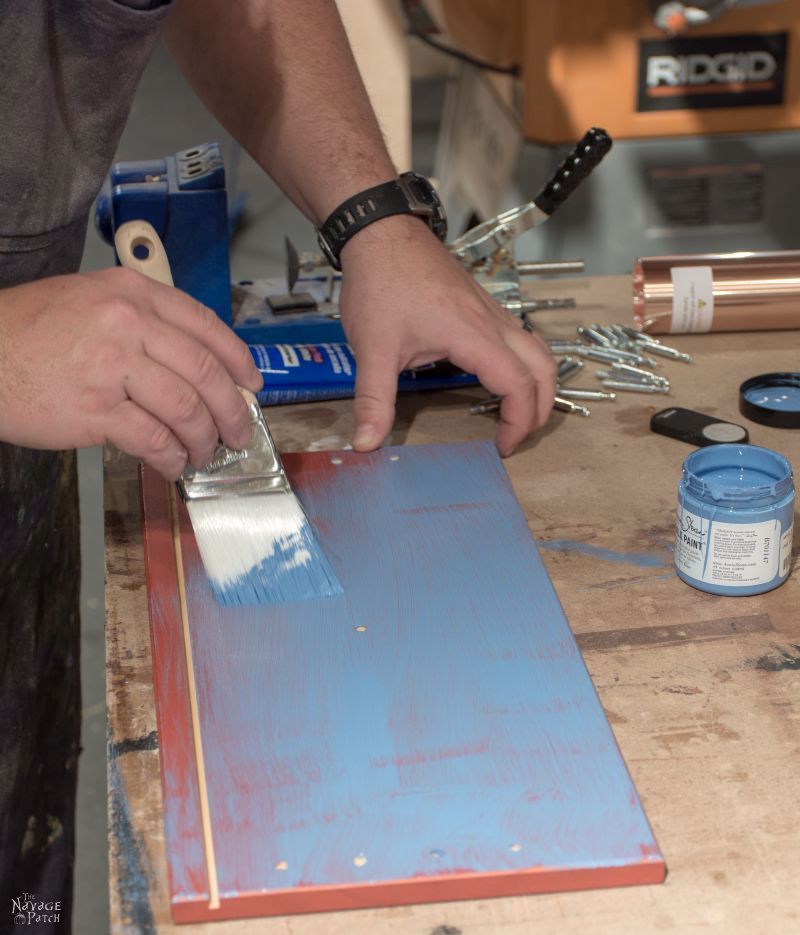
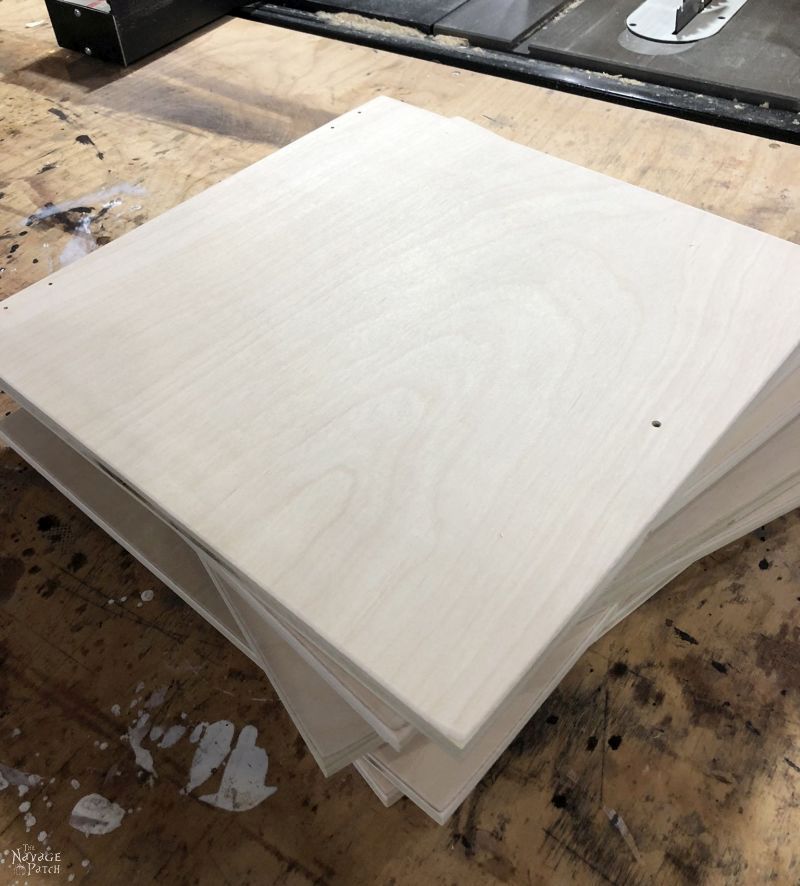
Anyway, I built 8 doors from 1/2 inch plywood. To make the hinge installation easier, I marked where the hinges would be.
I then pre-drilled the hinge holes and the hole for the door knob, and then I sanded all the edges and corners.
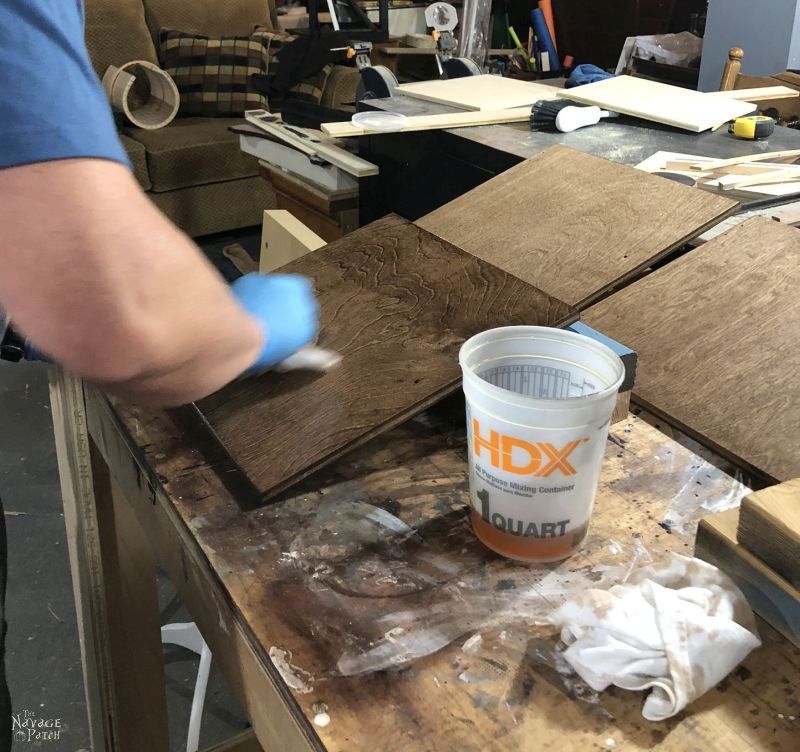
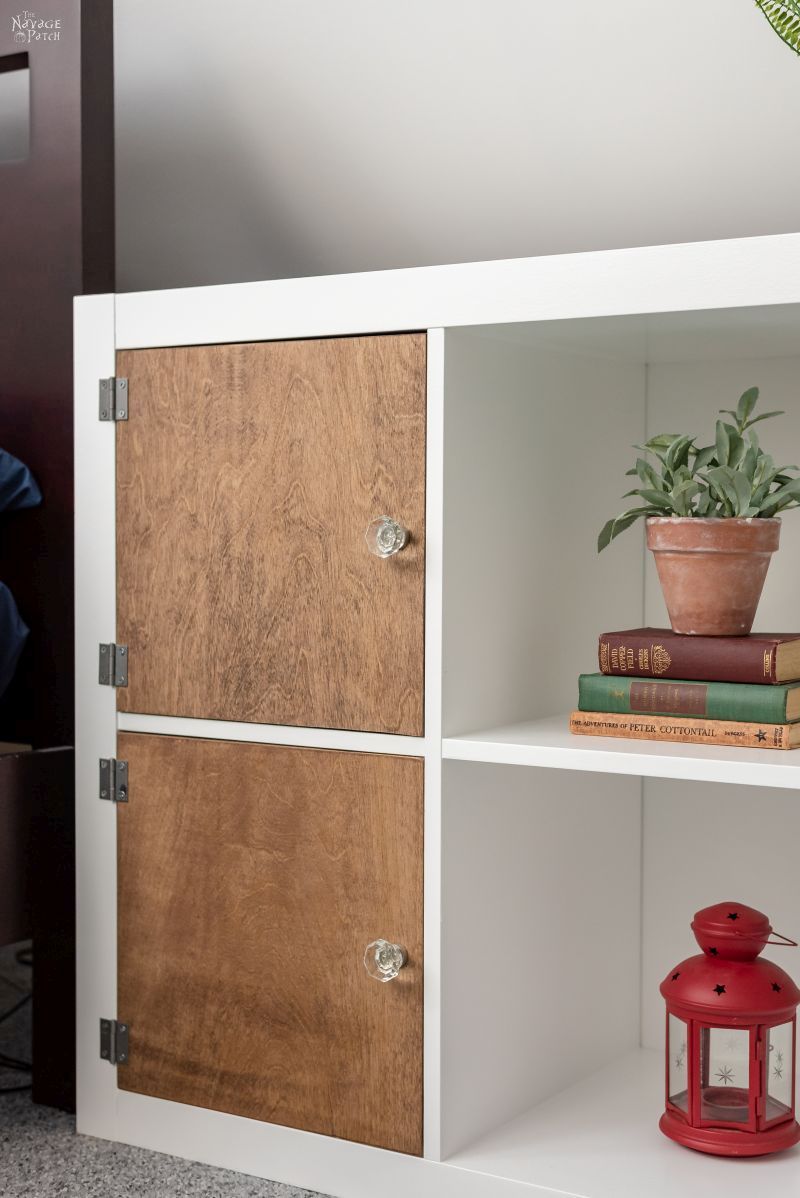
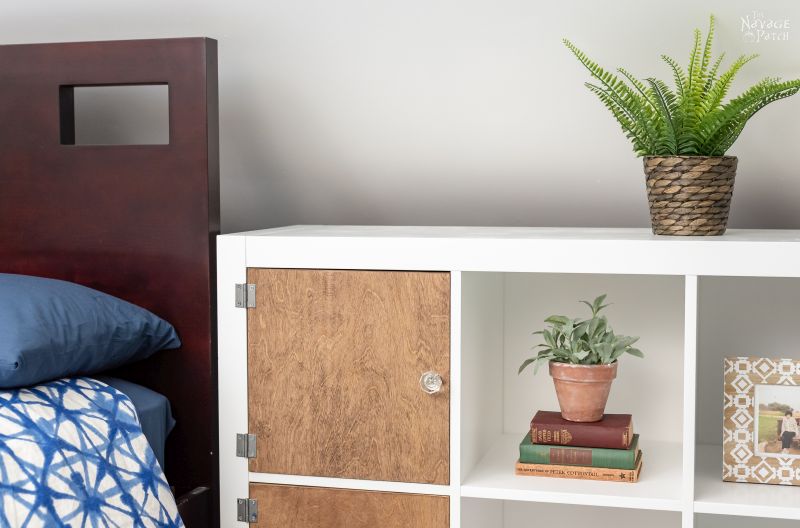
Keeping with the color scheme in Barish’s room, I stained the doors with Minwax Special Walnut and then sealed them with Greg’s Wonder Finish (equal parts polyurethane, mineral spirits and boiled linseed oil).
During this time, I also built the backing for my Kallax makeover. I measured the height and width of the Kallax and then cut two pieces of 1/8 inch hardboard an inch shorter than the height and width I’d measured. Then I primed and painted the smooth side. I forgot to take pics of the backing board, but I’m sure you get the drift.
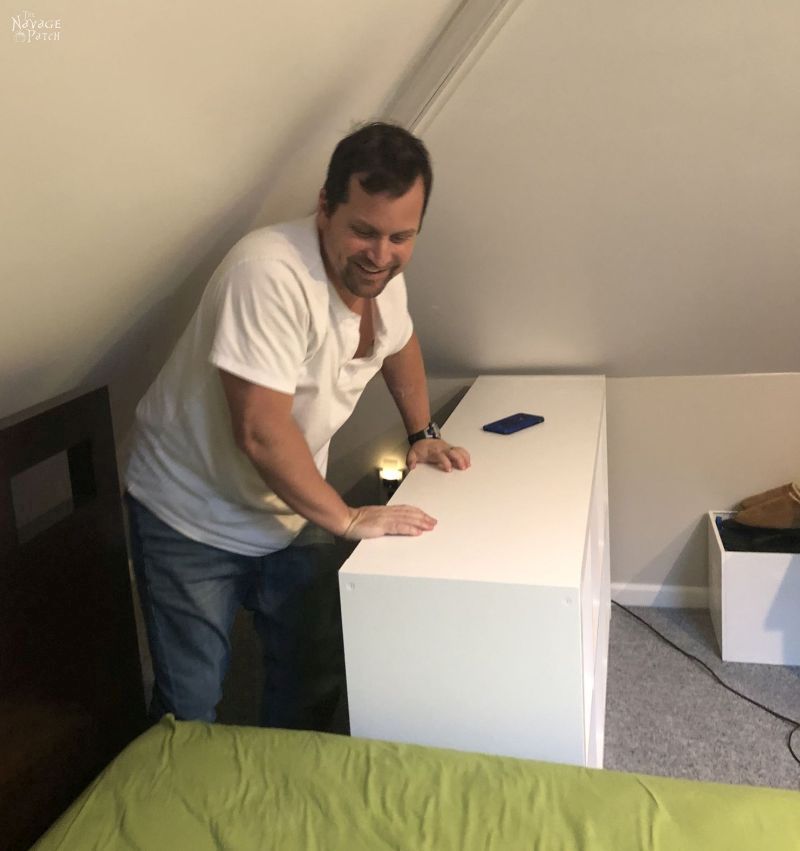
Before attaching the backing board or doors, Handan and I carried the Kallaxes from the basement up to Barish’s room on the second floor. I especially delayed final assembly until the pieces were in Barish’s room so they’d be easier to handle while climbing the stairs.
We put them in their places and then I crawled into the triangular void to attach the backing boards.

Handan just loves shooting of photos while I flop around like a catfish on hot asphalt.
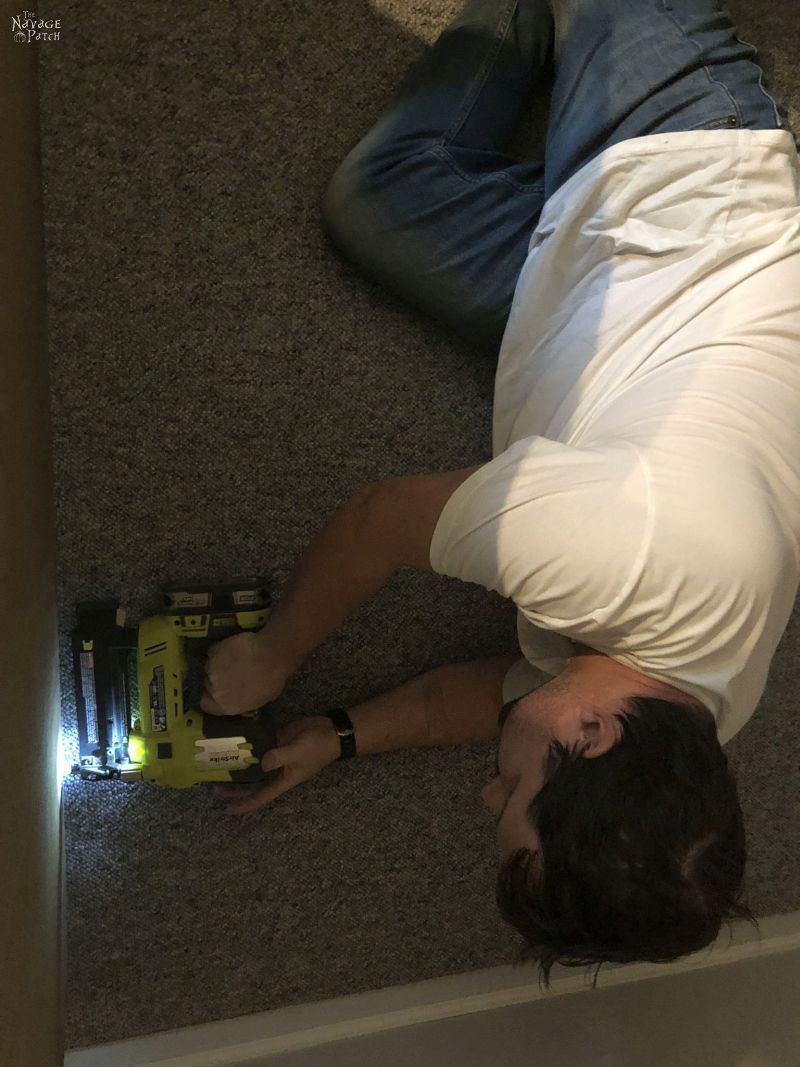
And of course, she also enjoys odd angles and weird closeups of my head.

Without the rest of the scene in frame, this pic looks a little out of context. Like, what am I looking at? What am I thinking about?? And what’s up with my hair? It looks like a brown Pac-Man is trying to eat my head in one ginormous bite!

As I labored away in the tight spaces behind Barish’s bed, Handan chortled and snapped her jolly pictures until I finished nailing in the two backing boards. It’s hard to keep a straight face when she’s up to her antics!
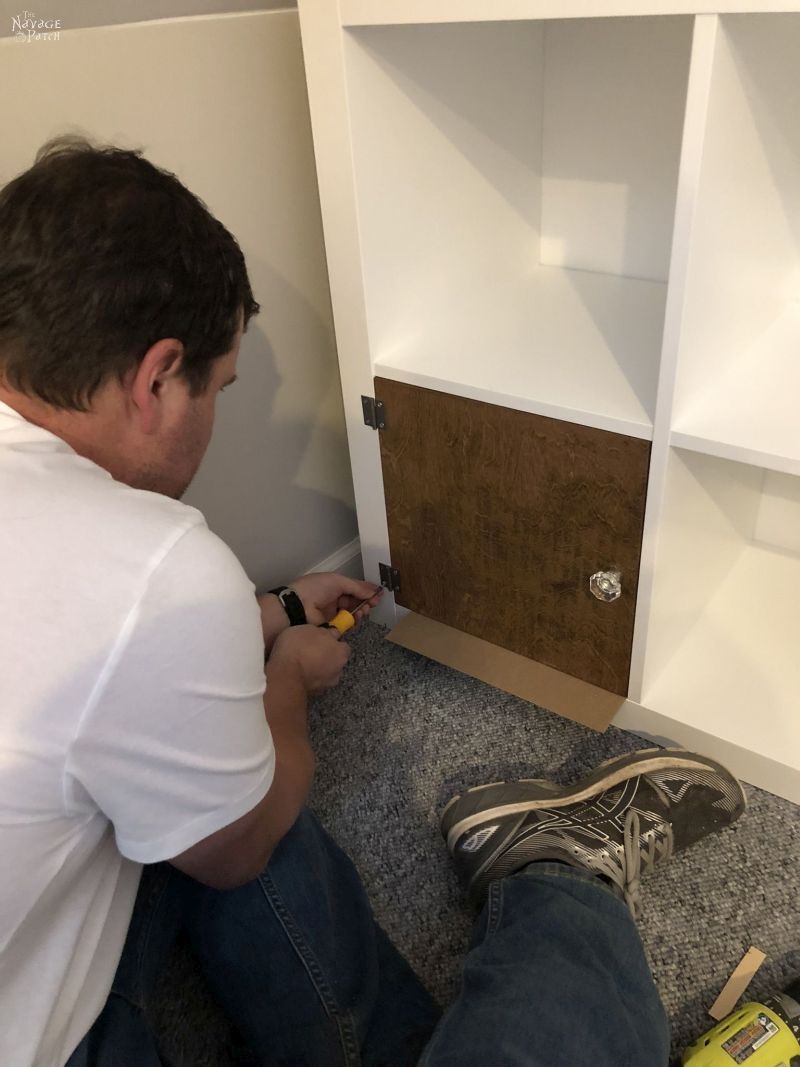
After extricating myself from the triangular void, I turned my attention to the doors and door knobs.
For the knobs, we used the same ones we had purchased for one of our other IKEA hacks.

I discovered my aforementioned error at this time.
None of the doors fit their spaces without a whole lot of wood-on-laminate rubbing.
Nobody wants that.
It was getting late, and I was tired and hungry, so I weighed my options.
- Hulk smash the Kallax and check myself into Shady Acres Rest Home.
- Blame it on the dogs and go fix myself a martini.
- Call The Boy over, hand him the screwdriver and congratulate him on his new inheritance.
- Take all the doors back to the basement and modify them until they fit.
Though options 1 and 2 had definite appeal, option 4 won out in the end.
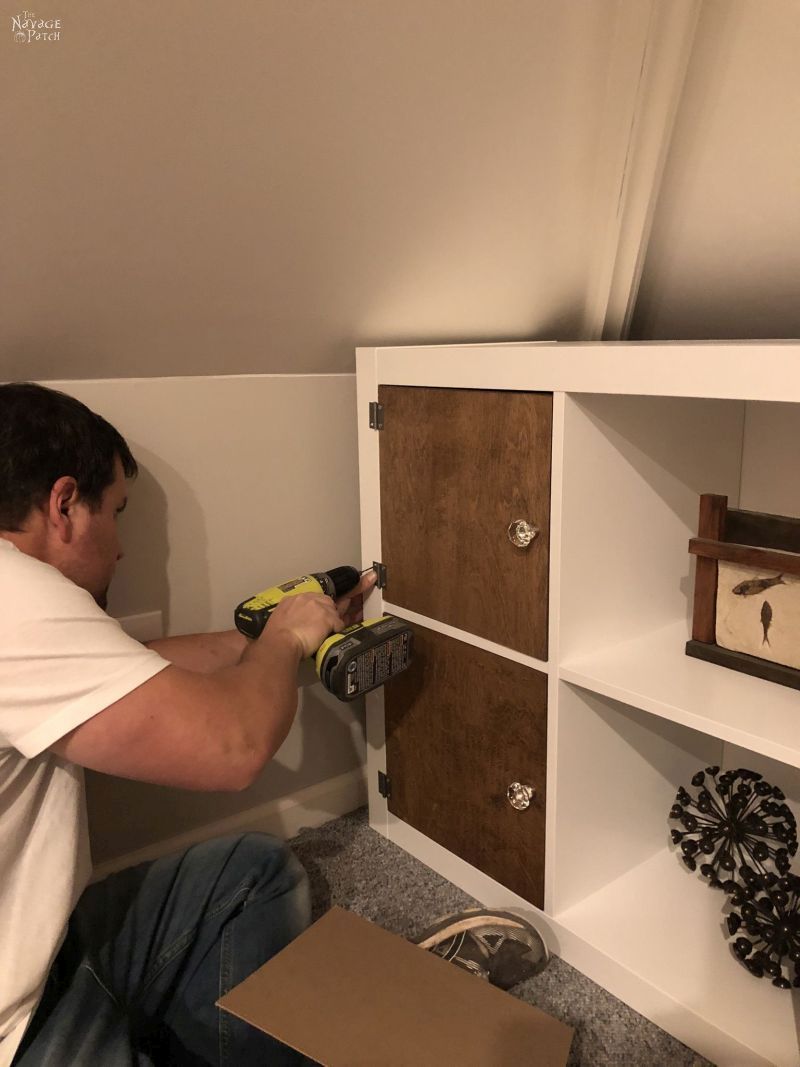
Fortunately, the doors only needed their heights to be trimmed, not their widths.
I ran the bottoms along my belt sander and took off about 1/8 inch.
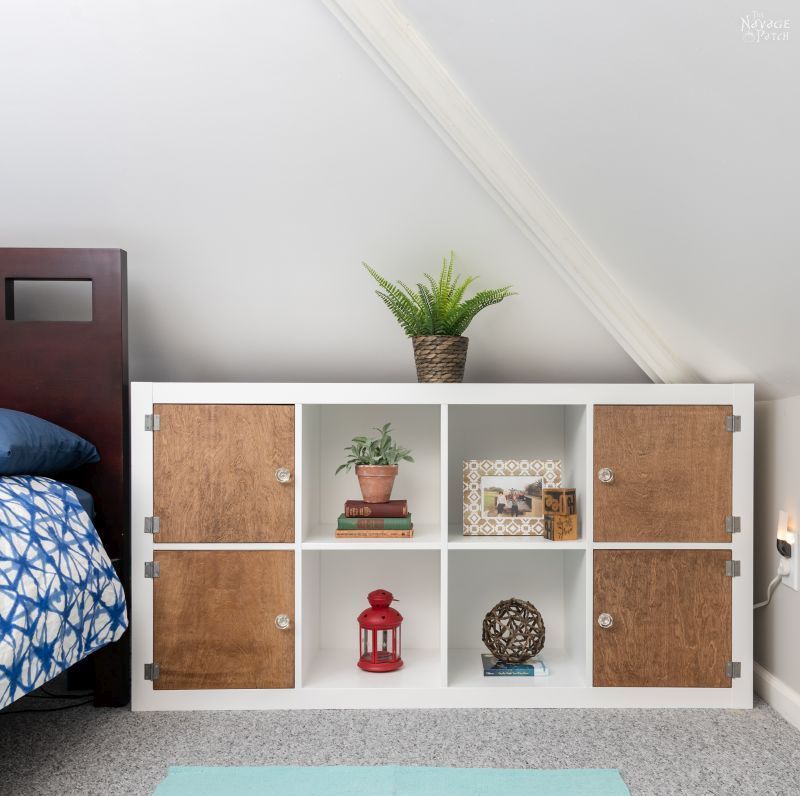
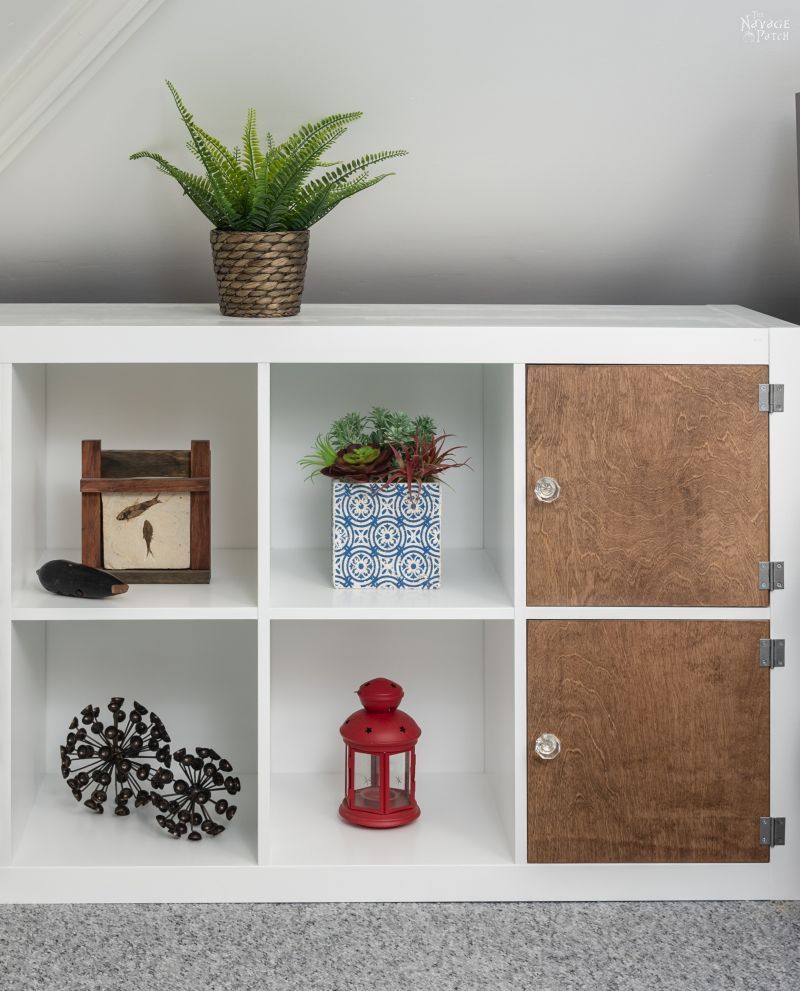
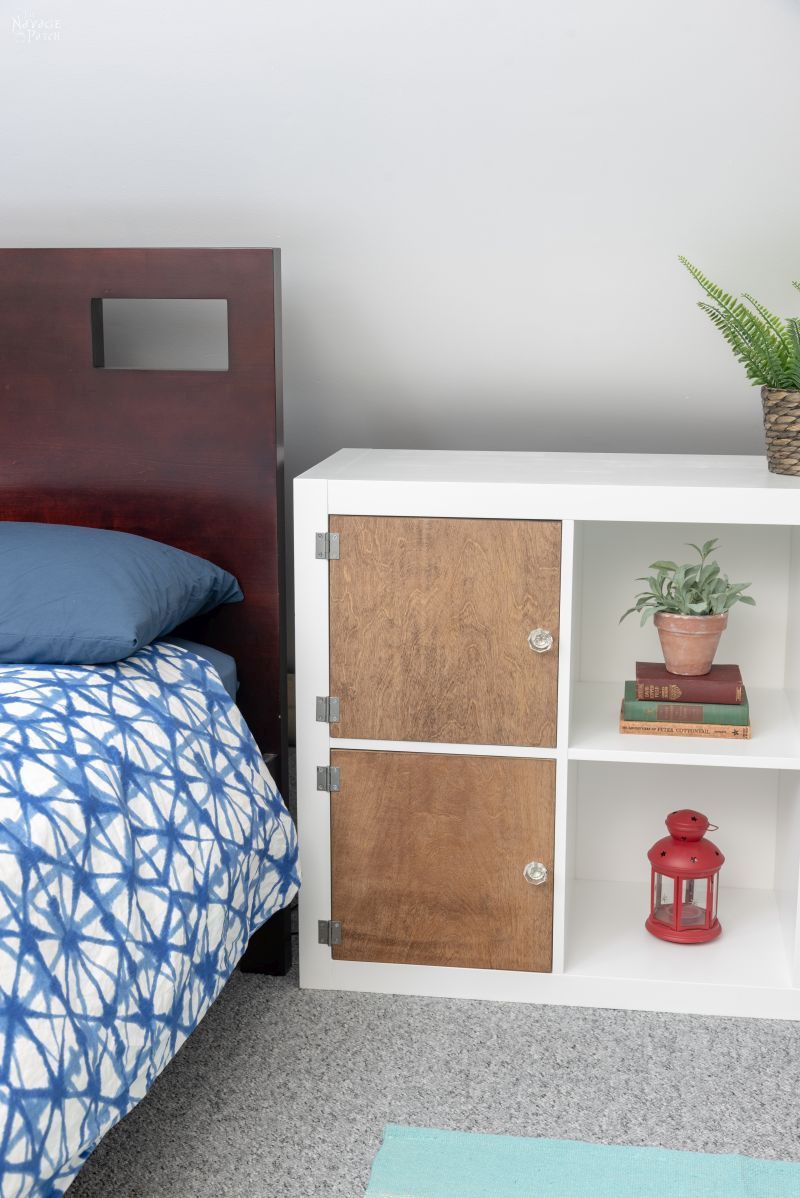
That did the trick, and I was able to install the doors with ease. The hinges are simple zinc-plated utility hinges that I spray painted with Rustoleum Antique Nickel.
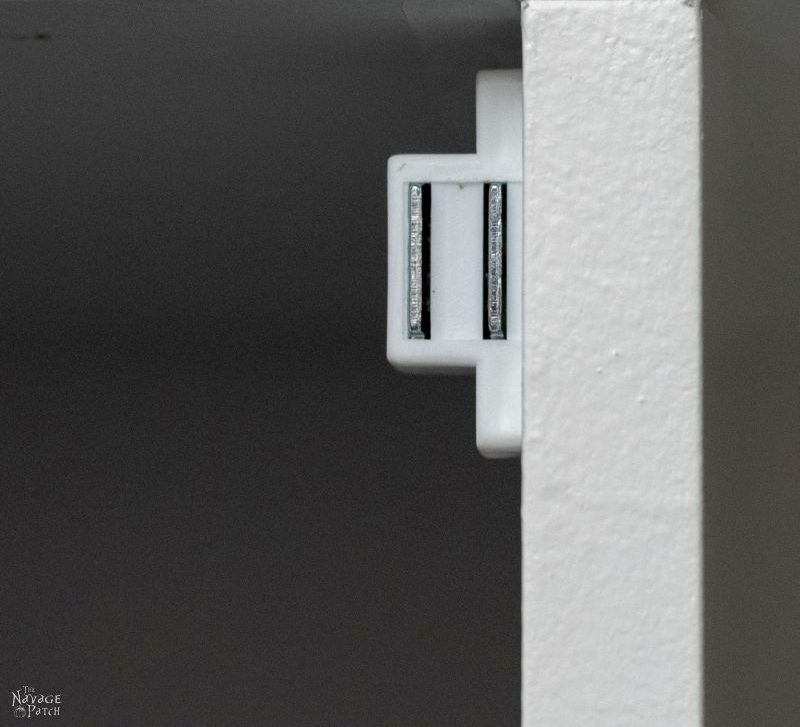
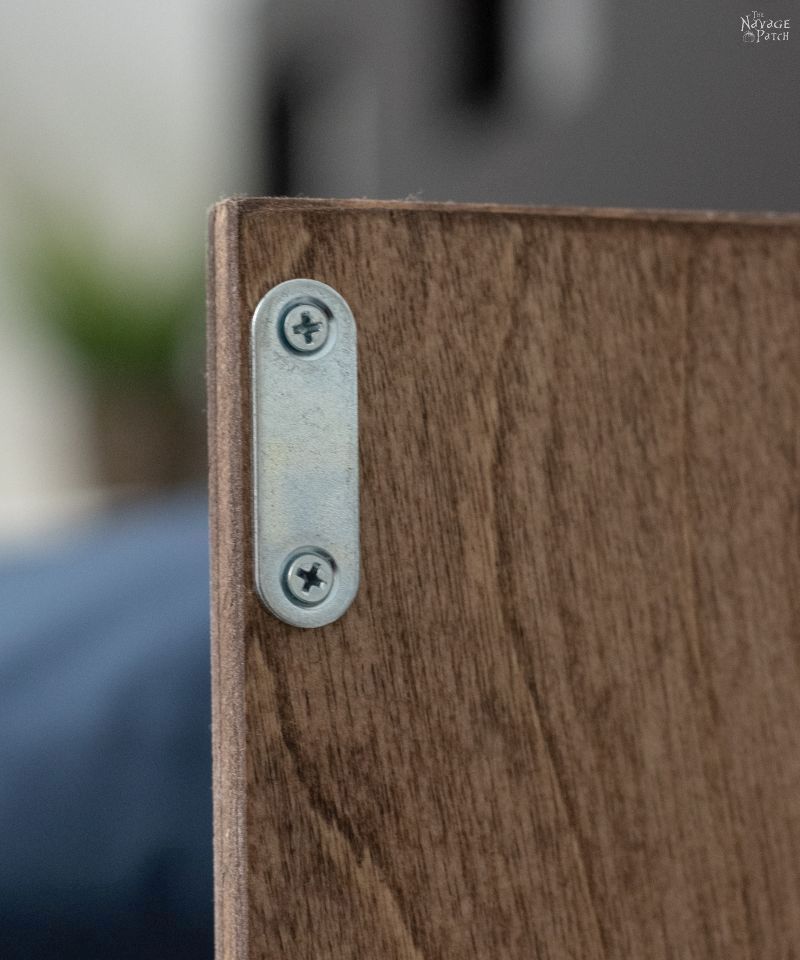
To keep the doors from flapping around like bird wings, I installed simple magnetic catches in each cubby and a metal catch plate on each door.
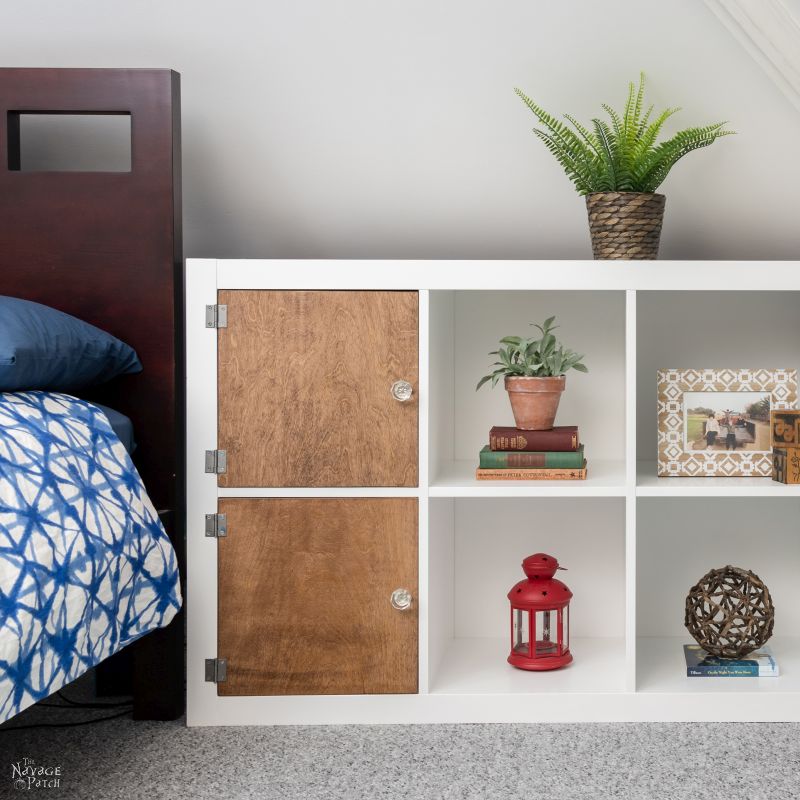
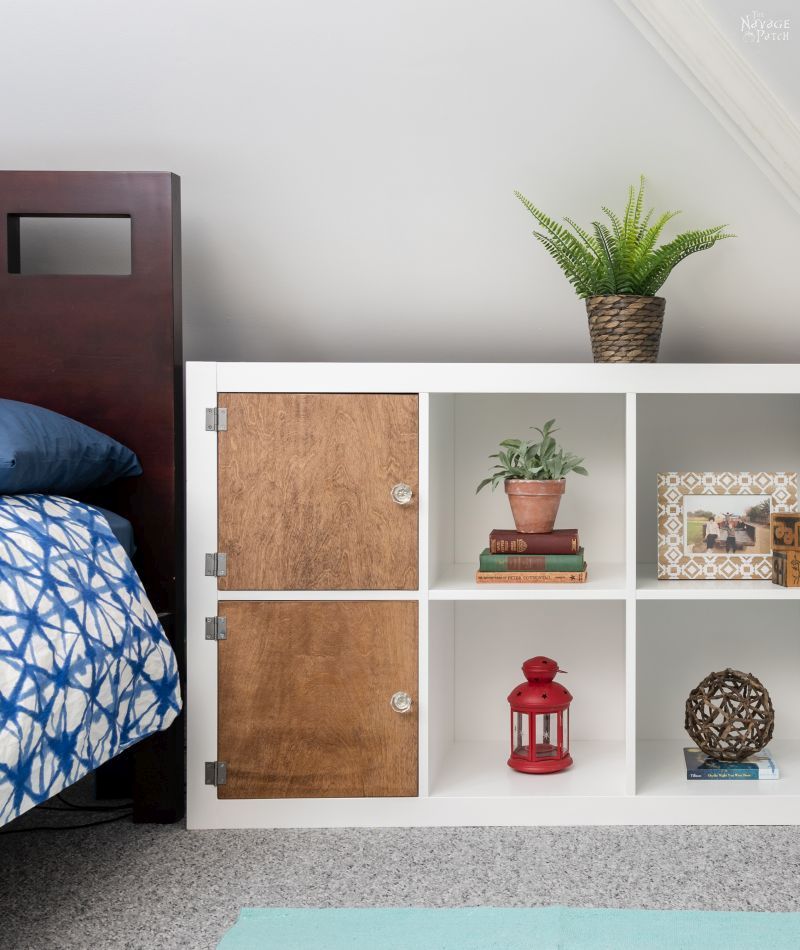
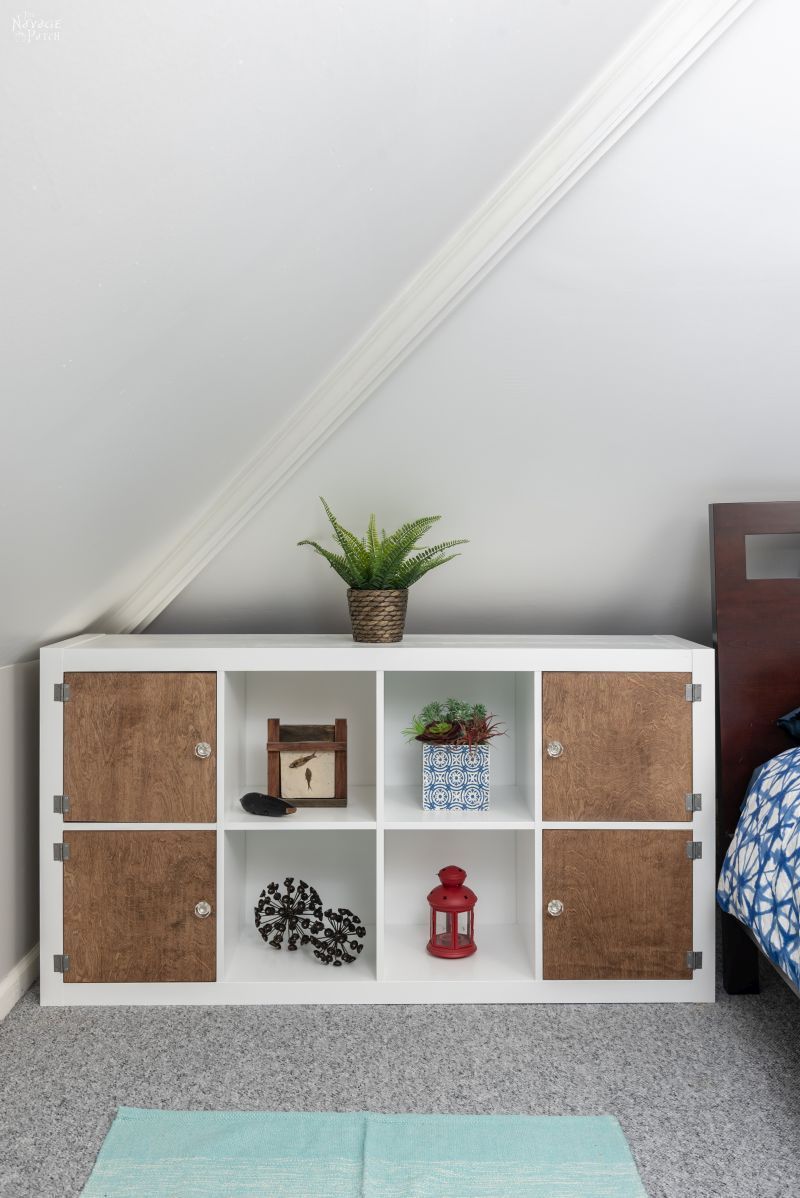
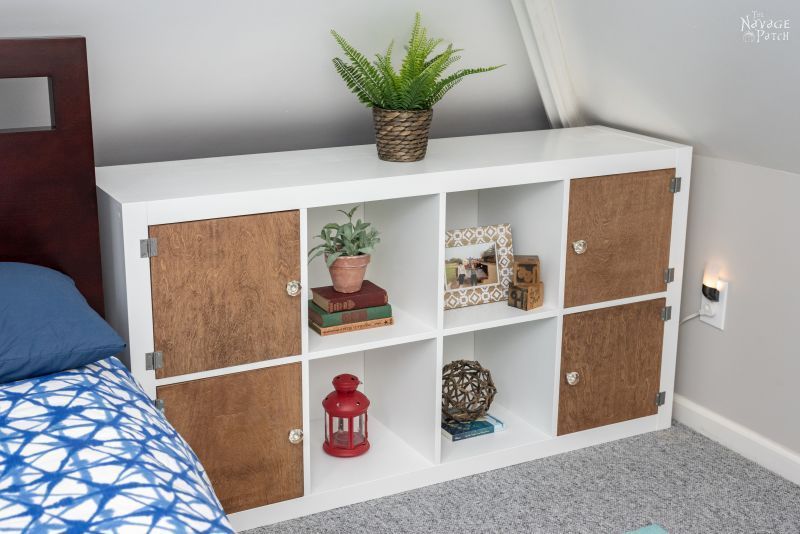
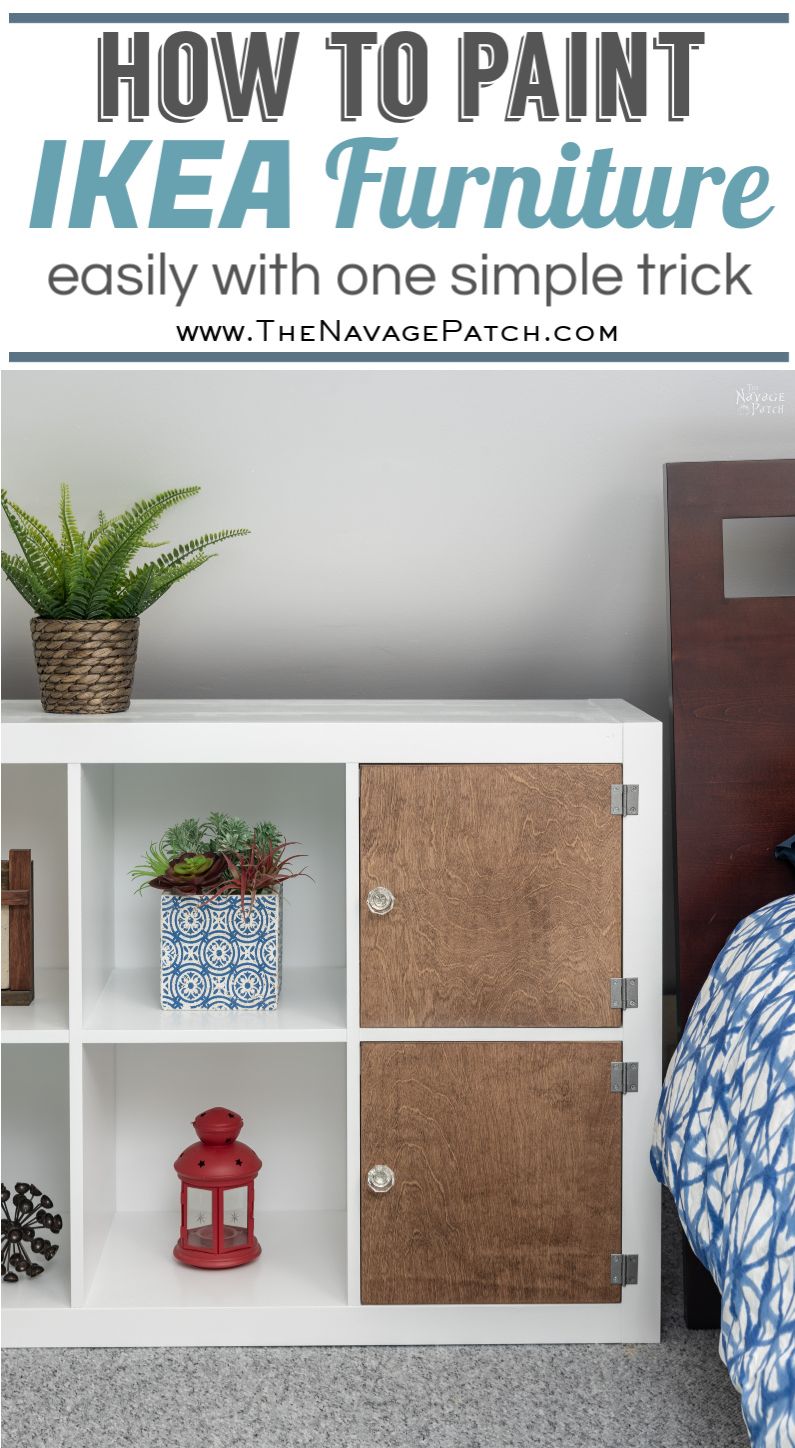
With the doors installed, our IKEA Kallax makeover was finished. We learned a lot about painting IKEA furniture with this project, and it’s knowledge we’ll carry forward and use for painting laminate furniture in the future. We no longer need to fear those smooth and sleek surfaces.
When it comes to painting, if it feels like a baby’s butt, you just gotta sand it and prime it!
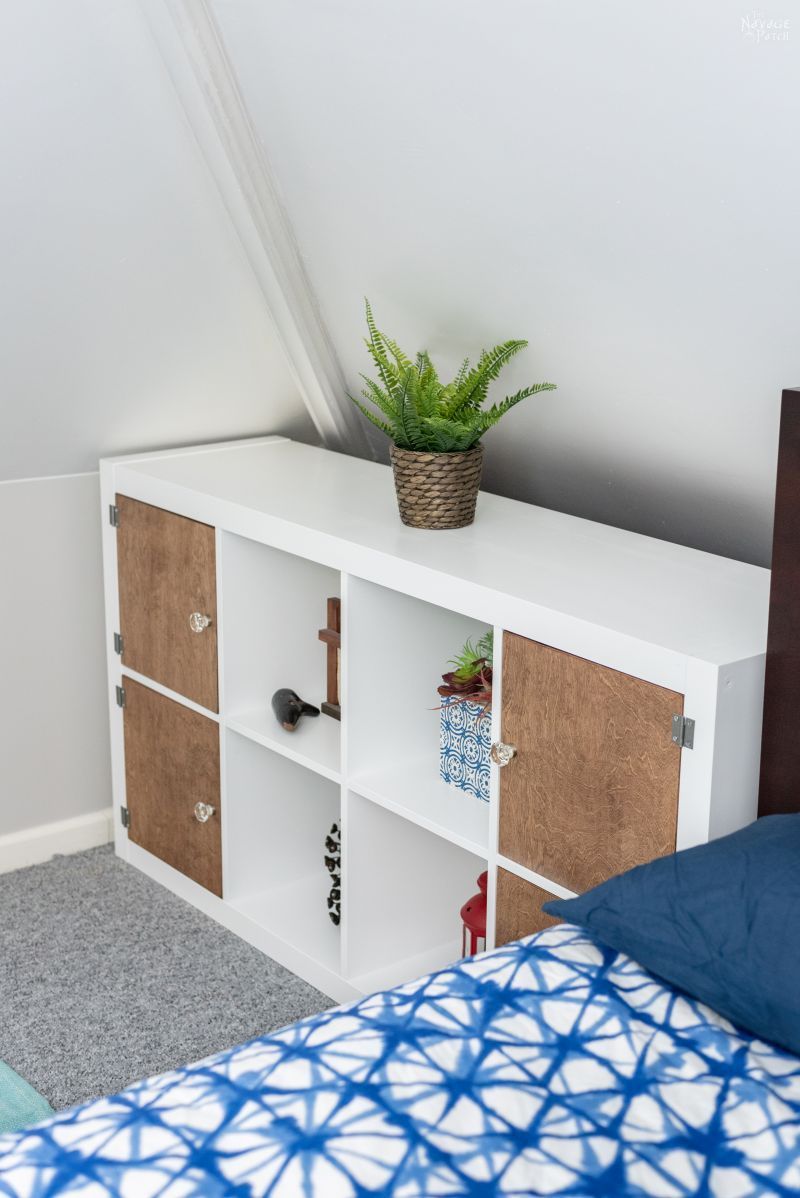
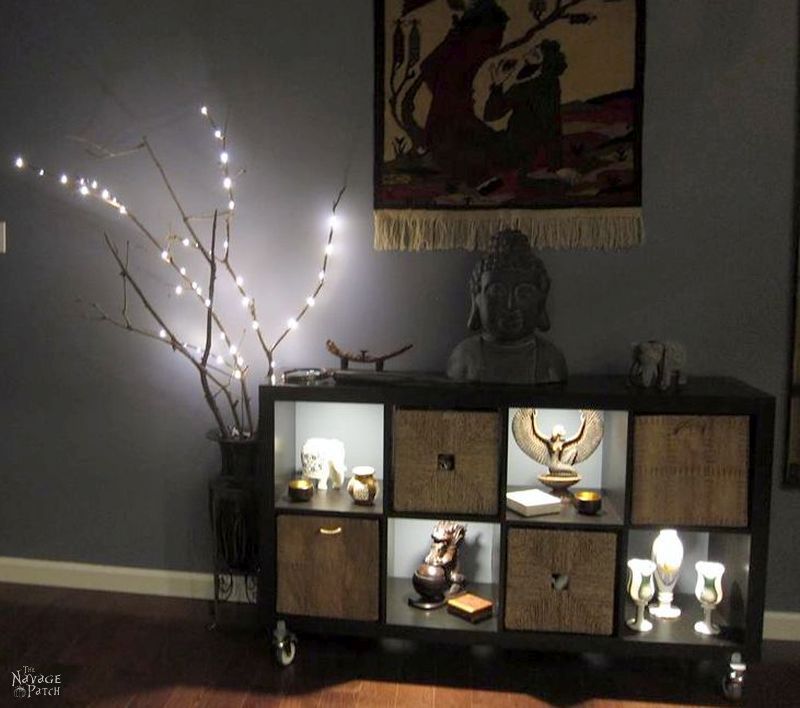
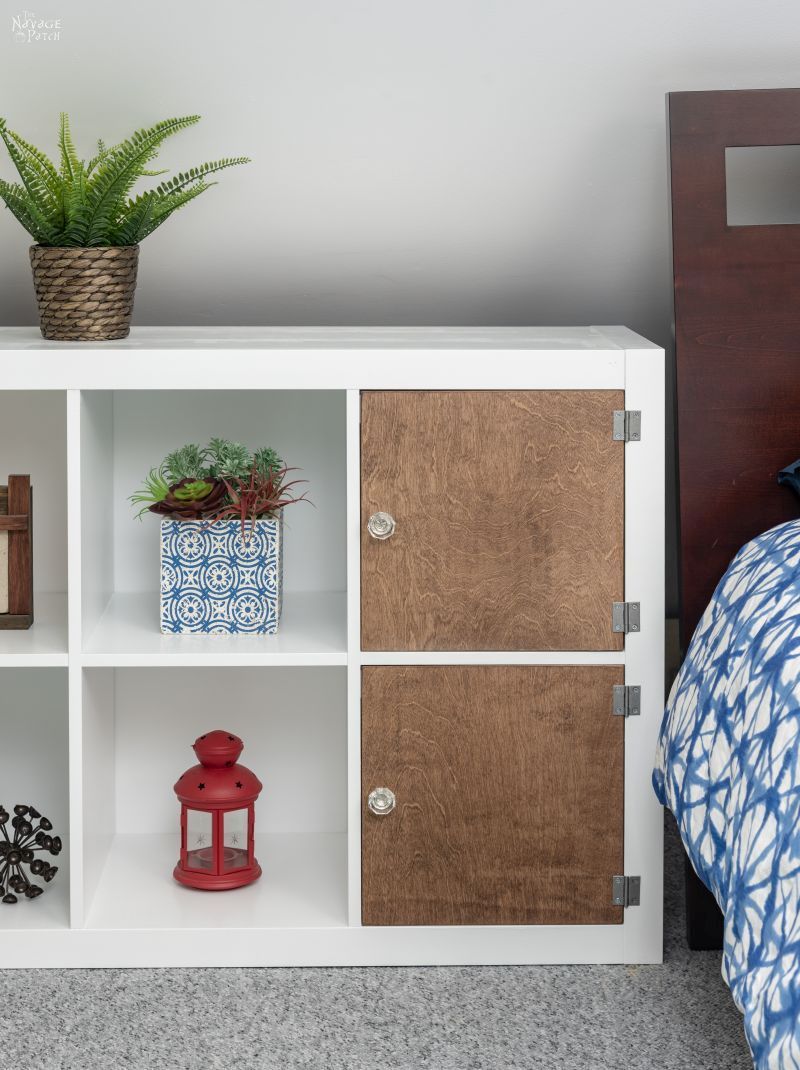
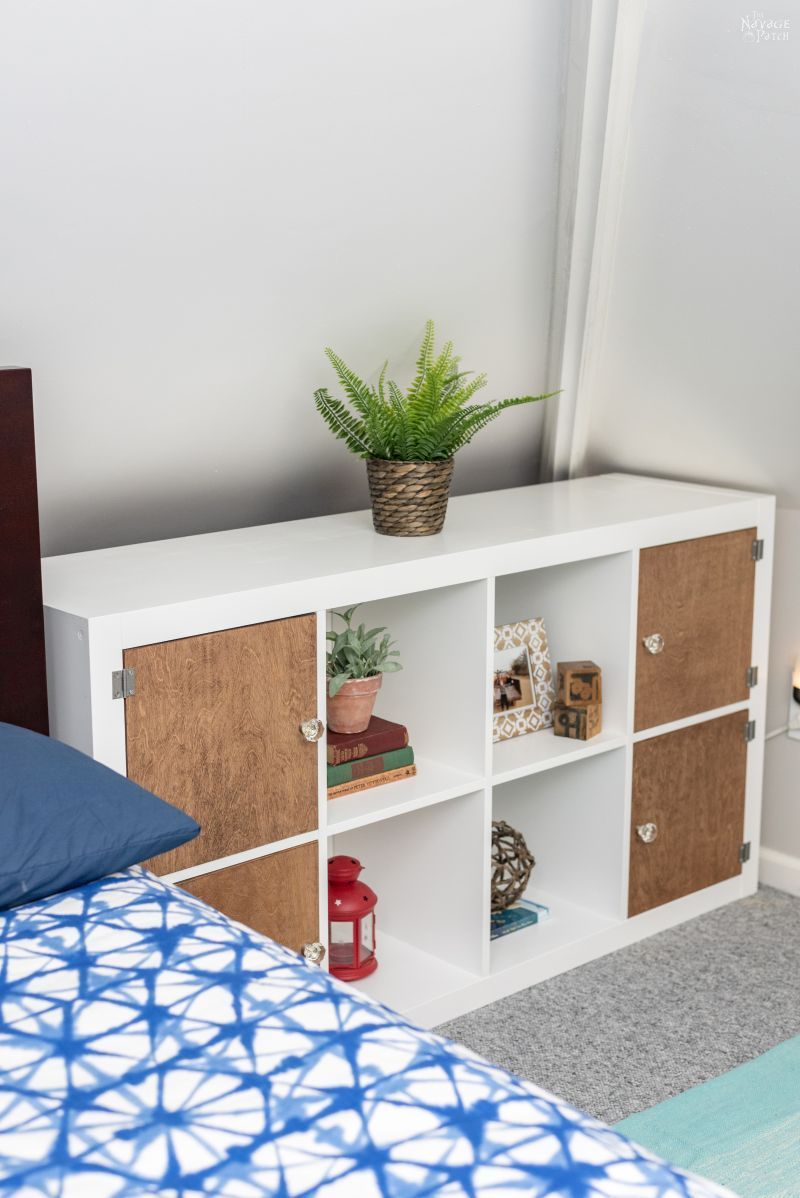
Now let’s a take a look at some of the beauty shots.
Here’s the wide-angle shot.
We love this pic of Barish and his best friend Jordan in India.
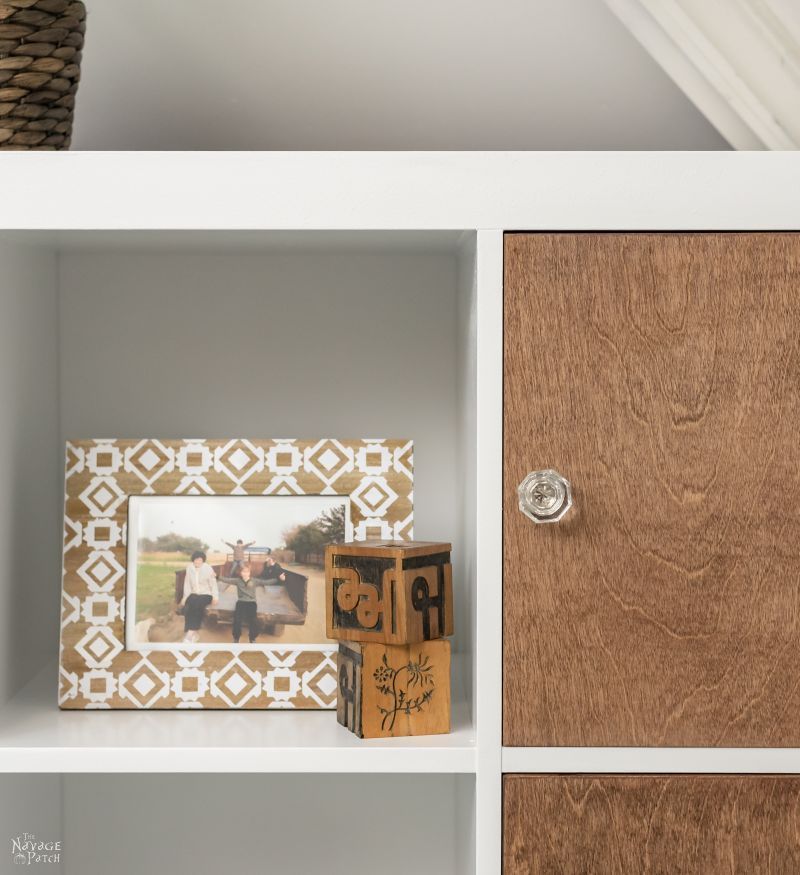
That’s my Boy back there. He’s the best! And Jordan was a true friend to him.


*****
Okay, now for the story of what we had originally intended.
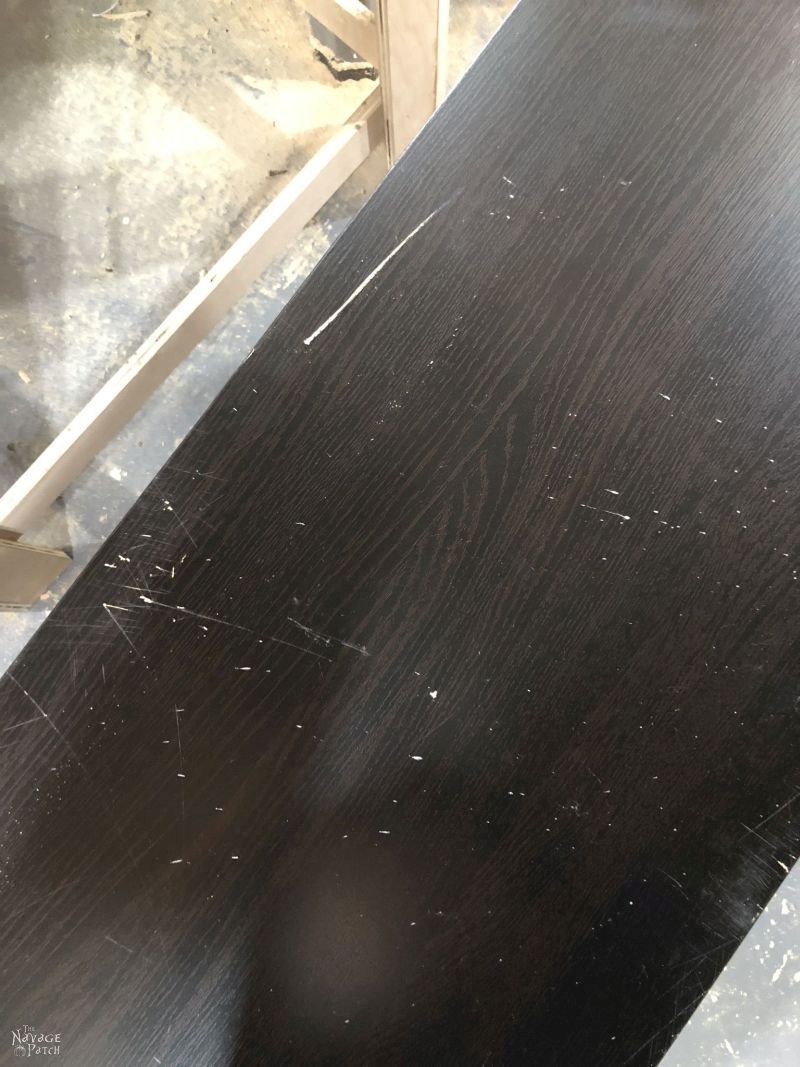
Handan had seen Pinterest pins and posts about some products that were supposed to magically heal scratches and dings in IKEA and other laminate furniture. Our Kallaxes were in pretty bad shape, so this was of great interest to us.
We ordered the Miller Wood Stain Scratch Fix Pen and the Ram-Pro Furniture Markers Touch-up Repair System and put them to the test.
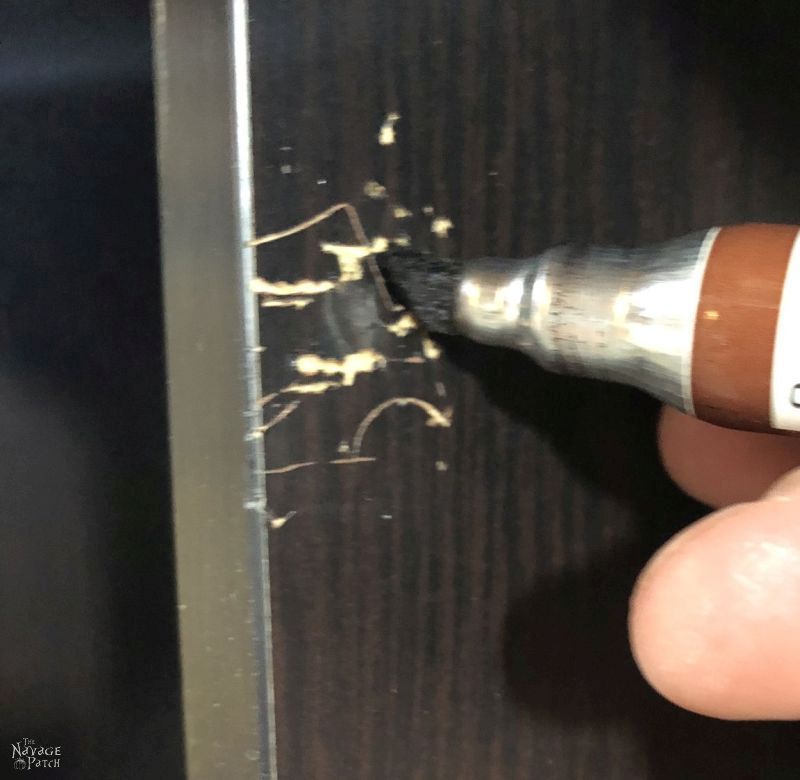
Here are just some of the scratches.
We started with the Miller pen on this scratch.

At first, it seemed like it was doing a pretty good job.

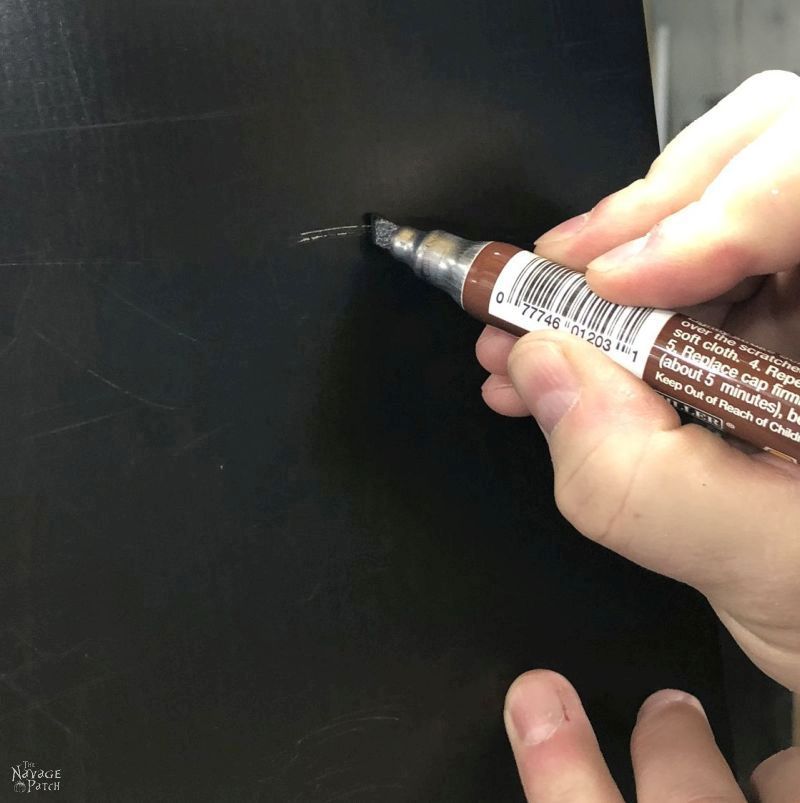
But what the photo doesn’t show is that at certain angles, it looks like you’ve drawn on your furniture with a black marker, which is exactly what we did.
We discovered that wiping the marker off immediately after application helps somewhat.
Overall, the Miller pen wasn’t terrible for scratches that had penetrated through the laminate but didn’t go too deep. Those types of scratches really stood out before, because they exposed the yellow wood (or wood composite) beneath. The marker merely colored the wood, making it less visible than before but not altogether invisible.
It did nothing for the light scratches on the left in the picture above.
The Ram-Pro came with markers and crayons. We tried the markers in the same manner that we did with the Miller.
It was a disaster. No matter what color we chose, the marker stuck out like the Pope at a biker convention.
And unlike the Miller pen, the Ram-Pro wouldn’t wipe off.
At all!
I had to break out the paint thinner to remove the marks it left.
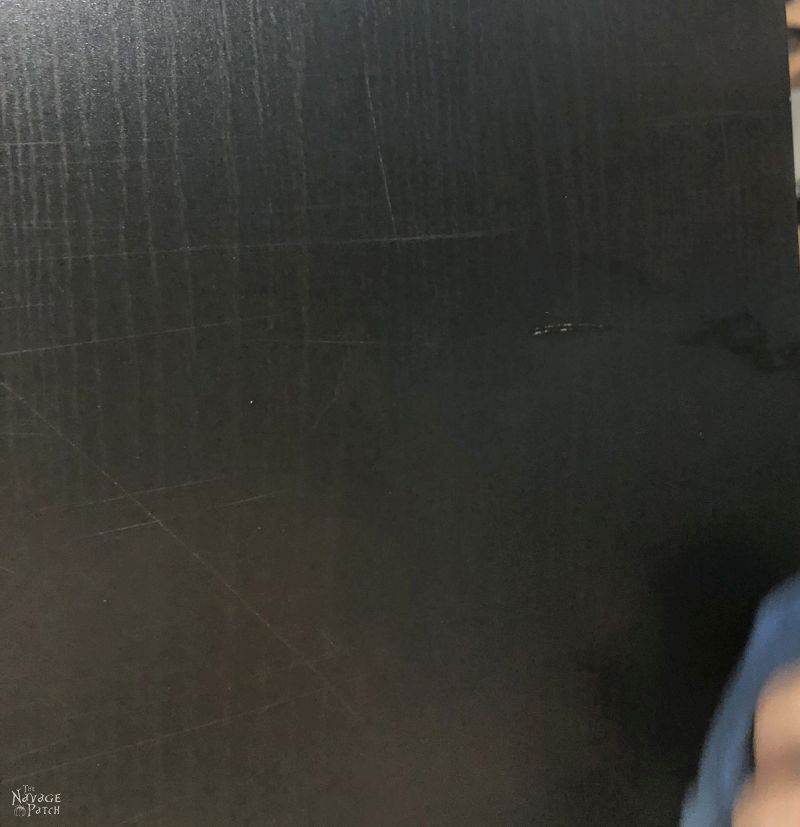
Next, I decided to try the crayons on one of the deeper holes.

I started with the Miller pen just to color the wood a bit.
Then I scribbled it with the crayon, basically filling the deep scratch with wax.
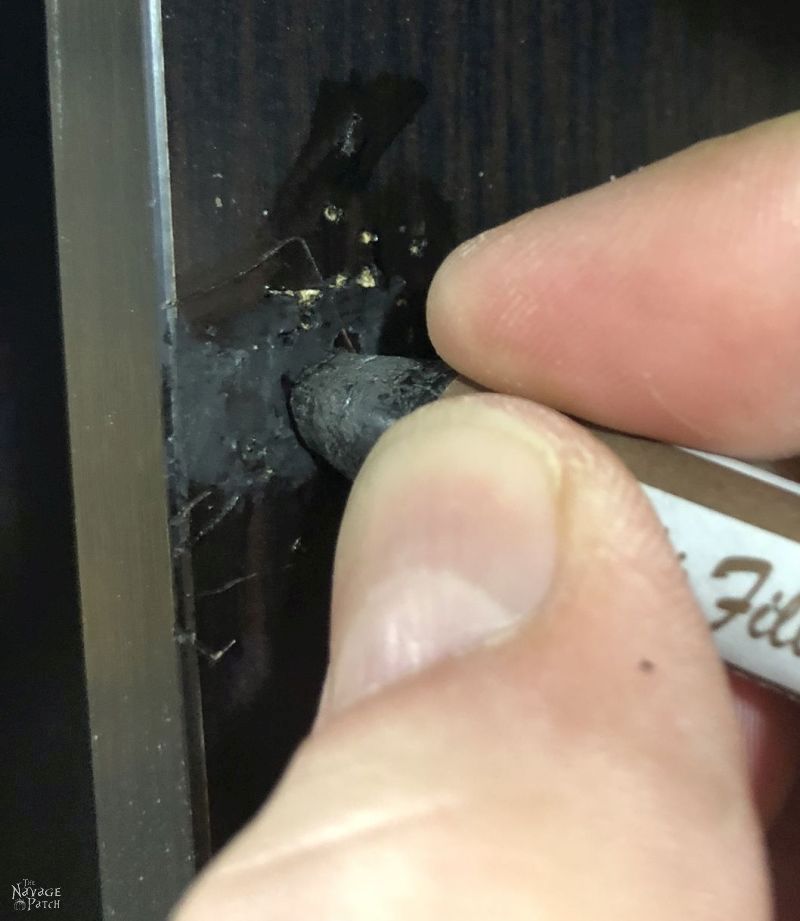
Until it looked like this.
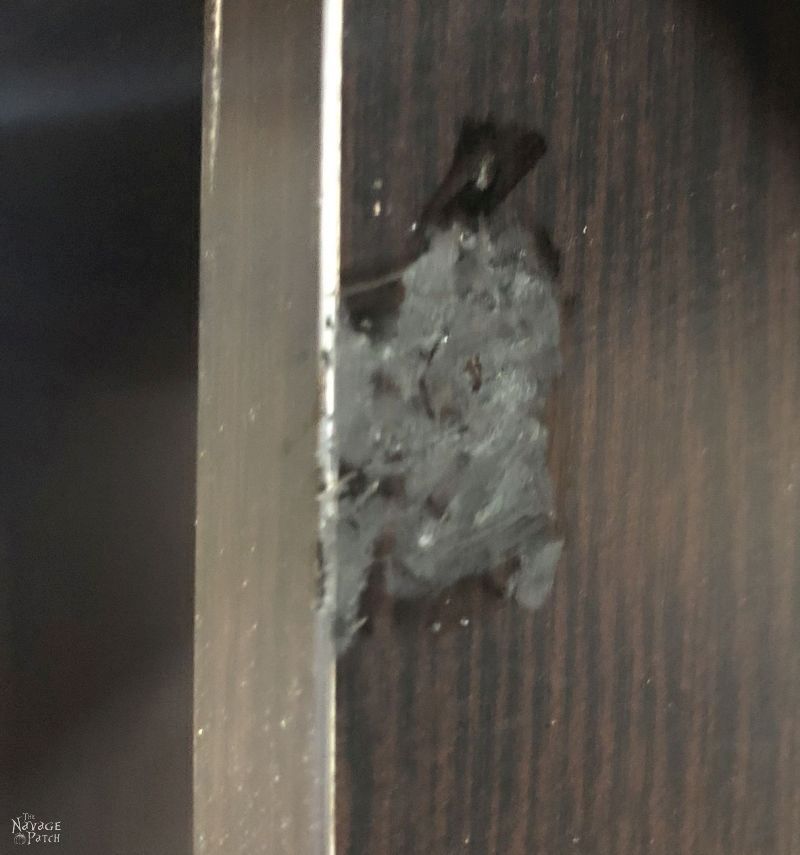
Well, obviously that wouldn’t do, so I rubbed it with a rag, and then rubbed it a bit with a rag soaked in paint thinner.
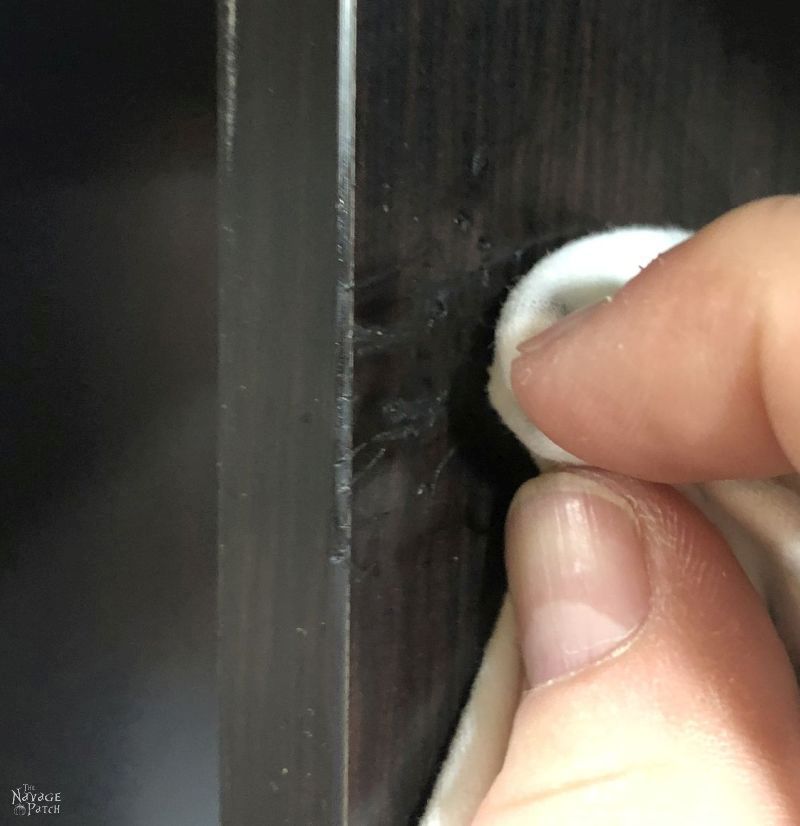
Not too bad, but certainly not magically fixed or erased. Just better than it was before.
Handan and I spent a long time trying to repair all the dents, divots and scratches in the two Kallaxes, but in the end, we gave up.
While the crayon did an okay job of filling some dents and the Miller pen did reasonably well on certain scratches, overall, they didn’t make the pieces of furniture look good again.
At best, they looked marginally better, and that wasn’t nearly good enough for Barish’s room after all the effort we’d already put forth.
I’m sorry for not having more pictures of how bad the fixes were, but I wasn’t actually planning on including this section after we decided to paint them.
But I figured I may as well share my thoughts on those products. Other people seem to love them, so everyone has their own standard for what constitutes an acceptable piece of furniture I guess! And maybe they’re great products if you’re just trying to conceal a single scratch. Unfortunately, ours were just too scratched-up to be saved.
Have you tried any of these furniture repair products? Did they work?
Have you tried painting IKEA furniture? Have you tried painting laminate furniture? How did it go?
Please let us know in the comments – we’d love to hear from you!
1 Swedish for “piece of crap”
We love it when you share our posts on Facebook and Pinterest!
WowZeers! Super Cool Guys. Great job filling that awkward space! Came out amazing!
Thanks, Shaun!
You did it again! Wish I had one of you. Great job!
Thank you so much, Linda! I wish I had an extra of me! 😀
I painted several pieces of my Ikea furniture. What a challenge that was! I found sanding, using krud cutter, rinsing well then painting with a homemade Gesso worked to create a good foundation to paint. My objection to BIN primer is the horrible smell that seems to linger for days in whichever space you’ve used it in. I paint in an enclosed patio so it’s just not a viable option.
You’re right about the smell, Zoe – it is powerful stuff! In an enclosed space, a respirator is a must!
Looking good. That triangular wall is odd, but you can turn it into a focal point and make the most of it as a feature. I bet Handan can come up with some cool wall decor to make it really pop.
Hmmmmm…I hadn’t thought of that, Laurie. That’s a good idea. Take the horrible part of the room and make it shine! I’m going to toss this in Handan’s corner and see what she comes up with! Thank you! 🙂
I enjoyed this post! My husband has this aversion to IKEA for some reason. I still have some of their pieces around and will hang on to them. They have been re-purposed numerous times also.
Thank you, Clovia! Your husband’s aversion probably stems from having to build all those pieces, lol! 😀
Great job, looks fresh and fabulous!! Thank you for sharing the secret!
So with this new look, BIN must truly stand for: Better Ikea Now. 🙂
Thank you, Gwen! Hey, that is a great one! Better IKEA now – I love it! 🙂
Don’t want to disappoint, but this is one job I will not even begin to attempt! However, I never laughed so much while reading a post as I have this one…my tears are still making it difficult to type. And an additional “thanks” to Handan for the photos. Greg, it looked like you were attempting a prison break in one of them. Oh my, still laughing. BTW, a great result for your above-and-beyond efforts!
I’m always attempting a prison break around here. It’s called “avoiding the project.” 😀
Excellent use of that space Greg. I have a different favorite primer. It is STIX and so far has stuck to anything I have used it on and has been a great surface to accept paint. INSL-X SXA110099-04 EMW1421981 is what I look for. I get mine from my Benjamin Moore dealer.
Good tip, Chris – I hadn’t heard of STIX until now. I’m going to check it out. Exceptional primers are a rare find!
Do you use this in lieu of sanding or is sanding still a must with this Primer?
I ask because I hate sanding OMG!
Honest truth, I’ve never seen IKEA furniture painted that well before. It looks like it was always white. That same awesome polished laminate look. Terrific job! I actually have some laminate furniture I need to paint in the future so I’m keeping this in mind. I especially love the doors and the hinges. And the glass knobs definitely brings it all together.
I recently bought a white paint pen to fix a few scratches on our lounge furniture. You can definitely see that it’s been painted/marked over. Even on the white. I wouldn’t use it for any prominent scratches or repair jobs because I’m picky like that (and so is my Mom and she’s demand I go fix it!) I used it on two picture frames I had just to fill in the gaps but then I sprayed the whole thing so I couldn’t see it in the end.
I wish there was some sort of laminate repair that worked, though. I have two small cupboards and both have a chip out of the top that I really want to fix.
Oh, jeez, Jay, how the heck did I miss this comment?? Well, I’m only a year and two months late, so not bad for me! Anyway thanks for your compliment, and I hope you’re well!
Babes, how did you light it when it was in the dining room?
It looks great painted too.
LOL, we lit it with IKEA LED light bars 🙂
I miss seeing your incredible projects at Talk of the Town. I hope you’ll link up tomorrow at 6 pm central time!
Hi Angie! Handan will link up tomorrow! 🙂
They look beautiful for sure. I love, no, I mean I REALLY LOVE your antics as you tell the ‘story!!’ Im betting Handan could bling up that wall in a ‘manly way.’
Thank you, Sherry! She sure did! 🙂
little late to the game, but i’m glad i did some research before i started painting! my brother helped me move 700 miles away and insisted he knew how to pack furniture. he didn’t. i’m looking forward to finally painting over all of the dings and scuffs. :+)
Oh good! Glad you found us! Good luck with your painting!
Greg, I would like to ask you is the Aura paint scratch resistant? I am about to paint Hemnes chest of drawers. Benjamin Moore schop has recommended Scuff-X by Benjamin Moore. And now I am a little bit confused. Thank you
Hi Natasza, I’ve used Aura paint in the past with good results. It will certainly be more durable than Behr or any of the bargain brands. Just how scratch resistant depends on what you’re scratching it with, of course! I don’t know about Scuff-X, so I can’t comment on that. Good luck with your chest!
Natasza, I found this video which compares Aura to Scuff-x. I’m thinking it could be helpful in your decision:
Click here to see the Aura vs Scuff-X video
Love how they came out. I’m constantly on the lookout for articles about painting or hacking Ikea furniture. Although, one question. Why not take apart and then sand and paint? Thanks again for great information.
Thank you, Marilyn! There’s no reason you couldn’t take the piece apart to sand and paint – it would certainly make the sanding easier – but with user-assembled furniture like IKEA, I prefer to build it once and leave it be. I’m not a big fan of building furniture, so the first time was enough for me, lol! 🙂
I’m kind of confused. Just about the last bit – did you fill in the scratches before you painted with the Zinsser, or was that not necessary once you painted and sanded the piece? Looks GREAT, BTW!
There was only one area with scratches deep enough to fill, and I used a little wood filler on that before painting. The other scratches were hidden by sanding/priming/painting.
Hi there! Thanks for these tips….other than the steps of sanding, priming, and painting, did you use a sealer at all? I have read some mixed things about adding that at the end for items that are high frequency use like shelves/drawers etc…do you find it necessary to keep the paint from chipping? Thanks!
Hi Amber, I didn’t use a sealer. With a high-quality paint like Benjamin Moore and several thin coats, I didn’t see the need. But it’s personal preference. Some people swear that all high-traffic painted areas must be sealed. In general, I don’t think it’s worth the effort. But if you do seal, and if your piece is white, be sure to find a sealer that won’t yellow over time.
I usually just skim the story-time bits to find what I’m actually looking for in blog/Pinterest posts. Today I found myself truly entertained and read the whole thing. Cheers, you’re a fantastic writer sir.
Thank you so much, Melissa! I strive to entertain as well as educate! 🙂
I am considering Kallax for something because its the right dimensions, and cheap, but I want something besides the standard colors. Good tutorial, and I understand the rationale for repurposing something you already had. But me personally, I would go through the multi-step trouble of sanding, priming, and painting Kallax 3 coats of white when you can just go pick up a couple of units and have them put together in about 1/100th of the time.
Bill, I normally would be right there with you! But wives are good for reining in that type of behavior, lol! This is a great way to keep one going for those on a budget. Thanks for commenting!
Only recently been dipping my toe into projects like this, and I’m just looking to paint my Kallax before it’s assembled. I don’t own a sander like I see in your photos, would this project be possible through hand sanding with fine sandpaper, followed by shellac primer, paint, and done?
It sure is possible, Ollie. The only difference would be the time investment. Good luck!
Hi Greg,
I’m glad I found this post before I start painting my storage cubes! I’m new painting projects and I bought Zinsser 1-2-3 before I found your post. Can I still use that instead of the shellac one? Would the water-based primer have trouble sticking to the surface even if I sand it?
Hi Van, I highly recommend buying the Zinsser BIN. The shellac-based primer sticks way better than 123, and it’s the key to making paint stick on such smooth surfaces. With the BIN, you only need to sand a little. Though I haven’t tried it, I would imagine you’d have to do a lot more sanding to get to the same adhesion level with 123. Good luck to you!
Great tutorial and I am going to put it good use in the spring.
I purchased 5 units back when they only had white. I hate white furniture but was on firm budget for my studio/sewing room. I also purchased a white desk top and their horses.
Did I mention I hate white. Hate it!
So in the spring they will be back and I want to purchase some of their door/drawers that slide in.
You did a fantastic job but I have one question and it might only be my opinion. Why did you chose to use hinges that are screwed into the front and show rather than the ones that don’t? With them on the outside your eye is drawn to that.
Lucky son to have suck a unique shaped room. I would love it. Hope he does something above the bed.
Thank you, Sandra! I chose those hinges for simplicity’s sake. They are far easier to install and cheaper than tradition cabinet hinges. We’ve since moved from that house, so he’s out of that room and into a new one!
Wow the patients of a saint. Good reference for any future laminate project.
However let’s get down to the real point of my comment, those doors ?. I just love them, what a difference they make to the unit. Both my daughter and I have Kallax units all over the place in our houses – oh my lovely, wonderful other half is going to be so busy now he’s retired.
Thank you from me, not so much from him (I will warn him of the size difference) ☺️
LOL, tell your husband “I’m sorry” for me!
Hi! Using this guide to paint our ikea hemnes dresser!
Did you find the finishing surface of it to be sticky/tacky at all when putting objects on it (after days of drying of course)?? Some paints I’ve used in the past have felt “sticky” with objects placed on them. Thanks in advance!
Hi Brianna, no, BUT – remember it takes latex paint about 30 days to fully cure, so you want to be careful when placing anything heavy or hard on it before a month has passed. I do know the stickiness you’re talking about – I’ve encountered it with certain paints, but always when trying to place objects on it after only a few days (Sherwin-Williams in particular – I love their paint, but it does need time to cure).
Unreadable! Get to the point. Stop burying information in with your unfunny writing.
I wish I could convey in writing the sound a pissy cat makes, lol! 😂😂😂
Can I use a spray polyurethane to seal or do I have to paint this on? Is there one you recommend? Thanks!
Hi Steph, I don’t normally use a poly with painted interior furniture. Perhaps a clear wax?