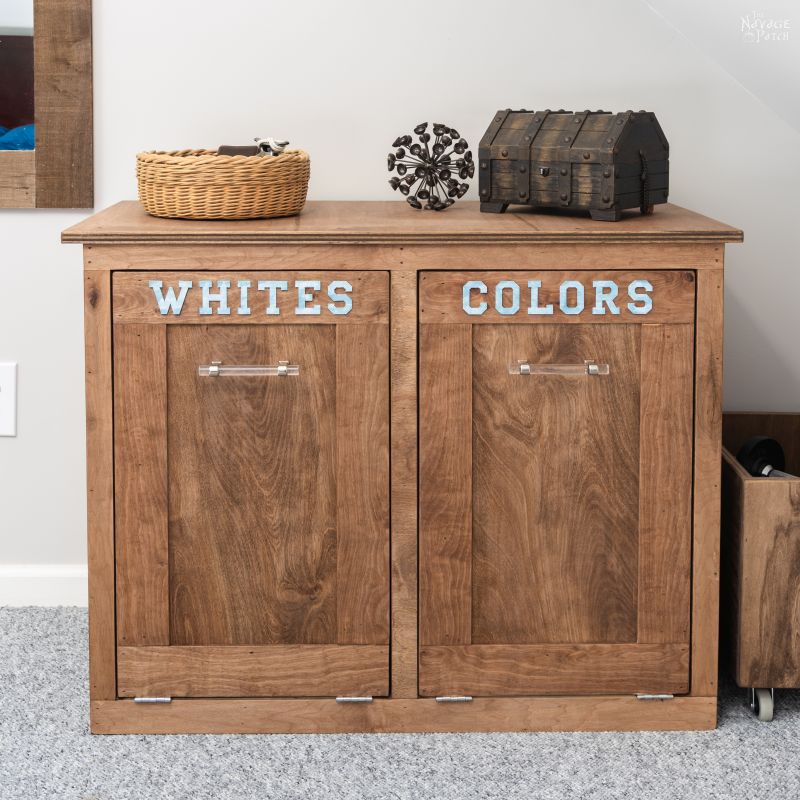
DIY Tilt-Out Laundry Hamper
Hide your dirty laundry with style with this DIY tilt out laundry hamper! Free plans included, and it can be built with or without a Kreg Jig!
A bedroom without visible laundry.
It’s such a simple concept, but try asking it of a teenager.
You’re more likely to see a report card with full marks or a 1600 SAT score.
The teen brain is wired differently than the adult brain. It simply doesn’t register the sight of dirty laundry covering 90% of the available floor surface.
Nor is it wired to see clean laundry.
Pile on the stairs waiting to go up?
It’ll be there until next Christmas.
Neat stack on the bed waiting to be loaded in a dresser?
It’ll be knocked onto the floor at bedtime where it will mingle and breed with the dirty laundry already in residence down there.
The teen brain is a stubborn and infuriating thing, but like all brains, it can be trained with sufficient time and effort.
Thus, as the ultimate project in Barish’s two-room makeover, we have confronted the Laundry Issue and devised a solution that should keep dirty laundry off of his floors.
What happens with the clean laundry is still a work in progress, but it’s important to take baby steps when mucking around with a teenage brain.
Before this makeover, Barish had at his disposal 4 collapsible cylinder-shaped laundry baskets and an assortment of small plastic tubs, all of which he would fill with clothing, bath towels and bed sheets.
Filling them all might take weeks, and then he’d have to lug all of it downstairs for a 2-day laundry extravaganza I like to call Washapalooza.
That left him with an equally grotesque amount of clean laundry that needed to be folded (HA!) and then properly put away (double HA!).
This resulted in two rooms that at any given time housed an eclectic-smelling mix of clean, dirty and mystery laundry.
Only the nose knew which was which.
One of the main stated goals of his bedroom makeover was to get a handle on the laundry situation once and for all.
This would be a two-pronged attack.
The first prong would be to provide him with the means to be neat, and that is the DIY laundry hamper I will show you today.
The second prong will be a long and ruthless psychological battle pitting our wits as parents against the slovenly teenage brain. It will be a hard-fought war, but after all the work we’ve put into his two rooms, defeat is not an option for us.
Barish will have a clean room.
DIY Tilt-Out Laundry Hamper
Sketchup plans, cut sheet and full tutorial are provided on page 2.
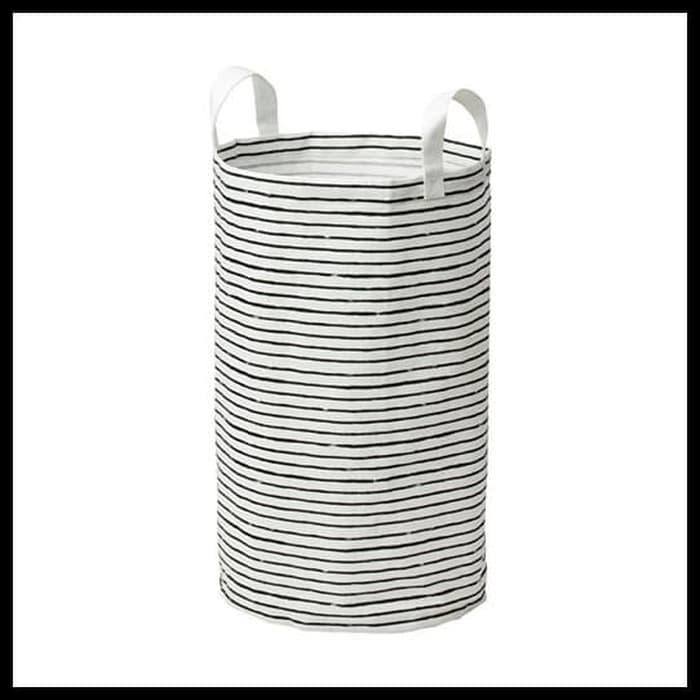
When we embarked upon this makeover back in January, we made a trip to IKEA to pick up some new pieces of furniture and some accessories for his soon-to-be-new room. Handan also picked out two canvas laundry baskets that she wanted Barish to start using. Though it wouldn’t be built for months, she knew back then what she wanted me to do, and I would be designing and building our DIY tilt-out laundry hamper around two of these laundry baskets:
I modified the design I’m sharing with you to fit into the cramped space of Barish’s bedroom. Since it was an addition and built over the garage, it has sloping walls on three sides. My babes originally wanted this DIY laundry hamper to go against one of the walls that is only 29 inches tall before it starts sloping towards the ceiling. This required a smaller design, and we had to shorten the IKEA laundry baskets to fit in the smaller hamper. My plans are for the full-sized version that will fit unmodified IKEA baskets.
Normally, I’d build something like this tilt-out laundry hamper using my KREG Jig system. But I was short on time, and drilling the pocket holes can be a pain, so I decided to wing this build with just wood glue and brad nails. I love how it turned out, and it was a much easier build! I left the small brad nail holes as-is, because I like how they look, but you can fill them in to better hide them.
DIY Laundry Hamper – Cabinet
I first assembled the base.
A bead of glue for the cabinet bottom…
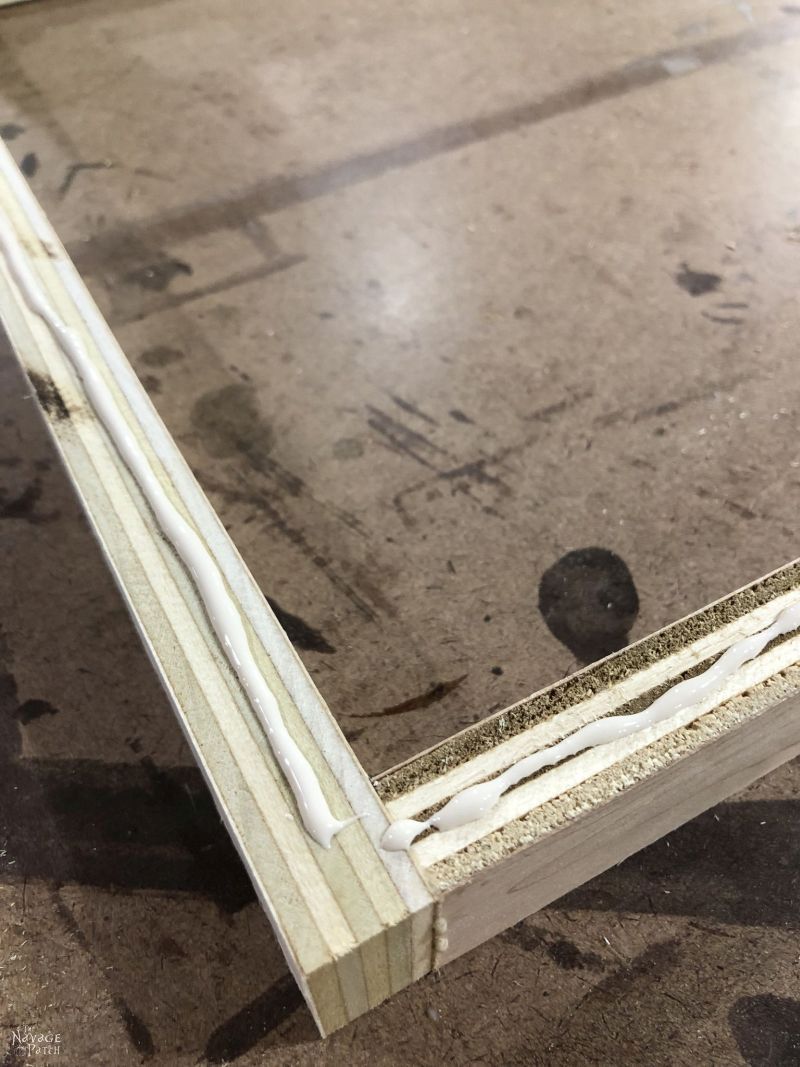
…and everything got secured with some brad nails.
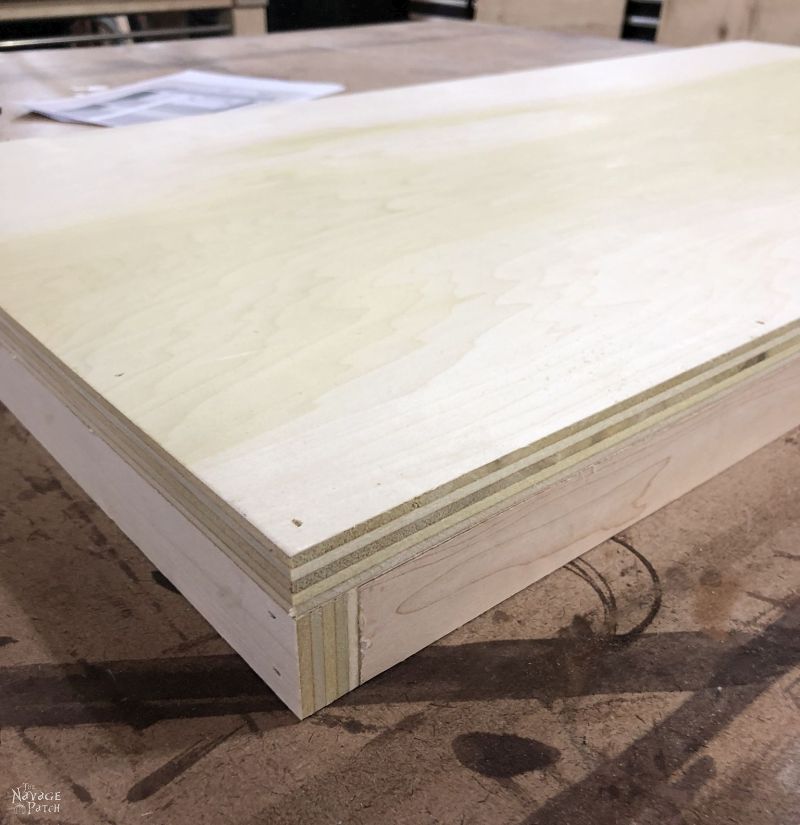
Next, I attached the two sides. Choosing good-quality plywood with interesting grain makes a huge difference for a project like this that will be stained instead of painted.
As you can see, I’m not the neatest guy when it comes to brad-nailing.
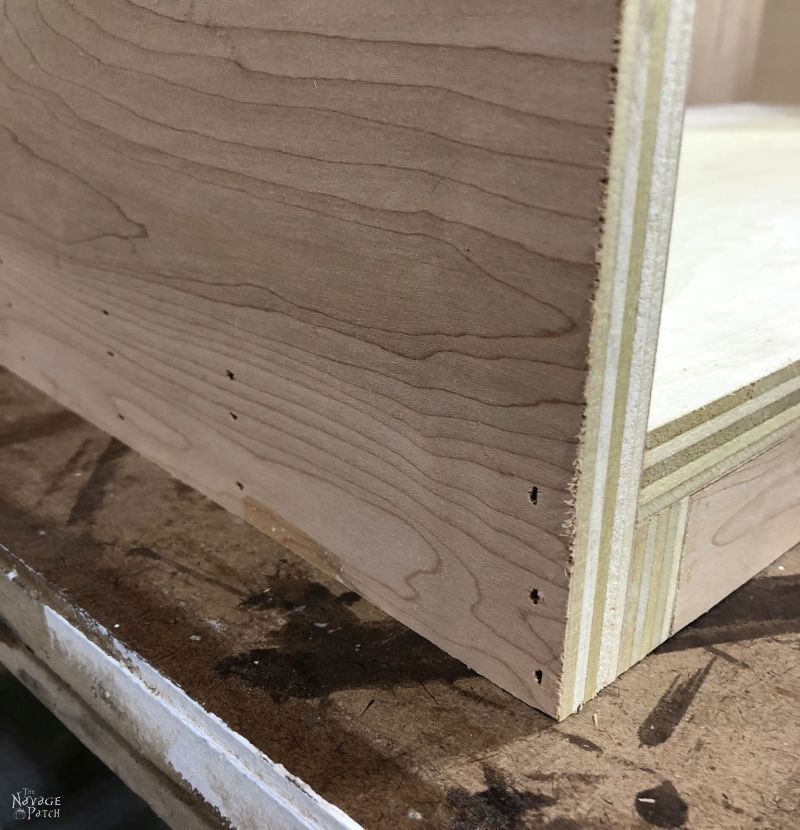
Okay, okay, fine! I’m not the neatest guy when it comes to anything! My babes can back me up on that count!
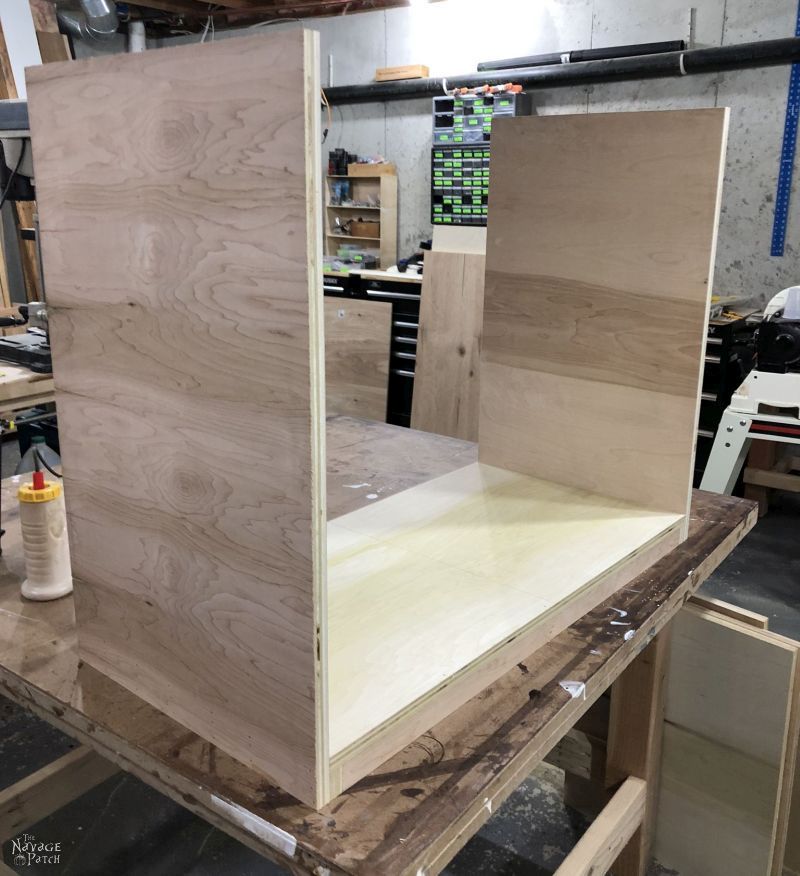
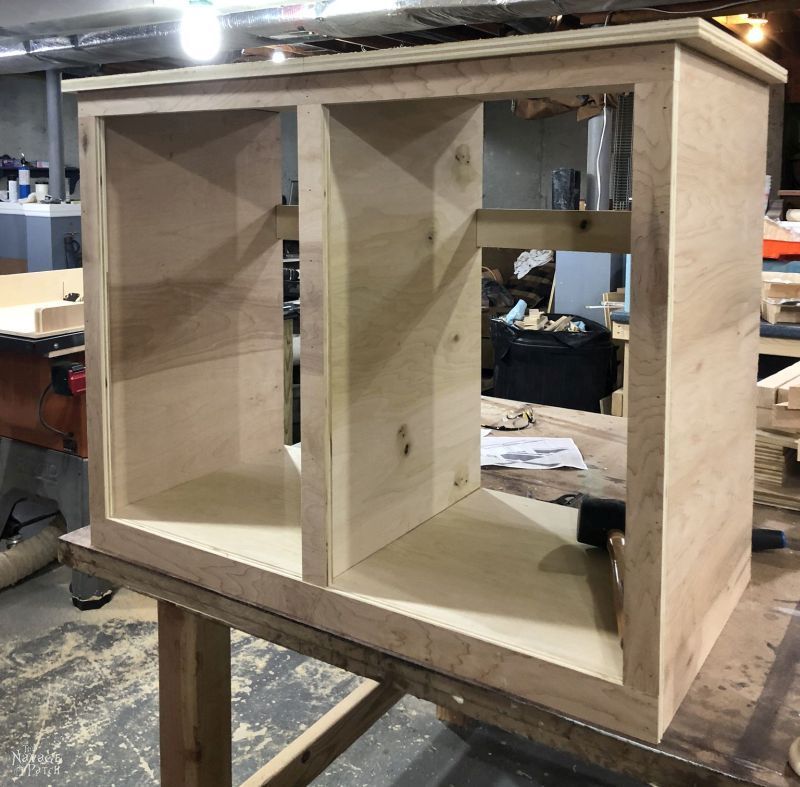
The next step was to attach the top. I used speed squares to make sure the sides were properly vertical and meeting the top at a 90 degree angle. I eyeballed my brad nailing, but a better way would be to lightly pencil a line across the top where the nails need to be shot.
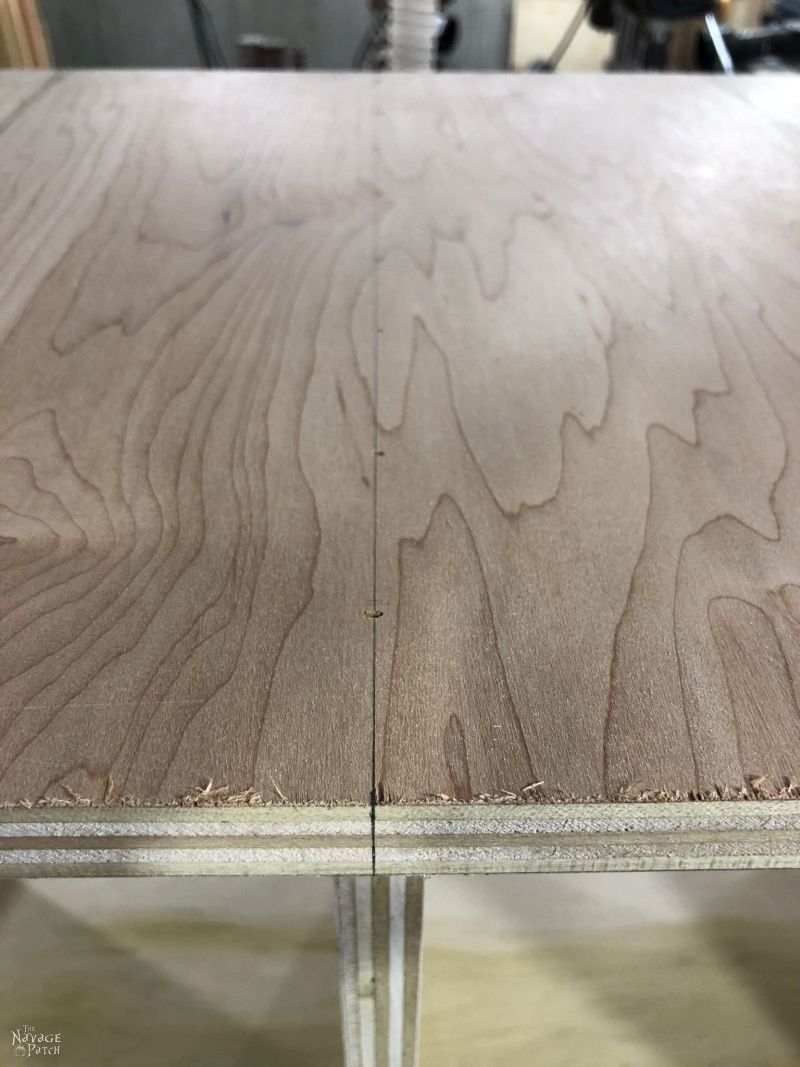
Once the top was on, I inserted the center divider. I measured along the top and bottom to find the midpoint and then positioned the divider accordingly.

To make sure I drove the nails down into the middle of the divider, I penciled a line across the top’s midpoint. As with the sides, I used speed squares to make sure the middle divider was positioned squarely.
Next, I attached the two rear hamper support pieces with glue and brad nails. The outer ends are secured with nails shot in from the outside of the cabinet. One of the inside ends is secured with nails shot in from the opposite side of the divider. For the other support piece’s inside end, I shot the nails in at an angle, and that held just fine.
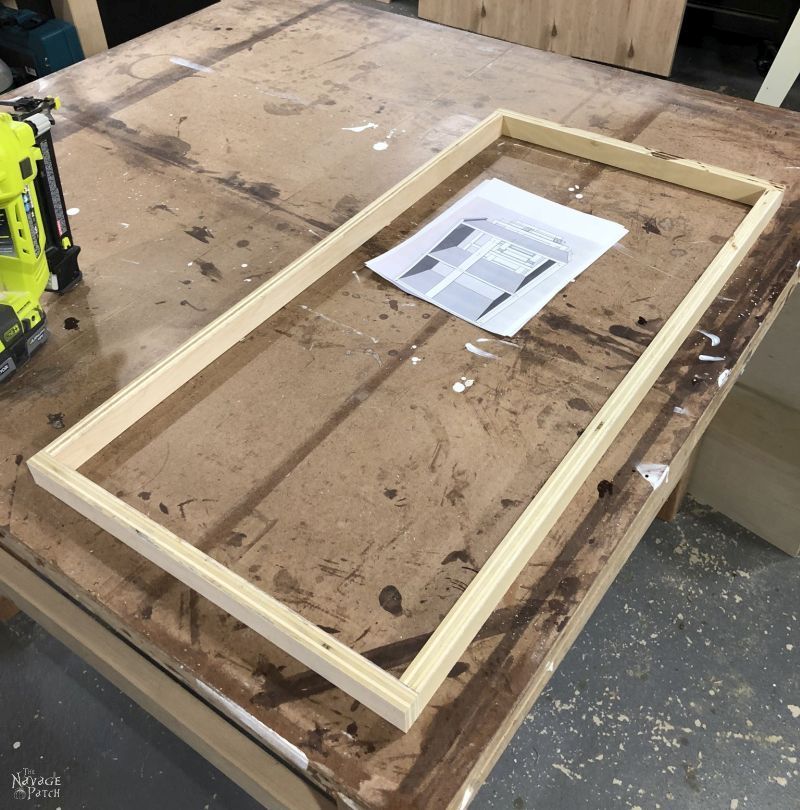
The last component of the cabinet was the face frame, which I attached with glue and brad nails.
DIY Laundry Hamper – Tilt-Out Doors
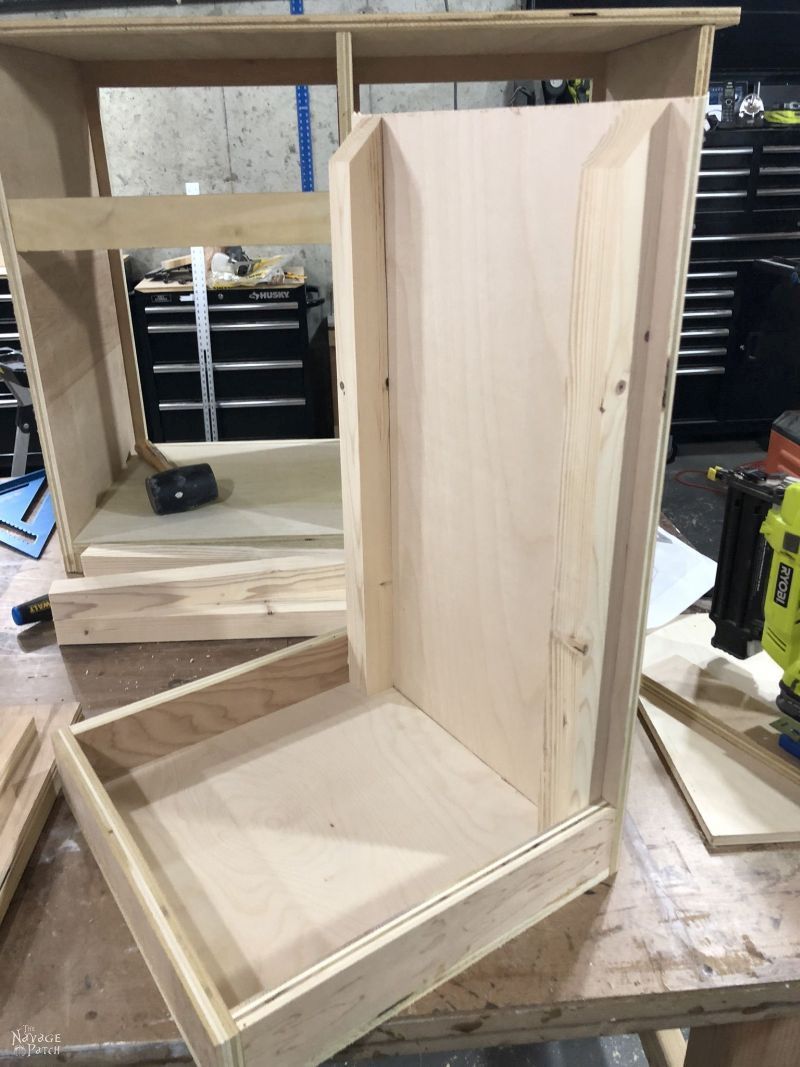
With the cabinet built, I turned my attention to the two tilt-out hamper doors. As I mentioned earlier, this project is designed around IKEA’s laundry baskets, but it can certainly be modified for any other type of basket.
I started by gluing and nailing plywood supports to three sides of the base and then attaching the door panel to the base.

Next, I attached the vertical supports.
And oddly, that is where my pictures of the tilt-out door build end. When I get on a roll building by myself, I sometimes forget about important things like taking pictures! But don’t worry! The whole process is detailed on page 2 with Sketchup drawings.
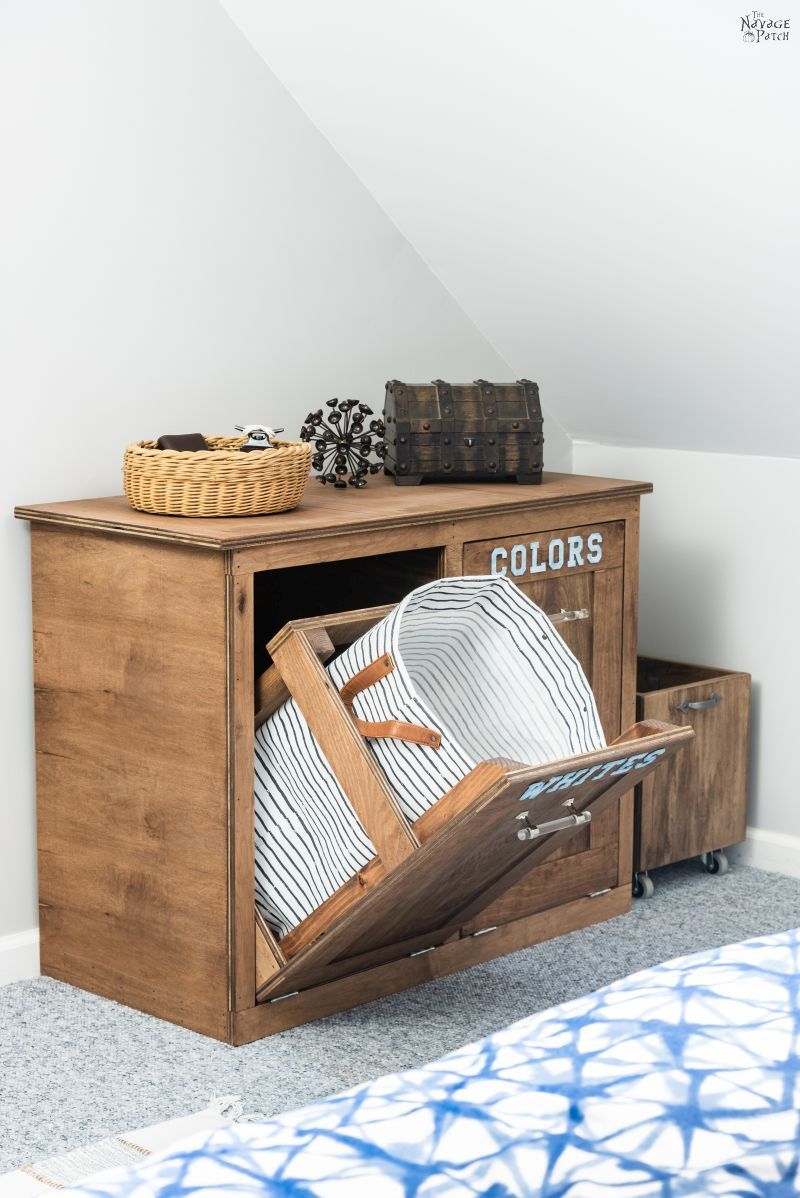
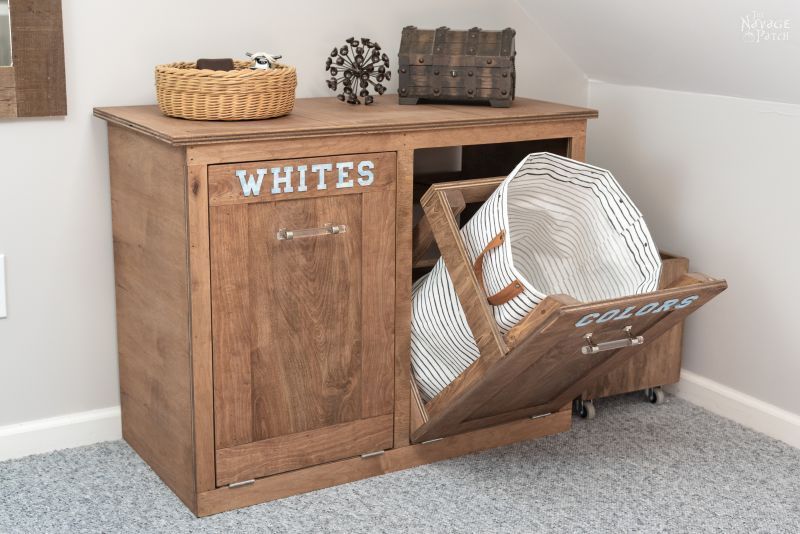
Suffice it to say, I built two of these tilt-out hamper drawers, as you can see below! 🙂 I put them in their places just to check the fit. The large gap showing above the tilt-out doors would be reduced by half once I installed the hinges.

Before I got to sanding staining, I installed the hinges to the bottom of the tilt-out hamper doors.
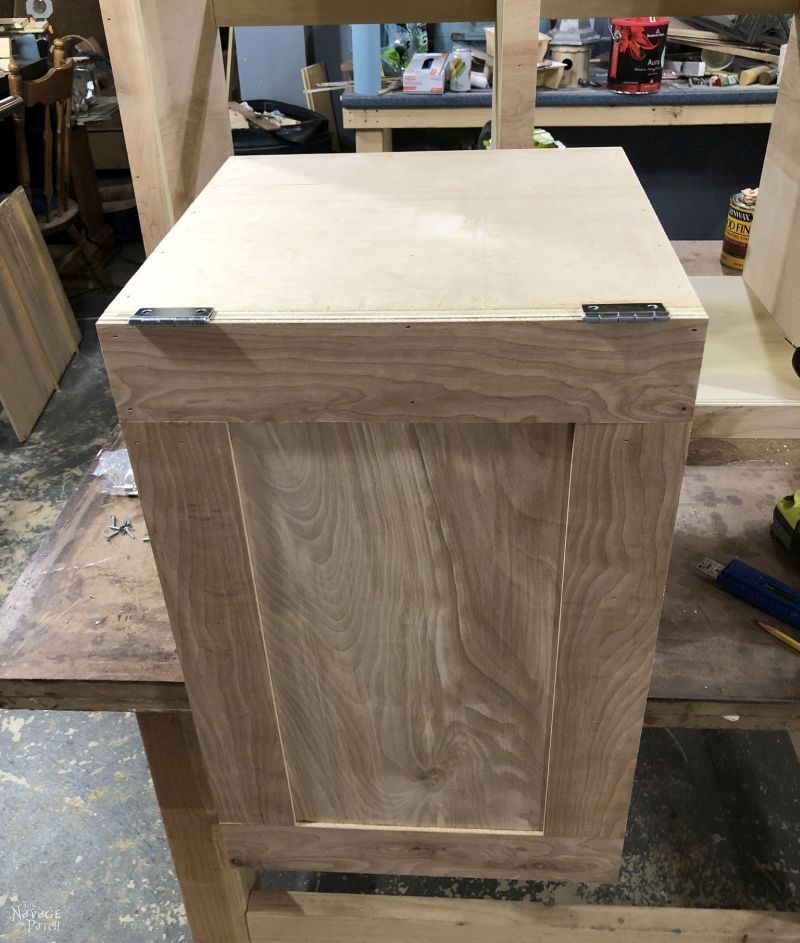
I then re-fit the doors in their places and traced the edges of the hinges along the bottom edge of the face frame. This would make it easier to install the doors later on in the build.
Because the hinges added about 1/8 inch to the bottom front of the doors, I needed to compensate for that in the back. A few layers of Gorilla Tape worked perfectly, but any sort of shim would do.

At this point, I removed the doors and gave everything a good sanding with a random orbit sander and 220 grit discs. I also used a detail sander around the door trim and in other tight spots. I removed all the sharp edges and corners, and took away as much roughness from the edges that I could.
When finished sanding, I stained everything with Minwax Special Walnut.

DIY Tilt-Out Laundry Hamper – Cricut-Cut Basswood Letters
This part is strictly optional. To make things as easy as possible for the Teen Brain living above us, we wanted to give each hamper bin a name. “Whites” and “Colors” seemed like logical choices, though other contenders were:
“Smelly” and “Stinky”
“Crusty” and “Soggy”
“WTF!” and “OMG!”
“Crawling” and “Quivering”
“Muddy” and “Moldy”
“Do Not Touch!” and “Do Not Inhale!”
and finally,
 and
and 
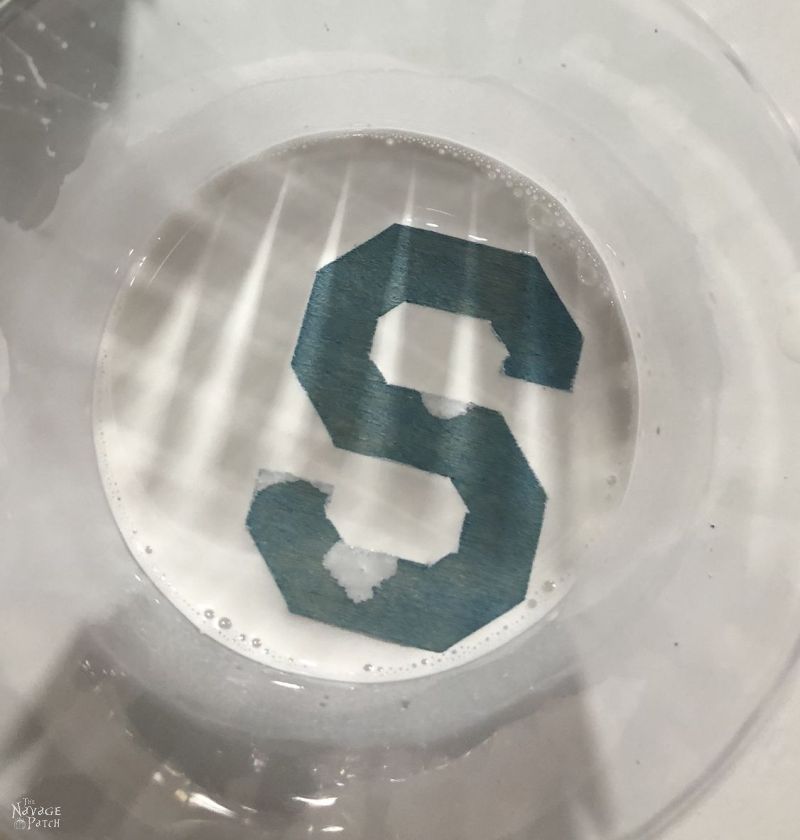
I cut the letters from basswood with my Cricut Maker.

Handan had a sort of light whitewashing with paint in mind. Thinking “blue makes everything better,” I mixed some of Handan’s old blue chalk paint with water and gave the letters a bath.

It lightened up after wiping off the excess.

It was a nice color but a little too dark and a little too blue.

I mixed up a batch of whitewash to try to lighten things up a bit. I dunked the letters in the whitewash.
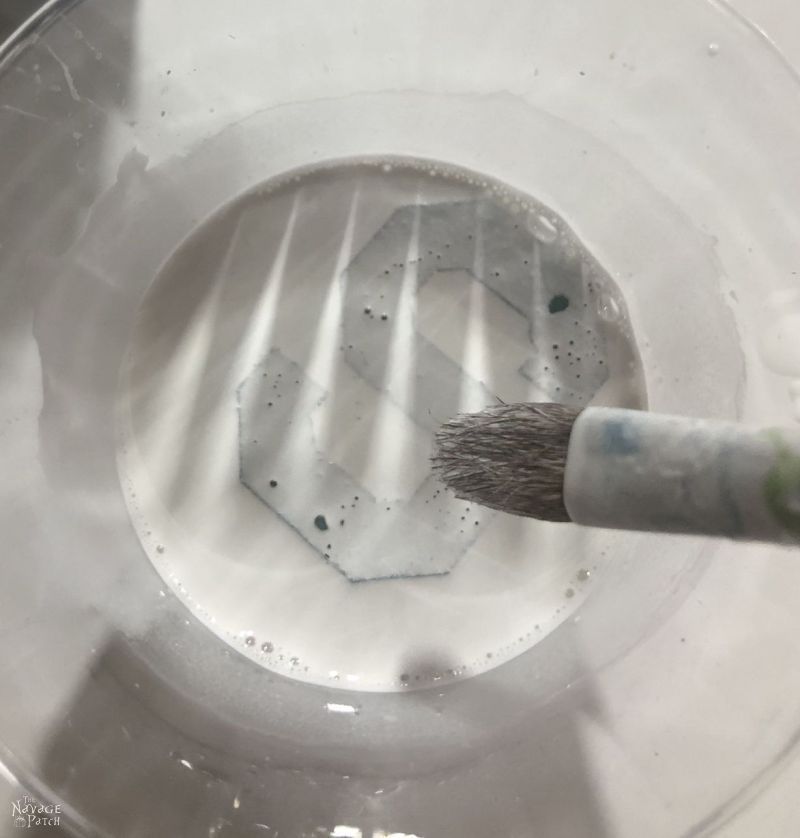

But the wood just drank in the white, leaving the darker blue shining through.
I thickened the whitewash a bit and had another go.

So far, so good.

If it stayed just like the picture below, it would have been perfect, but over time, the white soaked in.

This time, I really thickened up the whitewash. Then, I tried streaking the letters, as I thought the thick whitewash might actually conceal too much blue if I covered the letters entirely.

I very lightly dabbed the paint, careful not to remove too much white. I loved it!

Again, some of the white faded into the wood, but I was still happy with how the letters turned out. For such a small aspect of this project, I spent a lot of time getting the letters just right!
Applying the letters to the tilt-out hamper doors was a nerve-wracking task. First I lined up them as precisely as I could using measurements and straight edges to get the upper, lower and side boundaries and a good bit of eyeballing to get the spacing between the letters.

When I had the letters lined up to my liking, I hot glued them in place, starting with the two end letters and working in.

Success!

DIY Laundry Hamper – Final Assembly
It was time to attach the tilt-out hamper doors to the cabinet, and that meant I needed my babes’ help.
And you know what that means!
Yep, more distorted shots of my enormous melon! Guess how long it had been since I last washed my hair! Bonus points for guessing how long since I’d shaved!

Since I had previously marked where the hinges needed to go, it was simply a matter of propping the whole door up a couple of inches with some scrap wood (not shown – it’s blocked by the bottom of the door). That little extra piece of basswood is a leftover from our DIY Moroccan Candle Holders project. You can see that it also served as a test piece for my blue wash. 🙂
Below, that carved basswood is giving the final little lift to the hamper door to align it perfectly with the cabinet base.

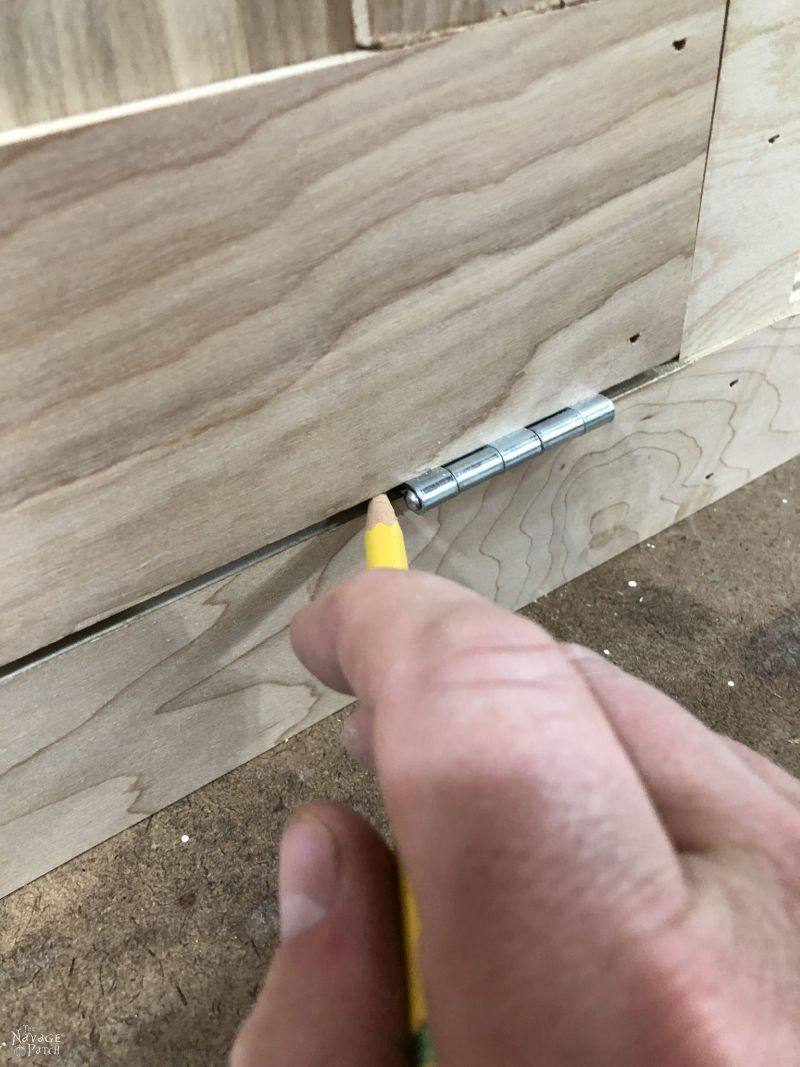
I needed to pre-drill those holes to make sure I inserted the screws to exactly the right spot and to make sure I didn’t split the plywood with the screws. But there’s no way I could fit a drill in there right next to the bottom of the hamper door.
I marked the holes with a pencil and then removed the tilt-out hamper door.

Because the tolerances were so tight, I decided to remove the hinges from the doors and install them first on the cabinet base. This made it easier to get them exactly where I wanted them. Since the tilt-out doors were already drilled in the corrected places, it would be easy to reconnect them.

After securing the hinges to the cabinet base, I reattached them to the tilt-out hamper door.

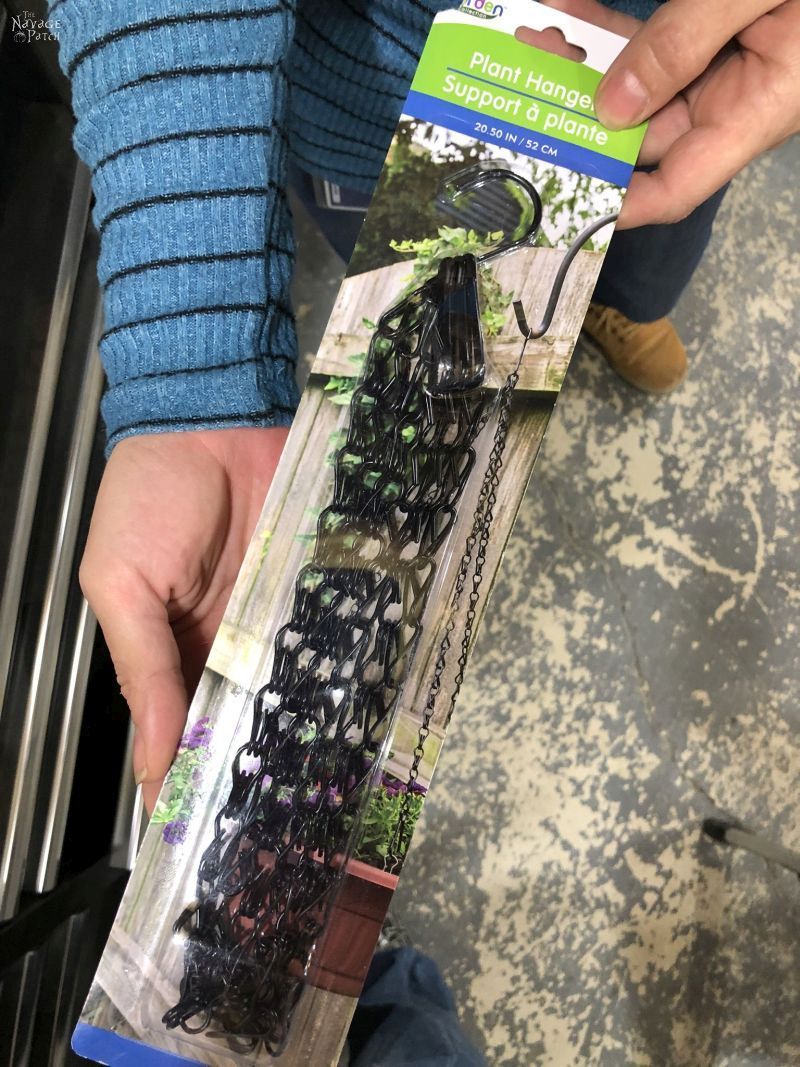
To prevent the hamper doors from crashing to the ground when opened, we used the chain from a dollar store plant hanger as a stopper.
I put a washer on a wood screw and then put the screw through the end of the chain. I drilled the screw into the top middle of each rear hamper support.

The picture below shows where I inserted the screw, though the picture shows me screwing in a hook. We changed plans after this pic, but I forgot to take one of the washer and screw.

The chain has a clip on the front, and it attached to the tilt-out hamper through an eye bolt screwed to the underside of the rear upper horizontal support pieces.

A screwdriver makes installing eye bolts a breeze!

The final step was to attach door pulls to the tilt-out faces. We chose glass-looking pulls to complement the glass knobs of Barish’s IKEA-Tarva-hacked dresser and his painted IKEA Kallaxes.
That finished the build!
At this point, you can protect the hamper with the finish of your choice. A wipe-on polyurethane would be easiest to apply.
Handan and I carried the DIY laundry hamper upstairs and set it into its place in Barish’s bedroom.
What a moment that was!
His two-room makeover was officially complete.
We’d won the easy battle.
The harder battle to coax the Teen Brain into complying with our wishes for it to be neat and tidy has just begun.
As mentioned early, Handan had to make the IKEA baskets smaller, so they’d fit with my smaller design. She did this by first removing the IKEA handles and then folding the material down until we had the height we required. She then secured the fold with a few fabric rivets.
Using the strap of an old purse we found at Goodwill, she fashioned 4 new leather handles for the baskets and secured them in place with rivets.
Okay, it’s time for the beauty shots!
Check out Barish’s new DIY tilt-out laundry hamper, and let us know what you think in the comments!
Plans and cut sheet are on page 2.


Click on ‘Next’ to continue to the plans, cut sheet and step-by-step instructions.
We love it when you share our posts on Facebook and Pinterest!


Nice! Now the trick is to see if it works to contain the mess. I heard some people put basketball hoops over launder bins to encourage teens to actually put dirty clothes into the hamper. Whatever works I say.
I really think some of your other label choices would have worked too. “Crusty” and “Soggy”–ewww but LOL and the toxic/radioactive symbols were spot on!
So far, so good, Laurie, but only time will tell! I like the hoops suggestion! Handan was thinking of doing that for our recyclables!
Well you two have created another genius solution to a problem,it looks fabulous. I have a friend who would like this for her hubby who seems to have a teen brain where laundry is concerned, their two very neat sons have long since flown the nest. Her hamper would need to be labeled – smelly oil clothes (heating engineer) and smelly workout clothes (weight lifting fanatic).
Thank you, Catherine! I think a lot of us guys still think like teens when it comes to laundry! 😀
Love it, totally making these for our new house!
Thank you, Mara! Awesome!:)
It’s always appreciated that your plans are easy to follow and simple enough for a newbie woodworker. I look at a lot of plans online and when they start talking biscuits and dove tails I just tune out and usually move on. I don’t want to build the Eiffel Tower, I want something that looks good and I can feasibly do in a couple of days!
This is just fantastic. Looks great but not complicated. And it all ties in so well with what you’ve both done so far. I know from experience that having a place for everything really does help when it comes to keeping things neat and tidy. ADHD brain is a bit like teenage brain. I know my clothes would probably end up less on the ground if I had a great hamper like this!
And that special walnut is just…it really is special, ain’t it?
Jay – thank you so much! You’re right about those woodworking sites. When we first started, I thought I might travel down the more “traditional” woodworking route. But time is precious these days, and I need to get stuff done fast! I love and appreciate fine woodworking, but honestly at this point, brad nails and glue are good enough for me! I hope you give this one a bash!
you havw=e taken such a mundane but necessary problem and turned it into a work of art this is seriously gorgeous xx this ding dong pc won’t let me change that funked up word to have grrr
LOL, you need to show that pc who’s boss, Chris! Thank you so much for your comment! Handan and I hope you are feeling good this spring and that you’re ready to tackle the summer head-on! 🙂
you guys are so smart! i love your projects and your sense of humor!!
Thank you, Karen! 🙂
It’s like a water fountain in the 1950’s…
Love it! This is exactly what I was looking for to build for my bathroom.
Awesome! Good luck to you! 🙂
Great, easy to follow plans. I was looking for something like this for the kitchen, potatoes and jars and so on…
There’s a laundry basket like that in a cupboard that “came with the house” except it’s going to leave when we re-do the bathroom (it’s in very aged and peeling plastic, yukky). It’s got a chain on it so it doesn’t tilt right out on to your feet, which is a handy add on (or would be if it wasn’t broken!). I’m now, after seeing your plans, going to add a wood replacement in the “new” bathroom.
Thaks for giving plans that are possible for those who aren’t trained cabinet makers.
Awesome! I’m happy to hear my plans are getting used! Shoot me a pic or two when you’re done! greg@thenavagepatch.com
Hello! This is exactly what I am looking for however I do not have time to make it. I’m wondering if you’re selling already made ones? I’d love to purchase it from you!
Hi Lana, unfortunately we don’t sell any of our creations – we just pass along the info on how to make them yourself! 🙂
Do you happen to know how many sheets of plywood you needed? I see all the cuts but my brain cannot figure out how many sheets that means lol