Cricut Mug Press – Mugs Made Easy!
Cricut Mug Press is the fun and easy way to make vibrant, permanent and 100% dishwasher safe mugs that’ll last a lifetime. It’s perfect for gift making!
Okay, I get it. I really do. I understand the frustration, and the struggle is most definitely real! Just when you saved up enough to finally get a Cricut Joy, they up and announce a new product, and now you’re staring at the wad of cash in your hand and wondering what the heck you should do with it!
Thanks a lot, Cricut! I had it all figured out until you dropped Mug Press on us! Now what am I gonna do?
*sigh*
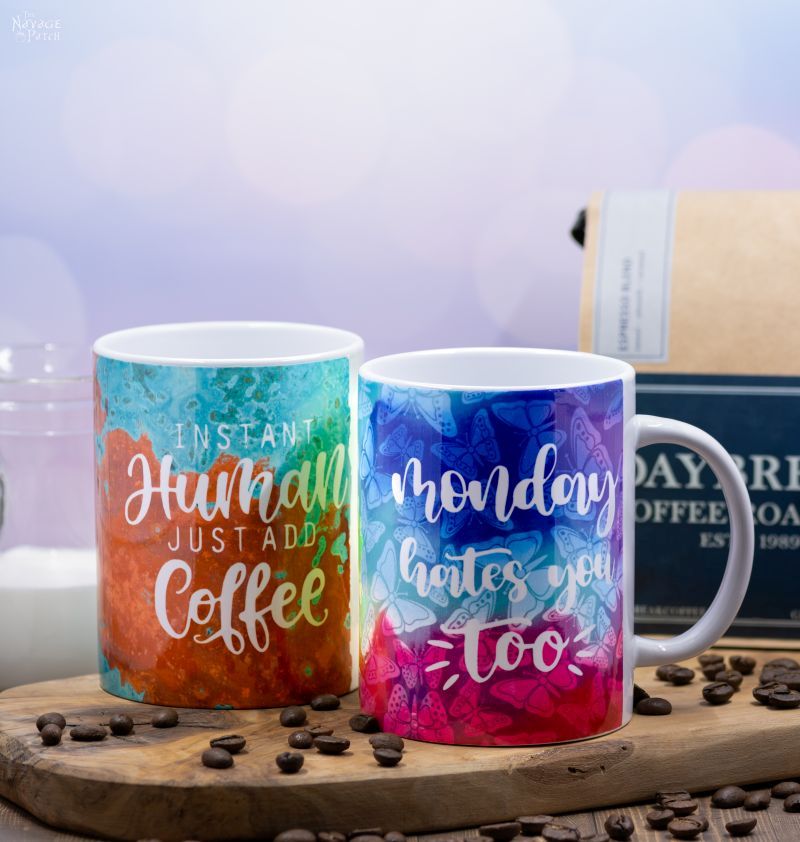
Look, I could sit and make you feel better by telling you that Cricut Mug Press is no big deal. I could inform you that there’s nothing to see here…move along…move along. And I could claim that it’s probably just a flash in the pan – here today, gone tomorrow.
But, madam, those would be big, steaming lies, and I just couldn’t live with myself! Because the raw truth of the matter is that the eggheads in the Cricut engineering department have done it, yet again!
It wasn’t enough for them to release a smart cutting machine that basically cuts everything but pepperoni pizza (though they may make an attachment for that someday!)
And they certainly didn’t rest on their glittery vinyl laurels when they released the Baby Yoda of cutting machines that caused the entire crafting world to go “Awwwwww…it’s so cute!” and simultaneously try to pinch its hard plastic cheeks.
And let’s not forget about Infusible Ink! Those pencil-pushing Poindexters in Cricut’s secret underground laboratory rewrote the book on heat transfer!
So I guess it’s really no surprise that they’ve come up with another must-have product that fills your soul with desire (okay, and maybe a little annoyance if you just saved up for the Joy or Maker).
But madam, don’t let fly your fury on me, as I’m just a lowly bard, sent forth to sing songs and tell tales about the mighty Cricut Mug Press.
What is Cricut Mug Press?
Cricut Mug Press is a simple, one-touch machine (the “one touch” I’m talking about is turning it on!) for making incredibly vibrant mugs that are 100% permanent and 100% dishwasher safe.
Forever.
Seriously, you can hand the mugs down to your descendants with instructions to wash them in the dishwasher every night on the “Heavy” setting, and your children’s children’s children will still be enjoying perfectly vibrant mugs.

How does Cricut Mug Press Work?
Cricut Mug Press fits into Cricut’s Infusible Ink ecosystem. It is a special-duty heat press designed to do one thing and to do that thing perfectly: transfer Infusible Ink designs onto compatible mug blanks for brilliant and beautiful personalized mugs. Simply wrap one of the custom-sized transfer sheets around a mug, place it in the Mug Press, and press the lever to secure the mug. That’s it! Cricut Mug Press does the rest! There’s no temperature to set, no timer and no pressure settings. Cricut Mug Press has a heat sensor that automatically selects the optimum time and temperature for your press.
What is Infusible Ink?
Wait, what? You don’t know? Well, have a look at my Infusible Ink post and get yourself up to speed! 🙂
What Mugs Will Work with Cricut Mug Press?
The best mugs are Cricut brand mugs that are specially made to work with Cricut Mug Press, but any sublimation mug with the same diameter and straight sides will work. Sublimation mugs have a special polyester coating – you can’t see it or feel it – but without it, Infusible Ink (or any sublimation ink) won’t work.
Now I know what you’re thinking: I’m sure Cricut mugs are good and all, but they’ll be expensive, so I’d prefer to buy them elsewhere.
Well, here’s the thing. In some cases for some products, you’d be correct in making that sort of assumption. Cricut is many things, but “cut-rate” and “bargain-basement” would not generally be among those things. But this time, dear madam, you’re wrong. Handan and I have been making Infusible Ink mugs for over a year in our oven. Until now, we’ve been using sublimation mugs we’ve bought in bulk from Amazon. Two things I can tell you for certain:
- Cricut mugs are of a much higher quality with a more consistent poly coating. Mugs with inconsistent poly coatings can result in imperfect or faded transfers, of which we’ve had many in our days before Cricut Mug Press. An imperfect Infusible Ink transfer means one thing: you’ve just created garbage. With Cricut mugs, every transfer has been perfect.
- Cricut Mugs are cheaper than bulk sublimation mugs from Amazon! I know! We were floored by that, and oh so very happy! We buy a lot of sublimation mugs, so this is excellent news for us!
What Cricut Machines Work with Mug Press? (But you don’t actually need one)
Cricut Maker, Explore, and Joy all work to cut Infusible Ink transfer sheets or draw with Infusible Ink pens and markers. But here’s a neat little fact: you don’t technically need a machine to get in on the fun! Obviously, with a Cricut cutting machine you have tons more design options, but there’s nothing stopping you from making some really cool mugs using hand-drawn art or lettering using Infusible Ink pens and markers. Heck, you could even wrap a full and uncut Infusible Ink transfer sheet around a mug for a vibrant and colorful mug. And if you wanted, you can purchase sublimation designs online, trim them to size and make personalized mugs without any sort of Cricut machine or Infusible Ink transfer sheets.
Look, obviously my job here is to talk up Cricut and help them sell their awesome products. But Cricut also understands our audience. Unlike some dedicated Cricut blogs whose readers likely all have Cricut machines, our readership mostly does not own a Cricut. Handan and I are very aware of this fact, which is why we try to give workarounds whenever we can. Of course, we’d love to convert as many people to Cricuteers as we can, but we don’t lose sight of the fact that Cricut machines are not in everyone’s budget.

Can I Use Infusible Ink Pens and Markers?
Absolutely! We’ll be showing you how in a future post and giving more free mug SVGs tailored for Cricut Infusible Ink pens and markers.
How to Make a Personalized Mug with Cricut Mug Press

Enough jabber-jawing, let’s make some mugs with Cricut Mug Press!

This is a sponsored conversation written by me on behalf of Cricut. The opinions and text are all mine.
SUPPLIES LIST
Affiliate links are provided below. Full disclosure here.
Step 1 – Turn on Cricut Mug Press
Press the power button on top of your Cricut Mug Press.
Congratulations, you’ve just pressed the only button you’ll need to press!
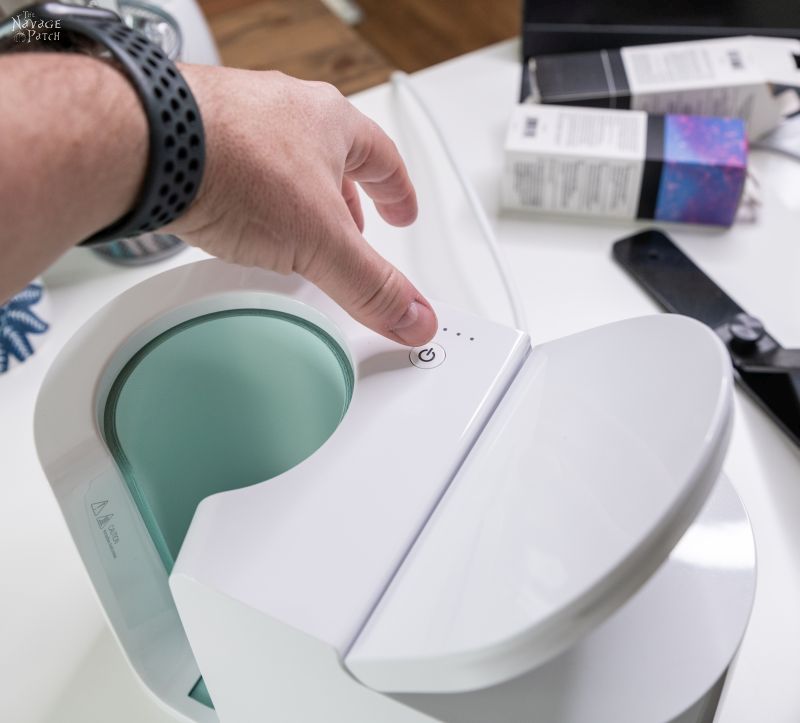
The button glows orange while heating, then your Cricut Mug Press will beep and the button will turn green when it is fully heated and ready for some hot mug action.

Step 2 – Design Space
Click on New Project, and let’s get pressing!

To find the mug template, type “mug” into the search bar and hit enter.

From here, you can make one of the pre-made Cricut designs, or you can upload your own design or one of our free SVGs. To upload your own (or one of ours), click on Mug Design Setup.

You’ll see this screen, but don’t click Customize yet. First we need to select your mug size and edge design, so scroll down.

For most our mugs, we used a straight edge. Also, all of the designs we’re sharing with you today are for the 15 ounce mug size. I’m pretty sure it’s illegal to drink coffee out of anything smaller, but since there are bound to be some rebels (or tea drinkers) out there, we’ll have all these designs available for the 12 ounce mug really soon. Once you’ve selected your mug size, click Customize.

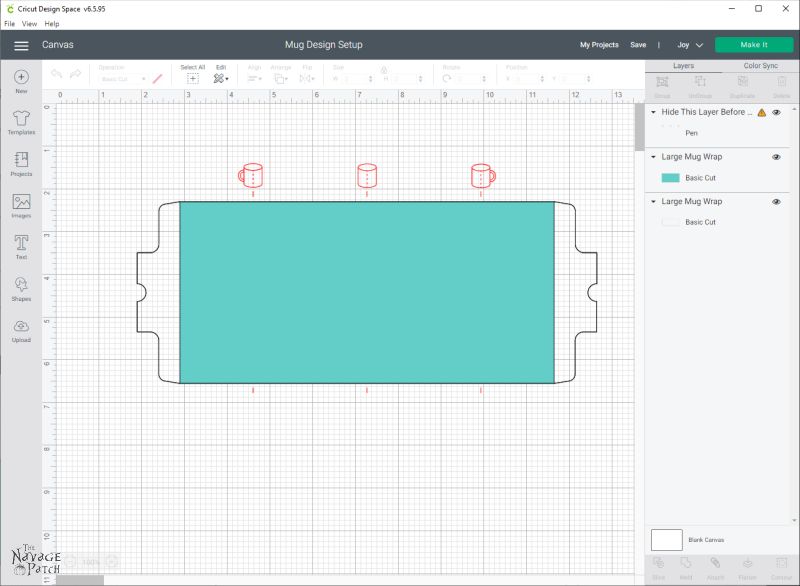
Shown below is the mug template in Design Space. There are two components to this template: the design boundary rectangle (in teal) and the overall mug wrap boundary. The wrap is designed to perfectly fit Cricut mug blanks, and the two tabs meet under the handle to ensure your design stays on the mug. You can’t see it from the picture below, but the overall mug wrap is set to double cut, so that shape will be cut out from the transfer sheet.
You’ll notice the handy guide pics in red – these will help you place your design should you ever upload one of your own. The left-most icon is where you’d place your design to have it facing out when drinking right-handed. The middle guide will show where to place a design so it sits opposite the handle, and the right-most guide shows where you want to put your design if you drink southpaw. Note that these are for reference only and should be hidden before cutting.
To upload one of our mug SVGs, click Upload from the left menu, and then click Upload Image.

Click Browse.

By this time, I hope you’ve downloaded our free mug design SVGs from The VIP Lounge. Navigate to where you saved them on your computer, select one and click Open.

Click Upload.

Select the image from Recent Uploads and click Insert Image.

Your SVG will upload something like the one shown below, and you’ll wonder what you did wrong. The short answer: nothing. The long answer: not a thing! Let’s get that image in place!

You just need to move your image into the same position as the teal rectangle. If you click on the teal rectangle and look at its position (circled below), you’ll see that it has an x value of 2.901 and a y value of 2.308. Now click on your image layer and input those numbers into the coordinate fields and hit Enter.

Ta-Da! You’re image is in place! Note that if you were making a smaller mug, those values would be different, but the method is the same. Now, since we’re not going to need those guides, let’s hide them.

Our next step is to select design boundary layer and the SVG you just uploaded, then click the Slice button in the lower right corner.

Nothing will change in your design, but you’ll see the Layers Panel changed a bit.

Now you need to make a decision (don’t worry, it’s quite easy): will your design be “positive,” like the one I’m showing here, or will it be “negative.” To clarify, I consider a positive design to be one in which the figures or letters are the elements staying on the transfer sheet, whereas in a negative design, I would weed out the figures below or any lettering. In other words and generally speaking, a negative design will showcase more of the vibrant transfer sheet, with the design showing in blank white space, whereas a positive design will showcase the design with more negative white space surrounding it.
So for the positive design below, you’ll hide the design boundary layer (remember, it’s the teal rectangle) and hide the slice result that shows in black.
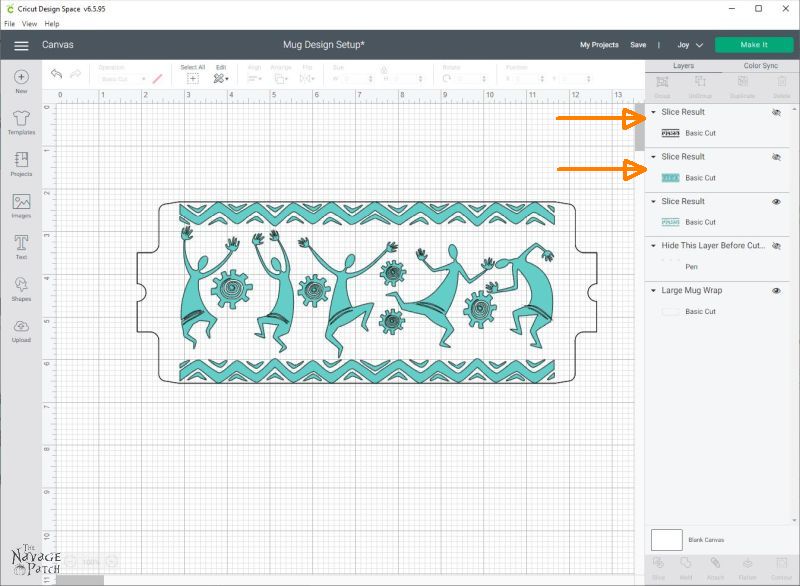
For illustrative purposes, if you had wanted to weed out the dancing figures, you would have kept the teal rectangle layer visible and hidden the one below it. Note that the black slice result layer is always hidden. Note that for your Cricut cutting machine, the “positive” and “negative” cuts are identical except for the vertical design boundary lines it would cut on both ends of the design in the example below.
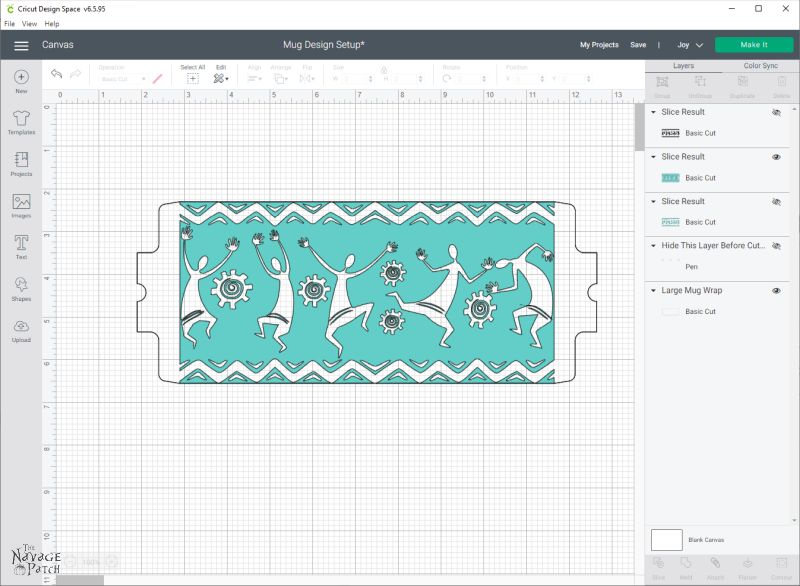
Next, select the Slice Result layer and the mug wrap boundary layer and click Attach in the lower right corner.

You can see the Layers Panel shows the two layers are attached. Now click Make It.

The following screen (for Cricut Joy only) will ask if you are using a cutting mat or smart materials. We are using the 12-inch Joy cutting mat.

You’ll then see your design preview. Do not hit Continue until you’ve mirrored your image!

Mirroring isn’t critical for this design since there’s no lettering, but it’s a good habit to get into whenever working with Infusible Ink.
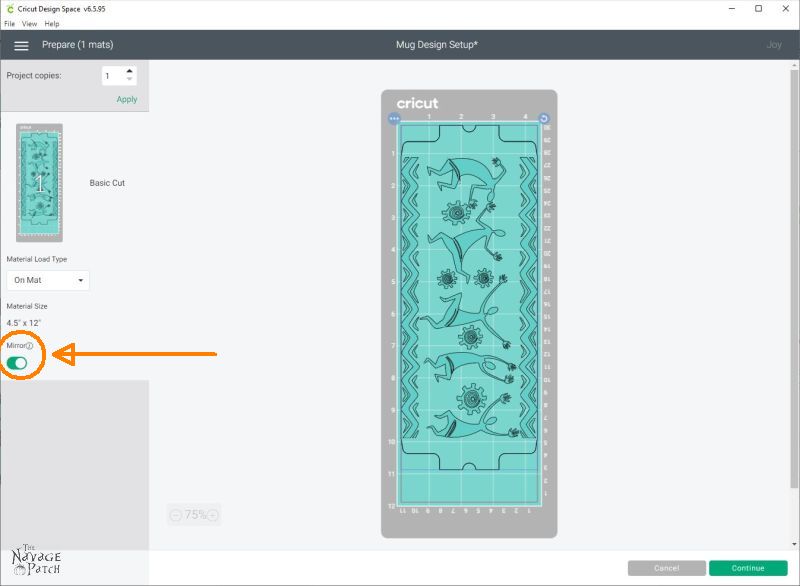
On the next screen, you’ll select Infusible Ink Transfer Sheet for the base material.

Make sure the pressure is set to Default or Normal.

Step 3 – Cutting & weeding
Next, put one of the pre-sized transfer sheets onto your mat. You may also cut a full-size transfer sheet to 4.5″ x 12″
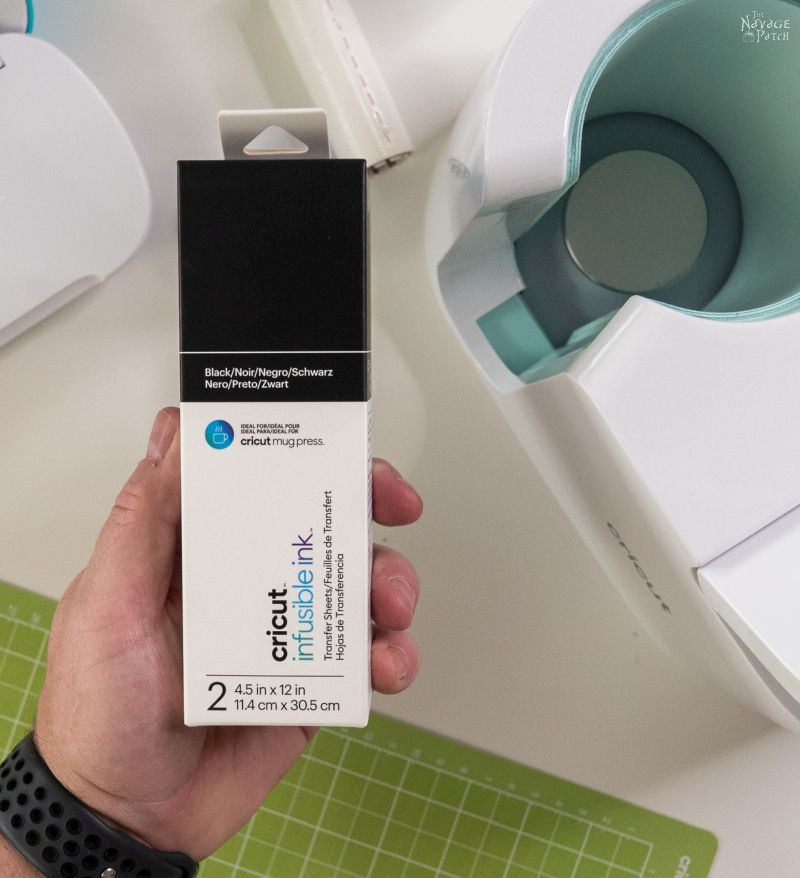
A brayer can help, but with these smaller sheets, we found it wasn’t really necessary.
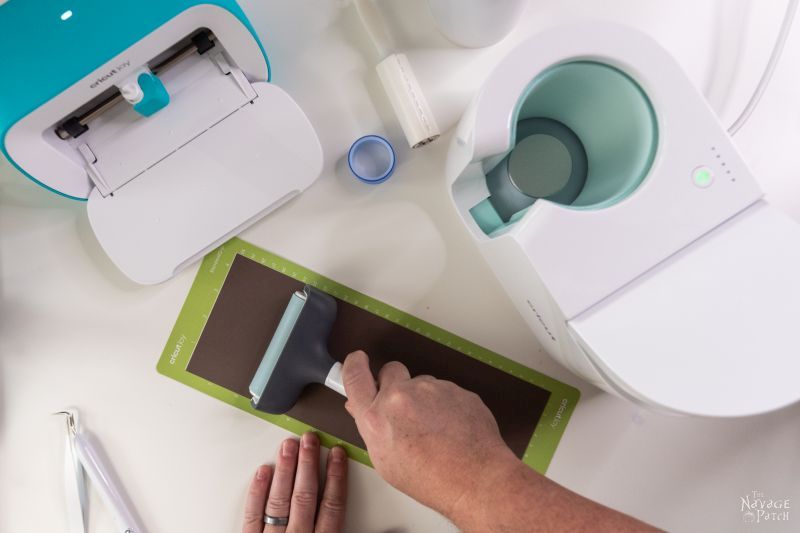
Load the mat into your Joy (or Maker or Air), and press Go. We’ve made a whole bunch of mugs with Cricut Joy and Cricut Maker with equal success. My heart lies with Joy though – it’s just so small and easy to use, and it works with Bluetooth instead of a cable so I’m not tethered to it.

As always, it’s best to lay the design face-down on the table and peel back the mat. This prevents the Infusible Ink transfer sheet from folding and possibly cracking the ink.


Carefully weed the design.

Step 4 – Clean your mug
The mugs are pretty dang clean out of the box, but they’ll still benefit from a little more TLC. Infusible Ink is a lot of awesome things, but forgiving is not one of them. You don’t want any dust or grease on the mug!

First wipe it down with an alcohol wipe.

Then run a lint roller all over it.

Now you’re good to go!
Step 5 – Apply the transfer sheet to the mug
With the mug standing upright, apply the transfer sheet.
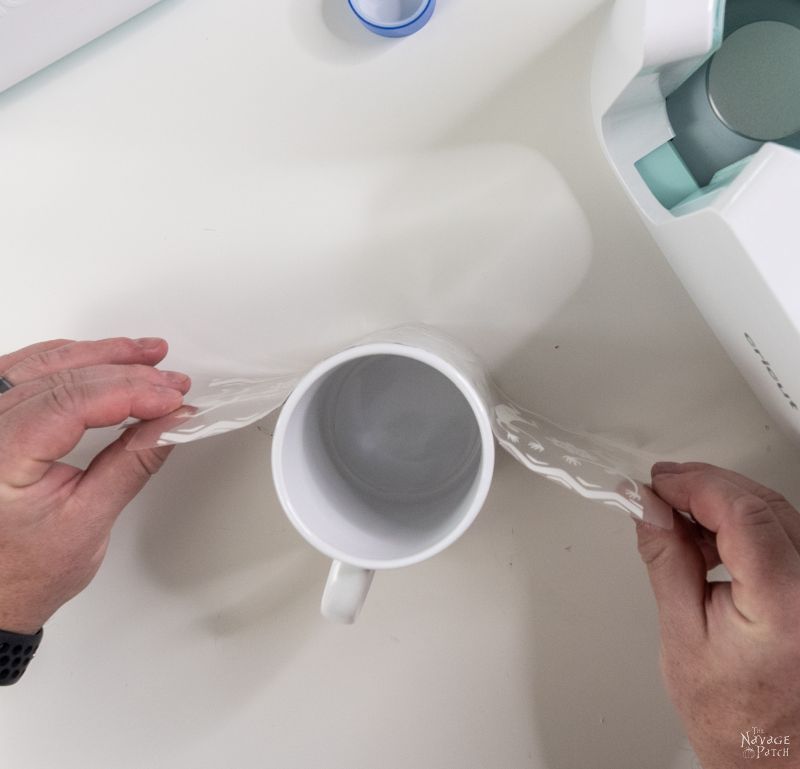
You want the transfer sheet to lay as flat as possible against the mug with minimal air pockets.
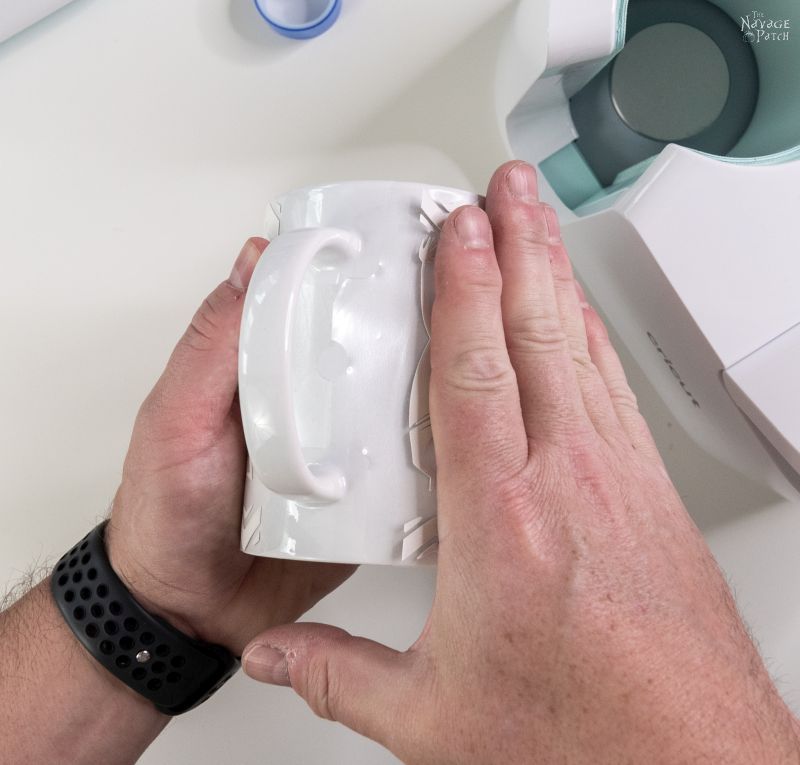
For a little extra support, you can put a piece of heat-resistant tape where the ends of the transfer sheet meet.

Gaps can happen at the bottom and top that can result in a faded transfer in those areas.
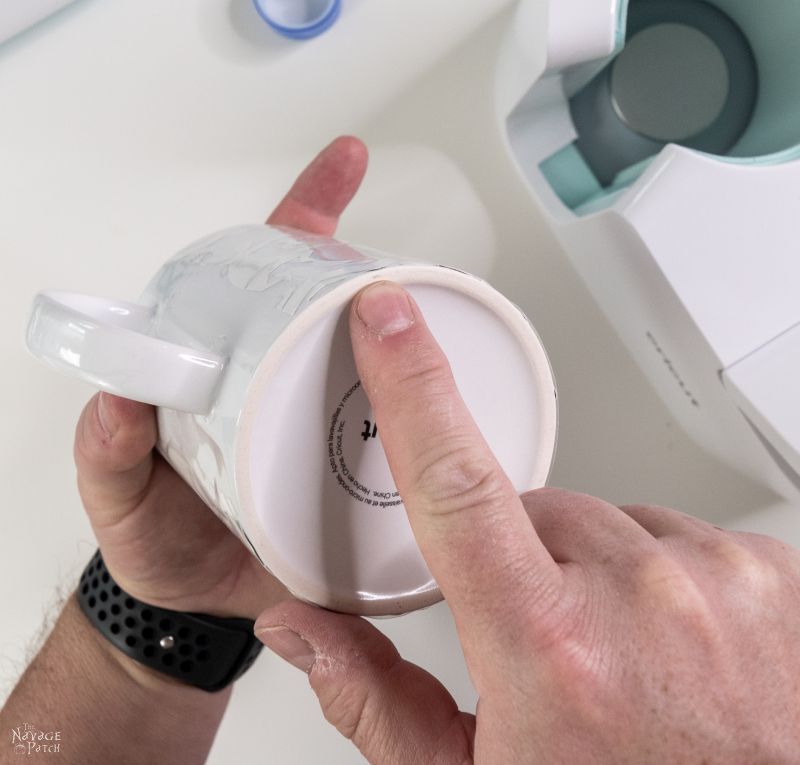
To prevent this, wrap some heat-resistant tape around the bottom rim, leaving half to hang over the rim, as shown in the picture below.

Then fold the overhang onto the bottom of the mug.

Those bottom gaps are now closed.

Repeat for the top rim of the mug.

Step 6 – Press the mug with Cricut Mug Press
Place the mug rightside-up in Cricut Mug Press. There’s a heat plate at the bottom of the press that helps to distribute the heat, so you always want to put mugs in bottom-side down.

Keep the handle centered in the gap.

Then press the lever to lock the mug in place and start the press.
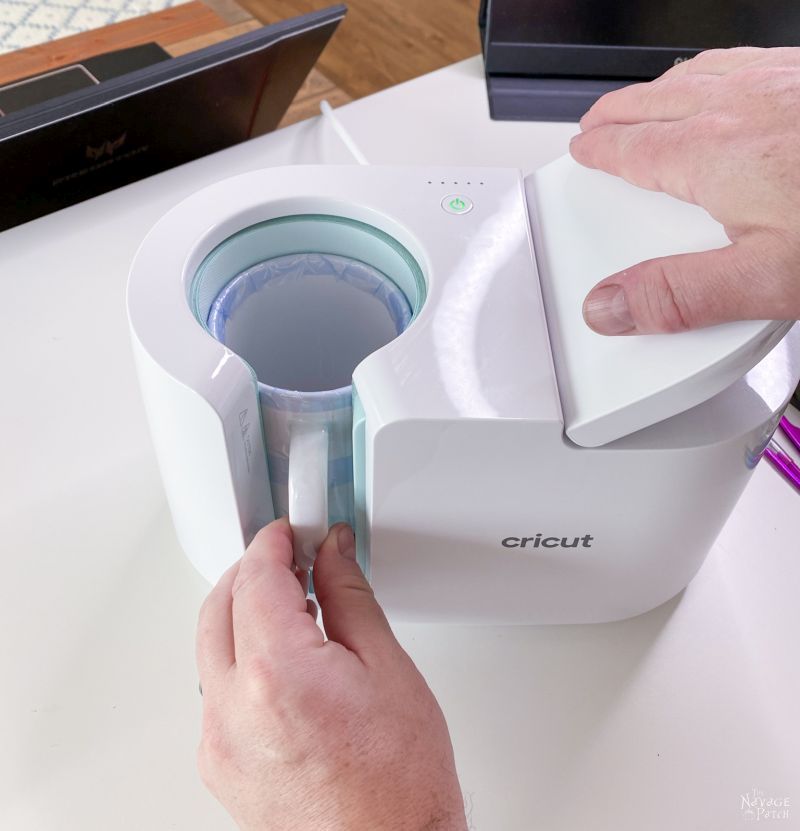

The first of five lights will start blinking. When it stops blinking and stays solid, the next light will start blinking. The whole press takes 5-6 minutes and finishes when the last light goes solid.

Step 7 – Remove your mug
After about 6 minutes, Cricut Mug Press will beep to tell you it has finished. Simply lift the lever to unlock your mug.

Then remove it using the handle. Don’t worry, even though the mug is around 400 degrees, the handle is still cool to the touch.

Place the mug on an EasyPress mat or other heat-resistant table protector such as a folded towel.

Step 8 – Unwrap and enjoy!
Let your mug cool for about 20 minutes (you should be able to handle it comfortably), then unwrap the transfer sheet and enjoy your awesome, custom mug!

Your Cricut Mug Press mug is dishwasher-safe, microwave-safe, won’t ever fade, and will last as long as the mug survives!
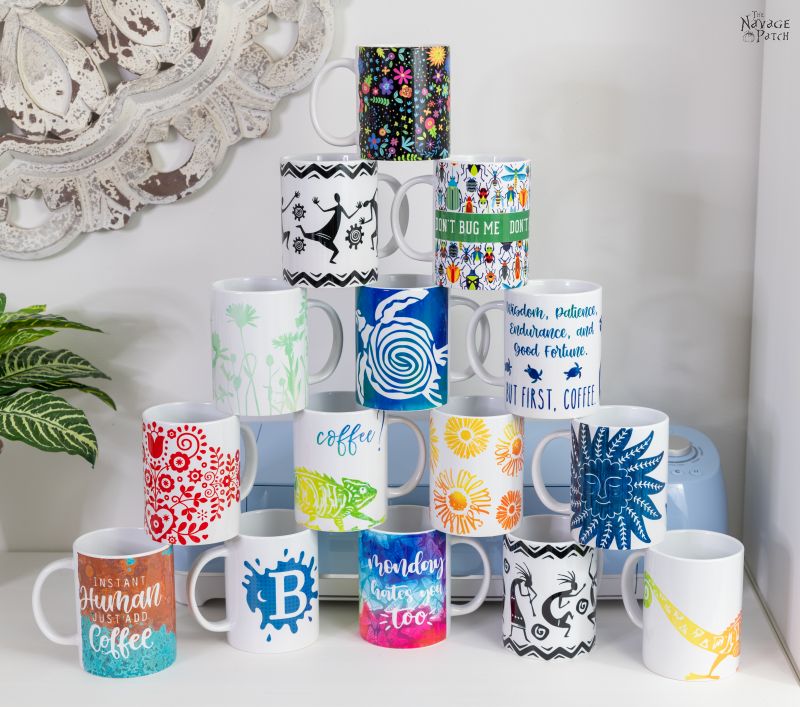
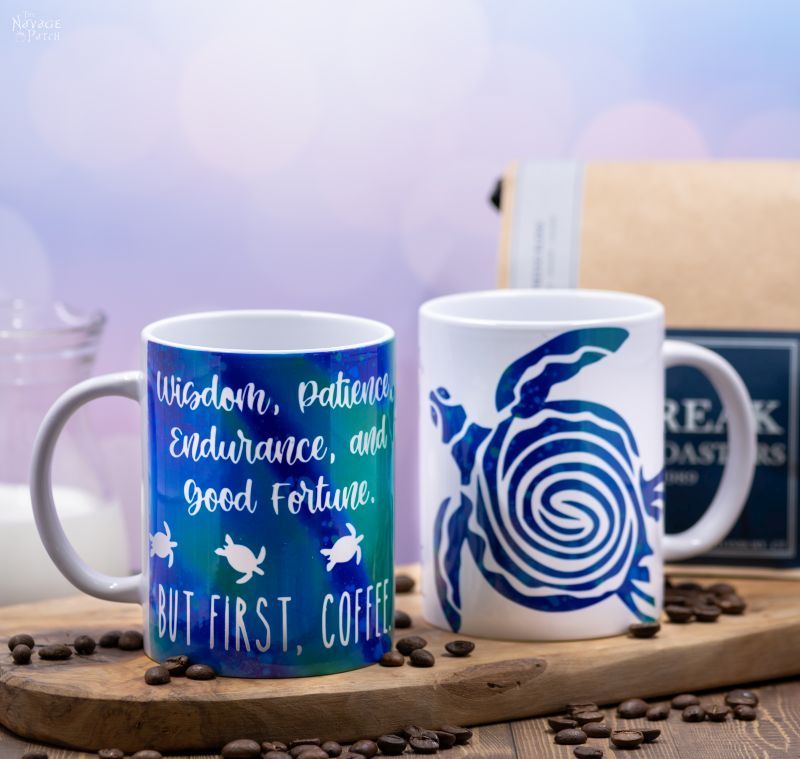
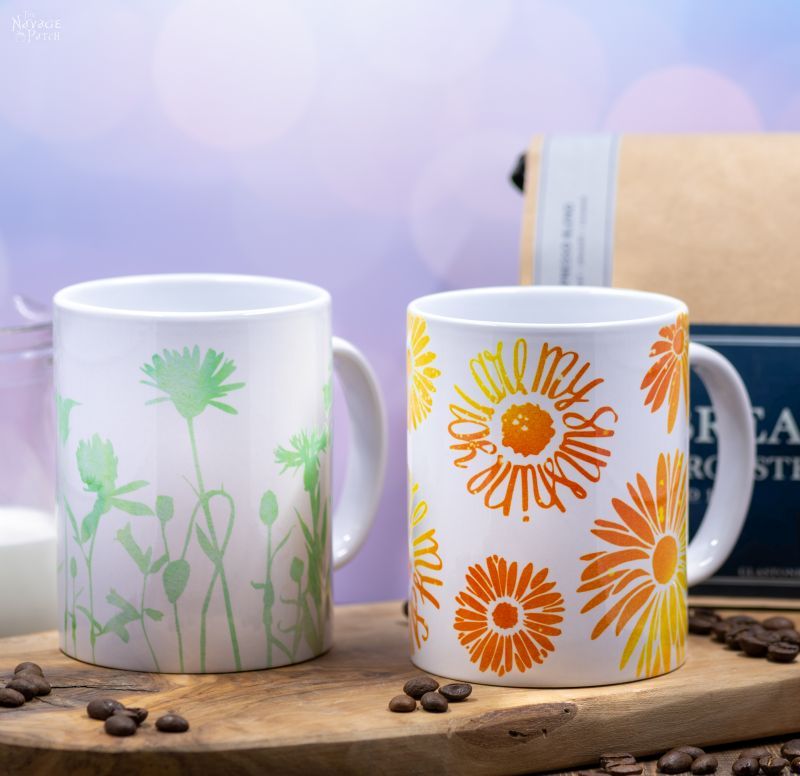
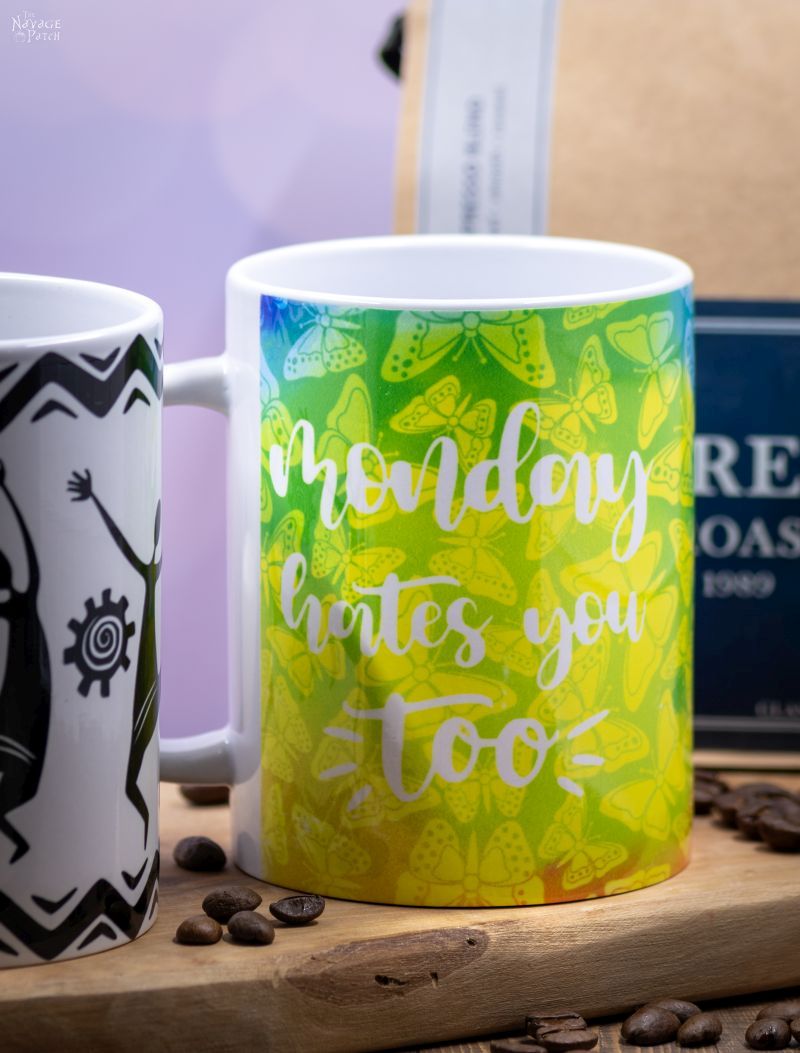
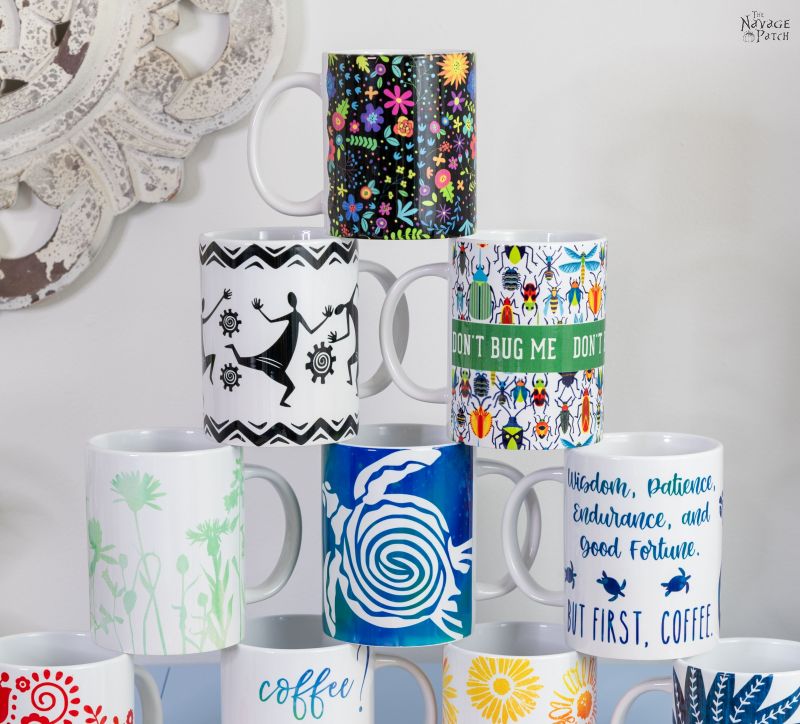
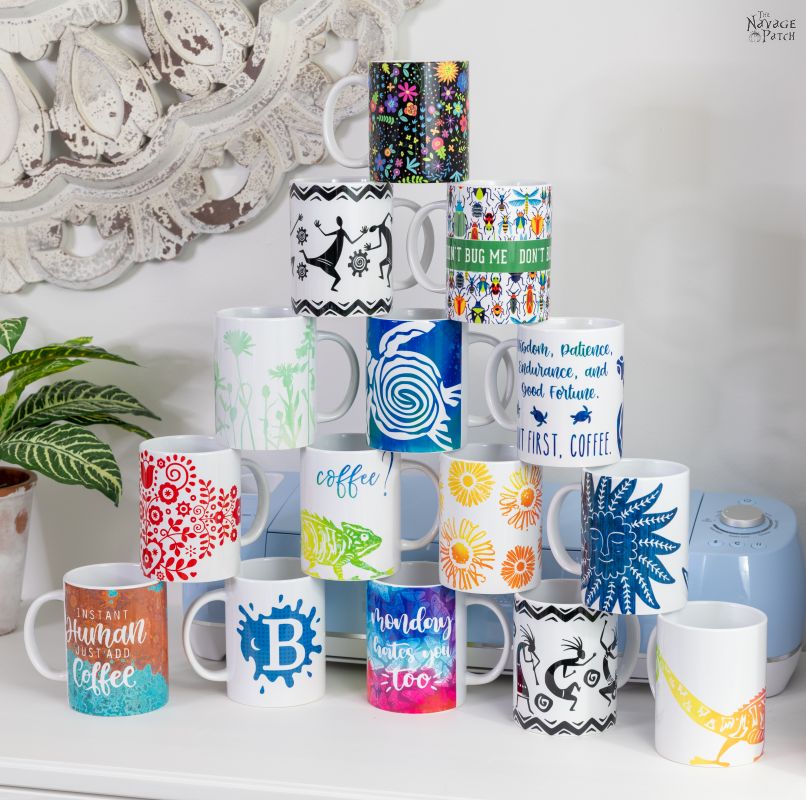
Here are some more mugs we made – all mug designs are available for free in The VIP Lounge.


We love to see our printables out in the wild! If you display our free printables in your home or use our free SVGs in your projects, and take a picture and post it on Instagram, be sure to tag us – thenavagepatch


Tips and Tricks
- You don’t have to use the Infusible Ink transfer sheets that are made specifically for the Cricut Mug Press, though there are advantages to doing so. The mug press transfer sheets don’t have grid lines on them, so there’s no chance of those grid lines getting transferred onto your mug in error. We made mugs using transfer sheets with and without grid lines and found no difference between the two. As of now, there are many more colors and patterns available in “regular” Infusible Ink, so we recommend not limiting yourself! Hopefully in the future, Cricut will do away with the grid lines on all Infusible Ink transfer sheets! (hint, hint)
- We tried making a couple of mugs using non-Cricut mugs, and though they turned out great, there is a slight quality difference. The designs pressed onto Cricut mugs have cleaner lines. That increase in quality, along with their cheaper price, makes Cricut mugs the clear winner. But in a pinch, if Cricut mugs are sold out in your area and you’re just dying to make some mugs, feel free to use another brand.
- When working with Infusible Ink, be sure your hands are grease-free and dry. I can’t stress that enough. Fingerprints can ruin an Infusible Ink transfer sheet, and water is its sworn enemy.
- The only part that takes a tiny bit of practice is wrapping the mug with the transfer sheet. You just need to find the way that works best for you. The key is getting it to lie flat against the mug with no big air bubbles.
- Don’t worry if you forget to turn your Cricut Mug Press off – it has an auto-off safety feature so forgetful folks (like me) don’t burn down the house!
WHERE TO BUY
Cricut Mug Press is on sale now for $199 at the following retailers:
Free Cricut Mug SVGs
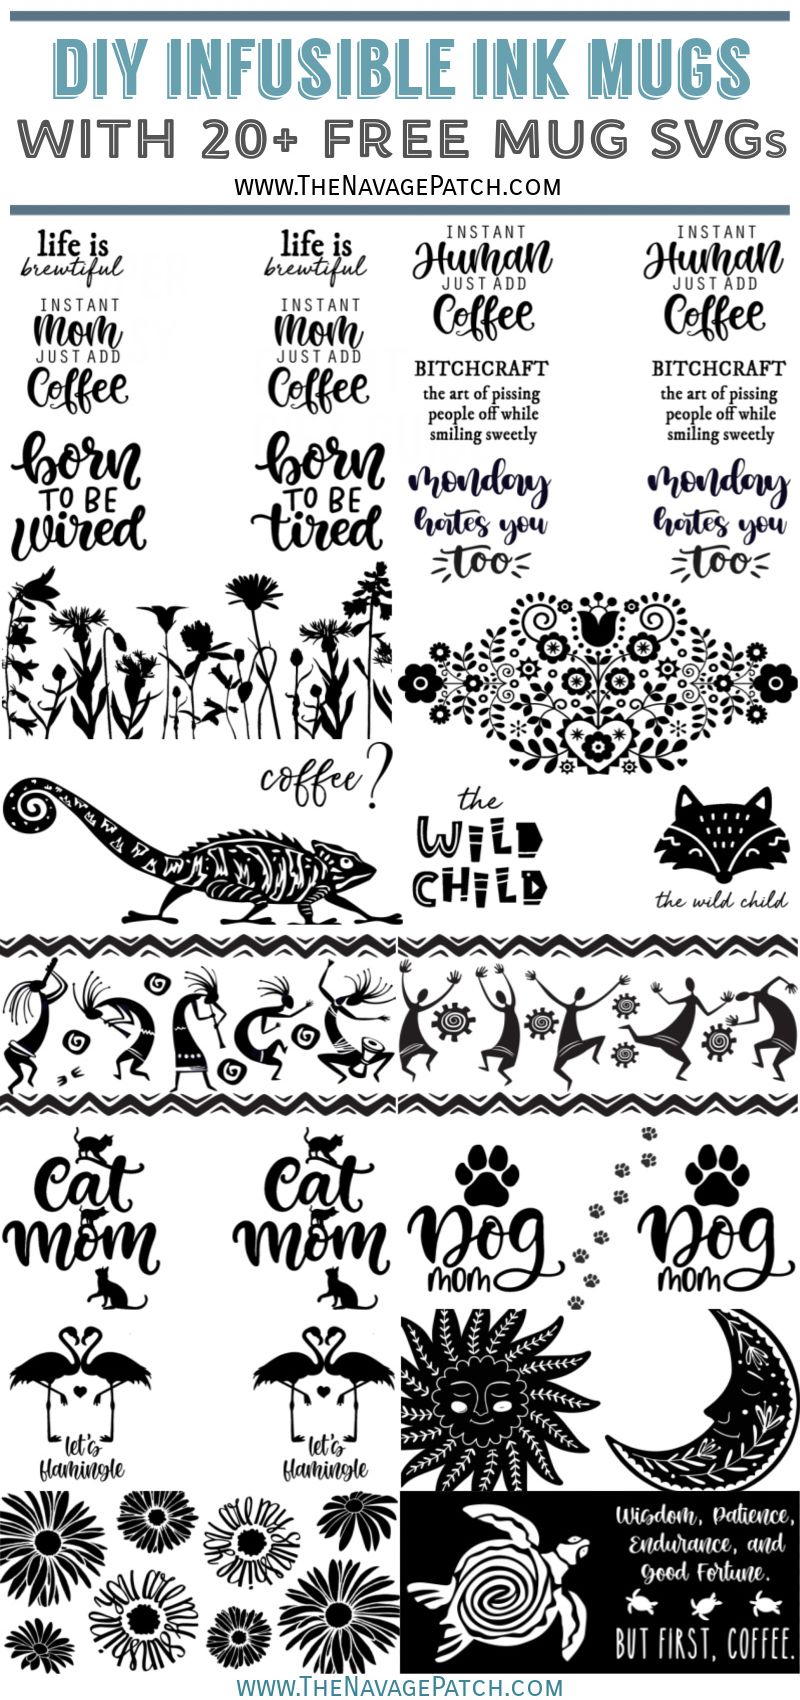
We created today’s FREE Cricut Mug SVG designs as PNG and SVG files and designed them for 15 oz size mugs. Now go ahead and click on the button below to download today’s freebies – they are all in the “SVGs – Stencils” section of the VIP Lounge.
If you’re not a Navage Patch VIP, you won’t be able to access our Freebies Library. But that can be easily fixed! Subscribe for free on the form below and become a Navage Patch VIP. Once you subscribe, a password will be sent to you in our Welcome email, and that will give you access to the VIP Lounge [Freebies Library].
Cricut Mug Maker Giveaway – Because We Love You Guys!

Here it is folks – the Cricut Mug Maker Giveaway! The drawing will be held at 10pm EST on Sunday, Sunday, March 28. Subscribe to our email list below for one entry, to our YouTube channel for a second entry, follow us on Pinterest for a third entry, and pin the image below for a fourth entry.
If you are already subscribed to our email list or social channels, you will need to do so again below to be entered. But don’t worry – you won’t receive duplicate emails from us!
Open to residents of the US and Canada only.
Congratulations to Elisabeth of Iowa, winner of the Cricut Mug Press!
Share it on Pinterest & Facebook!




this is amazing! I’m so sad we can’t get it in France yet and that this giveaway isn’t available for france either =,[ I would have gladly paid for the shipping cost, since I don’t know whaen we will be able to get it on the official shop here in europe! I’m looking forward to the launch here. I would love to try ceating those beautiful mugs! Thank you for all the explanations !
Dang, I hope you guys can get it soon, Caroline – you’re going to love it! 🙂
Very Nice! Thank you for all the explanations. I would love one of these. I enjoy everything on The Navage Patch! Thank you again.
Thank you, Gloria and good luck! 🙂
Love your stuff
Thanks, Amanda! 🙂
I would love to win the Cricut mug press!
Good luck, Diana!
Would love to win the Cricut Mug Press! I signed up for your site some time ago and love it, but I do not yet have a machine!! Just want one – ha!
Good luck to you, Judy! 🙂
I would love to win a mug press. My young daughter has become quite fond of my Cricut.
Good luck, Shannon! 🙂
Thanks for the chance to win. Just to let you know the “follow you on Pinterest” button doesn’t seem to be working. I already follow you on Pinterest but I would like to get that one requirement done. Thanks
Thanks for the heads-up, Martha. I made sure you were entered 4 times. 🙂
I can’t wait till summer vacation and I can try all your wonderful ideas out. I love the idea of designing mugs.
They’re really fun to make, Frences – we spent all weekend doing it!
Would love to win the Cricut Mug Press! I have been saving hard but cant afford one yet.
I wish you luck, Lindsay!
What a great prize from the best blog in all the kingdom! Thanks Handan and Greg for all the inspiration and the belly laughs, my DH often wonders what I am chuckling about alone in my craft room.
Why thank you so much, Donna! Best of luck to you! 🙂
I absolutely love The Navage Patch! I have learned so many things from both of you. It would be so awesome to win the Cricut Mug Press.
Thanks for all you do to brighten our world.
Glenda
You are so very welcome, Glenda! Good luck to you!
LOL, I love all you and Handen create! This Cricut Mug Press is the latest. While I don’t have a ginormous crafting space, I do have room for this press and have added it to my crafting loves. Keep up all the fun stuff!
You’re going to love it, Julie! 🙂
Wow thank you for the chance to win a Cricut Mug Press. It is on my bucket list
You’re very welcome, Christina! Best of luck to you!
yay, I can enter from Canada! And, the contest ends on my birthday so that would make super exciting!
I don’t have a Cricut – I see it so much everywhere that I am very tempted but maybe this device might just get me going. I love your blog – you sound like fun people.
Joanne
Hi Northern Neighbor and good luck to you! Oh, and happy soon-to-be birthday! WOOOt!
A long time follower of your blog. Love everything you share, especially the prints. Never disappointed in your ideas. Would love the mug press. Thanks for giving one away.
It is our pleasure, Darlene! Good luck to you!
I am new to the Cricut world and I am loving it. I have really enjoyed all the projects i have made so far. The mug press would be so fun. Thank you for giving us a chance to win it!
It is soooooo fun, Holly! Might be my favorite (right up there with Joy!)
I have been wanting to try this, so this would be the perfect time to do this, thanks for a great offer.
You’re so very welcome, Dean!
Thanks so much for this opportunity!
It is our pleasure, Elaine! 🙂
I’ve loved this site since the Patent Prints (IP has been my day job for over 20 years now). Patent drawings on mugs would be a great gift to attorneys and paralegals … almost like a tombstone in the Mergers arena. Thank you for the opportunity to win a Cricut mug press – I have ExploreAir 2 in Rose and Maker in Champagne. Not doing enough with them (yet).
Blessings and hugs!
Hey, that’s a great idea, Tona! Good luck to you! 🙂
Wow, what a fantastic gift. I would be green with envy of myself to win this fabulous circuit mug press. Just before the coronavirus virus, I would Volenteer to work with kids. We would make projects, some consist of porcelain tile that we would make designs or sayings on them, and then bake them. A circuit mug press would be valued, and appreciated in various ways, both with the kids, and on a personal basis for myself. Thanks you so much for as a follower of yours, to be given this chance to win this wonderful gift.
You are a good person to volunteer your time, Ivory. I wish you luck in the drawing! 🙂
I would like to win the Cricut Mug Press. Oh, the endless possibilities.
Soooo many possibilities, Ann! 🙂
I have really enjoyed your blog for quite awhile now. Greg you make me laugh so much! It is good for me. Your family seems great! I have a Maker. You do too but seem to like your Joy better. Is it because it’s easier and more convenient? Just like everyone else, I would love to win the fabulous Mug Press! I have watched many videos on it. Yours was the best. You are so entertaining! And informative! Thanks for all you and Handan do. Always look forward to your emails. I could not Pin the last thing we were instructed to do. Just wouldn’t let me. Thanks again! Shari
Shari, thank you so much for your kind words, and thank you for writing! I’m so happy you are enjoying our blog! I checked on your entry and made sure you’re entered 4 times. Good luck to you! 🙂
I’ve seen pictures of the mug press online, but I hadn’t been paying attention very well because I thought it was a “keep your coffee warm on your desk” machine! I suppose I should actually pay attention sometimes. Thank you for your super helpful tutorial!
LOLOL! Oh, that’s hilarious, Sarah! Can you imagine if that was Cricut’s big product announcement? :D:D:D:D
Thank you for giving all of us a chance to win the new Cricut Mug Press! I also did pin the post on pinterest but it does not show as an entry. I always look forward to reading your posts and I wish you and your family the best. I used to live in CT when I first started following The Navage Patch and moved south 1 yr ago but not quite as far down as you. Good luck to everyone!!
Debbie
You are so very welcome, Debbie! Don’t worry, you are entered 4 times. Congrats on your southward move! It’s so much better, isn’t it?
I cannot wait to get o e of these!! Absolutely the coolest thing and I love your designs!!
Thank you so much, Laurie – you’re going to love it! 🙂
What fun! Thanks for always making things seem simpler than they appeared to be. Your instructions are easy to follow!
Suz, if I can finally grasp it and explain it, then anyone can learn it no problem, lol! I’m joking but actually totally serious. 🙂
Great tutorial. Love the mug designs!
Thank you, Dawn! 🙂
Would love to win this for my daughter-in-law who is a big cricutter! Love your blog, and especially enjoy reading the running commentary with each new project!
Thank you so much, Lorie, and good luck to you (and your DIL!)
This looks so awesome I would love to be able to make those mugs with the cricket you are offering. However, I decided since I can’t even figure out how to enter it would be wasted on me. LOL. Some things are just not meant to be. ? Love your blog. You seem like a sweet couple and I love your humor. Stay safe and well!
Hi Teri, you must have figured it out – I see that you’re entered! 🙂
Thanks Greg! I wouldn’t have been able to enter without all of your encouragement. I have been laughing all morning. Thank you for starting my day off with a laugh and smile. Happy Friday Jr.
I can’t imagine me using the Mug Press enough to make it a worthwhile purchase/giveaway. I’d rather enter the Greg and Handan’s really cool free mug giveaway! ?
LOL, I’ll keep you posted on that one, Rebecca! 🙂
Have been interested in starting a new project, and being chosen to win your mug press would be perfect! Thank you for the chance to win such a great prize.
You’re so very welcome, Sandy!
I have been hearing about the mug press and I even have some mugs ready to go! Thank you for the chance to win a press.
You’re well-prepared, Karen! Good luck to you! 🙂
Thank you for the chance to win the Mug press, been wanting to do mugs but a little leery. This makes it look so simple.
Lynn, it is *so* easy with Mug Press!
DO YOU KNOW IF THERE ARE ANY PLANS AT ALL FOR CRICUT TO MAKE ANOTHER MACHINE THAT WILL ALLOW A PERSON TO MAKE THEIR OWN TILES INSTEAD OF MUGS?
I don’t know, Linda, but if you can get sublimation tiles, you should be able to use one of Cricut’s Easy Presses on it with their Infusible Inks!
THIS IS AWESOME !!!! THANK YOU SO MUCH…..
You’re very welcome, Marta! 🙂
You two are awesome! And generous with sharing your ideas and instructions. Your writing style cracks me up. I find myself smiling as I read your ramblings. Never dull instructions. And the use of pictures the entire way is sooooo helpful. A picture is definitely worth a thousand words.
I would dearly love to win this machine. My daughter and I are looking for a hobby to keep us busy as we remain house bound.
Can hardly wait for your next DIY project.
Thank you so much, Jennifer! Yes, for those still housebound, this would really help alleviate some of the boredom. Good luck to you and your daughter!
ik zou graag zo een pers willen winnen om nog meer te werken en creatie’s te maken met cricut produkten
This is so cool. Would love it!!!
Good luck, Anne! 🙂
This is awesome…subscribed: YouTube, pinterest, pinned, Facebook, instragram….ahhhh….this would be one awesome prize…I was undecidedon the mug press, but you made it easy to understand……good luck everyone
And good luck to you, Julia! 🙂
I look so forward to your blog posts. You are both so creative. Thanks for sharing your talents!
Thank you, Patti, and you’re welcome! 🙂
I love reading your posts! They are very entertaining! Hahaha! They are also very easy to follow. Thank you so much for all the clear and precise instructions on the projects you do.
You are so very welcome, Carol – it is our pleasure! 🙂
Although the mug press isn’t cheap, it’s $279.00 in Canada, I have no doubt it it’s well made. I have one of the original Cricut machines that uses the cartridges and keyboard templates and it still works. I also have the newer Air 2 and am trying to learn how to use Design Space but it has not been easy. I’m more of a visual learner but most of the videos I have watched assume you know the basics. I do find you lessons easier to understand so I have been pinning them. I’d love to win this because I unfortunately can’t shell out the $279 plus 13% tax! Thanks for the chance to win! Good luck everyone! ☘️
Yowza! 279 + 13%?!? That is a little steep, Giselle. I wish you luck in the drawing, and we’ll have more Cricut Cribs real soon to get you up to speed with your Air 2.
Thank you for all the great information! I’m sort of new to all this stuff, so to have it all in one place is great! Plus you make it so easy to understand!☺
You’re very welcome, Malaina!
Hey there! Since you guys have an ‘in’ with Cricut – I am wondering if they will be adding some colors other than white. We would love black (followed by red, blue, green, and yellow).
That said, do you know of a blank mug that is black that you have had success with?
Hey Mo! I don’t know of any blanks that are anything but white or off white(for pillow covers and toates). Since the ink gets infused into the mug, nothing would really show on a black mug. It would be like drawing on black construction paper with markers or pens. If you want to do transfers to black or other colored mugs, you may want to look into permanent vinyl or maybe this technique here: https://www.thenavagepatch.com/diy-iron-on-mugs/
But understand that they won’t be anywhere near as permanent as Infusible Ink. Good luck!
Your chameleon image is so cute and my grandsons would love it. Do you have other similar style images or can you tell me where to look? I don’t want to make 2 mugs with identical images. I can change the color but would also like to change the image. Lizard, dinosaur or similar? Thanks for the excellent tutorial and svg files!!
Hi Deborah, we will add a dinosaur and another chameleon sometime this weekend. Take a look tomorrow in the same folder as the other ones.
Wonderful! Thank you!!
I have not seen any additional images added to the folder. Am I missing something?
Sorry, Deborah! They are in there now! 🙂
Perfect! Thanks!! One more question… do you recall which color of transfer sheet you used for the chameleon mug? I like the color change. Thanks again 🙂
No problem! I used this one for the chameleon.
Thank you.
Thanks for the wonderful info.
You’re welcome, Pam!
Im all ready a winner, Just seeing the Kokopelli stencil made my day!! Thanks and Good luck everyone!!
I’m so happy you like it, Olga! Handan feels a deep kinship with Native American culture, as many turks and Central Asians believe their ancestors migrated up through Siberia, across the Bering Sea land bridge and down through what is now Alaska and Canada to settle in their new homelands.
Great designs and great tutorial! Enjoy reading your posts!
Thank you, MonaLisa!
Love to watch your tutorials. You make everything look easy and you always have greats tips to help.
Thank you so much, Teresa! 🙂
This little machine looks like so much fun! Thanks for the opportunity to win one. ?? Good luck everyone.
Good luck to you, Pam!
Thank you for the detailed tutorial for using the mug press. May I ask where I can find or purchase
the bug template you used for the Don’t Bug Me mug?
Hi Linda, that template is also in the VIP Patch along with the others. Just be sure to buy the Jungle Safari Infusible Ink transfer sheets for that one!
Hello !
Love your website and the awesome SVG’s to use for the cricut mugs. I really like the chameleon but was hoping to be able to remove the ” Tea” or “Coffee” from the top. I was planning on put just the chameleon on a children’s mug. I am not able to remove the words. Any chance I could get the SVG without the words attached ?
Thanks!
Hey I hope you don’t mind if I put your designs in my mug collection?
Mugexpert,
These designs are copyrighted by us and only for personal use. You cannot use them for commercial purposes. If you do, we’ll have our legal team contact you and your host.
Thank you,
Handan