Cricut Infusible Ink – A Heat Transfer Game-Changer!
Cricut Infusible Ink is a revolutionary heat transfer medium that gives professional-grade transfers in ultra-vibrant colors that won’t crack, peel or fade!
There’s a new kid on the heat transfer block, and its name is Cricut Infusible Ink.
Two years ago, Cricut turned the die-cutting world on its head with the introduction of Cricut Maker – a smart-cutting wonder capable of cutting over 300 materials. A tremendous *gasp* was heard around the country that fine August day, as millions of incredulous crafters fanned their faces with quivering hands and inhaled sharply in an event that has come to be known as The Great Gasp.
Thousands fainted and had to be rushed to the nearest front porch to be revived with gentle rocking and cool sweet tea.
Not content to rest on their precision-cut laurels and revel in their iron-on glory, the Big Brains at Cricut have now redefined and reinvented dye sublimation heat transfer with a new system of products that rely on their revolutionary Infusible Ink technology.
If a unicorn, a rainbow and a supercomputer had a baby, it’d be Cricut Infusible Ink!
With Cricut Infusible Ink transfer sheets and Infusible Ink markers & pens, we ordinary Joes and Joans can create professional-grade t-shirts, totes, coasters and onesies with shockingly vibrant colors that won’t fade, crack or peel – even when washed!
Results like these used to be the sole dominion of professional printing companies or those individuals with enough money and space for a dye sublimation printer and a heat press.
Cricut has now brought the magic to the masses with Infusible Ink!
Cue the next Great Gasp!!
But don’t faint yet, madam! I’ve much more to tell!
Let’s answer some basic questions first, and then we’ll get into some fun Cricut Infusible Ink projects with coasters and t-shirts!
This is a sponsored conversation written by me on behalf of Cricut. The opinions and text are all mine.
What is Cricut Infusible Ink and How Does it Work?
Okay, for this one, I’ll have to teach you a teeny tiny bit of science. Don’t worry, there won’t be a final exam at the end! I know the word “science” gives some people uncomfortable flashbacks of high school.
Cricut Infusible Ink transfer sheets employ a process known as dye sublimation. For those unfamiliar with the word “sublimation,” I’ll explain real quick and easy.
Sublimation is simply the process by which a solid changes to a gas without first becoming a liquid. Sounds science-y, but you actually see it from time to time in the real world.
Take an ice cube out of your freezer and put it on your counter. In an hour (or less), that cube will be water. By the end of the day (or maybe the next day), that water will have evaporated. This is not sublimation. The water has changed from a solid (the ice cube) to a liquid (the puddle) to a gas (water vapor).
Now take another ice cube from the tray and put it on a shelf in your freezer. Check back in a month or two. That cube will be gone (or much much smaller). It has sublimated, or changed directly from a solid to a gas.
It’s the same thing dry ice (frozen carbon dioxide) does when left on a counter.
It’s also the reason you can hang laundry out to dry in sub-freezing temperatures!
Okay, science lesson over. How are you feeling? No dizziness?
Good!
You survived a bit of physics and chemistry!
A+ and a gold star for you, madam!
Now, what the brainiacs at Cricut have done is to put a solid dye that can sublimate (with the help of a very hot heat press like the EasyPress 2) into their Infusible Ink transfer sheets and Infusible Ink markers & pens.
When a Cricut Infusible Ink transfer sheet is used with a compatible blank, the solid dye sublimates to a gas and infuses into the substrate. It literally becomes one with the coaster, shirt, tote (or onesie, if you have an extremely small human crawling around your house).
If you were to look at a polyester fiber under a microscope, you’d see that it is essentially a clear tube. The colorful gas created when Infusible Ink is heated permeates those clear polyester tubes at the molecular level and fuses with them. This is why the colors are so incredibly vivid!
Cricut Infusible Ink is amazing stuff!
I know, I know – you’re fanning yourself and gasping for air.
Hang in there, madam! There’s more!
How is Cricut Infusible Ink Different from Heat Transfer Vinyl or Iron-On?
Okay, think of a frosted cake. If the cake itself is your blank (t-shirt, tote, etc.), then heat transfer vinyl or an iron-on would be the frosting (we’re talking a single layer cake, not one of those delicious multi-layered deals with layers of frosting all throughout). Sure it sticks on well enough, but give a piece to my wife, and she’ll scrape the frosting right off with her fork. (She doesn’t like frosting!! GASP!!)
But Infusible Ink is different! Whereas HTV and iron-on sit on top of the blank like frosting on the cake, Infusible Ink would be the sugar in the cake.
Good luck trying to remove the sugar from that delicious chocolate cake! It has melted and become one with the moist and decadent crumb. Scrape all you want – that sugar’s never coming out!
(Is it obvious I’m on keto and haven’t eaten anything sweet in over a year? I’m dying here, talking to you about cakes! Alas, the things I do to educate!)
There are some other key differences between Infusible Ink and HTV/iron-on. Notably:
- HTV and iron-on can be applied to almost any surface, whereas Cricut Infusible Ink products must be applied to a compatible Cricut Infusible Ink blank.
- HTV and iron-on may be applied to any color garment or blank, whereas Cricut Infusible Ink products should only be applied to compatible white or light-colored Cricut Infusible Ink garments or blanks.
- Infusible Ink products require a Cricut EasyPress 2 or heat press capable of reaching 400 degrees Fahrenheit.
Do I Need a Sublimation Printer?
No! Cricut has eliminated the need for a sublimation printer by packing all the dye sublimation goodness magic into their Infusible Ink transfer sheets and Infusible Ink markers & pens!
What are the Compatible Blanks?
Cricut Infusible Ink compatible blanks are base materials that are specifically engineered to work with Infusible Ink transfer sheets, markers & pens. At the moment, the compatible blank list includes:
- T-shirts
- Tote bags
- Coasters (round and square)
- Onesies
- Pillow covers
- Cosmetic bags
- Wine bags
This list will grow in the future as Cricut adds more and more compatible blanks.
Essentially, the compatible blanks are polyester or poly-coated materials. As I explained earlier – it’s what Infusible Inks need to properly showcase their magic.
There are third parties that sell a range of blanks that are suitable for traditional dye sublimation heat transfer. Though these may be used with Infusible Inks, Cricut cannot guarantee perfect results.
Can I Use it on Cotton?
No. Cricut Infusible Inks are designed to work with polyester and poly-coated materials. This is one rule you can’t get around with Infusible Ink or any other dye sublimation process. The sublimated dye is only able to infuse (and become one with) polyester fibers or poly coating. While you technically could use Infusible Ink on a cotton t-shirt (look, you’re not violating any laws of physics by doing so), the results will be dull and lifeless – nothing like how the colors pop on a compatible t-shirt. In other words, you’d be wasting your time and money.
Do I Need an EasyPress 2?
You’ll need an EasyPress 2 or a heat press that can reach 400 degrees Fahrenheit. An EasyPress may be used, but Cricut can’t guarantee the results, as it generally doesn’t get hot enough for consistently perfect transfers.
What Cricut Machines Work with Infusible Ink?
Cricut Infusible Inks are compatible with all Cricut Maker and Cricut Explore machines and Cricut EasyPress 2 (and to a lesser extent, Cricut EasyPress).
Tell Me More About the Transfer Sheets!
Very well, madam.
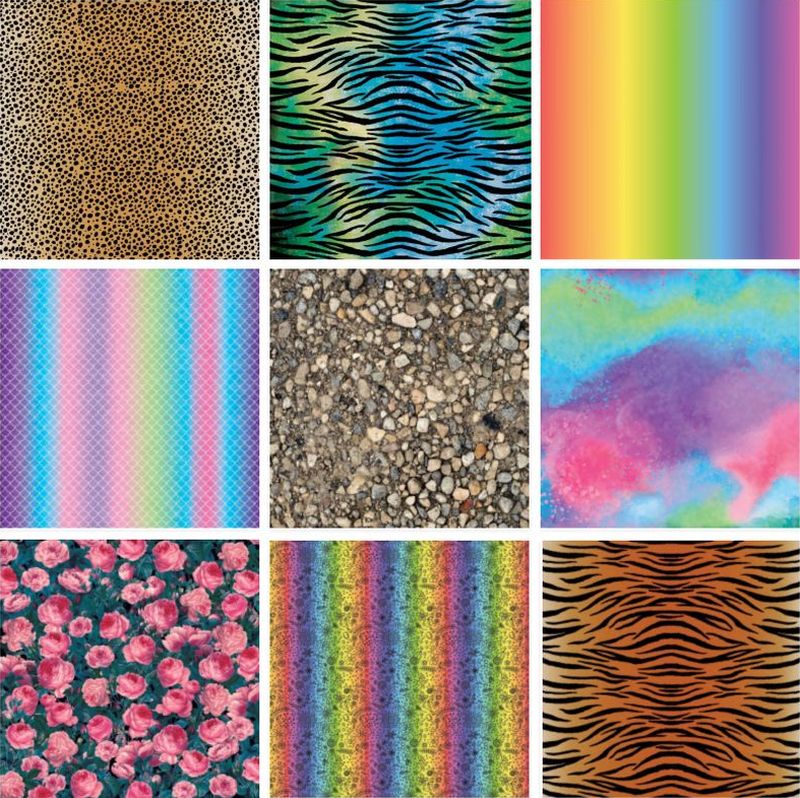
Cricut Infusible Ink transfer sheets are available in a wide array of patterns and colors.
Here are just a few:
The Infusible Ink transfer sheets are priced as follows:
- 2 pack of solid color 12″ x 12″ sheets – $12.99
- 2 pack (variety) of patterned 12″ x 12″ sheets – $12.99
- 4 pack (variety) of patterned 12″ x 12″ sheets – $17.99
The transfer sheets are far less vibrant than your final projects will be. The colors really pop when the Infusible Inks are transferred!
Tell Me More About the Markers & Pens!
Your wish is my command.
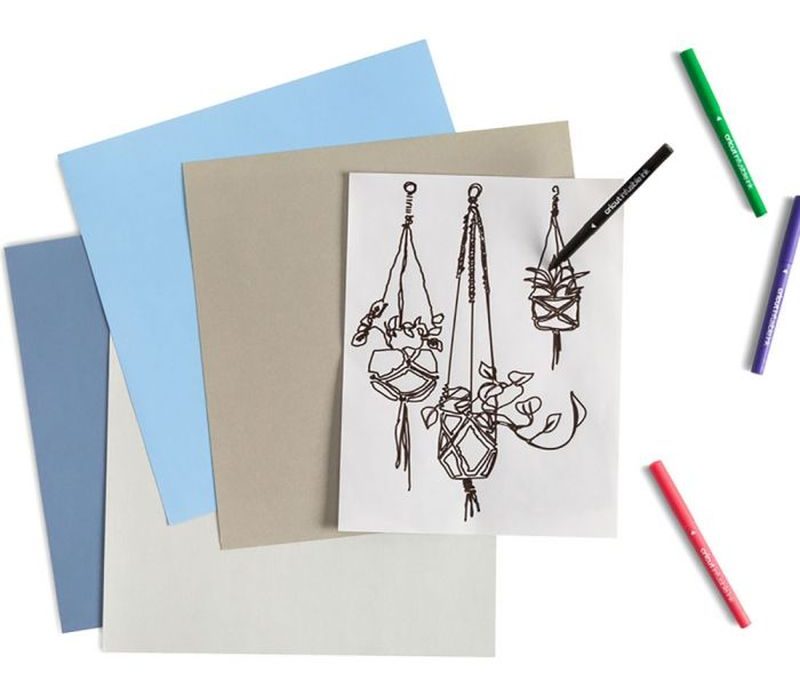
The Infusible Ink markers & pens fit right into your Cricut Maker or Explore and draw your design onto regular laser copy paper with Infusible Ink. They can also be used to draw freehand, but be aware that the image will be reversed when transferred, so it’s better to do text in a graphics editor, reverse it, and then let your Cricut Maker or Explore do the rest!
Where Can I Buy Cricut Infusible Ink Products?
Right now, the only place to buy Cricut Infusible Inks is in Michaels stores or online at Michaels.com. Starting October 1, you’ll be able to buy Infusible Ink products in Joann stores and online at Cricut.com.
Where Can I Find More Information About Cricut Infusible Inks?
Cricut has a comprehensive FAQ page that answers far more than I’ve talked about here. Check it out to learn more!
*****
Okay, enough preamble! Let’s make some t-shirts and coasters with Cricut Infusible Ink!
CRICUT INFUSIBLE INK T-SHIRT TUTORIAL
When I learned that you could only use Infusible Ink on polyester t-shirts, my first thought was welp, there goes that idea!
I mean, who wants to wear uncomfortable polyester, right?
So I figured I’d make some shirts for the blog, oooh and ahhh over the colors and then toss those suckers right in the bin.
But then I opened my first t-shirt package.
And it was a revelation!
This wasn’t some cheap polyester that made you feel like you’re wearing a plastic grocery bag. This shirt was soft, and it felt good!
I pulled off my shirt to try it on. It couldn’t be…
But it was! The shirt was comfortable.
Huzzah!
So back to infusing I went, with fully renewed vigor.
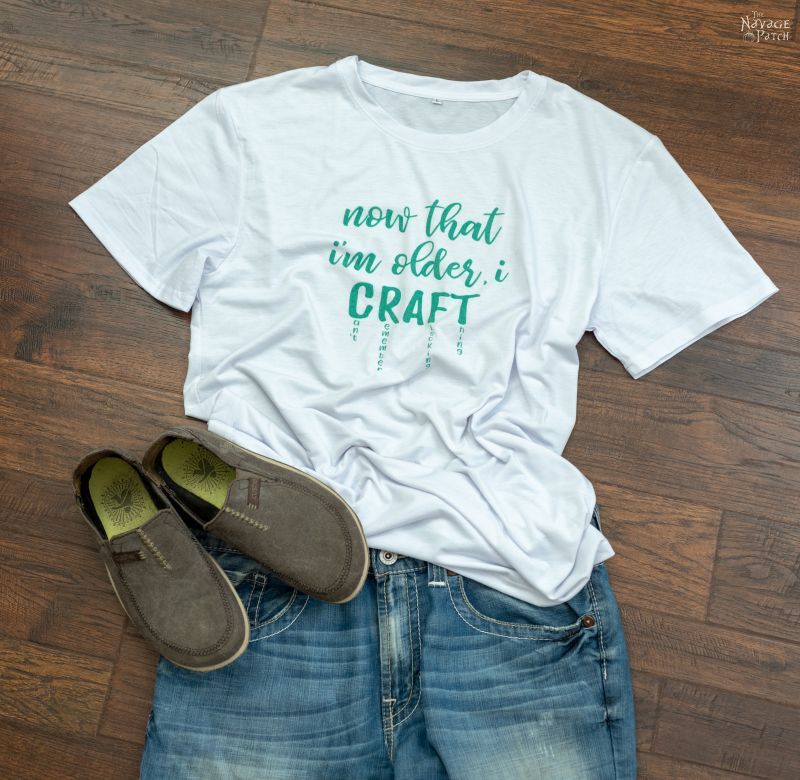
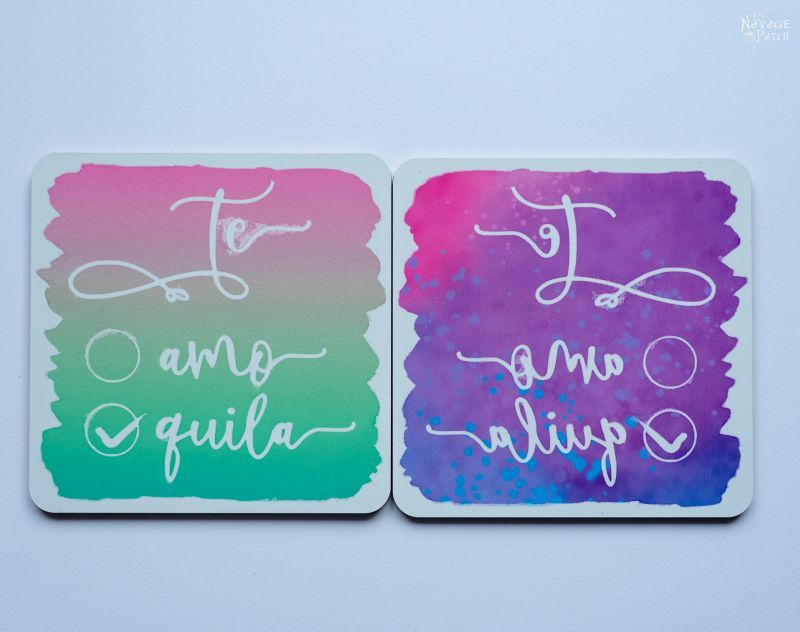
We came up with a fun little saying for our t-shirt design that sums up our life experience quite accurately! 😀
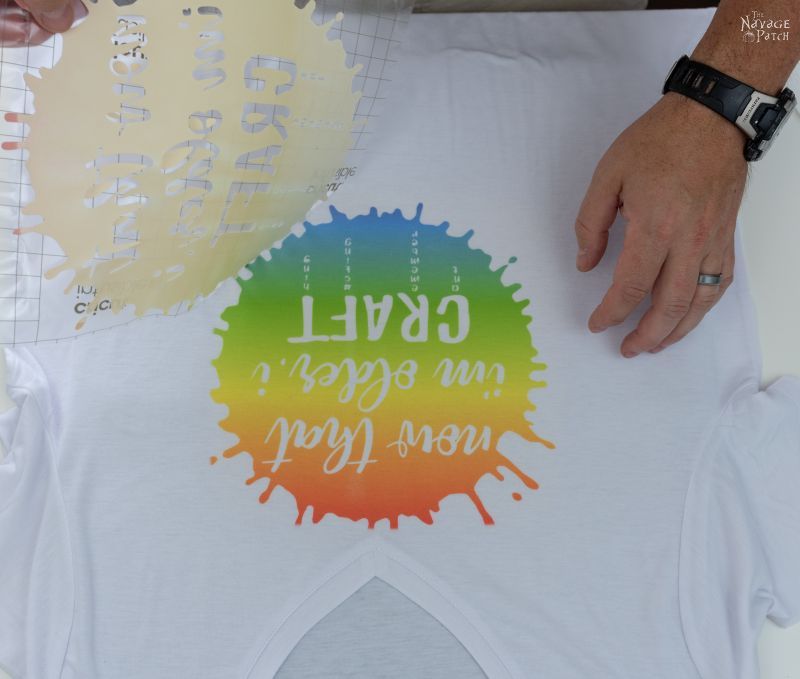
For Handan’s shirt, we decided to make the negative – that is, we would weed out the words from the Infusible Ink transfer sheet.
For my, shirt, we did the opposite. We kept the words on the transfer sheet and weeded out the rest.
Let’s have a look at how it’s done.
Cricut Infusible Ink T-Shirt
T-Shirt SUPPLIES LIST
Affiliate links are provided below. Full disclosure here.
- Cricut Maker or Cricut Explore cutting machine
- T-shirt design (available in the VIP Patch)
- Cricut Infusible Ink t-shirt
- Standard grip mat
- Brayer (highly recommended)
- Scissors
- Tweezers and other weeding tools
- Cricut EasyPress 2
- Cricut EasyPress mat
- Cricut Infusible Ink transfer sheets
- Butcher paper (included with the Infusible Ink transfer sheets)
- 80lb white cardstock
- Lint roller

We love to see our printables out in the wild! If you display our free printables in your home or use our free SVGs in your projects, and take a picture and post it on Instagram, be sure to tag us – thenavagepatch
This is a good time to tell you that whatever you think you know about heat transfer, you’re going to have to throw it out the window and start over with Infusible Inks.
Don’t misunderstand me – I’m not saying they’re had to work with! It’s just that things are done a little differently with Infusible Inks, so you’ll have to pay attention until you learn the tricks for each material.
The best place to learn how each material differs is at Cricut’s Heat Transfer Guide page.
Step 1 – Upload one of our designs to Cricut Design Space
We opened up our design in Cricut Design Space™ and resized it to about 8 3/4 inches to a side. The heat plate on our EasyPress 2 is 9 x 9 inches, and the design needs to fit completely under that plate. Unlike with HTV or iron-on, with Infusible Inks, your entire design must fit underneath whatever heat press you are using. Once you apply the heat press, you cannot move it around, or you’ll ruin your transfer.
The writing must be reversed before transfer! You can do that either using the “Flip” tool in Cricut Design Space™, or simply turning the “Mirror” button ON before cutting your design.
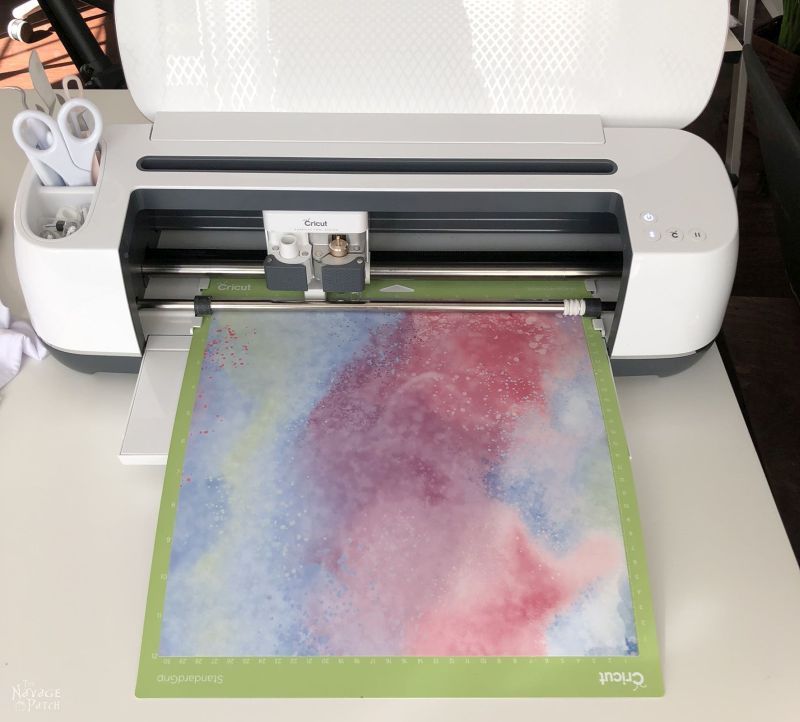
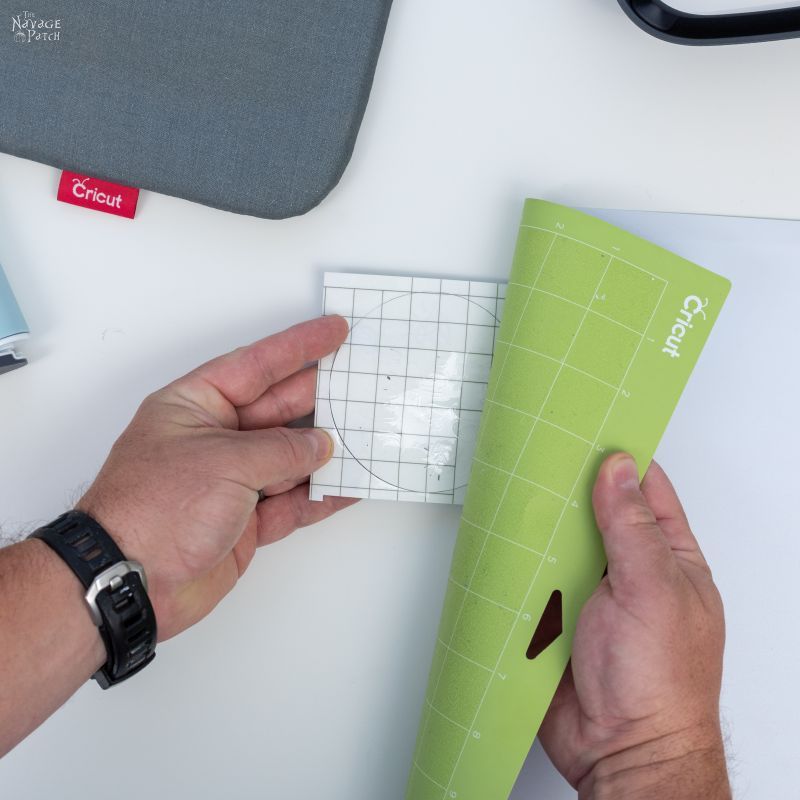
Step 2 – Choose your transfer sheet
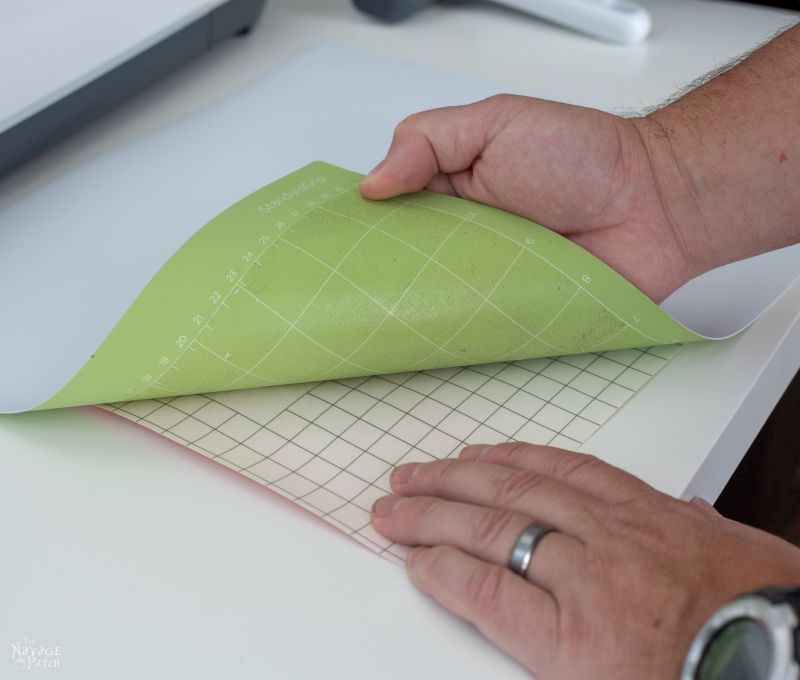
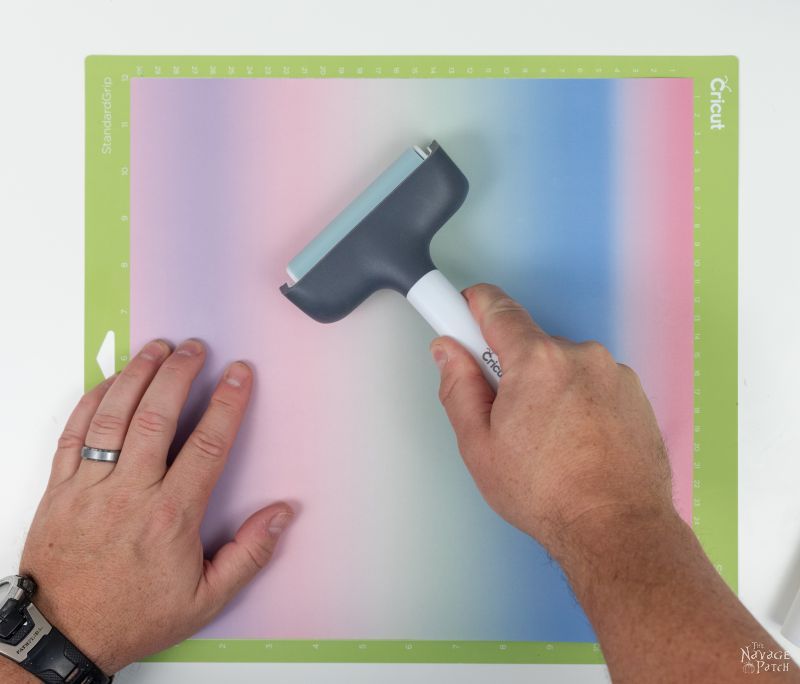
There are so many awesome colors and patterns to choose from! Handan chose Watercolor Splash for her shirt, and I chose a more standard green. I put the Infusible Ink transfer sheet on a standard grip mat.
Note: A brayer will make your job a whole lot easier when attaching these transfer sheets to the mat!
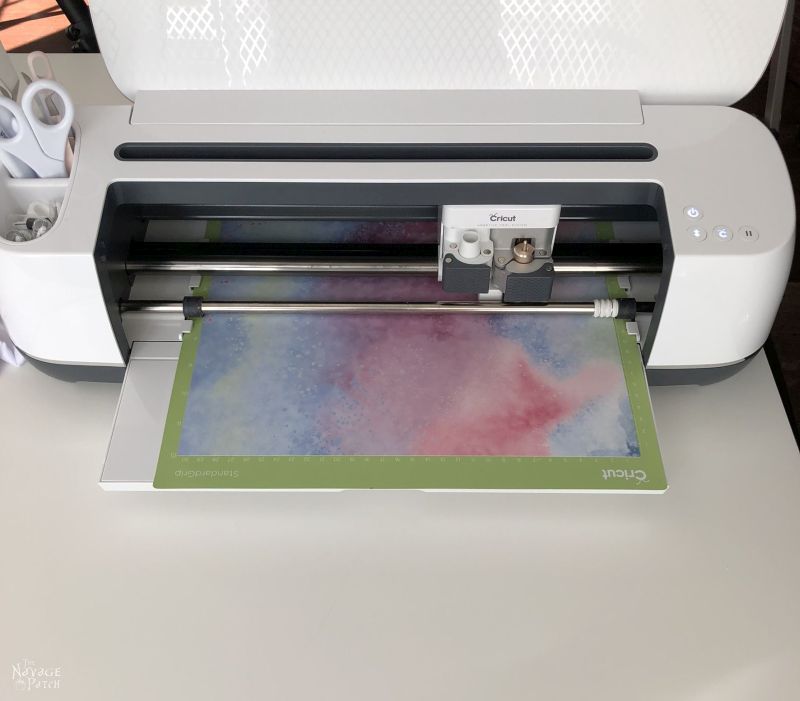
Step 3 – Load the mat into your cricut
Step 4 – Cut your design
Click “Browse All Materials,” and then select “Infusible Ink Transfer Sheet” on your Cricut Maker. Cricut Explore users should select “Custom” on the dial.
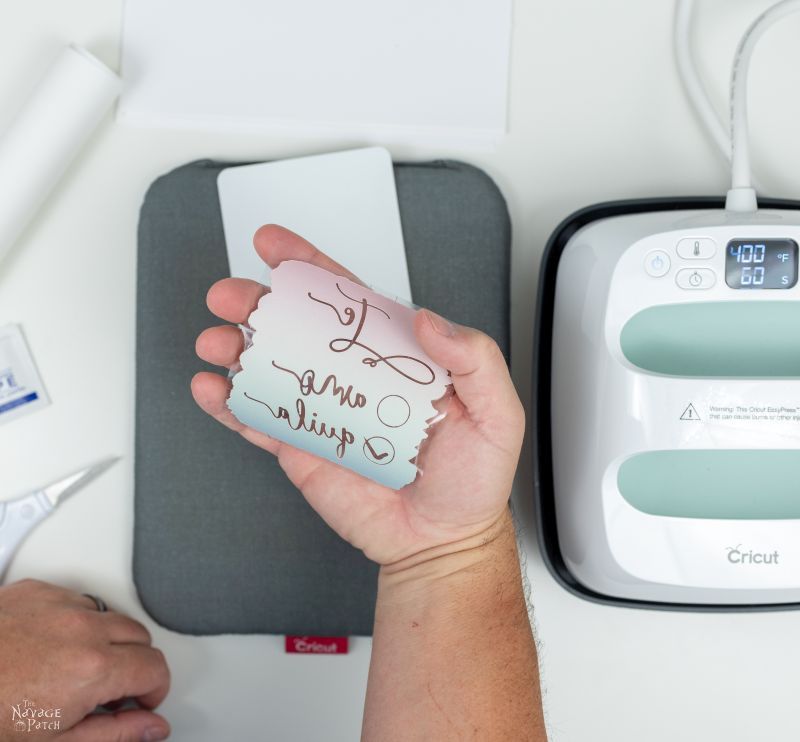
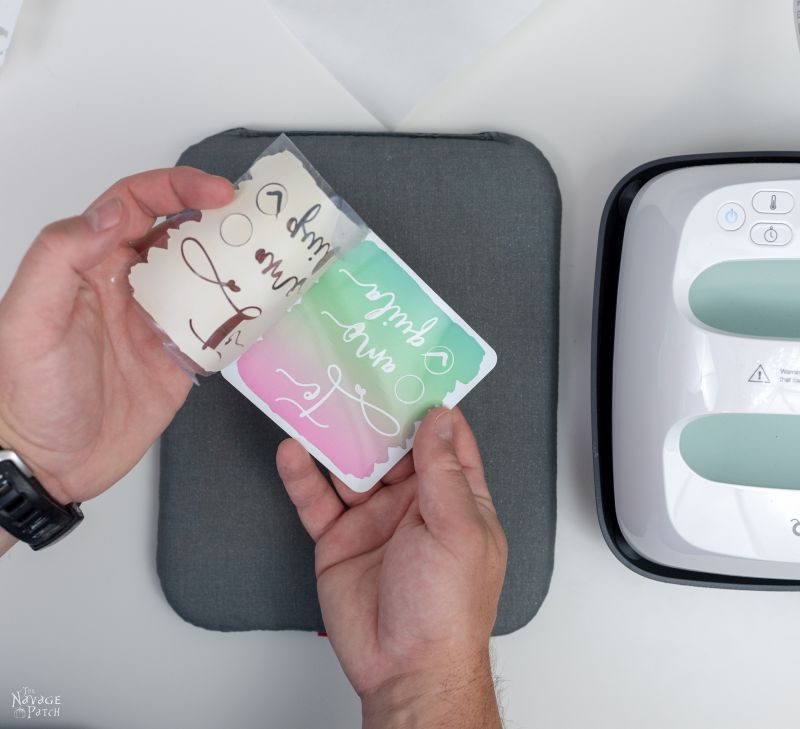
Step 5 – Peel the transfer sheet
Step 6 – Weed your design
This is a little different than with HTV or iron-on, as the Infusible Ink transfer sheets are a little stiffer. Bending and “cracking” the transfer sheet gets things going, and weeding becomes much easier. Smaller, more intricate weeding takes a little practice, but after a few designs, we were speeding right along.
Step 7 – Determine your heat setting
Using Cricut’s Heat Transfer Guide, determine your temperature setting and length of press. For this t-shirt with an EasyPress 2, it’s 385 degrees for 40 seconds.
We made some t-shirts at 385, and then we decided to kick things up a notch and make some at 400 degrees. There wasn’t too much difference, but 400 seemed a little better.
Anyway, it certainly didn’t hurt, and since 400 seems to be the sweet spot for dye sublimation, we just went with it from then on.
Step 8 – Put cardstock in shirt
To prevent bleedthrough, insert a piece of cardstock or 4 pieces of butcher paper between the two shirt layers and then lay the shirt on your EasyPress mat. We tried with and without cardstock, just for giggles (and because we like to break the rules a little, heheheh) and found no issues with bleedthrough, so if you forget (or you run out of cardstock), don’t worry too much.
However, we do recommend using it, if possible! Better safe than sorry!
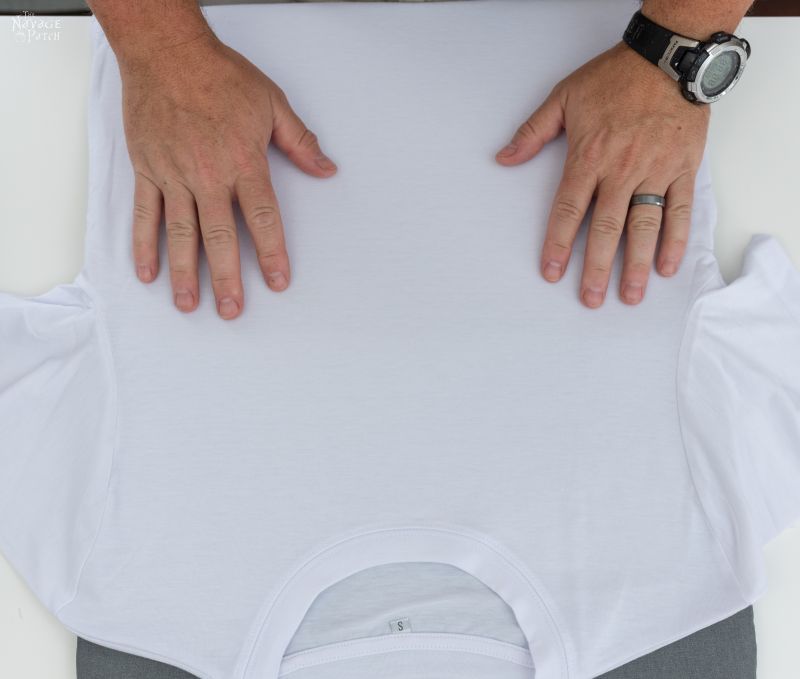
Step 9 – Use a lint roller on the shirt
*IMPORTANT! Don’t skip this step!*
We like to bend the rules here and there, but not with this step! Any lint or debris on the shirt will hinder your transfer and leave ugly and permanent spots!

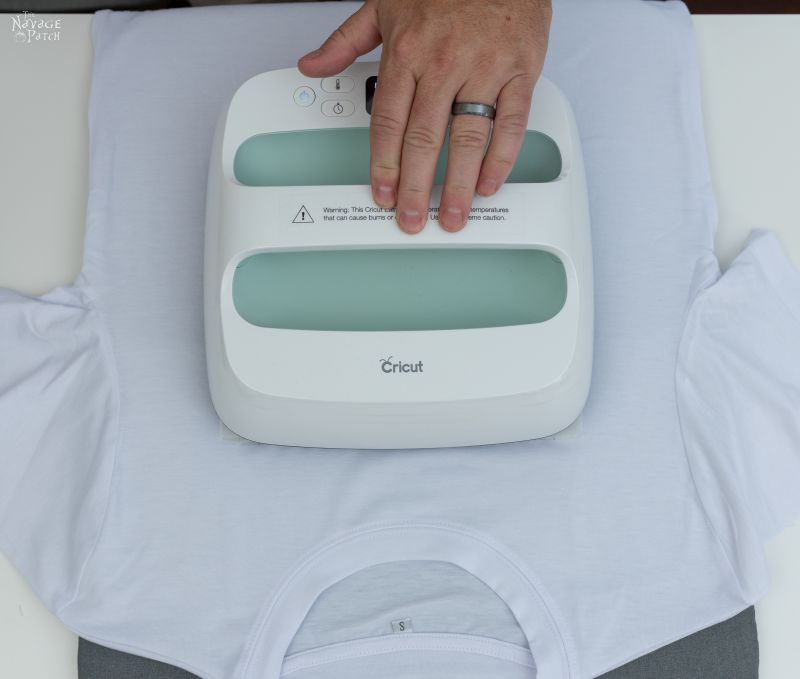
Step 10 – Preheat the shirt
*IMPORTANT! Don’t skip this step either!*
Using the butcher paper, preheat the shirt for 15 seconds at 385. We preheated ours to 400, as I explained earlier. 385 or 400 doesn’t matter, as this step not only smooths the shirt material, but more importantly, it evaporates any moisture that may be lurking among the polyester fibers. Water and Infusible Ink don’t mix! (At least until the ink has been transferred – then water’s no problem!)

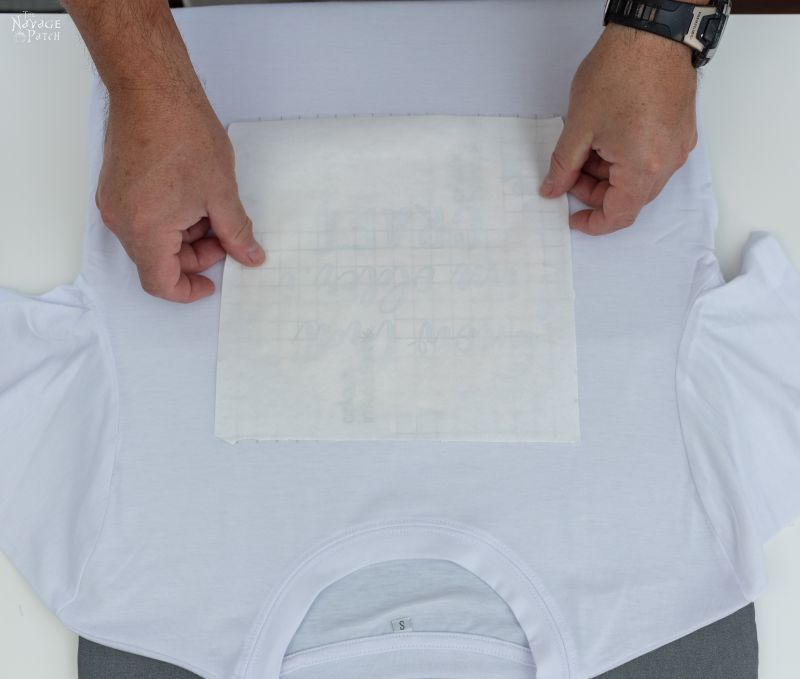
Step 11 – Position your design
Let the shirt cool completely and then position your design.

Step 12 – Apply heat
Cover the transfer sheet with butcher paper.
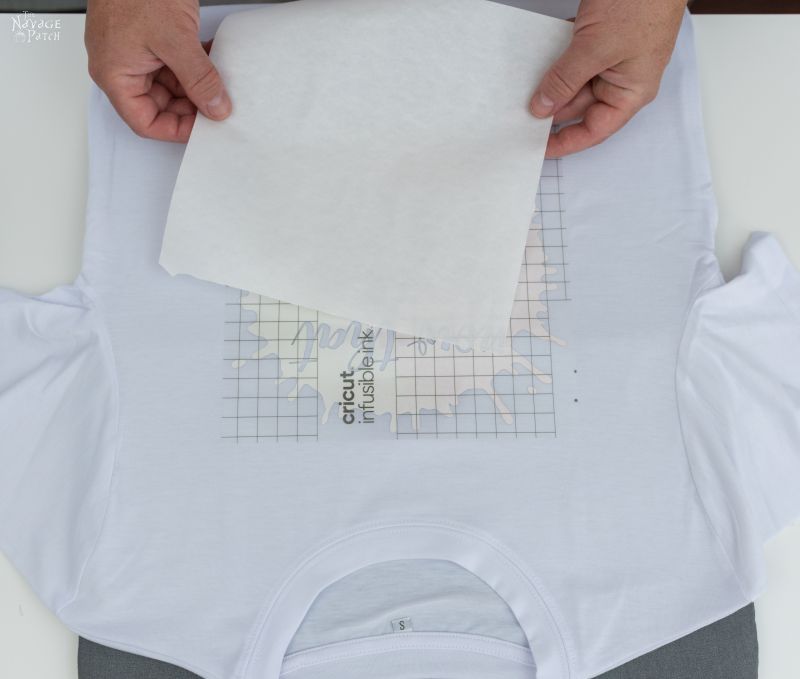
We cut our butcher paper to the same size as our transfer sheet. This made it easier to make sure that all of our design was under the heat plate.
Press for 40 seconds at 385-400 degrees using light pressure.
Step 13 – Remove heat and peel
Let it cool for a few seconds and peel warm. Holy cow!
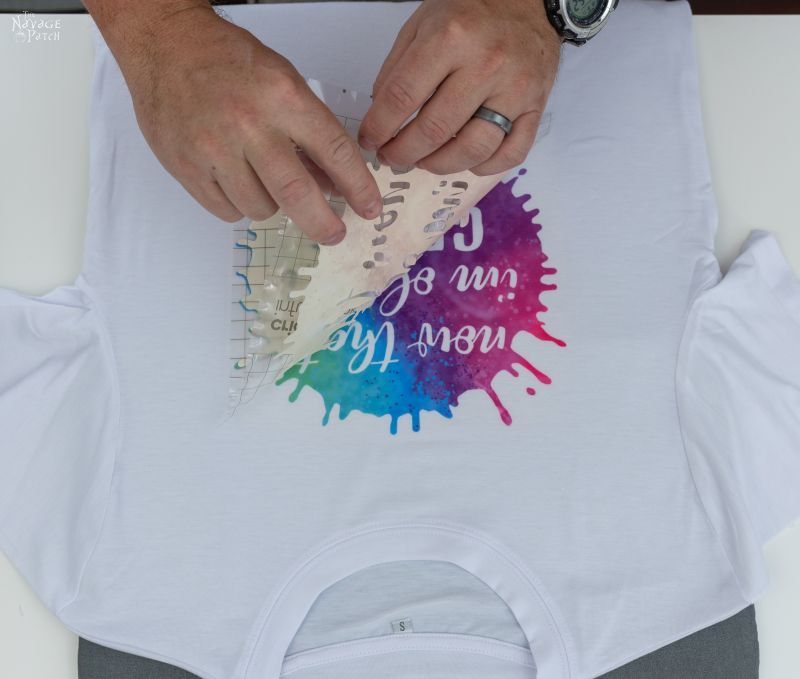
Look at those colors!
And here’s the coolest part!

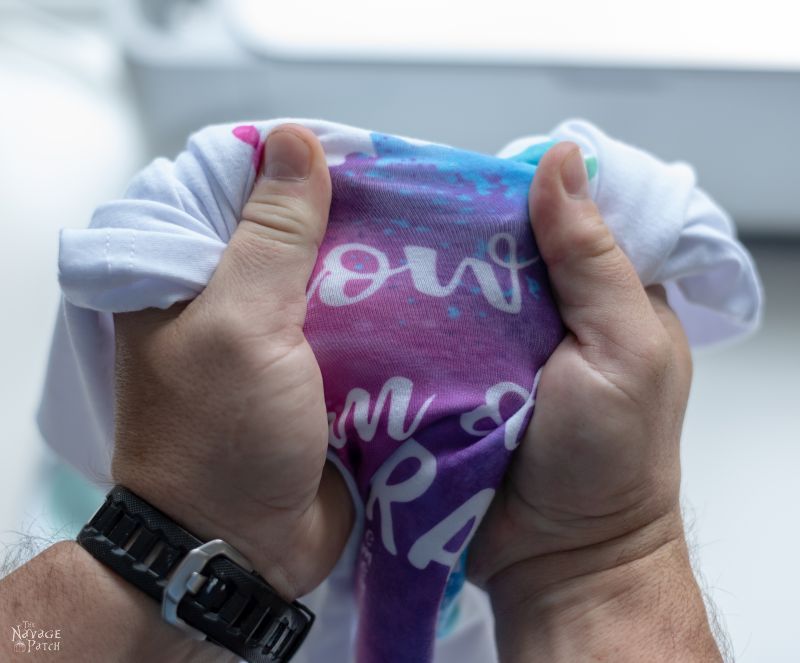
No cracking! That ink is infused into the shirt!
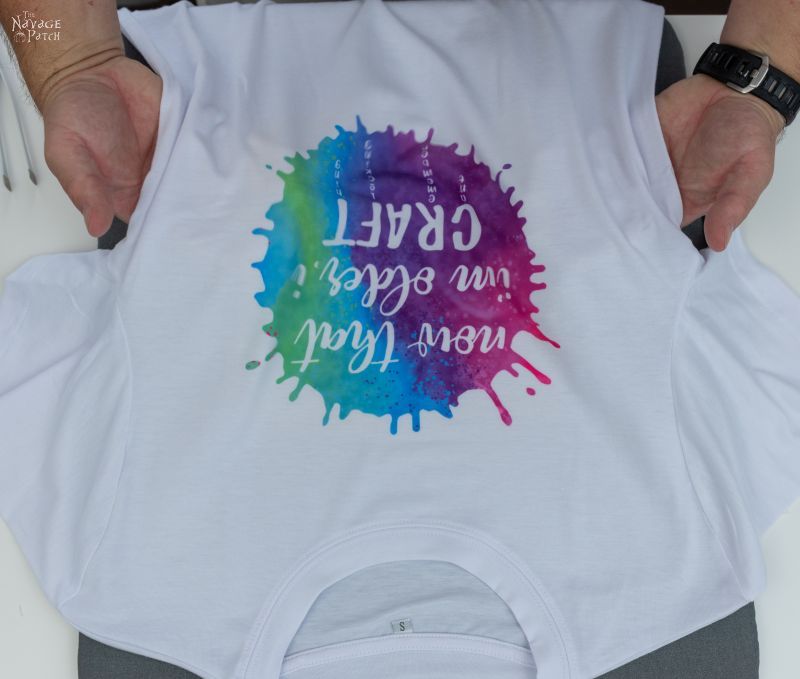
Here’s one of our screw-ups. I didn’t have the EasyPress centered, so I missed some of the transfer sheet. But check out that rainbow!
And hey, it’ll still work! (I’ll give it to my mom – she’ll never notice. Shhhhh! Don’t tell her!!)
Don’t these shirts look great! Have you noticed what it says? 😀 If you can’t read it, you can head on over to the VIP Patch and download all of the designs we’re showing you today for free! Not a VIP Patch member? No worries, just click on the Subscribe button at the top of this page to join our newsletter (it’s free!) and gain access to our always-growing library of free printables, SVG files, calendars, planners and project plans!
I can’t wait to make more t-shirts for myself and for Barish! The sky’s the limit with Cricut Infusible Ink, and I’m just taking off!
Next, I want to show you these awesome Cricut Infusible Ink Mugs I made for Valentine’s Day! Like I said, sky’s the limit with Cricut Infusible Ink! If you’d like to see the Cricut Infusible Ink Mug tutorial click on the picture below or click HERE.

Okay, now let’s make some coasters!
CRICUT INFUSIBLE INK COASTERS TUTORIAL
Cricut has two different types of coasters – lightweight square poly-coated and round ceramic poly-coated – and each has its own Infusible Ink transfer method.
Coasters SUPPLIES LIST
Affiliate links are provided below. Full disclosure here.
- Cricut Maker or Cricut Explore cutting machine
- Coaster design (available in the VIP Patch)
- Infusible Ink compatible coasters
- Standard grip mat
- Brayer (highly recommended)
- Scissors
- Tweezers and other weeding tools
- Cricut EasyPress 2
- Cricut EasyPress mat
- Cricut Infusible Ink transfer sheets
- Heat-resistant tape
- Butcher paper (included with the Infusible Ink transfer sheets)
- 80lb white cardstock
- Clean cloth or alcohol wipes

Square coasters
Step 1 – Select design, cut and weed
These steps are outlined more fully in the t-shirt tutorial above.
Also, as mentioned above, a brayer is a tremendous help with securing the transfer sheets onto the mat!

Here is our weeded design. Remember to flip your image! We may or may not have made a few coasters – *ahem* – backwards.
Step 2 – Clean the coaster
You can use a lint-free cloth for this step, but we found that small alcohol wipes are perfect!
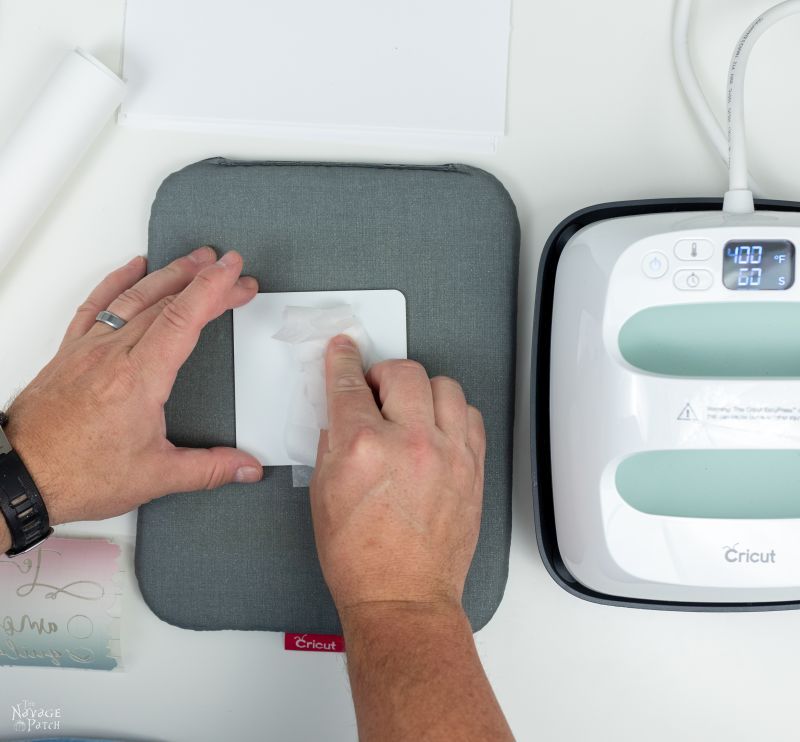
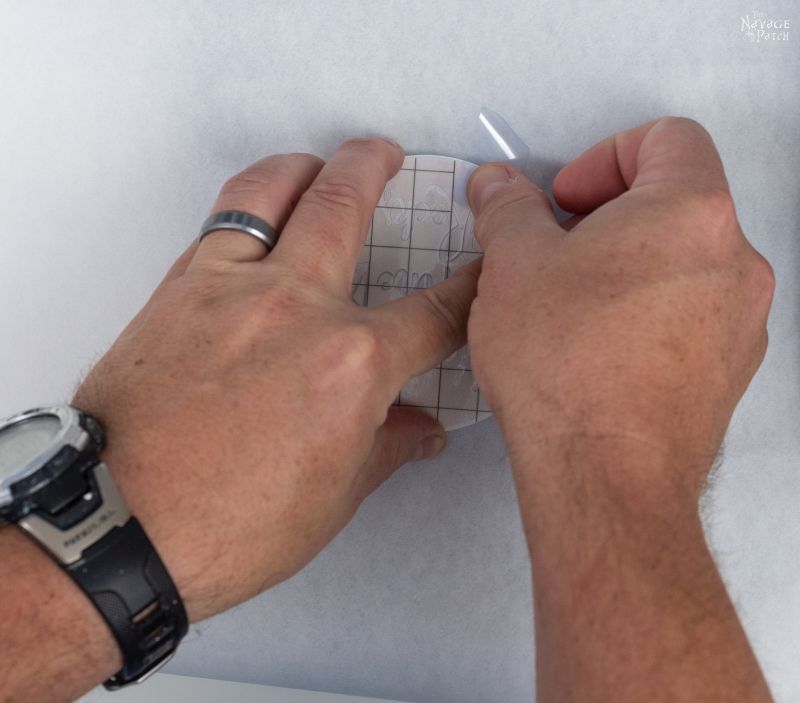
Step 3 – Tape your design to the coaster
Though Cricut doesn’t say to do this step, we found that taping the transfer sheet to the coaster with heat-resistant tape made it much easier to get consistently perfect results. Without the tape, if you move the heat press even a little bit during the transfer, you can end up with blurring and ghosting.
Tape solves those problems!
*We recommend not skipping the tape!*

Step 4 – Layer up before pressing
Okay, listen up, because for these square coasters, I’m going to veer a little from Cricut’s official instructions.
They recommend the following setup in their heat transfer guide:
As you can see in the picture above, the mat is first, then butcher paper, then the coaster, the transfer sheet, cardstock and then the heat press.
We found this setup gave the occasional failure, like these:
Yeah, and one is backwards, so what? I told you to reverse your images! Do as I say, not as I sometimes do! Or would that be “do as I say, not as I don’t?”
I don’t know. Whatever. Just be sure to reverse your images! These Infusible Inks are precious – you don’t want to waste them!
After a bit of frustration, we decided to mix things up a bit. Instead of laying the butcher paper first and covering the coaster with the cardstock, we laid the cardstock first and covered the coaster with the butcher paper.
The cardstock covers and protects the EasyPress mat.

The coaster goes on the cardstock, transfer sheet facing up.

Then the butcher paper covers the coaster.

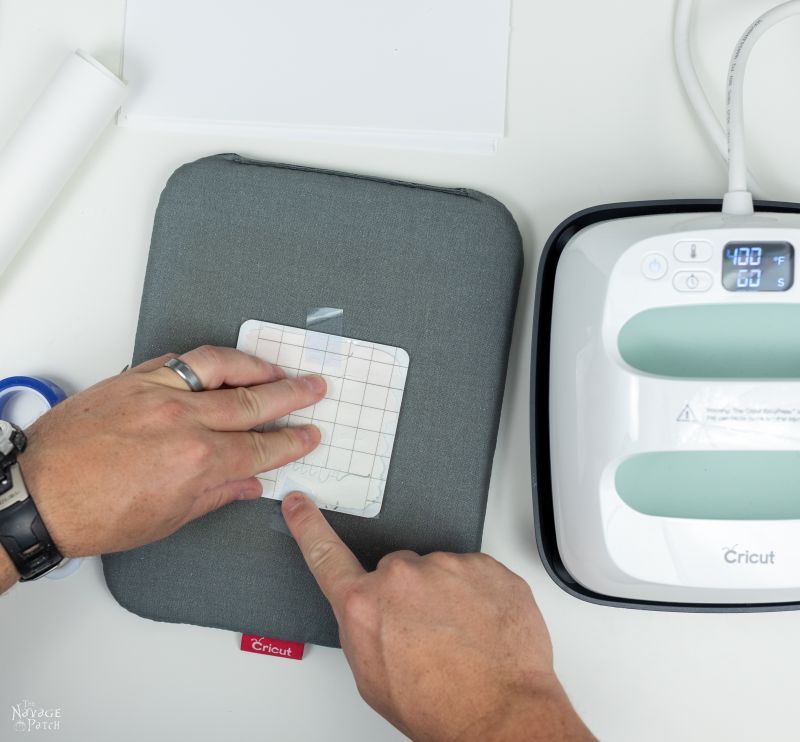
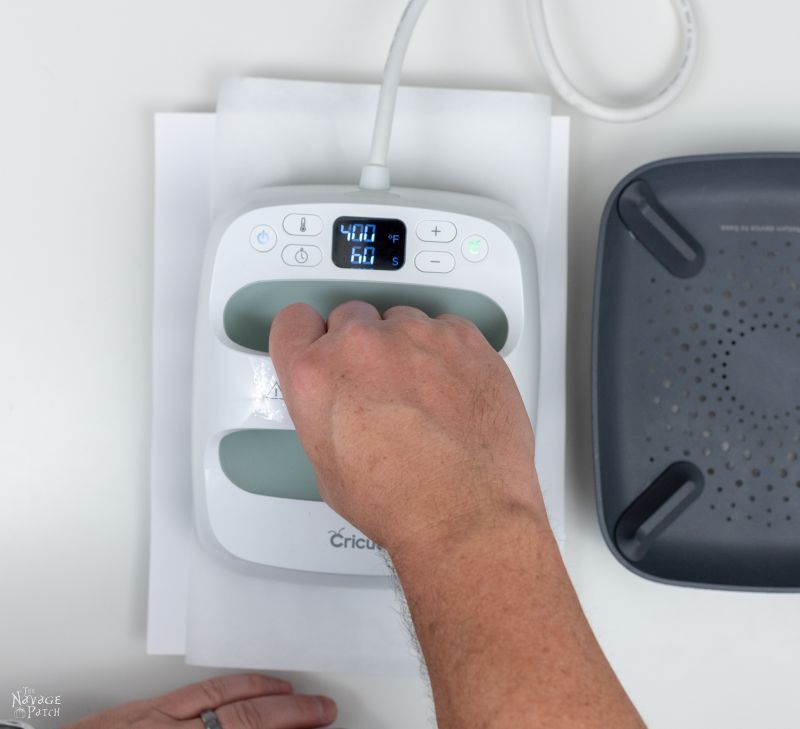
Step 5 – Apply heat
We applied heat according to Cricut’s recommendations – 400 degrees for 60 seconds, no pressure.
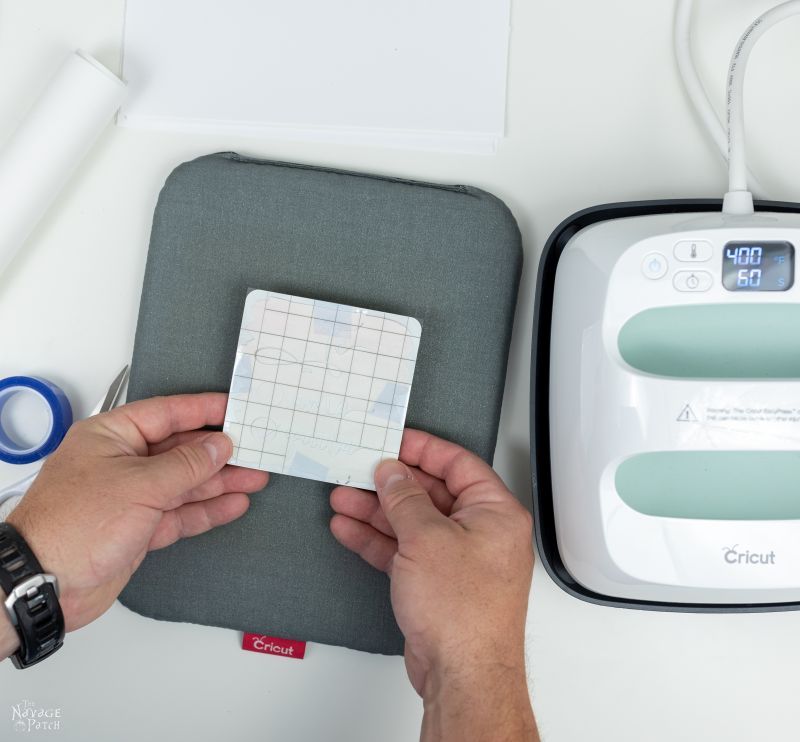
Step 6 – Let it cool!
When it’s finished, you’ll need to let the coaster cool a bit before peeling. It’s going to be incredibly hot, so be careful! Since these coasters are thin, they’ll be cool enough to handle in about 5 minutes.
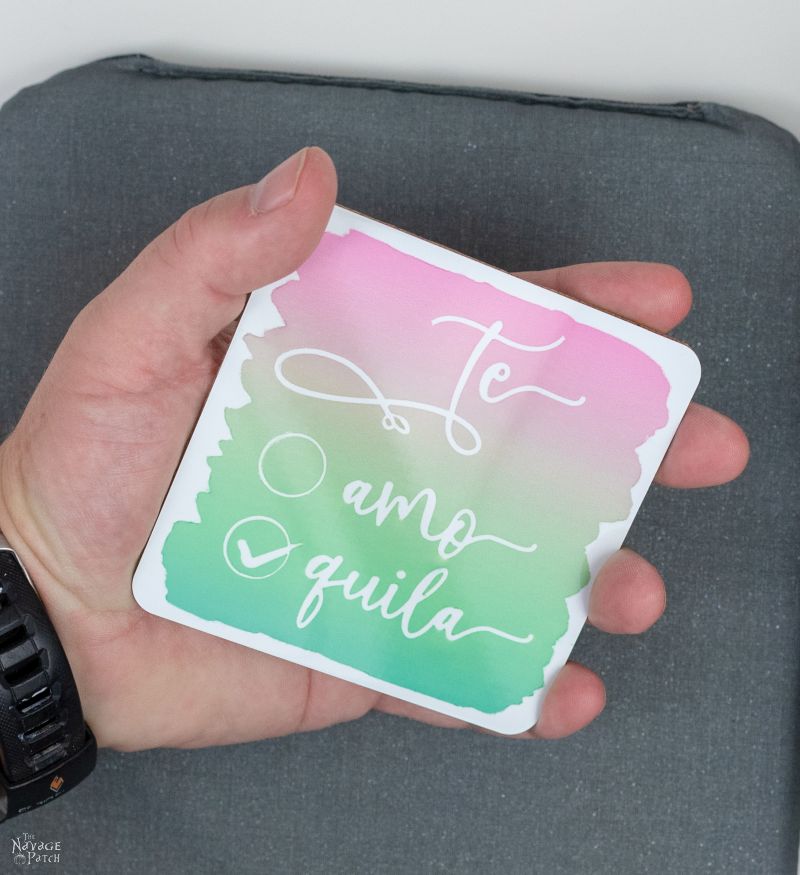
Step 7 – Peel and enjoy!
Perfect!
Round Ceramic Coasters
The round ceramic coasters are thicker and heavier than the square ones, and they require a very different approach. Unlike with the square coaster, Cricut’s method is the best, and it’s the one we recommend using (yes, of course we tried other ways, and yes, of course we’ll show you!)
Step 1 – Select design, cut and weed
ALERT! ALERT! REVERSE YOUR IMAGES!!
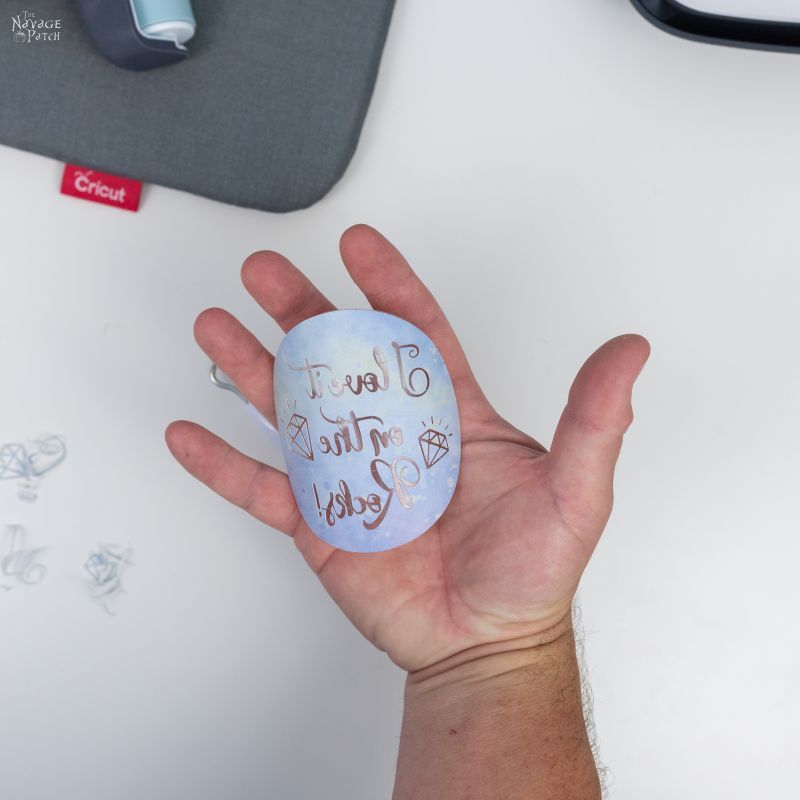
I once heard about a real handsome guy in his mid 40s who made TWO coasters backwards because he didn’t reverse his image.
(Or maybe it was because his wife didn’t reverse the image. The story gets a little muddied around that part, and I’ve learned it’s best not to ask too many questions about it. [LOL. You sure learned well! – The Wife])
Step 2 – Clean the coaster

Step 3 – Tape your design to the coaster
Again, we highly recommend this step, especially with the round coasters, as the transfer time is 4 times longer than with the square coasters!
*Don’t skip this step!*

Step 4 – Layer up before pressing
We played around with the placement with these, swapping the placement of the butcher paper and the cardstock. We found each method worked equally well, but since our alternative method didn’t yield better results, we recommend sticking with Cricut’s layering scheme: EasyPress mat, cardstock, Infusible Ink transfer sheet (face up), coaster (face down), butcher paper, heat press.
Here is the coaster, face up. But to do a successful transfer, we need to…

…turn it face-down on the mat.
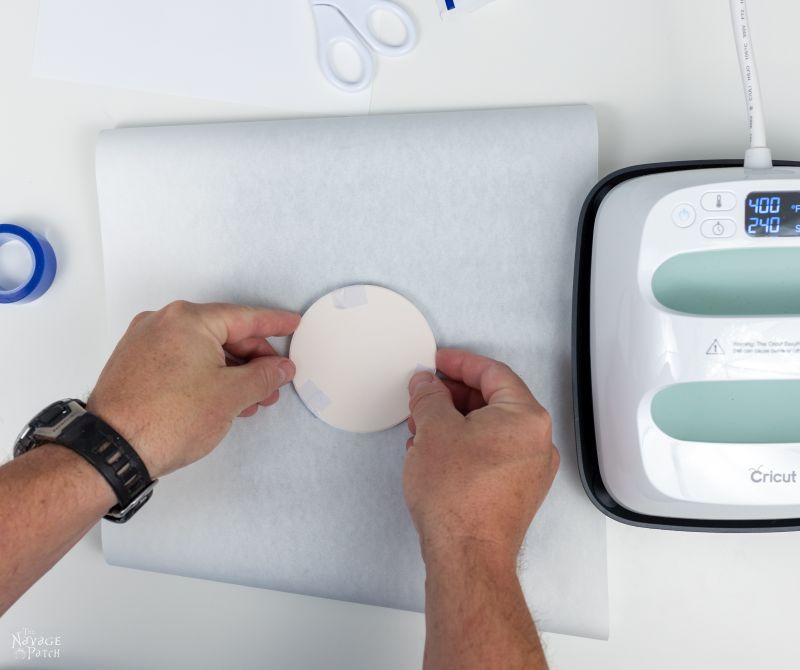
Cardstock on top.

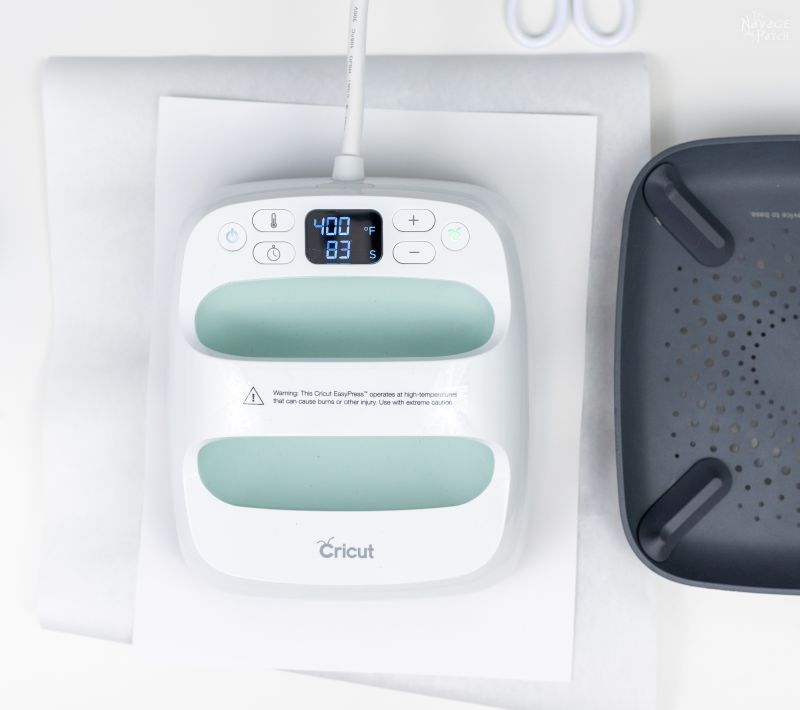
Step 5 – Apply heat
Apply the heat – 400 degrees for 240 seconds. Yep, this is a long press! Plenty of time to go pour yourself a dry martini or a glass of wine!

Tick tock!
Step 6 – Let it cool!
When done, you’ll want to leave the ceramic coaster alone for at least 15-20 minutes. This sucker will be hot, and because it’s ceramic, it’s going to stay hot! Even after 20 minutes, approach it with caution.
Step 7 – Peel and enjoy!


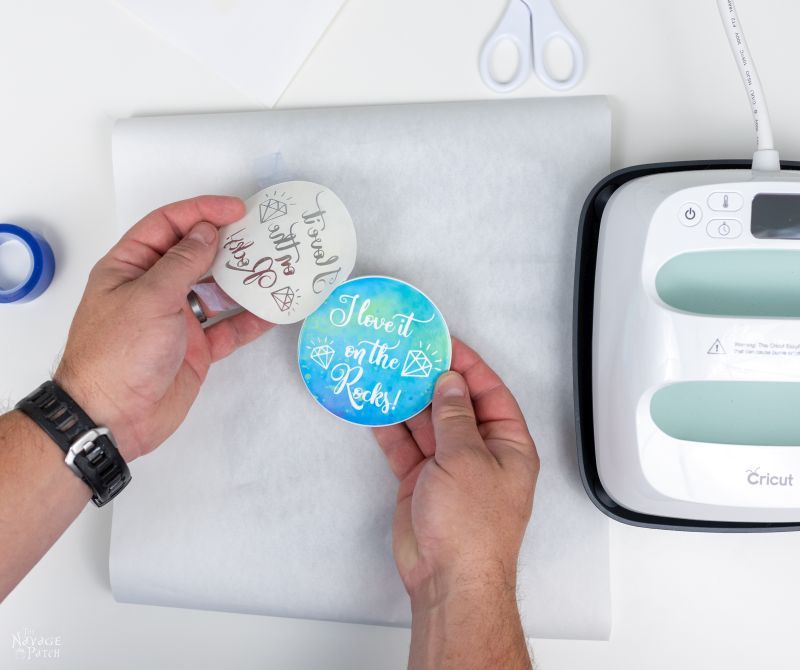
Besides swapping the positions of the butcher paper and cardstock, we tried a couple of coasters using the method for the square coasters, just to see how it would turn out.
Here’s the answer – Cricut’s method:
Square coaster method on a round coaster (incorrect and not recommended!):

The difference is far more striking in person. Cricut’s method gives a flawless result with crisp lines for the letters. The incorrect method not only gives blurry letters, but an incomplete ink transfer as can be seen above the word “love.”
Here are some of the other coasters we made. All these designs are available in the VIP Patch.


*****
How about some more free SVGs that you can use for Infusible Ink mugs, Tees, or anything that tickles your fancy? Click the picture below or on this link: Personalized Holiday Mugs.

*****
Observations and Discoveries Using Cricut Infusible Ink
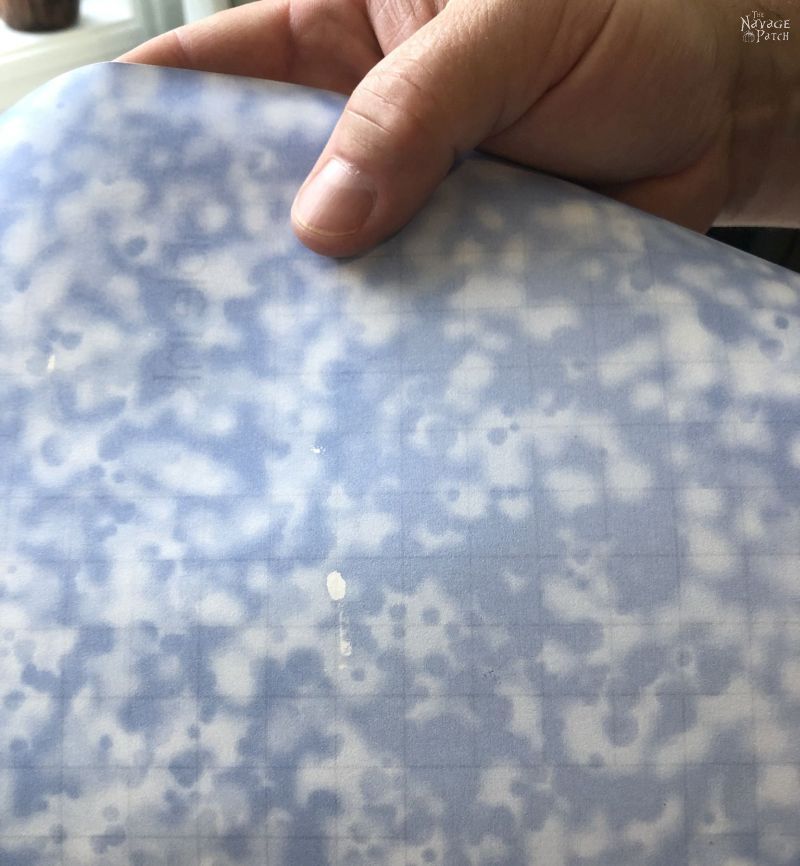
- Wash your hands before handling the transfer sheets. You don’t want to get any oils on them. But be sure to dry your hands thoroughly, because…
- Infusible Ink transfer sheets and water don’t mix! This is what a drop of water did to one of our sheets:
Final Thoughts
As professional bloggers and DIYers, there are a lot of times when projects are not much fun. It’s a job, after all, and those projects are a means to an end. Though we always love the end result of our work, getting to that result can often be trying, tiring and frustrating.
But something different happened while we were playing with these Cricut Infusible Inks.
Something wonderful!
We found ourselves acting like kids again – laughing and brimming with excitement!
I don’t know what it is about Infusible Ink projects that makes us get so jazzed, but I know we’re not the only ones!
Cricut’s kinda corny line about there being “magic” in Infusible Inks is actually true!
Waiting on a transfer makes you feel like a kid at Christmas – you don’t know what you’re going to get, but you’re pretty damn sure it’s going to be awesome!
For that reason alone, I would recommend anyone to jump in with a Cricut Maker or Cricut Explore so they could get all giddy again while crafting.
It had been a while since we bounced around the craft room like little kids…and we can’t wait to do it some more!
******
FREE DOWNLOADABLE SVG CUT FILES
All these free downloadable SVG designs are prepared as 11.5×11.5 inches. But as they are high resolution files, you can scale them up or down easily. If you need help with scaling down these printables then make sure you check out Handan’s “How To Easily Resize Pictures” post.
Any of the designs can be used for a t-shirt, tote, coaster or whatever you like. Now it’s time to click on the button below to download today’s free SVG files – they are all in the “SVGs – Stencils” section of The VIP Patch.
take me to your
amazing freebies library
If you’re not a Navage Patch VIP, you won’t be able to access our Freebies Library. But that can be easily fixed! Subscribe for free on the form below and become a Navage Patch VIP. Once you subscribe, a password will be sent to you in our Welcome email, and that will give you access to The VIP Patch [Freebies Library].
Share it on Pinterest & Facebook!
Love free SVGs? Then check out our guide on Where to Find the BEST Free SVG Files!

Isn’t that a coincidence! I C.R.a.F.T. also 🙂 Great information post!
LOL, thank you so much, Sara!
As usual great post but not meaning to be a party pooper-looks like too much work-lol!
Thank you, Susan – it’s really not! It may have its own rules to follow, but infusible ink is easy to work with (and a heck of a lot more fun than HTV and iron-on IMHO)! 🙂
Can you tell me what fonts you used for the tequila, vodka, and wine coasters? I LOVE them, but would like one about beer instead of two about tequila, but I want it to coordinate with the rest! I would love if you could let me know. Thanks!
It may have its own rules to follow, but infusible ink is easy to work. I love them, but would like the one about beer instead of two about tequila,t I want it to coordinate with the rest! I would love it if you could let me know. I don’t know what it is about Infusible Ink projects that make us get so jazzed.
I was so excited to find your page so I could learn about infusible ink. Unfortunately, multiple ads continued to pop up and I can’t see the content. I’ve tried marking them as blocking content and refreshed, but they come back up in the same location. I’m only able to see 1/2 of this text box because the ads are covering it. Is there a way you can adjust how the ads pop up?
Hi Tammy, I’m so sorry about this. Our ad provider is having technical issues and it is affecting many websites. Unfortunately, there is nothing I can do to fix it until they solve the issue on their end. I apologize for the inconvenience!
I absolutely love the versatility of Cricut Infusible Ink! Your tips on getting the best results were super helpful. Can’t wait to try out some of the projects you mentioned—especially the coasters! Thanks for sharing your insights!
I love how you broke down the benefits of Cricut Infusible Ink! It’s amazing how it can create such vibrant and long-lasting designs. I can’t wait to try it out on some projects! Thanks for the tips!